
Status: Deprecated
This article covers a version of Ubuntu that is no longer supported. If you are currently operate a server running Ubuntu 12.04, we highly recommend upgrading or migrating to a supported version of Ubuntu:
- Upgrade to Ubuntu 14.04.
- Upgrade from Ubuntu 14.04 to Ubuntu 16.04
- Migrate the server data to a supported version
Reason: Ubuntu 12.04 reached end of life (EOL) on April 28, 2017 and no longer receives security patches or updates. This guide is no longer maintained.
See Instead: This guide might still be useful as a reference, but may not work on other Ubuntu releases. If available, we strongly recommend using a guide written for the version of Ubuntu you are using. You can use the search functionality at the top of the page to find a more recent version.
Installation
While most developers have a preferred development environment and have specific tools and processes that are familiar, this can sometimes break down when not in your usual location. Luckily, there are projects like Codiad that can help you develop your projects from anywhere with web access.
Codiad is a complete IDE (integrated development environment) that can be accessed through any web browser. You can work on multiple projects in many different languages and even get access to live previews for web based projects. The IDE include file management, auto-syntax highlighting, and a great plugin system to extend the feature set.
In this guide, we’ll discuss how to get Codiad up and running on an Ubuntu 12.04 VPS instance.
Install PHP and Apache
Since the project is basically a self-contained web directory, we’ll need to set up a web server and PHP processing in order to get this running.
Let’s start by installing the components. Let’s update our package database and then install the needed packages. We will also install git because we will need this later:
sudo apt-get update
sudo apt-get install apache2 php5 libapache2-mod-php5 php5-mcrypt git
After the software has been installed, we’ll need to edit some values. First, let’s open a file and tell the Apache web server that we want to prefer PHP files to HTML when getting a directory listing:
sudo nano /etc/apache2/mods-enabled/dir.conf
Delete the index.php line from the middle of the DirectoryIndex and move it to the front, like this:
<pre> <IfModule mod_dir.c>
DirectoryIndex <span class="highlight">index.php</span> index.html index.cgi index.pl index.xhtml index.htm
</IfModule> </pre>
Save and close the file.
Configure the Apache Virtual Hosts
Now, we’ll need to modify our Virtual Hosts file so that we can add a location for our IDE files. Open the default Virtual Hosts file now with root privileges:
sudo nano /etc/apache2/sites-available/default
Within the VirtualHost section, outside of any other Directory section, we’ll want to add an additional Directory section that contains information about the project we’re setting up.
We will be placing our Codiad directory in our home directory, so that we will have easy access to our files, so use your username instead of demouser in the following config. We’re going to create an alias and then create rules for the directory:
<pre> . . . <Directory /var/www/> Options Indexes FollowSymLinks MultiViews AllowOverride None Order allow,deny allow from all </Directory>
<span class="highlight">Alias /codiad /home/demouser/Codiad</span>
<span class="highlight"><Directory "/home/demouser/Codiad"></span>
<span class="highlight">Options -Indexes FollowSymLinks MultiViews</span>
<span class="highlight">AllowOverride All</span>
<span class="highlight">Order allow,deny</span>
<span class="highlight">allow from all</span>
<span class="highlight"></Directory></span>
ScriptAlias /cgi-bin/ /usr/lib/cgi-bin/
. . .
</pre>
Save and close the file when you are finished.
Restart Apache when you are finished:
sudo service apache2 restart
Download and Configure Project Files
Now, we need to get the actual Codiad files. We will put the folder in our home directory. We can get the project from their GitHub page.
First, switch to your home directory, and then clone the project:
cd ~
git clone https://github.com/Codiad/Codiad.git
This will create a directory called Codiad in your home directory. Enter that directory now:
cd Codiad
Here, copy the example configuration file into production:
cp config.example.php config.php
Currently, all of the files within this directory are owned by our regular user (demouser in this example). The group owner is also our user group. We need to transfer the group ownership of a few select pieces to our web server user.
We can do this by typing:
sudo chown :www-data config.php workspace/ plugins/ themes/ data/
This will allow our web server to write to a few resources, which is necessary for the correct functionality of the app.
Password Protect the IDE Interface
Since we needed to allow write permissions to certain folders and files, we can add an extra layer of security by setting up some password protection. We can do this by creating a password file outside of our app directory, and then using this to authorize users.
Let’s create the password file within the Apache configuration directory. We will call it codiad.passwd. We can add our username and create this file by typing:
<pre> sudo htpasswd -c /etc/apache2/codiad.passwd <span class=“highlight”>username</span> </pre>
You will be asked to select and confirm a password for the user authorization. The utility then hashes your password and enters it into the file. We can see it by typing:
cat /etc/apache2/codiad.passwd
demouser:$apr1$wYcm/kRQ$6EGOoj.pYRnYxvddNbIdN0
Let’s lock this down so that only root and the web server have access to this file:
sudo chown root:www-data /etc/apache2/codiad.passwd
sudo chmod 0640 /etc/apache2/codiad.passwd
Now, let’s create an .htaccess file within our app directory that will reference this file for authorization purposes.
cd ~/Codiad
nano .htaccess
Inside this file, we need to reference the password file that we created and then give a message for the password prompt. It’s probably best not to give too much specific information about the service living behind the prompt:
AuthUserFile /etc/apache2/codiad.passwd
AuthGroupFile /dev/null
AuthName "Authentication required.  Please enter credentials"
AuthType Basic
Require valid-user
Save and close the file when you are finished.
Now, let’s restart Apache again just to be safe:
sudo service apache2 restart
Using Codiad
Our configuration is now complete and our IDE should be available. To reach your new IDE, you’ll need to visit your server’s domain name or IP address followed by /codiad in your web browser:
<pre> http://<span class=“highlight”>your_domain.com</span>/codiad </pre>
You will be presented with an authentication request. This is the Apache level authentication that we set up using the password file and the .htaccess file:
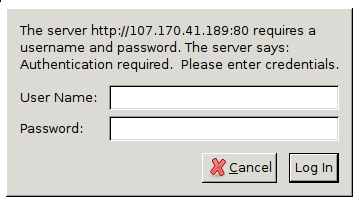
Enter the credentials that you configured. Afterwards, you’ll be taken to the initial setup screen:
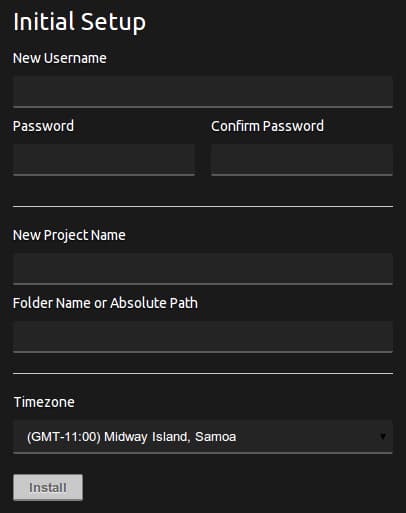
From here, we can set up a Codiad user account, and start a project. For the “Folder Name or Absolute Path”, it is best just to pick a name that matches your project name. Click on the “Install” button when you are finished.
You will be taken to a login screen where you should enter the account details you just created:
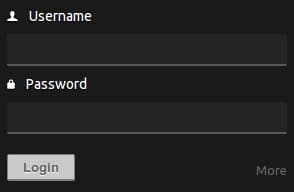
You will now see your basic IDE interface:

Exploring the Interface
Let’s get to know the interface a little bit.
On the left-hand side, we have our projects side-bar. The top portion shows our root project directory and any files and folders that we may have created or moved to that folder:
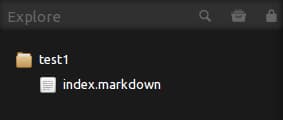
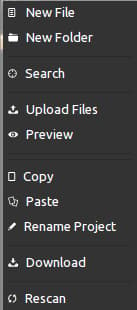
You can access the menu to create files and folders and manipulate properties by right-clicking on the project folder, or any other items in this pane:
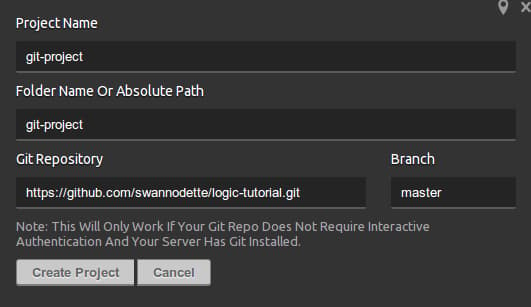
The bottom shows the projects pane, which lists all of our available projects. You can create new projects by clicking the “+” button and you can switch between projects by double-clicking each.
If you create a new project, you can actually pull an entire project directly from a publicly accessible git repository:
In the main portion of the window is the editor itself. You can see your code here and have some options for formatting and syntax highlighting. Double-click on files in the left sidebar to open them in the editor:
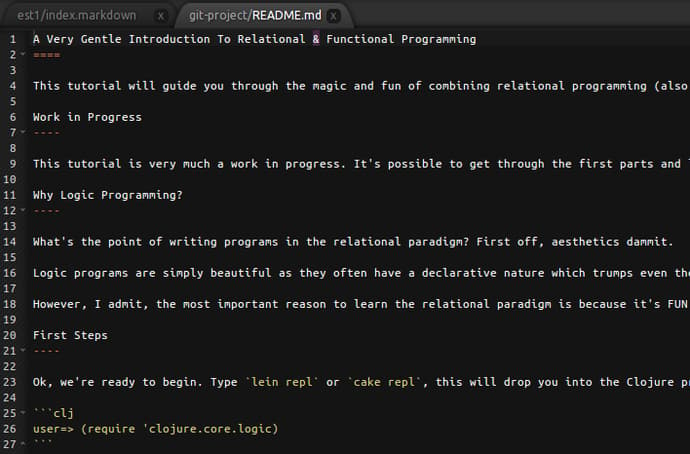
Along the bottom, you can choose the editor settings, split the window to view multiple files simultaneously, and adjust syntax.
On the right-hand side, we have a pull-tab that extends out into an administration sidebar:
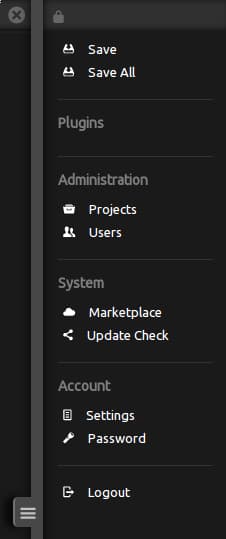
This is where you can go to manage your projects and users, update Codiad, install plugins, change, your password, etc. This is even the interface you need to save your files.
If you’d like to leave this interface open, you can click the two arrows in the upper-left corner of the panel. This will change it to a lock symbol, which will keep the panel open, allowing you to easily access settings and save options.
Conclusion
You should now be up and running with your new browser-based IDE. Codiad has many different extensions that can enhance the functionality of the editor. For instance, there is a simplified terminal interface to manage files, and a collaborative extension to allow you to share your projects with other members of your team.
Explore the interface and see if the added flexibility can help you work from anywhere.
<div class=“author”>By Justin Ellingwood</div>
Thanks for learning with the DigitalOcean Community. Check out our offerings for compute, storage, networking, and managed databases.
About the author
Former Senior Technical Writer at DigitalOcean, specializing in DevOps topics across multiple Linux distributions, including Ubuntu 18.04, 20.04, 22.04, as well as Debian 10 and 11.
Still looking for an answer?
This textbox defaults to using Markdown to format your answer.
You can type !ref in this text area to quickly search our full set of tutorials, documentation & marketplace offerings and insert the link!
You need to also do " sudo apt-get install php5-json ". I got stuck on that part ;)
Please correct:
sudo chown root:www-data /etc/apache2/codiad.password
to
sudo chown root:www-data /etc/apache2/codiad.passwd
I found that /etc/apache2/apache2.conf replaces /etc/apache2/sites-available/default in my (most recent) version of apache.
@isaac: Could you check your Apache error log to see if there is anymore information? Run:
tail /var/log/apache2/error.log
After this line:
sudo chown :www-data config.php workspace/ plugins/ themes/ data/
you should probably also mention that you need to make these directories writeable. Many distros will not do that by default:
sudo chmod 770 config.php workspace/ plugins/ themes/ data/
Options -Indexes FollowSymLinks MultiViews
Throws Error:
Job for apache2.service failed because the control process exited with error code. See "systemctl status apache2.service" and "journalctl -xe" for details.
Remove the’ -’ from “-Indexes”. So it becomes,
Options Indexes FollowSymLinks MultiViews
This comment has been deleted
 This work is licensed under a Creative Commons Attribution-NonCommercial- ShareAlike 4.0 International License.
Become a contributor for community
Get paid to write technical tutorials and select a tech-focused charity to receive a matching donation.

DigitalOcean Documentation
Full documentation for every DigitalOcean product.

Resources for startups and AI-native businesses
The Wave has everything you need to know about building a business, from raising funding to marketing your product.
The developer cloud
Scale up as you grow — whether you're running one virtual machine or ten thousand.

Start building today
From GPU-powered inference and Kubernetes to managed databases and storage, get everything you need to build, scale, and deploy intelligent applications.
