
About Apache Tomcat
Apache Tomcat is a web server and servlet container that is used to serve Java applications. Tomcat is an open source implementation of the Java Servlet and JavaServer Pages technologies, released by the Apache Software Foundation.
This tutorial covers the basic installation and some configuration of Tomcat 7 on your Ubuntu 14.04 server.
Note: Tomcat can be installed automatically on your Droplet by adding this script to its User Data when launching it. Check out this tutorial to learn more about Droplet User Data.
There are two basic ways to install Tomcat on Ubuntu:
- Install through apt-get. This is the simplest method.
- Download the binary distribution from the Apache Tomcat site. This guide does not cover this method; refer to Apache Tomcat Documentation for instructions.
For this tutorial, we will use the simplest method: apt-get. Please note that this will install the latest release of Tomcat that is in the official Ubuntu repositories, which may or may not be the latest release of Tomcat. If you want to guarantee that you are installing the latest version of Tomcat, you can always download the latest binary distribution.
Step One — Prerequisites
Before you begin with this guide, you should have a separate, non-root user account set up on your server. You can learn how to do this by completing steps 1-4 in the initial server setup for Ubuntu 14.04. We will be using the demo user created here for the rest of this tutorial.
Step Two - Install Tomcat
The first thing you will want to do is update your apt-get package lists:
- sudo apt-get update
Now you are ready to install Tomcat. Run the following command to start the installation:
- sudo apt-get install tomcat7
Answer yes at the prompt to install tomcat. This will install Tomcat and its dependencies, such as Java, and it will also create the tomcat7 user. It also starts Tomcat with its default settings.
Let’s make a quick change to the Java options that Tomcat uses when it starts. Open the Tomcat7 parameters file:
- sudo nano /etc/default/tomcat7
Find the JAVA_OPTS line and replace it with the following. Feel free to change the Xmx and MaxPermSize values—these settings affect how much memory Tomcat will use:
JAVA_OPTS="-Djava.security.egd=file:/dev/./urandom -Djava.awt.headless=true -Xmx512m -XX:MaxPermSize=256m -XX:+UseConcMarkSweepGC"
Save and exit.
Now restart Tomcat with this command:
- sudo service tomcat7 restart
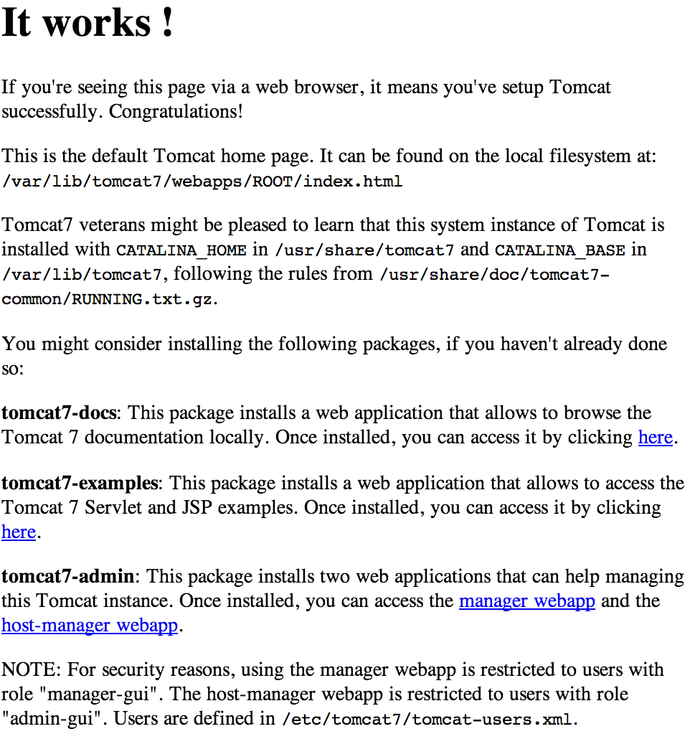
Tomcat is not completely set up yet, but you can access the default splash page by going to your domain or IP address followed by :8080 in a web browser:
Open in web browser:http://server_IP_address:8080
You will see a splash page that says “It works!”, in addition to other information. Now we will go deeper into the installation of Tomcat.
Step Three - Installing Additional Packages
Note: This section is not necessary if you are already familiar with Tomcat and you do not need to use the web management interface, documentation, or examples. If you are just getting into Tomcat for the first time, please continue.
With the following command, we will install the Tomcat online documentation, the web interface (manager webapp), and a few example webapps:
- sudo apt-get install tomcat7-docs tomcat7-admin tomcat7-examples
Answer yes at the prompt to install these packages. We will get into the usage and configuration of these tools in a later section. Next, we will install the Java Development Kit.
Step Four - Install Java Development Kit (Optional)
If you are planning on developing apps on this server, you will want to be sure to install the software in this section.
The Java Development Kit (JDK) enables us to develop Java applications to run in our Tomcat server. Running the following command will install openjdk-7-jdk:
- sudo apt-get install default-jdk
In addition to JDK, the Tomcat documentation suggests also installing Apache Ant, which is used to build Java applications, and a source control system, such as git. Let’s install both of those with the following command:
- sudo apt-get install ant git
For more information about Apache Ant, refer to the official manual. For a tutorial on using git, refer to DigitalCloud’s Git Tutorial.
Step 5 - Configure Tomcat Web Management Interface
In order to use the manager webapp installed in Step 3, we must add a login to our Tomcat server. We will do this by editing the tomcat-users.xml file:
- sudo nano /etc/tomcat7/tomcat-users.xml
This file is filled with comments which describe how to configure the file. You may want to delete all the comments between the following two lines, or you may leave them if you want to reference the examples:
<tomcat-users>
...
</tomcat-users>
You will want to add a user who can access the manager-gui and admin-gui (the management interface that we installed in Step Three). You can do so by defining a user similar to the example below. Be sure to change the username and password to something secure:
<tomcat-users>
    <user username="admin" password="password" roles="manager-gui,admin-gui"/>
</tomcat-users>
Save and quit the tomcat-users.xml file. To put our changes into effect, restart the Tomcat service:
- sudo service tomcat7 restart
Step 6 - Access the Web Interface
Now that we’ve configured an admin user, let’s access the web management interface in a web browser:
Open in web browser:http://server_IP_address:8080
You will see something like the following image:
As you can see, there are four links to packages you installed in Step Three:
- tomcat7-docs: Online documentation for Tomcat. Accessible via
http://server_IP_address:8080/docs/ - tomcat7-examples: Tomcat 7 Servlet and JSP examples. You can click through the example webapps to get a basic idea of how they work (and also look at the source code to see how they were implemented). Accessible via
http://server_IP_address:8080/examples/ - tomcat7-admin (manager-webapp): Tomcat Web Application Manager. This will allow you to manage and your Java applications.
- tomcat7-admin (host-manager): Tomcat Virtual Host Manager.
Let’s take a look at the Web Application Manager, accessible via the link or http://server_IP_address:8080/manager/html:
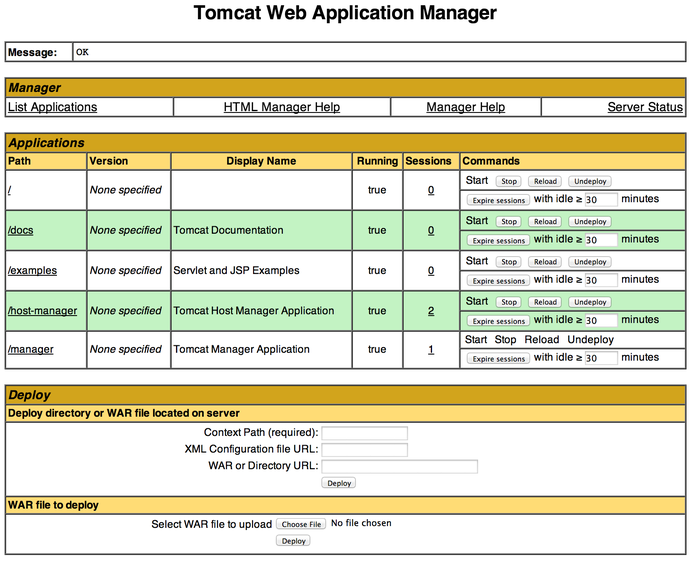
The Web Application Manager is used to manage your Java applications. You can Start, Stop, Reload, Deploy, and Undeploy here. You can also run some diagnostics on your apps (i.e. find memory leaks). Lastly, information about your server is available at the very bottom of this page.
Now let’s take a look at the Virtual Host Manager, accessible via the link or http://server_IP_address:8080/host-manager/html/:
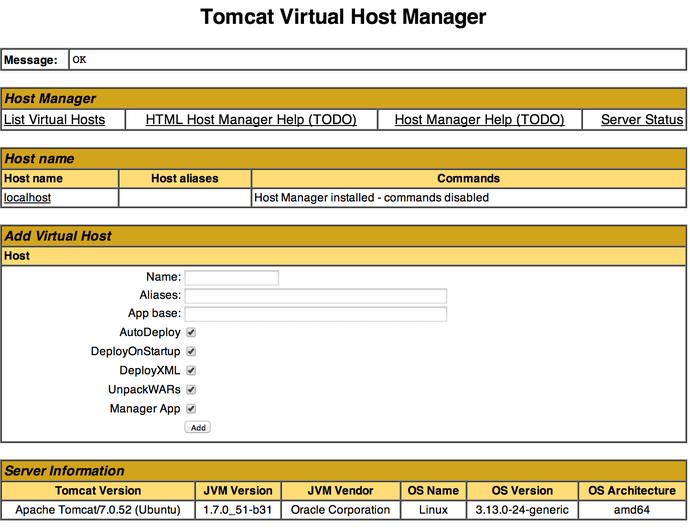
From the Virtual Host Manager page, you can add virtual hosts to serve your applications in.
Finished!
Your installation of Tomcat is complete! Your are now free to deploy your own webapps!
Thanks for learning with the DigitalOcean Community. Check out our offerings for compute, storage, networking, and managed databases.
About the author
Software Engineer @ DigitalOcean. Former Señor Technical Writer (I no longer update articles or respond to comments). Expertise in areas including Ubuntu, PostgreSQL, MySQL, and more.
Still looking for an answer?
This textbox defaults to using Markdown to format your answer.
You can type !ref in this text area to quickly search our full set of tutorials, documentation & marketplace offerings and insert the link!
This tutorial is great… only problem: Tomcat7 takes roughly 5 minutes to start. Any idea why?
In looking at the Tomcat logs, I see:
INFO: Creation of SecureRandom instance for session ID generation using [SHA1PRNG] took [211,911] milliseconds.
Then, Google Foo helped me find:
http://wiki.apache.org/tomcat/HowTo/FasterStartUp
I’m considering a move to the Oracle JDK unless anyone thinks it’s worth digging around and changing the random stuff as described?
Actually, by setting the following in /etc/default/tomcat7, I was fine: <pre> JAVA_OPTS=“-Djava.security.egd=file:/dev/./urandom -Djava.awt.headless=true -Xmx1024m -XX:MaxPermSize=512m -XX:+UseConcMarkSweepGC” </pre>
Hello I have an issue with my tomcat. After completing the first half of the tutorial everything was fine. I edited the webpage to say “It CHANGED !” instead of “It Works!” and it seemed fine. Then after creating the admin user and restarted the server the page load took about 5 minutes to load the plain “It Works !” page that I only hardly modified.
I have now noticed that this happens every single time i restart the tomcat7 service.
@carsonwevans: To speed up the restarting of Tomcat, checkout Brock’s comment above.
As for losing your changes when restarting, what file exactly are you editing? <pre> /var/lib/tomcat7/webapps/ROOT/index.html </pre>
under example link WebSocket (JSR356) Examples are not working I am always getting Info: WebSocket connection closed. Can some one help ?
To avoid pulling in a bunch of X11 and Gnome packages…
$ sudo apt-get --no-install-recommends install default-jdk
Hi I successfully installed tomcat7 in the localhost but when i open “http://localhost:8080/manager/html” it asking to enter username and password, i am entered the username and password which are defined in “tomcat-users.xml”, but it didn’t display the manager page still asking username and password.
can any one help.
// this written in /etc/tomcat7/tomcat-users.xml ``<?xml version=‘1.0’ encoding=‘utf-8’?>
<tomcat-users> <role rolename=“manager-gui”/> <tomcat-user> <user username=“username” password=“password” roles=“manager-gui,admin-gui” /> </tomcat-user> </tomcat-users>```
I am also facing same issue as Krishna. Hi Krishna…did you find any resolution to this?
Hello,
Try to clear the browser history (cookies, etc), and then try again to access the manager page.
 This work is licensed under a Creative Commons Attribution-NonCommercial- ShareAlike 4.0 International License.
Become a contributor for community
Get paid to write technical tutorials and select a tech-focused charity to receive a matching donation.

DigitalOcean Documentation
Full documentation for every DigitalOcean product.

Resources for startups and AI-native businesses
The Wave has everything you need to know about building a business, from raising funding to marketing your product.
The developer cloud
Scale up as you grow — whether you're running one virtual machine or ten thousand.

Start building today
From GPU-powered inference and Kubernetes to managed databases and storage, get everything you need to build, scale, and deploy intelligent applications.
