
Introduction
Bacula-Web is a PHP web application that provides an easy way to view summaries and graphs of Bacula backup jobs that have already run. Although it doesn’t allow you to control Bacula in any way, Bacula-Web provides a graphical alternative to viewing jobs from the console. Bacula-Web is especially useful for users who are new to Bacula, as its reports make it easy to understand what Bacula has been operating.
In this tutorial, we will show you how to install Bacula-Web on an Ubuntu 14.04 server that your Bacula server software is running on.
Prerequisites
To follow this tutorial, you must have the Bacula backup server software installed on an Ubuntu server. Instructions to install Bacula can be found here: How To Install Bacula Server on Ubuntu 14.04.
This tutorial assumes that your Bacula setup is using MySQL for the catalog. If you are using a different RDBMS, such as PostgreSQL, be sure to make the proper adjustments to this tutorial. You will need to install the appropriate PHP module(s) and make adjustments to the database connection information examples.
Let’s get started.
Install Nginx and PHP
Bacula-Web is a PHP application, so we need to install PHP and a web server. We’ll use Nginx. If you want to learn more about this particular software setup, check out this LEMP tutorial.
Update your apt-get listings:
sudo apt-get update
Then, install Nginx, PHP-fpm, and a few other packages with apt-get:
sudo apt-get install nginx apache2-utils php5-fpm php5-mysql php5-gd
Now we are ready to configure PHP and Nginx.
Configure PHP-FPM
Open the PHP-FPM configuration file in your favorite text editor. We’ll use vi:
sudo vi /etc/php5/fpm/php.ini
Find the line that specifies cgi.fix_pathinfo, uncomment it, and replace its value with 0. It should look like this when you’re done.
cgi.fix_pathinfo=0
Now find the date.timezone setting, uncomment it, and replace its value with your time zone. We’re in New York, so that’s what we’re setting the value to:
date.timezone = America/New_York
If you need a list of supported timezones, check out the PHP documentation.
Save and exit.
PHP-FPM is configured properly, so let’s restart it to put the changes into effect:
sudo service php5-fpm restart
Configure Nginx
Now it’s time to configure Nginx to serve PHP applications.
First, because we don’t want unauthorized people to access Bacula-Web, let’s create an htpasswd file. Use htpasswd to create an admin user, called “admin” (you should use another name), that can access the Bacula-Web interface:
sudo htpasswd -c /etc/nginx/htpasswd.users admin
Enter a password at the prompt. Remember this login, as you will need it to access Bacula-Web.
Now open the Nginx default server block configuration file in a text editor. We’ll use vi:
sudo vi /etc/nginx/sites-available/default
Replace the contents of the file with the following code block. Be sure to substitute the highlighted value of server_name with your server’s domain name or IP address:
server {
    listen 80 default_server;
    listen [::]:80 default_server ipv6only=on;

    root /usr/share/nginx/html;
    index index.php index.html index.htm;

    server_name server_domain_name_or_IP;

    auth_basic "Restricted Access";
    auth_basic_user_file /etc/nginx/htpasswd.users;

    location / {
        try_files $uri $uri/ =404;
    }

    error_page 404 /404.html;
    error_page 500 502 503 504 /50x.html;
    location = /50x.html {
        root /usr/share/nginx/html;
    }

    location ~ \.php$ {
        try_files $uri =404;
        fastcgi_split_path_info ^(.+\.php)(/.+)$;
        fastcgi_pass unix:/var/run/php5-fpm.sock;
        fastcgi_index index.php;
        fastcgi_param SCRIPT_FILENAME $document_root$fastcgi_script_name;
        include fastcgi_params;
    }
}
Save and exit. This configures Nginx to serve PHP applications, and to use the htpasswd file, that we created earlier, for authentication.
To put the changes into effect, restart Nginx.
sudo service nginx restart
Now we’re ready to download Bacula-Web.
Download and Configure Bacula-Web
Change to your home directory, and download the latest Bacula-Web archive. At the time of this writing, 7.0.3 was the latest version:
cd ~
wget --content-disposition http://www.bacula-web.org/download.html?file=files/bacula-web.org/downloads/bacula-web-7.0.3.tgz
Now create a new directory, bacula-web, change to it, and extract the Bacula-Web archive:
mkdir bacula-web
cd bacula-web
tar xvf ../bacula-web-*.tgz
Before copying the files to our web server’s document root, we should configure it first.
Change to the configuration directory like this:
cd application/config
Bacula-Web provides a sample configuration. Copy it like this:
cp config.php.sample config.php
Now edit the configuration file in a text editor. We’ll use vi:
vi config.php
Find the // MySQL bacula catalog, and uncomment the connection details. Also, replace the password value with your Bacula database password (which can be found in /etc/bacula/bacula-dir.conf in the “dbpassword” setting):
// MySQL bacula catalog
$config[0]['label'] = 'Backup Server';
$config[0]['host'] = 'localhost';
$config[0]['login'] = 'bacula';
$config[0]['password'] = 'bacula-db-pass';
$config[0]['db_name'] = 'bacula';
$config[0]['db_type'] = 'mysql';
$config[0]['db_port'] = '3306';
Save and exit.
Bacula-Web is now configured. The last step is to put the application files in the proper place.
Copy Bacula-Web Application to Document Root
We configured Nginx to use /usr/share/nginx/html as the document root. Change to it, and delete the default index.html, with these commands:
cd /usr/share/nginx/html
sudo rm index.html
Now, move the Bacula-Web files to your current location, the Nginx document root:
sudo mv ~/bacula-web/* .
Change the ownership of the files to www-data, the daemon user that runs Nginx:
sudo chown -R www-data: *
Now Bacula-Web is fully installed.
Access Bacula-Web via a Browser
Bacula-Web is now accessible on your server’s domain name or public IP address.
You may want to test that everything is configured properly. Luckily, a Bacula-Web test page is provided. Access it by opening this URL in a web browser (substitute the highlighted part with your server’s information):
http://server_public_IP/test.php
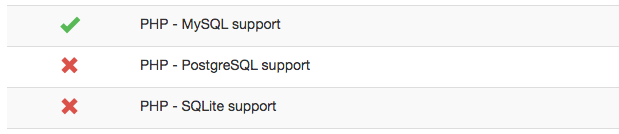
You should see a table that shows the status of the various components of Bacula-Web. They should all have a green checkmark status, except for the database modules that you don’t need. For example, we’re using MySQL, so we don’t need the other database modules:
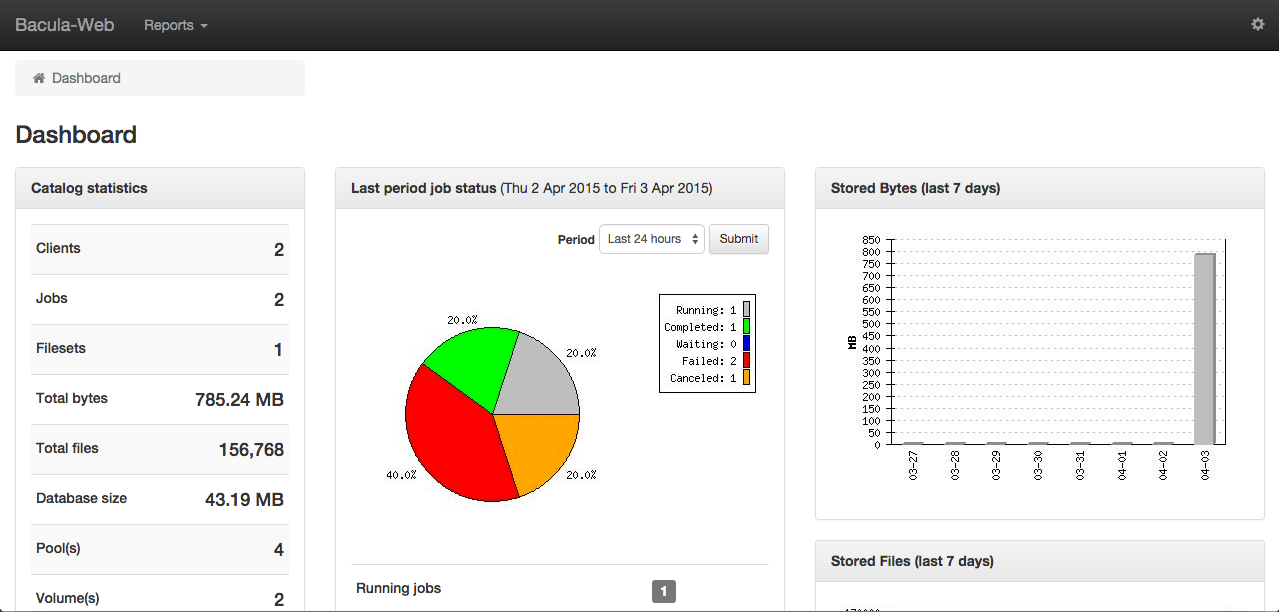
If everything looks good, you’re ready to use the dashboard. You can access it by clicking on the top-left “Bacula-Web” text, or by visiting your server in a web browser:
http://server_public_IP/
It should look something like this:
Conclusion
Now you are ready to use Bacula-Web to easily monitor your various Bacula jobs and statuses.
Have fun!
Thanks for learning with the DigitalOcean Community. Check out our offerings for compute, storage, networking, and managed databases.
Tutorial Series: How To Use Bacula on Ubuntu 14.04
This series will show you how implement file backups of your Ubuntu 14.04 servers using Bacula, the popular open-source backup software suite.
Browse Series: 4 tutorials
About the author
Software Engineer @ DigitalOcean. Former Señor Technical Writer (I no longer update articles or respond to comments). Expertise in areas including Ubuntu, PostgreSQL, MySQL, and more.
Still looking for an answer?
This textbox defaults to using Markdown to format your answer.
You can type !ref in this text area to quickly search our full set of tutorials, documentation & marketplace offerings and insert the link!
There must be something wrong with your /etc/nginx/sites-available/default config because it always returns a blank page from a web browser.
Wish I could get this working… Any help would be appreciated.
This comment has been deleted
I like the how-to’s on this site, they’re usually quite informative and easy to follow.
I do however seem to have hit a snag on this particular how-to. I’ll mention that the Bacula install works perfectly, no issues there.
I’ve done 2 fresh installs as well as bit of reconfiguring with each one, and I keep getting the same error over and over.
When I open a browser all I get is the following:
Exception trace File: /usr/share/nginx/html/core/db/cdb.class.php on line 44 in function PDO->__construct File: /usr/share/nginx/html/core/bweb.class.php on line 99 in function CDB::connect File: /usr/share/nginx/html/index.php on line 26 in function Bweb->__construct Database error File /usr/share/nginx/html/core/db/cdb.class.php Line 44 Exception code 1045 Exception message SQLSTATE[28000] [1045] Access denied for user ‘bacula’@‘localhost’ (using password: YES)
I’m guessing it’s some sort of mismatch of passwords between Bacula and MySQL, but the documentation is unclear in regards to this.
One thing which stands out is in the step above for the nginx config file:
$config[0][‘password’] = ‘bacula-db-pass’;
It mentions it should match the password in the /etc/bacula/bacula-dir.conf in the “dbpassword” setting), but it is blank there. I filled it in, but that didn’t work either. But at no point in the documentation does it say to fill it in either…I’d say that updates may have changed how this installs.
Any ideas?
I keep getting a 403 error when attempting to login to the test page. I have followed this series diligently and have a working setup of bacula from step 1. Not totally sure where I have gone wrong. My suspicion is that I need the latest version of the software and not 7.0.3 like they used in the article?
I decided to refer to the documentation on the Bacula website, and realized there’s quite a few steps missing to get this working properly! I started from scratch and it works now.
great article!, but can someone giveme a hand, it returns a blank page this is the log for nginx
2017/03/30 11:59:45 [error] 13822#0: *60 FastCGI sent in stderr: “PHP message: PHP Parse error: syntax error, unexpected ‘bacula’ (T_STRING) in /usr/share/nginx/html/application/config/config.php on line 36” while reading response header from upstream, client: 172.21.38.64, server: 172.16.1.150, request: “GET /index.php HTTP/1.1”, upstream: “fastcgi://unix:/var/run/php5-fpm.sock:”, host: “172.16.1.150”
 This work is licensed under a Creative Commons Attribution-NonCommercial- ShareAlike 4.0 International License.
Become a contributor for community
Get paid to write technical tutorials and select a tech-focused charity to receive a matching donation.

DigitalOcean Documentation
Full documentation for every DigitalOcean product.

Resources for startups and AI-native businesses
The Wave has everything you need to know about building a business, from raising funding to marketing your product.
The developer cloud
Scale up as you grow — whether you're running one virtual machine or ten thousand.

Start building today
From GPU-powered inference and Kubernetes to managed databases and storage, get everything you need to build, scale, and deploy intelligent applications.
