Not using Ubuntu 14.04?
Choose a different version or distribution. stack on Ubuntu 14.04")
Introduction
The LEMP software stack is a group of software that can be used to serve dynamic web pages and web applications. This is an acronym that describes a Linux operating system, with an Nginx web server. The backend data is stored in MySQL and the dynamic processing is handled by PHP.
In this guide, we will demonstrate how to install a LEMP stack on an Ubuntu 14.04 server. The Ubuntu operating system takes care of the first requirement. We will describe how to get the rest of the components up and running.
Note: The LEMP Stack can be installed automatically on your Droplet by adding this script to its User Data when launching it. Check out this tutorial to learn more about Droplet User Data.
Prerequisites
Before you complete this tutorial, you should have a regular, non-root user account on your server with sudo privileges. You can learn how to set up this type of account by completing steps 1-4 in our Ubuntu 14.04 initial server setup.
Once you have your account available, sign into your server with that username. You are now ready to begin the steps outlined in this guide.
1. Install the Nginx Web Server
In order to display web pages to our site visitors, we are going to employ Nginx, a modern, efficient web server.
All of the software we will be getting for this procedure will come directly from Ubuntu’s default package repositories. This means we can use the apt package management suite to complete the installation.
Since this is our first time using apt for this session, we should start off by updating our local package index. We can then install the server:
sudo apt-get update
sudo apt-get install nginx
In Ubuntu 14.04, Nginx is configured to start running upon installation.
You can test if the server is up and running by accessing your server’s domain name or public IP address in your web browser.
If you do not have a domain name pointed at your server and you do not know your server’s public IP address, you can find it by typing one of the following into your terminal:
<pre> ip addr show eth0 | grep inet | awk ‘{ print $2; }’ | sed ‘s//.*$//’ </pre> <pre> <span class=“highlight”>111.111.111.111</span> <span class=“highlight”>fe80::601:17ff:fe61:9801</span> </pre>
Or you could try using:
<pre> curl http://icanhazip.com </pre> <pre> <span class=“highlight”>111.111.111.111</span> </pre>
Try one of the lines that you receive in your web browser. It should take you to Nginx’s default landing page:
<pre> http://<span class=“highlight”>server_domain_name_or_IP</span> </pre>
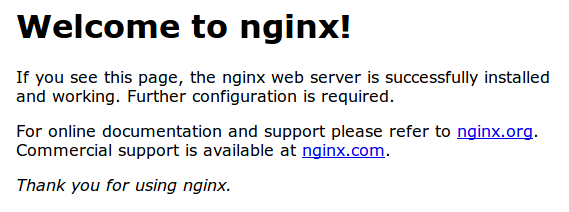
If you see the above page, you have successfully installed Nginx.
2. Install MySQL to Manage Site Data
Now that we have a web server, we need to install MySQL, a database management system, to store and manage the data for our site.
You can install this easily by typing:
sudo apt-get install mysql-server
You will be asked to supply a root (administrative) password for use within the MySQL system.
The MySQL database software is now installed, but its configuration is not exactly complete yet.
First, we need to tell MySQL to generate the directory structure it needs to store its databases and information. We can do this by typing:
sudo mysql_install_db
Next, you’ll want to run a simple security script that will prompt you to modify some insecure defaults. Begin the script by typing:
sudo mysql_secure_installation
You will need to enter the MySQL root password that you selected during installation.
Next, it will ask if you want to change that password. If you are happy with your MySQL root password, type “N” for no and hit “ENTER”. Afterwards, you will be prompted to remove some test users and databases. You should just hit “ENTER” through these prompts to remove the unsafe default settings.
Once the script has been run, MySQL is ready to go.
3. Install PHP for Processing
Now we have Nginx installed to serve our pages and MySQL installed to store and manage our data, but we still need something to connect these two pieces and to generate dynamic content. We can use PHP for this.
Since Nginx does not contain native PHP processing like some other web servers, we will need to install php5-fpm, which stands for “fastCGI process manager”. We will tell Nginx to pass PHP requests to this software for processing.
We can install this module and will also grab an additional helper package that will allow PHP to communicate with our database backend. The installation will pull in the necessary PHP core files. Do this by typing:
sudo apt-get install php5-fpm php5-mysql
Configure the PHP Processor
We now have our PHP components installed, but we need to make a slight configuration change to make our setup more secure.
Open the main php5-fpm configuration file with root privileges:
sudo nano /etc/php5/fpm/php.ini
What we are looking for in this file is the parameter that sets cgi.fix_pathinfo. This will be commented out with a semi-colon (;) and set to “1” by default.
This is an extremely insecure setting because it tells PHP to attempt to execute the closest file it can find if a PHP file does not match exactly. This basically would allow users to craft PHP requests in a way that would allow them to execute scripts that they shouldn’t be allowed to execute.
We will change both of these conditions by uncommenting the line and setting it to “0” like this:
cgi.fix_pathinfo=0
Save and close the file when you are finished.
Now, we just need to restart our PHP processor by typing:
sudo service php5-fpm restart
This will implement the change that we made.
4. Configure Nginx to Use our PHP Processor
Now, we have all of the required components installed. The only configuration change we still need to do is tell Nginx to use our PHP processor for dynamic content.
We do this on the server block level (server blocks are similar to Apache’s virtual hosts). Open the default Nginx server block configuration file by typing:
sudo nano /etc/nginx/sites-available/default
Currently, with the comments removed, the Nginx default server block file looks like this:
<pre> server { listen 80 default_server; listen [::]:80 default_server ipv6only=on;
root /usr/share/nginx/html;
index index.html index.htm;

server_name localhost;

location / {
    try_files $uri $uri/ =404;
}
} </pre>
We need to make some changes to this file for our site.
- First, we need to add an
index.phpoption as the first value of ourindexdirective to allow PHP index files to be served when a directory is requested. - We also need to modify the
server_namedirective to point to our server’s domain name or public IP address. - The actual configuration file includes some commented out lines that define error processing routines. We will uncomment those to include that functionality.
- For the actual PHP processing, we will need to uncomment a portion of another section. We will also need to add a
try_filesdirective to make sure Nginx doesn’t pass bad requests to our PHP processor.
The changes that you need to make are in red in the text below:
<pre> server { listen 80 default_server; listen [::]:80 default_server ipv6only=on;
root /usr/share/nginx/html;
index <span class="highlight">index.php</span> index.html index.htm;

server_name <span class="highlight">server_domain_name_or_IP</span>;

location / {
    try_files $uri $uri/ =404;
}

<span class="highlight">error_page 404 /404.html;</span>
<span class="highlight">error_page 500 502 503 504 /50x.html;</span>
<span class="highlight">location = /50x.html {</span>
    <span class="highlight">root /usr/share/nginx/html;</span>
<span class="highlight">}</span>

<span class="highlight">location ~ \.php$ {</span>
    <span class="highlight">try_files $uri =404;</span>
    <span class="highlight">fastcgi_split_path_info ^(.+\.php)(/.+)$;</span>
    <span class="highlight">fastcgi_pass unix:/var/run/php5-fpm.sock;</span>
    <span class="highlight">fastcgi_index index.php;</span>
    <span class="highlight">fastcgi_param SCRIPT_FILENAME $document_root$fastcgi_script_name;</span>
    <span class="highlight">include fastcgi_params;</span>
<span class="highlight">}</span>
} </pre>
When you’ve made the above changes, you can save and close the file.
Restart Nginx to make the necessary changes:
sudo service nginx restart
5. Create a PHP File to Test Configuration
Your LEMP stack should now be completely set up. We still should test to make sure that Nginx can correctly hand .php files off to our PHP processor.
We can do this by creating a test PHP file in our document root. Open a new file called info.php within your document root in your text editor:
sudo nano /usr/share/nginx/html/info.php
We can type this into the new file. This is valid PHP code that will return formatted information about our server:
<?php
phpinfo();
?>
When you are finished, save and close the file.
Now, you can visit this page in your web browser by visiting your server’s domain name or public IP address followed by /info.php:
<pre> http://<span class=“highlight”>server_domain_name_or_IP</span>/info.php </pre>
You should see a web page that has been generated by PHP with information about your server:
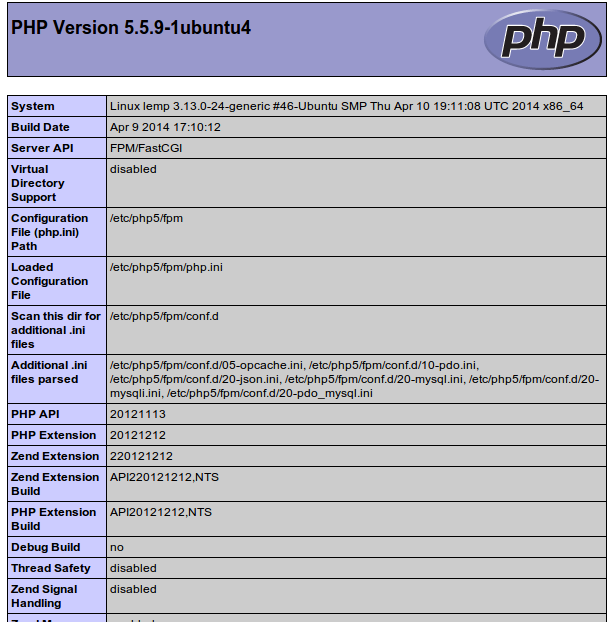
If you see a page that looks like this, you’ve set up PHP processing with Nginx successfully.
After you test this, it’s probably best to remove the file you created as it can actually give unauthorized users some hints about your configuration that may help them try to break in. You can always regenerate this file if you need it later.
For now, remove the file by typing:
sudo rm /usr/share/nginx/html/info.php
Conclusion
You should now have a LEMP stack configured on your Ubuntu 14.04 server. This gives you a very flexible foundation for serving web content to your visitors.
<div class=“author”>By Justin Ellingwood</div>
Thanks for learning with the DigitalOcean Community. Check out our offerings for compute, storage, networking, and managed databases.
Tutorial Series: Introduction to Nginx and LEMP on Ubuntu 14.04
This tutorial series helps sysadmins set up a new web server using the LEMP stack, focusing on Nginx setup with virtual blocks. This will let you serve multiple websites from one Droplet.
You’ll start by setting up your Ubuntu 14.04 server and end with multiple virtual blocks set up for your websites. An Nginx configuration guide is included at the end for reference.
About the author
Former Senior Technical Writer at DigitalOcean, specializing in DevOps topics across multiple Linux distributions, including Ubuntu 18.04, 20.04, 22.04, as well as Debian 10 and 11.
Still looking for an answer?
This textbox defaults to using Markdown to format your answer.
You can type !ref in this text area to quickly search our full set of tutorials, documentation & marketplace offerings and insert the link!
Step Four: The location block provided results in error: nginx: [emerg] unknown directive “fast_cgi_split_path_info” in /etc/nginx/sites-enabled/default:56
Need to remove the underscore between fast and cgi: fastcgi_split_path_info ^(.+.php)(/.+)$;
Step Two I installed mysql-server-5.6, when I run the mysql_install_db command I get the following error:
user@host:~$ sudo mysql_install_db FATAL ERROR: Could not find my-default.cnf
If you compiled from source, you need to run ‘make install’ to copy the software into the correct location ready for operation.
If you are using a binary release, you must either be at the top level of the extracted archive, or pass the --basedir option pointing to that location.
Any idea what Dir I should be running this from or what --basedir option to use?
Brilliant tutorial, thanks Justin!
Really informative and I’m very happy you explained what every configuration means exactly.
Good work :)
Hii… how to install wordpress with nginx on ubuntu 14.04? any tutorial here? can i use this tutorial: https://www.digitalocean.com/community/articles/how-to-install-wordpress-with-nginx-on-ubuntu-12-04 ?
@davidprimadi: It should be more or less the same on 14.04 as on 12.04. Let us know how it goes!
In step 5 of the 12.04 LEMP install tutorial, the instructions state to make the following change in the /etc/php5/fpm/pool.d/www.conf:
change: listen = 127.0.0.1:9000 to listen = /var/run/php5-fpm.sock
However in Step 3 this 14.04 tutorial we are not instructed to do so. Any reason why?
In 14.04, php5-fpm defaults to using the socket file instead of communicating over 127.0.0.1:9000. So the reason you don’t need to change it is because it should already read “listen = /var/run/php5-fpm.sock”
 This work is licensed under a Creative Commons Attribution-NonCommercial- ShareAlike 4.0 International License.
Become a contributor for community
Get paid to write technical tutorials and select a tech-focused charity to receive a matching donation.

DigitalOcean Documentation
Full documentation for every DigitalOcean product.

Resources for startups and AI-native businesses
The Wave has everything you need to know about building a business, from raising funding to marketing your product.
The developer cloud
Scale up as you grow — whether you're running one virtual machine or ten thousand.

Start building today
From GPU-powered inference and Kubernetes to managed databases and storage, get everything you need to build, scale, and deploy intelligent applications.
