By Jose Alvarez Rey and Rachel Lee

The author selected the Diversity in Tech Fund to receive a donation as part of the Write for DOnations program.
Introduction
Components are a key feature of modern front-end development. A component is a piece of code that usually includes two pieces:
- The logic of the component: what the component can do.
- The template: how the user will interact with the web application.
Organizing your app into components helps you write modern and robust web applications. JavaScript frameworks, such as React and Vue.js, can help you develop many kinds of components and are widely used by developers.
However, one of the pain points of these frameworks is that you need to create many components, even for simple things like an input text field. Because of that, a more streamlined approach is to use a components library, which has readymade components you can select and use as needed. With a components library, you don’t need to worry about CSS design, colors, sizes, and fonts—you can focus on the functionality.
For Vue.js, there is Vuetify, a Vue UI library based on Material Design principles. Vuetify is highly configurable and customizable. You can modify the components to fit your needs, and you can set up your own theme to have a consistent component library based on your brand style.
In this tutorial, you will create a to-do app based on Vuetify and publish it using Nginx as a reverse proxy, which is required to deploy a Vue app.
Note: As Vue is a front-end framework, the app you create for this tutorial will run in the browser. However, for additional functionality, such as authentication or data persistence, you would need a backend. Defining or developing this back-end functionality is out of the scope of this article.
Prerequisites
To follow this tutorial, you will need the following:
- One Ubuntu 20.04 server with a sudo non-root user. To get started, follow our Initial Server Setup Guide for Ubuntu 20.04. For this tutorial, the non-root user is
sammy. - Nginx installed, which you can do by following Steps 1-3 of the tutorial, How To Install Nginx on Ubuntu 20.04.
- A fully registered domain name. This tutorial will use
your_domainthroughout. You can purchase a domain name on Namecheap, get one for free on Freenom, or use the domain registrar of your choice. - Node.js (at least v14.0.0) installed, which you can do by following the How to Install Node.js and Create a Local Development Environment tutorial for your operating system.
- Familiarity with Vue.js, which you can find in the Vue quick start guide and our series, How To Develop Websites with Vue.js.
Step 1 — Setting Up Your Vue Application
In this step, you will configure your Vue.js application. Vue.js has a client that you can use to create the boilerplate of the project, which is a good way to start from scratch.
You’ll begin by installing the Vue.js client globally with this command:
- sudo npm install -g @vue/cli
Next, validate the version:
- vue --version
The latest version, when this tutorial was written, was 5.0.8:
Output@vue/cli 5.0.8
Now that you have installed @vue/cli, you can use it to create the vuejs application. In this tutorial, the app will be called vuetify-meets-nginx-app, but you can change the name to whatever you’d like.
To create the app, run this command:
- vue create vuetify-meets-nginx-app
This command is interactive and has multiple options. For this tutorial, choose the Default option for Vue 2:
OutputVue CLI v5.0.8
? Please pick a preset: (Use arrow keys)
  Default ([Vue 3] babel, eslint)
❯ Default ([Vue 2] babel, eslint)
  Manually select features
Warning: At the time of this writing, Vuetify does not support Vue.js v3. If you try to add Vuetify to a Vue.js v3, you will see this error:
OutputError: you cannot call "get" on a collection with no paths. Instead, check the "length" property first to verify at least 1 path exists.**
For more information, please see the Vuetify roadmap.
Once the application has been created, you’ll notice that Vue generated files and directories:
├── README.md
├── babel.config.js
├── jsconfig.json
├── node_modules
├── package-lock.json
├── package.json
├── public/
      ├── favicon.ico
      └── index.html
├── src
        ...
└── vue.config.js
Here’s a brief overview:
babel.config.js: Babel is a Javascript compiler, and this file defines its behavior. This is necessary to run, build, and generate the final application.jsconfig.json: This file is also necessary to compile the app. For example, this file sets the version of the Javascript code toECMAScript 2009 (ES5), the default one. For more information, check out this documentation.node_modules: Directory containing all installed and configured libraries.package.json: The main configuration file of your app. You will see here information about the dependencies and the commands available to run or build your app.package-lock.json: This is a dump file of all the dependencies used by your app. This file is especially useful if you want to install your app on another laptop or server withnpm.public: Here, you have the base code thatnpm run servecommand needs to publish your app. It is generated by the@vue/clicommand.vue.config.js:Vueconfiguration file.
In the src folder, you’ll see the following files and directories:
src
├── App.vue
├── assets
│ ├── logo.png
│ └── logo.svg
├── components
│ └── HelloWorld.vue
├── main.js
Here’s a brief overview:
App.vue: The Vue.js application’s top-level component. All other components will be inside the component defined here.assets: All assets, such as images, CSS files, and fonts, must be placed here.components: This contains all the components you create. The@vue/clicommand generated one calledHelloWorld.vue.main.js: The app main file. If you need to configure a library or plugin, this is the file. It also created the Vue app.
Now you can navigate to the vuetify-meets-nginx-app directory:
- cd vuetify-meets-nginx-app
To start the application in development mode, run the following command:
- npm run serve
Your output will look like this:
OutputINFO  Starting development server...

DONE  Compiled successfully in 27235ms

 App running at:
 - Local:   http://localhost:8080/
 - Network: unavailable

 Note that the development build is not optimized.
 To create a production build, run npm run build.
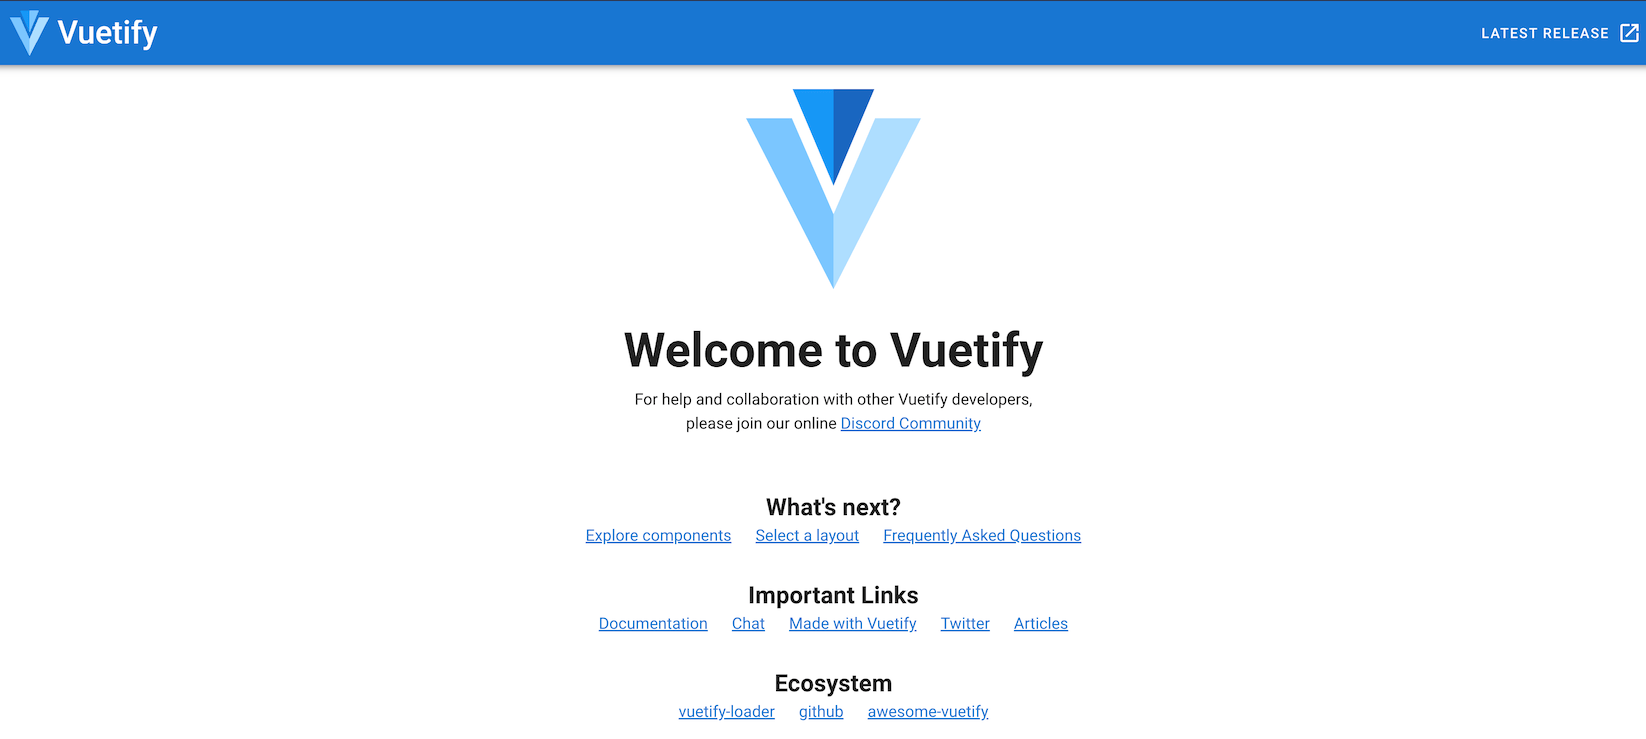
Once the development server has started, head over to localhost:8080 to see the application:

Note: If you are following the tutorial on a remote server, you can use port forwarding to see the app in the browser. Ensure that port 8080 is open on your server. While the development server is still running, open another terminal on your local computer and enter the following command to initiate port-forwarding:
- ssh -L 8080:localhost:8080 your_non_root_user@your_server_ip
Upon connecting to the server, navigate to http://localhost:8080 on your local machine’s web browser. Keep the second terminal open throughout the remainder of this tutorial.
In this step, you created your Vue.js application. Next, you’ll add Vuetify to the project.
Step 2 — Integrating Vuetify into the Vue App
In this step, you’ll add Vuetify to your Vue.js app.
Without a component library like Vuetify, you would have to use HTML inputs, like div and button, design the CSS for your web app, and create your own components if you wanted some reusable blocks. But with the Vuetify library, you only need to import the components you want and add them to your template.
Vuetify is also highly customizable. For instance, you can have themes. One theme is a CSS library that includes things like color palettes, custom screen sizes, and fonts. For example, if your primary color is blue, you can configure Vuetify in that way, and every time you use the CSS class primary, Vuetify will use the blue color. You can find more information about the themes in the Vuetify documentation. More information about these and other components can be found in the Vuetify feature guides.
To get started adding Vuetify, terminate the development server that you launched in the previous step by typing CTRL+C in the terminal where the development server is running.
Next, run the following command in the vuetify-meets-nginx-app directory:
- vue add vuetify
This command installs Vuetify using the Vue.js client.
Choose the default configuration in the preset options list:
Output📦  Installing vue-cli-plugin-vuetify...

added 38 packages, and audited 39 packages in 2s

7 packages are looking for funding
  run `npm fund` for details

found 0 vulnerabilities
✔  Successfully installed plugin: vue-cli-plugin-vuetify

? Choose a preset: (Use arrow keys)
  Configure (advanced)
❯ Default (recommended)
  Vite Preview (Vuetify 3 + Vite)
  Prototype (rapid development)
  Vuetify 3 Preview (Vuetify 3)
After a few minutes, you can launch the development server again:
- npm run serve
Navigate to localhost:8080, where you can see the application with a new “vuetified” style:
At this point, you have created a basic app and have added Vuetify for styling. Next, you will create a to-do app with additional functionality.
Step 3 — Creating a To-Do Vuetify App
In this step, you will create a to-do app. A to-do app is a list of tasks that will require some basic functionality:
- A way to add new tasks.
- A way to mark them as done.
- A method to display them, allowing users to see what is pending.
To add these functionalities to your app, you will modify the App.vue file, which is the application’s top-level component. All other components will be inside the component defined here.
Note:
Vue.js, like many other frameworks, uses hot reloading by default. If you keep running the npm run serve command while you are developing your code, you will see the updates in the browser as soon as you save the changes.
Navigate to src/App.vue and open it for editing using nano or your favorite text editor:
- cd src
- nano App.vue
Here is the default code:
<template>
  <v-app>
    <v-app-bar
      app
      color="primary"
      dark
    >
      <div class="d-flex align-center">
        <v-img
          alt="Vuetify Logo"
          class="shrink mr-2"
          contain
          src="https://cdn.vuetifyjs.com/images/logos/vuetify-logo-dark.png"
          transition="scale-transition"
          width="40"
        />

        <v-img
          alt="Vuetify Name"
          class="shrink mt-1 hidden-sm-and-down"
          contain
          min-width="100"
          src="https://cdn.vuetifyjs.com/images/logos/vuetify-name-dark.png"
          width="100"
        />
      </div>

      <v-spacer></v-spacer>

      <v-btn
        href="https://github.com/vuetifyjs/vuetify/releases/latest"
        target="_blank"
        text
      >
        <span class="mr-2">Latest Release</span>
        <v-icon>mdi-open-in-new</v-icon>
      </v-btn>
    </v-app-bar>

    <v-main>
      <HelloWorld/>
    </v-main>
  </v-app>
</template>

<script>
import HelloWorld from './components/HelloWorld';

export default {
  name: 'App',

  components: {
    HelloWorld,
  },

  data: () => ({
    //
  }),
};
</script>
Every component has two pieces: a template (usually HTML code) and a script with the functionality that is written in Javascript.
The template is what the end user will see in the browser and determines how users interact with your application. Typically, you must import components to be used in the template, but since you installed Vuetify as a plugin, all the components are available in the template without explicitly importing them.
In the template block, there are a lot of v- HTML tags. Although nonstandard for HTML, these tags are Vuetify components and will always start with v-.
In the template, you currently have:
v-app: the main component, which is attached to the body of the website.v-app-bar: the default side bar.v-img: a component that loads images.v-icon: a component for showing icons.v-spacer: a component that aligns the next component to the right.
Regarding the script block in the App.vue file, the Vuetify installation does not add any code here, so what you have is the starting code generated by the Vue cli command and the minimum code required for a Vue component.
Now that you’ve looked over the default code in the App.vue file, you’re ready to start creating your to-do app. The first step will be to remove some default code you won’t be using.
Cleaning Up the App.vue file
The default HelloWorld component won’t be necessary for your to-do app, so you will remove it from the App.vue file.
To use a Vue component inside another component or view, you must import the component into the script block of the file. In your App.vue file, you have the HelloWorld component import in the first line:
...
import HelloWorld from './components/HelloWorld';
...
Since you will not be using this component, delete the import line.
The next step is to remove the component from the list of component dependencies of the App.vue page. In the script block, locate the following lines:
...
<script>
  ...

  components: {
    HelloWorld,
  },

  ...
</script>
Delete the HelloWorld line from the list of components.
The last step is to remove it from the template block:
...
<template>
    ...
    <v-main>
      <HelloWorld/>
    </v-main>
  </v-app>
</template>
...
Delete the HelloWorld line.
Now that the default HelloWorld component has been removed, you can start creating your to-do app.
Adding Component Data Fields
To build your to-do app, you’ll add data fields for your app. The data of the component is a function that returns all the data models that you will be able to use in the template. All these data models are Javascript variables inside an object and will also be accessible by the methods of the component.
Locate the data field in the script block:
...
<script>
  ...
  data: () => ({
    //
  }),
};
</script>
You will modify the data function to store your task list. Add the following highlighted lines to the data function:
...
<script>
    ...
    data: () => ({
        tasks: ['task 1', 'task 2', 'task 3'],
        newTask: null
    }),
};
</script>
With this update, you added two data models: a newTask variable to store the task name and tasks for the list of tasks. Both data models are now available to be used in the template and in the methods.
Note: If you’re not familiar with how Vue.js makes data models accessible for the template and the methods of the components, have a look at Reactivity Fundamentals of Vue.js in the official documentation.
Adding Functionality to Your App
Next, you will add the functionality. In Vue.js components, the functionality is inside a list of functions called methods. In the script block under the data models, add the highlighted lines to add three functions:
...
<script>
export default {
    name: 'App',

    data: () => ({
        tasks: ['task 1', 'task 2', 'task 3'],
        newTask: null
    }),
    methods: {
        addNewTask() {
            this.tasks.push(this.newTask);
            this.clearNewTask();
        },
        clearNewTask() {
            this.newTask = '';
        },
        removeTask(i) {
            this.tasks.splice(i, 1);
        }
    }
};
You added three functions:
addNewTask: To add the new task inside thenewTaskdata model to thetaskslist.clearNewTask: To clear the data model fornewTask.removeTask: To remove a task fromtasksbased on an array index.
You have now added the functionality for your to-do app. Next, you’ll modify the template to use the methods.
Updating the Template
The last piece of your to-do app is the template. In this section, you’ll update the template to use the methods and data models you added in the previous sections.
You’ll need to remove some components you don’t need from v-app-bar. Delete the v-btn block. Then, your code will look like this:
<template>
    <v-app>
        <v-app-bar
            app
            color="primary"
            dark
        >
        <div class="d-flex align-center">
            <v-img
                alt="Vuetify Logo"
                class="shrink mr-2"
                contain
                src="https://cdn.vuetifyjs.com/images/logos/vuetify-logo-dark.png"
                transition="scale-transition"
                width="40"
            />

            <v-img
                alt="Vuetify Name"
                class="shrink mt-1 hidden-sm-and-down"
                contain
                min-width="100"
                src="https://cdn.vuetifyjs.com/images/logos/vuetify-name-dark.png"
                width="100"
            />
        </div>

        <v-spacer></v-spacer>

        </v-app-bar>
        ...
    </v-app>
</template>
Next, you are going to add some components to define the base layout of your app. First is a v-container, which is a component that provides the ability to center and horizontally pad your app’s contents. More information about this component and other containers can be found in the grid system documentation from Vuetify.
Within v-container, you will add a v-card component, which is another Vuetify container. It is useful for organizing content on the screen, such as a panel or a static image. For more information about the v-card component, take a look at the Vuetify documentation on cards.
Locate the v-main block in the current template and add the highlighted lines:
...
<v-main>
    <v-container>
        <v-card elevation="0">
        </v-card>
    </v-container>
</v-main>
...
As you can see in the code, there is an elevation="0" property in the v-card component. Elevation is a common property inside Vuetify components that adjusts the relative z-distance between two components. In this case, you don’t need any distance, and 0 is the value to remove the elevation. However, you can play with it to see the differences or have a look at the elevation documentation.
Next, you will use two v-card functional components: v-title, which provides a default font size and padding for card titles, and v-card-text, which will contain the content of the card. Add the highlighted lines to your v-card component:
...
<v-main>
    <v-container>
        <v-card elevation="0">
            <v-card-title></v-card-title>
            <v-card-text></v-card-text>
       </v-card>
    </v-container>
</v-main>
...
A functional component is a component that only renders a template. It does not have any logic and, because it is just a template, it renders faster. For more on functional components, or to learn how to create your own, have a look at the Vue.js guide on functional components.
Now that you have your container component, you must add a v-text-field component to handle the names of new tasks. In the v-card-title component you just added, insert the highlighted lines:
...
<v-main>
    <v-container>
        <v-card elevation="0">
            <v-card-title>
              <v-text-field
                v-model="newTask"
                label="Task Name"
                prepend-icon="mdi-content-save"
                clear-icon="mdi-close-circle"
                clearable
                filled
                type="text"
                @click:prepend="addNewTask"
                @click:clear="clearNewTask"
                ></v-text-field>
            </v-card-title>
           ...
        </v-card>
    </v-container>
</v-main>
...
v-text-field is a required component for naming the new tasks.
It has the following properties:
v-model="newTask"attaches the data model to the component. Any text you put in the input will also be added to the data model.label="Task Name"is the text in the input type’s placeholder.prepend-icon="mdi-content-save"will display the Save icon in the text box’s left corner.clear-icon="mdi-close-circle"is the Clear button’s icon.clearableshows the Clear icon.filledapplies an alternate filled input style to the component.type="text"sets the input type of the underlying HTML input field. Other options includeemailorpassword.@click: prepend="addNewTask"attaches the Save button’s click event to theaddNewTaskfunction.@click: clear="clearNewTask"connects the Save button’s click event to theclearNewTaskfunction.
The next step is to show every task inside the tasks list model. For that, you are going to use the v-timeline component, which is a display component for showing time- or order-based information. You are going to add it to v-card-text, which is the v-card body component. Inside the v-card-text component you’ve already added, insert the highlighted lines:
...
<v-main>
    <v-container>
        <v-card elevation="0">
            <v-card-title>
            ...
            </v-card-title>
            <v-card-text>
              <v-timeline
                  v-if="tasks.length > 0"
                  dense
              ></v-timeline>
            </v-card-text>
            ...
      </v-card>
   </v-container>
</v-main>
...
v-timeline displays all of the tasks in the list. The v-if is to show the component only if you have at least one task in the data model. dense is for condensing the content (basically, it removes some padding and margins from the component CSS style).
Now, to show the name of every task, you’ll need to use a v-timeline functional component: v-timeline-item. Add the following lines inside the v-timeline component:
...
<v-main>
    <v-container>
        <v-card elevation="0">
            <v-card-title>
            ...
            </v-card-title>
            <v-card-text>
              <v-timeline
                  v-if="tasks.length > 0"
                  dense
                >
                    <v-timeline-item
                        v-for="(t, index) in tasks"
                        :key="index"
                    >
                         {{ t }}
                    </v-timeline-item>
              </v-timeline>
            </v-card-text>
        </v-card>
    </v-container>
</v-main>
...
This code uses a v-for loop to show a v-timeline-item component for every task in your task list model. As v-timeline-item is a functional component of v-timeline, it will be rendered with the style of a chronological list.
You add the index as key to the v-for loop because it is mandatory for the v-for Vue directive. For more about using unique keys with v-for, check out the Vue product documentation.
With the {{ t }} line, you will show the name of the task inside the v-timeline-item component.
The next step is to add a button to remove the task from the list. But before that, you’ll need to add some extra grid system components to organize the task names and buttons. Add the highlighted lines inside the v-timeline-item component:
...
<v-main>
    <v-container>
        <v-card elevation="0">
            <v-card-title>
            ...
            </v-card-title>
            <v-card-text>
              <v-timeline
                  v-if="tasks.length > 0"
                  dense
                >
                    <v-timeline-item
                        v-for="(t, index) in tasks"
                        :key="index"
                    >
                        <v-row class="display-1 text-capitalize">
                            <v-col cols="7">
                                {{ t }}
                            </v-col>
                            <v-col
                                class="text-right"
                                cols="5"
                            >
                            </v-col>
                        </v-row>
                     </v-timeline-item>
               </v-timeline>
             </v-card-text>
         </v-card>
     </v-container>
</v-main>
...
With the code above, you added:
- A
v-rowcomponent with two classes to set the size of the text of the task (display-1, similar to H1 in HTML) and with all the characters in capital letters (text-capitalize). - A
v-colcomponent inside the row to show the name of every task that will need 7/12 parts of the space (thecols="7"property). - Another
v-colcomponent that places the remove button. It needs 5/12 parts of the space (cols="5"property) and has all the components inside aligned to the right, determined by thetext-rightclass.
Finally, it is time to include a v-btn component to attach the removeTask function to a button component. To keep it simple, you are going to use an icon button, which is a button with just an icon and no text. To do this, you will need a v-icon component as well.
Add the highlighted lines:
...
<v-timeline
    v-if="tasks.length > 0"
    dense
>
    <v-timeline-item
        v-for="(t, index) in tasks"
        :key="index"
    >
        <v-row class="display-1 text-capitalize">
            <v-col cols="7">
                {{ t }}
            </v-col>
            <v-col
                class="text-right"
                cols="5"
            >
                <v-btn
                    icon
                    @click="removeTask(index)"
                >
                    <v-icon color="red lighten-1" large>
                        mdi-sticker-remove
                    </v-icon>
                </v-btn>
            </v-col>
        </v-row>
    ...
    </v-timeline-item>
</v-timeline>
In the code you just added, the icon property of the v-btn component specifies that no text is required. It modifies the component to style only a v-icon component.
The @click component event binds your removeTask method to the button’s click event. So every time the underlying button click event is generated, your method will be called.
You used the index provided by the v-for loop as the parameter for the removeTask method.
Finally, the v-icon color will be red lighten-1, the size will be large, and you used the mdi-sticker-remove material design’s icon.
You have now updated the template with some Vuetify components, configured them to use and show the content of your data models, and allowed your app’s users to interact with them using your page methods.
Here is the final code of the App.vue file:
<template>
    <v-app>
        <v-app-bar
            app
            color="primary"
            dark
        >
        <div class="d-flex align-center">
            <v-img
                alt="Vuetify Logo"
                class="shrink mr-2"
                contain
                src="https://cdn.vuetifyjs.com/images/logos/vuetify-logo-dark.png"
                transition="scale-transition"
                width="40"
            />

            <v-img
                alt="Vuetify Name"
                class="shrink mt-1 hidden-sm-and-down"
                contain
                min-width="100"
                src="https://cdn.vuetifyjs.com/images/logos/vuetify-name-dark.png"
                width="100"
            />
        </div>

        <v-spacer></v-spacer>

        </v-app-bar>

        <v-main>
            <v-container>
                <v-card elevation="0">
                    <v-card-title>
                        <v-text-field
                            v-model="newTask"
                            label="Task Name"
                            prepend-icon="mdi-content-save"
                            clear-icon="mdi-close-circle"
                            clearable
                            filled
                            type="text"
                            @click:prepend="addNewTask"
                            @click:clear="clearNewTask"
                        ></v-text-field>
                    </v-card-title>
                    <v-card-text>
                        <v-timeline
                            v-if="tasks.length > 0"
                            dense
                        >
                            <v-timeline-item
                                v-for="(t, index) in tasks"
                                :key="index"
                            >
                                <v-row class="display-1 text-capitalize">
                                    <v-col cols="7">
                                        {{ t }}
                                    </v-col>
                                    <v-col
                                        class="text-right"
                                        cols="5"
                                    >
                                        <v-btn
                                            icon
                                            @click="removeTask(index)"
                                        >
                                            <v-icon color="red lighten-1" large>
                                                mdi-sticker-remove
                                            </v-icon>
                                        </v-btn>
                                    </v-col>
                                </v-row>
                            </v-timeline-item>
                        </v-timeline>
                    </v-card-text>
                </v-card>
            </v-container>
        </v-main>
    </v-app>
</template>

<script>

export default {
    name: 'App',

    data: () => ({
        tasks: ['task 1', 'task 2', 'task 3'],
        newTask: null
    }),
    methods: {
        addNewTask() {
            this.tasks.push(this.newTask);
            this.clearNewTask();
        },
        clearNewTask() {
            this.newTask = '';
        },
        removeTask(i) {
            this.tasks.splice(i, 1);
        }
    }
};
</script>
Save and close your file.
If you don’t have the development server still running, launch it again:
- npm run serve
Now you can navigate to localhost:8080 to see your app working.
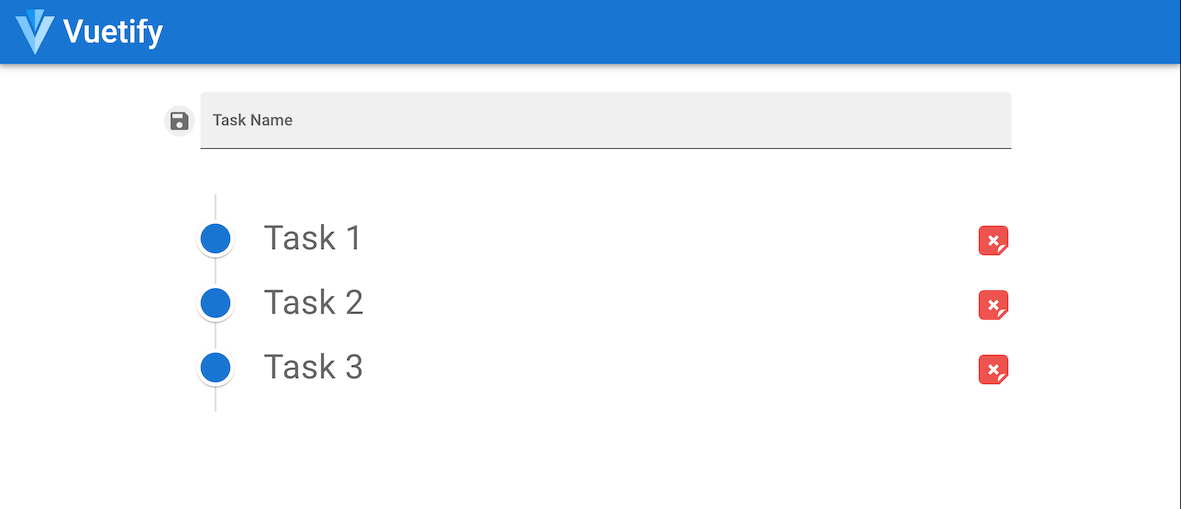
In this step, you created a to-do app. You added functionality and updated the UI. Now that you’ve written the app, you can generate a version ready for production. The next step will be to build the app for production.
Step 4 — Building Your App for Production
In the previous step, you wrote your to-do app. But before publishing it with Nginx, you’ll need to prepare the app for production. This step is called building the app.
The build step converts the app into something that can be read by a browser. If you try to open your src files in a browser, you won’t see anything. This is because they are Vue.js files, not HTML, JS, and CSS files, which are what browsers can read. Before publishing your app with Nginx, you’ll need to build the app for production, which is what you will do in this step.
You can use the build command to do this automatically. package.json is the main configuration file of your app. It contains information about the dependencies and the commands available to run or build your app, such as the build command, as shown here:
{
  ...
  "scripts": {
    "serve": "vue-cli-service serve",
    "build": "vue-cli-service build",
    "lint": "vue-cli-service lint"
  },
  ...
}
For more about the package.json file configuration, please have a look at the package.json guide.
To start the build process, stop the dev server with CTRL+C.
In the same terminal, navigate to the project directory:
- cd vuetify-meets-nginx-app
Run the build command:
- npm run build
When the build finishes, you’ll have a version of your app ready for production in the directory dist.
Next, you’ll set up Nginx as a reverse proxy to deploy and access the app.
Step 5 — Configuring Nginx as a Reverse Proxy
Now that you have a working application, you must configure Nginx as a reverse proxy to serve your app’s files and connect it to your domain name.
A reverse proxy is an application or service that runs on a server and forwards external requests to another location. In your case, every time a user visits your domain in a browser, Nginx will handle this request by answering with a file from your app. It will return a file because when you build the app, HTML, JS, and CSS files are generated, which Nginx will treat as any other static files or websites you may have on your server.
Nginx works with sites. Every site is a different website configured in a single file. All the configuration files are placed by default in /etc/nginx/sites-available/. Navigate to this directory:
- cd /etc/nginx/sites-available/
Create a file called vuetify-meets-nginx-app:
- sudo nano vuetify-meets-nginx-app
Note: You can name the file whatever you want, but naming it as the app or website you want to publish is the convention.
In your vuetify-meets-nginx-app file, add the following lines, making sure to update server_name with your own information:
server {
  listen 80;
  listen [::]:80;
  server_name your_domain;
  autoindex on;
  root   /home/sammy/vuetify-meets-nginx-app/dist/;
  index  index.html;
}
In this tutorial, you are configuring Nginx to listen on port 80, but you can use any port you want. Replace your_domain with your domain name. You could also use the IP address of your server or localhost, if you are testing this in a local development environment.
With the root line, you’re telling Nginx that all of the files are in the /home/sammy/vuetify-meets-nginx-app/dist/ directory, which was created in the previous step. Finally, with the index line, you tell Nginx that the main file is index.html.
Save and close your file.
Next, you’ll need to resolve a permissions issue in the Nginx configuration file.
Nginx is a service running on your server. You can list all the running processes related to Nginx with the following command:
- ps -fea | grep nginx
The ps command with -fea flags lists all current processes in a full-format listing. The output of this command is then filtered to only list processes matching nginx.
The output will be similar to the following:
Outputroot       39922       1  0 Jul14 ?        00:00:00 nginx: master process /usr/sbin/nginx -g daemon on; master_process on;
www-data   39923   39922  0 Jul14 ?        00:00:01 nginx: worker process
sammy     117909  117434  0 21:27 pts/0    00:00:00 grep --color=auto nginx
As shown in the output, the nginx service is running with the user www-data.
Next, review the permissions of /home/sammy/vuetify-meets-nginx-app/dist/ with this command:
- ls -l /home/sammy/vuetify-meets-nginx-app/dist/
The output will look similar to the following:
Outputtotal 20
drwxrwxr-x 2 sammy sammy 4096 Jul 14 18:54 css
-rw-rw-r-- 1 sammy sammy 4286 Jul 14 18:54 favicon.ico
-rw-rw-r-- 1 sammy sammy  853 Jul 14 18:54 index.html
drwxrwxr-x 2 sammy sammy 4096 Jul 14 18:54 js
All the files and folders have permissions to be available for the user sammy. If you configure Nginx to read those files, it won’t work because the Nginx user www-data does not have execution permission.
There are a few options for solving this issue:
- Grant Nginx read, write, and execution permissions to the
distfolder. However, granting a service that is accessible from the entire network with permissions to read local user files is not secure. Additionally, Nginx will need permission to access all the parent folders because it needs to navigate to the final folder, which would basically open the/homedirectory to the world. This is not recommended. - Run
nginxwithsudo. This is also not secure, since now you would have a service with access to all the files on your server. - Move your
distcontent to a location where only Nginx has access and no one else does. This is the safest option.
For this tutorial, you will use the third option.
In Ubuntu and some other Linux-based distributions, the shared place for exchanging files between services is the /var path. You will copy the files to /var/www, which is the default path that Nginx uses for websites.
From your project directory, run the following command to copy your files to the /var/www path:
- sudo cp -r /home/sammy/vuetify-meets-nginx-app/dist /var/www/vuetify-meets-nginx-app
All the files will be copied with the same permissions as before, which is for the sammy user, so you’ll need to add the sammy user to the same permission group as www-data. You can do this with the following command:
- sudo usermod -aG www-data sammy
At this point, Nginx can access the necessary files in a secure way. However, you’ll need to copy the project files every time you generate a new version of the app, which would complicate autodeploys, CI/CD tools, and so on. A better solution would be to modify the build command to generate the files directly in the correct path.
To do that, open package.json for editing and add the highlighted text:
...
"build": "vue-cli-service build --dest /var/www/vuetify-meets-nginx-app",
...
Save and close your file.
Now you can complete the Nginx configuration. Open the Nginx config file and update it with the new application path:
server {
  listen 80;
  listen [::]:80;
  server_name your_domain OR your_server_IP;
  autoindex on;
  root   /var/www/vuetify-meets-nginx-app;
  index  index.html;
}
Save and close your file.
Now that your site file is ready, you need to enable it. For that, go to the enabled sites path:
- cd /etc/nginx/sites-enabled/
Disable the default site to ensure you don’t have two sites enabled and listening on the same port (port 80):
- sudo rm default
Finally, create a simlink file to your app’s configuration file:
- sudo ln -s /etc/nginx/sites-available/vuetify-meets-nginx-app
Nginx will take into account only the site files placed in the enabled directory. You can copy the configuration file directly, but having duplicated files is not recommended because you can potentially have discrepancies. This is why a simlink, a file shortcut to the available file, is a better approach.
Test to make sure that there are no syntax errors in your Nginx files:
- sudo nginx -t
Your output will look like this:
Outputnginx: the configuration file /etc/nginx/nginx.conf syntax is ok
nginx: configuration file /etc/nginx/nginx.conf test is
successful
To apply the changes, restart the Nginx service:
- sudo systemctl restart nginx
Now you can navigate to your domain (or your server’s IP address) to view your to-do app ready and published.
In this step, you configured Nginx as a reverse proxy to publish your app.
Conclusion
In this tutorial, you created a Vue.js application and installed and configured Vuetify. You then generated a static version of your app ready for production and, finally, configured the Nginx service to publish it.
For a closer look at the project files, check out the Github repository.
As a next step, try configuring Nginx to serve your application over HTTPS. To get started, follow our tutorial, How To Secure Nginx with Let’s Encrypt on Ubuntu 20.04.
To learn more about Vuetify, check out the Vuetify documentation. If you are interested in extending the functionality of Vuetify components, check out our tutorial, Extending Vuetify Form Field Validation.
Thanks for learning with the DigitalOcean Community. Check out our offerings for compute, storage, networking, and managed databases.
About the author(s)
Still looking for an answer?
This textbox defaults to using Markdown to format your answer.
You can type !ref in this text area to quickly search our full set of tutorials, documentation & marketplace offerings and insert the link!
What if the vuejs app is connected to an api that is also hosted on same server of frontend ui? let say the api was develop in nodejs/express. How can i connect the vuejs + api? What is the necessary configuration? thanks a lot
 This work is licensed under a Creative Commons Attribution-NonCommercial- ShareAlike 4.0 International License.
Become a contributor for community
Get paid to write technical tutorials and select a tech-focused charity to receive a matching donation.

DigitalOcean Documentation
Full documentation for every DigitalOcean product.

Resources for startups and AI-native businesses
The Wave has everything you need to know about building a business, from raising funding to marketing your product.
The developer cloud
Scale up as you grow — whether you're running one virtual machine or ten thousand.

Start building today
From GPU-powered inference and Kubernetes to managed databases and storage, get everything you need to build, scale, and deploy intelligent applications.
