
Introduction
Diaspora is an open-source distributed social network.
It differs from most other social networks because it’s decentralized — a true network with no central base. There are servers (called pods) all over the world, each containing the data of users who have chosen to register with it. These pods communicate with each other seamlessly so that you can register with any pod and communicate freely with your contacts, wherever they are on the network. You can read more on Diaspora’s about page.
In this tutorial we are going to set up and configure a Diaspora pod. Among other things, you will learn:
- How to set up a Rails application (Diaspora) for production
- How to configure MariaDB with Diaspora
- How to set up Nginx as a reverse proxy server for Diaspora
- The best practices for an SSL configuration for Nginx
- How to write custom systemd unit files to use in a Rails application
- For the security-conscious, there’s a bonus section on how to configure SELinux to play well with Diaspora
Deviations from the official Diaspora installation guide
The Diaspora wiki installation guides suggest we use Ruby Version Manager. While you could do that, we are going to use the system packaged Ruby instead. That way we avoid installing Ruby from source and having another dependency like RVM to worry about.
The official guide also suggests the use of script/server, a script that starts unicorn and sidekiq, two apps we need for Diaspora. Since CentOS 7 uses systemd, we’ll write our own init files for these services instead.
Prerequisites
Please complete these prerequisites before starting the tutorial.
-
CentOS 7 with 1 GB RAM
The minimum RAM needed for a small community is 1 GB, so we will use the 1 GB / 1 CPU Droplet.
-
sudo user
Most of the commands below need root privileges. Check the how to add users guide to add your user and give it sudo privileges. This user account will be in addition to the diaspora user account which we will create later, and which Diaspora’s services will run under with more limited privileges.
-
SSL certificate
Although Diaspora can run without an SSL certificate, Diaspora’s mechanism for connecting to other pods requires a valid SSL certificate. For production, you should have a paid SSL certificate. We just need the two cert files created in this article (public, private), so you can skip the web server configuration part of that tutorial. We’ll do that on our own.
Alternately, for testing purposes, you can generate a self-signed certificate. See this tutorial for details, or just run this command from your home directory:
openssl req \ -newkey rsa:2048 -nodes -keyout ssl.key \ -x509 -days 365 -out ssl.crt -
Registered domain name pointing to your Droplet’s IP
-
Swap file
For a 1 GB server, a swap file of at least 1 GB is needed. Follow the Add swap on CentOS 7 tutorial to set one up.
-
Follow the Initial Server Setup with CentOS 7 guide
-
Follow the Additional Recommended Steps for New CentOS 7 Servers guide
Step 1 — Install Utilities
Let’s install a couple of packages for utilities that will come in handy later:
- sudo yum install deltarpm yum-cron vim
Then update our system:
- sudo yum update
Step 2 — Enable the EPEL Repository
EPEL stands for Extra Packages for Enterprise Linux, and it has some packages we’ll need to install that are not part of the base CentOS repositories.
Let’s enable it by installing the epel-release package and checking for any
package updates:
- sudo yum install epel-release
- sudo yum update
If you are asked to import the EPEL 7 gpg key as shown below, answer yes:
Retrieving key from file:///etc/pki/rpm-gpg/RPM-GPG-KEY-EPEL-7
Importing GPG key 0x352C64E5:
  Userid     : "Fedora EPEL (7) <epel@fedoraproject.org>"
  Fingerprint: 91e9 7d7c 4a5e 96f1 7f3e 888f 6a2f aea2 352c 64e5
  Package    : epel-release-7-5.noarch (@extras)
  From       : /etc/pki/rpm-gpg/RPM-GPG-KEY-EPEL-7
  Is this ok [y/N]: y
Step 3 — Install Packages for Ruby and C
The following packages are needed by Diaspora and its gems that have native C extensions.
Install the packages:
- sudo yum install git ruby ruby-devel libxslt-devel libxml2-devel gcc gcc-c++ automake net-tools libcurl-devel libffi-devel make redis nodejs ImageMagick-devel
Redis is an open-source key value data store which Diaspora uses as its database. Now that Redis is installed, let’s configure it to be enabled at boot, and start the service:
- sudo systemctl enable redis
- sudo systemctl start redis
Step 4 — Add a Dedicated Diaspora User
Create a user account to run Diaspora. You can name this account whatever you like, but this tutorial will assume that this user is called diaspora.
- sudo useradd diaspora
Step 5 — Configure the Firewall
Configuring and tightening the firewall is of great importance when setting up a production environment. The tool we will use is firewalld, which simplifies things compared to pure iptables commands.
First, start the firewalld service and enable it to start at boot:
- sudo systemctl start firewalld
- sudo systemctl enable firewalld
Now we’ll allow ssh on port 22, http on port 80, https on port 443 and smtp on port 25. As your sudo user, add these services:
- sudo firewall-cmd --permanent --add-service=ssh
- sudo firewall-cmd --permanent --add-service=http
- sudo firewall-cmd --permanent --add-service=https
- sudo firewall-cmd --permanent --add-service=smtp
Reload the firewall rules:
- sudo firewall-cmd --reload
For more information on using firewalld, read the Additional Recommended Steps for New CentOS 7 Servers tutorial.
Step 6 — Install and Secure MariaDB
The next big step is to set up a database for Diaspora. In this tutorial, we will use MariaDB, although we’ll include a few tidbits for PostgreSQL throughout the tutorial.
Install the required packages:
- sudo yum install mariadb-server mariadb-devel
Ensure that MariaDB is started and enabled on boot:
- sudo systemctl start mariadb
- sudo systemctl enable mariadb
Secure the MariaDB installation by running the following command:
- sudo mysql_secure_installation
Answer the questions as shown below in red text and add a strong root password when prompted:
Enter current password for root (enter for none): ENTER
Set root password? [Y/n] Y
Remove anonymous users? [Y/n] Y
Disallow root login remotely? [Y/n] Y
Remove test database and access to it? [Y/n] Y
Reload privilege tables now? [Y/n] Y
Step 7 — Create Diaspora User and Database
Next we will log in to MariaDB to create the diaspora user. When prompted, enter the root password you created above:
- mysql -u root -p
Create a user for Diaspora. Change password in the command below to a real password. This should not be the same as the root password you provided during mysql_secure_installation.
- CREATE USER 'diaspora'@'localhost' IDENTIFIED BY 'password';
Create the Diaspora production database:
- CREATE DATABASE IF NOT EXISTS `diaspora_production` DEFAULT CHARACTER SET `utf8mb4` COLLATE `utf8mb4_bin`;
Grant the MariaDB diaspora user the necessary permissions on the database:
- GRANT SELECT, INSERT, UPDATE, DELETE, CREATE, DROP, INDEX, ALTER, LOCK TABLES ON `diaspora_production`.* TO 'diaspora'@'localhost';
Quit the database session.
- \q
Try connecting to the new database with the user diaspora (use the password you entered for IDENTIFIED BY 'password' above).
- mysql -u diaspora -p -D diaspora_production
You should now see the prompt: MariaDB [diaspora_production]>. Quit the
database session by entering:
- \q
We are now done installing the MariaDB database.
For additional security, check the detailed article on How To Secure MySQL and MariaDB Databases.
Next we’ll grab the Diaspora source code and get it configured to run on your VPS.
Step 8 — Install Bundler
Bundler is the package manager for Ruby gems. We will install it to be globally available.
- sudo gem install bundler
Since the bundle executable is installed in /usr/local/bin/bundle, make a symbolic link in order to include it in users’ PATH.
- sudo ln -sf /usr/local/bin/bundle /usr/bin/bundle
Step 9 — Fetch the Diaspora Source Code
Diaspora is developed in three main branches. stable contains code that is considered stable and is to be released, master has the stable tagged versions which we will use, while develop has the latest code with possible bugs.
Change to the diaspora user account.
- sudo su - diaspora
Check out the master branch. At the time of this writing, it contains Diaspora version 0.5.1.1.
- git clone -b master https://github.com/diaspora/diaspora.git
Step 10 — Configure the Diaspora Database
Now change into the working directory.
- cd ~/diaspora/
Copy the example database configuration file and open database.yml with your favorite editor.
- cp config/database.yml.example config/database.yml
- vim config/database.yml
Now we’ll edit the configuration file to match the database settings created earlier.
Note: Be very careful not to break the indentation when editing yaml (.yml) files. Always use spaces instead of tabs.
Edit the very first lines where the mysql2 adapter is defined. (MariaDB is a drop-in replacement for MySQL.) Replace root with diaspora and change the password to the password for the database user diaspora you created earlier. Do not remove the quotes. When finished, save and close the file.
mysql: &mysql
  adapter: mysql2
  host: "localhost"
  port: 3306
  username: "diaspora"
  password: "password"
  encoding: utf8mb4
  collation: utf8mb4_bin
Note: You’ll need to fill out the PostgreSQL section instead if you’re using that database, and change the database to PostgreSQL.
Step 11 — Configure Diaspora’s Basic Settings
Let’s start by copying the example configuration file.
- cp config/diaspora.yml.example config/diaspora.yml
You will need to edit a few settings in this file for Diaspora to work properly. Read the whole file carefully to grasp the idea of what it does and how. It is pretty self-explanatory, but let’s look at some of the most crucial settings.
Open the file in a text editor.
- vim config/diaspora.yml
Line 39 — Uncomment the url line so it looks like the following:
url: "https://example.org/"
Replace https://example.org/ with your own domain name. The URL you use here will get hard-coded into the database, so make sure it’s accurate. Read the comments above this configuration line for details.
Line 47 — Uncomment the certificate_authorities line so it looks like the following:
certificate_authorities: '/etc/pki/tls/certs/ca-bundle.crt'
Note: There are two certificate_authorities lines; make sure you uncomment the one for CentOS.
Line 166 — Uncomment the rails_environment line and replace development with production so it looks like the following:
rails_environment: 'production'
Save and close the file.
These are the minimum changes required to have a working Diaspora pod. There are many more options to explore and configure to your liking such as connecting with other social networks (Twitter, WordPress, Tumblr, Facebook). Please read through the file and make your desired configuration changes.
Step 12 — Install Gems and Set Up the Database
Install the needed gems, set up the database, and precompile the assets.
Make sure you are in the right directory:
- cd /home/diaspora/diaspora/
First we tell the nokogiri gem to use the system libxm2 library we previously installed:
- bundle config build.nokogiri --use-system-libraries
Next, use bundler to install the needed gems:
- RAILS_ENV=production bin/bundle install --without test development --deployment
Set up the database:
- RAILS_ENV=production bin/rake db:create db:schema:load
Precompile the assets:
- RAILS_ENV=production bin/rake assets:precompile
At this point, you can leave the diaspora user account and switch back to the sudo user you created when following the Prerequisites of this tutorial.
- exit
Step 13 — Configure the Diaspora systemd Services
Diaspora consists of two main services that need to run:
- unicorn, the application server
- sidekiq, for background jobs processing
A script is provided for this case, which resides in script/server, but we’ll use systemd instead. systemd is the init system used in CentOS 7.
For a better understanding of how systemd works, read the following articles:
- How To Use Systemctl to Manage Systemd Services and Units
- Understanding Systemd Units and Unit Files
- How To Use Journalctl to View and Manipulate Systemd Logs
Create the tmpfiles Directory
Create the directory which will hold the unicorn Unix socket.
- sudo mkdir /run/diaspora
Change ownership to the diaspora user and set the permissions.
- sudo chown diaspora:diaspora /run/diaspora
- sudo chmod 750 /run/diaspora
Since the /run and /var/run directories are volatile, the /run/diaspora directory we just created will not survive a system reboot. With systemd, we can use tmpfiles to preserve this directory between reboots.
Open /etc/tmpfiles.d/diaspora.conf for editing.
- sudo vim /etc/tmpfiles.d/diaspora.conf
Paste in the following line:
d /run/diaspora 0750 diaspora diaspora - -
The configuration format is one line per path, containing type, path, mode, ownership, age, and argument fields respectively. You can learn more about tmpfiles.d at its official web page or its man page.
Unicorn
First we will edit diaspora.yml so that the service listens to a Unix socket. We will change back to the diaspora user for this.
- sudo su - diaspora
Open the config file for editing:
- vim /home/diaspora/diaspora/config/diaspora.yml
Uncomment line 157 so it reads:
listen: 'unix:/run/diaspora/diaspora.sock'
Save and exit the file.
Now go back to your sudo user.
- su - username
Create the unicorn.service file.
- sudo vim /etc/systemd/system/diaspora-unicorn.service
Paste in the following content exactly to create the script. Remember to check the earlier links about systemd if you need help understanding what’s in this file:
[Unit]
Description=Diaspora Unicorn Server
Requires=redis.service
After=redis.service network.target

[Service]
User=diaspora
Group=diaspora
SyslogIdentifier=diaspora-unicorn
WorkingDirectory=/home/diaspora/diaspora
Environment=RAILS_ENV=production
## Uncomment if postgres is installed
#Environment=DB=postgres

PIDFile=/run/diaspora/unicorn.pid
Restart=always

CPUAccounting=true
emoryAccounting=true
BlockIOAccounting=true
CapabilityBoundingSet=
PrivateTmp=true
NoNewPrivileges=true

ExecStart=/usr/bin/bundle exec "unicorn_rails -c config/unicorn.rb -E production"

[Install]
WantedBy=multi-user.target
Note: Uncomment the Environment=DB=postgres line if you are using PostgreSQL. For MariaDB, no change is needed.
Start the unicorn service and enable it on boot.
- sudo systemctl start diaspora-unicorn
- sudo systemctl enable diaspora-unicorn
Now check the service status:
- systemctl status diaspora-unicorn
If all went well, that command should return an output similar to this:
diaspora-unicorn.service - Diaspora Unicorn Server
Loaded: loaded (/etc/systemd/system/diaspora-unicorn.service; enabled)
Active: active (running) since Tue 2015-06-23 10:18:25 EDT; 16s ago
Main PID: 16658 (ruby)
CGroup: /system.slice/diaspora-unicorn.service
└─16658 ruby /home/diaspora/diaspora/vendor/bundle/ruby/bin/unicorn_rails -c config/unicorn.rb -E production
Sidekiq
Likewise with sidekiq, let’s create the sidekiq.service file.
- sudo vim /etc/systemd/system/diaspora-sidekiq.service
Paste in the following:
[Unit]
Description=Diaspora Sidekiq Worker
Requires=redis.service
After=redis.service network.target

[Service]
User=diaspora
Group=diaspora
SyslogIdentifier=diaspora-sidekiq
WorkingDirectory=/home/diaspora/diaspora
Environment=RAILS_ENV=production
## Uncomment if postgres is installed
#Environment=DB=postgres

Restart=always

CPUAccounting=true
emoryAccounting=true
BlockIOAccounting=true
CapabilityBoundingSet=
PrivateTmp=true

ExecStart=/usr/bin/bundle exec "sidekiq -e production -L log/sidekiq.log >> log/sidekiq.log 2>&1"

[Install]
WantedBy=multi-user.target
Note: Uncomment the Environment=DB=postgres line if you are using PostgreSQL. For MariaDB, no change is needed.
Start the sidekiq service and enable it at boot:
- sudo systemctl start diaspora-sidekiq
- sudo systemctl enable diaspora-sidekiq
Now run:
- systemctl status diaspora-sidekiq
The output should be similar to this:
diaspora-sidekiq.service - Diaspora Sidekiq Worker
   Loaded: loaded (/etc/systemd/system/diaspora-sidekiq.service; enabled)
   Active: active (running) since Mon 2014-12-29 08:21:45 UTC; 44s ago
 Main PID: 18123 (sh)
   CGroup: /system.slice/diaspora-sidekiq.service
           ├─18123 sh -c sidekiq -e production -L log/sidekiq.log >> log/sidekiq.log 2>&1
           └─18125 sidekiq 2.17.7 diaspora [0 of 5 busy]
Step 14 — Install Nginx
Nginx will be serve as our reverse proxy so that nearly all requests will be sent to Unicorn. Only the files in public/ will be served directly by Nginx.
Let’s first install the web server.
- sudo yum install nginx
Start the service and enable it on boot:
- sudo systemctl start nginx
- sudo systemctl enable nginx
Step 15 — Give Nginx Permissions
For Nginx to be able to access the diaspora user’s home folder, we need to add the nginx user to the diaspora group:
- sudo usermod -a -G diaspora nginx
Finally, we will relax the diaspora user’s home directory permissions to allow read and execute access to the diaspora group:
- sudo chmod 750 /home/diaspora/
Step 16 — Upload SSL Certificate and Enable Forward Secrecy
You will now need the SSL certificate files from your Certificate Authority. In the configuration example below, we use /etc/ssl/diaspora/ssl.crt for the public certificate and /etc/ssl/diaspora/ssl.key for the private key.
Create a directory to store the certificate files.
- sudo mkdir /etc/ssl/diaspora
Upload or move the certificate and key files to the server and place them under the directory we just created. SFTP or SCP can be used to do this; see this tutorial.
Note: If you created a self-signed certificate, move to that directory and copy the files to /etc/ssl/diaspora with the sudo cp ssl.crt ssl.key /etc/ssl/diaspora command.
Forward secrecy has become an essential part of SSL/TLS encrypted communications. For a more detailed explanation of forward secrecy, see this Mozilla server security wiki entry.
Change again to the system’s root user.
- sudo su -
Create the dhparam.pem file.
- openssl dhparam 2048 > /etc/ssl/dhparam.pem
The dhparam file might take several minutes to complete. When it’s finished, log back in to your sudo user’s account.
- su - username
Step 17 — Disable the default site in nginx.conf
We will now modify /etc/nginx/nginx.conf so that the default Welcome to Nginx message doesn’t interfere with the Diaspora configuration file we will create.
- sudo vim /etc/nginx/nginx.conf
Search under the server block for the lines including default_server;. Remove default_server from these entries so that the area of the server block looks like this:
server {
listen 80;
listen [::]:80;
server_name localhost;
root /usr/share/nginx/html;
Note: You could even comment out the whole server block if you like; that would work too.
Step 18 — Create Diaspora’s Own Nginx Configuration File
Create a new nginx configuration file for our Diaspora pod:
- sudo vim /etc/nginx/conf.d/diaspora.conf
Paste in the following content; explanations are given just below the code:
upstream diaspora {
  server unix:/run/diaspora/diaspora.sock fail_timeout=0;
}
server {
  listen [::]:80;
  listen 80;
  server_name _;
  return 301 https://example.com$request_uri;
}
server {
  listen [::]:443 ssl spdy;
  listen 443 ssl spdy;
  server_name example.com;
  root /home/diaspora/diaspora/public;
  server_tokens off;
  error_log /var/log/nginx/diaspora_error.log;

  # Configure maximum picture size
  # Note that Diaspora has a client side check set at 4M
  client_max_body_size 4M;

  ## SSL settings
  ssl_certificate /etc/ssl/diaspora/ssl.crt;
  ssl_certificate_key /etc/ssl/diaspora/ssl.key;

  # https://wiki.mozilla.org/Security/Server_Side_TLS
  ssl_dhparam /etc/ssl/dhparam.pem;
  ssl_protocols TLSv1 TLSv1.1 TLSv1.2;
  ssl_ciphers 'ECDHE-RSA-AES128-GCM-SHA256:ECDHE-ECDSA-AES128-GCM-SHA256:ECDHE-RSA-AES256-GCM-SHA384:ECDHE-ECDSA-AES256-GCM-SHA384:DHE-RSA-AES128-GCM-SHA256:DHE-DSS-AES128-GCM-SHA256:kEDH+AESGCM:ECDHE-RSA-AES128-SHA256:ECDHE-ECDSA-AES128-SHA256:ECDHE-RSA-AES128-SHA:ECDHE-ECDSA-AES128-SHA:ECDHE-RSA-AES256-SHA384:ECDHE-ECDSA-AES256-SHA384:ECDHE-RSA-AES256-SHA:ECDHE-ECDSA-AES256-SHA:DHE-RSA-AES128-SHA256:DHE-RSA-AES128-SHA:DHE-DSS-AES128-SHA256:DHE-RSA-AES256-SHA256:DHE-DSS-AES256-SHA:DHE-RSA-AES256-SHA:AES128-GCM-SHA256:AES256-GCM-SHA384:AES128:AES256:AES:!aNULL:!eNULL:!EXPORT:!DES:!RC4:!MD5:!PSK';
  ssl_session_timeout 5m;
  ssl_prefer_server_ciphers on;
  ssl_session_cache shared:SSL:50m;
  add_header Strict-Transport-Security "max-age=31536000";

  location / {
    # Proxy if requested file not found
    try_files $uri $uri/index.html $uri.html @diaspora;
  }

  location @diaspora {
    gzip off;
    proxy_set_header  X-Forwarded-Ssl   on;
    proxy_set_header  X-Real-IP         $remote_addr;
    proxy_set_header  X-Forwarded-For   $proxy_add_x_forwarded_for;
    proxy_set_header  X-Forwarded-Proto https;
    proxy_set_header  Host              $http_host;
    proxy_set_header  X-Frame-Options   SAMEORIGIN;
    proxy_redirect                      off;
    proxy_pass http://diaspora;
  }
}
Replace the following variables:
example.comwith your own registered domain name; you’ll need to do this in two places/etc/ssl/diaspora/ssl.crtwith the path to your own public certificate/etc/ssl/diaspora/ssl.keywith the path to your own private key
Explanation:
- The
upstreamblock is where we set up the Unix socket Diaspora listens to (which we also set in Unicorn earlier). This is used later as theproxy_passdirective. - The first
serverblock listens to the standard HTTP port80and redirects any requests to HTTPS. - The second
serverblock listens to the port443(SSL) and sets some strong SSL parameters which were taken from the Mozilla wiki.
For more about Nginx server blocks in general, please read this tutorial.
After all modifications are complete, check the configuration file for any errors.
- sudo nginx -t
If all went well, this should return:
nginx: the configuration file /etc/nginx/nginx.conf syntax is ok
nginx: configuration file /etc/nginx/nginx.conf test is successful
Restart Nginx to apply the changes.
- sudo systemctl restart nginx
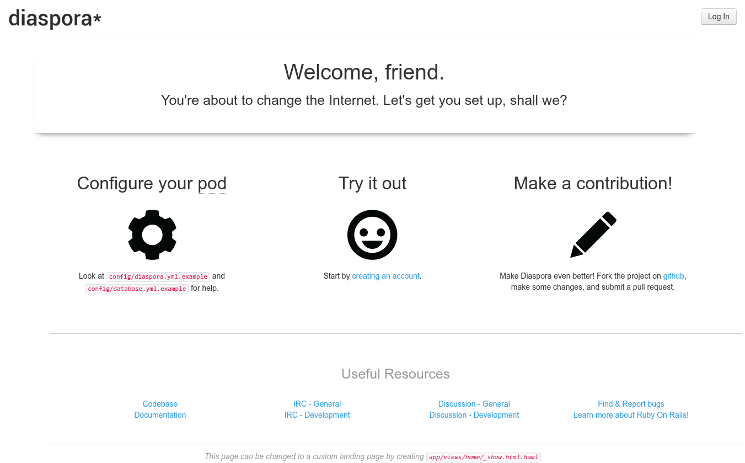
If you now visit your Diaspora pod’s domain name in your browser (https://example.com, for example), you should reach the Diaspora welcome page. Congratulations!
Note: Click through the browser warning if you use a self-signed certificate.
Step 19 — Create Diaspora User
Let’s create your first Diaspora user. Click the link in Start by creating an account.
Fill in the details to create a new Diaspora user. Then, you should be able to view your user’s home page and start using the Diaspora social network.
Step 20 — Configure SELinux (Optional)
Warning: If you’re not familiar with SELinux, please be aware that this can break things. You can skip this section and start using Diaspora.
CentOS 7 Droplets have SELinux disabled by default. For maximum security, you can enable SELinux and configure it to work with your Diaspora pod’s services. If you are new to SELinux, here is a series of tutorials you can refer to for more information:
- An Introduction to SELinux on CentOS 7 – Part 1: Basic Concepts
- An Introduction to SELinux on CentOS 7 – Part 2: Files and Processes
- An Introduction to SELinux on CentOS 7 – Part 3: Users
Enable SELinux
Open /etc/selinux/config in a text editor.
- sudo vim /etc/selinux/config
Change the SELINUX setting from disabled to permissive as shown below. It is necessary to first set a permissive status because every file in the system needs to have its context labeled before SELinux can be enforced.
# This file controls the state of SELinux on the system.
# SELINUX= can take one of these three values:
#     enforcing - SELinux security policy is enforced.
#     permissive - SELinux prints warnings instead of enforcing.
#     disabled - No SELinux policy is loaded.
SELINUX=permissive
# SELINUXTYPE= can take one of these two values:
#     targeted - Targeted processes are protected,
#     minimum - Modification of targeted policy. Only selected processes are protected.
#     mls - Multi Level Security protection.
SELINUXTYPE=targeted
Save and close the file.
After making this change, reboot the Droplet for the setting to take effect. Simply type:
- sudo reboot
Enter your sudo user’s password to reboot the system. Then SSH back in to the Droplet and change back into your sudo user’s account with:
- su - username
Now, edit /etc/selinux/config once again and set the SELINUX setting to enforcing.
- sudo vim /etc/selinux/config
When finished, the line should say this:
SELINUX=enforcing
Save and close the file. Reboot the Droplet once more.
- sudo reboot
Then SSH back in to your Droplet after it comes back online.
SELinux Nginx Policy
From here, you want to remain as the root user. If you now visit your domain, you will be presented with a 502 error. In our case, SELinux is blocking Nginx’s socket and access to the diaspora user’s home directory.
You can check the audit logs with:
- grep denied /var/log/audit/audit.log
You should see messages like the ones below:
type=AVC msg=audit(1424394514.632:385): avc:  denied  { search } for  pid=1114 comm="nginx" name="diaspora" dev="vda1" ino=783369 scontext=system_u:system_r:httpd_t:s0 tcontext=system_u:object_r:user_home_dir_t:s0 tclass=dir
type=AVC msg=audit(1424394514.632:386): avc:  denied  { write } for  pid=1114 comm="nginx" name="diaspora.sock" dev="tmpfs" ino=21382 scontext=system_u:system_r:httpd_t:s0 tcontext=system_u:object_r:var_run_t:s0 tclass=sock_file
Install the tools below to begin fixing the problem:
- yum install policycoreutils-{python,devel} setroubleshoot-server
We’ll grep through the audit.log file and allow the Denied entries in our SELinx policy. Run:
- grep nginx /var/log/audit/audit.log | audit2allow -M nginx_diaspora
The generated SELinux policy is stored in the file nginx_diaspora.te in your root’s /home directory (though you can organize your SELinux policies in any location). The binary nginx_diaspora.pp should be passed to the semodule command to import the policy. Open nginx_diaspora.te to see what is now allowed by SELinux.
- vim nginx_diaspora.te
It should contain the following entries. If not, replace the contents of nginx_diaspora.te with what’s shown below.
module nginx_diaspora 1.0;

require {
        type var_run_t;
        type httpd_t;
        type user_home_t;
        type init_t;
        class sock_file write;
        class unix_stream_socket connectto;
        class file { read open };
}


#============= httpd_t ==============
allow httpd_t init_t:unix_stream_socket connectto;

#!!!! This avc can be allowed using the boolean 'httpd_read_user_content'
allow httpd_t user_home_t:file { read open };
allow httpd_t var_run_t:sock_file write;
Many of the allowed contexts could probably be narrowed down, but this is an appropriate starting point. Then let’s import the policy module.
- semodule -i nginx_diaspora.pp
If you now refresh the page in your browser, you should see the Diaspora welcome page again. Congratulations on configuring an SELinux-hardened Diaspora pod running on CentOS 7!
Brief SELinux Troubleshooting
If the welcome page loads but shows broken image placeholders and not actual images, follow these steps:
- Run the command below to
grepthroughaudit.logand add new Denied entries to the Nginx policy.
- grep nginx /var/log/audit/audit.log | audit2allow -M nginx_diaspora
- Reload the policy module.
- semodule -i nginx_diaspora.pp
You can repeat these steps a few times.
Note: You can use the command below to open a real-time output stream from /var/log/messages. This will show you human-readable SELinux error messages and provide suggested fixes.
- tail -f /var/log/messages
Here is an example readout:
. . .

*****  Plugin catchall (100. confidence) suggests   **************************

If you believe that nginx should be allowed write access on the  sock_file by default.
Then you should report this as a bug.
You can generate a local policy module to allow this access.
Do
allow this access for now by executing:
# grep nginx /var/log/audit/audit.log | audit2allow -M mypol
# semodule -i mypol.pp

. . .
Conclusion
Now that you’ve set up your Diaspora pod, you can start inviting your friends and family to connect to it. While it does lack some features present in the big commercial, closed-source social networks, one of Diaspora’s advantages is that you get to own your data.
From here, you can read the Diaspora wiki for pod maintainers and register your pod to a global pod list so that others can benefit from your installation.
Thanks for learning with the DigitalOcean Community. Check out our offerings for compute, storage, networking, and managed databases.
About the author(s)
Current fan and former Editorial Manager at DigitalOcean. Hi! Expertise in areas including Ubuntu, Docker, Rails, and more.
Still looking for an answer?
This textbox defaults to using Markdown to format your answer.
You can type !ref in this text area to quickly search our full set of tutorials, documentation & marketplace offerings and insert the link!
great guide. thank you. did want to make you aware your systemd service files have typos in them.
both are missing the M in the line:
MemoryAccounting=true
 This work is licensed under a Creative Commons Attribution-NonCommercial- ShareAlike 4.0 International License.
Become a contributor for community
Get paid to write technical tutorials and select a tech-focused charity to receive a matching donation.

DigitalOcean Documentation
Full documentation for every DigitalOcean product.

Resources for startups and AI-native businesses
The Wave has everything you need to know about building a business, from raising funding to marketing your product.
The developer cloud
Scale up as you grow — whether you're running one virtual machine or ten thousand.

Start building today
From GPU-powered inference and Kubernetes to managed databases and storage, get everything you need to build, scale, and deploy intelligent applications.
