By Nik Wakelin and Rachel Lee

The author selected the Diversity in Tech Fund to receive a donation as part of the Write for DOnations program.
Introduction
The most common image formats used by web developers are JPEG and PNG. .jpg files are best used for photographs, while .png files are best used for images with large blocks of similar color, like logos or diagrams. However, these formats were first developed in 1992 and 1996, respectively. In recent years, advances in video compression have resulted in the development of two new, major image formats for the web: webp and avif. Known as “Next-Generation” (or “Next-gen”) image formats, these formats are free to use, result in significantly smaller images (between 20% and 50% reduction), and are becoming widely supported by web browsers. Because webp and avif result in smaller images, serving images in these new formats is more efficient and faster.
However, there are a few challenges with using “Next-Generation” formats. First, if you want maximum compatibility for users on older browsers, you may want to use png and jpg as necessary. Second, if you have a large library of uploaded images, it would be slow (and expensive) to convert them.
This is where an image proxy can help. An image proxy is an application that will generate or retrieve custom images on the fly based on a web request. They can be used for cropping or resizing images, adding watermarks or image effects, and changing the format. With an image proxy, you can deliver images that look the same to the end user, but which are much more efficient.
One available proxy is called imgproxy. It is backed by Evil Martians and available as both a self-hosted free-to-use version with commercial “Pro” extensions, should you need them. imgproxy is written in Go and uses libvips to power its image transformations. libvips is one of the fastest and most efficient image processing libraries available, which is perfect for use generating images as they are requested by users.
In this tutorial, you will set up imgproxy and generate proxied URLs to modify images. You will also configure imgproxy to securely serve images using a signed URL and to automatically switch to “Next-Generation” image formats where supported.
Prerequisites
To follow this tutorial, you will need:
- A server or development machine with Docker installed. For Ubuntu 20.04, you can follow the guide, How To Install and Use Docker on Ubuntu 20.04 (or select another version or distribution). For macOS or Windows, see the product docs for Docker Desktop.
- A scripting language to run example scripts. In this tutorial, we’ll use Ruby, which you can install on Ubuntu by following the guide, How to Install Ruby on Rails with rbenv on Ubuntu 20.04. On macOS, you can use the built-in version.
- Some familiarity with browser developer tools will be useful. For Chrome, check out the official documentation or the tutorial, How to Use Chrome Tools to Find Performance Bottlenecks.
Step 1 — Installing imgproxy using Docker
imgproxy using DockerIn this step, you will install imgproxy and check that it is running correctly. There are a few different ways to install imgproxy, but in this tutorial, you will use Docker because it is the most portable method and will mean minimal change when moving to a production-style environment.
On your server or development machine that has Docker installed, run the following command to check that Docker is running:
- docker info
The start of the output will look similar to the following (don’t worry if your number of containers or images are slightly different):
OutputClient:
 Context:    default
 Debug Mode: false
 Plugins:
  buildx: Docker Buildx (Docker Inc., v0.7.1)
  compose: Docker Compose (Docker Inc., v2.2.1)
  scan: Docker Scan (Docker Inc., v0.14.0)

Server:
 Containers: 15
  Running: 0
  Paused: 0
  Stopped: 15
 Images: 47
 Server Version: 20.10.11
 ...
Once you’ve confirmed Docker is running, you can download the latest version of the imgproxy image from Dockerhub using the pull subcommand:
- docker pull darthsim/imgproxy:latest
You will see a set of progress bars while this downloads the image.
Next, you’ll start an instance of the container using the run subcommand:
- docker run -p 8080:8080 -it darthsim/imgproxy
The -p option tells Docker to map the container’s port 8080 to port 8080 on your machine. The --it option tells Docker you want an interactive terminal (in this case, you’ll want to see the logs output by imgproxy). Finally, darthsim/imgproxy is the name of the image you downloaded previously and want to run.
The output will look similar to this:
WARNING [2021-12-24T03:21:18Z] No keys defined, so signature checking is disabled
WARNING [2021-12-24T03:21:18Z] No salts defined, so signature checking is disabled
INFO    [2021-12-24T03:21:18Z] Starting server at :8080
Don’t worry about the warnings; you will fix those in a later step.
In this step, you installed impgproxy and confirmed that it is running. In the next step, you will request modified images using imgproxy URLs.
Step 2 — Creating imgproxy URLs to Modify Images
imgproxy URLs to Modify ImagesIn this step, you will create imgproxy URLs that you can use to request modified images.
When using imgproxy, the end user of the website makes an HTTP request to imgproxy. Then, imgproxy makes a request to get the source image. The source image can be anywhere on the internet accessible to our proxy. (You’ll secure this in a later step.) Once it has the source image, imgproxy modifies the image according to your requirements, and then sends that image to the end user.
You tell imgproxy the kinds of modifications you want by specifying them in URL parameters. imgproxy URLs use the following format:
http://your-imgproxy-host/%signature/%processing_options/%encoded_source_url.%extension
The %signature in this URL is optional, and you will configure it in a later step. %processing_options is where you tell imgproxy to do things like crop or watermark the image—or you can leave it out entirely if you don’t want the image modified. %encoded_source_url points to the source image, the one you’re asking imgproxy to modify. You need to encode it so that it remains valid when you’re embedding it another URL. Finally, the optional %extension parameter lets you specify an image file type for imgproxy to convert to by using a common file extension—for instance, .jpg.
Once you have generated the proxied URL, you can replace the src attribute of an img tag with the new, proxied URL. For instance, here’s a typical image URL:
<img src="https://yourserver.com/assets/image.png" />
With imgproxy, you could replace that URL with something like this:
<img src="https://imgproxy.yourserver.com/your imgproxy url here />
This will work well when it is time to modify your website. However, when learning to use imgproxy, the quickest way to view results is to type the URLs into the address bar of your favorite web browser, which will immediately render the results. Next, you will run through the different parts of an imgproxy URL and access it with your browser.
Because you started imgproxy in Docker, your server is running on localhost and listening on port 8080. This makes your imgproxy host:
http://localhost:8080
Note: If you’re using a remote server instead of a local machine to run this tutorial, replace “localhost” in the following examples with the IP address of your server. If you have the correct URL, you will see a Hey, I’m imgproxy message when you visit http://your-server-ip:8080.
For this tutorial, you can use this picture of a puppy found at the following link: https://i.imgur.com/KSLD4VV.jpeg. (This image was originally from Unsplash.) Alternatively, you can use any image that’s accessible on the internet. For this tutorial, make sure to use a photograph (a jpg image) rather than an illustration or logo.
The first step for creating a proxied URL is to encode the source URL. This means that you replace all the special characters that have meaning in a URL (for example, ://, /, .) with safe characters with no meaning. This way, when you embed the source image URL into the proxy URL, it remains valid and the client can separate it from the proxy URL.
imgproxy uses URL-safe Base64 encoding. You might have a favorite programming language to use for this, or an online Base64 encoding tool will do the trick (be sure to check the box labeled “Perform URL-safe encoding (uses Base64URL format)”).
Note: You can use plain URLs instead of Base64 encoding with the /plain option, but this means you would need to encode any query parameters. In general, Base64 encoding is less error-prone.
Using URL-Safe Base64, the sample puppy picture encodes to aHR0cHM6Ly9pLmltZ3VyLmNvbS9LU0xENFZWLmpwZWc. You can now use that to build your imgproxy URL, and enter it into your web browser, like so:
http://localhost:8080/sig/aHR0cHM6Ly9pLmltZ3VyLmNvbS9LU0xENFZWLmpwZWc
Note: If you’re testing with a different image, replace the last part of this URL with your Base64-encoded URL instead.
Once you load this, you will see an unmodified image of a puppy.
Note: If you don’t see an image, an error message will be displayed instead, or you can check the output from the docker run command from Step 1. It will show the imgproxy logs, including any requests that resulted in an error.
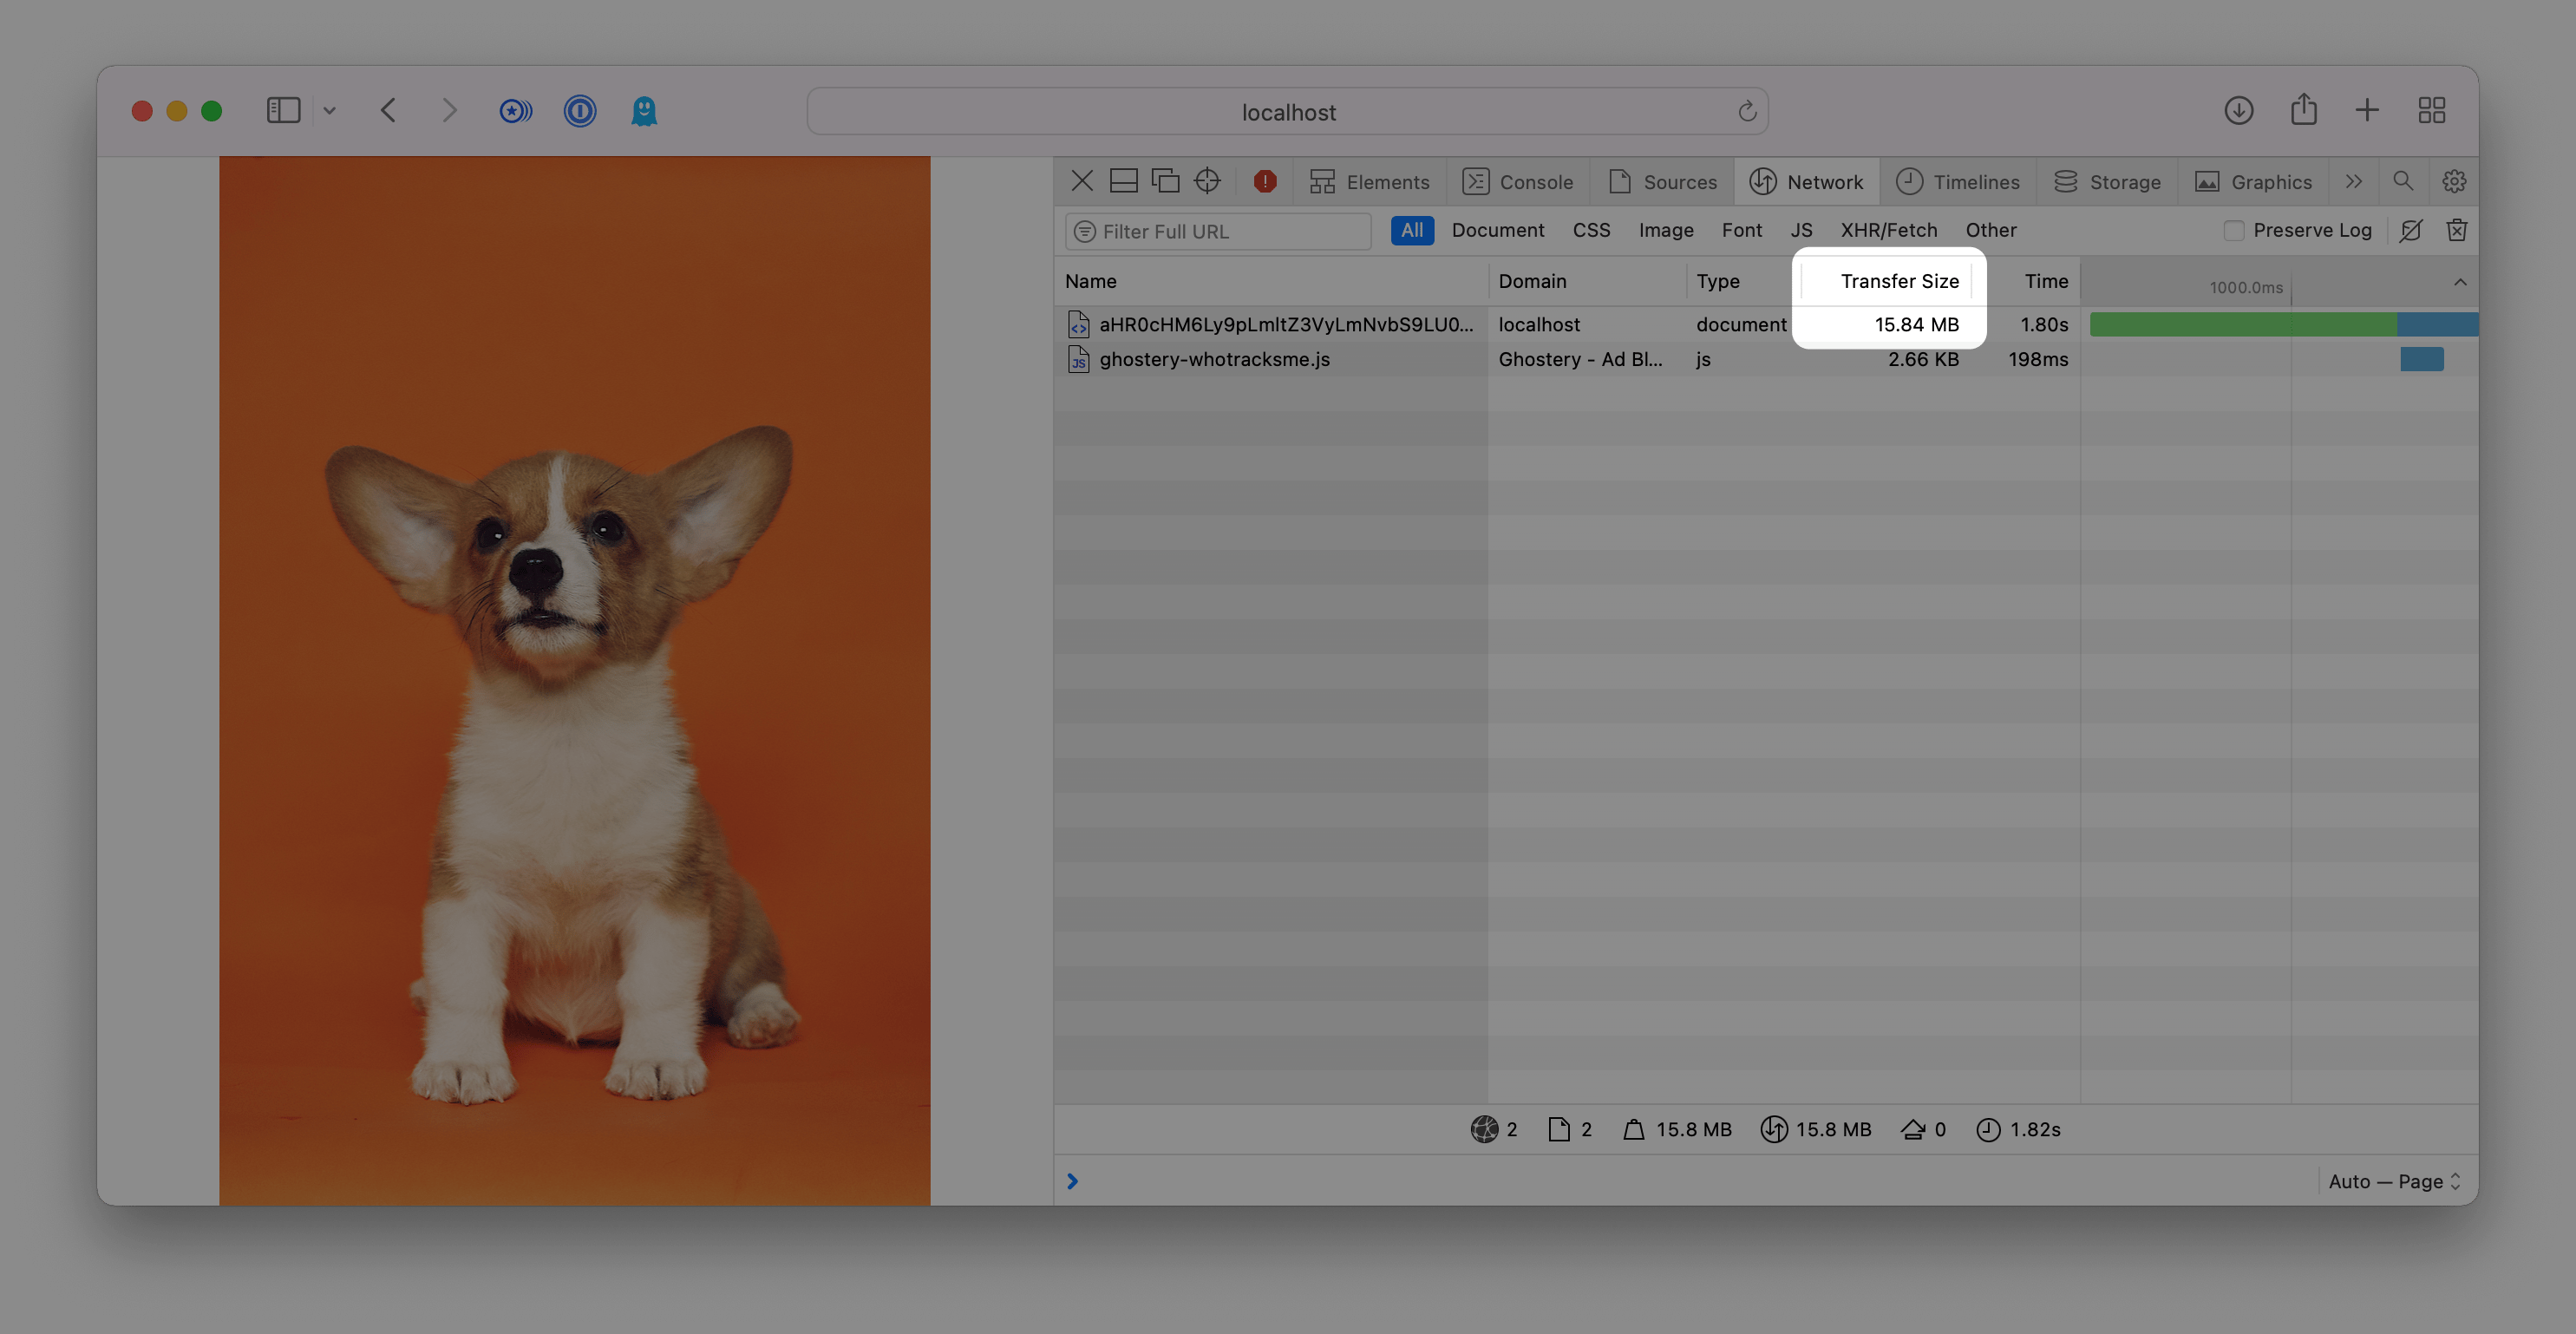
Next, you will change the image format using the .extension part of the URL. Open the following in your browser:
http://localhost:8080/sig/aHR0cHM6Ly9pLmltZ3VyLmNvbS9LU0xENFZWLmpwZWc.png
This will take longer to load, and if you look at the Network tab in your browser’s developer tools, you will see that this image is much larger than the original—in the case of the sample puppy image, the png version is 15.84MB, versus just 1.3MB for the original jpg. When the client requested the image, imgproxy automatically modified it from jpg to png.
You can also convert this image to the more efficient “Next-Generation” formats, webp or avif, by adding one of those formats as the specifier, like so:
http://localhost:8080/sig/aHR0cHM6Ly9pLmltZ3VyLmNvbS9LU0xENFZWLmpwZWc.webp
The webp version of the test image is around 600KB—that’s an approximately 53% decrease compared to the original .jpg. As you can see, using this image format can speed up requests for the image.
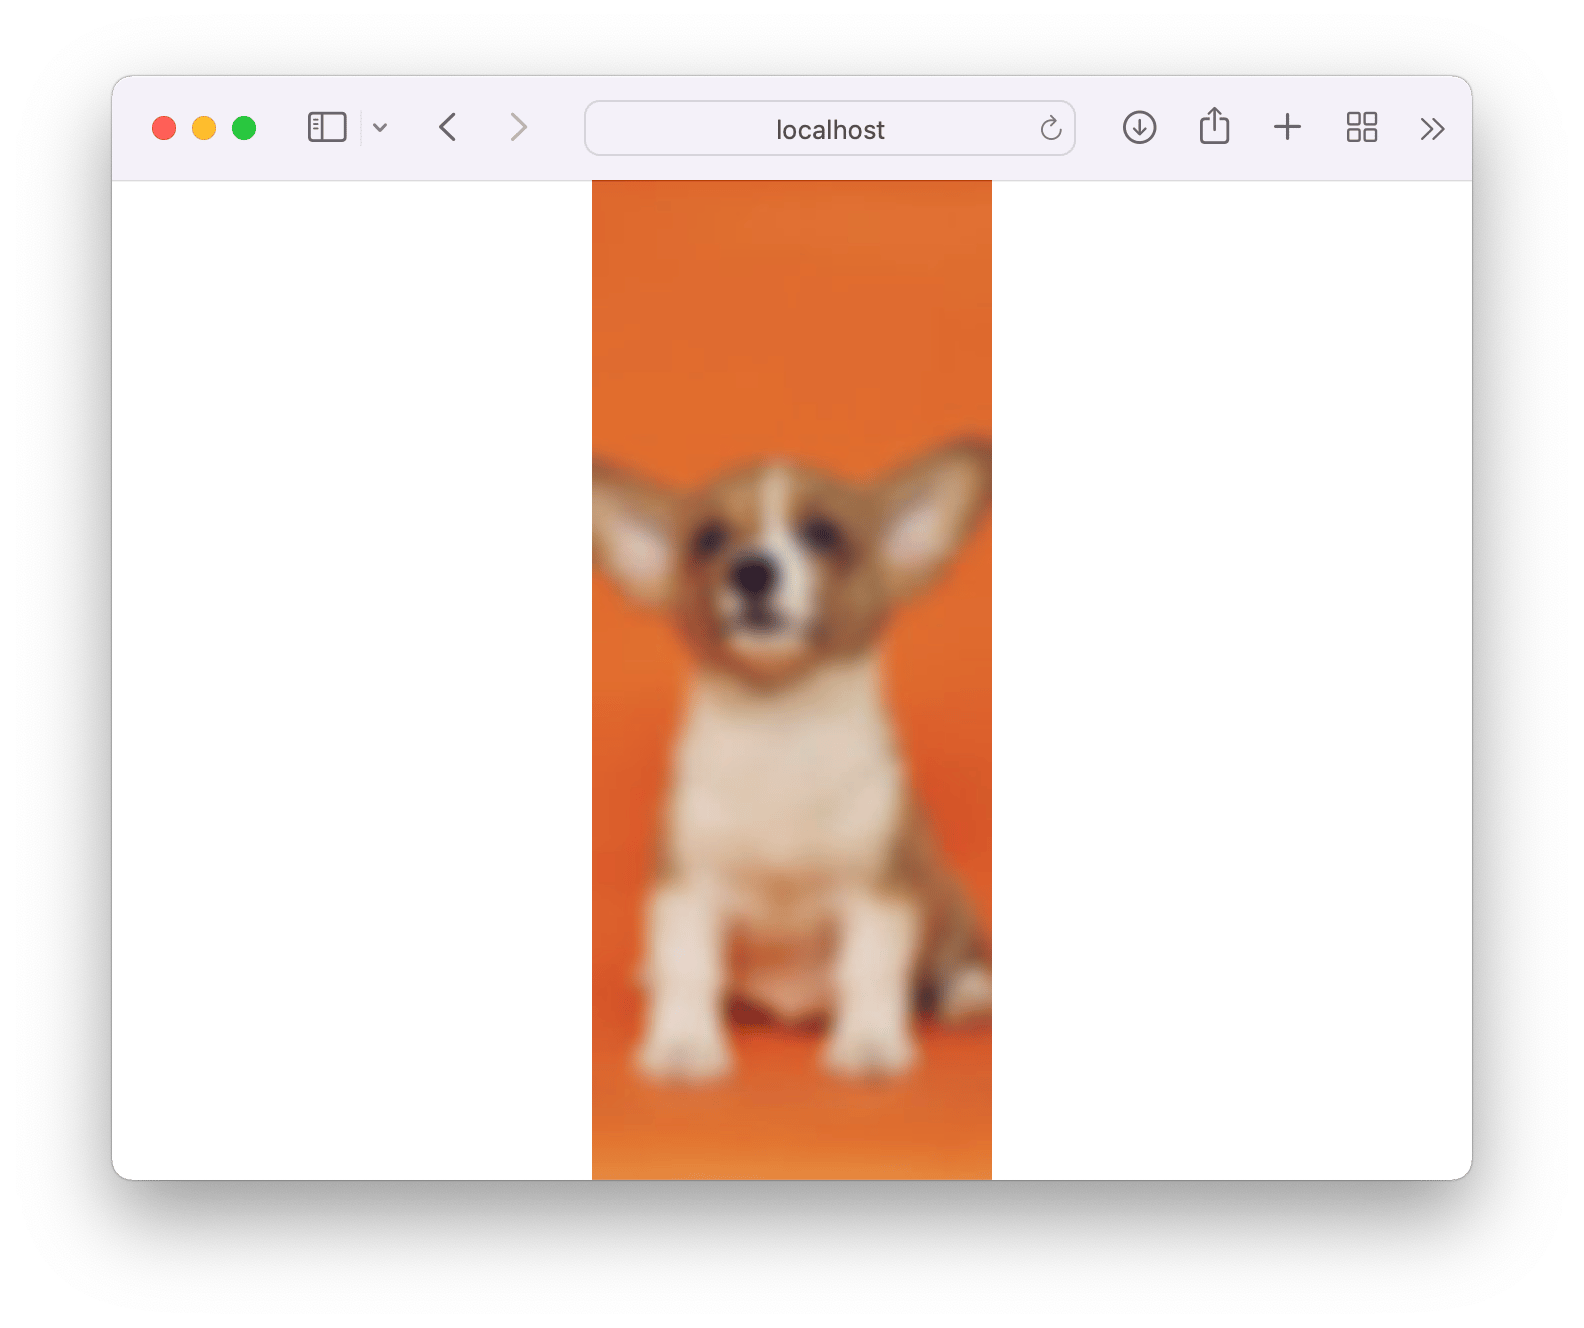
You can also change the image size or add different effects. You do this by specifying different modifications as the %processing_options parameter. In this case, you will ask imgproxy to resize the image to a width of 200 and height of 500 pixels with size, using a resizing_type of fill (keeping the image aspect ratio and cropping parts of the image outside that), and then add a gaussian blur using a mask size of 5.
Try this out by visiting the following URL in your browser:
http://localhost:8080/sig/size:200:500/resizing_type:fill/blur:5/aHR0cHM6Ly9pLmltZ3VyLmNvbS9LU0xENFZWLmpwZWc
If you load that URL in your browser, you will see a blurred and resized version of the test image.
In addition to resizing and blurring, there are many different transformations you can use. For more options, check out the Generating the URL section of the imgproxy documentation.
In this step, you generated imgproxy URLs to serve and modify a source image. Next, you will secure imgproxy so that it will only serve source images from URLs you specifically allow using the %signature URL parameter.
Step 3 — Securing imgproxy with a Signature
imgproxy with a SignatureUntil now, you have been using a placeholder in the “signature” part of the imgproxy URL. However, it is important to sign the URLs you’re using. This means that the only URLs imgproxy will handle are ones you’ve created using a secret key/salt pair. This prevents anyone malicious from using up your server resources. In this step, you will configure imgproxy to require a signature and create a valid signature to use in your URLs.
imgproxy is a 12-factor app, which means that you can configure it using environment variables without having to modify any files. This works well when running in Docker, as Docker provides the --env flag to set environment variables.
To create the signatures, you’ll first need a key/salt pair, which can be any random hexadecimal string. You can generate them using random data on your computer, or with an online random generator tool. Make sure to specify 64 digits, and generate at least two strings—one for the key and one for the salt.
Generate two hexadecimal strings of 64 digits, similar to what is shown below.
Example Random Hex49d5e2cd30d80fccc2e30877e4e58b2f0854a8dca6fb2e980b129171910080ed7ffa5dfbfde006e0c1a8ff52e7b5c614f0d3e9ec6e6ed754399fb0e2eb473c59
(Note that your strings will differ from the above.) Record the generated strings to use in the next command.
Next, restart Docker using the same command you used in Step 1, but this time adding two --env options to set the IMGPROXY_KEY and IMGPROXY_SALT environment variables to your randomly generated values in the running container. Replace the highlighted portions with the strings you generated previously.
- docker run --env IMGPROXY_KEY=first-hex-result --env IMGPROXY_SALT=second-hex-result -p 8080:8080 -it darthsim/imgproxy
Now if you open http://localhost:8080/sig/aHR0cHM6Ly9pLmltZ3VyLmNvbS9LU0xENFZWLmpwZWc in your web browser, you will receive a “403 Forbidden” response. You will also see an entry in the Docker logs looking something like this:
Example Docker LogWARNING [2021-12-28T03:12:34Z] Completed in 134.6µs /sig/aHR0cHM6Ly9pLmltZ3VyLmNvbS9LU0xENFZWLmpwZWc request_id=WQGTfRgeBXPvaQYHkNjab method=GET status=403 client_ip=172.17.0.1 error="Invalid signature"
As you can see at the end of that log line, imgproxy returned a 403 error because you haven’t specified a signature that matches what imgproxy expects. This means you have correctly configured imgproxy to require a signature. This signature matching is an example of shared secret authentication. imgproxy is internally computing a signature using a SHA256 hash of the requested URL plus the key and salt. In order to generate the same signature, the same secret key and salt must be provided. This means that only people or programs who have your IMGPROXY_KEY and IMGPROXY_SALT values can generate URLs that your imgproxy instance will respond to. Users without these values can’t use your resources.
Note: You don’t specify the key or salt values directly in the URL because this will be made public, either in the source of a web page or potentially when being cached by other browsers or proxies. That’s why it’s important to use a “one-way” hash like SHA256—there’s no way for someone to take your signature and use it to re-create your secrets.
Finally, in order to make valid requests, you need to generate a valid signature in the same way as imgproxy. There are a number of example implementations of the signature algorithm available in the imgproxy Github repo, but for this tutorial, you will use a Ruby script.
Using nano or your favorite text editor, create a file called signature.rb:
- nano signature.rb
Copy the contents below into your file. Replace the key-salt pair with the IMGPROXY_KEY and IMGPROXY_SALT values you generated previously. If you’re using a remote server rather than your local computer, you should also replace the localhost output with your server IP in the last line.
# adapted from https://github.com/imgproxy/imgproxy/blob/master/examples/signature.rb
require "openssl"
require "base64"

key = ["your IMGPROXY_KEY value"].pack("H*")
salt = ["your IMGPROXY_SALT value"].pack("H*")

url = "https://i.imgur.com/KSLD4VV.jpeg"

encoded_url = Base64.urlsafe_encode64(url).tr("=", "").scan(/.{1,16}/).join("/")

path = "/#{encoded_url}"

digest = OpenSSL::Digest.new("sha256")
hmac = Base64.urlsafe_encode64(OpenSSL::HMAC.digest(digest, key, "#{salt}#{path}")).tr("=", "")

signed_path = "/#{hmac}#{path}"

puts "Open http://localhost:8080#{signed_path} in a web browser"
First, this code block requires the libraries needed to generate your signature. Then it converts the key and salt string into hex bytes using .pack("H*") because this is what the OpenSSL library expects (you can read more about pack and unpack here).
The script then URL-safe Base64 encodes the source URL, similar to what you did in Step 1. Although, in this case, it also removes any = characters that are used as padding in Base64, and splits every 16 characters with a /. These changes generate a good-looking URL.
Once the script has the encoded source URL, it then generates the signature using the SHA256 algorithm, secret key, and salt. The signature itself is then Base64 encoded so that it can safely be included in your result URL.
Finally, the script helpfully prints a signed URL you can open in your browser.
Run this script to get your signed URL. You can open a different tab in your terminal, or press Ctrl+C to stop imgproxy, run the script, and then use the docker command to start it again.
- ruby signature.rb
The output will look similar to this:
OutputOpen http://localhost:8080/-CAkkjs5IioquivOi5LYyDnVxEULmPK-xIwIwXTleUA/aHR0cHM6Ly9pLmlt/Z3VyLmNvbS9LU0xE/NFZWLmpwZWc in a web browser
The highlighted portion will be different in your URL. This is your signed URL, which only you could generate because only you know the key/salt pair. If you open your signed URL in your browser, you will see the expected image instead of a 403. Be sure to save your signed URL for use in a later step.
You have now configured imgproxy to require a signed URL and you generated a valid signed URL. Now only people or programs with access to your key/salt pair can talk to your imgproxy.
Next, you will configure imgproxy to automatically serve the most modern image formats possible.
Step 4 — Configuring imgproxy to Automatically Serve “Next-Generation” Images
imgproxy to Automatically Serve “Next-Generation” ImagesUp until now, you have been explicitly telling imgproxy which format to use when returning an image. Another option is to tell imgproxy to use the most efficient image format possible. This means that you can serve “Next-Generation” formats (webp or avif) only if the user’s browser supports them. Otherwise, imgproxy will automatically fall back to png or jpg.
imgproxy does this by checking the Accept header that is automatically sent when web browsers make requests to check what image formats are supported. You can see a list of the default Accept headers for an image on MDN. For instance, Chrome sends:
image/avif,image/webp,image/apng,image/*,*/*;q=0.8
Because both image/avif and image/webp (the MIME types for the respective image formats) are present, we know that Chrome supports both image formats.
You can instruct imgproxy to use the most modern supported image format using AVIF/WebP Support Detection. To enable this, set the IMGPROXY_ENABLE_WEBP_DETECTION environment variable to true, which you can do by specifying it when you invoke docker run.
First, use Ctrl+C to stop your running Docker image. Then, restart it using the following command, making sure to replace the highlighted portions with your key and salt values:
- docker run --env IMGPROXY_ENABLE_WEBP_DETECTION=true --env IMGPROXY_KEY=your-key-from-Step-3 --env IMGPROXY_SALT=your-Salt-from-Step 3 -p 8080:8080 -it darthsim/imgproxy
This is the same docker command you used in Step 3, with an additional --env flag to enable webp detection.
To check the configuration, you will open the image in your browser. Access the signed URL you generated in Step 3, which looks something like this:
Example Image URLhttp://localhost:8080/-CAkkjs5IioquivOi5LYyDnVxEULmPK-xIwIwXTleUA/aHR0cHM6Ly9pLmlt/Z3VyLmNvbS9LU0xE/NFZWLmpwZWc
You will be served a webp image. You can verify this by checking the request size and type in your browser developer tools, or by using curl. To check using curl, open a new tab in your terminal so that imgproxy stays running and use the following command, replacing the highlighted URL with your own:
- curl -s -v -H "Accept: image/avif,image/webp,image/apng,image/*,*/*;q=0.8" http://localhost:8080/M-RTYvp5xktEK9gG93hPwAB6on9aX7H5XciGsI3XSac/aHR0cHM6Ly9pLmlt/Z3VyLmNvbS9LU0xE/NFZWLmpwZWc
The -s flag means to silence the output since images don’t make much sense when output in plain text. -v means verbose, so that you can see the request and response headers. Finally, the -H option sets the Accept header to be identical to Chrome‘s.
The output will look similar to this:
Output*   Trying ::1:8080...
* Connected to localhost (::1) port 8080 (#0)
> GET /M-RTYvp5xktEK9gG93hPwAB6on9aX7H5XciGsI3XSac/aHR0cHM6Ly9pLmlt/Z3VyLmNvbS9LU0xE/NFZWLmpwZWc HTTP/1.1
> Host: localhost:8080
> User-Agent: curl/7.77.0
> Accept: image/avif,image/webp,image/apng,image/*,*/*;q=0.8
>
* Mark bundle as not supporting multiuse
< HTTP/1.1 200 OK
< Cache-Control: max-age=3600, public
< Content-Disposition: inline; filename="KSLD4VV.webp"
< Content-Length: 601246
< Content-Type: image/webp
< Expires: Tue, 28 Dec 2021 09:08:32 GMT
< Server: imgproxy
< Vary: Accept
< X-Request-Id: I3sp-dXATs2AClfpHcSg-
< Date: Tue, 28 Dec 2021 08:08:32 GMT
<
* Failure writing output to destination
* Closing connection 0
You can see in the Content-Type header that imgproxy has returned a webp image.
If you’d like, you can do the same for the IMGPROXY_ENABLE_AVIF_DETECTION environment variable. This works similarly, but for the avif format rather than webp.
In this step, you configured imgproxy to automatically use next-generation image formats if and only if they are supported by the user’s browser.
Conclusion
In this tutorial, you have learned about new image formats and how to run, configure, and secure imgproxy via Docker. You also configured imgproxy to automatically serve webp images to any website visitor with a browser that can handle them. You are now ready to deploy imgproxy to anywhere that will automatically run Docker containers to transform your images on the fly and improve your Web Vitals score.
As a next step, you can explore additional options for processing images using imgproxy. You can see a full list of processing options in the product documentation. You can also explore additional configuration options. Finally, you could deploy your imgproxy container on the Digital Ocean App Platform.
Thanks for learning with the DigitalOcean Community. Check out our offerings for compute, storage, networking, and managed databases.
About the author(s)
Still looking for an answer?
This textbox defaults to using Markdown to format your answer.
You can type !ref in this text area to quickly search our full set of tutorials, documentation & marketplace offerings and insert the link!
Can it be cached and served by a CDN? Can we use imgproxy in digital ocean cdn?
 This work is licensed under a Creative Commons Attribution-NonCommercial- ShareAlike 4.0 International License.
Become a contributor for community
Get paid to write technical tutorials and select a tech-focused charity to receive a matching donation.

DigitalOcean Documentation
Full documentation for every DigitalOcean product.

Resources for startups and AI-native businesses
The Wave has everything you need to know about building a business, from raising funding to marketing your product.
The developer cloud
Scale up as you grow — whether you're running one virtual machine or ten thousand.

Start building today
From GPU-powered inference and Kubernetes to managed databases and storage, get everything you need to build, scale, and deploy intelligent applications.
