
Introduction
Django is a powerful web framework that can help you get your Python application or website off the ground quickly. It includes several convenient features like an object-relational mapper, a Python API, and a customizable administrative interface for your application. It also includes a caching framework and encourages clean app design through its URL Dispatcher and Template system.
Out of the box, Django includes a minimal web server for testing and local development, but it should be paired with a more robust serving infrastructure for production use cases. Django is often rolled out with an Nginx web server to handle static file requests and HTTPS redirection, and a Gunicorn WSGI server to serve the app.
In this guide, we will augment this setup by offloading static files like Javascript and CSS stylesheets to DigitalOcean Spaces, and optionally delivering them using a Content Delivery Network, or CDN, which stores these files closer to end users to reduce transfer times. We’ll also use a DigitalOcean Managed PostgreSQL database as our data store to simplify the data layer and avoid having to manually configure a scalable PostgreSQL database.
Prerequisites
Before you begin with this guide, you should have the following available to you:
- A fresh Ubuntu 18.04 server instance with a basic firewall and a non-root user with
sudoprivileges configured. You can learn how to set this up by running through the Initial Server Setup with Ubuntu 18.04. - A DigitalOcean Managed PostgreSQL Cluster. To learn how to create a cluster, consult the DigitalOcean Managed Databases product documentation.
- A DigitalOcean Space to store your Django project’s static files and set of Access Keys for this Space. To learn how to create a Space, consult the How to Create Spaces product documentation, and to learn how to create Access Keys for Spaces, consult Sharing Access to Spaces with Access Keys.
- Nginx installed, secured, and configured on your server to work with a domain name of your choosing. For more information on setting up A records and securing your Nginx installation using Let’s Encrypt, please see How To Secure Nginx with Let’s Encrypt on Ubuntu 18.04.
Step 1 — Installing Packages from the Ubuntu Repositories
To begin, we’ll download and install all of the items we need from the Ubuntu repositories. We’ll use the Python package manager pip to install additional components a bit later.
We need to first update the local apt package index and then download and install the packages.
In this guide, we’ll use Django with Python 3. To install the necessary libraries, log in to your server and type:
- sudo apt update
- sudo apt install python3-pip python3-dev libpq-dev curl postgresql-client
This will install pip, the Python development files needed to build Gunicorn, the libpq header files needed to build the Pyscopg PostgreSQL Python adapter, and the PostgreSQL command-line client.
Hit Y and then ENTER when prompted to begin downloading and installing the packages.
Next, we’ll configure the database to work with our Django app.
Step 2 — Creating the PostgreSQL Database and User
We’ll now create a database and database user for our Django application.
To begin, grab the Connection Parameters for your cluster by navigating to Databases from the Cloud Control Panel, and clicking into your database. You should see a Connection Details box containing some parameters for your cluster. Note these down.
Back on the command line, log in to your cluster using these credentials and the psql PostgreSQL client we just installed:
- psql -U username -h host -p port -d database -set=sslmode=require
When prompted, enter the password displayed alongside the Postgres username, and hit ENTER.
You will be given a PostgreSQL prompt from which you can manage the database.
First, create a database for your project called polls:
- CREATE DATABASE polls;
Note: Every Postgres statement must end with a semicolon, so make sure that your command ends with one if you are experiencing issues.
We can now switch to the polls database:
- \c polls;
Next, create a database user for the project. Make sure to select a secure password:
- CREATE USER myprojectuser WITH PASSWORD 'password';
We’ll now modify a few of the connection parameters for the user we just created. This will speed up database operations so that the correct values do not have to be queried and set each time a connection is established.
We are setting the default encoding to UTF-8, which Django expects. We are also setting the default transaction isolation scheme to “read committed”, which blocks reads from uncommitted transactions. Lastly, we are setting the timezone. By default, our Django projects will be set to use UTC. These are all recommendations from the Django project itself.
Enter the following commands at the PostgreSQL prompt:
- ALTER ROLE myprojectuser SET client_encoding TO 'utf8';
- ALTER ROLE myprojectuser SET default_transaction_isolation TO 'read committed';
- ALTER ROLE myprojectuser SET timezone TO 'UTC';
Now we can give our new user access to administer our new database:
- GRANT ALL PRIVILEGES ON DATABASE polls TO myprojectuser;
When you are finished, exit out of the PostgreSQL prompt by typing:
- \q
Your Django app is now ready to connect to and manage this database.
In the next step, we’ll install virtualenv and create a Python virtual environment for our Django project.
Step 3 — Creating a Python Virtual Environment for your Project
Now that we’ve set up our database to work with our application, we’ll create a Python virtual environment that will isolate this project’s dependencies from the system’s global Python installation.
To do this, we first need access to the virtualenv command. We can install this with pip.
Upgrade pip and install the package by typing:
- sudo -H pip3 install --upgrade pip
- sudo -H pip3 install virtualenv
With virtualenv installed, we can create a directory to store our Python virtual environments and make one to use with the Django polls app.
Create a directory called envs and navigate into it:
- mkdir envs
- cd envs
Within this directory, create a Python virtual environment called polls by typing:
- virtualenv polls
This will create a directory called polls within the envs directory. Inside, it will install a local version of Python and a local version of pip. We can use this to install and configure an isolated Python environment for our project.
Before we install our project’s Python requirements, we need to activate the virtual environment. You can do that by typing:
- source polls/bin/activate
Your prompt should change to indicate that you are now operating within a Python virtual environment. It will look something like this: (polls)user@host:~/envs$.
With your virtual environment active, install Django, Gunicorn, and the psycopg2 PostgreSQL adaptor with the local instance of pip:
Note: When the virtual environment is activated (when your prompt has (polls) preceding it), use pip instead of pip3, even if you are using Python 3. The virtual environment’s copy of the tool is always named pip, regardless of the Python version.
- pip install django gunicorn psycopg2-binary
You should now have all of the software you need to run the Django polls app. In the next step, we’ll create a Django project and install this app.
Step 4 — Creating the Polls Django Application
We can now set up our sample application. In this tutorial, we’ll use the Polls demo application from the Django documentation. It consists of a public site that allows users to view polls and vote in them, and an administrative control panel that allows the admin to modify, create, and delete polls.
In this guide, we’ll skip through the tutorial steps, and simply clone the final application from the DigitalOcean Community django-polls repo.
If you’d like to complete the steps manually, create a directory called django-polls in your home directory and navigate into it:
- cd
- mkdir django-polls
- cd django-polls
From there, you can follow the Writing your first Django app tutorial from the official Django documentation. When you’re done, skip to Step 5.
If you just want to clone the finished app, navigate to your home directory and use git to clone the django-polls repo:
- cd
- git clone https://github.com/do-community/django-polls.git
cd into it, and list the directory contents:
- cd django-polls
- ls
You should see the following objects:
OutputLICENSE README.md manage.py mysite polls templates
manage.py is the main command-line utility used to manipulate the app. polls contains the polls app code, and mysite contains project-scope code and settings. templates contains custom template files for the administrative interface. To learn more about the project structure and files, consult Creating a Project from the official Django documentation.
Before running the app, we need to adjust its default settings and connect it to our database.
Step 5 — Adjusting the App Settings
In this step, we’ll modify the Django project’s default configuration to increase security, connect Django to our database, and collect static files into a local directory.
Begin by opening the settings file in your text editor:
- nano ~/django-polls/mysite/settings.py
Start by locating the ALLOWED_HOSTS directive. This defines a list of the addresses or domain names that you want to use to connect to the Django instance. An incoming request with a Host header not in this list will raise an exception. Django requires that you set this to prevent a certain class of security vulnerability.
In the square brackets, list the IP addresses or domain names associated with your Django server. Each item should be listed in quotations with entries separated by a comma. Your list will also include localhost, since you will be proxying connections through a local Nginx instance. If you wish to include requests for an entire domain and any subdomains, prepend a period to the beginning of the entry.
In the snippet below, there are a few commented out examples that demonstrate what these entries should look like:
. . .

# The simplest case: just add the domain name(s) and IP addresses of your Django server
# ALLOWED_HOSTS = [ 'example.com', '203.0.113.5']
# To respond to 'example.com' and any subdomains, start the domain with a dot
# ALLOWED_HOSTS = ['.example.com', '203.0.113.5']
ALLOWED_HOSTS = ['your_server_domain_or_IP', 'second_domain_or_IP', . . ., 'localhost']

. . .
Next, find the section of the file that configures database access. It will start with DATABASES. The configuration in the file is for a SQLite database. We already created a PostgreSQL database for our project, so we need to adjust these settings.
We will tell Django to use the psycopg2 database adaptor we installed with pip, instead of the default SQLite engine. We’ll also reuse the Connection Parameters referenced in Step 2. You can always find this information from the Managed Databases section of the DigitalOcean Cloud Control Panel.
Update the file with your database settings: the database name (polls), the database username, the database user’s password, and the database host and port. Be sure to replace the database-specific values with your own information:
. . .

DATABASES = {
    'default': {
        'ENGINE': 'django.db.backends.postgresql_psycopg2',
        'NAME': 'polls',
        'USER': 'myprojectuser',
        'PASSWORD': 'password',
        'HOST': 'managed_db_host',
        'PORT': 'managed_db_port',
    }
}

. . .
Next, move down to the bottom of the file and add a setting indicating where the static files should be placed. This is necessary so that Nginx can handle requests for these items. The following line tells Django to place them in a directory called static in the base project directory:
. . .

STATIC_URL = '/static/'
STATIC_ROOT = os.path.join(BASE_DIR, 'static/')
Save and close the file when you are finished.
At this point, you’ve configured the Django project’s database, security, and static files settings. If you followed the polls tutorial from the start and did not clone the GitHub repo, you can move on to Step 6. If you cloned the GitHub repo, there remains one additional step.
The Django settings file contains a SECRET_KEY variable that is used to create hashes for various Django objects. It’s important that it is set to a unique, unpredictable value. The SECRET_KEY variable has been scrubbed from the GitHub repository, so we’ll create a new one using a function built-in to the django Python package called get_random_secret_key(). From the command line, open up a Python interpreter:
- python
You should see the following output and prompt:
OutputPython 3.6.7 (default, Oct 22 2018, 11:32:17)
[GCC 8.2.0] on linux
Type "help", "copyright", "credits" or "license" for more information.
>>>
Import the get_random_secret_key function from the Django package, then call the function:
- from django.core.management.utils import get_random_secret_key
- get_random_secret_key()
Copy the resulting key to your clipboard.
Exit the Python interpreter by pressing CTRL+D.
Next, open up the settings file in your text editor once again:
nano ~/django-polls/mysite/settings.py
Locate the SECRET_KEY variable and paste in the key you just generated:
. . .

# SECURITY WARNING: keep the secret key used in production secret!
SECRET_KEY = 'your_secret_key_here'

. . .
Save and close the file.
We’ll now test the app locally using the Django development server to ensure that everything’s been correctly configured.
Step 6 — Testing the App
Before we run the Django development server, we need to use the manage.py utility to create the database schema and collect static files into the STATIC_ROOT directory.
Navigate into the project’s base directory, and create the initial database schema in our PostgreSQL database using the makemigrations and migrate commands:
- cd django-polls
- ./manage.py makemigrations
- ./manage.py migrate
makemigrations will create the migrations, or database schema changes, based on the changes made to Django models. migrate will apply these migrations to the database schema. To learn more about migrations in Django, consult Migrations from the official Django documentation.
Create an administrative user for the project by typing:
- ./manage.py createsuperuser
You will have to select a username, provide an email address, and choose and confirm a password.
We can collect all of the static content into the directory location we configured by typing:
- ./manage.py collectstatic
The static files will then be placed in a directory called static within your project directory.
If you followed the initial server setup guide, you should have a UFW firewall protecting your server. In order to test the development server, we’ll have to allow access to the port we’ll be using.
Create an exception for port 8000 by typing:
- sudo ufw allow 8000
Testing the App Using the Django Development Server
Finally, you can test your project by starting the Django development server with this command:
- ./manage.py runserver 0.0.0.0:8000
In your web browser, visit your server’s domain name or IP address followed by :8000 and the polls path:
- http://server_domain_or_IP:8000/polls
You should see the Polls app interface:

To check out the admin interface, visit your server’s domain name or IP address followed by :8000 and the administrative interface’s path:
- http://server_domain_or_IP:8000/admin
You should see the Polls app admin authentication window:
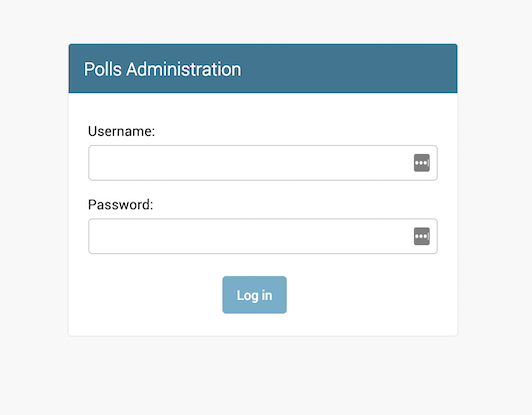
Enter the administrative username and password you created with the createsuperuser command.
After authenticating, you can access the Polls app’s administrative interface:
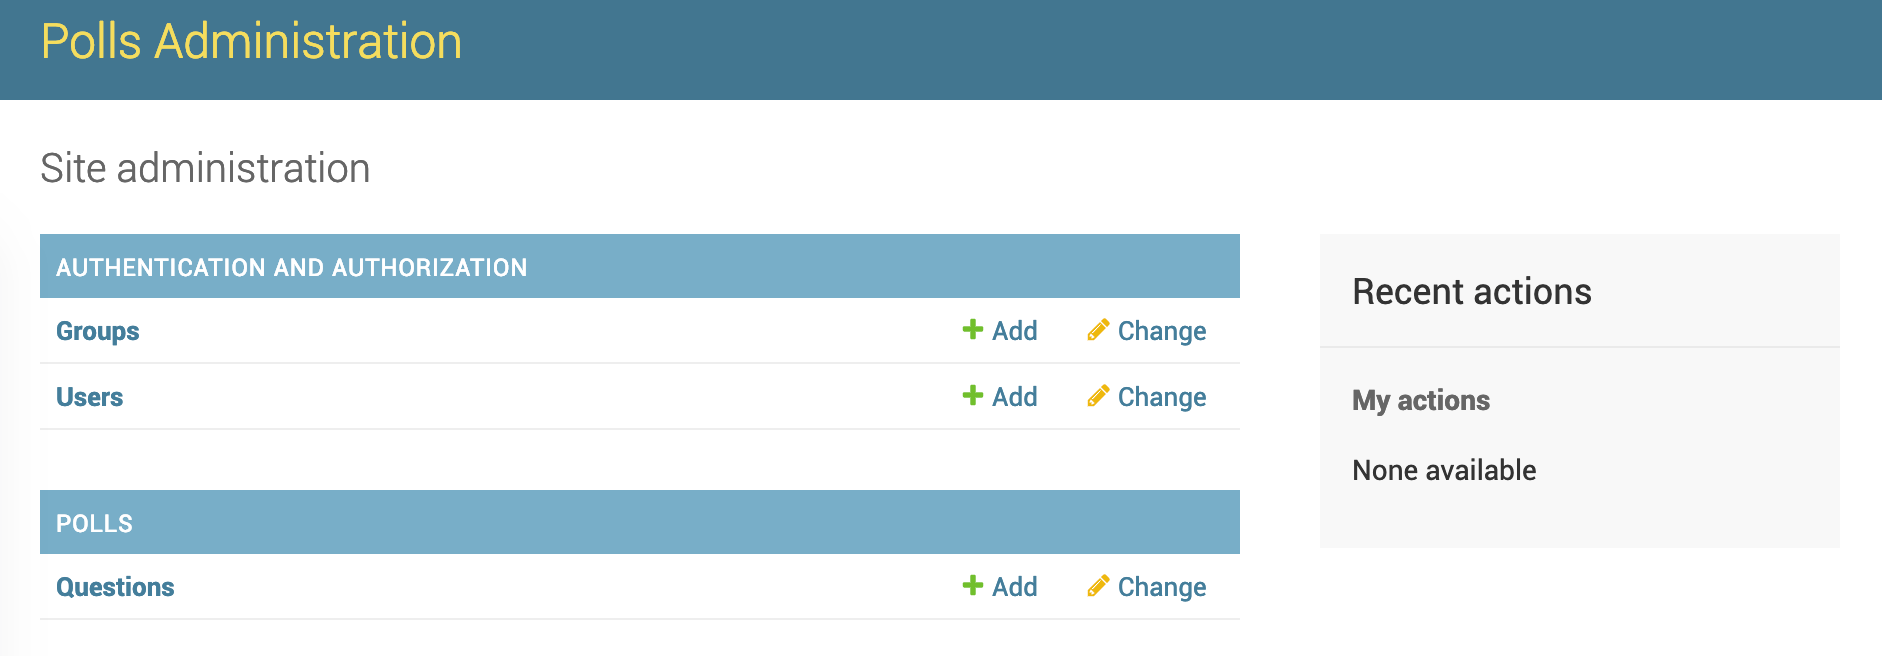
When you are finished exploring, hit CTRL-C in the terminal window to shut down the development server.
Testing the App Using Gunicorn
The last thing we want to do before offloading static files is test Gunicorn to make sure that it can serve the application. We can do this by entering our project directory and using gunicorn to load the project’s WSGI module:
- gunicorn --bind 0.0.0.0:8000 mysite.wsgi
This will start Gunicorn on the same interface that the Django development server was running on. You can go back and test the app again.
Note: The admin interface will not have any of the styling applied since Gunicorn does not know how to find the static CSS content responsible for this.
We passed Gunicorn a module by specifying the relative directory path to Django’s wsgi.py file, the entry point to our application,. This file defines a function called application, which communicates with the application. To learn more about the WSGI specification, click here.
When you are finished testing, hit CTRL-C in the terminal window to stop Gunicorn.
We’ll now offload the application’s static files to DigitalOcean Spaces.
Step 7 — Offloading Static Files to DigitalOcean Spaces
At this point, Gunicorn can serve our Django application but not its static files. Usually we’d configure Nginx to serve these files, but in this tutorial we’ll offload them to DigitalOcean Spaces using the django-storages plugin. This allows you to easily scale Django by centralizing its static content and freeing up server resources. In addition, you can deliver this static content using the DigitalOcean Spaces CDN.
For a full guide on offloading Django static files to Object storage, consult How to Set Up Object Storage with Django.
Installing and Configuring django-storages
We’ll begin by installing the django-storages Python package. The django-storages package provides Django with the S3Boto3Storage storage backend that uses the boto3 library to upload files to any S3-compatible object storage service.
To start, install thedjango-storages and boto3 Python packages using pip:
- pip install django-storages boto3
Next, open your app’s Django settings file again:
- nano ~/django-polls/mysite/settings.py
Navigate down to the INSTALLED_APPS section of the file, and append storages to the list of installed apps:
. . .

INSTALLED_APPS = [
    . . .
    'django.contrib.staticfiles',
    'storages',
]

. . .
Scroll further down the file to the STATIC_URL we previously modified. We’ll now overwrite these values and append new S3Boto3Storage backend parameters. Delete the code you entered earlier, and add the following blocks, which include access and location information for your Space. Remember to replace the highlighted values here with your own information::
. . .

# Static files (CSS, JavaScript, Images)
# https://docs.djangoproject.com/en/2.1/howto/static-files/

AWS_ACCESS_KEY_ID = 'your_spaces_access_key'
AWS_SECRET_ACCESS_KEY = 'your_spaces_secret_key'

AWS_STORAGE_BUCKET_NAME = 'your_space_name'
AWS_S3_ENDPOINT_URL = 'spaces_endpoint_URL'
AWS_S3_OBJECT_PARAMETERS = {
    'CacheControl': 'max-age=86400',
}
AWS_LOCATION = 'static'
AWS_DEFAULT_ACL = 'public-read'

STATICFILES_STORAGE = 'storages.backends.s3boto3.S3Boto3Storage'

STATIC_URL = '{}/{}/'.format(AWS_S3_ENDPOINT_URL, AWS_LOCATION)
STATIC_ROOT = 'static/'
We define the following configuration items:
AWS_ACCESS_KEY_ID: The Access Key ID for the Space, which you created in the tutorial prerequisites. If you didn’t create a set of Access Keys, consult Sharing Access to Spaces with Access Keys.AWS_SECRET_ACCESS_KEY: The secret key for the DigitalOcean Space.AWS_STORAGE_BUCKET_NAME: Your DigitalOcean Space name.AWS_S3_ENDPOINT_URL: The endpoint URL used to access the object storage service. For DigitalOcean, this will be something likehttps://nyc3.digitaloceanspaces.comdepending on the Space region.AWS_S3_OBJECT_PARAMETERSSets the cache control headers on static files.AWS_LOCATION: Defines a directory within the object storage bucket where all static files will be placed.AWS_DEFAULT_ACL: Defines the access control list (ACL) for the static files. Setting it topublic-readensures that the files are publicly accessible to end users.STATICFILES_STORAGE: Sets the storage backend Django will use to offload static files. This backend should work with any S3-compatible backend, including DigitalOcean Spaces.STATIC_URL: Specifies the base URL that Django should use when generating URLs for static files. Here, we combine the endpoint URL and the static files subdirectory to construct a base URL for static files.STATIC_ROOT: Specifies where to collect static files locally before copying them to object storage.
Save and close the file when you’re done editing.
From now on, when you run collectstatic, Django will upload your app’s static files to the Space. When you start Django, it’ll begin serving static assets like CSS and Javascript from this Space.
In the next section, we’ll enable the CDN for this Space and optionally configure a custom subdomain for the Spaces CDN. This will speed up delivery of your Django project’s static files by caching them across a geographically-distributed network of edge servers. To learn more about CDNs, consult Using a CDN to Speed Up Static Content Delivery. If you don’t want to enable Spaces CDN, skip ahead to Configuring CORS Headers.
Enabling CDN (Optional)
To activate static file delivery via the DigitalOcean Spaces CDN, begin by enabling the CDN for your DigitalOcean Space. To learn how to do this, consult How to Enable the Spaces CDN from the DigitalOcean product documentation.
If you’d like to use a custom domain with Spaces CDN, create the subdomain CNAME record and appropriate SSL certificates by following How to Customize the Spaces CDN Endpoint with a Subdomain.
Using a custom domain with Spaces CDN is highly recommended. This will drastically improve Search Engine Optimization (SEO) for your site by keeping your offloaded asset URLs similar to your Django site’s URLs. To use a custom domain with Spaces CDN, you need to ensure that you first add your domain to your DigitalOcean account. To learn how to do this, consult How to Add Domains.
Once you’ve enabled the CDN for your Space and optionally created a custom subdomain for it, navigate to your Space using the Cloud Control Panel. You should see a new Endpoints link under your Space name:
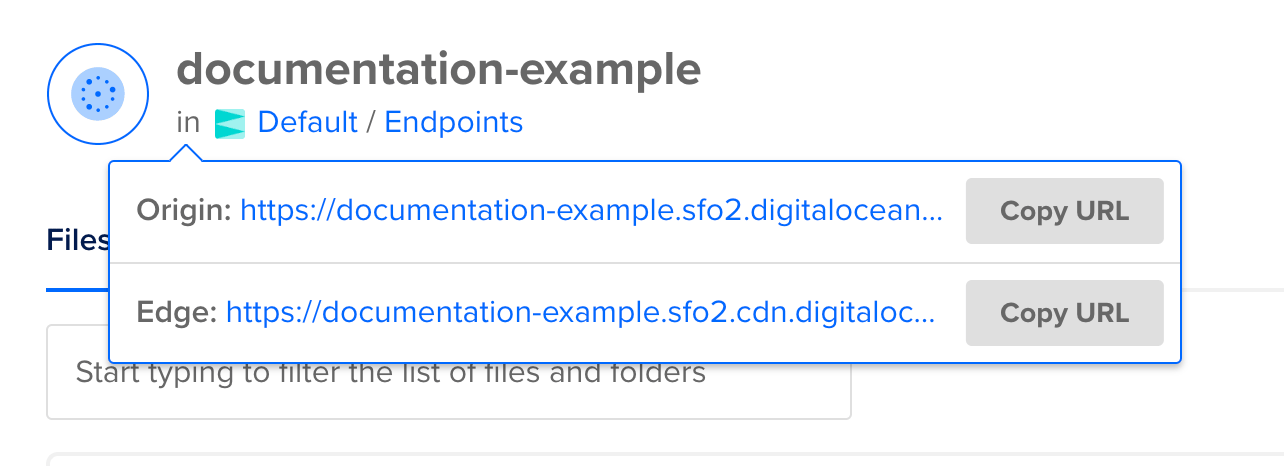
These endpoints should contain your Space name. If you created a custom subdomain for Spaces CDN, this list will contain an additional endpoint called Subdomain.
The Edge endpoint routes requests for Spaces objects through the CDN, serving them from the edge cache as much as possible. Note down this Edge endpoint, as we’ll use it to configure the django-storages plugin. If you created a subdomain for Spaces CDN, the Subdomain endpoint is an alias for this Edge endpoint.
Next, edit your app’s Django settings file once again:
- nano ~/django-polls/mysite/settings.py
Navigate down to the Static Files section we recently modified. Add the AWS_S3_CUSTOM_DOMAIN parameter to configure the django-storages plugin CDN endpoint and update the STATIC_URL parameter to use this new CDN endpoint:
. . .

# Static files (CSS, JavaScript, Images)
# https://docs.djangoproject.com/en/2.1/howto/static-files/

# Moving static assets to DigitalOcean Spaces as per:
# https://www.digitalocean.com/community/tutorials/how-to-set-up-object-storage-with-django
AWS_ACCESS_KEY_ID = 'your_spaces_access_key'
AWS_SECRET_ACCESS_KEY = 'your_spaces_secret_key'

AWS_STORAGE_BUCKET_NAME = 'your_space_name'
AWS_S3_ENDPOINT_URL = 'spaces_endpoint_URL'
AWS_S3_CUSTOM_DOMAIN = 'spaces_edge_endpoint_URL'
AWS_S3_OBJECT_PARAMETERS = {
    'CacheControl': 'max-age=86400',
}
AWS_LOCATION = 'static'
AWS_DEFAULT_ACL = 'public-read'

STATICFILES_STORAGE = 'storages.backends.s3boto3.S3Boto3Storage'

STATIC_URL = '{}/{}/'.format(AWS_S3_CUSTOM_DOMAIN, AWS_LOCATION)
STATIC_ROOT = 'static/'
Here, replace the spaces_edge_endpoint_URL with the Edge endpoint you just noted down, truncating the https:// prefix. For example, if the Edge endpoint URL is https://example.sfo2.cdn.digitaloceanspaces.com, AWS_S3_CUSTOM_DOMAIN should be set to example.sfo2.cdn.digitaloceanspaces.com.
If you created a custom subdomain, replace spaces_edge_endpoint_URL with the custom subdomain endpoint, truncating the https:// prefix. For example, if the subdomain endpoint URL is https://assets.example.com, AWS_S3_CUSTOM_DOMAIN should be set to assets.example.com.
When you’re done, save and close the file.
When you start Django, it will now serve static content using the CDN for your DigitalOcean Space.
Before we test that this is all functioning correctly, we need to configure Cross-Origin Resource Sharing (CORS) headers for our Spaces files or access to certain static assets may be denied by your web browser. If you are using a custom subdomain with Spaces CDN for the same domain used by Django, you can skip ahead to Testing Spaces Static File Delivery.
Configuring CORS Headers
CORS headers tell the web browser that an application running at one domain can access scripts or resources located at another. In this case, we need to allow cross-origin resource sharing for our Django server’s domain so that requests for static files in the Space are not denied by the web browser.
Note: This step is only necessary if you are not using a custom subdomain with Spaces CDN.
To begin, navigate to the Settings page of your Space using the Cloud Control Panel:

In the CORS Configurations section, click Add.

Here, under Origin, enter the wildcard origin, *
Warning: When you deploy your app into production, be sure to change this value to your exact origin domain (including the http:// or https:// protocol). Leaving this as the wildcard origin is insecure, and we do this here only for testing purposes since setting the origin to http://example.com:8000 (using a nonstandard port) is currently not supported.
Under Allowed Methods, select GET.
Click on Add Header, and in text box that appears, enter Access-Control-Allow-Origin.
Set Access Control Max Age to 600 so that the header we just created expires every 10 minutes.
Click Save Options.
From now on, objects in your Space will contain the appropriate Access-Control-Allow-Origin response headers, allowing modern secure web browsers to fetch these files across domains.
Testing Spaces Static File Delivery
We’ll now test that Django is correctly serving static files from our DigitalOcean Space.
Navigate to your Django app directory:
- cd ~/django-polls
From here, run collectstatic to collect and upload static files to your DigitalOcean Space:
- python manage.py collectstatic
You should see the following output:
OutputYou have requested to collect static files at the destination
location as specified in your settings.

This will overwrite existing files!
Are you sure you want to do this?

Type 'yes' to continue, or 'no' to cancel:
Type yes and hit ENTER to confirm.
You should then see output like the following
Output121 static files copied.
This confirms that Django successfully uploaded the polls app static files to your Space. You can navigate to your Space using the Cloud Control Panel, and inspect the files in the static directory.
Next, we’ll verify that Django is rewriting the appropriate URLs.
Start the Gunicorn server:
- gunicorn --bind 0.0.0.0:8000 mysite.wsgi
In your web browser, visit your server’s domain name or IP address followed by :8000 and /admin:
http://server_domain_or_IP:8000/admin
You should once again see the Polls app admin authentication window, this time with correct styling.
Now, use your browser’s developer tools to inspect the page contents and reveal the source file storage locations.
To do this using Google Chrome, right-click the page, and select Inspect.
You should see the following window:
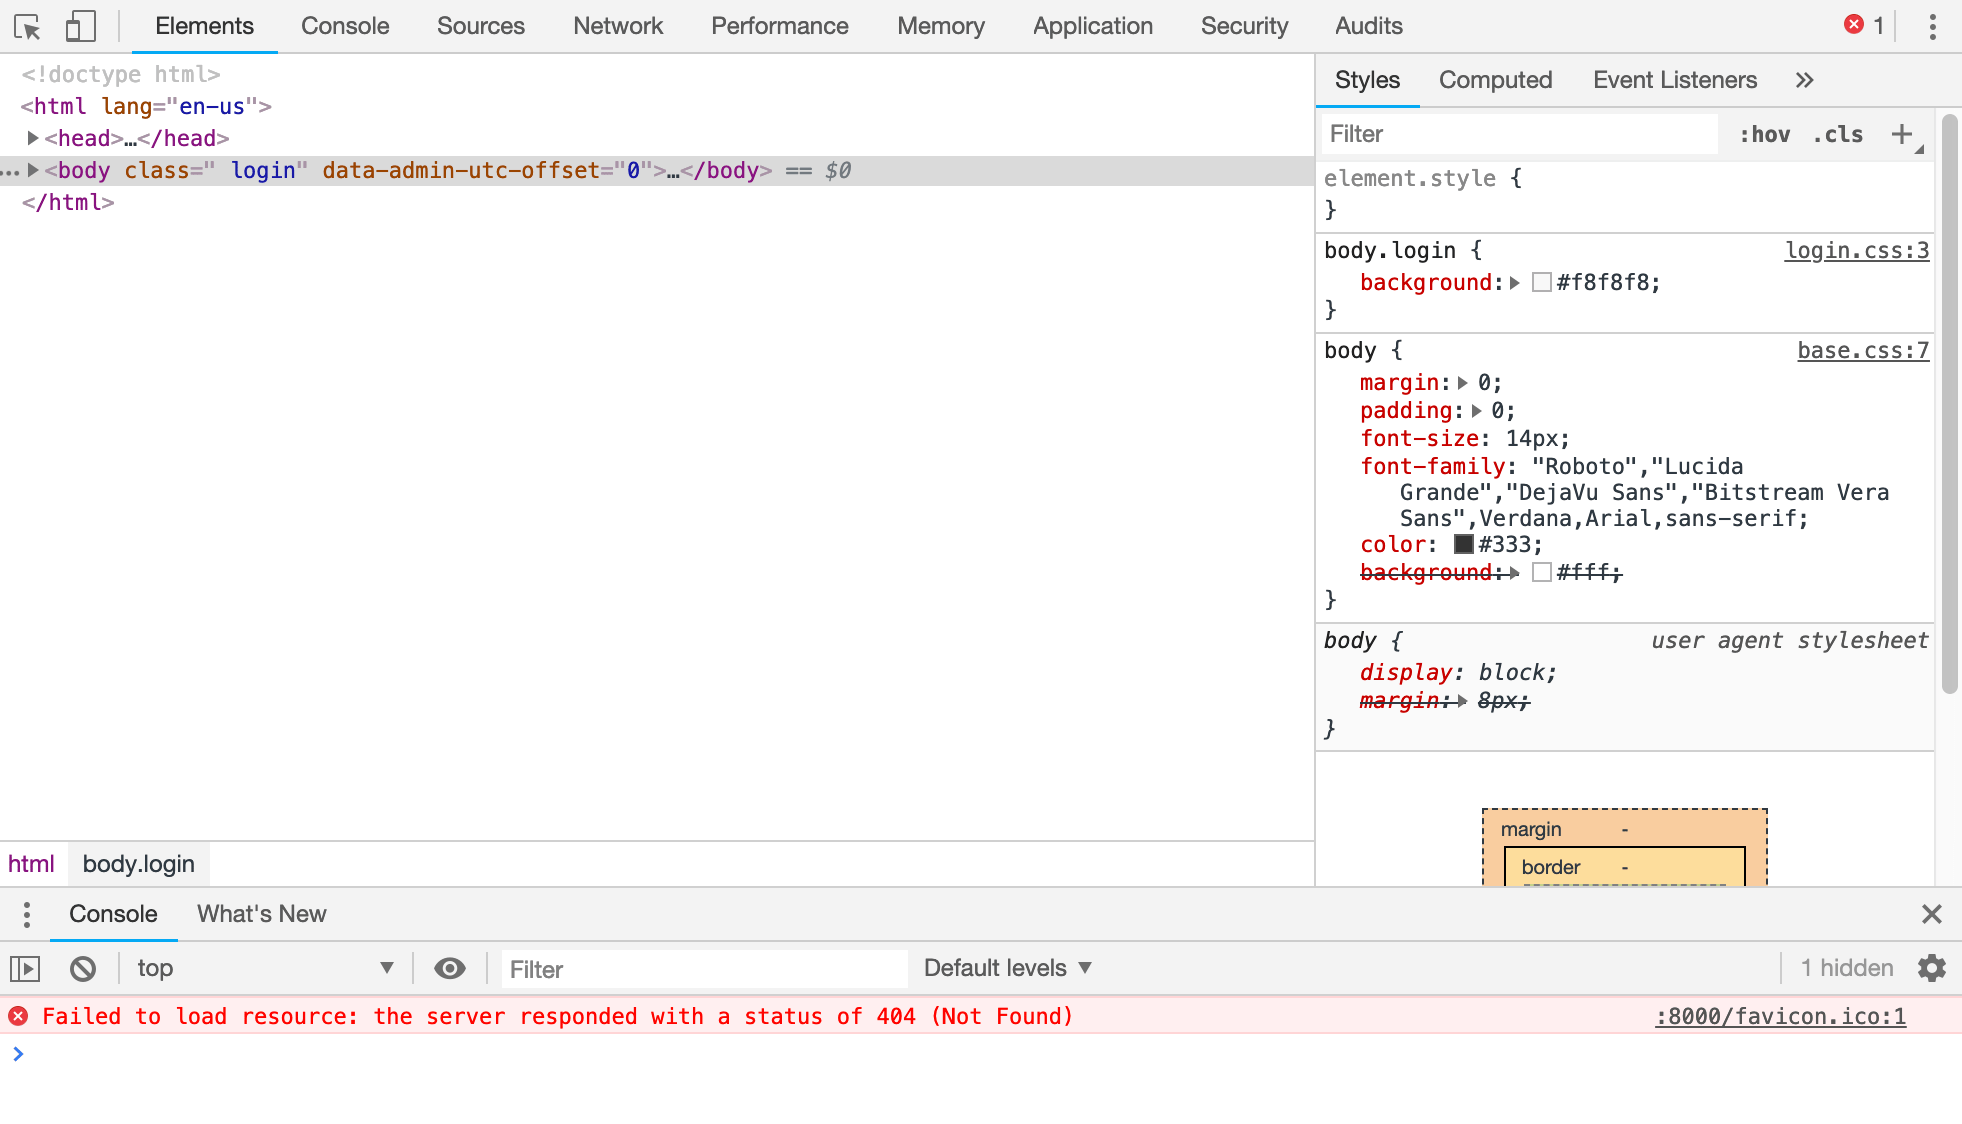
From here, click on Sources in the toolbar. In the list of source files in the left-hand pane, you should see /admin/login under your Django server’s domain, and static/admin under your Space’s CDN endpoint. Within static/admin, you should see both the css and fonts directories.
This confirms that CSS stylesheets and fonts are correctly being served from your Space’s CDN.
When you are finished testing, hit CTRL-C in the terminal window to stop Gunicorn.
You can disable your active Python virtual environment by entering deactivate:
- deactivate
Your prompt should return to normal.
At this point you’ve successfully offloaded static files from your Django server, and are serving them from object storage. We can now move on to configuring Gunicorn to start automatically as a system service.
Step 8 — Creating systemd Socket and Service Files for Gunicorn
In Step 6 we tested that Gunicorn can interact with our Django application, but we should implement a more robust way of starting and stopping the application server. To accomplish this, we’ll make systemd service and socket files.
The Gunicorn socket will be created at boot and will listen for connections. When a connection occurs, systemd will automatically start the Gunicorn process to handle the connection.
Start by creating and opening a systemd socket file for Gunicorn with sudo privileges:
- sudo nano /etc/systemd/system/gunicorn.socket
Inside, we will create a [Unit] section to describe the socket, a [Socket] section to define the socket location, and an [Install] section to make sure the socket is created at the right time. Add the following code to the file:
[Unit]
Description=gunicorn socket

[Socket]
ListenStream=/run/gunicorn.sock

[Install]
WantedBy=sockets.target
Save and close the file when you are finished.
Next, create and open a systemd service file for Gunicorn with sudo privileges in your text editor. The service filename should match the socket filename with the exception of the extension:
- sudo nano /etc/systemd/system/gunicorn.service
Start with the [Unit] section, which specifies metadata and dependencies. We’ll put a description of our service here and tell the init system to only start this after the networking target has been reached. Because our service relies on the socket from the socket file, we need to include a Requires directive to indicate that relationship:
[Unit]
Description=gunicorn daemon
Requires=gunicorn.socket
After=network.target
Next, we’ll open up the [Service] section. We’ll specify the user and group that we want to process to run under. We will give our regular user account ownership of the process since it owns all of the relevant files. We’ll give group ownership to the www-data group so that Nginx can communicate easily with Gunicorn.
We’ll then map out the working directory and specify the command to use to start the service. In this case, we’ll have to specify the full path to the Gunicorn executable, which is installed within our virtual environment. We will bind the process to the Unix socket we created within the /run directory so that the process can communicate with Nginx. We log all data to standard output so that the journald process can collect the Gunicorn logs. We can also specify any optional Gunicorn tweaks here, like the number of worker processes. Here, we run Gunicorn with 3 worker processes.
Add the following Service section to the file. Be sure to replace the username listed here with your own username:
[Unit]
Description=gunicorn daemon
Requires=gunicorn.socket
After=network.target

[Service]
User=sammy
Group=www-data
WorkingDirectory=/home/sammy/django-polls
ExecStart=/home/sammy/envs/polls/bin/gunicorn \
          --access-logfile - \
          --workers 3 \
          --bind unix:/run/gunicorn.sock \
          mysite.wsgi:application
Finally, we’ll add an [Install] section. This will tell systemd what to link this service to if we enable it to start at boot. We want this service to start when the regular multi-user system is up and running:
[Unit]
Description=gunicorn daemon
Requires=gunicorn.socket
After=network.target

[Service]
User=sammy
Group=www-data
WorkingDirectory=/home/sammy/django-polls
ExecStart=/home/sammy/envs/polls/bin/gunicorn \
          --access-logfile - \
          --workers 3 \
          --bind unix:/run/gunicorn.sock \
          mysite.wsgi:application

[Install]
WantedBy=multi-user.target
With that, our systemd service file is complete. Save and close it now.
We can now start and enable the Gunicorn socket. This will create the socket file at /run/gunicorn.sock now and at boot. When a connection is made to that socket, systemd will automatically start the gunicorn.service to handle it:
- sudo systemctl start gunicorn.socket
- sudo systemctl enable gunicorn.socket
We can confirm that the operation was successful by checking for the socket file.
Checking for the Gunicorn Socket File
Check the status of the process to find out whether it started successfully:
- sudo systemctl status gunicorn.socket
You should see the following output:
OutputFailed to dump process list, ignoring: No such file or directory
● gunicorn.socket - gunicorn socket
   Loaded: loaded (/etc/systemd/system/gunicorn.socket; enabled; vendor preset: enabled)
   Active: active (running) since Tue 2019-03-05 19:19:16 UTC; 1h 22min ago
   Listen: /run/gunicorn.sock (Stream)
   CGroup: /system.slice/gunicorn.socket

Mar 05 19:19:16 django systemd[1]: Listening on gunicorn socket.
Next, check for the existence of the gunicorn.sock file within the /run directory:
- file /run/gunicorn.sock
Output/run/gunicorn.sock: socket
If the systemctl status command indicated that an error occurred, or if you do not find the gunicorn.sock file in the directory, it’s an indication that the Gunicorn socket was not created correctly. Check the Gunicorn socket’s logs by typing:
- sudo journalctl -u gunicorn.socket
Take another look at your /etc/systemd/system/gunicorn.socket file to fix any problems before continuing.
Testing Socket Activation
Currently, if you’ve only started the gunicorn.socket unit, the gunicorn.service will not be active, since the socket has not yet received any connections. You can check this by typing:
- sudo systemctl status gunicorn
Output● gunicorn.service - gunicorn daemon
   Loaded: loaded (/etc/systemd/system/gunicorn.service; disabled; vendor preset: enabled)
   Active: inactive (dead)
To test the socket activation mechanism, we can send a connection to the socket through curl by typing:
- curl --unix-socket /run/gunicorn.sock localhost
You should see the HTML output from your application in the terminal. This indicates that Gunicorn has started and is able to serve your Django application. You can verify that the Gunicorn service is running by typing:
- sudo systemctl status gunicorn
Output● gunicorn.service - gunicorn daemon
   Loaded: loaded (/etc/systemd/system/gunicorn.service; disabled; vendor preset: enabled)
   Active: active (running) since Tue 2019-03-05 20:43:56 UTC; 1s ago
 Main PID: 19074 (gunicorn)
    Tasks: 4 (limit: 4915)
   CGroup: /system.slice/gunicorn.service
           ├─19074 /home/sammy/envs/polls/bin/python3 /home/sammy/envs/polls/bin/gunicorn --access-logfile - --workers 3 --bind unix:/run/gunicorn.sock mysite.wsgi:application
           ├─19098 /home/sammy/envs/polls/bin/python3 /home/sammy/envs/polls/bin/gunicorn
. . .

Mar 05 20:43:56 django systemd[1]: Started gunicorn daemon.
Mar 05 20:43:56 django gunicorn[19074]: [2019-03-05 20:43:56 +0000] [19074] [INFO] Starting gunicorn 19.9.0
. . .
Mar 05 20:44:15 django gunicorn[19074]:  - - [05/Mar/2019:20:44:15 +0000] "GET / HTTP/1.1" 301 0 "-" "curl/7.58.0"
If the output from curl or the output of systemctl status indicates that a problem occurred, check the logs for additional details:
- sudo journalctl -u gunicorn
You can also check your /etc/systemd/system/gunicorn.service file for problems. If you make changes to this file, be sure to reload the daemon to reread the service definition and restart the Gunicorn process:
- sudo systemctl daemon-reload
- sudo systemctl restart gunicorn
Make sure you troubleshoot any issues before continuing on to configuring the Nginx server.
Step 8 — Configuring Nginx HTTPS and Gunicorn Proxy Passing
Now that Gunicorn is set up in a more robust fashion, we need to configure Nginx to encrypt connections and hand off traffic to the Gunicorn process.
If you followed the preqrequisites and set up Nginx with Let’s Encrypt, you should already have a server block file corresponding to your domain available to you in Nginx’s sites-available directory. If not, follow How To Secure Nginx with Let’s Encrypt on Ubuntu 18.04 and return to this step.
Before we edit this example.com server block file, we’ll first remove the default server block file that gets rolled out by default after installing Nginx:
- sudo rm /etc/nginx/sites-enabled/default
We’ll now modify the example.com server block file to pass traffic to Gunicorn instead of the default index.html page configured in the prerequisite step.
Open the server block file corresponding to your domain in your editor:
- sudo nano /etc/nginx/sites-available/example.com
You should see something like the following:
server {

        root /var/www/example.com/html;
        index index.html index.htm index.nginx-debian.html;

        server_name example.com www.example.com;

        location / {
                try_files $uri $uri/ =404;
        }

    listen [::]:443 ssl ipv6only=on; # managed by Certbot
    listen 443 ssl; # managed by Certbot
    ssl_certificate /etc/letsencrypt/live/example.com/fullchain.pem; # managed by Certbot
    ssl_certificate_key /etc/letsencrypt/live/example.com/privkey.pem; # managed by Certbot
    include /etc/letsencrypt/options-ssl-nginx.conf; # managed by Certbot
    ssl_dhparam /etc/letsencrypt/ssl-dhparams.pem; # managed by Certbot

}

server {
    if ($host = example.com) {
        return 301 https://$host$request_uri;
    } # managed by Certbot


        listen 80;
        listen [::]:80;

        server_name example.com www.example.com;
    return 404; # managed by Certbot


}
This is a combination of the default server block file created in How to Install Nginx on Ubuntu 18.04 as well as additions appended automatically by Let’s Encrypt. We are going to delete the contents of this file and write a new configuration that redirects HTTP traffic to HTTPS, and forwards incoming requests to the Gunicorn socket we created in the previous step.
If you’d like, you can make a backup of this file using cp. Quit your text editor and create a backup called example.com.old:
- sudo cp /etc/nginx/sites-available/example.com /etc/nginx/sites-available/example.com.old
Now, reopen the file and delete its contents. We’ll build the new configuration block by block.
Begin by pasting in the following block, which redirects HTTP requests at port 80 to HTTPS:
server {
    listen 80 default_server;
    listen [::]:80 default_server;
    server_name _;
    return 301 https://example.com$request_uri;
}
Here we listen for HTTP IPv4 and IPv6 requests on port 80 and send a 301 response header to redirect the request to HTTPS port 443 using the example.com domain. This will also redirect direct HTTP requests to the server’s IP address.
After this block, append the following block of config code that handles HTTPS requests for the example.com domain:
. . .
server {
	listen [::]:443 ssl ipv6only=on;
	listen 443 ssl;
	server_name example.com www.example.com;

	# Let's Encrypt parameters
	ssl_certificate /etc/letsencrypt/live/example.com/fullchain.pem;
	ssl_certificate_key /etc/letsencrypt/live/example.com/privkey.pem;
	include /etc/letsencrypt/options-ssl-nginx.conf;
    ssl_dhparam /etc/letsencrypt/ssl-dhparams.pem;

	location = /favicon.ico { access_log off; log_not_found off; }

    location / {
        proxy_pass         http://unix:/run/gunicorn.sock;
        proxy_redirect     off;

        proxy_set_header   Host              $http_host;
        proxy_set_header   X-Real-IP         $remote_addr;
        proxy_set_header   X-Forwarded-For   $proxy_add_x_forwarded_for;
        proxy_set_header   X-Forwarded-Proto https;
    }
}
Here, we first listen on port 443 for requests hitting the example.com and www.example.com domains.
Next, we provide the same Let’s Encrypt configuration included in the default server block file, which specifies the location of the SSL certificate and private key, as well as some additional security parameters.
The location = /favicon.ico line instructs Nginx to ignore any problems with finding a favicon.
The last location = / block instructs Nginx to hand off requests to the Gunicorn socket configured in Step 8. In addition, it adds headers to inform the upstream Django server that a request has been forwarded and to provide it with various request properties.
After you’ve pasted in those two configuration blocks, the final file should look something like this:
server {
    listen 80 default_server;
    listen [::]:80 default_server;
    server_name _;
    return 301 https://example.com$request_uri;
}
server {
        listen [::]:443 ssl ipv6only=on;
        listen 443 ssl;
        server_name example.com www.example.com;

        # Let's Encrypt parameters
        ssl_certificate /etc/letsencrypt/live/example.com/fullchain.pem;
        ssl_certificate_key /etc/letsencrypt/live/example.com/privkey.pem;
        include /etc/letsencrypt/options-ssl-nginx.conf;
        ssl_dhparam /etc/letsencrypt/ssl-dhparams.pem;

        location = /favicon.ico { access_log off; log_not_found off; }

        location / {
          proxy_pass         http://unix:/run/gunicorn.sock;
          proxy_redirect     off;

          proxy_set_header   Host              $http_host;
          proxy_set_header   X-Real-IP         $remote_addr;
          proxy_set_header   X-Forwarded-For   $proxy_add_x_forwarded_for;
          proxy_set_header   X-Forwarded-Proto https;
        }
}
Save and close the file when you are finished.
Test your Nginx configuration for syntax errors by typing:
- sudo nginx -t
If your configuration is error-free, restart Nginx by typing:
- sudo systemctl restart nginx
You should now be able to visit your server’s domain or IP address to view your application. Your browser should be using a secure HTTPS connection to connect to the Django backend.
To completely secure our Django project, we need to add a couple of security parameters to its settings.py file. Reopen this file in your editor:
- nano ~/django-polls/mysite/settings.py
Scroll to the bottom of the file, and add the following parameters:
. . .

SECURE_PROXY_SSL_HEADER = ('HTTP_X_FORWARDED_PROTO', 'https')
SESSION_COOKIE_SECURE = True
CSRF_COOKIE_SECURE = True
SECURE_SSL_REDIRECT = True
These settings tell Django that you have enabled HTTPS on your server, and instruct it to use “secure” cookies. To learn more about these settings, consult the SSL/HTTPS section of Security in Django.
When you’re done, save and close the file.
Finally, restart Gunicorn:
- sudo systemctl restart gunicorn
At this point, you have configured Nginx to redirect HTTP requests and hand off these requests to Gunicorn. HTTPS should now be fully enabled for your Django project and app. If you’re running into errors, this discussion on troubleshooting Nginx and Gunicorn may help.
Warning: If you did not configure a custom subdomain for Spaces CDN, as stated in Configuring CORS Headers, be sure to change the Origin from the wildcard * domain to your domain name (https://example.com in this guide) before making your app accessible to end users.
Conclusion
In this guide, you set up and configured a scalable Django application running on an Ubuntu 18.04 server. This setup can be replicated across multiple servers to create a highly-available architecture. Furthermore, this app and its config can be containerized using Docker or another container runtime to ease deployment and scaling. These containers can then be deployed into a container cluster like Kubernetes. In an upcoming Tutorial series, we will explore how to containerize and modernize this Django polls app so that it can run in a Kubernetes cluster.
In addition to static files, you may also wish to offload your Django Media files to object storage. To learn how to do this, consult Using Amazon S3 to Store your Django Site’s Static and Media Files. You might also consider compressing static files to further optimize their delivery to end users. To do this, you can use a Django plugin like Django compressor.
Thanks for learning with the DigitalOcean Community. Check out our offerings for compute, storage, networking, and managed databases.
About the author(s)
DevOps Engineer, Former Technical Writer and Editor at DigitalOcean. Expertise in topics including Ubuntu, Kubernetes, Docker, CentOS.
Former Senior Technical Writer at DigitalOcean, specializing in DevOps topics across multiple Linux distributions, including Ubuntu 18.04, 20.04, 22.04, as well as Debian 10 and 11.
Still looking for an answer?
This textbox defaults to using Markdown to format your answer.
You can type !ref in this text area to quickly search our full set of tutorials, documentation & marketplace offerings and insert the link!
Is there another tutorial for teaching how to use all this with Docker and Kubernetes?
If you do this:
STATIC_URL = '/static/'
STATIC_ROOT = os.path.join(BASE_DIR, 'static/')
You will get an error:
The STATICFILES_DIRS setting should not contain the STATIC_ROOT setting.
AWSAccessKey is getting added when I tried to offload static files to Spaces. Please let me know how to remove these params
https://test-website-static.sgp1.digitaloceanspaces.com/test-website-static/static/admin/css/base.css?AWSAccessKeyId=<some-key>&Signature=<some-signature>&Expires=1570055659
I fail to see (Or you failed to provide) an explanation of how this is Scalable
I had major issues getting gunicorn running with systemd. I kept on receiving the following error
gunicorn.service: Failed with result 'exit-code'.
I was able to fix it by placing my Environmental variables in /etc/systemd/system/gunicorn.service as below
[Service]
Environment=DJANGO_SECRET='my secret key'
Environment=OTHER_SECRET='another secret'
hopefully this saves someone else some time and a lot of googleing
“In an upcoming Tutorial series, we will explore how to containerize and modernize this Django polls app so that it can run in a Kubernetes cluster.” Is it already published or not?
This comment has been deleted
This comment has been deleted
 This work is licensed under a Creative Commons Attribution-NonCommercial- ShareAlike 4.0 International License.
Become a contributor for community
Get paid to write technical tutorials and select a tech-focused charity to receive a matching donation.

DigitalOcean Documentation
Full documentation for every DigitalOcean product.

Resources for startups and AI-native businesses
The Wave has everything you need to know about building a business, from raising funding to marketing your product.
The developer cloud
Scale up as you grow — whether you're running one virtual machine or ten thousand.

Start building today
From GPU-powered inference and Kubernetes to managed databases and storage, get everything you need to build, scale, and deploy intelligent applications.
