By Abdelhadi Dyouri and Brian MacDonald
The author selected the Free and Open Source Fund to receive a donation as part of the Write for DOnations program.
Introduction
Flask is a lightweight Python web framework that provides useful tools and features for creating web applications in the Python Language. SQLAlchemy is an SQL toolkit that provides efficient and high-performing database access for relational databases. It provides ways to interact with several database engines such as SQLite, MySQL, and PostgreSQL. It gives you access to the database’s SQL functionalities. It also gives you an Object Relational Mapper (ORM), which allows you to make queries and handle data using Python objects and methods. Flask-SQLAlchemy is a Flask extension that makes using SQLAlchemy with Flask easier, providing you tools and methods to interact with your database in your Flask applications through SQLAlchemy.
A many-to-many database relationship is a relationship between two database tables where a record in each table can reference several records in the other table. For example, in a blog, a table for posts can have a many-to-many relationship with a table for storing authors. Each post can have many authors, and each author can write many posts. Therefore, there is a many-to-many relationship between posts and authors. For another example, in a social media application, each post may have many hashtags, and each hashtag may have many posts.
In this tutorial, you’ll modify an application built using Flask and Flask-SQLAlchemy by adding a many-to-many relationship to it. You’ll have a relationship between posts and tags, where each blog post can have several tags, and each tag can have multiple posts tagged with it.
Although you can follow this tutorial independently, it is also a continuation of the How to Use One-to-Many Database Relationships with Flask-SQLAlchemy tutorial, in which you build a multi-table database with a one-to-many relationship between posts and comments in a blogging application.
By the end of the tutorial, your application will have a new feature for adding tags to posts. Posts can be tagged with multiple tags, and each tag page will display all the posts tagged with it.
Prerequisites
-
A local Python 3 programming environment. Follow the tutorial for your distribution in How To Install and Set Up a Local Programming Environment for Python 3 series. In this tutorial, we’ll call our project directory
flask_app. -
An understanding of basic Flask concepts, such as routes, view functions, and templates. If you are not familiar with Flask, check out How To Create Your First Web Application Using Flask and Python and How To Use Templates in a Flask Application.
-
An understanding of basic HTML concepts. You can review our How To Build a Website with HTML tutorial series for background knowledge.
-
(Optional) In Step 1, you’ll clone the blogging application you’ll be working on in this tutorial. However, you can optionally work through the tutorial How to Use One-to-Many Database Relationships with Flask-SQLAlchemy. You can access the final code from this page.
Step 1 — Setting Up the Web Application
In this step, you’ll set up the blogging application to be ready for modification. You will also review the Flask-SQLAlchemy database models and the Flask routes to understand the structure of the application. If you followed the tutorial in the prerequisites section and still have the code and the virtual environment on your local machine, you can skip this step.
To demonstrate adding a many-to-many relationship to a Flask web application with Flask-SQLAlchemy, you will use the previous tutorial’s application code, which is a blogging system with the ability to add and display posts, comment on posts, and read and delete existing comments.
Clone the repository and rename it from flask-slqa-bloggy to flask_app with the following command:
- git clone https://github.com/do-community/flask-slqa-bloggy flask_app
Navigate to flask_app:
- cd flask_app
Then create a new virtual environment:
- python -m venv env
Activate the environment:
- source env/bin/activate
Install Flask and Flask-SQLAlchemy:
- pip install Flask Flask-SQLAlchemy
Next, set the following environment variables:
- export FLASK_APP=app
- export FLASK_ENV=development
FLASK_APP indicates the application you are currently developing, which is app.py in this case. FLASK_ENV specifies the mode. You’ll set it to development for development mode; this will allow you to debug the application. Remember not to use this mode in a production environment.
Next, open the Flask shell to create the database tables:
- flask shell
Then import the db Flask-SQLAlchemy database object, the Post model, and the Comment model, and create the database tables using the db.create_all() function:
- from app import db, Post, Comment
- db.create_all()
- exit()
Then populate the database using the init_db.py program:
- python init_db.py
This adds three posts and four comments to the database.
Run the development server:
- flask run
If you go to your browser, you’ll have the application running at the following URL:
http://127.0.0.1:5000/
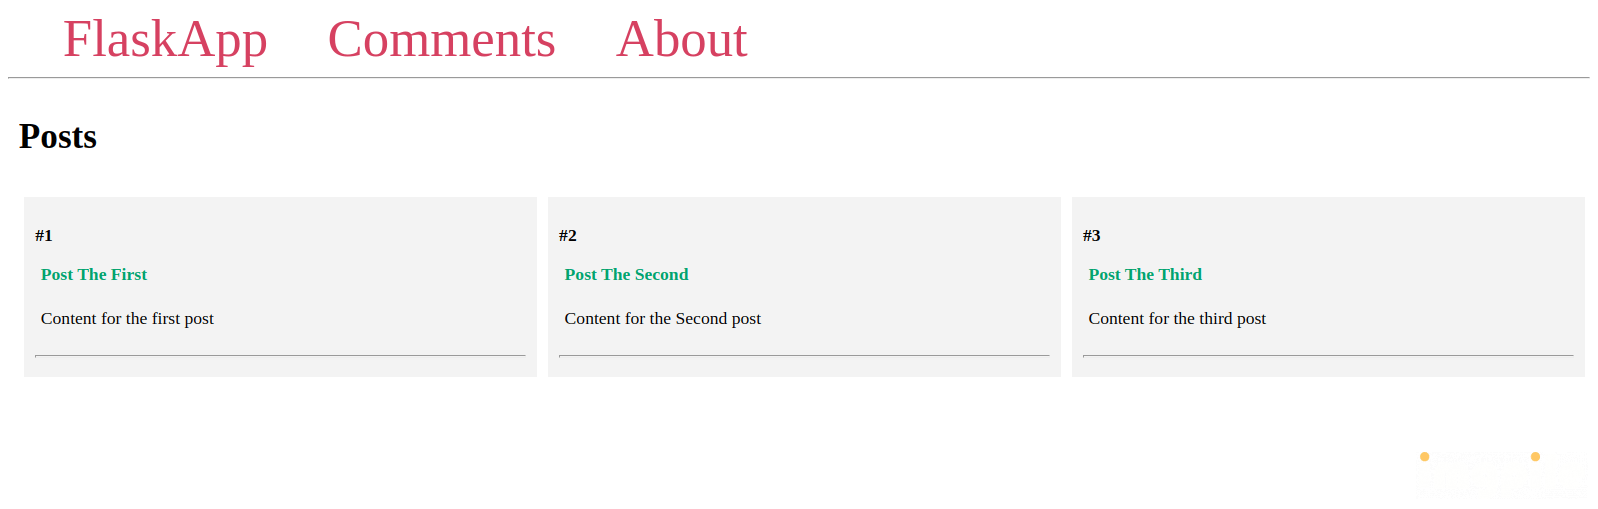
You’ll see a page similar to the following:
If you get an error, make sure you’ve followed the steps above properly.
To stop the development server, use CTRL + C.
Next, you will go through the Flask-SQLAlchemy database models to understand the current relationships between tables. If you are familiar with the contents of the app.py file, you can skip to the next step.
Open the app.py file:
- nano app.py
The file contents are as follows:
import os
from flask import Flask, render_template, request, redirect, url_for
from flask_sqlalchemy import SQLAlchemy

basedir = os.path.abspath(os.path.dirname(__file__))

app = Flask(__name__)
app.config['SQLALCHEMY_DATABASE_URI'] =\
           'sqlite:///' + os.path.join(basedir, 'database.db')
app.config['SQLALCHEMY_TRACK_MODIFICATIONS'] = False


db = SQLAlchemy(app)


class Post(db.Model):
    id = db.Column(db.Integer, primary_key=True)
    title = db.Column(db.String(100))
    content = db.Column(db.Text)
    comments = db.relationship('Comment', backref='post')

    def __repr__(self):
        return f'<Post "{self.title}">'


class Comment(db.Model):
    id = db.Column(db.Integer, primary_key=True)
    content = db.Column(db.Text)
    post_id = db.Column(db.Integer, db.ForeignKey('post.id'))

    def __repr__(self):
        return f'<Comment "{self.content[:20]}...">'


@app.route('/')
def index():
    posts = Post.query.all()
    return render_template('index.html', posts=posts)


@app.route('/<int:post_id>/', methods=('GET', 'POST'))
def post(post_id):
    post = Post.query.get_or_404(post_id)
    if request.method == 'POST':
        comment = Comment(content=request.form['content'], post=post)
        db.session.add(comment)
        db.session.commit()
        return redirect(url_for('post', post_id=post.id))

    return render_template('post.html', post=post)


@app.route('/comments/')
def comments():
    comments = Comment.query.order_by(Comment.id.desc()).all()
    return render_template('comments.html', comments=comments)


@app.post('/comments/<int:comment_id>/delete')
def delete_comment(comment_id):
    comment = Comment.query.get_or_404(comment_id)
    post_id = comment.post.id
    db.session.delete(comment)
    db.session.commit()
    return redirect(url_for('post', post_id=post_id))
Here, you have two database models representing two tables:
-
Post: which has an ID column, a title, content, and a One-to-Many relationship with the comments table. -
Comment: which has an ID column, a column for content, and apost_idcolumn to reference the post the comment belongs to.
Below the models you have the following routes:
/: The index page, which displays all the posts in the database./<int:post_id>/: The individual post page. For example, the linkhttp://127.0.0.1:5000/2/displays the details of the second post in the database and its comments./comments/: A page that displays all the comments in the database and links to the post each comment was posted on./comments/<int:comment_id>/delete: A route that deletes a comment through a Delete Comment button.
Close the app.py file.
In the next step, you will use a many-to-many relationship to create a link between two tables.
Step 2 — Setting up Database Models for a Many-to-Many Relationship
In this step, you’ll add a database model that will represent the tags table. You will link it with the existing posts table using an association table, which is a table that connects your two tables in a many-to-many relationship. A many-to-many relationship links two tables where each item in a table has many related items in the other table. In the association table, each post will reference its tags and each tag references the posts tagged with it. You’ll also insert a few posts and tags into your database, print posts with their tags, and print tags and their related posts.
Let’s say you have a simple table for blog posts as follows:
Posts
+----+-----------------------------------+
| id | content                           |
+----+-----------------------------------+
| 1  | A post on life and death          |
| 2  | A post on joy                     |
+----+-----------------------------------+
And a table for tags like so:
Tags
+----+-------+
| id | name  |
+----+-------+
| 1  | life  |
| 2  | death |
| 3  | joy   |
+----+-------+
Let’s say you want to tag A post on life and death with the life and death tags. You could do this by adding a new row in the posts table like so:
Posts
+----+-----------------------------------+------+
| id | content                           | tags |
+----+-----------------------------------+------+
| 1  | A post on life and death          | 1, 2 |
| 2  | A post on joy                     |      |
+----+------------------------------------------+
This approach doesn’t work, because each column should only have one value. If you have multiple values, basic operations such as adding and updating data become cumbersome and slow. Instead, there should be a third table that references primary keys of related tables—this table is often called an association table or a join table, and it stores IDs of each item from each table.
Here is an example of an association table that links between posts and tags:
post_tag
+----+---------+-------------+
| id | post_id | tag_id      |
+----+---------+-------------+
| 1  | 1       | 1           |
| 2  | 1       | 2           |
+----+---------+-------------+
In the first row, the post with the ID 1 (that is, A post on life and death) relates to the tag with the ID 1 (life). In the second row, the same post also relates to the tag with the ID 2 (death). This means that the post is tagged with both the life and death tags. Similarly, you can tag each post with multiple tags.
Now, you will modify the app.py file to add a new database model that represents the table you’ll be using for storing tags. You’ll also add an association table called post_tag that links posts with tags.
First, open app.py to establish a relationship between posts and tags:
- nano app.py
Add a post_tag table and a Tag model below the db object and above the Post model, then add a tags relationship pseudo-column to the Post model so you can access a post’s tags via post.tags and access a tag’s posts via tag.posts:
# ...

db = SQLAlchemy(app)


post_tag = db.Table('post_tag',
                    db.Column('post_id', db.Integer, db.ForeignKey('post.id')),
                    db.Column('tag_id', db.Integer, db.ForeignKey('tag.id'))
                    )


class Tag(db.Model):
    id = db.Column(db.Integer, primary_key=True)
    name = db.Column(db.String(50))

    def __repr__(self):
        return f'<Tag "{self.name}">'


class Post(db.Model):
    id = db.Column(db.Integer, primary_key=True)
    title = db.Column(db.String(100))
    content = db.Column(db.Text)
    comments = db.relationship('Comment', backref='post')
    tags = db.relationship('Tag', secondary=post_tag, backref='posts')

    def __repr__(self):
        return f'<Post "{self.title}">'
Save and close the file.
Here you use the db.Table() function to create a table with two columns. For association tables, the best practice is to use a table instead of a database model.
The post_tag table has two columns representing two foreign keys, which are keys that are used to reference primary key columns in another table:
post_id: An integer foreign key that represents the post ID and references the ID column in theposttable.tag_id: An integer foreign key that represents the tag ID and references the ID column in thetagtable.
These keys establish the relationships between tables.
Below the post_tag table, you create a Tag model, which represents the table in which you’ll store your tags. This tags table has two columns:
id: The tag’s ID.name: The tag’s name.
You use the tag’s name in the special __repr__() method to give each tag object a clear string representation for debugging purposes.
You add a tags class variable to the Post model. You use the db.relationship() method, passing it the name of the tags model (Tag in this case).
You pass the post_tag association table to the secondary parameter to establish a many-to-many relationship between posts and tags.
You use the backref parameter to add a back reference that behaves like a column to the Tag model. This way, you can access the tag’s posts via tag.posts and the tags of a post via post.tags. You’ll see an example demonstrating this later.
Next, edit the init_db.py Python program to modify the database by adding the post_tag association table and the tags table that will be based on the Tag model:
- nano init_db.py
Edit the file to look as follows:
from app import db, Post, Comment, Tag

db.drop_all()
db.create_all()

post1 = Post(title='Post The First', content='Content for the first post')
post2 = Post(title='Post The Second', content='Content for the Second post')
post3 = Post(title='Post The Third', content='Content for the third post')

comment1 = Comment(content='Comment for the first post', post=post1)
comment2 = Comment(content='Comment for the second post', post=post2)
comment3 = Comment(content='Another comment for the second post', post_id=2)
comment4 = Comment(content='Another comment for the first post', post_id=1)

tag1 = Tag(name='animals')
tag2 = Tag(name='tech')
tag3 = Tag(name='cooking')
tag4 = Tag(name='writing')

post1.tags.append(tag1)  # Tag the first post with 'animals'
post1.tags.append(tag4)  # Tag the first post with 'writing'
post3.tags.append(tag3)  # Tag the third post with 'cooking'
post3.tags.append(tag2)  # Tag the third post with 'tech'
post3.tags.append(tag4)  # Tag the third post with 'writing'


db.session.add_all([post1, post2, post3])
db.session.add_all([comment1, comment2, comment3, comment4])
db.session.add_all([tag1, tag2, tag3, tag4])

db.session.commit()
Save and close the file.
Here, you import the Tag model. You delete everything in the database using the db.drop_all() function to add the tags and post_tag tables safely and to avoid any of the common issues related to adding new tables to a database. Then you create all the tables anew using the db.create_all() function.
After the code from the previous tutorial declaring the posts and comments, you use the Tag model to create four tags.
You then add tags to posts using the tags attribute that was added via the tags = db.relationship('Tag', secondary=post_tag, backref='posts') line in the app.py file. You assign tags to posts using an append() method similar to Python lists.
Next, you add the tags you created to the database session using the db.session.add_all() function.
Note:
The db.create_all() function does not recreate or update a table if it already exists. For example, if you modify your model by adding a new column and run the db.create_all() function, the change you make to the model will not be applied to the table if the table already exists in the database. The solution is to delete all existing database tables with the db.drop_all() function and then recreate them with the db.create_all() function, as demonstrated in the init_db.py file.
This process will apply the modifications you make to your models but will also delete all the existing data in the database. To update the database and preserve existing data, you’ll need to use schema migration, which allows you to modify your tables and preserve data. You can use the Flask-Migrate extension to perform SQLAlchemy schema migrations through the Flask command-line interface.
Run the init_db.py program to apply changes to the database:
- python init_db.py
The program should successfully execute without any output. If you see an error, make sure you made changes properly to the init_db.py file.
To take a look at the posts and tags that are currently in the database, open the Flask shell:
- flask shell
Execute the following Python code that loops through posts and tags:
from app import Post

posts = Post.query.all()

for post in posts:
    print(post.title)
    print(post.tags)
    print('---')
Here, you import the Post model from app.py. You query the posts table and fetch all the posts in the database. You loop through posts, and you print the post title and the list of tags associated with each post.
You’ll get an output similar to the following:
Output
Post The First
[<Tag "animals">, <Tag "writing">]
---
Post The Third
[<Tag "cooking">, <Tag "tech">, <Tag "writing">]
---
Post The Second
[]
---
You can access tag names using tag.name as demonstrated in the following example, which you can run using the Flask shell:
from app import Post

posts = Post.query.all()

for post in posts:
    print('TITLE: ', post.title)
    print('-')
    print('TAGS:')
    for tag in post.tags:
        print('> ', tag.name)
    print('-'*30)
Here, along with printing the post’s title, you also loop through the tags of each post and print the tag name.
You’ll get output similar to the following:
OutputTITLE:  Post The First
-
TAGS:
>  animals
>  writing
------------------------------
TITLE:  Post The Third
-
TAGS:
>  cooking
>  tech
>  writing
------------------------------
TITLE:  Post The Second
-
TAGS:
------------------------------
As you can see, the tags you added to posts in the init_db.py program are properly linked with the posts they were tagged with.
To see a demonstration of how to access posts tagged with a specific tag via tag.posts, run the following code in the Flask shell:
from app import Tag

writing_tag = Tag.query.filter_by(name='writing').first()

for post in writing_tag.posts:
    print(post.title)
    print('-'*6)
    print(post.content)
    print('-')
    print([tag.name for tag in post.tags])
    print('-'*20)
You import the Tag model. Then you use the filter_by() method on the query attribute passing it a name parameter to get the writing tag by its name, and you get the first result using the first() method. You store the tag object in a variable called writing_tag. For more on the filter_by method, see Step 4 of the How To Use Flask-SQLAlchemy to Interact with Databases in a Flask Application tutorial.
You loop through the posts tagged with the writing tag, which you access via writing_tag.posts. You print the post title, content, and a list of tag names you construct using a list comprehension based on the tags of the post, which you access via post.tags.
You’ll get an output similar to the following:
OutputPost The Third
------
Content for the third post
-
['cooking', 'tech', 'writing']
--------------------
Post The First
------
Content for the first post
-
['animals', 'writing']
--------------------
Here you see the two posts that were tagged with the writing tag, and tag names are displayed in a Python list.
You can now access posts and their tags and access posts of a specific tag.
You’ve added a database model that represents the tag table. You linked between posts and tags using an association table, and you inserted a few tags into the database and tagged posts with them. You accessed posts and their tags and the posts of an individual tag. Next, you’ll use the Flask shell to add new posts and new tags and link between tags and posts, and you’ll learn how to remove tags from a post.
Step 3 — Managing Data in a Many-to-Many Relationship
In this step, you’ll use the Flask shell to add new posts to the database, add tags, and link between posts and tags. You’ll access posts with their tags, and you’ll see how to disassociate an item from another in Many-to-Many relationships.
First, with your programming environment activated, open the Flask shell if you haven’t already:
- flask shell
Next, add a few posts and tags:
from app import db, Post, Tag

life_death_post = Post(title='A post on life and death', content='life and death')
joy_post = Post(title='A post on joy', content='joy')

life_tag = Tag(name='life')
death_tag = Tag(name='death')
joy_tag = Tag(name='joy')

life_death_post.tags.append(life_tag)
life_death_post.tags.append(death_tag)
joy_post.tags.append(joy_tag)

db.session.add_all([life_death_post, joy_post, life_tag, death_tag, joy_tag])

db.session.commit()
This creates two posts and three tags. You tag posts with their related tags, and you use the add_all() method to add the newly created items to the database session. Then you commit the changes and apply them to the database using the commit() method.
Next, use the Flask shell to get all the posts and their tags as you’ve done in the previous step:
posts = Post.query.all()

for post in posts:
    print(post.title)
    print(post.tags)
    print('---')
You’ll get an output similar to the following:
Output
Post The First
[<Tag "animals">, <Tag "writing">]
---
Post The Third
[<Tag "cooking">, <Tag "tech">, <Tag "writing">]
---
Post The Second
[]
---
A post on life and death
[<Tag "life">, <Tag "death">]
---
A post on joy
[<Tag "joy">]
---
You can see that posts were added along with their tags.
To demonstrate how to break a relationship between two items in a many to many database relationship, let’s say that the Post The Third post is no longer about cooking, so you’ll have to remove the cooking tag from it.
First, get the post and the tag you want to remove:
- from app import db, Post, Tag
- post = Post.query.filter_by(title='Post The Third').first()
- tag = Tag.query.filter_by(name='cooking').first()
- print(post.title)
- print(post.tags)
- print(tag.posts)
Here you fetch the post titled Post The Third using the filter_by() method. You get the cooking tag. You print the title of the post, its tags, and the posts tagged with the cooking tag.
The filter_by() method returns a query object, and you can use the all() method to get a list of all the results. But because we expect only one result in this case, you use the first() method to get the first (and only) result. For more on the first() and all() methods, check out Step 4 of How to Use Flask-SQLAlchemy to Interact with Databases in a Flask Application.
You’ll get the following output:
Output
Post The Third


[<Tag "cooking">, <Tag "tech">, <Tag "writing">]


[<Post "Post The Third">]
Here you see the post title, the post tags, and a list of the posts tagged with the cooking tag.
To remove the cooking tag from the post, use the remove() method like so:
- post.tags.remove(tag)
- db.session.commit()
- print(post.tags)
- print(tag.posts)
Here you use the remove() method to disassociate the cooking tag from the post. Then you use the db.session.commit() method to apply the changes to the database.
You’ll get an output that confirms that the tag was removed from the post:
Output[<Tag "tech">, <Tag "writing">]

[]
As you can see, the cooking tag is no longer in the post.tags list, and the post has been removed from the tag.posts list.
Exit the flask shell:
- exit()
You’ve added new posts and tags. You tagged posts and you removed tags from posts. Next, you’ll display the tags of each post in your Flask web blog’s index page.
Step 4 — Displaying Tags Under Each Post
In this step, you’ll edit the index template to display tags under each post.
First, take a look at the current homepage page of the Flask web blog.
With your programming environment activated, tell Flask about the application (app.py in this case) using the FLASK_APP environment variable. Then set the FLASK_ENV environment variable to development to run the application in development mode:
- export FLASK_APP=app
- export FLASK_ENV=development
Next, run the application:
- flask run
With the development server running, visit the following URL in your browser:
http://127.0.0.1:5000/
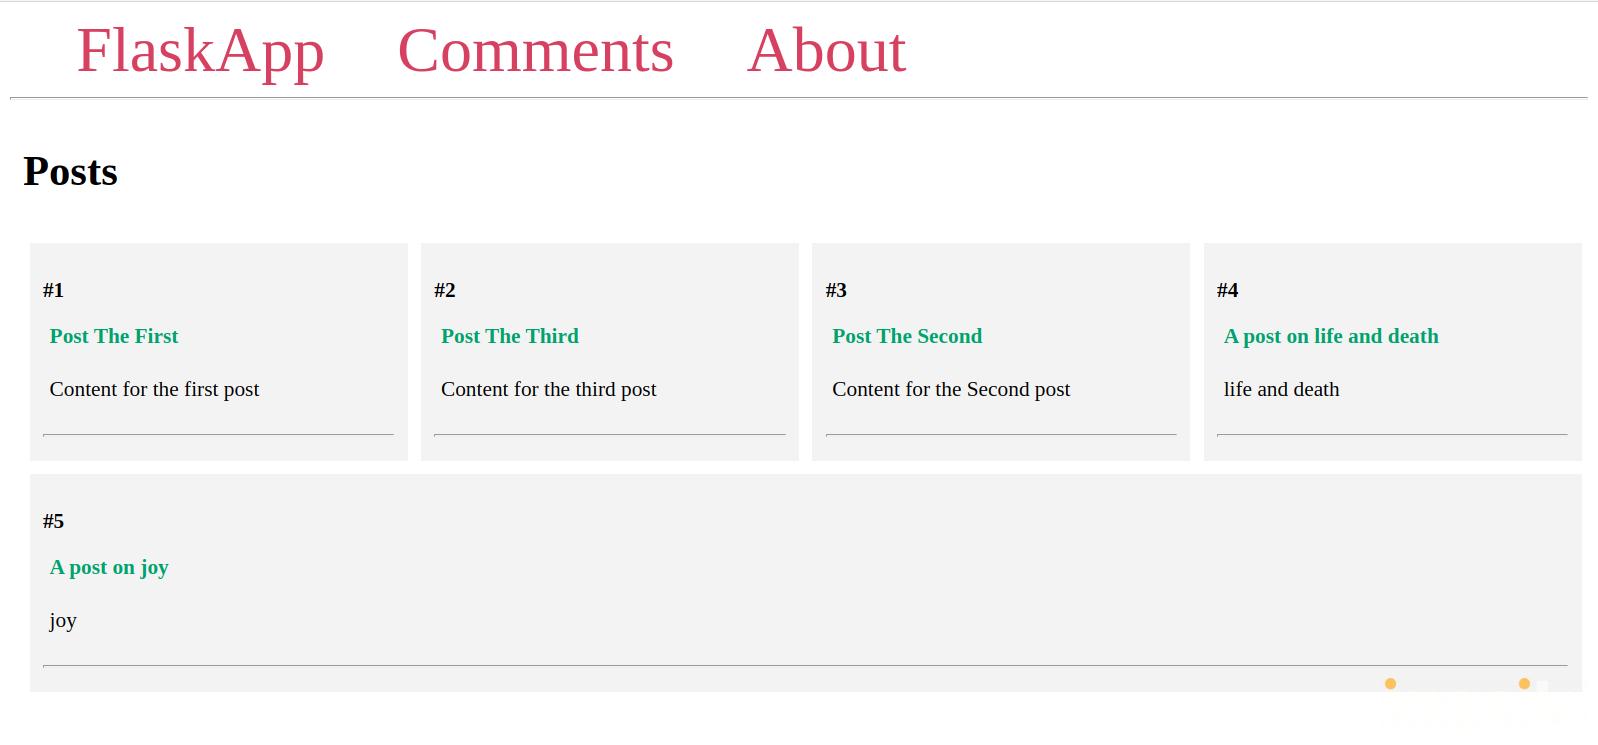
You’ll see a page similar to the following:
Leave the development server running and open a new terminal window.
You’ll need to display the tags of each post on two pages: under each post on the index page and under the post content on the post page. You’ll use the same code to display tags. To avoid code repetition, you will use a Jinja macro, which behaves like a Python function. A macro holds dynamic HTML code that can be displayed wherever you call the macro, and editing it applies changes wherever it has been called, which makes code reusable.
First, open a new file called macros.html in your templates directory:
- nano templates/macros.html
Add the following code to it:
{% macro display_tags(post) %}
    <div class="tags">
        <p>
            <h4>Tags:</h4>
            {% for tag in post.tags %}
                <a href="#" style="text-decoration: none; color: #dd5b5b">
                    {{ tag.name }}
                </a>
                |
            {% endfor %}
        </p>
    </div>
{% endmacro %}
Save and close the file.
Here, you use the macro keyword to declare a macro called display_tags() with a parameter called post. You use a <div> tag, in which you display an <h4> heading. You use a for loop to go through the tags of the post object that will be passed as an argument to the macro when calling it, similar to how an argument is passed in a Python function call. You get tags via post.tags. You display the tag name inside an <a> tag. You will later edit the href attribute’s value to link to a tag page you will create where all posts tagged with a particular tag are displayed. You specify the end of the macro using the endmacro keyword.
Next, to display tags under each post on the index page, open the index.html template file:
- nano templates/index.html
First, you’ll need to import the display_tags() macro from the macros.html file. Add the following import at the top above the {% extends 'base.html' %} line:
{% from 'macros.html' import display_tags %}
{% extends 'base.html' %}
Next, edit the for post in posts loop, by calling the display_tags() macro as follows:
{% for post in posts %}
    <div class="post">
        <p><b>#{{ post.id }}</b></p>
        <b>
            <p class="title">
                <a href="{{ url_for('post', post_id=post.id)}}">
                    {{ post.title }}
                </a>
            </p>
        </b>
        <div class="content">
            <p>{{ post.content }}</p>
        </div>

        {{ display_tags(post) }}

        <hr>
    </div>
{% endfor %}
Save and close the file.
You call the display_tags() macro, passing it the post object. This will display tag names under each post.
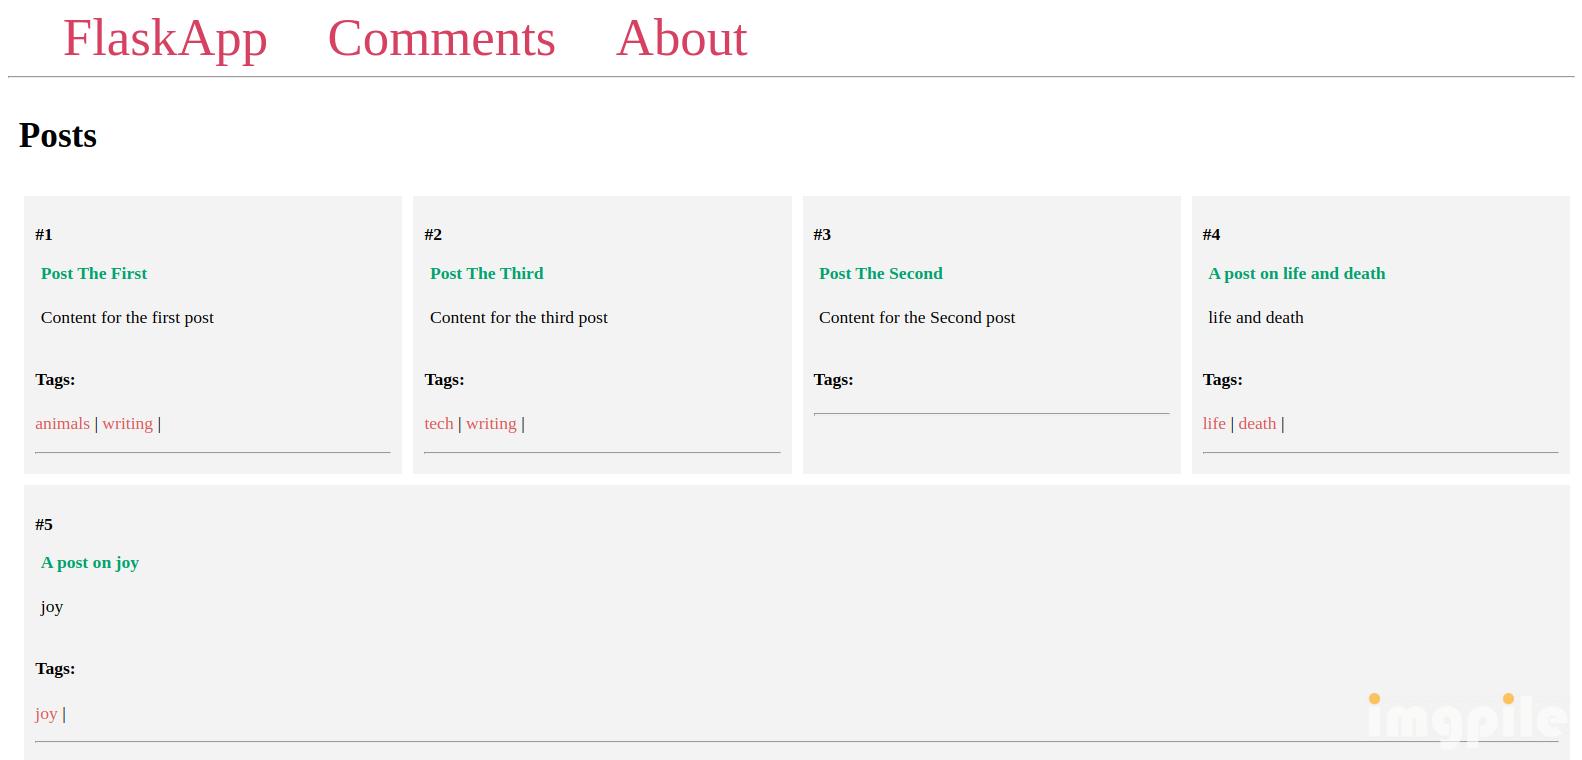
Refresh the index page in your browser and you’ll see tags under each post, as shown in the following image:
Next, you’ll add tags under the post content on the post’s page. Open the post.html template file:
- nano templates/post.html
First, import the display_tags macro at the top:
{% from 'macros.html' import display_tags %}
{% extends 'base.html' %}
Then call the display_tags() macro, passing it the post object below the post content and above the <hr> tag:
<div class="post">
    <p><b>#{{ post.id }}</b></p>
    <b>
        <p class="title">{{ post.title }}</p>
    </b>
    <div class="content">
        <p>{{ post.content }}</p>
    </div>

    {{ display_tags(post) }}

    <hr>
    <h3>Comments</h3>
Save and close the file.
Now, navigate to a post page:
http://127.0.0.1:5000/2
You’ll see that tags are displayed in the same way as the tags displayed on the index page.
You’ve displayed the tags you added to posts under each post. Next, you’ll add a new route to your Flask application that displays all the posts tagged with a specific tag. Then you’ll make the tag links you’ve displayed in this step functional.
Step 5 — Displaying Tags and Their Posts
In this step, you’ll add a route and a template to your web application to display the tags you have in your database and their posts.
First, you’ll add a route for displaying the posts of each tag. For example, the route /tags/tag_name/ will show a page that displays all the posts tagged with a tag named tag_name.
Open app.py for editing:
- nano app.py
Add the following route to the end of the file:
# ...

@app.route('/tags/<tag_name>/')
def tag(tag_name):
    tag = Tag.query.filter_by(name=tag_name).first_or_404()
    return render_template('tag.html', tag=tag)
Save and close the file.
Here you use a URL variable called tag_name that determines the tag and the posts tagged with it that will be displayed on the tag page. The tag name is passed to the tag() view function via the tag_name parameter, which you use on the filter_by() method to query the tag. You use the first_or_404() to get the tag object and store it in a variable called tag, or to respond with a 404 Not Found error message in case no tag with the given name exists in the database.
Then you render a template file called tag.html, passing it the tag object.
Open the new templates/tag.html for editing:
- nano templates/tag.html
Add the following code to it:
{% from 'macros.html' import display_tags %}
{% extends 'base.html' %}

{% block content %}
    <span class="title">
        <h1>{% block title %} Posts Tagged with "{{ tag.name }}" {% endblock %}</h1>
    </span>
    <div class="content">
        {% for post in tag.posts %}
        <div class="post">
            <p><b>#{{ post.id }}</b></p>
            <b>
                <p class="title">
                    <a href="{{ url_for('post', post_id=post.id)}}">
                        {{ post.title }}
                    </a>
                </p>
            </b>
            <div class="content">
                <p>{{ post.content }}</p>
            </div>

            {{ display_tags(post) }}

            <hr>
        </div>
        {% endfor %}
    </div>
{% endblock %}
Save and close the file.
You import the display_tags() macro from macros.html, and extend the base template.
In the content block, you set a heading as a title with the tag name included. You then loop through the posts tagged with the given tag, which you access via tag.posts. You display the post ID, the post title, and the post content. Then you call the display_tags() macro to display all post tags.
With your development server running, navigate to the following URL:
http://127.0.0.1:5000/tags/writing/
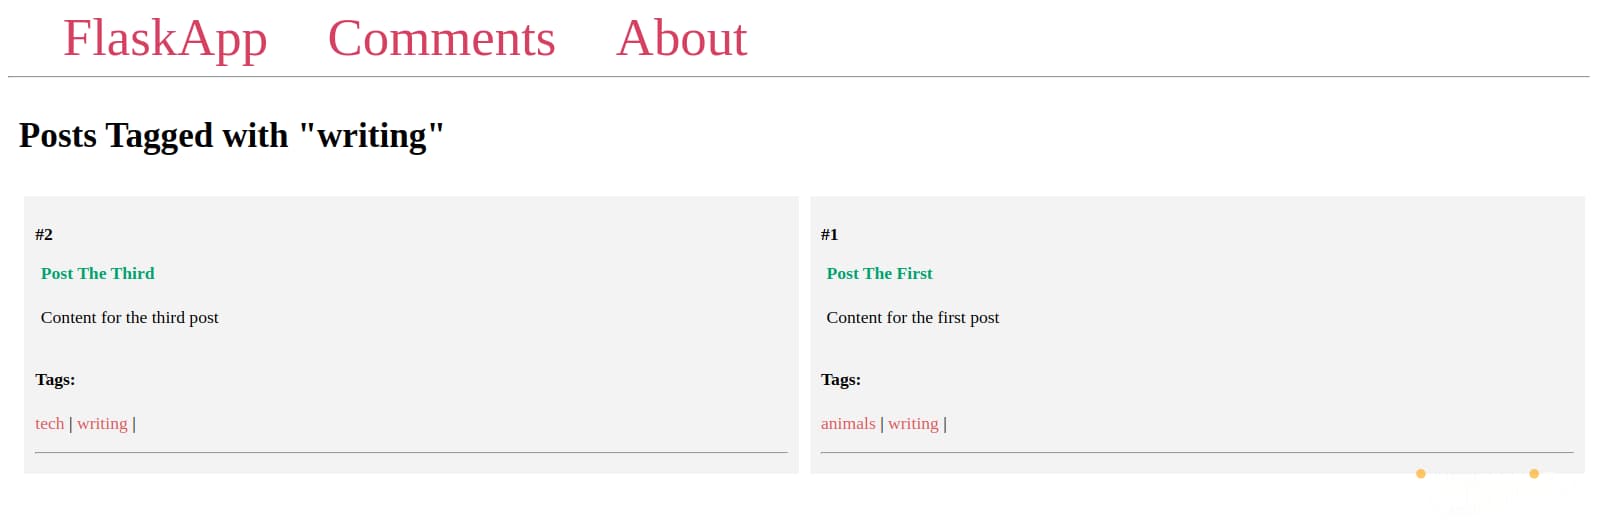
This is the page for the writing tag. As you can see, all the posts that were tagged with writing are displayed:
Now edit the display_tags() macro to make the tag links functional. Open macros.html:
- nano templates/macros.html
Edit the href attribute’s value as follows:
{% macro display_tags(post) %}
    <div class="tags">
        <p>
            <h4>Tags:</h4>
            {% for tag in post.tags %}
            <a href="{{ url_for('tag', tag_name=tag.name) }}"
               style="text-decoration: none; color: #dd5b5b">
                    {{ tag.name }}
                </a>
                |
            {% endfor %}
        </p>
    </div>
{% endmacro %}
Save and close the file.
Refresh the pages where the display_tags() macro has been used, and you’ll see that the tag links are now functional:
http://127.0.0.1:5000/
http://127.0.0.1:5000/2/
http://127.0.0.1:5000/tags/writing/
As you can see, using Jinja macros allows you to reuse code, and editing a macro applies changes across multiple templates.
You’ve added a page for individual tags where users can view all the posts that were tagged with a specific tag, and the tags under posts now link to this new page.
Conclusion
The tags feature that you added to your blogging system demonstrates how to manage many-to-many relationships using the Flask-SQLAlchemy extension. You learned how to link between two related tables using an association table (also called a join table), associate an entry with another, add the entry to the database, and access and disassociate data from an entry.
If you would like to read more about Flask, check out the other tutorials in the How To Build Web Applications with Flask series.
Thanks for learning with the DigitalOcean Community. Check out our offerings for compute, storage, networking, and managed databases.
Tutorial Series: How To Build Web Applications with Flask

Flask is a lightweight Python web framework that provides useful tools and features for creating web applications in the Python Language. It gives developers flexibility and is an accessible framework for new developers because you can build a web application quickly using only a single Python file. Flask is also extensible and doesn’t force a particular directory structure or require complicated boilerplate code before getting started. Learning Flask will allow you to quickly create web applications in Python. You can take advantage of Python libraries to add advanced features to your web application, like storing your data in a database, or validating web forms.
Browse Series: 13 tutorials
About the author(s)
Web developer. I mostly use Python & JavaScript. I like Flask and I am currently learning React. You can say hi on Twitter :)
Editor at DigitalOcean, former book editor at Pragmatic, O'Reilly, and others. Occasional conference speaker. Highly nerdy.
Still looking for an answer?
 This work is licensed under a Creative Commons Attribution-NonCommercial- ShareAlike 4.0 International License.
Become a contributor for community
Get paid to write technical tutorials and select a tech-focused charity to receive a matching donation.

DigitalOcean Documentation
Full documentation for every DigitalOcean product.

Resources for startups and AI-native businesses
The Wave has everything you need to know about building a business, from raising funding to marketing your product.
The developer cloud
Scale up as you grow — whether you're running one virtual machine or ten thousand.

Start building today
From GPU-powered inference and Kubernetes to managed databases and storage, get everything you need to build, scale, and deploy intelligent applications.
