Technical Writer

Introduction
Ruby on Rails, or Rails, provides a web application framework for creating sites and web apps written in the programming language Ruby. Using both Ruby and Rails can get you building and deploying scalable applications quickly.
This tutorial will guide you through spinning up a DigitalOcean Droplet with Ruby on Rails pre-installed using the DigitalOcean Ruby on Rails 1-Click App. After creating your Droplet, you’ll learn about some use cases and common commands. Since this 1-Click Droplet is based on a standard Ubuntu 20.04 Droplet, you can read more of our Ruby tutorials after you finish this guide.
1-Click Deployment
The Ruby on Rails 1-Click comes pre-installed with the following packages on a Ubuntu 20.04 Droplet:
| Package | Version |
|---|---|
| Ruby | 27.2 |
| Rails | 6.0.3.4 |
| Puma | 5.0.2 |
| Postgres | 12.4 |
| Nginx | 1.17.10 |
| Node.js | 12.19.0 |
| Certbot | 0.40.0 |
In addition to the package installation, this 1-Click also handles:
- Enabling UFW firewall that allows access only for SSH (port
22), HTTP (port80), and HTTPS (port442). - Creates a
railssystem user to deploy the application, as well as arailsdatabase user to connect with PostgreSQL. - Configures Ruby to use the installed software and install all Gems and processes locally to your
railsuser. - Configures Nginx to forward requests to the local UNIX socket, serving as a reverse proxy for the application server.
As of this writing, these packages are running on an Ubuntu 20.04 server along with version 7.0.4.2 of Ruby on Rails
Prerequisites
To get your Ruby on Rails 1-Click up and running on your browser, you need a domain name. You can use the DNS quickstart guide to learn how to set one up using DigitalOcean DNS.
Step 1 — Creating a Ruby on Rails Droplet
To create your Ruby on Rails 1-Click Droplet, first locate it in our list of Marketplace Applications and select the Ruby on Rails application. This will take you to the DigitalOcean Control Panel.
To get started creating your Droplet, press the Create Ruby on Rails Droplet button:

If you are not already logged into your DigitalOcean account, you will need to log in to proceed. If you don’t have an account, you will be prompted to sign up.
Next, you’ll be taken to the Create Droplets page. Here you can customize your server settings before creating your Ruby on Rails Droplet. Our documentation on How to Create your First Droplet describes all the choices you need to make in detail, but the following sections discuss key settings to consider.
Choosing an image
Your image will already be set to the Marketplace tab with Ruby on Rails selected. If it’s not set, switch to the Marketplace tab and search for Ruby on Rails in the keyword search box. When properly set, your Control Panel will be similar to the following:
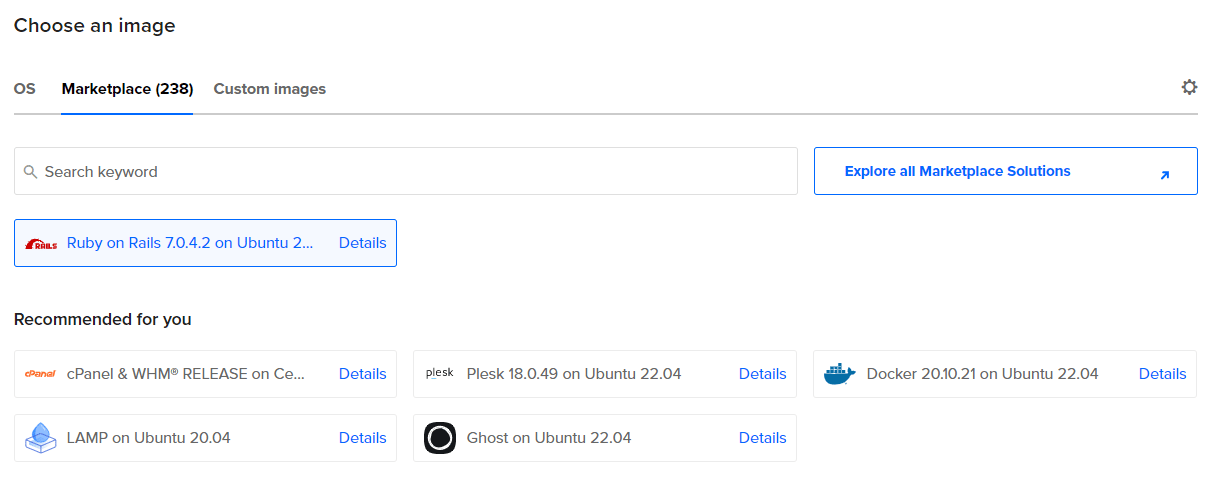
Ruby on Rails 7.0.4.2 on Ubuntu 20.04 is selected. If it’s not already selected, use the search box to search for Ruby on Rails.
Once the Ruby on Rails image is properly selected, you can accept the defaults or adjust settings according to your use case. We typically recommend the following changes:
Choosing a datacenter region
To avoid potential latency, it is recommended that you select a datacenter region closest to your user base. In some regions, we have more than one datacenter. There is no difference between these same region datacenters (e.g., SFO3 and SFO2).
Choosing a plan
Select a plan that works for you. Keep in mind that you can resize your Droplet depending on your needs. To run a Droplet with Ruby on Rails it is recommended to have at least 1GB of RAM.
Choosing an Authentication Method
When choosing an authentication method, the SSH Key option is recommended rather than Password for your Droplet. Authentication using SSH Keys is typically more secure.
Selecting additional options
Adding improved metrics monitoring and alerting to your Droplet helps you follow your Droplet resource usage over time. You may also want to consider enabling automated backups. If you prefer, you can come back later to enable backup functionality on Droplets you’ve already created.
Choosing a hostname
Provide your Droplet with an identifying name that you will remember, such as “Ruby on Rails Droplet 1” or naming it after the application you will be using it for.
After making all your selections, press Create Droplet button at the bottom of the Control Panel screen. Once the Droplet is created, its IP address will be displayed:

This IP address is important for connecting to your Droplet, as well as for any future configuration you may want to do. When you hover over the IP address, you can copy it to your clipboard.
Droplets created through the 1-Click Marketplace also come with additional resources that you can access by pressing the Get started link:

This toggles a new panel, where you can gain additional information that is specific to your chosen 1-Click. This includes an overview, further steps to get started using your Droplet, and links to relevant tutorials from our Community site. There are also useful links for where to get support and find more resources for Ruby on Rails. You can also get support by reviewing the official Ruby on Rails documentation.

Next, you will access your Ruby on Rails Droplet via the terminal using the SSH authentication method you set up earlier.
Step 2 — Accessing the Droplet via SSH to Enable Configuration
Once you’ve spun up your Ruby on Rails Droplet, you’ll need to connect to your Droplet via SSH. That means you’ll connect to the server from the command line. If you haven’t used a terminal program like SSH or PuTTY before, check out How To Connect To Your Droplet with SSH. When you’re ready, open a terminal on your computer and log into your Droplet as root via SSH with the following command, substituting the IP address with your Droplet’s IP address:
- ssh root@your_server_ip
After you log in, the following message of the day (MOTD) will appear with information about the software installed on this application, as well as other features that have been configured for you as listed in the 1-Click Deployment section:
Thank you for using DigitalOcean's Rails Application.

The "ufw" firewall is enabled. All ports except for 22, 80, and 443 are BLOCKED.

Let's Encrypt has been pre-installed for you. If you have a domain name, and
you will be using it with this 1-Click app, please see: https://do.co/2GOFe5J

You can use the following SFTP credentials to upload your files (using FileZilla/WinSCP/Rsync):
  * Host: 24.199.120.116
  * User: rails
  * Pass: cd083867dfdb40970449c422797378c1
If you provided an ssh-key when creating this Droplet, the key should be used for SFTP as well

You can use the following Postgres database credentials:
  * User: rails
  * Pass: a0d8c213e0d797342b1450e4e880180f

Ruby has been configured to use vendored bundles. Please use the 'rails' user to
interact with the default project via "su - rails"

Passwords have been saved in /root/.digitalocean.passwords

Nginx is configured to forward requests for rails to a local unix socket
    Public IP: http://24.199.120.116
    Access Logs: /var/log/nginx/access.log
    Error Logs: /var/log/nginx/error.log

Rails using the Puma server is managed via 'systemd'.
    Proccess management: systemctl {start|stop|restart} rails.service
    systemd Unit file: /etc/systemd/system/rails.service

Ruby information:
    All Gems and processes have been installed locally to the 'rails' user. Please
    'su - rails' to use this environment.

You can learn more about using this image here: https://do.co/2GTOVjB

-------------------------------------------------------------------------------------
To delete this message of the day: rm -rf /etc/update-motd.d/99-one-click
A few other things to note from this message:
- The credentials for your systems and databases user passwords will be available. This information is also saved within the following directory
/root/.digitalocean.passwords. - Your SFTP credentials if you want to upload files using software such as FileZilla, WinSCP, or rsync
- Information about how Rails uses Puma, managed by
systemdto start, stop, restart, or check the status of Puma.
Step 3 — Checking Ruby on Rails in Your Browser
You can check if Ruby on Rails is working by navigating to your IP address or domain information:
http://your_IP_or_domain
Keep in mind you do not need to run any additional binding steps such as rails server --binding=your_IP_or_domain since this is taken care of via the 1-Click installation process.
If successful, you will receive the following page in your browser:
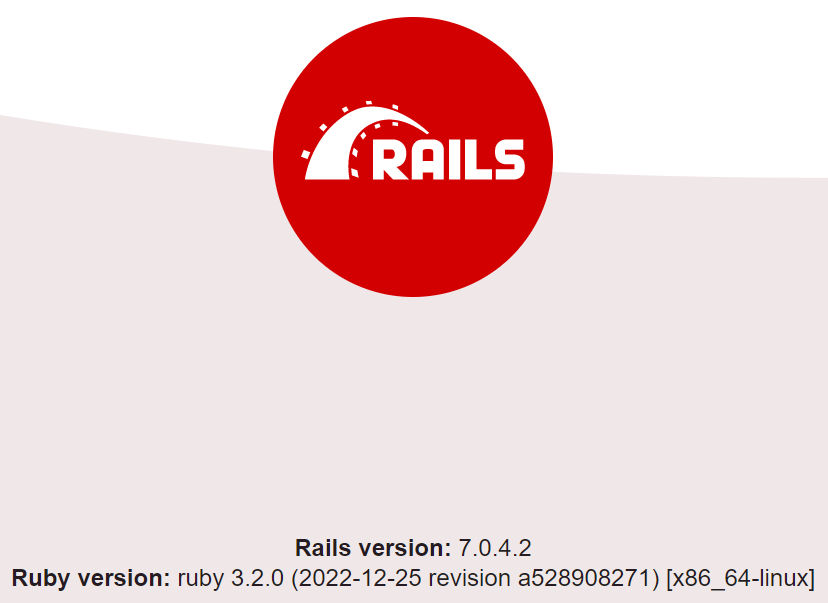
If you receive an error, you may want to check that you have the domain set up correctly per the prerequisites. Additionally, you may want to check if the service is active.
Step 4 — Checking Your Ruby on Rails Service is Active
You can manage your Ruby on Rails service via Puma in various ways. For example, you can check the service status with the following command:
- systemctl status rails.service
● rails.service - ExampleApp
     Loaded: loaded (/etc/systemd/system/rails.service; enabled; vendor preset:>
     Active: active (running) since Tue 2023-01-31 18:29:55 UTC; 37min ago
   Main PID: 2172 (ruby)
      Tasks: 13 (limit: 1116)
     Memory: 143.6M
        CPU: 3.518s
     CGroup: /system.slice/rails.service
             └─2172 "puma 5.6.5 (tcp://0.0.0.0:3000) [example]" "" "" "" "" ""
This output shows that the service is currently active (running). Now that you’ve verified Ruby on Rails is successfully running, next, you can write a basic program using Ruby.
You can explore some of the other process management commands such as the following:
To start the service, run:
- systemctl start rails.service
To stop the service, run:
- systemctl stop rails.service
To restart the service, run:
- systemctl restart rails.service
Conclusion
Your Ruby on Rails 1-Click Droplet is now ready to go. However, you may need to use various functionalities depending on the needs of your project. Here is a list of tutorials to explore all the possibilities which can be done with your pre-installed software for your Ruby on Rails Droplet:
- To start building a Ruby on Rails application, you can learn how to get started with our tutorial on How To Build a Ruby on Rails Application.
- To learn more about the Rails ecosystem, you can read through theproject documentation.
- To set up a robust frontend project with a framework such as React, you can check out our tutorial on How To Set Up a Ruby on Rails Project with a React Frontend.
- To learn about other database options, such as SQLite, read our tutorial on How To Use PostgreSQL with Your Ruby on Rails Application
- To add nested resources to your project, check out our tutorial on How To Create Nested Resources for a Ruby on Rails Application.
- To learn how to write other Ruby programs, you can read our tutorial on How To Write Your First Ruby Program.
Learn more about Ruby and Ruby on Rails by checking out our tutorial series.
Thanks for learning with the DigitalOcean Community. Check out our offerings for compute, storage, networking, and managed databases.
About the author
Educator and writer committed to empowering our community by providing access to the knowledge and tools for making creative ideas into a reality
Still looking for an answer?
This textbox defaults to using Markdown to format your answer.
You can type !ref in this text area to quickly search our full set of tutorials, documentation & marketplace offerings and insert the link!
 This work is licensed under a Creative Commons Attribution-NonCommercial- ShareAlike 4.0 International License.
Become a contributor for community
Get paid to write technical tutorials and select a tech-focused charity to receive a matching donation.

DigitalOcean Documentation
Full documentation for every DigitalOcean product.

Resources for startups and AI-native businesses
The Wave has everything you need to know about building a business, from raising funding to marketing your product.
The developer cloud
Scale up as you grow — whether you're running one virtual machine or ten thousand.

Start building today
From GPU-powered inference and Kubernetes to managed databases and storage, get everything you need to build, scale, and deploy intelligent applications.
