By Chuks Opia and Caitlin Postal
Not using Ubuntu 20.04?
Choose a different version or distribution.
The author selected the Electronic Frontier Foundation to receive a donation as part of the Write for DOnations program.
Introduction
Ruby on Rails is a popular server-side web application framework. It powers many popular applications that exist on the web today, like GitHub, Basecamp, SoundCloud, Airbnb, and Twitch. With its emphasis on programmer experience and the passionate community built around it, Ruby on Rails will give you the tools you need to build and maintain your modern web application.
React is a JavaScript library used to create front-end user interfaces. Backed by Facebook, it is one of the most popular front-end libraries used on the web today. React offers features like a virtual Document Object Model (DOM), component architecture, and state management, which make the process of front-end development more organized and efficient.
With the web’s frontend moving toward frameworks separate from the server-side code, combining the elegance of Rails with the efficiency of React will let you build powerful and modern applications informed by current trends. By using React to render components from within a Rails view (instead of the Rails template engine), your application will benefit from the latest advancements in JavaScript and front-end development while leveraging the expressiveness of Ruby on Rails.
In this tutorial, you will create a Ruby on Rails application that stores your favorite recipes and then displays them with a React frontend. When you are finished, you will be able to create, view, and delete recipes using a React interface styled with Bootstrap:

Prerequisites
To follow this tutorial, you need:
-
Node.js and npm installed on your development machine. This tutorial uses Node.js version 16.14.0 and npm version 8.3.1. Node.js is a JavaScript run-time environment that allows you to run your code outside the browser. It comes with a pre-installed Package Manager called npm, which lets you install and update packages. To install these on Ubuntu 20.04 or macOS, follow the “Installing Using a PPA” section of How To Install Node.js on Ubuntu 20.04 or the steps in How to Install Node.js and Create a Local Development Environment on macOS.
-
The Yarn package manager installed on your development machine, which will allow you to download the React framework. This tutorial was tested on version 1.22.10; to install this dependency, follow the official Yarn installation guide.
-
Ruby on Rails installed. To get this, follow our guide on How to Install Ruby on Rails with rbenv on Ubuntu 20.04. If you would like to develop this application on macOS, you can use How To Install Ruby on Rails with rbenv on macOS. This tutorial was tested on version 3.1.2 of Ruby and version 7.0.4 of Rails, so make sure to specify these versions during the installation process.
Note: Rails version 7 is not backward-compatible. If you are using Rails version 5, please visit the tutorial for How To Set Up a Ruby on Rails v5 Project with a React Frontend on Ubuntu 18.04.
- PostgreSQL installed, as described in Steps 1 and 2 How To Use PostgreSQL with Your Ruby on Rails Application on Ubuntu 20.04 or How To Use PostgreSQL with Your Ruby on Rails Application on macOS. To follow this tutorial, you can use PostgreSQL version 12 or higher. If you want to develop this application on a different distribution of Linux or another OS, see the official PostgreSQL downloads page. For more information on how to use PostgreSQL, see How To Install and Use PostgreSQL.
Step 1 — Creating a New Rails Application
You will build your recipe application on the Rails application framework in this step. First, you’ll create a new Rails application, which will be set up to work with React.
Rails provides several scripts called generators that create everything necessary to build a modern web application. To review a complete list of these commands and what they do, run the following command in your terminal:
- rails -h
This command will yield a comprehensive list of options, allowing you to set your application’s parameters. One of the commands listed is the new command, which creates a new Rails application.
Now, you will create a new Rails application using the new generator. Run the following command in your terminal:
- rails new rails_react_recipe -d postgresql -j esbuild -c bootstrap -T
The preceding command creates a new Rails application in a directory named rails_react_recipe, installs the required Ruby and JavaScript dependencies, and configures Webpack. The flags associated with this new generator command include the following:
- The
-dflag specifies the preferred database engine, which in this case is PostgreSQL. - The
-jflag specifies the application’s JavaScript approach. Rails offers a few different ways to handle Javascript code in Rails applications. Theesbuildoption passed to the-jflag instructs Rails to preconfigure esbuild as the preferred JavaScript bundler. - The
-cflag specifies the application’s CSS processor. Bootstrap is the preferred option in this case. - The
-Tflag instructs Rails to skip the generation of test files since you won’t be writing tests for this tutorial. This command is also suggested if you want to use a Ruby testing tool different from the one Rails provides.
Once the command has finished, move to the rails_react_recipe directory, which is the root directory of your app:
- cd rails_react_recipe
Next, list out the contents of the directory:
- ls
The contents will print similar to this:
OutputGemfile       README.md  bin        db   node_modules  storage  yarn.lock
Gemfile.lock  Rakefile   config     lib  package.json  tmp
Procfile.dev  app        config.ru  log  public        vendor
This root directory has several auto-generated files and folders that make up the structure of a Rails application, including a package.json file containing dependencies for a React application.
Now that you have successfully created a new Rails application, you will hook it up to a database in the next step.
Step 2 — Setting Up the Database
Before you run your new Rails application, you must first connect it to a database. In this step, you’ll connect the newly created Rails application to a PostgreSQL database so that recipe data can be stored and fetched as needed.
The database.yml file found in config/database.yml contains database details like database names for different development environments. Rails specifies a database name for the various development environments by appending an underscore (_) followed by the environment name. In this tutorial, you will use the default database config values, but you can change your config values if necessary.
Note: At this point, you can alter config/database.yml to set which PostgreSQL role you would like Rails to use to create your database. During the prerequisites, you created a role that is secured by a password in the How To Use PostgreSQL with Your Ruby on Rails Application tutorial. If you have not yet set the user, you can now follow the instructions for Step 4 — Configuring and Creating Your Database in the same prerequisite tutorial.
Rails offers many commands that make developing web applications easy, including commands to work with databases such as create, drop, and reset. To create a database for your application, run the following command in your terminal:
- rails db:create
This command creates a development and test database, yielding the following output:
OutputCreated database 'rails_react_recipe_development'
Created database 'rails_react_recipe_test'
Now that the application is connected to a database, start the application by running the following command:
- bin/dev
Rails provides an alternative bin/dev script that starts a Rails application by executing the commands in the Procfile.dev file in the app’s root directory using the Foreman gem.
Once you run this command, your command prompt will disappear, and the following output will print in its place:
Outputstarted with pid 70099
started with pid 70100
started with pid 70101
yarn run v1.22.10
yarn run v1.22.10
$ esbuild app/javascript/*.* --bundle --sourcemap --outdir=app/assets/builds --public-path=assets --watch
$ sass ./app/assets/stylesheets/application.bootstrap.scss:./app/assets/builds/application.css --no-source-map --load-path=node_modules --watch
=> Booting Puma
=> Rails 7.0.4 application starting in development
=> Run `bin/rails server --help` for more startup options
[watch] build finished, watching for changes...
Puma starting in single mode...
* Puma version: 5.6.5 (ruby 3.1.2-p20) ("Birdie's Version")
*  Min threads: 5
*  Max threads: 5
*  Environment: development
*          PID: 70099
* Listening on http://127.0.0.1:3000
* Listening on http://[::1]:3000
Use Ctrl-C to stop
Sass is watching for changes. Press Ctrl-C to stop.
To access your application, open a browser window and navigate to http://localhost:3000. The Rails default welcome page will load, which means that you have correctly set up your Rails application:
To stop the web server, press CTRL+C in the terminal where the server is running. You will get a goodbye message from Puma:
Output^C SIGINT received, starting shutdown
- Gracefully stopping, waiting for requests to finish
=== puma shutdown: 2019-07-31 14:21:24 -0400 ===
- Goodbye!
Exiting
sending SIGTERM to all processes
terminated by SIGINT
terminated by SIGINT
exited with code 0
Your terminal prompt will then reappear.
You have successfully set up a database for your food recipe application. In the next step, you will install the JavaScript dependencies you need to put together your React frontend.
Step 3 — Installing Frontend Dependencies
In this step, you will install the JavaScript dependencies needed on the frontend of your food recipe application. They include:
- React for building user interfaces.
- React DOM to enable React to interact with the browser DOM.
- React Router for handling navigation in a React application.
Run the following command to install these packages with the Yarn package manager:
- yarn add react react-dom react-router-dom
This command uses Yarn to install the specified packages and adds them to the package.json file. To verify this, open the package.json file located in the root directory of the project:
- nano package.json
The installed packages will be listed under the dependencies key:
{
  "name": "app",
  "private": "true",
  "dependencies": {
    "@hotwired/stimulus": "^3.1.0",
    "@hotwired/turbo-rails": "^7.1.3",
    "@popperjs/core": "^2.11.6",
    "bootstrap": "^5.2.1",
    "bootstrap-icons": "^1.9.1",
    "esbuild": "^0.15.7",
    "react": "^18.2.0",
    "react-dom": "^18.2.0",
    "react-router-dom": "^6.3.0",
    "sass": "^1.54.9"
  },
  "scripts": {
    "build": "esbuild app/javascript/*.* --bundle --sourcemap --outdir=app/assets/builds --public-path=assets",
    "build:css": "sass ./app/assets/stylesheets/application.bootstrap.scss:./app/assets/builds/application.css --no-source-map --load-path=node_modules"
  }
}
Close the file by pressing CTRL+X.
You have installed a few front-end dependencies for your application. Next, you’ll set up a homepage for your food recipe application.
Step 4 — Setting Up the Homepage
With the required dependencies installed, you will now create a homepage for the application to serve as the landing page when users first visit the application.
Rails follows the Model-View-Controller architectural pattern for applications. In the MVC pattern, a controller’s purpose is to receive specific requests and pass them along to the appropriate model or view. The application currently displays the Rails welcome page when the root URL is loaded in the browser. To change this, you will create a controller and view for the homepage and then match it to a route.
Rails provides a controller generator for creating a controller. The controller generator receives a controller name and a matching action. For more on this, you can review the Rails documentation.
This tutorial will call the controller Homepage. Run the following command to create a Homepage controller with an index action:
- rails g controller Homepage index
Note:
On Linux, the error FATAL: Listen error: unable to monitor directories for changes. may result from a system limit on the number of files your machine can monitor for changes. Run the following command to fix it:
- echo fs.inotify.max_user_watches=524288 | sudo tee -a /etc/sysctl.conf && sudo sysctl -p
This command will permanently increase the number of directories you can monitor with Listen to 524288. You can change this again by running the same command and replacing 524288 with your desired number.
Running the controller command generates the following files:
- A
homepage_controller.rbfile for receiving all homepage-related requests. This file contains theindexaction you specified in the command. - A
homepage_helper.rbfile for adding helper methods related to theHomepagecontroller. - An
index.html.erbfile as the view page for rendering anything related to the homepage.
Apart from these new pages created by running the Rails command, Rails also updates your routes file located at config/routes.rb, adding a get route for your homepage, which you will modify as your root route.
A root route in Rails specifies what will show up when users visit the root URL of your application. In this case, you want your users to see your homepage. Open the routes file located at config/routes.rb in your favorite editor:
- nano config/routes.rb
In this file, replace get 'homepage/index' with root 'homepage#index' so that the file matches the following:
Rails.application.routes.draw do
  root 'homepage#index'
  # For details on the DSL available within this file, see http://guides.rubyonrails.org/routing.html
end
This modification instructs Rails to map requests to the root of the application to the index action of the Homepage controller, which in turn renders in the browser whatever is in the index.html.erb file located at app/views/homepage/index.html.erb.
Save and close the file.
To verify that this is working, start your application:
- bin/dev
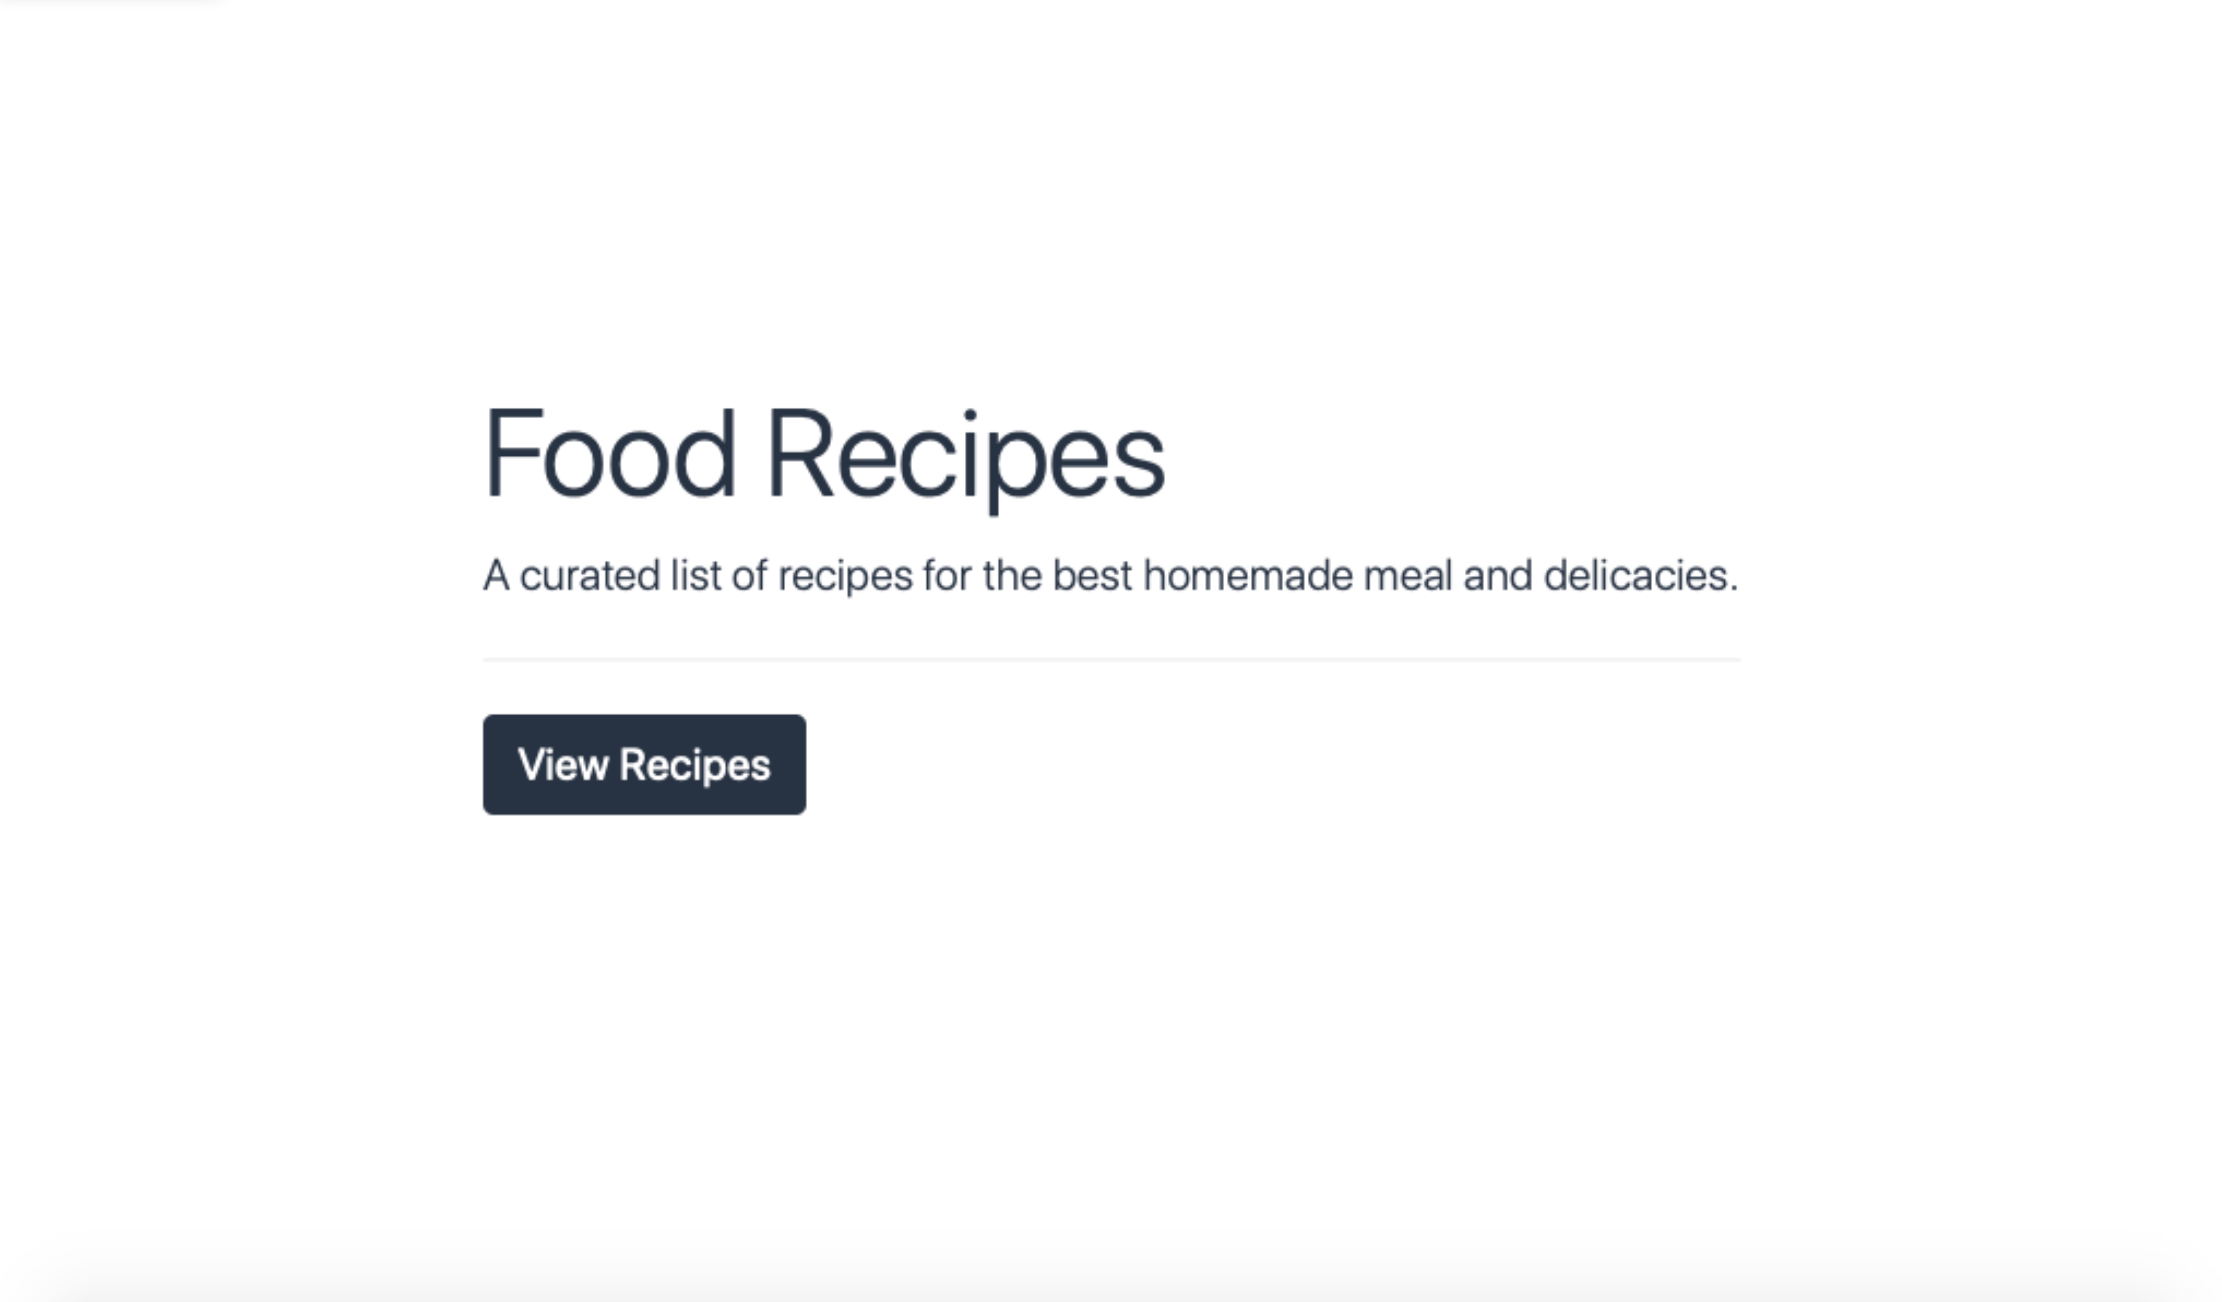
When you open or refresh the application in the browser, a new landing page for your application will load:

Once you have verified that your application is working, press CTRL+C to stop the server.
Next, open the ~/rails_react_recipe/app/views/homepage/index.html.erb file:
- nano ~/rails_react_recipe/app/views/homepage/index.html.erb
Remove the code inside the file, then save the file as empty. By doing this, you ensure that the contents of index.html.erb do not interfere with the React rendering of your frontend.
Now that you have set up your homepage for your application, you can move to the next section, where you will configure the frontend of your application to use React.
Step 5 — Configuring React as Your Rails Frontend
In this step, you will configure Rails to use React on the application’s frontend, instead of its template engine. This new configuration will allow you to create a more visually appealing homepage with React.
With the help of the esbuild option specified when generating the Rails application, most of the setup required to allow JavaScript to work seamlessly with Rails is already in place. All that is left is to load the React app’s entry point into the esbuild entry point for JavaScript files. To do this, start by creating a components directory in the app/javascript directory:
- mkdir ~/rails_react_recipe/app/javascript/components
The components directory will house the component for the homepage, along with other React components in the application, including the entry file into the React application.
Next, open the application.js file located at app/javascript/application.js:
- nano ~/rails_react_recipe/app/javascript/application.js
Add the highlighted line of code to the file:
// Entry point for the build script in your package.json
import "@hotwired/turbo-rails"
import "./controllers"
import * as bootstrap from "bootstrap"
import "./components"
The line of code added to the application.js file will import the code in the entry index.jsx file, making it available to esbuild for bundling. With the /components directory imported into the Rails app’s JavaScript entry point, you can create a React component for your homepage. The homepage will contain some texts and a call to action button to view all recipes.
Save and close the file.
Then, create a Home.jsx file in the components directory:
- nano ~/rails_react_recipe/app/javascript/components/Home.jsx
Add the following code to the file:
import React from "react";
import { Link } from "react-router-dom";

export default () => (
  <div className="vw-100 vh-100 primary-color d-flex align-items-center justify-content-center">
    <div className="jumbotron jumbotron-fluid bg-transparent">
      <div className="container secondary-color">
        <h1 className="display-4">Food Recipes</h1>
        <p className="lead">
          A curated list of recipes for the best homemade meal and delicacies.
        </p>
        <hr className="my-4" />
        <Link
          to="/recipes"
          className="btn btn-lg custom-button"
          role="button"
        >
          View Recipes
        </Link>
      </div>
    </div>
  </div>
);
In this code, you import React and the Link component from React Router. The Link component creates a hyperlink to navigate from one page to another. You then create and export a functional component containing some Markup language for your homepage, styled with Bootstrap classes.
Save and close the file.
With your Home component set, you will now set up routing using React Router. Create a routes directory in the app/javascript directory:
- mkdir ~/rails_react_recipe/app/javascript/routes
The routes directory will contain a few routes with their corresponding components. Whenever any specified route is loaded, it will render its corresponding component to the browser.
In the routes directory, create an index.jsx file:
- nano ~/rails_react_recipe/app/javascript/routes/index.jsx
Add the following code to it:
import React from "react";
import { BrowserRouter as Router, Routes, Route } from "react-router-dom";
import Home from "../components/Home";

export default (
  <Router>
    <Routes>
      <Route path="/" element={<Home />} />
    </Routes>
  </Router>
);
In this index.jsx route file, you import the following modules: the React module that allows you to use React, as well as the BrowserRouter, Routes, and Route modules from React Router, which together help you navigate from one route to another. Lastly, you import your Home component, which will be rendered whenever a request matches the root (/) route. When you want to add more pages to your application, you can declare a route in this file and match it to the component you want to render for that page.
Save and exit the file.
You have now set up routing using React Router. For React to be aware of the available routes and use them, the routes have to be available at the entry point to the application. To achieve this, you will render your routes in a component that React will render in your entry file.
Create an App.jsx file in the app/javascript/components directory:
- nano ~/rails_react_recipe/app/javascript/components/App.jsx
Add the following code into the App.jsx file:
import React from "react";
import Routes from "../routes";

export default props => <>{Routes}</>;
In the App.jsx file, you import React and the route files you just created. You then export a component to render the routes within fragments. This component will render at the application’s entry point, making the routes available whenever the application is loaded.
Save and close the file.
Now that you have your App.jsx set up, you can render it in your entry file. Create an index.jsx file in the components directory:
- nano ~/rails_react_recipe/app/javascript/components/index.jsx
Add the following code to the index.js file:
import React from "react";
import { createRoot } from "react-dom/client";
import App from "./App";

document.addEventListener("turbo:load", () => {
  const root = createRoot(
    document.body.appendChild(document.createElement("div"))
  );
  root.render(<App />);
});
In the import lines, you import the React library, the createRoot function from ReactDOM, and your App component. Using ReactDOM’s createRoot function, you create a root element as a div element appended to the page, and you render your App component in it. When the application is loaded, React will render the content of the App component inside the div element on the page.
Save and exit the file.
Finally, you will add some CSS styles to your homepage.
Open the application.bootstrap.scss file in your ~/rails_react_recipe/app/assets/stylesheets/application.bootstrap.scss directory:
- nano ~/rails_react_recipe/app/assets/stylesheets/application.bootstrap.scss
Next, replace the contents of the application.bootstrap.scss file with the following code:
@import 'bootstrap/scss/bootstrap';
@import 'bootstrap-icons/font/bootstrap-icons';

.bg_primary-color {
  background-color: #FFFFFF;
}
.primary-color {
  background-color: #FFFFFF;
}
.bg_secondary-color {
  background-color: #293241;
}
.secondary-color {
  color: #293241;
}
.custom-button.btn {
  background-color: #293241;
  color: #FFF;
  border: none;
}
.hero {
  width: 100vw;
  height: 50vh;
}
.hero img {
  object-fit: cover;
  object-position: top;
  height: 100%;
  width: 100%;
}
.overlay {
  height: 100%;
  width: 100%;
  opacity: 0.4;
}
You set some custom colors for the page. The .hero section will create the framework for a hero image, or a large web banner on your website’s front page, which you will add later. Additionally, the custom-button.btn styles the button that the user will use to enter the application.
With your CSS styles in place, save and exit the file.
Next, restart the web server for your application:
- bin/dev
Then reload the application in your browser. A brand new homepage will load:
Stop the webserver with CTRL+C.
You configured your application to use React as its frontend in this step. In the next step, you will create models and controllers that enable you to create, read, update, and delete recipes.
Step 6 — Creating the Recipe Controller and Model
Now that you have set up a React frontend for your application, you’ll create a Recipe model and controller. The recipe model will represent the database table containing information about the user’s recipes, while the controller will receive and handle requests to create, read, update, or delete recipes. When a user requests a recipe, the recipe controller receives this request and passes it to the recipe model, which retrieves the requested data from the database. The model then returns the recipe data as a response to the controller. Finally, this information is displayed in the browser.
Start by creating a Recipe model using the generate model subcommand provided by Rails and specifying the model’s name along with its columns and data types. Run the following command:
- rails generate model Recipe name:string ingredients:text instruction:text image:string
The preceding command instructs Rails to create a Recipe model together with a name column of type string, an ingredients and instruction column of type text, and an image column of type string. This tutorial has named the model Recipe, because models in Rails use a singular name while their corresponding database tables use a plural name.
Running the generate model command creates two files and prints the following output:
Output      invoke  active_record
      create    db/migrate/20221017220817_create_recipes.rb
      create    app/models/recipe.rb
The two files created are:
- A
recipe.rbfile that holds all the model-related logic. - A
20221017220817_create_recipes.rbfile (the number at the beginning of the file may differ depending on the date when you run the command). This migration file contains the instruction for creating the database structure.
Next, you will edit the recipe model file to ensure that only valid data is saved to the database. You can achieve this by adding some database validation to your model.
Open your recipe model located at app/models/recipe.rb:
- nano ~/rails_react_recipe/app/models/recipe.rb
Add the following highlighted lines of code to the file:
class Recipe < ApplicationRecord
  validates :name, presence: true
  validates :ingredients, presence: true
  validates :instruction, presence: true
end
In this code, you add model validation, which checks for the presence of name, ingredients, and instruction fields. Without these three fields, a recipe is invalid and won’t be saved to the database.
Save and close the file.
For Rails to create the recipes table in your database, you have to run a migration, which is a way to make changes to your database programmatically. To ensure that the migration works with the database you set up, you must make changes to the 20221017220817_create_recipes.rb file.
Open this file in your editor:
- nano ~/rails_react_recipe/db/migrate/20221017220817_create_recipes.rb
Add the highlighted materials so that your file matches the following:
class CreateRecipes < ActiveRecord::Migration[5.2]
  def change
    create_table :recipes do |t|
      t.string :name, null: false
      t.text :ingredients, null: false
      t.text :instruction, null: false
      t.string :image, default: 'https://raw.githubusercontent.com/do-community/react_rails_recipe/master/app/assets/images/Sammy_Meal.jpg'

      t.timestamps
    end
  end
end
This migration file contains a Ruby class with a change method and a command to create a table called recipes along with the columns and their data types. You also update 20221017220817_create_recipes.rb with a NOT NULL constraint on the name, ingredients, and instruction columns by adding null: false, ensuring that these columns have a value before changing the database. Finally, you add a default image URL for your image column; this could be another URL if you want to use a different image.
With these changes, save and exit the file. You’re now ready to run your migration and create your table. In your terminal, run the following command:
- rails db:migrate
You use the database migrate command to run the instructions in your migration file. Once the command runs successfully, you will receive an output similar to the following:
Output== 20190407161357 CreateRecipes: migrating ====================================
-- create_table(:recipes)
   -> 0.0140s
== 20190407161357 CreateRecipes: migrated (0.0141s) ===========================
With your recipe model in place, you will next create your recipes controller to add the logic for creating, reading, and deleting recipes. Run the following command:
- rails generate controller api/v1/Recipes index create show destroy --skip-template-engine --no-helper
In this command, you create a Recipes controller in an api/v1 directory with an index, create, show, and destroy action. The index action will handle fetching all your recipes; the create action will be responsible for creating new recipes; the show action will fetch a single recipe, and the destroy action will hold the logic for deleting a recipe.
You also pass some flags to make the controller more lightweight, including:
--skip-template-engine, which instructs Rails to skip generating Rails view files since React handles your front-end needs.--no-helper, which instructs Rails to skip generating a helper file for your controller.
Running the command also updates your routes file with a route for each action in the Recipes controller.
When the command runs, it will print an output like this:
Output      create  app/controllers/api/v1/recipes_controller.rb
       route  namespace :api do
                namespace :v1 do
                  get 'recipes/index'
                  get 'recipes/create'
                  get 'recipes/show'
                  get 'recipes/destroy'
                end
              end
To use these routes, you will make changes to your config/routes.rb file. Open up the routes.rb file in your text editor:
- nano ~/rails_react_recipe/config/routes.rb
Update this file to look like the following code, altering or adding the highlighted lines:
Rails.application.routes.draw do
  namespace :api do
    namespace :v1 do
      get 'recipes/index'
      post 'recipes/create'
      get '/show/:id', to: 'recipes#show'
      delete '/destroy/:id', to: 'recipes#destroy'
    end
  end
  root 'homepage#index'
  get '/*path' => 'homepage#index'
  # Define your application routes per the DSL in https://guides.rubyonrails.org/routing.html

  # Defines the root path route ("/")
  # root "articles#index"
end
In this route file, you modify the HTTP verb of the create and destroy routes so that it can post and delete data. You also modify the routes for the show and destroy actions by adding an :id parameter to the route. :id will hold the identification number of the recipe you want to read or delete.
You add a catch-all route with get '/*path' that will direct any other request that doesn’t match the existing routes to the index action of the homepage controller. The front-end routing will handle requests unrelated to creating, reading, or deleting recipes.
Save and exit the file.
To assess a list of routes available in your application, run the following command:
- rails routes
Running this command displays a lengthy list of URI patterns, verbs, and matching controllers or actions for your project.
Next, you will add the logic to get all recipes at once. Rails uses the ActiveRecord library to handle database-related tasks like this. ActiveRecord connects classes to relational database tables and provides a rich API for working with them.
To get all recipes, you’ll use ActiveRecord to query the recipes table and fetch all the recipes in the database.
Open the recipes_controller.rb file with the following command:
- nano ~/rails_react_recipe/app/controllers/api/v1/recipes_controller.rb
Add the highlighted lines to the recipes controller:
class Api::V1::RecipesController < ApplicationController
  def index
    recipe = Recipe.all.order(created_at: :desc)
    render json: recipe
  end

  def create
  end

  def show
  end

  def destroy
  end
end
In your index action, you use ActiveRecord’s all method to get all the recipes in your database. Using the order method, you order them in descending order by their created date, which will place the newest recipes first. Lastly, you send your list of recipes as a JSON response with render.
Next, you will add the logic for creating new recipes. As with fetching all recipes, you’ll rely on ActiveRecord to validate and save the provided recipe details. Update your recipe controller with the following highlighted lines of code:
class Api::V1::RecipesController < ApplicationController
  def index
    recipe = Recipe.all.order(created_at: :desc)
    render json: recipe
  end

  def create
    recipe = Recipe.create!(recipe_params)
    if recipe
      render json: recipe
    else
      render json: recipe.errors
    end
  end

  def show
  end

  def destroy
  end

  private

  def recipe_params
    params.permit(:name, :image, :ingredients, :instruction)
  end
end
In the create action, you use ActiveRecord’s create method to create a new recipe. The create method can assign all controller parameters provided into the model at once. This method makes it easy to create records but opens the possibility of malicious use. Malicious use can be prevented by using the strong parameters feature provided by Rails. This way, parameters can’t be assigned unless they’ve been allowed. You pass a recipe_params parameter to the create method in your code. The recipe_params is a private method where you allow your controller parameters to prevent wrong or malicious content from getting into your database. In this case, you permit a name, image, ingredients, and instruction parameter for valid use of the create method.
Your recipe controller can now read and create recipes. All that’s left is the logic for reading and deleting a single recipe. Update your recipes controller with the highlighted code:
class Api::V1::RecipesController < ApplicationController
  before_action :set_recipe, only: %i[show destroy]

  def index
    recipe = Recipe.all.order(created_at: :desc)
    render json: recipe
  end

  def create
    recipe = Recipe.create!(recipe_params)
    if recipe
      render json: recipe
    else
      render json: recipe.errors
    end
  end

  def show
    render json: @recipe
  end

  def destroy
    @recipe&.destroy
    render json: { message: 'Recipe deleted!' }
  end

  private

  def recipe_params
    params.permit(:name, :image, :ingredients, :instruction)
  end

  def set_recipe
    @recipe = Recipe.find(params[:id])
  end
end
In the new lines of code, you create a private set_recipe method called by a before_action only when the show and delete actions match a request. The set_recipe method uses ActiveRecord’s find method to find a recipe whose id matches the id provided in the params and assigns it to an instance variable @recipe. In the show action, you return the @recipe object set by the set_recipe method as a JSON response.
In the destroy action, you did something similar using Ruby’s safe navigation operator &., which avoids nil errors when calling a method. This addition lets you delete a recipe only if it exists, then send a message as a response.
After making these changes to recipes_controller.rb, save and close the file.
In this step, you created a model and controller for your recipes. You’ve written all the logic needed to work with recipes on the backend. In the next section, you’ll create components to view your recipes.
Step 7 — Viewing Recipes
In this section, you will create components for viewing recipes. You will create two pages: one to view all existing recipes and another to view individual recipes.
You’ll start by creating a page to view all recipes. Before creating the page, you need recipes to work with, as your database is currently empty. Rails provides a way to create seed data for your application.
Open the seed file called seeds.rb for editing:
- nano ~/rails_react_recipe/db/seeds.rb
Replace the initial contents of the seed file with the following code:
9.times do |i|
  Recipe.create(
    name: "Recipe #{i + 1}",
    ingredients: '227g tub clotted cream, 25g butter, 1 tsp cornflour,100g parmesan, grated nutmeg, 250g fresh fettuccine or tagliatelle, snipped chives or chopped parsley to serve (optional)',
    instruction: 'In a medium saucepan, stir the clotted cream, butter, and cornflour over a low-ish heat and bring to a low simmer. Turn off the heat and keep warm.'
  )
end
In this code, you use a loop that instructs Rails to create nine recipes with sections for name, ingredients, and instruction. Save and exit the file.
To seed the database with this data, run the following command in your terminal:
- rails db:seed
Running this command adds nine recipes to your database. Now you can fetch them and render them on the frontend.
The component to view all recipes will make an HTTP request to the index action in the RecipesController to get a list of all recipes. These recipes will then be displayed in cards on the page.
Create a Recipes.jsx file in the app/javascript/components directory:
- nano ~/rails_react_recipe/app/javascript/components/Recipes.jsx
Once the file is open, import the React, useState, useEffect, Link, and useNavigate modules by adding the following lines:
import React, { useState, useEffect } from "react";
import { Link, useNavigate } from "react-router-dom";
Next, add the highlighted lines to create and export a functional React component called Recipes:
import React, { useState, useEffect } from "react";
import { Link, useNavigate } from "react-router-dom";

const Recipes = () => {
  const navigate = useNavigate();
  const [recipes, setRecipes] = useState([]);
};

export default Recipes;
Inside the Recipe component, React Router’s navigation API will call the useNavigate hook. React’s useState hook will initialize the recipes state, which is an empty array ([]), and a setRecipes function for updating the recipes state.
Next, in a useEffect hook, you will make an HTTP request to fetch all of your recipes. To do this, add the highlighted lines:
import React, { useState, useEffect } from "react";
import { Link, useNavigate } from "react-router-dom";

const Recipes = () => {
  const navigate = useNavigate();
  const [recipes, setRecipes] = useState([]);

  useEffect(() => {
    const url = "/api/v1/recipes/index";
    fetch(url)
      .then((res) => {
        if (res.ok) {
          return res.json();
        }
        throw new Error("Network response was not ok.");
      })
      .then((res) => setRecipes(res))
      .catch(() => navigate("/"));
  }, []);
};

export default Recipes;
In your useEffect hook, you make an HTTP call to fetch all recipes using the Fetch API. If the response is successful, the application saves the array of recipes to the recipes state. If an error occurs, it will redirect the user to the homepage.
Finally, return the markup for the elements that will be evaluated and displayed on the browser page when the component is rendered. In this case, the component will render a card of recipes from the recipes state. Add the highlighted lines to Recipes.jsx:
import React, { useState, useEffect } from "react";
import { Link, useNavigate } from "react-router-dom";
const Recipes = () => {
const navigate = useNavigate();
const [recipes, setRecipes] = useState([]);
useEffect(() => {
const url = "/api/v1/recipes/index";
fetch(url)
.then((res) => {
if (res.ok) {
return res.json();
}
throw new Error("Network response was not ok.");
})
.then((res) => setRecipes(res))
.catch(() => navigate("/"));
}, []);
const allRecipes = recipes.map((recipe, index) => (
<div key={index} className="col-md-6 col-lg-4">
<div className="card mb-4">
<img
src={recipe.image}
className="card-img-top"
alt={`${recipe.name} image`}
/>
<div className="card-body">
<h5 className="card-title">{recipe.name}</h5>
<Link to={`/recipe/${recipe.id}`} className="btn custom-button">
View Recipe
</Link>
</div>
</div>
</div>
));
const noRecipe = (
<div className="vw-100 vh-50 d-flex align-items-center justify-content-center">
<h4>
No recipes yet. Why not <Link to="/new_recipe">create one</Link>
</h4>
</div>
);
return (
<>
<section className="jumbotron jumbotron-fluid text-center">
<div className="container py-5">
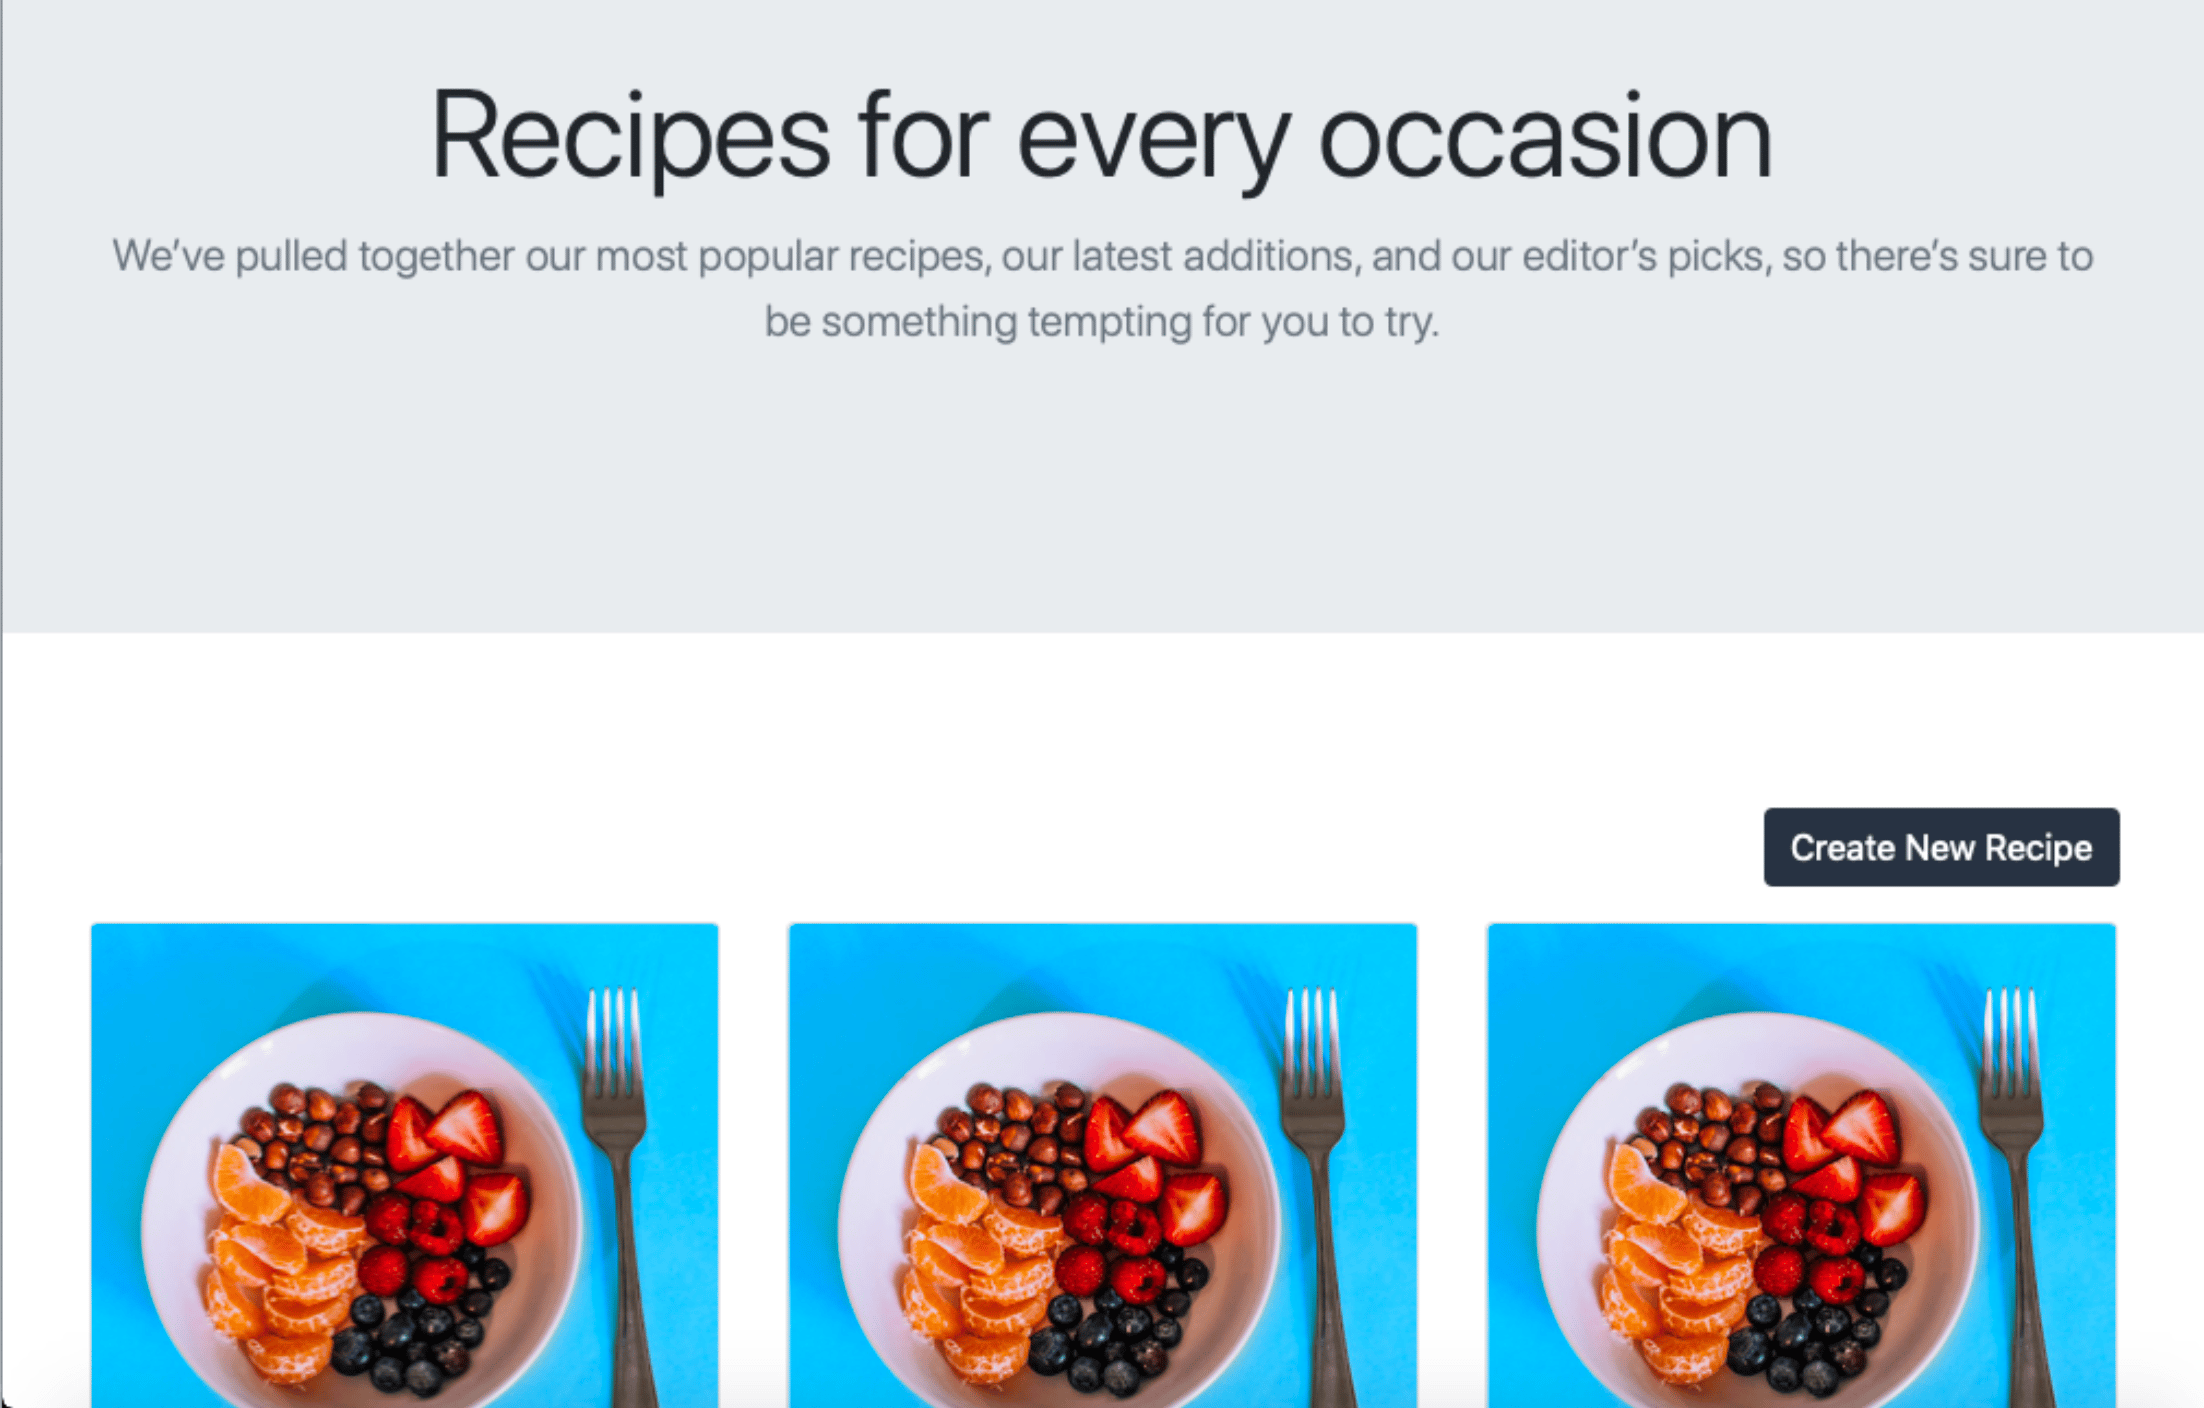
<h1 className="display-4">Recipes for every occasion</h1>
<p className="lead text-muted">
We’ve pulled together our most popular recipes, our latest
additions, and our editor’s picks, so there’s sure to be something
tempting for you to try.
</p>
</div>
</section>
<div className="py-5">
<main className="container">
<div className="text-end mb-3">
<Link to="/recipe" className="btn custom-button">
Create New Recipe
</Link>
</div>
<div className="row">
{recipes.length > 0 ? allRecipes : noRecipe}
</div>
<Link to="/" className="btn btn-link">
Home
</Link>
</main>
</div>
</>
);
};
export default Recipes;
Save and exit Recipes.jsx.
Now that you have created a component to display all the recipes, you will create a route for it. Open the front-end route file app/javascript/routes/index.jsx:
- nano app/javascript/routes/index.jsx
Add the highlighted lines to the file:
import React from "react";
import { BrowserRouter as Router, Routes, Route } from "react-router-dom";
import Home from "../components/Home";
import Recipes from "../components/Recipes";

export default (
  <Router>
    <Routes>
      <Route path="/" exact component={Home} />
      <Route path="/recipes" element={<Recipes />} />
    </Routes>
  </Router>
);
Save and exit the file.
At this point, it’s a good idea to verify that your code is working as expected. As you did before, use the following command to start your server:
- bin/dev
Then open the app in your browser. Press the View Recipe button on the homepage to access a display page with your seed recipes:
Use CTRL+C in your terminal to stop the server and return to your prompt.
Now that you can view all the recipes in your application, it’s time to create a second component to view individual recipes. Create a Recipe.jsx file in the app/javascript/components directory:
- nano app/javascript/components/Recipe.jsx
As with the Recipes component, import the React, useState, useEffect, Link, useNavigate, and useParam modules by adding the following lines:
import React, { useState, useEffect } from "react";
import { Link, useNavigate, useParams } from "react-router-dom";
Next, add the highlighted lines to create and export a functional React component called Recipe:
import React, { useState, useEffect } from "react";
import { Link, useNavigate, useParams } from "react-router-dom";

const Recipe = () => {
  const params = useParams();
  const navigate = useNavigate();
  const [recipe, setRecipe] = useState({ ingredients: "" });
};

export default Recipe;
Like the Recipes component, you initialize the React Router navigation with the useNavigate hook. A recipe state and a setRecipe function will update the state with the useState hook. In addition, you call the useParams hook, which returns an object whose key/value pairs are of URL parameters.
To find a specific recipe, your application needs to know the recipe’s id, which means your Recipe component expects an id param in the URL. You can access this via the params object that holds the return value of the useParams hook.
Next, declare a useEffect hook where you will access the id param from the params object. Once you get the recipe id param, you will make an HTTP request to fetch the recipe. Add the highlighted lines to your file:
import React, { useState, useEffect } from "react";
import { Link, useNavigate, useParams } from "react-router-dom";

const Recipe = () => {
  const params = useParams();
  const navigate = useNavigate();
  const [recipe, setRecipe] = useState({ ingredients: "" });

  useEffect(() => {
    const url = `/api/v1/show/${params.id}`;
    fetch(url)
      .then((response) => {
        if (response.ok) {
          return response.json();
        }
        throw new Error("Network response was not ok.");
      })
      .then((response) => setRecipe(response))
      .catch(() => navigate("/recipes"));
  }, [params.id]);
};

export default Recipe;
In the useEffect hook, you use the params.id value to make a GET HTTP request to fetch the recipe that owns the id and then to save it to the component state using the setRecipe function. The app redirects the user to the recipes page if the recipe does not exist.
Next, add an addHtmlEntities function, which will be used to replace character entities with HTML entities in the component. The addHtmlEntities function will take a string and replace all escaped opening and closing brackets with their HTML entities. This function will help you convert whatever escaped character was saved in your recipe instruction. Add the highlighted lines:
import React, { useState, useEffect } from "react";
import { Link, useNavigate, useParams } from "react-router-dom";
const Recipe = () => {
const params = useParams();
const navigate = useNavigate();
const [recipe, setRecipe] = useState({ ingredients: "" });
useEffect(() => {
const url = `/api/v1/show/${params.id}`;
fetch(url)
.then((response) => {
if (response.ok) {
return response.json();
}
throw new Error("Network response was not ok.");
})
.then((response) => setRecipe(response))
.catch(() => navigate("/recipes"));
}, [params.id]);
const addHtmlEntities = (str) => {
return String(str).replace(/</g, "<").replace(/>/g, ">");
};
};
export default Recipe;
Finally, return the markup to render the recipe in the component state on the page by adding the highlighted lines:
import React, { useState, useEffect } from "react";
import { Link, useNavigate, useParams } from "react-router-dom";
const Recipe = () => {
const params = useParams();
const navigate = useNavigate();
const [recipe, setRecipe] = useState({ ingredients: "" });
useEffect(() => {
const url = `/api/v1/show/${params.id}`;
fetch(url)
.then((response) => {
if (response.ok) {
return response.json();
}
throw new Error("Network response was not ok.");
})
.then((response) => setRecipe(response))
.catch(() => navigate("/recipes"));
}, [params.id]);
const addHtmlEntities = (str) => {
return String(str).replace(/</g, "<").replace(/>/g, ">");
};
const ingredientList = () => {
let ingredientList = "No ingredients available";
if (recipe.ingredients.length > 0) {
ingredientList = recipe.ingredients
.split(",")
.map((ingredient, index) => (
<li key={index} className="list-group-item">
{ingredient}
</li>
));
}
return ingredientList;
};
const recipeInstruction = addHtmlEntities(recipe.instruction);
return (
<div className="">
<div className="hero position-relative d-flex align-items-center justify-content-center">
<img
src={recipe.image}
alt={`${recipe.name} image`}
className="img-fluid position-absolute"
/>
<div className="overlay bg-dark position-absolute" />
<h1 className="display-4 position-relative text-white">
{recipe.name}
</h1>
</div>
<div className="container py-5">
<div className="row">
<div className="col-sm-12 col-lg-3">
<ul className="list-group">
<h5 className="mb-2">Ingredients</h5>
{ingredientList()}
</ul>
</div>
<div className="col-sm-12 col-lg-7">
<h5 className="mb-2">Preparation Instructions</h5>
<div
dangerouslySetInnerHTML={{
__html: `${recipeInstruction}`,
}}
/>
</div>
<div className="col-sm-12 col-lg-2">
<button
type="button"
className="btn btn-danger"
>
Delete Recipe
</button>
</div>
</div>
<Link to="/recipes" className="btn btn-link">
Back to recipes
</Link>
</div>
</div>
);
};
export default Recipe;
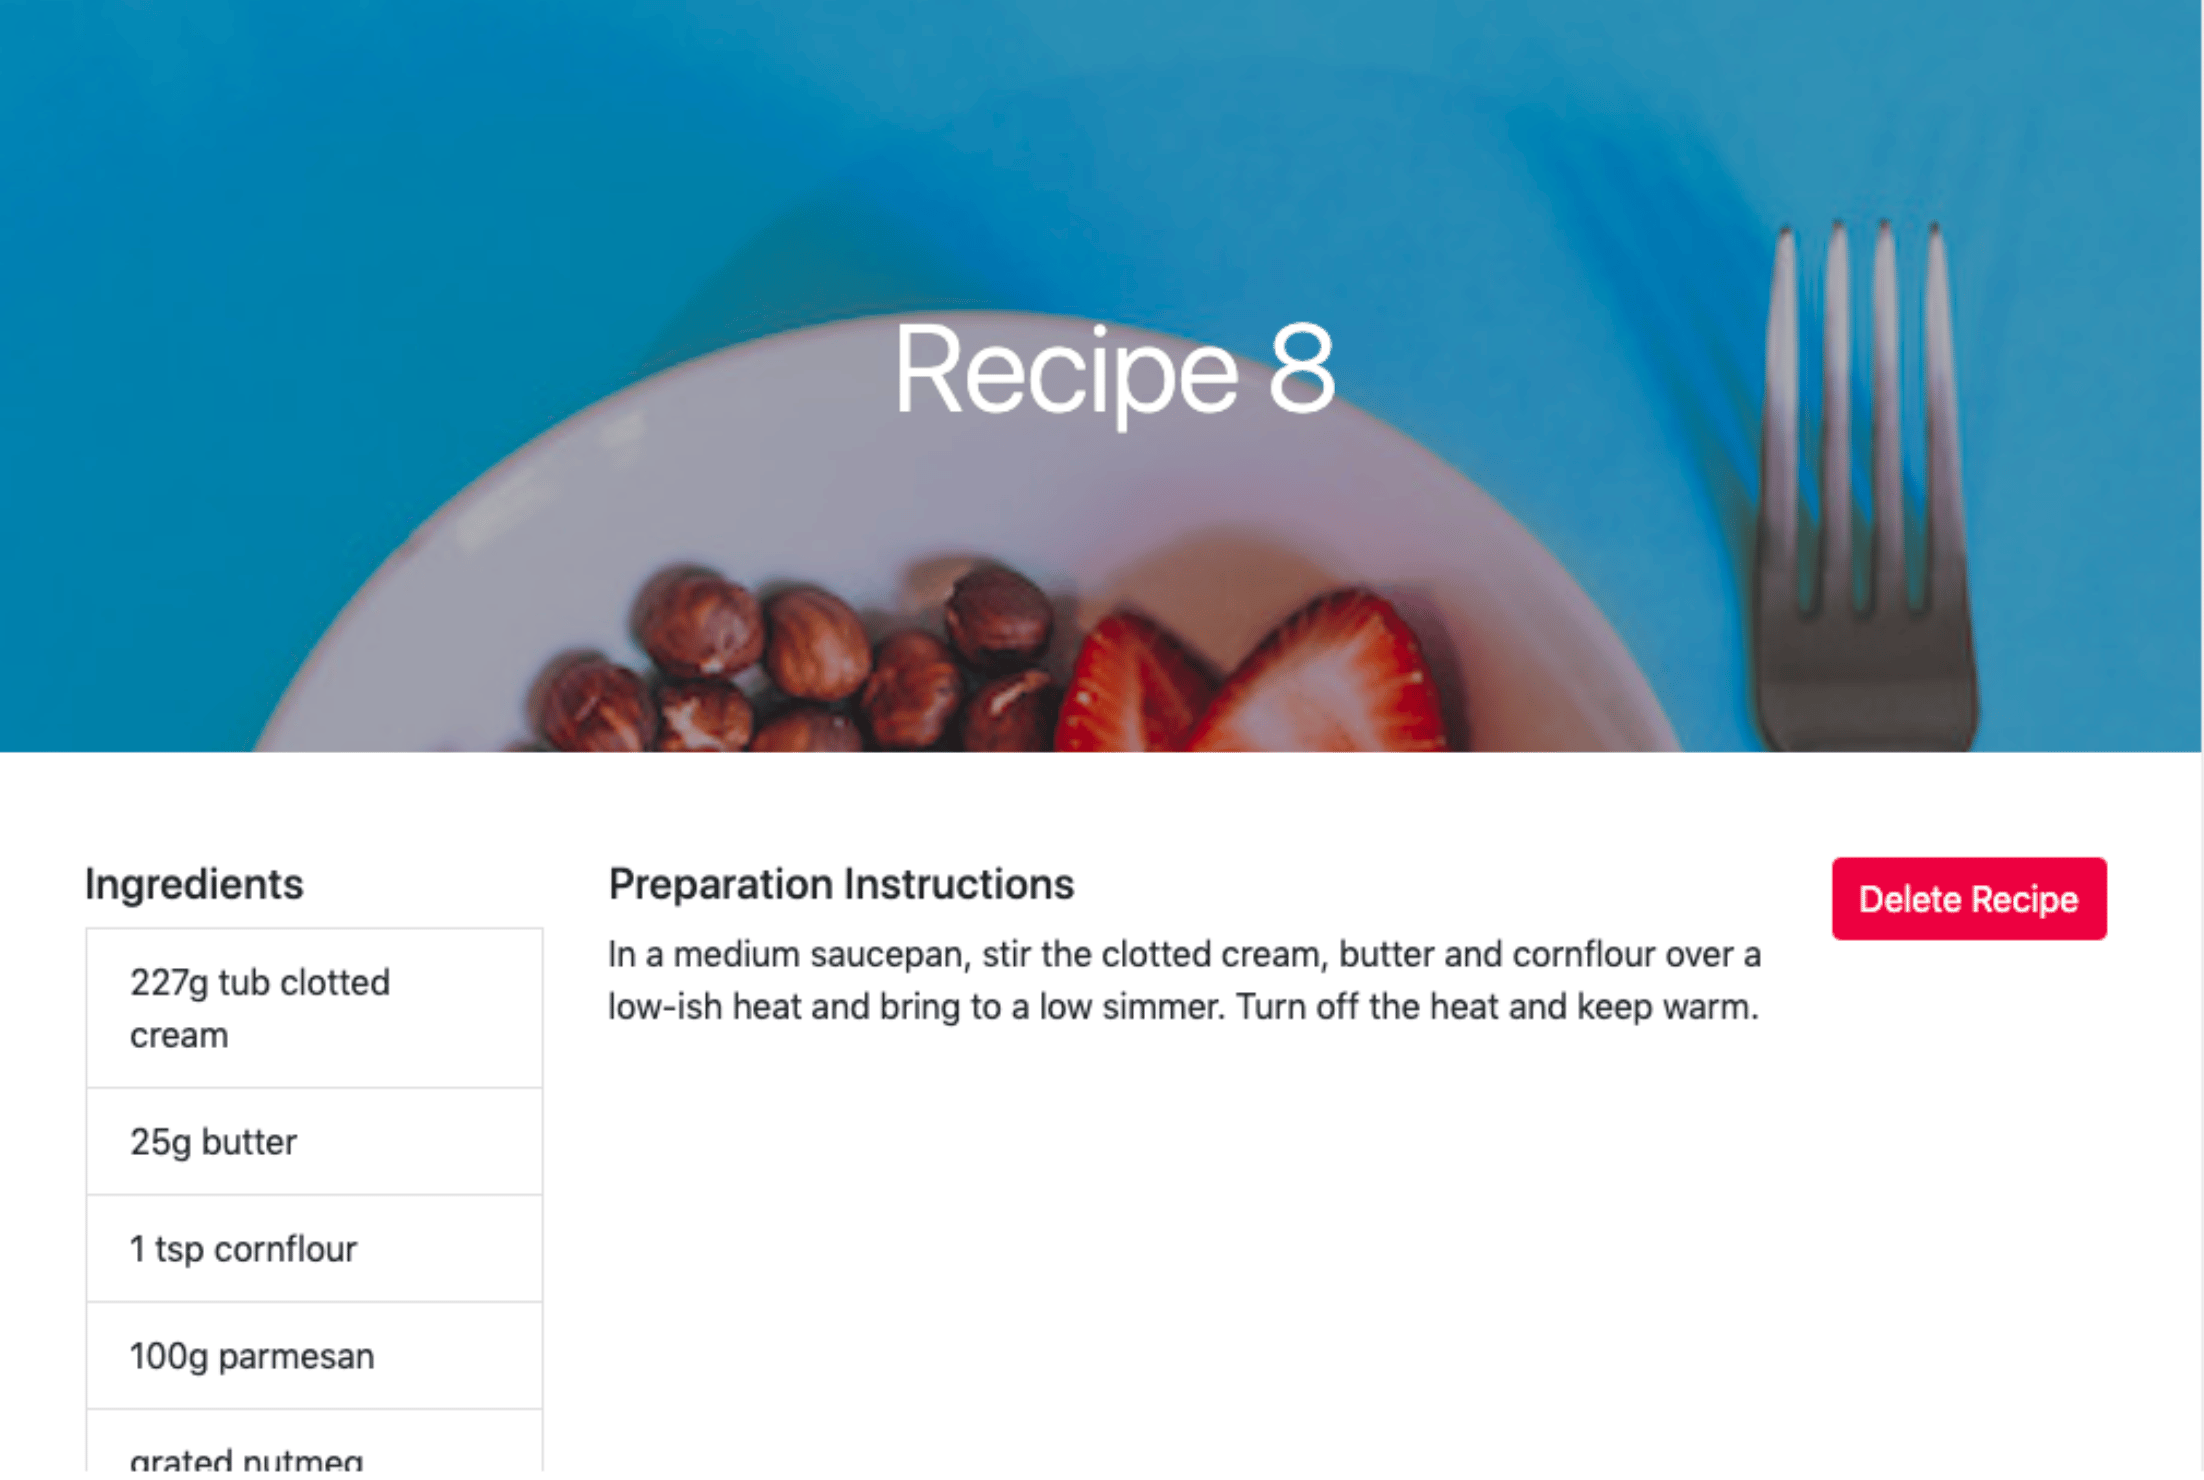
With an ingredientList function, you split your comma-separated recipe ingredients into an array and map over it to create a list of ingredients. If there are no ingredients, the app displays a message that says No ingredients available. You also replace all opening and closing brackets in the recipe instruction by passing it through the addHtmlEntities function. Lastly, the code displays the recipe image as a hero image, adds a Delete Recipe button next to the recipe instruction, and adds a button that links back to the recipes page.
Note: Using React’s dangerouslySetInnerHTML attribute is risky as it exposes your app to cross-site scripting attacks. This risk is reduced by ensuring that special characters entered when creating recipes are replaced using the stripHtmlEntities function declared in the NewRecipe component.
Save and exit the file.
To view the Recipe component on a page, you will add it to your routes file. Open your route file for editing:
- nano app/javascript/routes/index.jsx
Add the following highlighted lines to the file:
import React from "react";
import { BrowserRouter as Router, Routes, Route } from "react-router-dom";
import Home from "../components/Home";
import Recipes from "../components/Recipes";
import Recipe from "../components/Recipe";

export default (
  <Router>
    <Routes>
      <Route path="/" exact component={Home} />
      <Route path="/recipes" exact component={Recipes} />
      <Route path="/recipe/:id" element={<Recipe />} />
    </Routes>
  </Router>
);
You import your Recipe component in this route file and add a route. Its route has an :id param that will be replaced by the id of the recipe you want to view.
Save and close the file.
Use the bin/dev script to start your server again, then visit http://localhost:3000 in your browser. Click the View Recipes button to navigate to the recipes page. On the recipes page, access any recipe by clicking its View Recipe button. You will be greeted with a page populated with the data from your database:
You can stop the server with CTRL+C.
In this step, you added nine recipes to your database and created components to view these recipes, both individually and as a collection. In the next step, you will add a component to create recipes.
Step 8 — Creating Recipes
The next step to having a usable food recipe application is the ability to create new recipes. In this step, you will create a component for this feature. The component will contain a form to collect the required recipe details from the user and then make a request to the create action in the Recipe controller to save the recipe data.
Create a NewRecipe.jsx file in the app/javascript/components directory:
- nano app/javascript/components/NewRecipe.jsx
In the new file, import the React, useState, Link, and useNavigate modules you used in other components:
import React, { useState } from "react";
import { Link, useNavigate } from "react-router-dom";
Next, create and export a functional NewRecipe component by adding the highlighted lines:
import React, { useState } from "react";
import { Link, useNavigate } from "react-router-dom";

const NewRecipe = () => {
  const navigate = useNavigate();
  const [name, setName] = useState("");
  const [ingredients, setIngredients] = useState("");
  const [instruction, setInstruction] = useState("");
};

export default NewRecipe;
As with previous components, you initialize the React router navigation with the useNavigate hook and then use the useState hook to initialize a name, ingredients, and instruction state, each with their respective update functions. These are the fields you will need to create a valid recipe.
Next, create a stripHtmlEntities function that will convert special characters (like <) into their escaped/encoded values (like <), respectively. To do this, add the highlighted lines to the NewRecipe component:
import React, { useState } from "react";
import { Link, useNavigate } from "react-router-dom";
const NewRecipe = () => {
const navigate = useNavigate();
const [name, setName] = useState("");
const [ingredients, setIngredients] = useState("");
const [instruction, setInstruction] = useState("");
const stripHtmlEntities = (str) => {
return String(str)
.replace(/\n/g, "<br> <br>")
.replace(/</g, "<")
.replace(/>/g, ">");
};
};
export default NewRecipe;
In the stripHtmlEntities function, you replace the < and > characters with their escaped values. This way, you won’t store raw HTML in your database.
Next, add the highlighted lines to add the onChange and onSubmit functions to the NewRecipe component to handle editing and submission of the form:
import React, { useState } from "react";
import { Link, useNavigate } from "react-router-dom";
const NewRecipe = () => {
const navigate = useNavigate();
const [name, setName] = useState("");
const [ingredients, setIngredients] = useState("");
const [instruction, setInstruction] = useState("");
const stripHtmlEntities = (str) => {
return String(str)
.replace(/\n/g, "<br> <br>")
.replace(/</g, "<")
.replace(/>/g, ">");
};
const onChange = (event, setFunction) => {
setFunction(event.target.value);
};
const onSubmit = (event) => {
event.preventDefault();
const url = "/api/v1/recipes/create";
if (name.length == 0 || ingredients.length == 0 || instruction.length == 0)
return;
const body = {
name,
ingredients,
instruction: stripHtmlEntities(instruction),
};
const token = document.querySelector('meta[name="csrf-token"]').content;
fetch(url, {
method: "POST",
headers: {
"X-CSRF-Token": token,
"Content-Type": "application/json",
},
body: JSON.stringify(body),
})
.then((response) => {
if (response.ok) {
return response.json();
}
throw new Error("Network response was not ok.");
})
.then((response) => navigate(`/recipe/${response.id}`))
.catch((error) => console.log(error.message));
};
};
export default NewRecipe;
The onChange function accepts the user input event and the state setter function, then it subsequently updates the state with the user input value. In the onSubmit function, you check that none of the required inputs are empty. You then build an object containing the parameters required to create a new recipe. Using the stripHtmlEntities function, you replace the < and > characters in the recipe instruction with their escaped value and replace every new line character with a break tag, thereby retaining the text format entered by the user. Lastly, you make a POST HTTP request to create the new recipe and redirect to its page on a successful response.
To protect against Cross-Site Request Forgery (CSRF) attacks, Rails attaches a CSRF security token to the HTML document. This token is required whenever a non-GET request is made. With the token constant in the preceding code, your application verifies the token on the server and throws an exception if the security token doesn’t match what is expected. In the onSubmit function, the application retrieves the CSRF token embedded in your HTML document by Rails and then makes an HTTP request with a JSON string. If the recipe is successfully created, the application redirects the user to the recipe page where they can view their newly created recipe.
Lastly, return the markup that renders a form for the user to enter the details for the recipe the user wishes to create. Add the highlighted lines:
import React, { useState } from "react";
import { Link, useNavigate } from "react-router-dom";
const NewRecipe = () => {
const navigate = useNavigate();
const [name, setName] = useState("");
const [ingredients, setIngredients] = useState("");
const [instruction, setInstruction] = useState("");
const stripHtmlEntities = (str) => {
return String(str)
.replace(/\n/g, "<br> <br>")
.replace(/</g, "<")
.replace(/>/g, ">");
};
const onChange = (event, setFunction) => {
setFunction(event.target.value);
};
const onSubmit = (event) => {
event.preventDefault();
const url = "/api/v1/recipes/create";
if (name.length == 0 || ingredients.length == 0 || instruction.length == 0)
return;
const body = {
name,
ingredients,
instruction: stripHtmlEntities(instruction),
};
const token = document.querySelector('meta[name="csrf-token"]').content;
fetch(url, {
method: "POST",
headers: {
"X-CSRF-Token": token,
"Content-Type": "application/json",
},
body: JSON.stringify(body),
})
.then((response) => {
if (response.ok) {
return response.json();
}
throw new Error("Network response was not ok.");
})
.then((response) => navigate(`/recipe/${response.id}`))
.catch((error) => console.log(error.message));
};
return (
<div className="container mt-5">
<div className="row">
<div className="col-sm-12 col-lg-6 offset-lg-3">
<h1 className="font-weight-normal mb-5">
Add a new recipe to our awesome recipe collection.
</h1>
<form onSubmit={onSubmit}>
<div className="form-group">
<label htmlFor="recipeName">Recipe name</label>
<input
type="text"
name="name"
id="recipeName"
className="form-control"
required
onChange={(event) => onChange(event, setName)}
/>
</div>
<div className="form-group">
<label htmlFor="recipeIngredients">Ingredients</label>
<input
type="text"
name="ingredients"
id="recipeIngredients"
className="form-control"
required
onChange={(event) => onChange(event, setIngredients)}
/>
<small id="ingredientsHelp" className="form-text text-muted">
Separate each ingredient with a comma.
</small>
</div>
<label htmlFor="instruction">Preparation Instructions</label>
<textarea
className="form-control"
id="instruction"
name="instruction"
rows="5"
required
onChange={(event) => onChange(event, setInstruction)}
/>
<button type="submit" className="btn custom-button mt-3">
Create Recipe
</button>
<Link to="/recipes" className="btn btn-link mt-3">
Back to recipes
</Link>
</form>
</div>
</div>
</div>
);
};
export default NewRecipe;
The returned markup includes a form that contains three input fields; one each for the recipeName, recipeIngredients, and instruction. Each input field has an onChange event handler that calls the onChange function. An onSubmit event handler is also attached to the submit button and calls the onSubmit function that submits the form data.
Save and exit the file.
To access this component in the browser, update your route file with its route:
- nano app/javascript/routes/index.jsx
Update your route file to include these highlighted lines:
import React from "react";
import { BrowserRouter as Router, Routes, Route } from "react-router-dom";
import Home from "../components/Home";
import Recipes from "../components/Recipes";
import Recipe from "../components/Recipe";
import NewRecipe from "../components/NewRecipe";

export default (
  <Router>
    <Routes>
      <Route path="/" exact component={Home} />
      <Route path="/recipes" exact component={Recipes} />
      <Route path="/recipe/:id" exact component={Recipe} />
      <Route path="/recipe" element={<NewRecipe />} />
    </Routes>
  </Router>
);
With the route in place, save and exit your file.
Restart your development server and visit http://localhost:3000 in your browser. Navigate to the recipes page and click the Create New Recipe button. You will find a page with a form to add recipes to your database:
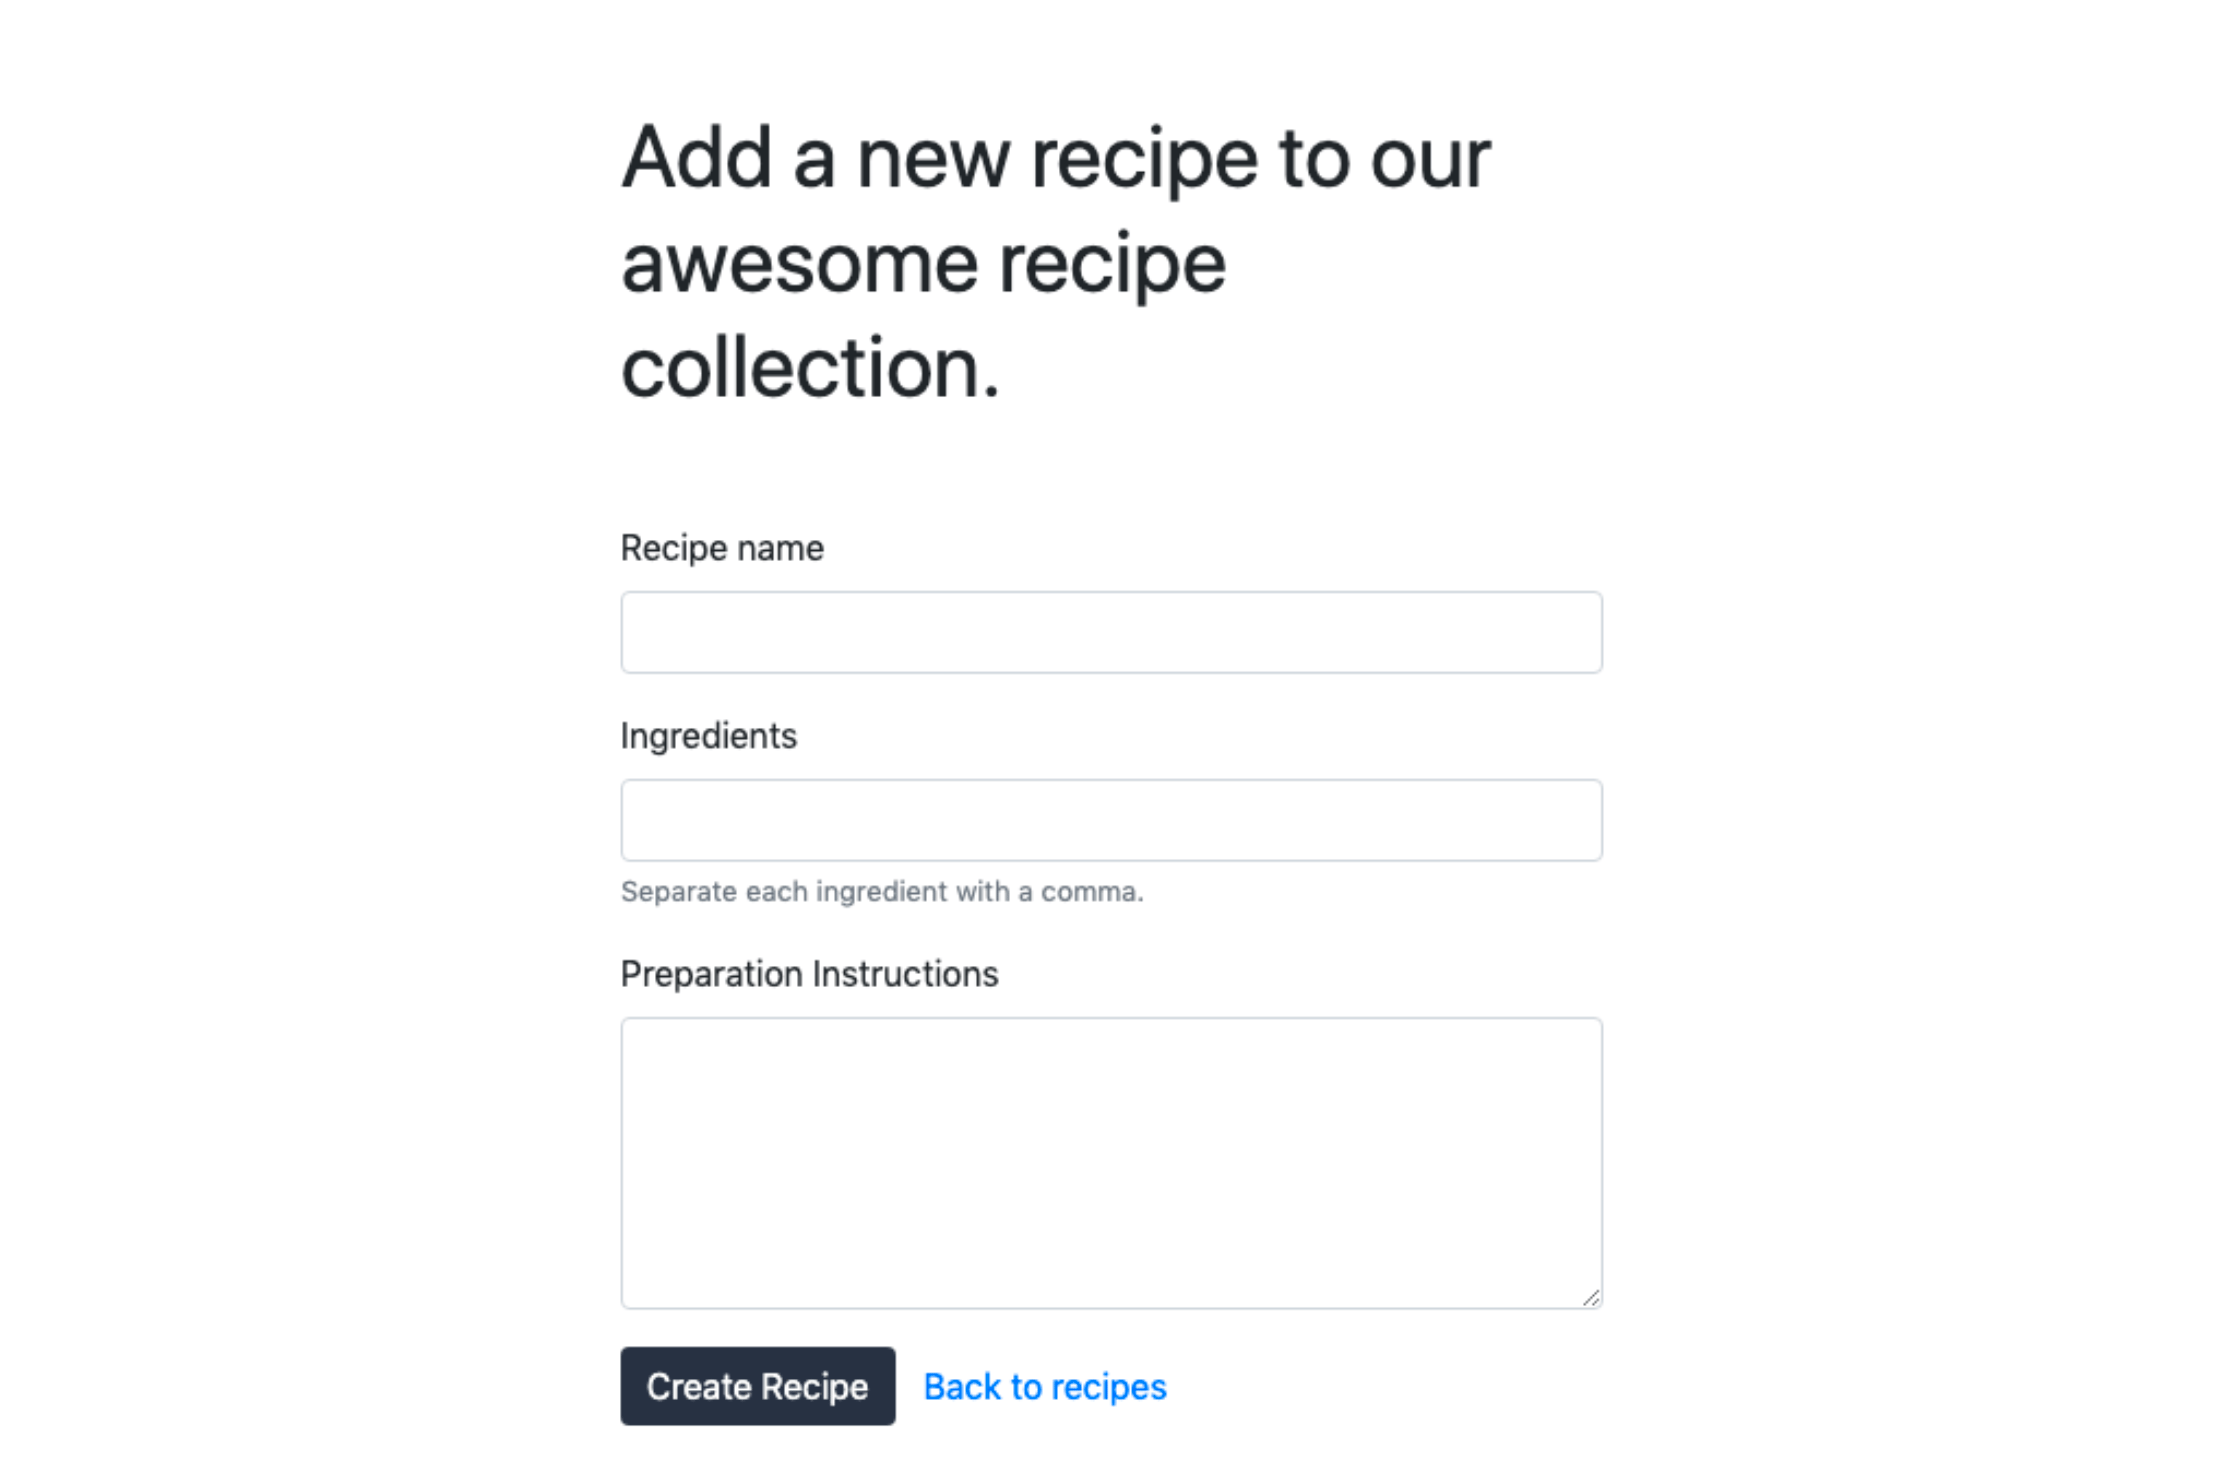
Enter the required recipe details and click the Create Recipe button. The newly created recipe will then appear on the page. When ready, close the server.
In this step, you added the ability to create recipes to your food recipe application. In the next step, you’ll add the functionality to delete recipes.
Step 9 — Deleting Recipes
In this section, you will modify your Recipe component to include an option for deleting recipes. When you click the delete button on the recipe page, the application will send a request to delete a recipe from the database.
First, open your Recipe.jsx file for editing:
- nano app/javascript/components/Recipe.jsx
In the Recipe component, add a deleteRecipe function with the highlighted lines:
import React, { useState, useEffect } from "react";
import { Link, useNavigate, useParams } from "react-router-dom";
const Recipe = () => {
const params = useParams();
const navigate = useNavigate();
const [recipe, setRecipe] = useState({ ingredients: "" });
useEffect(() => {
const url = `/api/v1/show/${params.id}`;
fetch(url)
.then((response) => {
if (response.ok) {
return response.json();
}
throw new Error("Network response was not ok.");
})
.then((response) => setRecipe(response))
.catch(() => navigate("/recipes"));
}, [params.id]);
const addHtmlEntities = (str) => {
return String(str).replace(/</g, "<").replace(/>/g, ">");
};
const deleteRecipe = () => {
const url = `/api/v1/destroy/${params.id}`;
const token = document.querySelector('meta[name="csrf-token"]').content;
fetch(url, {
method: "DELETE",
headers: {
"X-CSRF-Token": token,
"Content-Type": "application/json",
},
})
.then((response) => {
if (response.ok) {
return response.json();
}
throw new Error("Network response was not ok.");
})
.then(() => navigate("/recipes"))
.catch((error) => console.log(error.message));
};
const ingredientList = () => {
let ingredientList = "No ingredients available";
if (recipe.ingredients.length > 0) {
ingredientList = recipe.ingredients
.split(",")
.map((ingredient, index) => (
<li key={index} className="list-group-item">
{ingredient}
</li>
));
}
return ingredientList;
};
const recipeInstruction = addHtmlEntities(recipe.instruction);
return (
<div className="">
...
In the deleteRecipe function, you get the id of the recipe to be deleted, then build your URL and grab the CSRF token. Next, you make a DELETE request to the Recipes controller to delete the recipe. The application redirects the user to the recipes page if the recipe is successfully deleted.
To run the code in the deleteRecipe function whenever the delete button is clicked, pass it as the click event handler to the button. Add an onClick event to the delete button element in the component:
...
return (
    <div className="">
      <div className="hero position-relative d-flex align-items-center justify-content-center">
        <img
          src={recipe.image}
          alt={`${recipe.name} image`}
          className="img-fluid position-absolute"
        />
        <div className="overlay bg-dark position-absolute" />
        <h1 className="display-4 position-relative text-white">
          {recipe.name}
        </h1>
      </div>
      <div className="container py-5">
        <div className="row">
          <div className="col-sm-12 col-lg-3">
            <ul className="list-group">
              <h5 className="mb-2">Ingredients</h5>
              {ingredientList()}
            </ul>
          </div>
          <div className="col-sm-12 col-lg-7">
            <h5 className="mb-2">Preparation Instructions</h5>
            <div
              dangerouslySetInnerHTML={{
                __html: `${recipeInstruction}`,
              }}
            />
          </div>
          <div className="col-sm-12 col-lg-2">
            <button
              type="button"
              className="btn btn-danger"
              onClick={deleteRecipe}
            >
              Delete Recipe
            </button>
          </div>
        </div>
        <Link to="/recipes" className="btn btn-link">
          Back to recipes
        </Link>
      </div>
    </div>
  );
...
At this point in the tutorial, your complete Recipe.jsx file should match this file:
import React, { useState, useEffect } from "react";
import { Link, useNavigate, useParams } from "react-router-dom";
const Recipe = () => {
const params = useParams();
const navigate = useNavigate();
const [recipe, setRecipe] = useState({ ingredients: "" });
useEffect(() => {
const url = `/api/v1/show/${params.id}`;
fetch(url)
.then((response) => {
if (response.ok) {
return response.json();
}
throw new Error("Network response was not ok.");
})
.then((response) => setRecipe(response))
.catch(() => navigate("/recipes"));
}, [params.id]);
const addHtmlEntities = (str) => {
return String(str).replace(/</g, "<").replace(/>/g, ">");
};
const deleteRecipe = () => {
const url = `/api/v1/destroy/${params.id}`;
const token = document.querySelector('meta[name="csrf-token"]').content;
fetch(url, {
method: "DELETE",
headers: {
"X-CSRF-Token": token,
"Content-Type": "application/json",
},
})
.then((response) => {
if (response.ok) {
return response.json();
}
throw new Error("Network response was not ok.");
})
.then(() => navigate("/recipes"))
.catch((error) => console.log(error.message));
};
const ingredientList = () => {
let ingredientList = "No ingredients available";
if (recipe.ingredients.length > 0) {
ingredientList = recipe.ingredients
.split(",")
.map((ingredient, index) => (
<li key={index} className="list-group-item">
{ingredient}
</li>
));
}
return ingredientList;
};
const recipeInstruction = addHtmlEntities(recipe.instruction);
return (
<div className="">
<div className="hero position-relative d-flex align-items-center justify-content-center">
<img
src={recipe.image}
alt={`${recipe.name} image`}
className="img-fluid position-absolute"
/>
<div className="overlay bg-dark position-absolute" />
<h1 className="display-4 position-relative text-white">
{recipe.name}
</h1>
</div>
<div className="container py-5">
<div className="row">
<div className="col-sm-12 col-lg-3">
<ul className="list-group">
<h5 className="mb-2">Ingredients</h5>
{ingredientList()}
</ul>
</div>
<div className="col-sm-12 col-lg-7">
<h5 className="mb-2">Preparation Instructions</h5>
<div
dangerouslySetInnerHTML={{
__html: `${recipeInstruction}`,
}}
/>
</div>
<div className="col-sm-12 col-lg-2">
<button
type="button"
className="btn btn-danger"
onClick={deleteRecipe}
>
Delete Recipe
</button>
</div>
</div>
<Link to="/recipes" className="btn btn-link">
Back to recipes
</Link>
</div>
</div>
);
};
export default Recipe;
Save and exit the file.
Restart the application server and navigate to the homepage. Click the View Recipes button to access all existing recipes, then open any particular recipe and click the Delete Recipe button on the page to delete the article. You will be redirected to the recipes page, and the deleted recipe will no longer exist.
With the delete button working, you now have a fully functional recipe application!
Conclusion
In this tutorial, you created a food recipe application with Ruby on Rails and a React frontend, using PostgreSQL as your database and Bootstrap for styling. If you’d like to continue building with Ruby on Rails, consider following our Securing Communications in a Three-tier Rails Application Using SSH Tunnels tutorial or visit our How To Code in Ruby series to refresh your Ruby skills. To dive deeper into React, try How To Display Data from the DigitalOcean API with React.
Thanks for learning with the DigitalOcean Community. Check out our offerings for compute, storage, networking, and managed databases.
About the author(s)
Full-stack software developer from Lagos, Nigeria. Technical writer and life long learner.
Still looking for an answer?
This textbox defaults to using Markdown to format your answer.
You can type !ref in this text area to quickly search our full set of tutorials, documentation & marketplace offerings and insert the link!
What are the contents of Procfile.dev? Would be great to have that on the tutorial since rails 7 comes with Puma by default.
Great guide!
FWIW, I had to “gem install foreman” to get this working.
This comment has been deleted
This was a fantastic tutorial! It was very detailed and well organized. After working through it, there is one small change that I would recommend making in the second-to-last paragraph in Step 4. Referring to app/views/homepage/index.html.erb, the text instructs the reader to “remove the code inside the file, then save the file as empty”. Doing this will result in a blank page when the rails server runs. I think code needs to be added to the index.html.erb file in order for Rails to access the React code imported in app/javascript/application.js:
<%= javascript_include_tag "application", defer: true %>
For styling to apply to the rendered view, the following line will also need to be added to index.html.erb:
<%= stylesheet_link_tag "application", "data-turbo-track": "reload" %>
I have coded all files exactly as given in the tutorial. In fact, not coded, just copied and pasted, so I couldn’t go wrong. But like @daws185 said, I am getting a blank screen. Some code has to be written either in application.js or index.html.erb or both perhaps.
how to auto render the component.whenever i make changes in component i need to refresh the page .How can i fix it?
How do I change the default from the basically useless entry page to the recipes list?
I’ve tried altering routes.rb root and the routes index.jsx to no avail.
I know this is a simple change but I’m having a hard time wrapping my head around where Rails stops and React start (or vice versa).
Any help would be appreciated.
I have coded all files exactly as given in the tutorial. In fact, not coded, just copied and pasted, so I couldn’t go wrong. But I am getting a blank screen. If I put some code in index.html.erb, that gets displayed. If I empty index.html.erb, I get a blank screen.
Some connecting code or configuration has to be done, which is not mentioned in the tutorial. Please help.
first call of bin/dev gives error Missing :controller key on routes definition, please check your routes. (ArgumentError).
UPDATE: aha, you have to change the ‘/’ to ‘#’ when changing ‘get’ to ‘root’ :facepalm
 This work is licensed under a Creative Commons Attribution-NonCommercial- ShareAlike 4.0 International License.
Become a contributor for community
Get paid to write technical tutorials and select a tech-focused charity to receive a matching donation.

DigitalOcean Documentation
Full documentation for every DigitalOcean product.

Resources for startups and AI-native businesses
The Wave has everything you need to know about building a business, from raising funding to marketing your product.
The developer cloud
Scale up as you grow — whether you're running one virtual machine or ten thousand.

Start building today
From GPU-powered inference and Kubernetes to managed databases and storage, get everything you need to build, scale, and deploy intelligent applications.
