By Mauro Chojrin and Rachel Lee

The author selected the Tech Education Fund to receive a donation as part of the Write for DOnations program.
Introduction
RESTful APIs are used in various ways and for many different purposes, such as resource sharing, task automation, remote validation, and more. For example, some platforms that offer an API include Facebook, LinkedIn, Twitter, GitHub, and DigitalOcean. By leveraging these platforms’ APIs, your applications can interact with these remote systems without human intervention. For instance, you could have your application post pictures to its user’s Facebook wall, use LinkedIn to corroborate a user’s identity, and spawn new Digital Ocean droplets when the load is too heavy.
If you’re familiar with application development using PHP, you’ll be able to use existing services to power your applications without writing large programs from scratch or keeping complex infrastructures online.
In this tutorial, you’ll build a client for a RESTful API using HTTP POST and GET calls to interact with the server. You will build a web application that will take information from the OpenWeather Map API and display it. You’ll start with a basic app before enabling user input and using a Software Development Kit (SDK) to help future-proof the code. The final web application will give users real-time weather information about a city of their choice.
When dealing with a new API, a good starting point is to read the documentation. In this case, you can find helpful information in the OpenWeather guide.
Prerequisites
To complete this tutorial, you will need:
- A local development environment for PHP with XML support enabled, which you can do by following Step 1 of the tutorial, How To Install PHP 7.4 and Set Up a Local Development Environment on Ubuntu 20.04. When installing additional packages at the end of Step 1, replace
php7.4withphp8.0where needed and deletephp7.4-jsonfrom the package installation command. - Composer installed on your machine, which you can do by following Steps 1-2 of the tutorial, How to Install and Use Composer.
- Familiarity with PHP, which you can gain from the tutorial series, How To Code in PHP.
- An API key for OpenWeather Map, which you can get by creating a free account. After registering, navigate to My API keys under your account.
Step 1 — Building an Interface for the Web App
In this step, you will build a basic version of a web application, which you will modify in later steps. Here, you will create an HTML form and a request handler.
Start by creating a directory for the project (weather-app) and navigating into it.
- mkdir weather-app
- cd weather-app
Using your favorite text editor or nano, create an index.php file:
- nano index.php
Copy the following contents into your file:
<html>
<body>
    <h1>Weather query</h1>
<?php
if ( 'post' === strtolower($_SERVER['REQUEST_METHOD']) ) {
?>
    <h2>6.36</h2>
<?php
} else {
?>
    <form method="post">
        <input type="submit" value="Get London's temperature">
    </form>
<?php
}
?>
</body>
</html>
The first if statement separates the HTML form and the request handler. The condition that it’s checking ('post' === strtolower($_SERVER['REQUEST_METHOD'])) is verifying which HTTP verb was used to produce the request. Here, you use the comparison 'post' === strtolower($_SERVER['REQUEST_METHOD']) instead of a simple 'post' === $_SERVER['REQUEST_METHOD'] to normalize the value instead of depending on webserver or browser configuration.
If the method is post, that means the request originated from the form submission, so we know we’re in the second step. If the method is not post, you can safely assume it’s the user’s first visit to the site, so it makes sense to show them the form and let them initiate the workflow, which in this case, means asking for London’s temperature.
Taking a closer look at the then part of the if statement, you’ll note that there’s a fixed 6.36 value. This is a random placeholder number, which you’ll replace later with live data.
Save and close the file when you’re done.
Next, start the built-in PHP web server by running the following command:
- php -S localhost:8707
The output will look like this:
[Wed Nov 17 11:54:10 2021] PHP 8.0.12 Development Server (http://localhost:8707) started
Then, open a new tab in your browser and point it to http://localhost:8707.
Note: If you are using a remote machine as in the prerequisite tutorial, How To Install PHP 7.4 and Set Up a Local Development Environment on Ubuntu 20.04, you can use port forwarding to view your app. After starting the PHP web server, open a new terminal on your local machine and run this command: ssh -L 8707:localhost:8707 your-non-root-user@your-server-ip. After a successful connection to the remote server, you can view your app at http://localhost:8707.
You’ll see a screen that looks similar to this:
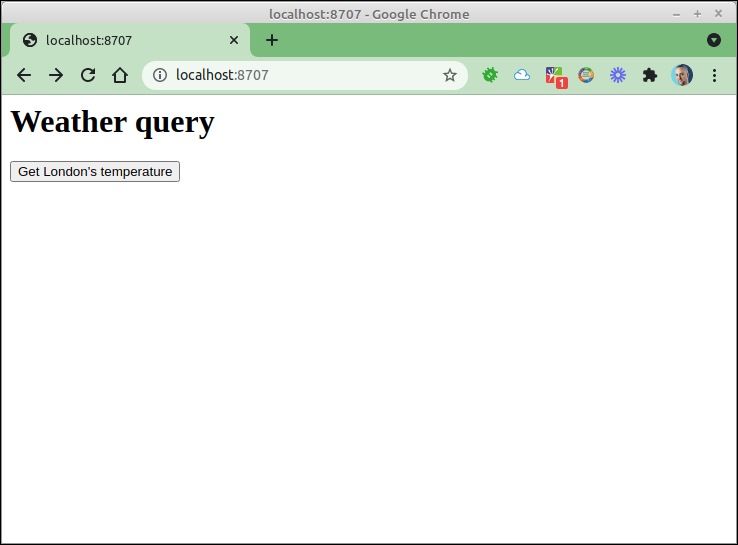
Click on Get London’s temperature to see the result:
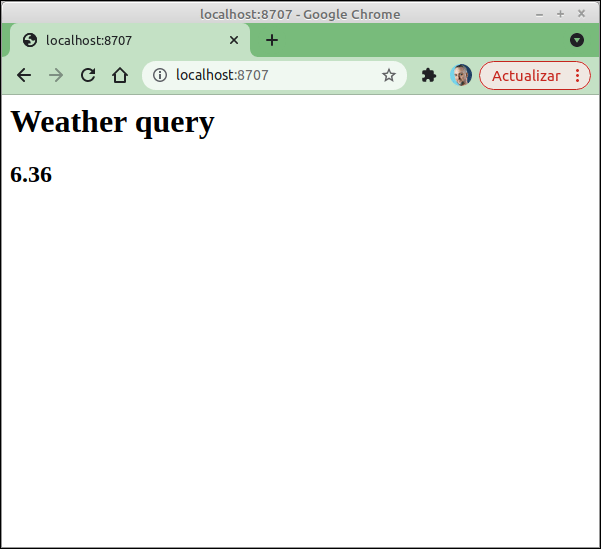
Since the data is currently hardcoded in the application, 6.36 is the only possible response.
In this step, you created a web application that allows the user to initiate a query for the current temperature in London, which is currently hardcoded. In the next step, you’ll update your app to retrieve data from an API.
Step 2 — Retrieving Data from a RESTful API
In this step, you’ll update your application to fetch the data from a trusted source (OpenWeather Map).
There are many ways you can get information from a RESTful API using PHP. One of the most common ways is to use the curl library. While this library is perfectly functional, it is designed for low-level control over HTTP communication, which can become cumbersome in many cases.
Here, you will use the function file_get_contents to read from a RESTful API. You might be familiar with using this function to read local files, but PHP’s stream management system provides the same abstraction over many underlying storage mechanisms. You can use file_get_contents to read from a remote file just as if it was present on your local drive. Since a RESTful resource is identified by a URI, you can feed its endpoint to the function, and it will return the contents of the response sent by the remote server (already stripped of headers).
If you needed to interact with the server in a more complex way — by using authentication, for instance — you could do so by specifying a particular stream_context as the third parameter.
To retrieve data from the OpenWeather Map API, open index.php for editing and update it as shown:
<html>
<body>
    <h1>Weather query</h1>
<?php
if ( 'post' === strtolower($_SERVER['REQUEST_METHOD'])) {
?>
    <h2><?php echo file_get_contents('https://api.openweathermap.org/data/2.5/weather?mode=xml&units=metric&q=London&appid=YOUR_API_KEY'); ?></h2>
<?php
} else {
    ?>
    <form method="post">
        <input type="submit" value="Get London's temperature">
    </form>
<?php
}?>
</body>
</html>
Remember to change YOUR_API_KEY for the actual value of your OpenWeather API Key.
This script takes a fixed URL https://api.openweathermap.org/data/2.5/weather?mode=xml&units=metric&q=London&appid=YOUR_API_KEY, makes an HTTP call, and outputs the response exactly as it received it.
This URL is composed of:
- A base URL (
https://api.openweathermap.org/data/2.5/) - An endpoint (
weather) - The query string (
?mode=xml&units=metric&q=London&appid=YOUR_API_KEY)
This is a common structure for RESTful APIs. The base URL will be the same no matter what resource you’re looking for. The endpoint will vary according to the specific type of information you’re looking for, and finally, the query string will be used to provide some options to refine your request.
In this case, we’re using the following modifiers:
mode: format we want the response to use,xmlin our case.units: units of measurement,metricin our case.q: city expression,Londonin our case.appid: API key.
For additional parameters, please see the OpenWeather product docs.
Save and close the file when you’re done.
Go back to your browser and refresh the page to see the result. The output will look similar to this:
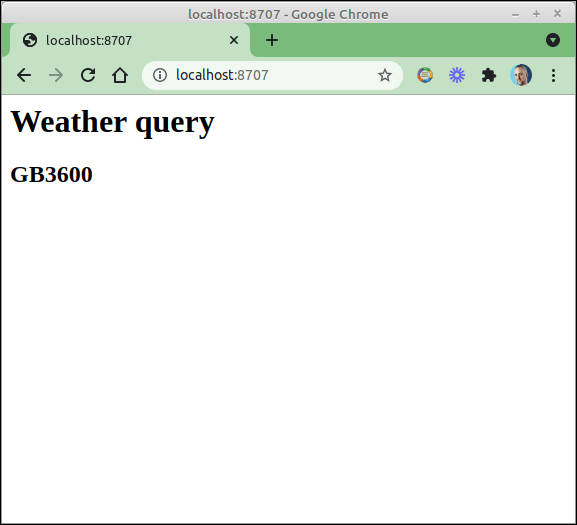
At this point, the result is not what a user would expect: this returns the country designation for Great Britain (GB) and the timezone (3600).
If you look at the source code for the page, you’ll see output similar to the following:
<html>
<body>
<h1>Weather query</h1>
<h2>
  <?xml version="1.0" encoding="UTF-8"?>
  <current>
    <city id="2643743" name="London">
      <coord lon="-0.1257" lat="51.5085"></coord>
      <country>GB</country>
      <timezone>3600</timezone>
      <sun rise="2022-04-12T05:11:24" set="2022-04-12T18:50:48"></sun>
    </city>
    <temperature value="18.21" min="15.02" max="19.87" unit="celsius"></temperature>
    <feels_like value="17.73" unit="celsius"></feels_like>
    <humidity value="63" unit="%"></humidity>
    <pressure value="1006" unit="hPa"></pressure>
    <wind>
      <speed value="4.63" unit="m/s" name="Gentle Breeze"></speed>
      <gusts></gusts>
      <direction value="210" code="SSW" name="South-southwest"></direction>
    </wind>
    <clouds value="40" name="scattered clouds"></clouds>
    <visibility value="10000"></visibility>
    <precipitation mode="no"></precipitation>
    <weather number="802" value="scattered clouds" icon="03d"></weather>
    <lastupdate value="2022-04-12T14:11:48"></lastupdate>
  </current>
</h2>
</body>
</html>
The problem is that your script is outputting the API server’s response exactly as it received it, so it is up to the browser to render it correctly. Since the API server’s response is XML, the browser interprets the tags to the best of its ability: all non-HTML tags (such as city, temperature, etc.) are ignored by the browser. To address this problem, you’ll update the application to parse the XML response and extract the pieces that have meaning for the user — the contents of the temperature tag.
In this step, you updated your application to query the remote API and get real-time information. In the next step, you’ll update the app to parse the XML data it receives.
Step 3 — Displaying the Data
At this point, your app queries a remote server and receives a response. Since the received information is XML, it needs to be parsed to get specific pieces of information, such as the temperature of a city. In this step, you’ll update the app to transform the XML response to display information relevant to the user.
One approach is to parse the data manually, such as through regular expressions. However, this approach can be both complex and error-prone. A better approach is to use the class SimpleXMLElement. This class is specifically designed to deal with the intricacies of XML and provides an easy-to-use interface.
Open your index.php file for editing and update it to look like this:
<html>
<body>
    <h1>Weather query</h1>
<?php
if ( 'post' === strtolower($_SERVER['REQUEST_METHOD'])) {
    ?><h2><?php
    $xml = new SimpleXMLElement('https://api.openweathermap.org/data/2.5/weather?mode=xml&units=metric&q=London&appid=YOUR_API_KEY', 0, true);
    echo $xml->temperature['value'];
    ?></h2>
<?php
} else {
    ?>
    <form method="post">
        <input type="submit" value="Get London's temperature">
    </form>
<?php
}?>
</body>
</html>
Remember to replace YOUR_API_KEY with the actual value of your API key.
$xml is an instance of SimpleXMLElement. Every child node in the XML text is a public property of it, and the attributes are accessible as array keys.
The call to the class constructor is done by supplying three parameters. The first is a data source. In this case, you specify a URL as the source for the XML data: https://api.openweathermap.org/data/2.5/weather?mode=xml&units=metric&q=London&appid=YOUR_API_KEY.
Next is an options modifier, which specifies how the XML is interpreted. In this case, you’re using a 0, meaning the default options should be used. The third argument is a true value. A SimpleXMLElement object can be created using two possible sources: a literal XML value or a URL. By issuing a true, you’re saying the URL is to be used.
The line echo $xml->temperature['value']; is leveraging the object-oriented interface provided by SimpleXMLElement. The basic function of this class is to convert a string that is supposed to be well-formed XML into an easy-to-use tree structure.
So, if you look back at the XML returned by the server:
<?xml version="1.0" encoding="UTF-8"?>
  <current>
    <city id="2643743" name="London">
      <coord lon="-0.1257" lat="51.5085"></coord>
      <country>GB</country>
      <timezone>3600</timezone>
      <sun rise="2022-04-12T05:11:24" set="2022-04-12T18:50:48"></sun>
    </city>
    <temperature value="18.21" min="15.02" max="19.87" unit="celsius"></temperature>
    <feels_like value="17.73" unit="celsius"></feels_like>
    <humidity value="63" unit="%"></humidity>
    <pressure value="1006" unit="hPa"></pressure>
    <wind>
      <speed value="4.63" unit="m/s" name="Gentle Breeze"></speed>
      <gusts></gusts>
      <direction value="210" code="SSW" name="South-southwest"></direction>
    </wind>
    <clouds value="40" name="scattered clouds"></clouds>
    <visibility value="10000"></visibility>
    <precipitation mode="no"></precipitation>
    <weather number="802" value="scattered clouds" icon="03d"></weather>
    <lastupdate value="2022-04-12T14:11:48"></lastupdate>
  </current>
You’ll see that the $xml object has the following properties:
citytemperaturefeels_likehumiditypressurewindcloudsvisibilityprecipitationweatherlastupdate
Each of these properties is also an instance of SimpleXMLElement.
In this case, you’re only interested in an attribute of the <temperature/> element: value. So, by using $xml->temperature['value'] you get 18.21 in the example above.
Save and close the file when you’re done.
Go back to your browser, refresh the page, and you should see something similar to the following:
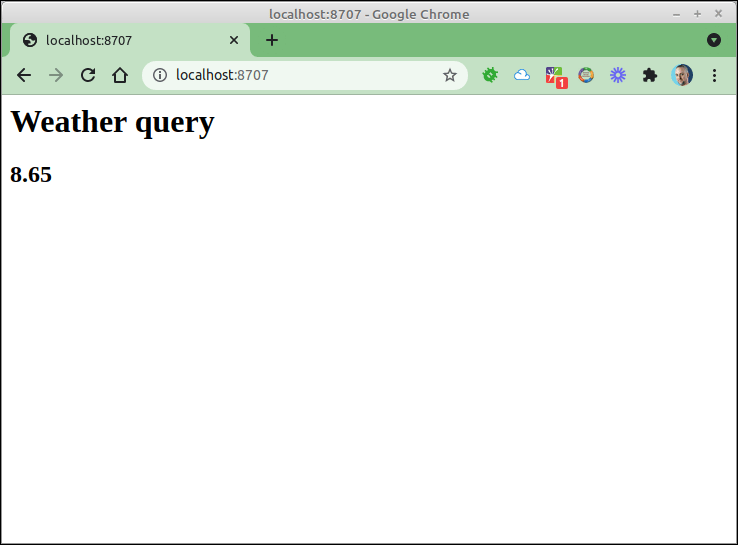
The number in your output is probably different. That’s expected since the application is executing a real-time query.
Now your app can parse the XML data. SimpleXMLElement is reading from the URL you provided, parsing the result, and building an object-oriented representation of the text returned by the remote server. Once that’s done, your application can reference the temperature value as a property of the SimpleXMLElement object.
At this point, your script can display live information taken from a trusted source in a format that is meaningful to end-users. In the next step, you’ll introduce interactivity to the app by enabling user input.
Step 4 — Enabling User Input
In this step, you’ll enable the user to query the temperature of different cities. You’ll do this by altering the data source URL to get different results from the remote server.
The first change is to show a city dropdown in the first screen so the user can select which city they’re interested in. Open index.php for editing and update the form as shown:
<html>
<body>
    <h1>Weather query</h1>
<?php
if ( 'post' === strtolower($_SERVER['REQUEST_METHOD'])) {
    ?><h2><?php
    $xml = new SimpleXMLElement('https://api.openweathermap.org/data/2.5/weather?mode=xml&units=metric&q=London&appid=YOUR_API_KEY', 0, true);
    echo $xml->temperature['value'];
    ?></h2>
<?php
} else {
    ?>
    <form method="post">
        <label for="city">Select your city</label>
        <select name="city" id="city">
            <option value="London">London</option>
            <option value="Buenos Aires">Buenos Aires</option>
            <option value="New York">New York</option>
            <option value="Paris">Paris</option>
        </select>
        <input type="submit" value="Get your city's temperature">
    </form>
<?php
}?>
</body>
</html>
Now the application will display a dropdown selection for the user, so they can choose which city they want to get information about, instead of having it be fixed to London.
However, to have the script query the selected city, you’ll need to change the first part of the if statement as well. Update the data source URL as shown:
<html>
<body>
    <h1>Weather query</h1>
<?php
if ( 'post' === strtolower($_SERVER['REQUEST_METHOD'])) {
    ?><h2><?php
    $xml = new SimpleXMLElement('`https://api.openweathermap.org/data/2.5/weather?mode=xml&units=metric&q=`'.$_POST['city'].'&appid=YOUR_API_KEY', 0, true);
    echo $xml->temperature['value'];
    ?></h2>
<?php
} else {
    ?>
    <form method="post">
        <label for="city">Select your city</label>
        <select name="city" id="city">
            <option value="London">London</option>
            <option value="Buenos Aires">Buenos Aires</option>
            <option value="New York">New York</option>
            <option value="Paris">Paris</option>
        </select>
        <input type="submit" value="Get your city's temperature">
    </form>
<?php
}?>
</body>
</html>
Here, you changed the value of the q parameter from London to the city selected by the user. The URL is created as a concatenation of:
https://api.openweathermap.org/data/2.5/weather?mode=xml&units=metric&q=$_POST['city']'&appid=YOUR_API_KEY'
Save and close the file when you’re done.
Note: This is the way OpenWeather Map handles the parameters. For other APIs, you’d have to consult the specific documentation for details.
To see your changes, return to your browser and start the navigation over. Your app should now display a drop-down for selecting a city:
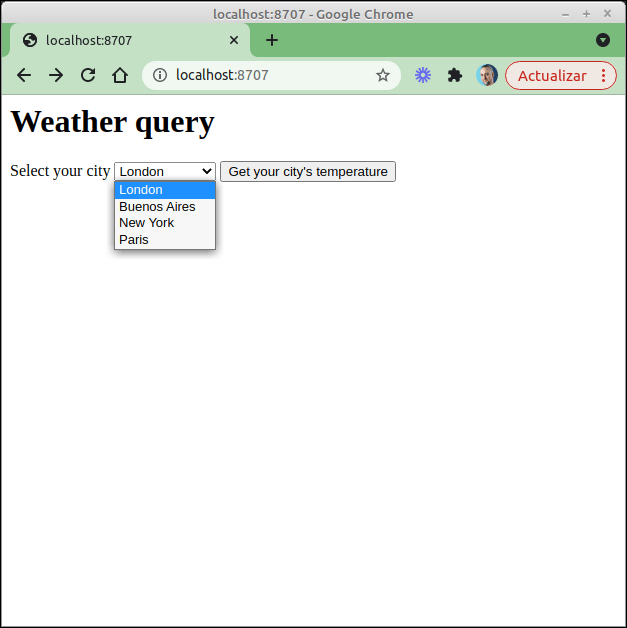
Selecting different cities should now return different temperature values.
In this step, you enabled user input in your app and updated the data source URL to retrieve data based on the user’s selection.
However, at this point, your code is tightly coupled with the current structure of the API’s response, which is not very future-proof. Currently, it makes sense to look for the temperature tag as a first-level child of the root element, but that could change at any time — and if that happens, the application code would have to be updated to keep it working. One way to address this issue is to use a Software Development Kit (SDK), which you’ll do in the next step.
Step 5 — Installing a Software Development Kit (SDK)
In this step, you’ll install the OpenWeather Map PHP Client. This client completely isolates your application logic from the specific details of how to communicate with OpenWeather Map servers, effectively yielding a much more future-proof application. Rather than retrieving the data manually, as you have done in previous steps, you’ll use the SDK to retrieve the data for you.
Using an SDK within your applications makes them much more maintainable over time. For example, if a change happens in the way the server wants the client to interact with it, all you need to do is update the SDK on your end. By comparison, if you were to code the requests yourself, adapting the code would require a great deal of effort tracking down every remote call and updating it. Plus, there is also the possibility of new bugs appearing.
The first step in using the OpenWeather Map PHP SDK is to install it. In this tutorial, you will use Composer, a dependency manager for PHP, which you installed as part of the prerequisites.
Once you have Composer available, run the following command to install the SDK and its dependencies:
- composer require "cmfcmf/openweathermap-php-api" "http-interop/http-factory-guzzle:^1.0" "php-http/guzzle6-adapter:^2.0 || ^1.0"
The SDK itself is the package cmfcmf/openweathermap-php-api. http-interop/http-factory-guzzle and php-http/guzzle6-adapter are auxiliary packages needed to handle HTTP communication at a lower level.
This will produce the following output:
- Using version ^3.3 for cmfcmf/openweathermap-php-api
- ./composer.json has been created
- Running composer update cmfcmf/openweathermap-php-api http-interop/http-factory-guzzle php-http/guzzle6-adapter
- Loading composer repositories with package information
- Updating dependencies
- Lock file operations: 16 installs, 0 updates, 0 removals
- - Locking cmfcmf/openweathermap-php-api (v3.3.0)
- - Locking guzzlehttp/guzzle (6.5.5)
- - Locking guzzlehttp/promises (1.5.1)
- - Locking guzzlehttp/psr7 (1.8.3)
- - Locking http-interop/http-factory-guzzle (1.2.0)
- - Locking php-http/guzzle6-adapter (v2.0.2)
- - Locking php-http/httplug (2.2.0)
- - Locking php-http/promise (1.1.0)
- - Locking psr/cache (1.0.1)
- - Locking psr/http-client (1.0.1)
- - Locking psr/http-factory (1.0.1)
- - Locking psr/http-message (1.0.1)
- - Locking ralouphie/getallheaders (3.0.3)
- - Locking symfony/polyfill-intl-idn (v1.23.0)
- - Locking symfony/polyfill-intl-normalizer (v1.23.0)
- - Locking symfony/polyfill-php72 (v1.23.0)
- Writing lock file
- Installing dependencies from lock file (including require-dev)
- Package operations: 16 installs, 0 updates, 0 removals
- - Installing psr/http-message (1.0.1): Extracting archive
- - Installing psr/http-factory (1.0.1): Extracting archive
- - Installing psr/http-client (1.0.1): Extracting archive
- - Installing psr/cache (1.0.1): Extracting archive
- - Installing cmfcmf/openweathermap-php-api (v3.3.0): Extracting archive
- - Installing guzzlehttp/promises (1.5.1): Extracting archive
- - Installing ralouphie/getallheaders (3.0.3): Extracting archive
- - Installing guzzlehttp/psr7 (1.8.3): Extracting archive
- - Installing http-interop/http-factory-guzzle (1.2.0): Extracting archive
- - Installing php-http/promise (1.1.0): Extracting archive
- - Installing php-http/httplug (2.2.0): Extracting archive
- - Installing symfony/polyfill-php72 (v1.23.0): Extracting archive
- - Installing symfony/polyfill-intl-normalizer (v1.23.0): Extracting archive
- - Installing symfony/polyfill-intl-idn (v1.23.0): Extracting archive
- - Installing guzzlehttp/guzzle (6.5.5): Extracting archive
- - Installing php-http/guzzle6-adapter (v2.0.2): Extracting archive
- 2 package suggestions were added by new dependencies, use `composer suggest` to see details.
- Generating autoload files
- 6 packages you are using are looking for funding.
- Use the `composer fund` command to find out more!
Now you have a new directory within your project: vendor. This directory is where every dependency installed via Composer will be found.
Together with the library code, there’s a file that provides access to all of them: autoload.php. You’ll need to include this file at the beginning of every script that needs to use any of the dependencies you bring in.
In this step, you added a new dependency to your application: an object-oriented client for OpenWeather Map API. By relying on it, you’ll get a much cleaner coding interface, which will help you reduce the overall effort of updating your code to match new versions of the API.
Step 6 — Refactoring your Web App with an SDK
In this step, you’ll refactor your code to use the SDK installed in the previous step. You will require the SDK code in your script and use the objects provided within the library to access the remote API.
Open index.php for editing and update it to look like this:
<?php
use Cmfcmf\OpenWeatherMap;
use Cmfcmf\OpenWeatherMap\Exception as OWMException;
use Http\Factory\Guzzle\RequestFactory;
use Http\Adapter\Guzzle6\Client as GuzzleAdapter;
?>
<html>
<body>
    <h1>Weather query</h1>
<?php
if ( 'post' === strtolower($_SERVER['REQUEST_METHOD'])) {
    require_once 'vendor/autoload.php';
    $city = $_POST['city'];

    $owm = new OpenWeatherMap('YOUR_API_KEY', GuzzleAdapter::createWithConfig([]), new RequestFactory());

    try {
        $weather = $owm->getWeather($city, 'metric', 'en');
        ?><h2><?php echo $weather->temperature; ?></h2>
        <?php
    } catch(OWMException $e) {
        echo 'OpenWeatherMap exception: ' . $e->getMessage() . ' (Code ' . $e->getCode() . ').';
    } catch(\Exception $e) {
        echo 'General exception: ' . $e->getMessage() . ' (Code ' . $e->getCode() . ').';
    }
} else {
    ?>
    <form method="post">
        <label for="city">Select your city</label>
        <select name="city" id="city">
            <option value="London">London</option>
            <option value="Buenos Aires">Buenos Aires</option>
            <option value="New York">New York</option>
            <option value="Paris">Paris</option>
        </select>
        <input type="submit" value="Get your city's temperature">
    </form>
<?php
}?>
</body>
</html>
Remember to replace YOUR_API_KEY with the actual value of your API Key.
You start by declaring namespaces at the top (use ... statements). With these lines, you instruct the interpreter how to map short class names to fully classified ones (for instance, OpenWeatherMap to Cmfcmf\OpenWeatherMap), making the code easier to read and write.
You’ve also included the vendor/autoload.php file. This file was created by composer and contains the necessary calls to spl_autoload_register to allow you to create new instances of classes not explicitly required by your script.
The most significant change is using a method (getWeather) to make the call to the remote server, leaving your code clean and much easier to maintain over time. Making the HTTP call and transforming the text into a PHP object are done for you. In a way, you can forget that there’s a remote call being done and work just as if you had direct access to the weather information. And, should the response from the server change, all you’d have to do is update the SDK version instead of modifying every instance of your code where calls to the API happen to be made.
Next, you made a change to catch exceptions. When dealing with external systems, it’s good practice to anticipate issues, such as the remote server becoming unresponsive or the local network failing. If you’re not catching exceptions, should they occur, they will produce an unpleasant user experience and could even break the system stability since the script execution would stop unexpectedly.
Here, there are two catch statements in this script to make it easier to debug. Since the method OpenWeatherMap::getWeather throws specific exceptions (OWMException), it makes sense to use them and leave another catch-all exception handler just in case there is an unknown one.
Save and close the file when you’re done.
If you refresh the page, you’ll see a slight change in the output:
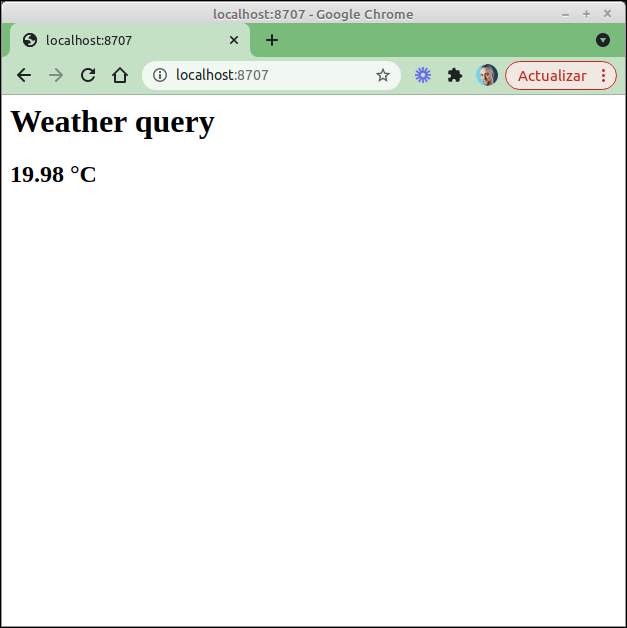
Now, the Celsius symbol appears alongside the temperature.
This happens because your application is now using echo $weather->temperature; to produce its output, and $weather->temperature is an object of Cmfcmf\OpenWeatherMap\Util\Temperature class, which implements a __toString method that includes the units in its return value. If you wanted to get the same output as in the previous step, you could use echo $weather->temperature->getValue() instead.
In this step, you made your application much easier to maintain by leveraging an existing SDK to abstract the low-level communication details.
There’s just one final step to make your application production-ready: removing the hardcoded API_KEY. If the key stays hardcoded, every time you deploy your application in a different environment, you’ll have to get into the code to make it work, which is a source of errors.
Step 7 — Removing Hardcoding
So far, you’ve been working with a piece of hardcoded data: your OpenWeather API key. Removing hardcoded information allows your application to be run in different environments, a crucial feature for real applications where you want to have several execution contexts (dev, test, prod, etc…).
In this step, you’ll prepare your application for deployment among different environments by removing the hardcoded API key.
One technique is to store this kind of information in environment variables, which can be accessed within a PHP script through the $_ENV array.
To use this approach, open your index.php file for editing and update the highlighted portion:
<?php
use Cmfcmf\OpenWeatherMap;
use Cmfcmf\OpenWeatherMap\Exception as OWMException;
use Http\Factory\Guzzle\RequestFactory;
use Http\Adapter\Guzzle6\Client as GuzzleAdapter;
?>
<html>
<body>
    <h1>Weather query</h1>
<?php
if ( 'post' === strtolower($_SERVER['REQUEST_METHOD'])) {
    require_once 'vendor/autoload.php';
    $city = $_POST['city'];

    $owm = new OpenWeatherMap($_ENV['API_KEY'], GuzzleAdapter::createWithConfig([]), new RequestFactory());

    try {
        $weather = $owm->getWeather($city, 'metric', 'en');
        ?><h2><?php echo $weather->temperature; ?></h2>
        <?php
    } catch(OWMException $e) {
        echo 'OpenWeatherMap exception: ' . $e->getMessage() . ' (Code ' . $e->getCode() . ').';
    } catch(\Exception $e) {
        echo 'General exception: ' . $e->getMessage() . ' (Code ' . $e->getCode() . ').';
    }
} else {
    ?>
    <form method="post">
        <label for="city">Select your city</label>
        <select name="city" id="city">
            <option value="London">London</option>
            <option value="Buenos Aires">Buenos Aires</option>
            <option value="New York">New York</option>
            <option value="Paris">Paris</option>
        </select>
        <input type="submit" value="Get your city's temperature">
    </form>
<?php
}?>
</body>
</html>
Save and close the file when you’re done.
For the change to take effect, you’ll need to stop your local webserver and start it again using this command:
- API_KEY=YOUR_API_KEY php -d variables_order=EGPCS -S localhost:8707
Replace YOUR_API_KEY with the actual value of your API Key.
In this invocation, you’re first establishing the value of the environment variable and then calling the PHP interpreter. The operating system will create a new running environment for the PHP process, including the API Key definition.
The -d modifier is applied to the php command and is used to alter PHP’s configuration. In this case, the variables_order definition establishes how super globals are to be populated. The value EGPCS means Environment, Get, Post, Cookies, Server. You can read more about this in the PHP documentation.
In the case of a production environment, you can use the webserver configuration to establish these values.
In this step, you removed the hardcoding of the API Key and used an environment variable instead. Your application is now more suitable for running in different environments.
Conclusion
In this article, you built a web application that allows users to query OpenWeather Map and get the current temperature of a city of their choice. You retrieved data from a remote RESTful API using file_get_contents and parsed XML data using SimpleXMLElement. You also used an SDK to access remote APIs when available. Finally, you updated your application to take secrets from environment variables instead of having them hardcoded.
As a next step, you could move on to more complex APIs and see how the basic principles are the same.
Remember that RESTful APIs are not the only API type that exists. SOAP is a very different protocol that is still used in many scenarios, especially in government institutions, so you might want to get familiar with other API types as well.
Thanks for learning with the DigitalOcean Community. Check out our offerings for compute, storage, networking, and managed databases.
About the author(s)
I help PHP dev's level up
Still looking for an answer?
This textbox defaults to using Markdown to format your answer.
You can type !ref in this text area to quickly search our full set of tutorials, documentation & marketplace offerings and insert the link!
 This work is licensed under a Creative Commons Attribution-NonCommercial- ShareAlike 4.0 International License.
Become a contributor for community
Get paid to write technical tutorials and select a tech-focused charity to receive a matching donation.

DigitalOcean Documentation
Full documentation for every DigitalOcean product.

Resources for startups and AI-native businesses
The Wave has everything you need to know about building a business, from raising funding to marketing your product.
The developer cloud
Scale up as you grow — whether you're running one virtual machine or ten thousand.

Start building today
From GPU-powered inference and Kubernetes to managed databases and storage, get everything you need to build, scale, and deploy intelligent applications.
