
Status: Deprecated
This article covers a version of Ubuntu that is no longer supported. If you are currently operate a server running Ubuntu 12.04 or Ubuntu 12.10, we highly recommend upgrading or migrating to a supported version of Ubuntu:
- Upgrade to Ubuntu 14.04.
- Upgrade from Ubuntu 14.04 to Ubuntu 16.04
- Migrate the server data to a supported version
Reason: Ubuntu 12.04 reached end of life (EOL) on April 28, 2017 and no longer receives security patches or updates. This guide is no longer maintained.
See Instead: This guide might still be useful as a reference, but may not work on other Ubuntu releases. If available, we strongly recommend using a guide written for the version of Ubuntu you are using. You can use the search functionality at the top of the page to find a more recent version.
Introduction
WordPress is an extremely popular blogging and Content Management System (CMS) used by millions of websites. It can be used to easily organize, manage, and create content on the web and handle interactions with visitors and contributors.
Although most people use WordPress for its graphical interface, there are benefits to being able to control the software from the command line. A tool called wp-cli provides just this functionality.
This aids in scripting and allows you to manage your all aspects of the site, from configuration files and database management to posting, theming, uploading media and approving comments, from one place.
In this guide, we will use the wp-cli interface to manage our WordPress installation.
How To Install WP-CLI
This guide assumes that you have created a VPS using the WordPress application image from the droplet creation page. If you need assistance doing this, you can follow this guide.
When you have finished deploying your droplet, SSH into the server as the root user:
<pre> ssh root@<span class=“highlight”>server_ip_address</span> </pre>
You should be in the root user’s home directory.
The first thing we need to do is install git. This version control system is used during the wp-cli installation:
apt-get update
apt-get install git
Next, we can get the installer and run it with this command, taken from the project’s website:
curl https://raw.githubusercontent.com/wp-cli/wp-cli.github.com/master/installer.sh | bash
This will install a few tools needed to make the software function correctly.
Next, we will create a .bash_profile file for our root user and add the path to the wp-cli executable and the auto-complete script.
nano ~/.bash_profile
In this file, put the following two lines:
export PATH=/root/.wp-cli/bin:$PATH
source $HOME/.wp-cli/vendor/wp-cli/wp-cli/utils/wp-completion.bash
Save and close the file.
Now, we can “source” the file (re-read it into our environment), to apply our changes:
source ~/.bash_profile
Now, we have the interface installed and we can begin using it.
Change to the WordPress web directory to begin. On the one-click installation, that is here:
cd /home/wordpress/public_html
Install Site with WP-CLI
If this is a completely new VPS instance, then you have not even completed the basic configuration. If you have gone through the site initialization process already, feel free to skip this step.
If you type in wp, which is the command used to interact with the wp-cli interface, you will get the following message:
wp
Error: The site you have requested is not installed.
Run `wp core install`.
You could initialize the site by going to your IP address or domain name in your web browser and filling out a form that looks like this:
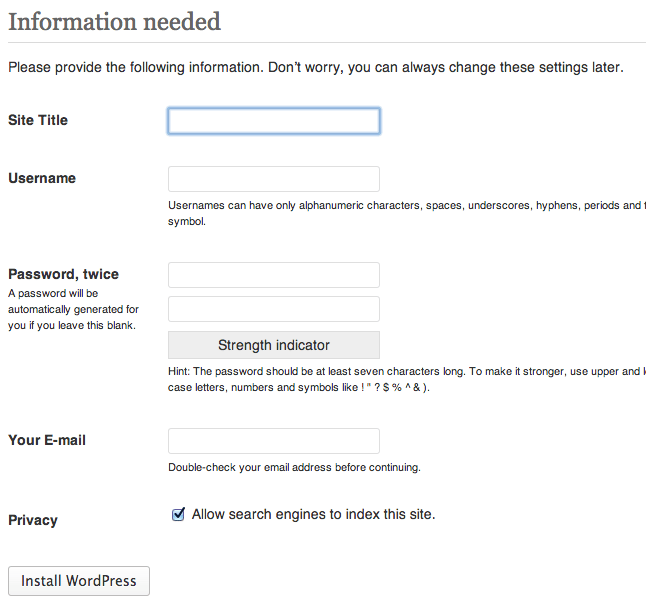
However, since this is a guide on how to use wp-cli, we will fill out all of this information in a single command. We do this by doing the core installation.
We will have to pass as parameters all of the fields that are asked for on that page. This is done in the following general format:
<pre> –<span class=“highlight”>parameter</span>=“<span class=“highlight”>value</span>” </pre>
The parameters that we need to define are:
-
url: The domain name that will be used to access your site. If you do not have a domain, you can use your IP address
-
title: The title of your site
-
admin_user: Name you will use to log in and do administrative site functions
-
admin_password: The associated password for the admin user
-
admin_email: Email address you would like to be contacted at for site issues
We add these after the core command and the install subcommand. All together, this gives us a command that looks like this:
<pre> wp core install --url=“<span class=“highlight”>your_domain_name</span>” --title=“<span class=“highlight”>Your Blog Title</span>” --admin_user=“admin” --admin_password=“<span class=“highlight”>your_password</span>” --admin_email=“<span class=“highlight”>your_email</span>” </pre>
This process may take a bit of time to configure all of the necessary components. When it completes, you should see a line that says:
Success: WordPress installed successfully.
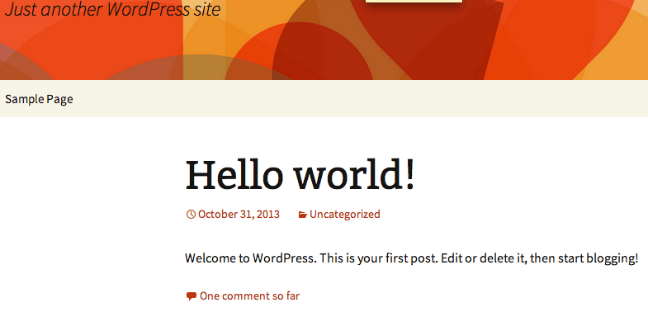
If we visit our site in a browser, we should see the default WordPress site:
How To Use the WP-CLI Help System
Although wp-cli does not include a traditional man manual page, it includes a robust internal help system. You can access it at any time by typing:
wp help
DESCRIPTION

  Manage WordPress through the command-line.

SYNOPSIS

  wp <subcommand>

SUBCOMMANDS

  cache               Manage the object cache.
  cap                 Manage user capabilities.
  cli                 Get information about WP-CLI itself.
. . .
You can see all of the top-level sub-commands that wp-cli uses to manipulate different areas of WordPress.
To exit, type:
q
This first level is perhaps best viewed by typing wp followed by a space and then pressing tab a few times to see the available sub-commands:
wp <tab><tab>
cache           eval            network-meta    role            theme
cap             eval-file       option          scaffold        transient
cli             export          plugin          search-replace  user
comment         help            post            shell           user-meta
core            import          post-meta       site
db              media           rewrite         term
You can then use the help system to query about specific sub-commands:
wp help theme
NAME

  wp theme

DESCRIPTION

  Manage themes.

SYNOPSIS

  wp theme <subcommand>

SUBCOMMANDS

  activate          Activate a theme.
  delete            Delete a theme.
. . .
As you can see, each of these sub-commands has its own sub-commands. The help system operates the entire way down the command structure:
wp help theme install
NAME

  wp theme install

DESCRIPTION

  Install a theme.
. . .
In this way, you can get help with just about any aspect of the system that you wish to use.
How To Install Themes with WP-CLI
To demonstrate some basic usage of wp-cli, we will do one of the first things that anybody does when they create a new blog: get a new theme.
First let’s see what themes we have installed already:
wp theme list
+----------------+----------+--------+---------+
| name           | status   | update | version |
+----------------+----------+--------+---------+
| twentythirteen | active   | none   | 1.1     |
| twentytwelve   | inactive | none   | 1.3     |
+----------------+----------+--------+---------+
As you can see, we have two themes installed, and we are currently using one called “twentythirteen”. This is fine, but it’s a bit boring.
Let’s search for something more exciting:
wp theme search fancy
Success: Showing 5 of 5 themes.
+---------------+---------------+--------+
| name          | slug          | rating |
+---------------+---------------+--------+
| Bold Headline | bold-headline | 100    |
| Clearly       | clearly       | 90     |
| The Skeleton  | the-skeleton  | 100    |
| Metronome     | metronome     | 0      |
| Shipyard      | shipyard      | 0      |
+---------------+---------------+--------+
We can see that there are 5 themes that claim to be fancy. “Bold Headline” seems pretty exciting and has a good rating. Let’s get that one. Use the string in the slug column in the command:
wp theme install bold-headline
If we check again, we can see that it was installed successfully:
wp theme list
+----------------+----------+--------+---------+
| name           | status   | update | version |
+----------------+----------+--------+---------+
| bold-headline  | inactive | none   | 1.2.5   |
| twentythirteen | active   | none   | 1.1     |
| twentytwelve   | inactive | none   | 1.3     |
+----------------+----------+--------+---------+
We can activate our new theme by typing:
wp theme activate bold-headline
Now, if we visit our site, we can see that our new theme has been applied:
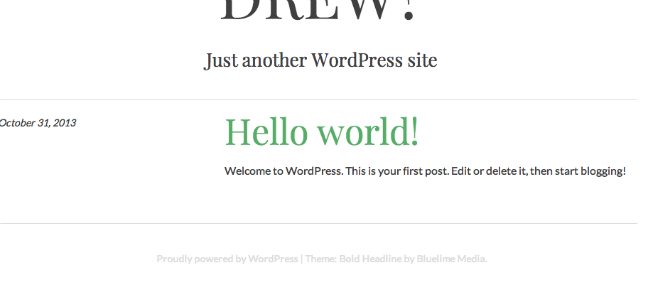
This looks pretty good!
How To Manage Plugins with WP-CLI
You can manage plugins in a similar way to themes. They have many of the same sub-commands:
wp plugin list
+---------+----------+--------+---------+
| name    | status   | update | version |
+---------+----------+--------+---------+
| akismet | inactive | none   | 2.5.9   |
| hello   | inactive | none   | 1.6     |
+---------+----------+--------+---------+
We have two themes installed, but neither are active.
Let’s get a plugin that can urge users to share content on social media sites. There’s a plugin called Digg-Digg that is known for this:
wp plugin search Digg
We can see a few different alternatives. Let’s actually switch it up and install the “aas-digg-digg-alternative” plugin instead. Again, reference the plugin through the slug name:
wp plugin install aas-digg-digg-alternative
We can activate the plugin by typing:
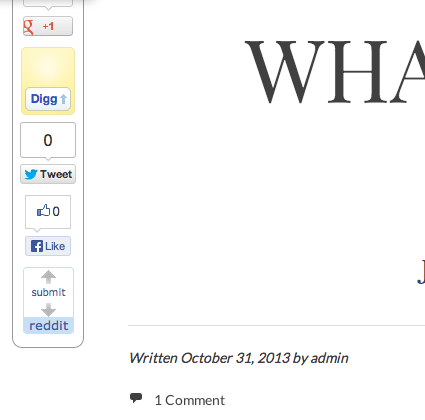
wp plugin activate aas-digg-digg-alternative
We can see the results by visiting one of our posts:
How To Manage Content with WP-CLI
If you are comfortable composing posts with a command-line editor, you can make entire blog posts through the wp-cli interface.
To get a list of the posts on your blog, type:
wp post list
+----+--------------+-------------+---------------------+-------------+
| ID | post_title   | post_name   | post_date           | post_status |
+----+--------------+-------------+---------------------+-------------+
| 1  | Hello world! | hello-world | 2013-10-31 20:02:18 | publish     |
+----+--------------+-------------+---------------------+-------------+
Right now, there’s only the default message. Instead of deleting this post, let’s edit it to be something more useful. We reference the post by its ID:
wp post edit 1
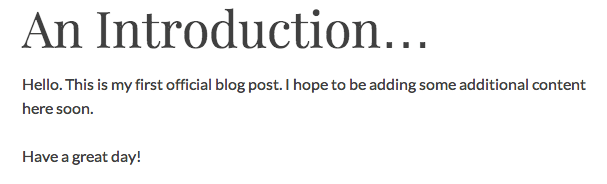
Delete the content and replace it with:
Hello.  This is my first official blog post.  I hope to be adding some additional content here soon.

Have a great day!
When you save and close the file, the changes will be live. We should also change the title to match our new content:
wp post update 1 --post_title="An Introduction..."
You can see your new content by revisiting your blog:
We can add a completely new post by typing something like this:
wp post create --post_status=publish --post_title="Second Post" --edit
This will open an editor where we can type our second post:
Hello.

Here is another post.

I am becoming quite prolific.
How To Do Database Queries with WP-CLI
One of the most useful features of wp-cli is integration with the SQL backend.
You can get right into the WordPress database in an interactive session by typing:
wp db cli
This will give you a MySQL prompt, which you can use to do any sort of database administration required. You can exit the interface by typing:
exit
For most common database operations though, you control it directly from the wp-cli interface.
To query our users and their associated IDs, we can use something like:
wp db query "SELECT user_login,ID FROM wp_users;"
+------------+----+
| user_login | ID |
+------------+----+
| admin      |  1 |
+------------+----+
As you can see, we only have one user. We can use this information though to update the post we just made. Let’s add an author field to our post. Be sure to get the post ID you wish to update:
wp post update 6 --post_author=1
Now, our post should have an author listed as “admin” beside our content.
We can optimize our database by typing:
wp db optimize
How To Update WordPress with WP-CLI
We can keep WordPress up-to-date by performing the following procedures:
wp core update
wp core update-db
More importantly, we can update our plugins, which have a tendency to be a weak link in WordPress security, by typing:
wp plugin update --all
Conclusion
You should now have a pretty good handle on how to complete tasks in WordPress through the command line. This is not only a fast and easy way to manage multiple sites for different clients, it also provides very nice scripting capabilities to do very complex tasks easily.
By effectively using wp-cli, you will no longer have to continually switch between the web browser and the terminal window when doing changes that might not be available from within the web interface.
<div class=“author”>By Justin Ellingwood</div>
Thanks for learning with the DigitalOcean Community. Check out our offerings for compute, storage, networking, and managed databases.
About the author
Former Senior Technical Writer at DigitalOcean, specializing in DevOps topics across multiple Linux distributions, including Ubuntu 18.04, 20.04, 22.04, as well as Debian 10 and 11.
Still looking for an answer?
This textbox defaults to using Markdown to format your answer.
You can type !ref in this text area to quickly search our full set of tutorials, documentation & marketplace offerings and insert the link!
This comment has been deleted
Thanks for the wp-cli tutorial. I think what is missing ( at least for my ) is how to do batch operations on multiple blogs / sites with this tool ( which isactually where it comes most helpful )
I have noticed that wp core update does NOT replace the loose files that are in htdocs.
But everything says it’s upgraded. Have you noticed this or is there some kind of problem I’m experiencing like permission errors that there are no warnings about?
URL above updated:
curl https://raw.githubusercontent.com/wp-cli/wp-cli.github.com/master/installer.sh | bash
Hey there, I tried several times but it didn’t work when I went strait :
$curl https://raw.github.com/wp-cli/wp-cli.github.com/master/installer.sh | bash
However, spitting the command worked out :
$ curl https://raw.github.com/wp-cli/wp-cli.github.com/master/installer.sh $ installer.sh bash
@charleslouis: Thanks for catching that! It looks like the url is now being redirected to:
https://raw.githubusercontent.com/wp-cli/wp-cli.github.com/master/installer.sh
By default, curl won’t follow redirects. I’ll update the article.
Hey again,
I need to specify " --allow-root" when using “wp”. Hence I created an alias in .bash_profile "alias wp=“wp --allow-root” That did the trick, but I doubt that the way I should handle this.
Does anyone has an idea on this ?
Thanks in a advance.
@charleslouis: Are you running wp-cli as “root”? It’s more secure to use a regular non-root user instead.
Great tutorial…however when I log in as the root user I get this error: “YIKES! It looks like you’re running this as root. You probably meant to run this as the user that your WordPress install exists under.” So when I change to my non-root user log in I get this error message: “wp: command not found”…
Probably a very simple fix…I just don’t know it (newbie shell user here). Thanks!
@timorr: Try following the tutorial from the beginning as your non-root user (including installing wp-cli). Does that fix it?
 This work is licensed under a Creative Commons Attribution-NonCommercial- ShareAlike 4.0 International License.
Become a contributor for community
Get paid to write technical tutorials and select a tech-focused charity to receive a matching donation.

DigitalOcean Documentation
Full documentation for every DigitalOcean product.

Resources for startups and AI-native businesses
The Wave has everything you need to know about building a business, from raising funding to marketing your product.
The developer cloud
Scale up as you grow — whether you're running one virtual machine or ten thousand.

Start building today
From GPU-powered inference and Kubernetes to managed databases and storage, get everything you need to build, scale, and deploy intelligent applications.
