By Chimezie Enyinnaya and Bradley Kouchi

Introduction
In this tutorial, you’ll implement authentication in a Nuxt.js app using the Auth module.
For the purpose of this tutorial, you’ll be using JWT for authentication.
Below is a quick demo of what you’ll be building in this tutorial:

You can find the source code for this application at GitHub.
Warning: Several of the packages in this tutorial now contain dependencies with known vulnerabilities. In a production setting, you would resolve these issues by upgrading these packages, finding alternatives, or creating forked versions with patched fixes. However, within the limited context of a tutorial, it provides educational value as-is.
Prerequisites
To complete this tutorial, you will need:
- Node.js installed locally, which you can do by following How to Install Node.js and Create a Local Development Environment.
- A valid Git installation is optionally required for cloning the API, consult Getting Started with Git.
Some familiarity with Vue.js and Nuxt.js may be beneficial. You can refer to this post if you’re getting started with Nuxt.js.
This tutorial was verified with Node v13.13.0, npm v6.14.4, vue v2.6.11, and nuxt v2.12.2.
Step 1 — Spinning up a Sample API
You are free to use whatever framework that works best for you. However, for quick development, this tutorial will clone an API built with AdonisJs.
The API utilizes:
- JWT (JSON Web Tokens) for authentication
- SQLite
- CORS enabled
The API has three endpoints:
/register: endpoint for user registration/login: endpoint for authenticating users/me: endpoint for getting details for the currently authenticated user and it is protected by anauthmiddleware, which means a user must be authenticated to access the endpoint
First, run the following command in your terminal window:
- git clone https://github.com/do-community/jwt-auth-api.git
Then, navigate to the project directory:
- cd jwt-auth-api
And install the API dependencies:
- npm install
Note: When running install, you may encounter issues with sqlite3 version 4.0.1 depending on the version of Node you are running. Refer to the changelog to determine compatibility with your environment.
At the time of original publication, the latest version of Node was 10. One option is to downgrade your version of Node to 10.20.1 (with the understanding that it is nearing end-of-life support). Then, run npm install.
A second option is to remove the package-lock.json file which will cause the system to look for 4.2.0 which is supported up to Node 13. You may need to also downgrade your version of Node to 13.13.0. Then, run npm install.
A third option would be to modify package.json to a version of sqlite3 supported by your current version of Node, remove package-lock.json, and run npm install. However, at the time of testing, 5.0.0 is not yet released to handle Node 14+ support.
Other symptoms of incompatibility include the following errors: TypeError: Cannot read property 'data' of undefined and Error: Cannot find module '[...]/node_modules/sqlite3/lib/binding/[...]/node_sqlite3.node'.
Next, rename .env.example to .env:
- mv .env.example .env
And generate an APP_KEY:
- npx @adonisjs/cli@4.0.12 key:generate
You should see:
- Outputgenerated: unique APP_KEY
Once that’s coomplete, let’s run the migrations:
- npx @adonisjs/cli@4.0.12 migration:run
Now, you can start the API:
- # ensure that you are in the `jwt-auth-api` project directory
- npm start
You can access the API on http://127.0.0.1:3333/api. Leave this running in a terminal window for the rest of the duration of the tutorial.
Step 2 — Creating a Nuxt.js App
Now, you can create a Nuxt.js app. Open a new terminal window and use vue-cli to initialize a new Vue project with the Nuxt starter template:
- npx vue-cli@2.9.6 init nuxt/starter nuxt-auth
Note: At the time of testing, vue-cli is deprecated. @vue/cli is the current command line tool for Vue projects. And @vue/cli-init is the recommended approach for legacy vue-cli projects. However, create-nuxt-app is the recommended approach for modern Nuxt projects.
Next, you need to navigate to the project directory:
- cd nuxt-auth
And install the dependencies:
npm install
Then, you can launch the app:
- npm run dev
The app should be running on http://localhost:3000. You can view the application in a web browser to see the default Vue application created by vue-cli.
Step 3 — Installing Necessary Nuxt.js Modules
Now, let’s install the Nuxt.js modules that you’ll be needing for your app. You’ll be using the Nuxt Auth module and the Nuxt Axios module, since the auth module makes use of Axios internally:
- # ensure that you are in the `nuxt-auth` project directory
- npm install @nuxtjs/auth@4.5.1 @nuxtjs/axios@5.3.1 --save
Once that’s completed, open nuxt.config.js:
- nano nuxt.config.js
Add the code below to nuxt.config.js:
module.exports = {
  // ...

  modules: [
    '@nuxtjs/axios',
    '@nuxtjs/auth'
  ],
}
Note: At this point, newer versions of Nuxt may encounter the error: Enable vuex store by creating 'store/index.js'. This error can be resolved by adding an empty index.js file to the store directory.
Next, you need to set up the modules. Paste the code below into nuxt.config.js:
module.exports = {
  // ...

  axios: {
    baseURL: 'http://127.0.0.1:3333/api'
  },

  auth: {
    strategies: {
      local: {
        endpoints: {
          login: { url: 'login', method: 'post', propertyName: 'data.token' },
          user: { url: 'me', method: 'get', propertyName: 'data' },
          logout: false
        }
      }
    }
  }
}
Here, you set the base URL that Axios will use when making requests. In our case, we are referencing the sample API we set up earlier.
Then, you define the authentication endpoints for the local strategy corresponding to those on your API:
- On successful authentication, the token will be available in the response as a
tokenobject inside adataobject. - Similarly, the response from the
/meendpoint will be inside adataobject. - Lastly, you set
logouttofalsesince your API doesn’t have an endpoint for logout. You’ll just remove the token from localStorage when a user logs out.
Step 4 — Creating a Navbar Component
To style your app, you can make use of Bulma.
Open nuxt.config.js and paste the code below within the link object that is inside the head object:
module.exports = {
  // ...
  head: {
    // ...
    link [
      // ...
      {
        rel: 'stylesheet',
        href: 'https://cdnjs.cloudflare.com/ajax/libs/bulma/0.7.1/css/bulma.min.css'
      }
    ]
  },
  // ...
}
Now, let’s create the Navbar component:
- nano components/Navbar.vue
And add the following code:
<template>
  <nav class="navbar is-light">
    <div class="container">
      <div class="navbar-brand">
        <nuxt-link class="navbar-item" to="/">Nuxt Auth</nuxt-link>
        <button class="button navbar-burger">
          <span></span>
          <span></span>
          <span></span>
        </button>
      </div>
      <div class="navbar-menu">
        <div class="navbar-end">
          <div class="navbar-item has-dropdown is-hoverable">
            <a class="navbar-link">
              My Account
            </a>
            <div class="navbar-dropdown">
              <nuxt-link class="navbar-item" to="/profile">My Profile</nuxt-link>
              <hr class="navbar-divider"/>
              <a class="navbar-item">Logout</a>
            </div>
          </div>
          <template>
            <nuxt-link class="navbar-item" to="/register">Register</nuxt-link>
            <nuxt-link class="navbar-item" to="/login">Log In</nuxt-link>
          </template>
        </div>
      </div>
    </div>
  </nav>
</template>
The Navbar component contains links to login, register, profile, and logout.
Next, let’s update the default layout to make use of the Navbar component.
Open default.vue:
- nano layouts/default.vue
And replace the content with the following:
<template>
  <div>
    <Navbar/>
    <nuxt/>
  </div>
</template>

<script>
import Navbar from '~/components/Navbar'

export default {
  components: {
    Navbar
  }
}
</script>
Also, let’s update the homepage.
Open index.vue:
- nano pages/index.vue
And replace the content with the following:
<template>
  <section class="section">
    <div class="container">
      <h1 class="title">Nuxt Auth</h1>
    </div>
  </section>
</template>
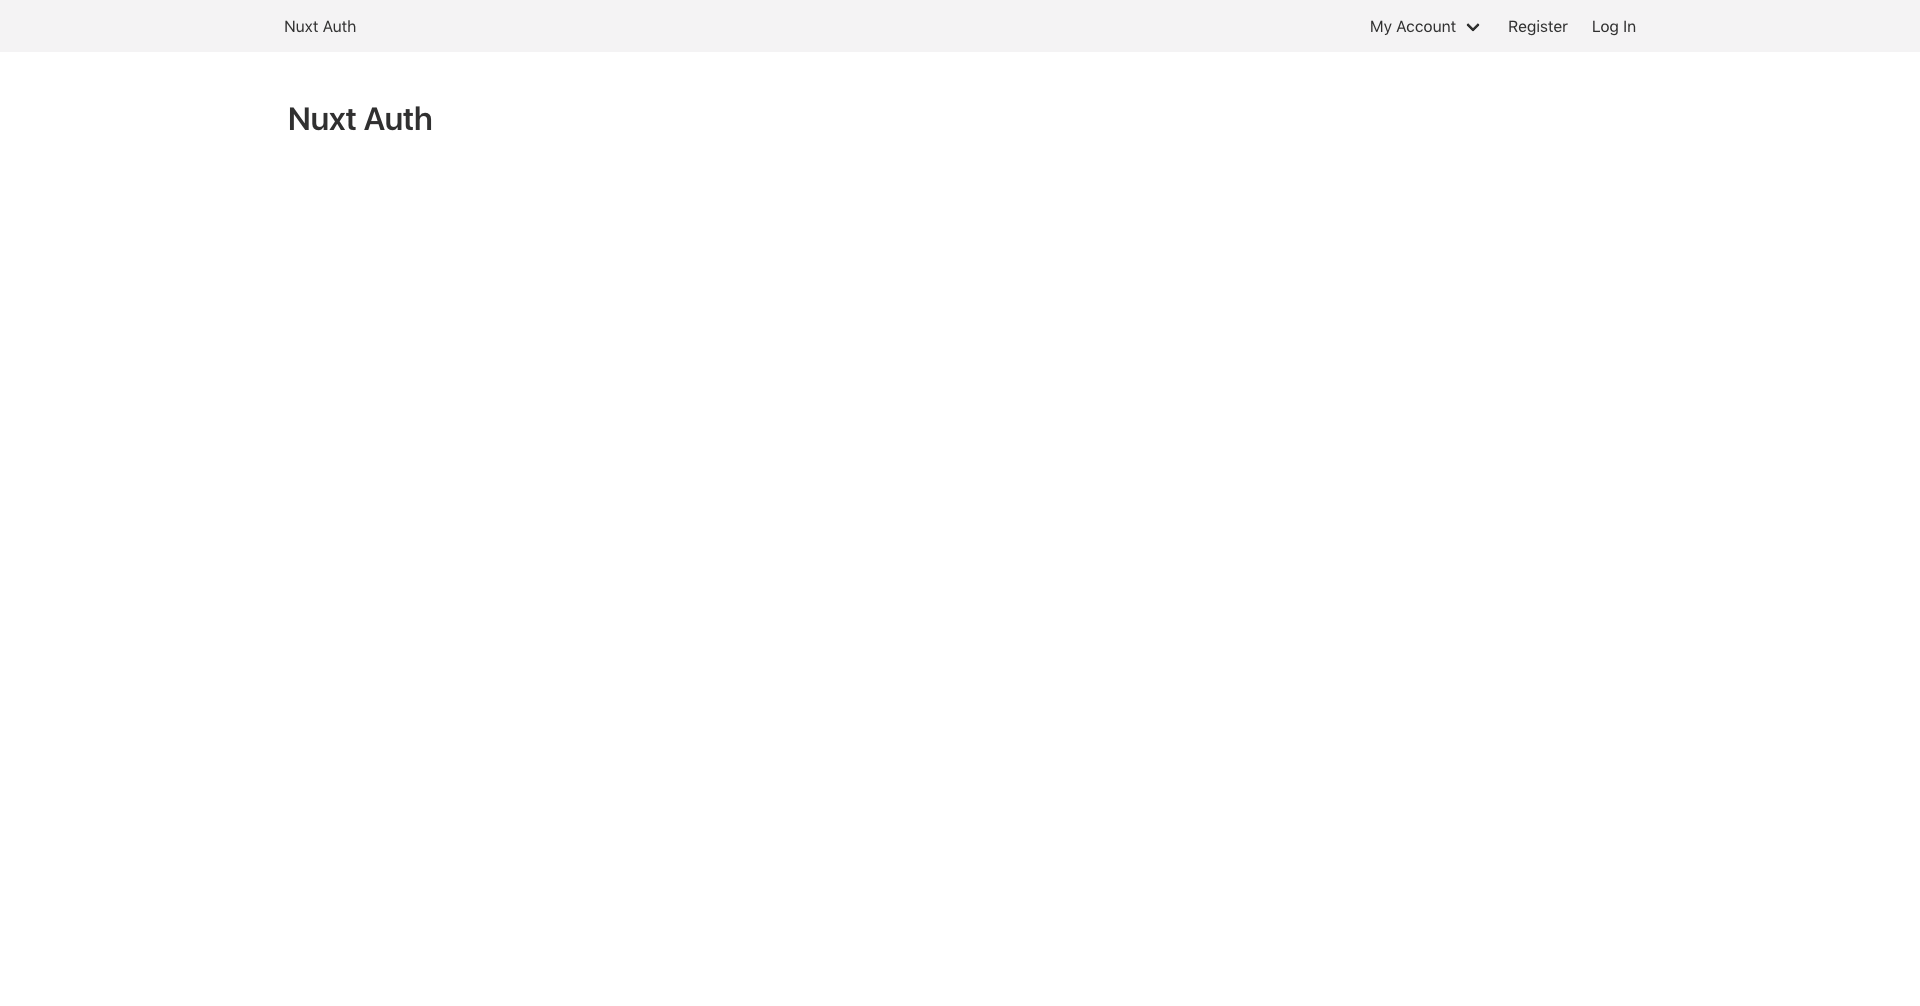
At this point, you should have an application that displays a title of "Nuxt Auth" with a header bar with navigation links:
Step 5 — Handling User Registration
Inside the pages directory, create a new register.vue file:
- nano pages/register.vue
And add the following code:
<template>
  <section class="section">
    <div class="container">
      <div class="columns">
        <div class="column is-4 is-offset-4">
          <h2 class="title has-text-centered">Register!</h2>

          <Notification :message="error" v-if="error"/>

          <form method="post" @submit.prevent="register">
            <div class="field">
              <label class="label">Username</label>
              <div class="control">
                <input
                  type="text"
                  class="input"
                  name="username"
                  v-model="username"
                  required
                />
              </div>
            </div>
            <div class="field">
              <label class="label">Email</label>
              <div class="control">
                <input
                  type="email"
                  class="input"
                  name="email"
                  v-model="email"
                  required
                />
              </div>
            </div>
            <div class="field">
              <label class="label">Password</label>
              <div class="control">
                <input
                  type="password"
                  class="input"
                  name="password"
                  v-model="password"
                  required
                />
              </div>
            </div>
            <div class="control">
              <button type="submit" class="button is-dark is-fullwidth">Register</button>
            </div>
          </form>

          <div class="has-text-centered" style="margin-top: 20px">
            Already got an account? <nuxt-link to="/login">Login</nuxt-link>
          </div>
        </div>
      </div>
    </div>
  </section>
</template>

<script>
import Notification from '~/components/Notification'

export default {
  components: {
    Notification,
  },

  data() {
    return {
      username: '',
      email: '',
      password: '',
      error: null
    }
  },

  methods: {
    async register() {
      try {
        await this.$axios.post('register', {
          username: this.username,
          email: this.email,
          password: this.password
        })

        await this.$auth.loginWith('local', {
          data: {
          email: this.email,
          password: this.password
          },
        })

        this.$router.push('/')
      } catch (e) {
        this.error = e.response.data.message
      }
    }
  }
}
</script>
This contains a form with three fields: username, email, and password. Each field is bound to corresponding data on the component. When the form is submitted, a register method will be called. Using the Axios module, you make a post request to the /register endpoint, passing along the user data. If the registration was successful, you make use of the Auth module’s loginWith(), using the local strategy and passing the user data to log the user in. Then, you redirect the user to the homepage. If there is an error during the registration, you set the error data as the error message gotten from the API response.
If there is an error, the error message is displayed by a Notification component.
Create a new Notification.vue file inside components:
- nano components/Notifaction.vue
And paste the code below in it:
<template>
  <div class="notification is-danger">
    {{ message }}
  </div>
</template>

<script>
export default {
  name: 'Notification',
  props: ['message']
}
</script>
The Notification component accepts a message props, which is the error message.
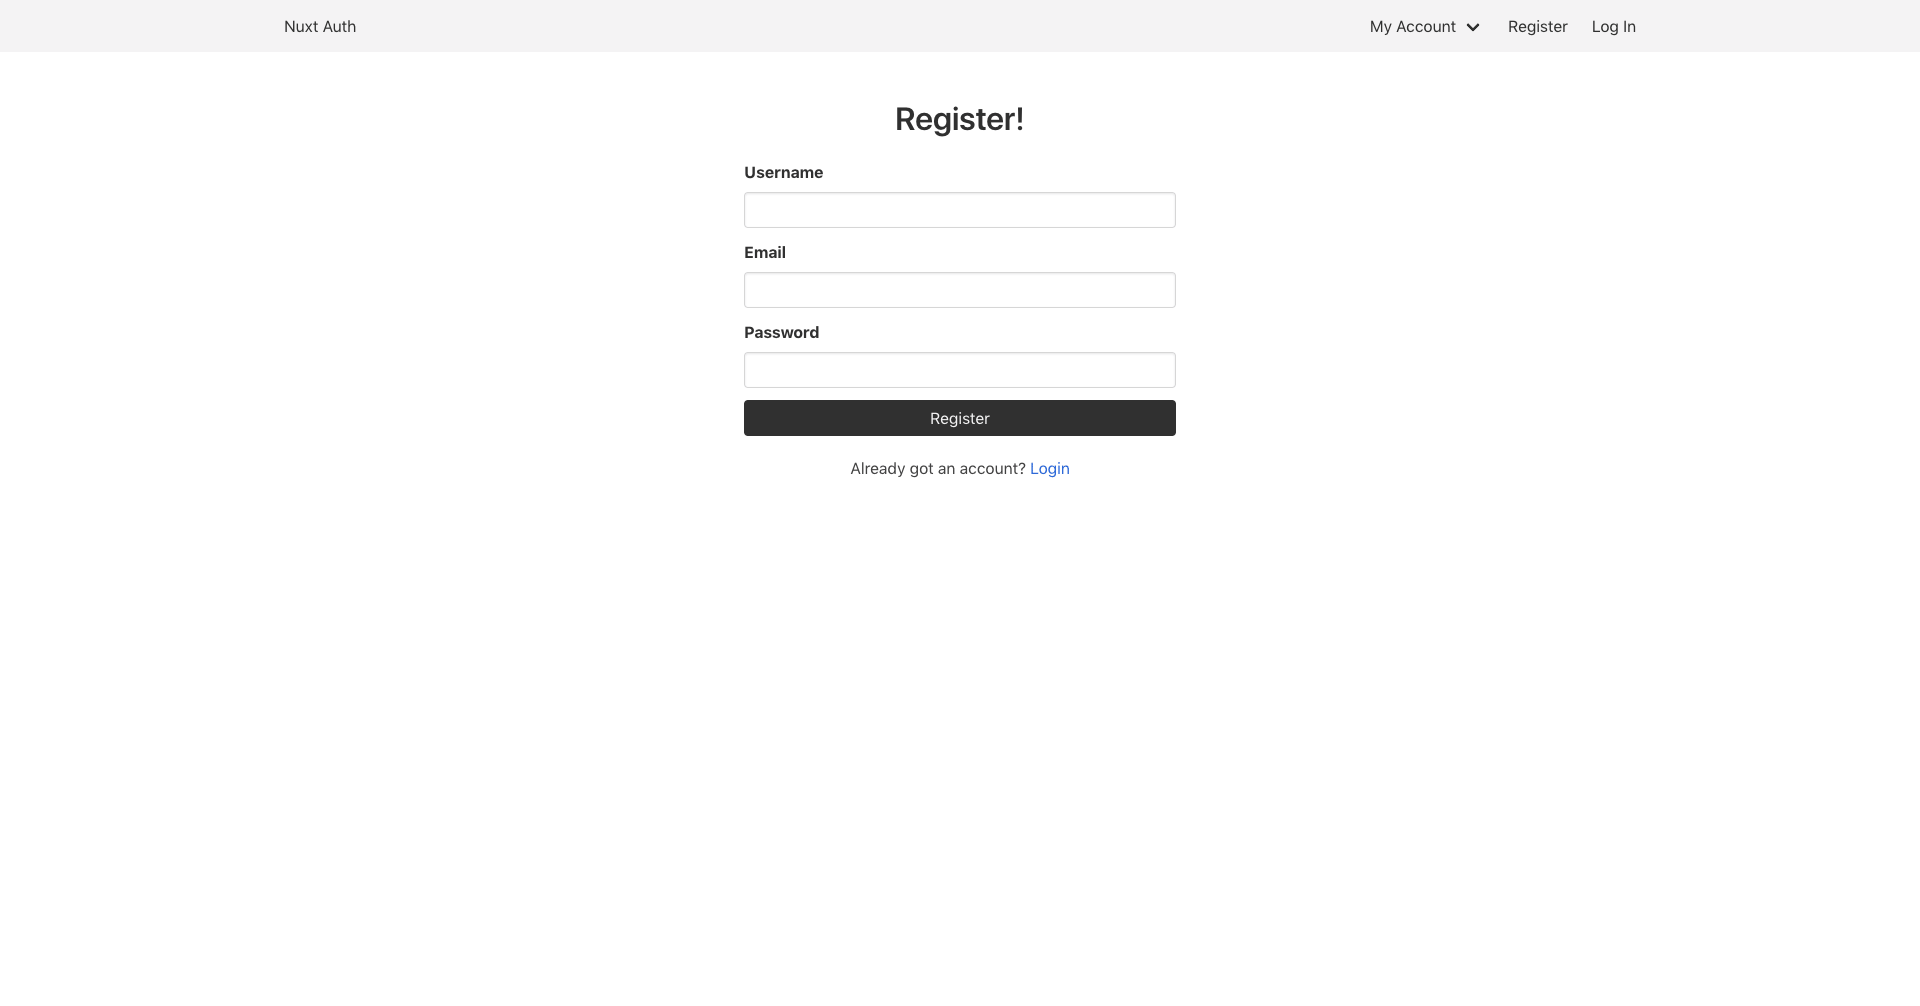
Now, you can test out user registration:

Step 6 — Handling LoggedUsers Logged In and Logged Out
Upon successful registration, users should be logged in but there is currently no way for the app to know whether users are logged in or not. So let’s fix that by updating the Navbar component and adding some computed properties.
Before you do just that, let’s first activate the Vuex store by creating an index.js file inside the store directory. The Auth module stores user authentication status as well as user details inside Vuex state in an auth object. So you can check if a user is logged in or not with this.$store.state.auth.loggedIn, which will either return true or false. Similarly, you can get a user’s details with this.$store.state.auth.user, which will be null if no user is logged in.
Note: You can also access the user authentication status as well as the user details directly with the Auth module using this.$auth.loggedIn and this.$auth.user respectively.
Since you might want to use the computed properties in multiple places in your app, let’s create store getters.
Open index.js:
- nano store/index.js
And paste the code below in it:
export const getters = {
  isAuthenticated(state) {
    return state.auth.loggedIn
  },

  loggedInUser(state) {
    return state.auth.user
  }
}
Here, you create two getters. The first one (isAuthenticated) will return the authentication status of a user and the second (loggedInUser) will return the details or the logged in user.
Next, let’s update the Navbar component to make use of the getters. Replace the content of components/Navbar.vue with the following:
<template>
  <nav class="navbar is-light">
    <div class="container">
      <div class="navbar-brand">
        <nuxt-link class="navbar-item" to="/">Nuxt Auth</nuxt-link>
        <button class="button navbar-burger">
          <span></span>
          <span></span>
          <span></span>
        </button>
      </div>
      <div class="navbar-menu">
        <div class="navbar-end">
          <div class="navbar-item has-dropdown is-hoverable" v-if="isAuthenticated">
            <a class="navbar-link">
              {{ loggedInUser.username }}
            </a>
            <div class="navbar-dropdown">
              <nuxt-link class="navbar-item" to="/profile">My Profile</nuxt-link>
              <hr class="navbar-divider"/>
              <a class="navbar-item">Logout</a>
            </div>
          </div>
          <template v-else>
            <nuxt-link class="navbar-item" to="/register">Register</nuxt-link>
            <nuxt-link class="navbar-item" to="/login">Log In</nuxt-link>
          </template>
        </div>
      </div>
    </div>
  </nav>
</template>

<script>
import { mapGetters } from 'vuex'

export default {
  computed: {
    ...mapGetters(['isAuthenticated', 'loggedInUser'])
  }
}
</script>
You create the computed properties by using the spread operator (...) to extract the getters from mapGetters. Then using isAuthenticated, you display the user menu or links to login or register depending on whether the user is logged in or not. Also, you use loggedInUser to display the authenticated user username.
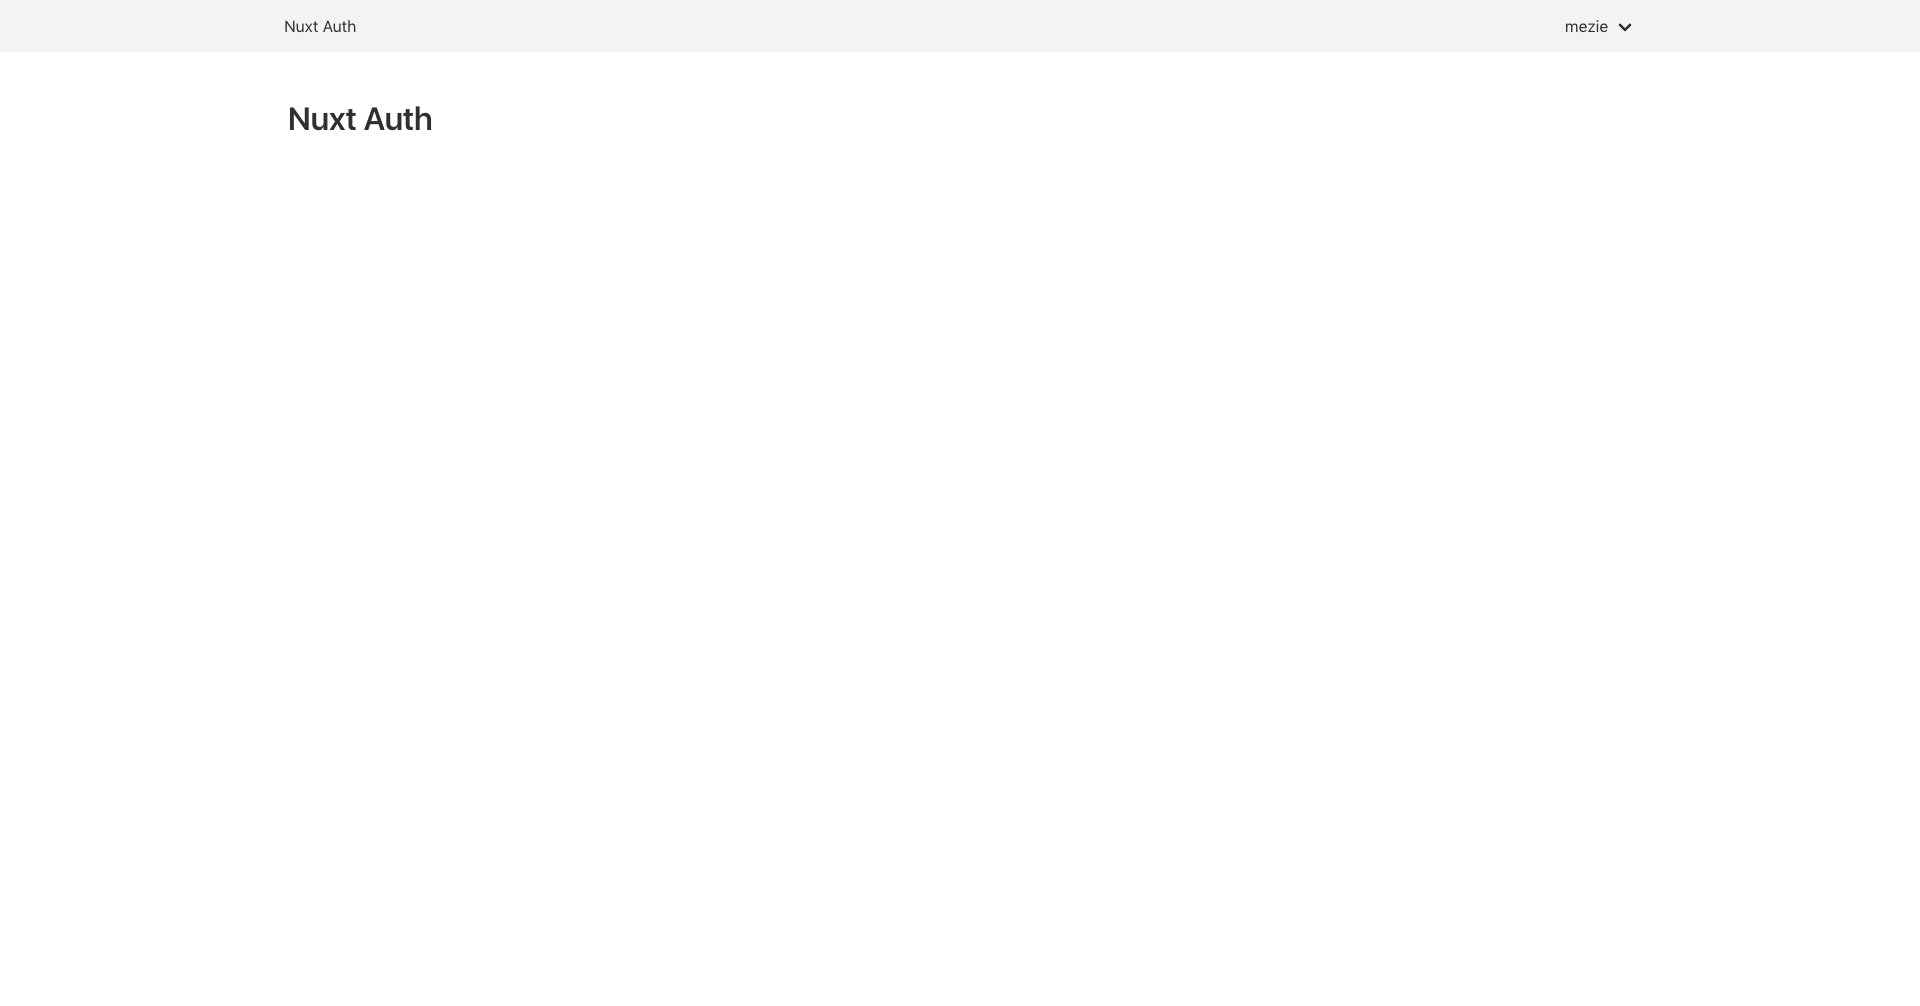
Now, if you give your app a refresh, you should see something similar to below:
Step 7 — Handling User Log In
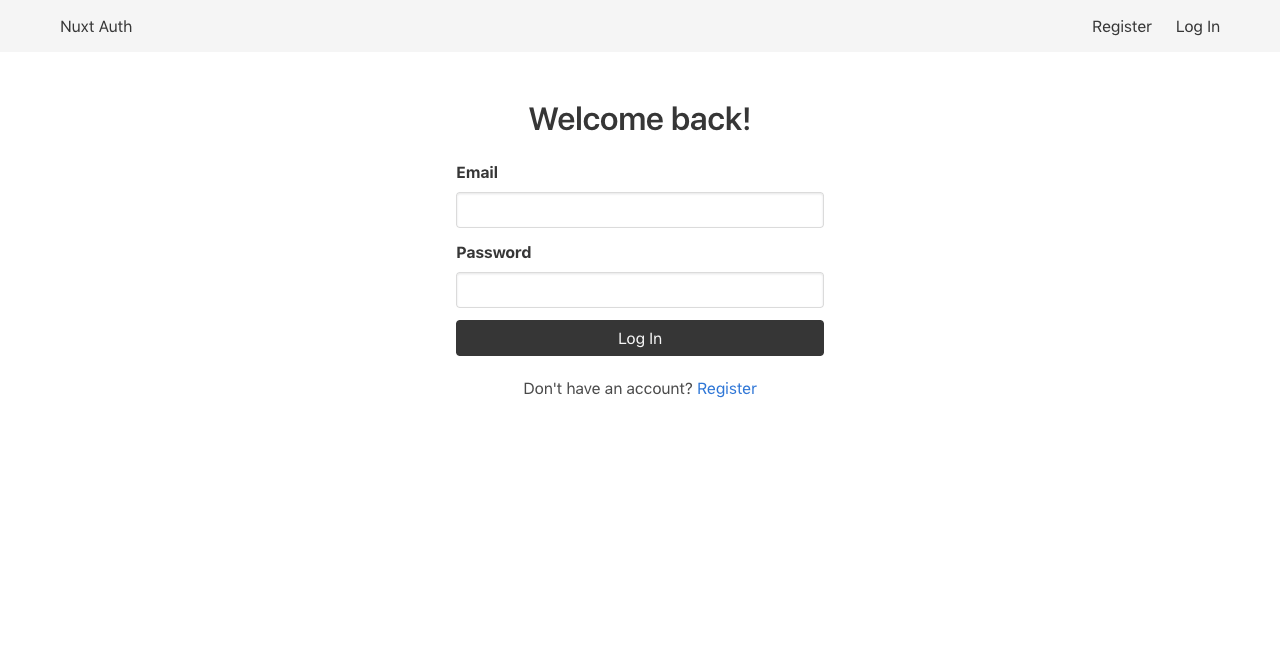
Now, let’s allow returning users the ability to log in.
Create a new login.vue file inside the pages directory:
nano pages/login.vue
And paste the code below in it:
<template>
  <section class="section">
    <div class="container">
      <div class="columns">
        <div class="column is-4 is-offset-4">
          <h2 class="title has-text-centered">Welcome back!</h2>

          <Notification :message="error" v-if="error"/>

          <form method="post" @submit.prevent="login">
            <div class="field">
              <label class="label">Email</label>
              <div class="control">
                <input
                  type="email"
                  class="input"
                  name="email"
                  v-model="email"
                />
              </div>
            </div>
            <div class="field">
              <label class="label">Password</label>
              <div class="control">
                <input
                  type="password"
                  class="input"
                  name="password"
                  v-model="password"
                />
              </div>
            </div>
            <div class="control">
              <button type="submit" class="button is-dark is-fullwidth">Log In</button>
            </div>
          </form>
          <div class="has-text-centered" style="margin-top: 20px">
            <p>
              Don't have an account? <nuxt-link to="/register">Register</nuxt-link>
            </p>
          </div>
        </div>
      </div>
    </div>
  </section>
</template>

<script>
import Notification from '~/components/Notification'

export default {
  components: {
    Notification,
  },

  data() {
    return {
      email: '',
      password: '',
      error: null
    }
  },

  methods: {
    async login() {
      try {
        await this.$auth.loginWith('local', {
          data: {
          email: this.email,
          password: this.password
          }
        })

        this.$router.push('/')
      } catch (e) {
        this.error = e.response.data.message
      }
    }
  }
}
</script>
This is quite similar to the register page. The form contains two fields: email and password. When the form is submitted, a login method will be called. Using the Auth module loginWith() and passing along the user data, you log the user in. If the authentication was successful, you redirect the user to the homepage. Otherwise, set error to the error message gotten from the API response. Again, you are using the Notification component from earlier on to display the error message.
Step 8 — Displaying the User Profile
Let’s allow logged in users to view their profile.
Create a new profile.vue file inside the pages directory:
- nano pages/profile.vue
And paste the code below in it:
<template>
  <section class="section">
    <div class="container">
      <h2 class="title">My Profile</h2>
      <div class="content">
        <p>
          <strong>Username:</strong>
          {{ loggedInUser.username }}
        </p>
        <p>
          <strong>Email:</strong>
          {{ loggedInUser.email }}
        </p>
      </div>
    </div>
  </section>
</template>

<script>
import { mapGetters } from 'vuex'

export default {
  computed: {
    ...mapGetters(['loggedInUser'])
  }
}
</script>
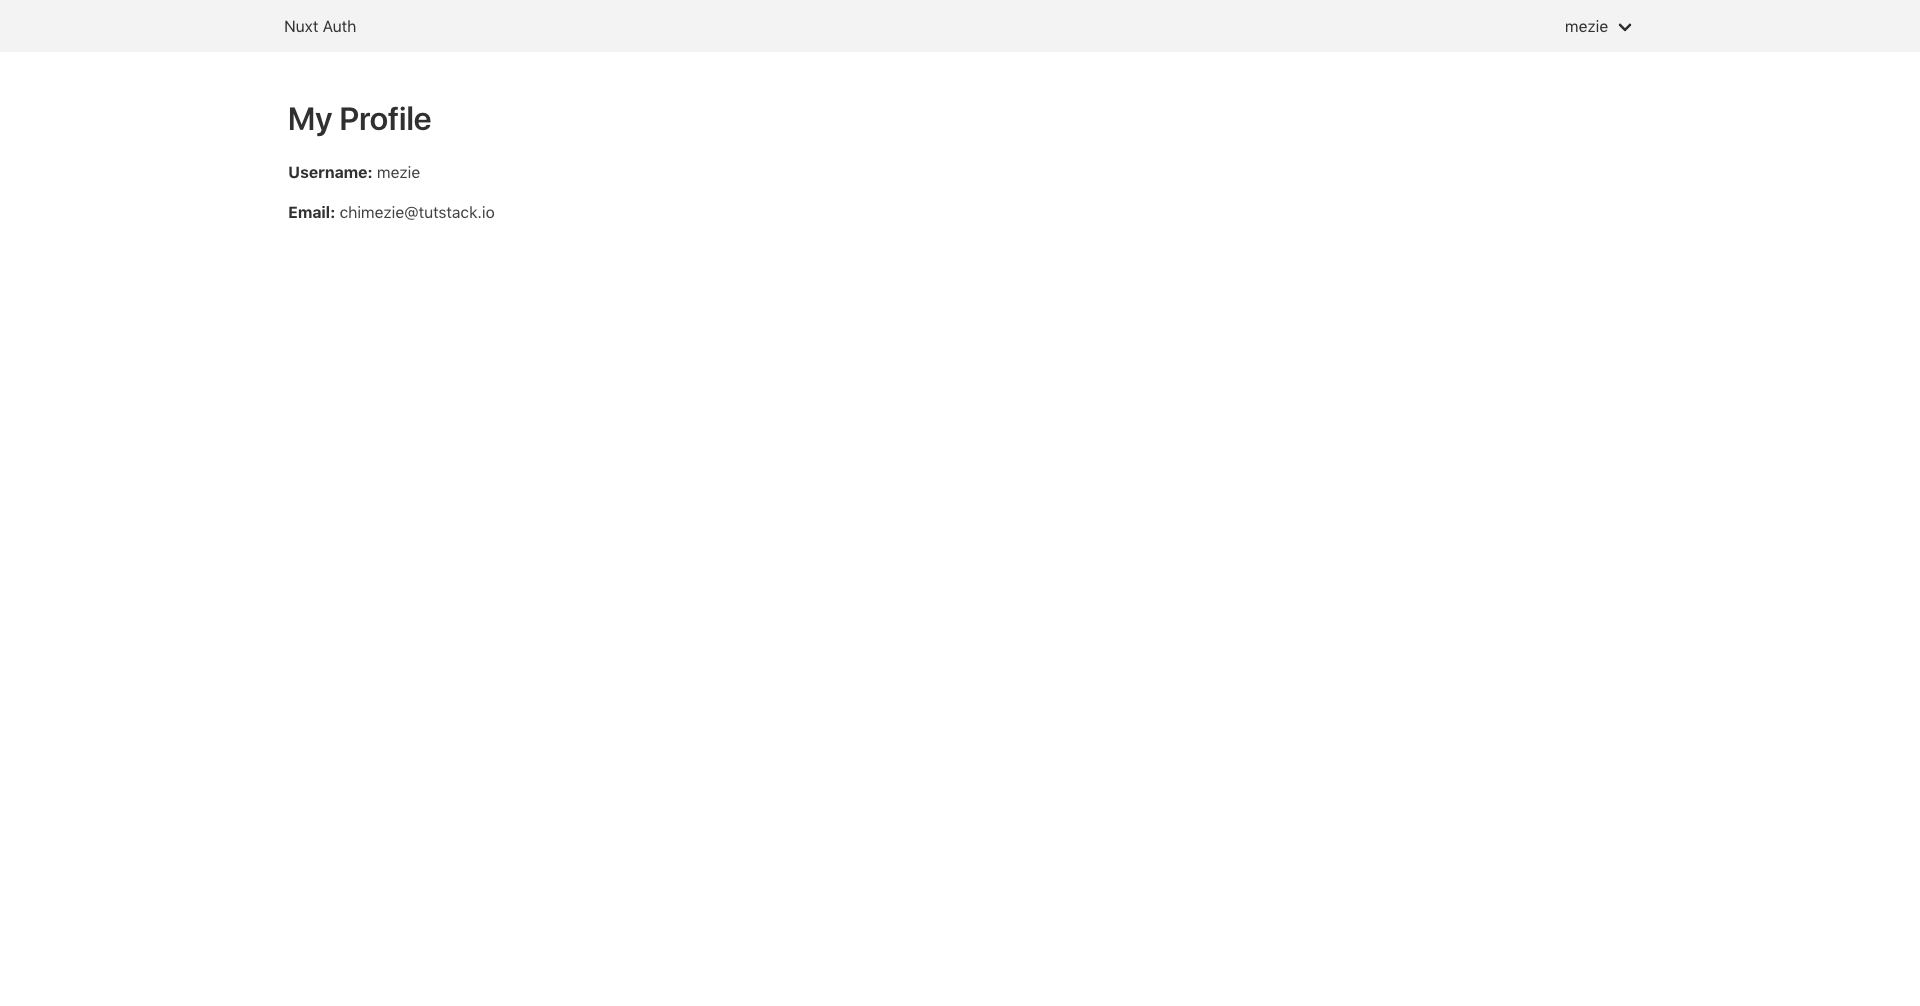
Notice how you are using the loggedInUser getter from earlier on to display the user details.
Clicking on the My Profile link should result in a My Profile page being displayed.
Step 9 — Logging Users Out
Update the logout link inside the Navbar component.
Open Navbar.vue:
- nano components/Navbar.vue
Modify the logout link to use @click="logout":
// ...
<div class="navbar-dropdown">
  <nuxt-link class="navbar-item" to="/profile">My Profile</nuxt-link>
  <hr class="navbar-divider"/>
  <a class="navbar-item"  @click="logout">Logout</a>
</div>
// ...
When the logout link is clicked, it will trigger a logout method.
Next, let’s add the logout method inside the script section of the Navbar component:
// ...

export default {
  // ...
  methods: {
    async logout() {
      await this.$auth.logout();
    },
  },
}
You call the logout() of the Auth module. This will delete the user’s token from localstorage and redirect the user to the homepage.
Step 10 — Restricting the Profile Page
As it stands now, anybody can visit the profile page. And if the user is not logged in, it will result in an error.

To fix this, you need to restrict the profile page to only logged in users. Luckily for us, you can achieve that with the Auth module. The Auth module comes with an auth middleware, which you can use in this scenario.
So let’s add the auth middleware to the profile page. Update the script section as below:
// ...

export default {
  middleware: 'auth',
  // ...
}
Now when a user that is not logged in tries to visit the profile page, the user will be redirected to the login page.
Step 11 — Creating a Guest Middleware
Again as it stands, even as a logged in user, you can still access the login and register pages. One way to fix that is to restrict login and register pages to only users that are not logged in. You can do that by creating a guest middleware.
Inside the middleware directory, create a new guest.js file:
- nano middleware/guest.js
And paste the code below in it:
export default function ({ store, redirect }) {
  if (store.state.auth.loggedIn) {
    return redirect('/')
  }
}
A middleware accepts the context as its first argument. So you extract store and redirect from the context. Then, you check if the user is logged in then redirect the user to the homepage. Otherwise, you allow the normal execution of the request.
Next, let’s make use of this middleware. Update the script section of both login and register as below:
// ...

export default {
  middleware: 'guest',
  // ...
}
Now, everything will be working as expected.
Conclusion
In this tutorial, you looked at how to implement authentication in a Nuxt.js application using the Auth module. You also saw how to keep the authentication flow sleek by making use of middleware.
To learn more about the Auth module, check out the docs.
If you’d like to learn more about Vue.js, check out our Vue.js topic page for exercises and programming projects.
Thanks for learning with the DigitalOcean Community. Check out our offerings for compute, storage, networking, and managed databases.
About the author(s)
Former Technical Editor at DigitalOcean. Expertise in areas including Vue.js, CSS, React, and more.
Still looking for an answer?
This textbox defaults to using Markdown to format your answer.
You can type !ref in this text area to quickly search our full set of tutorials, documentation & marketplace offerings and insert the link!
Requesting a async call from http://127.0.0.1:000 to http://127.0.0.1:3333/api endpoint will generate CORS issue
Thank you for this great tutorial.I have a issue.
methods: { async logout() { await this.$auth.logout(); }, },
this method not redirecting to the homepage.
Awesome blog, really helpful. just small typo in file name Notifaction
Unknown middleware guest An error occurred while rendering the page. Check developer tools console for details.
 This work is licensed under a Creative Commons Attribution-NonCommercial- ShareAlike 4.0 International License.
Become a contributor for community
Get paid to write technical tutorials and select a tech-focused charity to receive a matching donation.

DigitalOcean Documentation
Full documentation for every DigitalOcean product.

Resources for startups and AI-native businesses
The Wave has everything you need to know about building a business, from raising funding to marketing your product.
The developer cloud
Scale up as you grow — whether you're running one virtual machine or ten thousand.

Start building today
From GPU-powered inference and Kubernetes to managed databases and storage, get everything you need to build, scale, and deploy intelligent applications.
