By Jonah Aragon and Tammy Fox

Introduction
Ajenti is an open source, web-based control panel that can be used for a large variety of server management tasks. The add-on package called Ajenti V allows you to manage multiple websites from the same control panel. By now you should have Ajenti and Ajenti V installed.
In this tutorial we will install a WordPress blog, using the tools Ajenti V provides.
Prerequisites
For this tutorial, you will need:
- A registered domain name that resolves to the Droplet with Ajenti and Ajenti V installed (example.com is used throughout this tutorial)
- Ajenti and Ajenti V installed from How to Install the Ajenti Control Panel and Ajenti V on Ubuntu 14.04
Step 1 — Configuring WordPress
In your browser, browse to your Ajenti control panel such as https://panel.example.com/, and log into it using the admin account you created when installing Ajenti and Ajenti V. In the sidebar to the right, under the Web section, click Websites. The first time it may give you a notice that it is not active yet, just click the Enable button to allow Ajenti V to make the necessary config changes.
There will be a section called New Website. Under that there is a Name text field. You can type anything you want to identify your website with in there. Click the Create button, and you will notice your website is now listed under the Websites section. Click Manage next to your website.
Under the Website Files section, change /srv/new-website to any directory, for example /srv/example.com. Press the Set button, and then press the Create Directory button. Remember this directory. You will need to upload files to it soon.
Under the General section, uncheck the Maintenance mode setting. Then click Apply changes at the bottom of the page.
At the top of the page click on the Domains tab. Press the Add button, and type your domain name such as example.com in the text field that appears, then click the Apply Changes button.
Click the Advanced tab now, and in the Custom configuration box, enter the following:
# This order might seem weird - this is attempted to match last if rules below fail.
location / {
	try_files $uri $uri/ /index.php?$args;
}

# Add trailing slash to */wp-admin requests.
rewrite /wp-admin$ $scheme://$host$uri/ permanent;

# Directives to send expires headers and turn off 404 error logging.
location ~* ^.+\.(ogg|ogv|svg|svgz|eot|otf|woff|mp4|ttf|rss|atom|jpg|jpeg|gif|png|ico|zip|tgz|gz|rar|bz2|doc|xls|exe|ppt|tar|mid|midi|wav|bmp|rtf)$ {
       access_log off; log_not_found off; expires max;
}

location = /favicon.ico {
	log_not_found off;
	access_log off;
}
location = /robots.txt {
	allow all;
	log_not_found off;
	access_log off;
}
# Deny all attempts to access hidden files such as .htaccess, .htpasswd, .DS_Store (Mac).
# Keep logging the requests to parse later (or to pass to firewall utilities such as fail2ban)
location ~ /\. {
	deny all;
}
# Deny access to any files with a .php extension in the uploads directory
# Works in sub-directory installs and also in multisite network
# Keep logging the requests to parse later (or to pass to firewall utilities such as fail2ban)
location ~* /(?:uploads|files)/.*\.php$ {
	deny all;
}
Click Apply changes.
Next, click the Content tab on the top. In the dropdown menu select PHP FastCGI, and click Create. Click the Advanced menu under the new PHP entry, and enter the following content in Custom configuration. Note this is not the same Custom configuration as the previous step.
try_files $uri =404;
fastcgi_split_path_info ^(.+\.php)(/.+)$;
Click Apply Changes.
Browse to the MySQL tab. Under the Databases section, enter a name for your database, this can be anything. It will be referenced later in the tutorial as database_name. Click Create. Now under the Users section, you can just click Create and use the automatically generated Name and Password provided, or you can use your own. The username and password will be referenced later as db_user and db_password, respectively. When you are finished, click Apply Changes. Remember the database name, user, and password. You will need them later in this tutorial to finish setting up WordPress.
Step 2 — Uploading the Files
Before you can unpack the WordPress files, you need to install the zip utilities. In the sidebar, under Tools, click Terminal. Click New, and click the black box that appears. Type the following into the terminal:
apt-get install zip unzip
When the process completes, click the X next to Terminal 0 at the top of the page.
Go back to the Websites section again now, and click Manage next to your website. Then go to the General tab of your website. Under the Automatic Downloader section, input http://wordpress.org/latest.zip, then press Download and Unpack. A terminal will appear. When it finishes unpacking you can exit the terminal by clicking the X next to Terminal 0 at the top of the page.
Back under the Tools section in the sidebar, click File Manager. Navigate to the directory you previously created in the /srv/ directory by clicking the folder names. Inside there should be a directory named wordpress that was created when the Automatic Downloader unpacked the WordPress files. Open it and select all the files, like so:
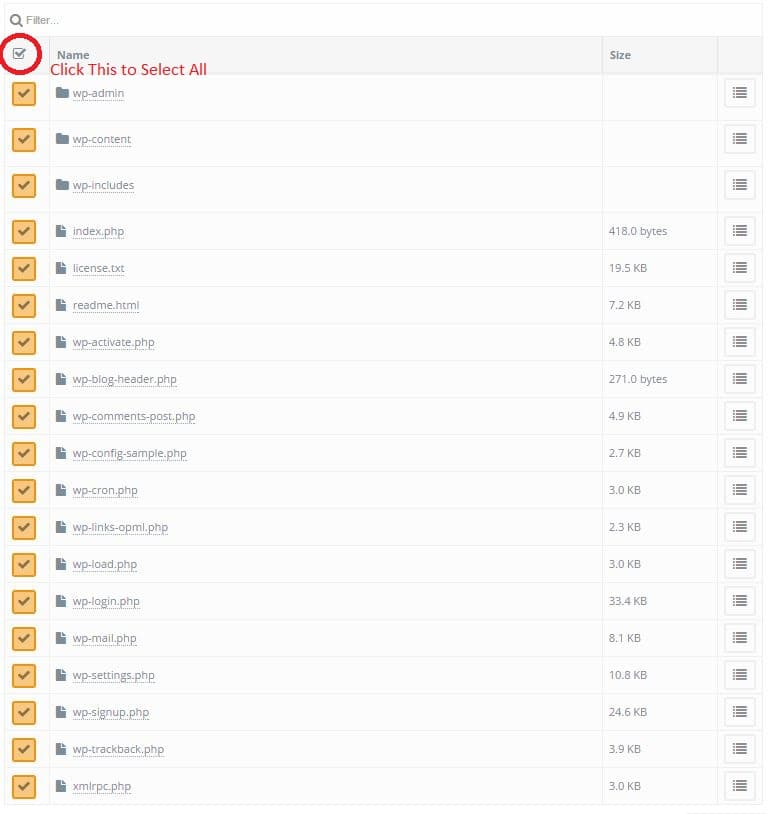
Then press the Cut option in the toolbar at the top of the screen.

Navigate back to your directory in the /srv/ directory such as /srv/example.com, and paste all the files in the root of the directory. You can then delete the empty wordpress folder. It may take a while for it to paste all the files, so be patient.
Now all the WordPress files are in the root of your website. We can now continue to the next step.
Step 3 — Installing WordPress
Browse to your domain name such as http://example.com in your web browser. You will be greeted by the initial WordPress installation page. Select your language in the selection field and click Continue, then click Let’s go!.
In the database name field, change wordpress to the database_name you picked earlier in the tutorial. Also provide the database username and password you decided on earlier in the tutorial.
Database host should be left as localhost. Table Prefix can be left as wp_, but changing this from its default value might make your installation more secure from certain MySQL attacks. Consider changing it to something like blog_ or even just something random as long as it’s followed by the _ character. Keep it relatively short — no more than 5 characters or so.
Now you can click Run the install, and WordPress will finish installing! You will be prompted to fill in a bit more site information such as the title and your admin credentials. Fill these in as you see fit.
Conclusion
You should now have a functional WordPress website installed on your Ajenti control panel.
Thanks for learning with the DigitalOcean Community. Check out our offerings for compute, storage, networking, and managed databases.
Tutorial Series: Using the Ajenti Control Panel with Ajenti V
Ajenti is an open source, web-based control panel that can be used for a large variety of server management tasks. It can install packages and run commands, and you can view basic server information such as RAM in use, free disk space, etc. All this can be accessed from a web browser.
Optionally, an add-on package called Ajenti V allows you to manage multiple websites from the same control panel and easily configure email accounts for your domains.
Browse Series: 5 tutorials
About the author(s)
Sign up for DigitalOcean with this link and get a $10 credit: https://www.digitalocean.com/?refcode=fb6730f5bb99
Technical Editor, DigitalOcean
Still looking for an answer?
This textbox defaults to using Markdown to format your answer.
You can type !ref in this text area to quickly search our full set of tutorials, documentation & marketplace offerings and insert the link!
I followed all steps but when I visit the wordpress website by opening my domain, the following happens:
A file named “download” is being downloaded. It contains PHP, here’s a snippet:
<?php
/* vim: set expandtab sw=4 ts=4 sts=4: */
/**
 * Main loader script
 *
 * @package PhpMyAdmin
 */

/**
 * Gets some core libraries and displays a top message if required
 */
require_once 'libraries/common.inc.php';

/**
 * display Git revision if requested
 */
require_once 'libraries/display_git_revision.lib.php';
require_once 'libraries/Template.class.php';

/**
 * pass variables to child pages
 */
$drops = array(
    'lang',
I tried running PHP code by adding a test.php file to the root which prints “hello world”. That works 100%. But as soon as I rename that file to index.php, it downloads that same file again.
Any ideas?
Thanks
there is a better way of download the files, in general tab using Automatic Downloader section
I did everything but get an apache server page in the end, there’s no Wordpress installation page.
Doesn’t work for me: I’m stuck to Create Database and Create User from MySQL Tab. I receive this error when I try to create database or user: “ERROR 1045 (28000): Access denied for user ‘bobses’@‘localhost’ (using password: YES)”
Can someone help me, please?
This doesn’t work, I get the following error: nginx: [emerg] duplicate location “/” in /etc/nginx/conf.d/example.conf:55 nginx: configuration file /etc/nginx/nginx.conf test failed
In that file there is:
    # This order might seem weird - this is attempted to match last if rules below fail.
location / {
    try_files $uri $uri/ /index.php?$args;
}
and also
    location  / {

        try_files $uri =404;
fastcgi_split_path_info ^(.+\.php)(/.+)$;


        fastcgi_index index.php;
        include fcgi.conf;
        fastcgi_pass unix:/var/run/ajenti-v-php7.0-fcgi-example-php7.0-fcgi-0.sock;
        fastcgi_param SCRIPT_FILENAME $document_root$fastcgi_script_name;

    }
 This work is licensed under a Creative Commons Attribution-NonCommercial- ShareAlike 4.0 International License.
Become a contributor for community
Get paid to write technical tutorials and select a tech-focused charity to receive a matching donation.

DigitalOcean Documentation
Full documentation for every DigitalOcean product.

Resources for startups and AI-native businesses
The Wave has everything you need to know about building a business, from raising funding to marketing your product.
The developer cloud
Scale up as you grow — whether you're running one virtual machine or ten thousand.

Start building today
From GPU-powered inference and Kubernetes to managed databases and storage, get everything you need to build, scale, and deploy intelligent applications.
