
Introduction
A Linux server is an extremely flexible platform for developing and serving content. There is no single right way to serve an application, but there are certain procedures or application sets that work well together. If you install a fair amount of web-facing software, you will probably notice that the general installation and configuration procedures follow the same path.
Generally speaking, these applications are backed by a database management system, such as MySQL/MariaDB, PostgreSQL, MongoDB, etc. The actual web content is accessed through a web server, like Apache or Nginx. Dynamic content is processed through a server-side programming language, such as PHP, Python, Ruby, etc. This is the basis of what we call “application stacks”.
The most traditional application stack is a LAMP stack. That is Linux for the operating system, Apache as the web server, MySQL for the database, and PHP to process information. Other components can be substituted as your requirements dictate. One of the nice things about Open Source software is that it is flexible and adaptive.
One popular kind of application that is installed using these web stacks is forum software. Most forums require you to go through the same basic process which involves installing a web server, a database system, and a programming language (including the libraries and modules that allow these tools to communicate). Following this, you need to install the actual software and then configure all of the pieces to work together.
The general procedure is the same for most kinds of forum software. In this article, we will be using the MyBB forum software on Ubuntu 12.04 to demonstrate the appropriate steps. Many other forums (Simple Machines, Vanilla, phpBB, PunBB, etc) will use a very similar procedure, although there will be some variation between each.
Step One –– Install the Stack
In this article, we will be using an Ubuntu 12.04 droplet.
The first thing you need to do when trying to get this software off the ground is install the stack components that will do the heavy lifting. In our case, the traditional LAMP stack will serve us well.
We will install each of the components first, and configure them in the next step.
Install Apache
First, update your packages and install Apache, which will be our web server. This piece of software serves web pages when users visit your website. Every site on the internet is served by a web browser.
sudo apt-get update
sudo apt-get install apache2
Install MySQL
Next, we will install MySQL, which will be our database management system. A database management system is responsible for storing information in an organized manner. It can be used to sort, search for, update, and format most kinds of data that would be useful for a website (users, stats, pages, etc).
On top of the actual database management software, we will also install some libraries and modules that will allow our other components to communicate easily with it. During the installation, you will be asked to choose and confirm a database administrator password. This can be anything you’d like:
sudo apt-get install mysql-server libapache2-mod-auth-mysql php5-mysql
Install PHP
The only remaining stack components we need to install are the PHP interpreter and its associated libraries. PHP is what we call a server-side scripting language.
Basically, this means that it is a programming language that executes code on the server. This allows you to generate dynamic content based on user requests and information stored in your database. A programming language can serve as the glue to connect the other pieces:
sudo apt-get install php5 libapache2-mod-php5 php5-mcrypt
Step Two –– Configure the Stack
Now that we have installed all of the components of our web stack, we need to do some quick configuration to secure and initialize our environment, and make sure that everything is configured to work together. These steps should be taken whenever you are setting up a web-facing service, because the default configurations are not always ideal.
MySQL Configuration
First, we will initialize the MySQL environment. We can initialize a database environment by typing:
sudo mysql_install_db
Afterwards, we can secure our installation by reversing some settings that are insecure, but defaulted to allow for easy testing. Run the interactive script by typing:
sudo mysql_secure_installation
This will ask you a few questions. First, it will prompt you for the database administer password that you set during the MySQL installation. Afterwards, answer “yes” to each of the questions that follow (except for the password change question, if you are happy with your selection).
Apache Configuration
Next, we need to configure a file in our Apache configuration directory to preference PHP files to regular HTML pages. This means that if there is a choice between serving an ambiguous request, the server will choose the PHP page. This is normally how you want web servers to work when they are used in tandem with PHP and databases.
Edit this file with your preferred editor. We will use nano here:
sudo nano /etc/apache2/mods-enabled/dir.conf
In this file, there is a directive called DirectoryIndex which lists the preferred file name to be served when a directory is requested by the web browser. We need to add index.php to the beginning of the list. Edit the file so that it matches this:
<pre> <IfModule mod_dir.c>
DirectoryIndex <span class="highlight">index.php</span> index.html index.cgi index.pl index.php index.xhtml index.htm
</IfModule> </pre>
After implementing this change, you need to restart the web server for this change to take effect:
sudo service apache2 restart
PHP Configuration
For our purposes, the default PHP configuration will work fine. However, in other circumstances, you may need to change some of the values in its configuration file to enable extra functionality, lock down unneeded resources, etc.
The PHP configuration files are located at /etc/php5. The file that you will probably be most concerned about is /etc/php5/apache2/php.ini. This will configure how PHP behaves when interacting with Apache:
sudo nano /etc/php5/apache2/php.ini
As you can see, the file is incredibly long. This is partly because there are so many configuration options and partly because the file is very well commented.
Sometimes applications can be optimized by changing some of the values in this file. For instance, if you are doing some intense calculations, you may need to increase the maximum memory usage of a PHP process:
memory_limit = 128M
The default should be fine for our purposes though.
Step Three –– Create the Application Database
We have our stack software installed and configured to work well together. MySQL is up and running, but there is not currently a database that we can use for our application. We will create one so that our forum software can manage its data.
First, log into MySQL. This will prompt you for the same password you selected for administering MySQL during installation:
mysql -u root -p
You will be logged into the MySQL interface and your command prompt will change. We can give SQL commands to the database software from this prompt. SQL is the querying language that MySQL implements. It is used to create, modify, and interact with both the database software and the data itself.
In order to compartmentalize the information from our forum, we need to create a database, which is the basic unit of organization available to us. We will name it after the associated software in case we someday have multiple databases being hosted on the same machine. This will let us easily identify what each contains.
In our example, we are installing the “MyBB” software, so we will name it accordingly. All SQL commands should end with a semi-colon (;):
<pre> CREATE DATABASE <span class=“highlight”>mybb</span>; </pre>
We also should create a specific user to use this database. This is good practice because it allows us to control what the software has access to on a fine-grained level. Here, we will create a user and assign it a password in one line:
<pre> CREATE USER ‘<span class=“highlight”>mybbuser</span>’@‘localhost’ IDENTIFIED BY ‘<span class=“highlight”>password</span>’; </pre>
We have a database and a user, but they are not associated yet. We need to grant the user access to the database:
<pre> GRANT ALL PRIVILEGES ON <span class=“highlight”>mybb</span>.* TO ‘<span class=“highlight”>mybbuser</span>’@‘localhost’ IDENTIFIED BY ‘<span class=“highlight”>password</span>’; </pre>
We can implement our changes and exit the MySQL interface by typing the following:
FLUSH PRIVILEGES;
exit
Step Four –– Download and Configure Forum Software
We now have our web stack configured and a database created for our application. All of the preliminary steps are complete and we can download and begin configuring our actual application.
We will download the initial files in a temporary directory in our home folder. Create it and change into the directory now:
mkdir ~/temp
cd ~/temp
This is the folder where we will download and configure our software before moving it into the web root where Apache can serve the files. You will have to acquire the project’s files from their respective websites. In our case, we can get the latest version directly from the website:
wget -O mybb.zip http://www.mybb.com/download/latest
We need to unzip the files with unzip, which is not installed on our system yet. We can fix that with this command:
sudo apt-get install unzip
Now we can extract the software from the zip archive:
unzip mybb.zip
This will create two directories called Documentation and Upload. The Upload directory contains the actual forum files, while the Documentation directory, unsurprisingly, contains the documentation. You can move the documentation directory anywhere that you’d like. As for the other directory, we need to move that into the web root:
sudo mv ~/temp/Upload /var/www/forum
Now, we have the files in the document root, where Apache can find them and serve them up. However, the application does not come with its configuration files in place. It does come with example configuration files that we can copy over as is. Change to the forum directory that we just moved our files into:
cd /var/www/forum
Move the default config file into location:
sudo mv inc/config.default.php inc/config.php
Now we just need to adjust the permissions on a few files so that the forum software can be configured correctly:
sudo chmod a+rw inc/settings.php
sudo chmod a+rw inc/config.php
sudo chmod a+rw cache
sudo chmod a+rw uploads
sudo chmod a+rw uploads/avatars
With these changes, the MyBB software should be able to access the configuration files and upload directories and make changes as necessary.
Most of the times, at this point, the rest of the software is configured through a web browser. MyBB is no different in this respect. Open your web browser and navigate to your IP address or domain name, followed by /forum/install/:
<pre> http://<span class=“highlight”>your_domain</span>/forum/install/ </pre>
You should see the first page of the web-based configuration tool. This will guide you through the final stages of the configuration process. You will select your preferences and tell MyBB information about your setup:
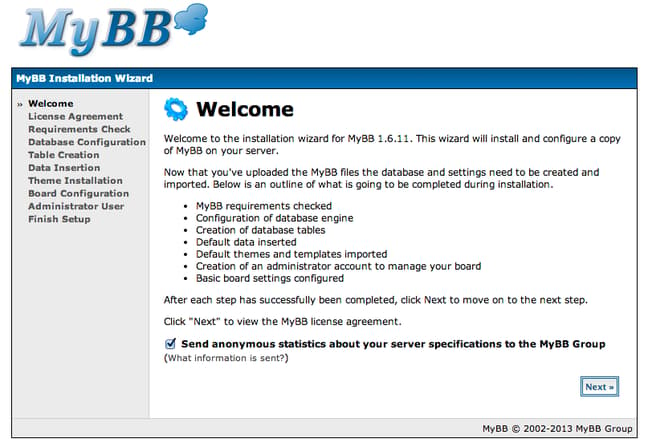
Click the “next” button to get through the first few pages. The requirements check page should all be green:
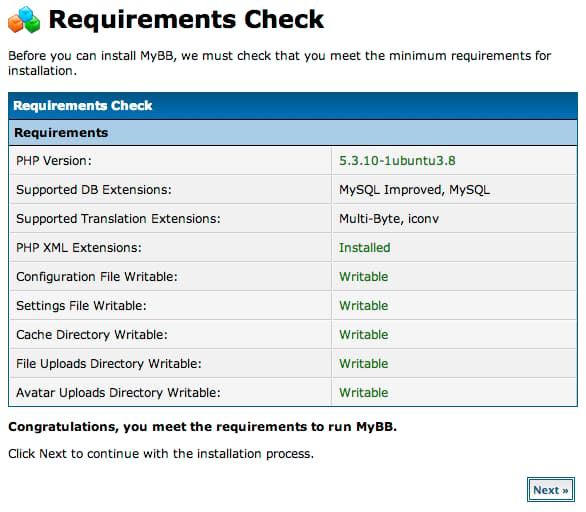
On the next page, you must enter the database information that you configured. If you were following along, your page should look something like this:
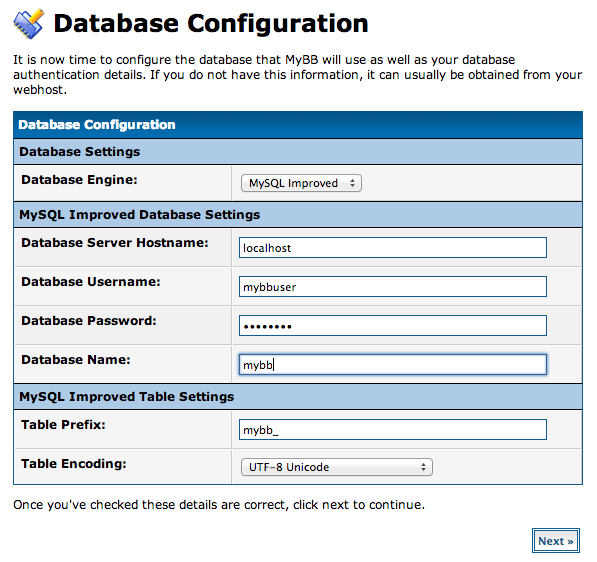
On the “Board Configuration” page, fill out the appropriate way to access your forum. You may need to change the IP address to a domain name and fill out some other information:
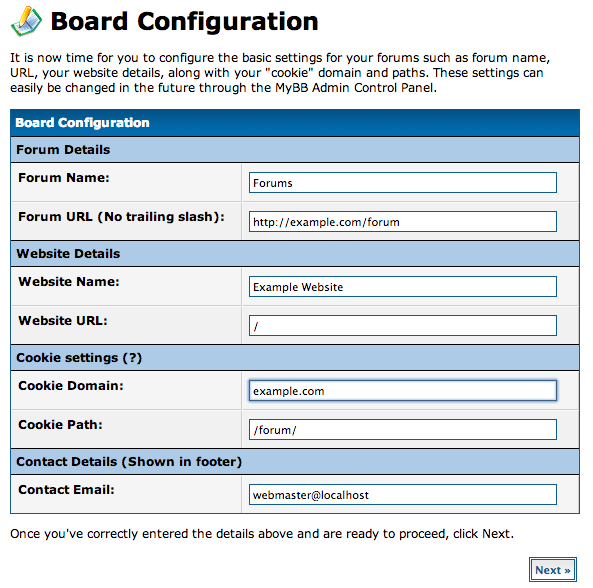
Fill out an administrative user to complete the process.
After you have finished running through the configuration, you will need to remove the installation folder from the web root. This prevents the software from being reconfigured by unauthorized users:
sudo rm -r /var/www/forum/install
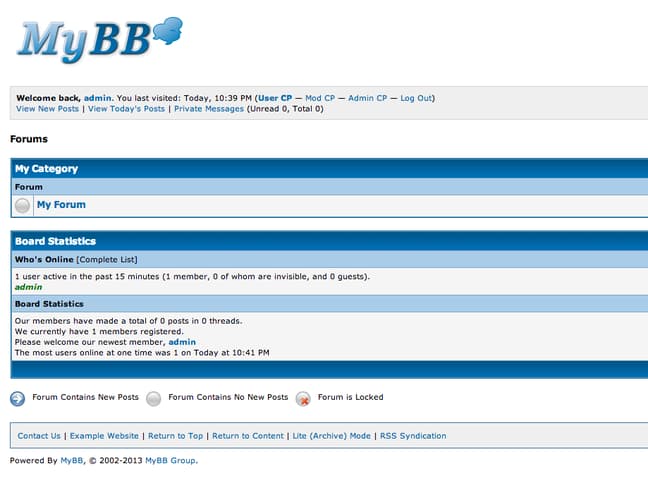
You can access the site by visiting:
<pre> http://<span class=“highlight”>your_domain</span>/forum </pre>
Conclusion
While this article used MyBB as an example, this general process is the same for most forum software and applies to other kinds of web-facing applications as well.
You should check the specific installation steps for your application, but the process of installing and configuring a LAMP stack, creating a database for the application, and then moving files to the web root will be relevant for a large amount of installations of this type.
<div class=“author”>By Justin Ellingwood</div>
Thanks for learning with the DigitalOcean Community. Check out our offerings for compute, storage, networking, and managed databases.
About the author
Former Senior Technical Writer at DigitalOcean, specializing in DevOps topics across multiple Linux distributions, including Ubuntu 18.04, 20.04, 22.04, as well as Debian 10 and 11.
Still looking for an answer?
This textbox defaults to using Markdown to format your answer.
You can type !ref in this text area to quickly search our full set of tutorials, documentation & marketplace offerings and insert the link!
Hello, Thanks for this guide, it helped me a lot. I have now a question. MyBB now is using /etc/apache2/mods-enabled/dir.conf instead of .htaccess. How can i reverse this? i need to configure .htaccess to manage error pages and redirect users to portal.php instead of index.php, wich after foloowing your guide is now configured into /etc/apache2/mods-enabled/dir.conf.
Regards, Guillermo
Hi gmellado!
There’s no reason that you can’t also use an .htaccess file with this as well. An .htaccess file should override system-wide configurations.
With Ubuntu 14.04 after installing Apache you may get the error message: “AH00558: apache2: Could not reliably determine the server’s fully qualified domain name, using 127.0.1.1. Set the ‘ServerName’ directive globally to suppress this message”
If so edit this file: /etc/apache2/apache2.conf (sudo nano /etc/apache2/apache2.conf) and at the bottom of the file insert this “ServerName localhost” (without the quotes). Save the file, restart Apache (service apache2 restart) and the error message should be gone.
Thats what worked for me.
This comment has been deleted
I would like to install Mybb on DigitalOcean using this TUTORIAL
But at the STEP: unzip mybb.zip I got stuck with this error
Archive: mybb.zip
End-of-central-directory signature not found. Either this file is not a zipfile, or it constitutes one disk of a multi-part archive. In the latter case the central directory and zipfile comment will be found on the last disk(s) of this archive. unzip: cannot find zipfile directory in one of mybb.zip or mybb.zip.zip, and cannot find mybb.zip.ZIP, period.
Could anybody help me? Sorry for my basic english.
Please answer my question! :(
https://www.digitalocean.com/community/questions/mybb-help-please-ubuntu-14-04-server
In my droplet sudo mv ~/temp/Upload /var/www/forum should be sudo mv ~/temp/Upload /var/www/html/forum
 This work is licensed under a Creative Commons Attribution-NonCommercial- ShareAlike 4.0 International License.
Become a contributor for community
Get paid to write technical tutorials and select a tech-focused charity to receive a matching donation.

DigitalOcean Documentation
Full documentation for every DigitalOcean product.

Resources for startups and AI-native businesses
The Wave has everything you need to know about building a business, from raising funding to marketing your product.
The developer cloud
Scale up as you grow — whether you're running one virtual machine or ten thousand.

Start building today
From GPU-powered inference and Kubernetes to managed databases and storage, get everything you need to build, scale, and deploy intelligent applications.
