Tutorial
How To Install a MEAN.JS Stack on an Ubuntu 14.04 Server

Not using Ubuntu 14.04?Choose a different version or distribution.
Introduction
MEAN.JS is a full-stack JavaScript development solution that pulls together some of the best JavaScript technologies so that you can get applications into production quickly and easily. MEAN.JS consists of MongoDB, ExpressJS, AngularJS, and Node.
In this guide, we will install each of these components onto an Ubuntu 14.04 server. This will give us the applications and structure we need to create and deploy MEAN apps easily.
Prerequisites
To begin this guide, you will need to have access to an Ubuntu 14.04 server.
You will need a non-root user account with sudo privileges to correctly install and configure the components we will be working with. Follow our Ubuntu 14.04 initial server setup guide to set up an account of this type.
When you are finished with the initial configuration of your server, log in with your non-root user and continue with this guide.
Download and Install MongoDB and Dependencies through Apt
Throughout this guide, we will be installing software using a number of different techniques depending on each project’s requirements. The first set of installations will use apt, Ubuntu’s package management system.
Before we can begin installing software, we will be adding an additional repository with up-to-date MongoDB packages. This repository is provided by the MongoDB project itself, so it should always have recent, stable versions of MongoDB.
First, we must add the MongoDB team’s key to our system’s list of trusted keys. This will allow us to confirm that the packages are genuine. The following command will add the correct key to our list (if you wish, you can verify the key ID through MongoDB’s official documentation):
sudo apt-key adv --keyserver hkp://keyserver.ubuntu.com:80 --recv 7F0CEB10
Now that we trust packages signed by the MongoDB maintainers, we need to add a reference to the actual repository to our apt configuration. We can create a separate file that will be sourced by apt with the correct repository reference by typing:
echo 'deb http://downloads-distro.mongodb.org/repo/ubuntu-upstart dist 10gen' | sudo tee /etc/apt/sources.list.d/mongodb.list
Our system is now configured with the new MongoDB repository. We can update our system’s local package cache so that it knows about the new packages, and then we can install the software we need.
We will be installing MongoDB packages to use as our database, git to help us with later installations, and some packages that we will need as dependencies and build dependencies for Node:
sudo apt-get update
sudo apt-get install mongodb-org git build-essential openssl libssl-dev pkg-config
Once the installation is complete, we can move on to building Node.
Download, Build, and Install Node from Source
Node is a very fast-moving project that cuts releases frequently. In order to get an up-to-date copy of Node, built to run on our specific system, we will be downloading the most recent source and compiling the binary manually. This is a rather straight forward procedure.
First go to the download section of the Node website. In the main section of the page, there are download links separated by operating system, as well as a link for the source code in the upper-right corner of the downloads:

Right-click on the source code link and select “Copy link address” or whatever similar option your browser provides.
Back on your server, move into your home directory and use the wget command to download the source code from the link you just copied. Your Node source URL will likely be different from the one shown below:
cd ~
wget http://nodejs.org/dist/v0.10.33/node-v0.10.33.tar.gz
Once the file has been download, extract the archive using the tar command:
tar xzvf node-v*
This will create the directory structure that contains the source code. Move into the new directory:
cd node-v*
Since we already installed all of the Node dependencies using apt in the last section, we can begin building the software right away. Configure and build the software using these commands:
./configure
make
Once the software is compiled, we can install it onto our system by typing:
sudo make install
Node is now installed on our system (along with some helper apps). Before we continue, we can get rid of both the source code archive and the source directory to keep our system clean:
cd ~
rm -rf ~/node-v*
Install the Rest of the Components with NPM, Git, and Bower
Now that we have Node installed, we have access to the npm package manager, which we can use to install some of the other software we require.
MEAN.JS uses a separate package manager, called bower, to manage front-end application packages. It also uses the Grunt Task Runner to automate common tasks. Since these are management packages that should be available to assist us with every app we create, we should tell npm that we need these globally installed:
sudo npm install -g bower grunt-cli
Now, we finally have all of the prerequisite packages installed. We can move onto installing the actual MEAN.JS boilerplate used to create applications. We will clone the official GitHub repository into a directory at /opt/mean in order to get the most up-to-date version of the project:
sudo git clone https://github.com/meanjs/mean.git /opt/mean
Enter the directory and tell npm to install all of the packages the project references. We need to use sudo since we are in a system directory:
cd /opt/mean
sudo npm install
Finally, since we are operating in a system directory, we need to call bower with sudo and the --allow-root option in order to install and configure our front-end packages:
sudo bower --allow-root --config.interactive=false install
See the Results
MEAN.JS is now completely installed. We can start up the sample application using the Grunt Task Runner within our project directory. This will run the application and allow it to begin accepting requests:
cd /opt/mean
grunt
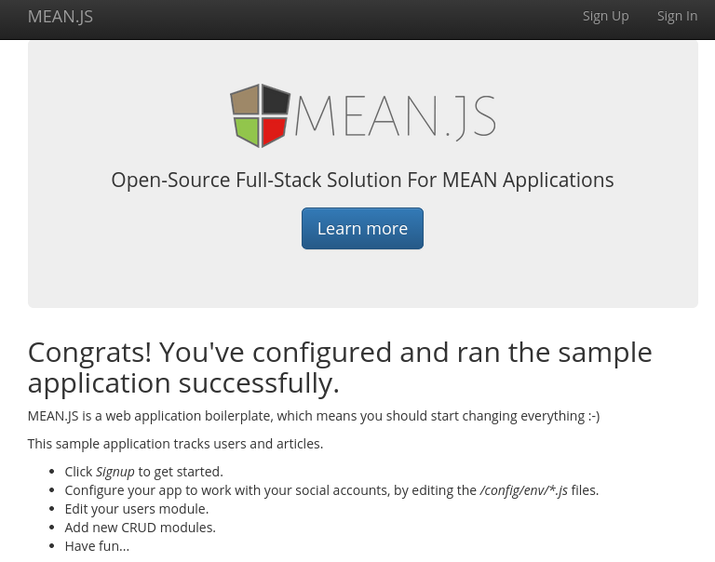
Once the process starts, you can visit your server’s domain name or IP address in your web browser on port “3000”:
http://server_domain_or_IP:3000
You should see the sample MEAN.JS application:
Conclusion
Now that you have the necessary components and the MEAN.JS boilerplate, you can begin making and deploying your own apps. Check out the documentation on MEAN.JS website for specific help on working with MEAN.JS.
After you get your application up and running, you’ll probably want to configure a reverse proxy to your application server in order to feed your app connections. We will cover this in a later guide.
Thanks for learning with the DigitalOcean Community. Check out our offerings for compute, storage, networking, and managed databases.
About the author(s)
This textbox defaults to using Markdown to format your answer.
You can type !ref in this text area to quickly search our full set of tutorials, documentation & marketplace offerings and insert the link!

Become a contributor for community
Get paid to write technical tutorials and select a tech-focused charity to receive a matching donation.

DigitalOcean Documentation
Full documentation for every DigitalOcean product.

Resources for startups and SMBs
The Wave has everything you need to know about building a business, from raising funding to marketing your product.
Get our newsletter
Stay up to date by signing up for DigitalOcean’s Infrastructure as a Newsletter.
New accounts only. By submitting your email you agree to our Privacy Policy
The developer cloud
Scale up as you grow — whether you're running one virtual machine or ten thousand.

Get started for free
Sign up and get $200 in credit for your first 60 days with DigitalOcean.*

*This promotional offer applies to new accounts only.
In case you get something like: jurikolo@ubuntu:/opt/mean$ sudo bower --allow-root --config.interactive=false install bower bootstrap#~3 not-cached git://github.com/twbs/bootstrap.git#~3 bower bootstrap#~3 resolve git://github.com/twbs/bootstrap.git#~3 bower angular#~1.2 not-cached git://github.com/angular/bower-angular.git#~1.2 bower angular#~1.2 resolve git://github.com/angular/bower-angular.git#~1.2 bower angular-resource#~1.2 not-cached git://github.com/angular/bower-angular-resource.git#~1.2 bower angular-resource#~1.2 resolve git://github.com/angular/bower-angular-resource.git#~1.2 bower angular-animate#~1.2 not-cached git://github.com/angular/bower-angular-animate.git#~1.2 bower angular-animate#~1.2 resolve git://github.com/angular/bower-angular-animate.git#~1.2 bower angular-mocks#~1.2 not-cached git://github.com/angular/bower-angular-mocks.git#~1.2 bower angular-mocks#~1.2 resolve git://github.com/angular/bower-angular-mocks.git#~1.2 bower angular-bootstrap#~0.12.0 not-cached git://github.com/angular-ui/bootstrap-bower.git#~0.12.0 bower angular-bootstrap#~0.12.0 resolve git://github.com/angular-ui/bootstrap-bower.git#~0.12.0 bower angular-ui-utils#~0.1.1 not-cached git://github.com/angular-ui/ui-utils.git#~0.1.1 bower angular-ui-utils#~0.1.1 resolve git://github.com/angular-ui/ui-utils.git#~0.1.1 bower angular-ui-router#~0.2.11 not-cached git://github.com/angular-ui/ui-router.git#~0.2.11 bower angular-ui-router#~0.2.11 resolve git://github.com/angular-ui/ui-router.git#~0.2.11
bower bootstrap#~3 ECMDERR Failed to execute “git ls-remote --tags --heads git://github.com/twbs/bootstrap.git”, exit code of #128
Additional error details: fatal: unable to connect to github.com: github.com[0: 192.30.252.128]: errno=Connection timed out
Try following workaround:
jurikolo@ubuntu:/opt/mean$ sudo git config --global url."https://".insteadOf git://This will tell Git to use HTTPS instead of GIT.Smooth install of mean.js on xubuntu 14.04, thanks!
It all went ok until I tried running grunt!
it work thanks
I discharge node, unzipped it and enter the folder but ./configure I get -bash: ./configure: No such file or directory
Working fine with the ip, how do it change it to the domain name?
I’m getting an error when trying to run grunt at the end of the process:
bootstrap#3.3.5 public/lib/bootstrap └── jquery#2.1.4
jquery#2.1.4 public/lib/jquery erictrose@skinserver4:/opt/mean$ grunt /opt/mean/node_modules/grunt/node_modules/grunt-legacy-log/node_modules/lodash/dist/lodash.js:2346 /** ^^^ SyntaxError: Unexpected token ILLEGAL at exports.runInThisContext (vm.js:73:16) at Module._compile (module.js:443:25) at Object.Module._extensions…js (module.js:478:10) at Module.load (module.js:355:32) at Function.Module._load (module.js:310:12) at Module.require (module.js:365:17) at require (module.js:384:17) at Object.<anonymous> (/opt/mean/node_modules/grunt/node_modules/grunt-legacy-log/index.js:20:9) at Module._compile (module.js:460:26) at Object.Module._extensions…js (module.js:478:10)
Thanks in advance for any help.
is anyone else getting: /usr/bin/env: python: No such file or directory
After running ./configure ?
There is a configure file listed in the directory, not sure what I need to do to run it. To get the source, I ran: wget https://nodejs.org/dist/v0.12.7/node-v0.12.7.tar.gz
This is one of the best tutorials I have ever read. I will likely use this as a template for all of my technical writing. Thank you.
I might suggest a small edit. Your sentence: “Enter the directory and tell npm to install all of the packages the project references.”
Did you mean to write: “Enter the directory and tell npm to install all of the packages and the project references.”
Either way. Thank you so much for the great article.
RH
on sudo npm install step I am getting this error: npm WARN cannot run in wd meanjs@0.3.3 bower install --config.interactive=false (wd=/opt/mean)
and on grunt step i get this: Running “jshint:all” (jshint) task
Running “csslint:all” (csslint) task
Running “copy:localConfig” (copy) task Warning: Unable to write “config/env/local.js” file (Error code: EACCES). Used --force, continuing.
Running “concurrent:default” (concurrent) task Running “nodemon:dev” (nodemon) task Running “watch” task Waiting… [nodemon] v1.2.1 [nodemon] to restart at any time, enter
rs[nodemon] watching: app/views//. gruntfile.js server.js config//.js app/**/.js [nodemon] startingnode --debug server.jsdebugger listening on port 5858 NODE_ENV is not defined! Using default development environment [nodemon] watching 25,409 files - this might cause high cpu usage. To reduce use “–watch”.MEAN.JS - Development Environment application started Environment: development Port: 3000 Database: mongodb://localhost/mean-dev
Could not connect to MongoDB! Error: failed to connect to [localhost:27017]
Tried various solutions suggested on other forums, but couldn’t fix this. Can anyone help?