
Introduction
Python is a versatile programming language that can be used for many different programming projects. First published in 1991 with a name inspired by the British comedy group Monty Python, the development team wanted to make Python a language that was fun to use. Easy to set up, and written in a relatively straightforward style with immediate feedback on errors, Python is a great choice for beginners and experienced developers alike. Python 3 is the most current version of the language and is considered to be the future of Python.
This tutorial will guide you through installing Python 3 on your local Windows 10 machine and setting up a programming environment via the command line.
Prerequisites
You will need a Windows 10 computer with administrative access that is connected to the internet.
Step 1 — Opening and Configuring PowerShell
We’ll be completing most of our installation and setup on a command-line interface, which is a non-graphical way to interact with your computer. That is, instead of clicking on buttons, you’ll be typing in text and receiving feedback from your computer through text as well. The command line, also known as a shell, can help you modify and automate many of the tasks you do on a computer every day, and is an essential tool for software developers.
PowerShell is a program from Microsoft that provides a command-line shell interface. Administrative tasks are performed by running cmdlets, which are pronounced command-lets, specialized classes of the .NET software framework that can carry out operations. Open-sourced in August 2016, PowerShell is now available across platforms, for both Windows and UNIX systems (including Mac and Linux).
To find Windows PowerShell, you can right-click on the Start menu icon on the lower left-hand corner of your screen. When the menu pops up, you should click on “Search,” then type “PowerShell” into the search bar. When you are presented with options, right-click on “Windows PowerShell,” the Desktop app. For our purposes, we’ll select “Run as Administrator.” When you are prompted with a dialogue box that asks “Do you want to allow this app to make changes to your PC?” click on “Yes.”
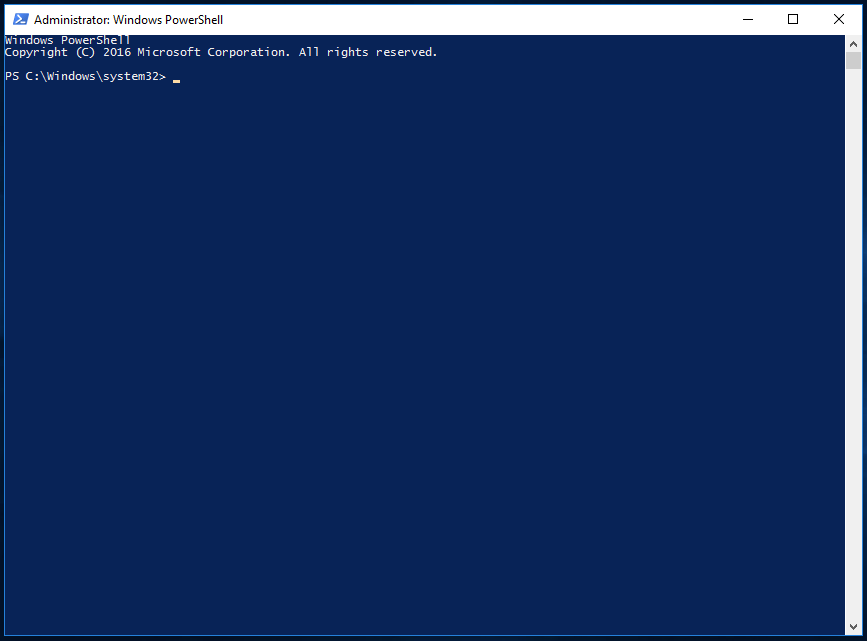
Once you do this, you’ll see a text-based interface that has a string of words that looks like this:
We can switch out of the system folder by typing the following command:
- cd ~
Then we’ll be in a directory such as PS C:\Users\Sammy.
To continue with our installation process, we are going to set up some permissions through PowerShell. Configured to run in the most secure mode by default, there are a few levels of permissions that you can set up as an administrator:
- Restricted is the default execution policy, under this mode you will not be able to run scripts, and PowerShell will work only as an interactive shell.
- AllSigned will enable you to run all scripts and configuration files that are signed by a trusted publisher, meaning that you could potentially open your machine up to the risk of running malicious scripts that happen to be signed by a trusted publisher.
- RemoteSigned will let you run scripts and configuration files downloaded from the internet signed by trusted publishers, again opening your machine up to vulnerabilities if these trusted scripts are actually malicious.
- Unrestricted will run all scripts and configuration files downloaded from the internet as soon as you confirm that you understand that the file was downloaded from the internet. In this case no digital signature is required so you could be opening your machine up to the risk of running unsigned and potentially malicious scripts downloaded from the internet.
We are going to use the RemoteSigned execution policy to set the permission for the current user that allows the PowerShell to accept downloaded scripts that we trust without making the permissions as broad as they would be with an Unrestricted permission. In the PowerShell, let’s type:
- Set-ExecutionPolicy -Scope CurrentUser
PowerShell will then prompt us to provide an execution policy, and since we want to use RemoteSigned, we’ll type:
- RemoteSigned
Once we press enter we’ll be asked if we do want to change the execution policy. Type the letter y for “yes,” and allow the changes to take effect. We can confirm that this worked by asking for the current permissions across the machine by typing:
- Get-ExecutionPolicy -List
You should receive output that looks something like this:
Output        Scope ExecutionPolicy
        ----- ---------------
MachinePolicy       Undefined
   UserPolicy       Undefined
      Process       Undefined
  CurrentUser    RemoteSigned
 LocalMachine       Undefined
This confirms that the current user can run trusted scripts downloaded from the internet. We can now move on to downloading the files we will need to set up our Python programming environment.
Step 2 — Installing the Package Manager Chocolatey
A package manager is a collection of software tools that work to automate installation processes that include the initial installation, upgrading and configuring of software, and removing software as needed. They keep software installations in a central location and can maintain all software packages on the system in formats that are commonly used.
Chocolatey is a command-line package manager built for Windows that works like apt-get does on Linux. Available in an open-source version, Chocolatey will help you quickly install applications and tools, and we will be using it to download what we need for our development environment.
Before we install the script, let’s read it to confirm that we are happy with the changes it will make to our machine. To do this, we will use the .NET scripting framework to download and display the Chocolatey script within the terminal window. We’ll create a WebClient object called $script (you can call it whatever you want as long as you use $ as the first character), that shares Internet connection settings with Internet Explorer:
- $script = New-Object Net.WebClient
Let’s look at the options that we have available to us by piping the object to the Get-Member class to return all members (properties and methods) of this WebClient object:
- $script | Get-Member
 . . .
[secondary_label Snippet of Output]
DownloadFileAsync         Method     void DownloadFileAsync(uri address, string fileName), void DownloadFileAsync(ur...
DownloadFileTaskAsync     Method     System.Threading.Tasks.Task DownloadFileTaskAsync(string address, string fileNa...
DownloadString            Method     string DownloadString(string address), string DownloadString(uri address) #method we will use
DownloadStringAsync       Method     void DownloadStringAsync(uri address), void DownloadStringAsync(uri address, Sy...
DownloadStringTaskAsync   Method     System.Threading.Tasks.Task[string] DownloadStringTaskAsync(string address), Sy…
 . . .
Looking over the output, we can identify the DownloadString method that we can use to display the script and signature in the PowerShell window. Let’s implement this method:
- $script.DownloadString("https://chocolatey.org/install.ps1")
After we inspect the script, we can install Chocolatey by typing the following into PowerShell:
- iwr https://chocolatey.org/install.ps1 -UseBasicParsing | iex
The cmdlet iwr or Invoke-WebRequest allows us to extract data from the web. This will pass the script to the iex or Invoke-Expression cmdlet, which will execute the contents of the script, running the installation script for the Chocolatey package manager.
Allow PowerShell to install Chocolatey. Once it is fully installed, we can begin installing additional tools with the choco command.
If we need to upgrade Chocolatey at any time in the future, we can run the following command:
- choco upgrade chocolatey
With our package manager installed, we can go on to install the rest of what we need for our Python 3 programming environment.
Step 3 — Installing the Text Editor nano (Optional)
We are now going to install nano, a text editor that uses a command line interface, which we can use to write programs directly within PowerShell. This is not a compulsory step, as you can alternatively use a text editor with a graphical user interface such as Notepad, but nano will get us more accustomed to using PowerShell.
Let’s use Chocolatey to install nano:
- choco install -y nano
Here we used the -y flag so that we confirm automatically that we want to run the script without being prompted.
Once nano is installed, we will be able to use the nano command to create new text files and will eventually use it to write our first Python program.
Step 4 — Installing Python 3
Just like we did with nano above, we will use Chocolatey to install Python 3:
- choco install -y python3
PowerShell will now install Python 3, generating output within PowerShell during that process.
Once the process is completed, you should see the following output:
OutputEnvironment Vars (like PATH) have changed. Close/reopen your shell to
 See the changes (or in powershell/cmd.exe just type 'refreshenv').
The install of python3 was successful.
 Software installed as 'EXE', install location is likely default.

Chocolatey installed 1/1 packages. 0 packages failed.
 See the log for details (C:\ProgramData\chocolatey\logs\chocolatey.log).
With the installation finished, you’ll want to confirm that Python is installed and ready to go. To see the changes, use the command refreshenv or close and re-open PowerShell as an Administrator, then check the version of Python available to you on your local machine:
- python -V
You should get output such as:
OutputPython 3.7.0
Alongside Python, pip will be installed, which will manage software packages for Python. Let’s ensure that pip is up-to-date by upgrading it:
- python -m pip install --upgrade pip
With Chocolatey, we can call Python 3 with the python command. We will use the -m flag to run the library module as a script, terminating the option list, and from there use pip to install its upgrade.
Once Python is installed and pip updated, we can set up a virtual environment for our development projects.
Step 5 — Setting Up a Virtual Environment
Now that we have Chocolatey, nano, and Python installed, we can go on to create our programming environment with the venv module.
Virtual environments enable you to have an isolated space on your computer for Python projects, ensuring that each of your projects can have its own set of dependencies that won’t disrupt any of your other projects.
Setting up a programming environment provides us with greater control over our Python projects and over how different versions of packages are handled. This is especially important when working with third-party packages.
You can set up as many Python programming environments as you want. Each environment is basically a directory or folder in your computer that has a few scripts in it to make it act as an environment.
Choose which directory you would like to put your Python programming environments in, or create a new directory with mkdir, as in:
- mkdir Environments
- cd Environments
Once you are in the directory where you would like the environments to live, you can create an environment by running the following command:
- python -m venv my_env
Using the python command, we will run the venv library module to create the virtual environment that in this case we have called my_env.
Essentially, venv sets up a new directory that contains a few items which we can view with the ls command:
- ls my_env
OutputMode                LastWriteTime         Length Name
----                -------------         ------ ----
d-----        8/22/2016   2:20 PM                Include
d-----        8/22/2016   2:20 PM                Lib
d-----        8/22/2016   2:20 PM                Scripts
-a----        8/22/2016   2:20 PM            107 pyvenv.cfg
Together, these files work to make sure that your projects are isolated from the broader context of your local machine, so that system files and project files don’t mix. This is good practice for version control and to ensure that each of your projects has access to the particular packages that it needs.
To use this environment, you need to activate it, which you can do by typing the following command that calls the activate script in the Scripts directory:
- my_env\Scripts\activate
Your prompt will now be prefixed with the name of your environment, in this case it is called my_env:
-
This prefix lets us know that the environment my_env is currently active, meaning that when we create programs here they will use only this particular environment’s settings and packages.
Step 6 — Creating a Simple Program
Now that we have our virtual environment set up, let’s create a simple “Hello, World!” program. This will make sure that our environment is working and gives us the opportunity to become more familiar with Python if we aren’t already.
To do this, we’ll open up nano and create a new file:
- nano hello.py
Once the text file opens up in Terminal we’ll type out our program:
print("Hello, World!")
Exit nano by typing the control and x keys, and when prompted to save the file press y then the enter key.
Once you exit out of nano and return to your shell, let’s run the program:
- python hello.py
The hello.py program that you just created should cause Terminal to produce the following output:
OutputHello, World!
To leave the environment, simply type the command deactivate and you will return to your original directory.
Conclusion
Congratulations! At this point you should have a Python 3 programming environment set up on your local Windows 10 machine and can begin a coding project!
To set up Python 3 on another computer, follow the local programming environment guides for Ubuntu 16.04, Debian 8, CentOS 7, or macOS. You can also read about installing Python and setting up a programming environment on an Ubuntu 16.04 server, which is especially useful when working on development teams.
With your local machine ready for software development, you can continue to learn more about coding in Python by following “Understanding Data Types in Python 3” and “How To Use Variables in Python 3”.
Thanks for learning with the DigitalOcean Community. Check out our offerings for compute, storage, networking, and managed databases.
About the author
Community and Developer Education expert. Former Senior Manager, Community at DigitalOcean. Focused on topics including Ubuntu 22.04, Ubuntu 20.04, Python, Django, and more.
Still looking for an answer?
This textbox defaults to using Markdown to format your answer.
You can type !ref in this text area to quickly search our full set of tutorials, documentation & marketplace offerings and insert the link!
Nice walk-through! It worked flawlessly. I wasn’t even aware that there were multiple execution policies in PowerShell and I’ve been using it quite a while. Bonus. #TIL
Nice, thank you for taking the time.
An alternative to Chocolatey as a Package Manager for most packages is Scoop, I highly suggest checking it out.
choco install -y python do not brings python command to your path, so next python -V would not work without fix your PATH manually.
Above problem solved…my bad…i tried saving it under Environments.But now after typing python hello.python…i encountered with the following problem.
(vir_env) PS C:\WINDOWS\system32> python hello.py C:\WINDOWS\system32\pythonEnv\vir_env\Scripts\python.exe: can’t open file ‘hello.py’: [Errno 2] No such file or directory (vir_env) PS C:\WINDOWS\system32> cd pythonEnv (vir_env) PS C:\WINDOWS\system32\pythonEnv> pythin hello.py pythin : The term ‘pythin’ is not recognized as the name of a cmdlet, function, script file, or operable program. Check the spelling of the name, or if a path was included, verify that the path is correct and try again. At line:1 char:1
- pythin hello.py
-
  + CategoryInfo          : ObjectNotFound: (pythin:String) [], CommandNotFoundException
  + FullyQualifiedErrorId : CommandNotFoundException
(vir_env) PS C:\WINDOWS\system32\pythonEnv> cd vir_env (vir_env) PS C:\WINDOWS\system32\pythonEnv\vir_env> python hello.py C:\WINDOWS\system32\pythonEnv\vir_env\Scripts\python.exe: can’t open file ‘hello.py’: [Errno 2] No such file or directory (vir_env) PS C:\WINDOWS\system32\pythonEnv\vir_env> cd … (vir_env) PS C:\WINDOWS\system32\pythonEnv> cd … (vir_env) PS C:\WINDOWS\system32> python hello.py C:\WINDOWS\system32\pythonEnv\vir_env\Scripts\python.exe: can’t open file ‘hello.py’: [Errno 2] No such file or directory (vir_env) PS C:\WINDOWS\system32> sn
Just an FYI for other readers: the “Windows 10” part of the title is important. I tried this on Windows 7 SP1 and hit a few roadblocks. Looks like it’s possible, but I had to go down the path of upgrading from Powershell 2.0 > Powershell 5.0, and didn’t follow all the way through. Specifically, the iwr cmdlet was absent from my environment, I think a symptom of running PS 2.0. Good walk through either way.
Getting this error:
PS D:\Py_Env> my_env\Scripts\activate (my_env) PS D:\Py_Env> nano hello.py nano : The term ‘nano’ is not recognized as the name of a cmdlet, function, script file, or operable program. Check the spelling of the name, or if a path was included, verify that the path is correct and try again. At line:1 char:1
- nano hello.py
-
  + CategoryInfo          : ObjectNotFound: (nano:String) [], CommandNotFoundException
  + FullyQualifiedErrorId : CommandNotFoundException
any suggestion how to fix this? nano is installed in C:\ProgramData\chocolatey\lib\nano\tools\lib\nano
Clean up question, would we break anything if we set the execution policy back to the default for the current user? I used followed your instructions because I was interested in using Chocolatey and I wanted to install Python 3.6.2, but I intend to use Visual Studio Code and/or PyCharm to do most of my development (school course work actually). So was wondering if I set the execution policy back to the more secure default whether I could still use VSC with the virtual environments? Anyways, this was a great help!
this is good and with no errors and best i have tried at last. now if we could continue on have to access databases in the browsers
 This work is licensed under a Creative Commons Attribution-NonCommercial- ShareAlike 4.0 International License.
Become a contributor for community
Get paid to write technical tutorials and select a tech-focused charity to receive a matching donation.

DigitalOcean Documentation
Full documentation for every DigitalOcean product.

Resources for startups and AI-native businesses
The Wave has everything you need to know about building a business, from raising funding to marketing your product.
The developer cloud
Scale up as you grow — whether you're running one virtual machine or ten thousand.

Start building today
From GPU-powered inference and Kubernetes to managed databases and storage, get everything you need to build, scale, and deploy intelligent applications.
