Not using CentOS 8?
Choose a different version or distribution.
Introduction
Let’s Encrypt is a Certificate Authority (CA) that facilitates obtaining and installing free TLS/SSL certificates, thereby enabling encrypted HTTPS on web servers. It simplifies the process by working with clients, such as Certbot, to automate the necessary steps.
In this tutorial, you will use Certbot to set up a TLS/SSL certificate with the Apache web server on CentOS 8. Additionally, you will automate the certificate renewal process using a cron job, which you can learn more about by reading How To Use Cron To Automate Tasks on CentOS 8.
Prerequisites
In order to complete this guide, you will need:
- One CentOS 8 server with a non-root sudo-enabled user and a basic
firewalldfirewall set up by following the CentOS 8 initial server setup guide. - Apache installed on the server with a virtual host configured for your domain. You can learn how to set this up by following our tutorial How To Install the Apache Web Server on CentOS 8. Be sure that you have a virtual host set up for your domain. This tutorial will use
/etc/httpd/sites-available/example.com.confas an example. - You should own or control the registered domain name that you wish to use the certificate with. If you do not already have a registered domain name, you may purchase one on Namecheap, get one for free on Freenom, or use the domain registrar of your choice.
- A DNS
ARecord that points your domain to the public IP address of your server. If you host your domain through DigitalOcean, you can refer to the DigitalOcean DNS documentation for details on how to add these records with the DigitalOcean platform. DNSArecords are required because of how Let’s Encrypt validates that you own the domain it is issuing a certificate for. For example, if you want to obtain a certificate forexample.com, that domain must resolve to your server for the validation process to work. Our setup will useexample.comandwww.example.comas the domain names, both of which will require a valid DNS record.
When you have all of these prerequisites completed, move on to install the Certbot client software.
Step 1 — Installing the Certbot Let’s Encrypt Client
To use Let’s Encrypt to obtain an SSL certificate, you first need to install Certbot and mod_ssl, an Apache module that provides support for SSLv3 encryption.
The certbot package is not available through the package manager by default. You will need to enable the EPEL repository to install Certbot.
To add the CentOS 8 EPEL repository, run the following command:
- sudo dnf install epel-release
Now that you have access to the repository, install all of the required packages:
- sudo dnf install certbot python3-certbot-apache mod_ssl
With these services installed, you’re now ready to run Certbot and fetch your certificates.
Step 2 — Obtaining a Certificate
Now that Certbot is installed, you can use it to request an SSL certificate for your domain.
Using the certbot Let’s Encrypt client to generate the SSL Certificate for Apache automates many of the steps in the process. The client will automatically obtain and install a new SSL certificate that is valid for the domains you provide as parameters.
To execute the interactive installation and obtain a certificate that covers only a single domain, run the certbot command with:
- sudo certbot --apache -d example.com
This runs certbot with the --apache plugin and specifies the domain to configure the certificate for with the -d flag.
If you want to install a single certificate that is valid for multiple domains or subdomains, you can pass them as additional parameters to the command, tagging each new domain or subdomain with the -d flag. The first domain name in the list of parameters will be the base domain used by Let’s Encrypt to create the certificate. For this reason, pass the base domain name as first in the list, followed by any additional subdomains or aliases:
- sudo certbot --apache -d example.com -d www.example.com
The base domain in this example is example.com.
The certbot utility can also prompt you to choose a domain based on your existing Apache configuration. To use this functionality, call certbot without any domains specified:
- sudo certbot --apache
The program will present you with a step-by-step guide to customize your certificate options. It will ask you to provide an email address for lost key recovery and notices, and then prompt you to agree to the terms of service. If you did not specify your domains on the command line, you will be prompted for that as well. If your Virtual Host files do not specify the domain they serve explicitly using the ServerName directive, you will be asked to choose the virtual host file.
When the installation is successfully finished, you will see a message similar to this:
OutputIMPORTANT NOTES:
 - Congratulations! Your certificate and chain have been saved at:
   /etc/letsencrypt/live/example.com/fullchain.pem
   Your key file has been saved at:
   /etc/letsencrypt/live/example.com/privkey.pem
   Your cert will expire on 2020-09-24. To obtain a new or tweaked
   version of this certificate in the future, simply run certbot again
   with the "certonly" option. To non-interactively renew *all* of
   your certificates, run "certbot renew"
 - Your account credentials have been saved in your Certbot
   configuration directory at /etc/letsencrypt. You should make a
   secure backup of this folder now. This configuration directory will
   also contain certificates and private keys obtained by Certbot so
   making regular backups of this folder is ideal.
 - If you like Certbot, please consider supporting our work by:

   Donating to ISRG / Let's Encrypt:   https://letsencrypt.org/donate
   Donating to EFF:                    https://eff.org/donate-le
The generated certificate files will be available within a subdirectory named after your base domain in the /etc/letsencrypt/live directory.
Now that your certificates are downloaded, installed, and loaded, you can check your SSL certificate status to make sure that everything is working.
Step 3 — Testing the Certificate and SSL Configuration
At this point, you can ensure that Certbot created your SSL certificate correctly by using the SSL Server Test from the cloud security company Qualys.
Open the following link in your preferred web browser, replacing example.com with your domain:
https://www.ssllabs.com/ssltest/analyze.html?d=example.com
You will land on a page that immediately begins testing the SSL connection to your server:
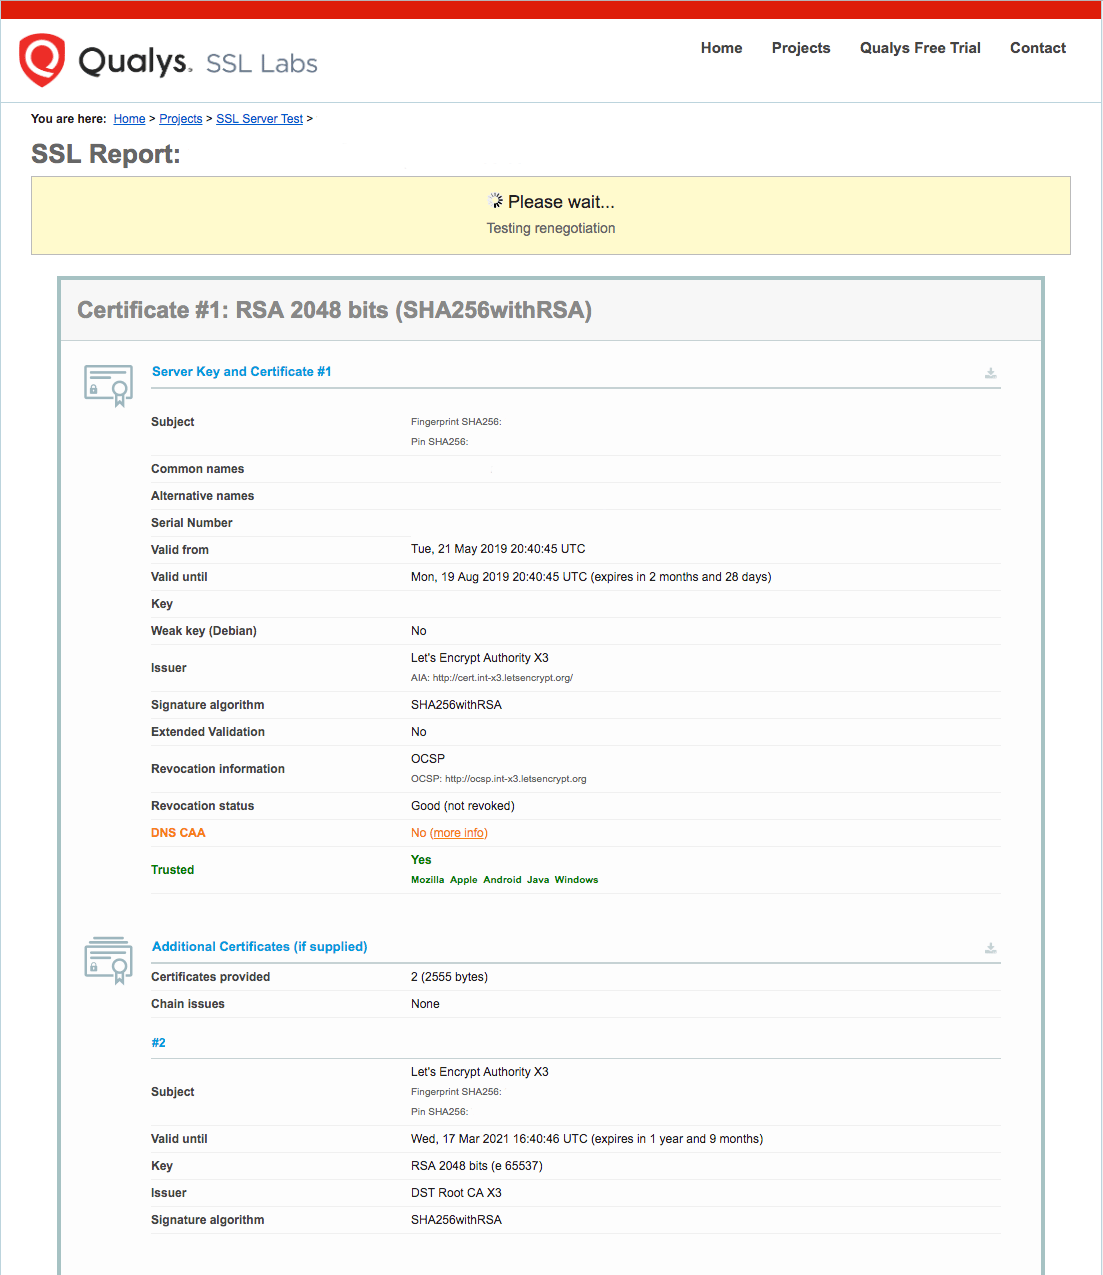
Once the test starts running, it may take a few minutes to complete. The status of the test will update in your browser.
When the testing finishes, the page will display a letter grade that rates the security and quality of your server’s configuration. At the time of this writing, default settings will give an A rating:

For more information about how SSL Labs determines these grades, check out the SSL Labs Grading post detailing the updates made to the grading scheme in January, 2018.
Try reloading your website using https:// and notice your browser’s security indicator. It will now indicate that the site is properly secured, usually with a lock icon.
With your SSL certificate installed and verified, the next step is to set up auto-renewal for your certificate to keep your certificate valid.
Step 4 — Setting Up Auto Renewal
Let’s Encrypt certificates are valid for 90 days, but it’s recommended that you check for renewal twice a day in case of a revocation or other problem. Because of this, it is a best practice to automate this process.
First, let’s examine the command that you will use to renew the certificate. The certbot Let’s Encrypt client has a renew command that automatically checks the currently installed certificates and tries to renew them if they are less than 30 days away from the expiration date. By using the --dry-run option, you can run a simulation of this task to test how renew works:
- sudo certbot renew --dry-run
The output should look similar to this:
OutputSaving debug log to /var/log/letsencrypt/letsencrypt.log

- - - - - - - - - - - - - - - - - - - - - - - - - - - - - - - - - - - - - - - -
Processing /etc/letsencrypt/renewal/example.com.conf
- - - - - - - - - - - - - - - - - - - - - - - - - - - - - - - - - - - - - - - -
Cert not due for renewal, but simulating renewal for dry run
Plugins selected: Authenticator apache, Installer apache
Starting new HTTPS connection (1): acme-staging-v02.api.letsencrypt.org
Renewing an existing certificate
Performing the following challenges:
http-01 challenge for example.com
http-01 challenge for www.example.com
Waiting for verification...
Cleaning up challenges
Resetting dropped connection: acme-staging-v02.api.letsencrypt.org

- - - - - - - - - - - - - - - - - - - - - - - - - - - - - - - - - - - - - - - -
new certificate deployed with reload of apache server; fullchain is
/etc/letsencrypt/live/example.com/fullchain.pem
- - - - - - - - - - - - - - - - - - - - - - - - - - - - - - - - - - - - - - - -

- - - - - - - - - - - - - - - - - - - - - - - - - - - - - - - - - - - - - - - -
** DRY RUN: simulating 'certbot renew' close to cert expiry
**          (The test certificates below have not been saved.)

Congratulations, all renewals succeeded. The following certs have been renewed:
  /etc/letsencrypt/live/example.com/fullchain.pem (success)
...
Notice that if you created a bundled certificate with multiple domains, only the base domain name will be shown in the output, but the renewal will be valid for all domains included in this certificate.
A practical way to ensure your certificates will not get outdated is to create a cron job that will periodically execute the automatic renewal command for you.
The official Certbot documentation recommends running cron twice per day. This will ensure that, in case Let’s Encrypt initiates a certificate revocation, there will be no more than half a day before Certbot renews your certificate. The documentation suggests using the following command to add an appropriate cron job to the /etc/crontab crontab file:
- echo "0 0,12 * * * root python3 -c 'import random; import time; time.sleep(random.random() * 3600)' && certbot renew -q" | sudo tee -a /etc/crontab > /dev/null
This will create a new cron job that will execute at noon and midnight every day (0 0,12 * * *). It will then run the short python3 script, which pauses for a random period of time between zero and sixty minutes. This is recommended in order to reduce the load on Let’s Encrypt’s servers.
After the python script exits, the actual certbot renew command will run.
For more information on how to create and schedule cron jobs, you can check our How To Use Cron To Automate Tasks on CentOS 8 guide. More detailed information about renewal can be found in the Certbot documentation.
Conclusion
In this guide you installed the Let’s Encrypt Certbot client, downloaded SSL certificates for your domain, and set up automatic certificate renewal. If you have any questions about using Certbot, you can check the official Certbot documentation. We also recommend that you check the official Let’s Encrypt blog for important updates from time to time.
Thanks for learning with the DigitalOcean Community. Check out our offerings for compute, storage, networking, and managed databases.
About the author
Senior Technical Writer at DigitalOcean
Still looking for an answer?
This textbox defaults to using Markdown to format your answer.
You can type !ref in this text area to quickly search our full set of tutorials, documentation & marketplace offerings and insert the link!
I kept getting the following error when running the “sudo certbot --apache -d example.com” line:
Error while running apachectl configtest.

AH00526: Syntax error on line 85 of /etc/httpd/conf.d/ssl.conf:
SSLCertificateFile: file '/etc/pki/tls/certs/localhost.crt' does not exist or is empty

The apache plugin is not working; there may be problems with your existing configuration.
The error was: MisconfigurationError("Error while running apachectl configtest.\n\nAH00526: Syntax error on line 85 of /etc/httpd/conf.d/ssl.conf:\nSSLCertificateFile: file '/etc/pki/tls/certs/localhost.crt' does not exist or is empty\n",)
The solution ended up being something I found on the letsencrypt site (https://community.letsencrypt.org/t/localhost-crt-does-not-exist-or-is-empty/103979):
restarting Apache via systemd fixes it:

systemctl restart httpd

Beneath the hood, it causes the following command to run, which fixes generates the missing snakeoil certificates:

/usr/libexec/httpd-ssl-gencerts
Do the above, then then run the command again. Hope this helps anyone else who comes along later!
Im getting this error message when i try
sudo certbot --apache -d example.com
Unable to find a virtual host listening on port 80 which is currently needed for Certbot to prove to the CA that you control your domain. Please add a virtual host for port 80.
this is my /etc/httpd/sites-available/example.conf
<VirtualHost *:80>
    ServerName example.com
    ServerAlias example.com
    DocumentRoot /var/www/example
    ErrorLog /var/www/example/log/error.log
    CustomLog /var/www/example/log/requests.log combined
</VirtualHost>
Everything went well until Step 3… After I had successfully created the certificate I cannot access my HTML pages. Firefox reports:
Secure Connection Failed An error occurred during a connection to myhost.ddns.me.uk. PR_END_OF_FILE_ERROR (where myhost is my own web address with the dynamic domain service)
Predictably, the SSL report also fails:
Assessment failed: No secure protocols supported
I also now cannot access my zoneminder (CCTV) pages, even internally using the server’s IP address.
I do have port sharing with OpenVPN (which is still working) redirecting non VPN port 443 traffic to another port. That was all working fine before trying to get the right certificat on HTTPS.
-
How do I quickly turn this off so that it works (but without certificate)?
-
How do I resolve the failure?
The certbot rpm (certbot-1.9.0-1.el8.noarch) already has a systemd .service and .timer files. There is no need to muck around with the crontab and a python command to do sleep. Instead:
sudo systemctl enable --now certbot-renew.timer
systemctl status --all 'certbot-renew.*'
hi Brian Boucheron,
very simple, easy and great tutorial, I’ve followed your procedure and successfully installed the the Let’s Encrypt, but now I’m facing the following problems 1- cronjob not working fine after some time certificates expired and I’m unable to reach my web site, then I execute command (sudo certbot renew --dry-run) manually and renew the certificates.
2- some time its shows not trusted and invalid certificates (even the validity date is correct)
3- https://www.ssllabs.com/ssltest/analyze.html?d=teachersbook.pk showing certificates are not trusted
kindly tell me about solution to my problem, I shall grateful to you
thanks
hi, you have not answered the my previous problem and now I have come with another problem, that’s is I’ve installed certificates for base and sub domain. now these certificates enables and working only for subdomain https://www.teachersbook.pk but not working for base domain https://teachersbook.pk, you can check it on https://www.ssllabs.com/ssltest/analyze.html?d=teachersbook.pk https://www.ssllabs.com/ssltest/analyze.html?d=www.teachersbook.pk now what to do?
This tutorial was/is very well written and easy to follow. I got my sister’s site encrypted in a matter of minutes.
Thanks
 This work is licensed under a Creative Commons Attribution-NonCommercial- ShareAlike 4.0 International License.
Become a contributor for community
Get paid to write technical tutorials and select a tech-focused charity to receive a matching donation.

DigitalOcean Documentation
Full documentation for every DigitalOcean product.

Resources for startups and AI-native businesses
The Wave has everything you need to know about building a business, from raising funding to marketing your product.
The developer cloud
Scale up as you grow — whether you're running one virtual machine or ten thousand.

Start building today
From GPU-powered inference and Kubernetes to managed databases and storage, get everything you need to build, scale, and deploy intelligent applications.
