
The author selected the Diversity in Tech Fund to receive a donation as part of the Write for DOnations program.
Introduction
TypeScript is a superset of JavaScript that adds optional static typing at build time, which cuts down on debugging runtime errors. It has grown into a powerful alternative to JavaScript over the years. At the same time, Gatsby has emerged as a useful front-end framework for creating static websites. TypeScript’s static-typing abilities go well with a static-site generator like Gatsby, and Gatsby has built-in support for coding in TypeScript.
In this tutorial, you’re going to use Gatsby’s built-in capabilities to configure a Gatsby project for TypeScript. After this tutorial, you will have learned how to integrate TypeScript into your Gatsby project.
Prerequisites
- You will need to have both Node and npm installed in order to run a development environment and handle TypeScript- or Gatsby-related packages, respectively. This tutorial was tested with Node.js version 14.17.2 and npm version 6.14.13. To install on macOS or Ubuntu 18.04, follow the steps in How to Install Node.js and Create a Local Development Environment on macOS or the Installing Using a PPA section of How To Install Node.js on Ubuntu 20.04.
- You will need the Gatsby CLI command line tool installed on your computer. To set this up, read the beginning of How to Set Up Your First Gatsby Site. This tutorial has been tested on Gatsby v3.9.0 and Gatsby CLI v3.9.0.
- You will need sufficient knowledge of JavaScript, especially ES6+ syntax such as destructuring and imports/exports. You can find more information on these topics in Understanding Destructuring, Rest Parameters, and Spread Syntax in JavaScript and Understanding Modules and Import and Export Statements in JavaScript.
- Additionally, you will need TypeScript installed on your machine. To do this, refer to the official TypeScript website. If you are using an editor besides Visual Studio Code, you may need to go through a few extra steps to make sure you have TypeScript performing type-checks at build time and showing any errors. For example, if you’re using Atom, you’ll need to install the
atom-typescriptpackage to be able to achieve a true TypeScript experience. If you would like to download TypeScript only for your project, do so after the Gatsby project folder has been set up.
Step 1 — Creating a New Gatsby Site and Removing Boilerplate
To get started, you’re going to create your Gatsby site and make sure that you can run a server and view the site. After that, you will remove some unused boilerplate files and code. This will set your project up for edits in later steps.
Open your computer’s console/terminal and run the following command:
- gatsby new gatsby-typescript-tutorial
This will take a few seconds to run as it sets up the necessary boilerplate files and folders for the Gatsby site. After it is finished, cd into the project’s directory:
- cd gatsby-typescript-tutorial
To make sure the site’s development environment can start properly, run the following command:
- gatsby develop
After a few seconds, you will receive the following message in the console:
Output...
You can now view gatsby-starter-default in the browser.

  http://localhost:8000
Usually, the default port is :8000, but you can change this by running gatsby develop -p another_number instead.
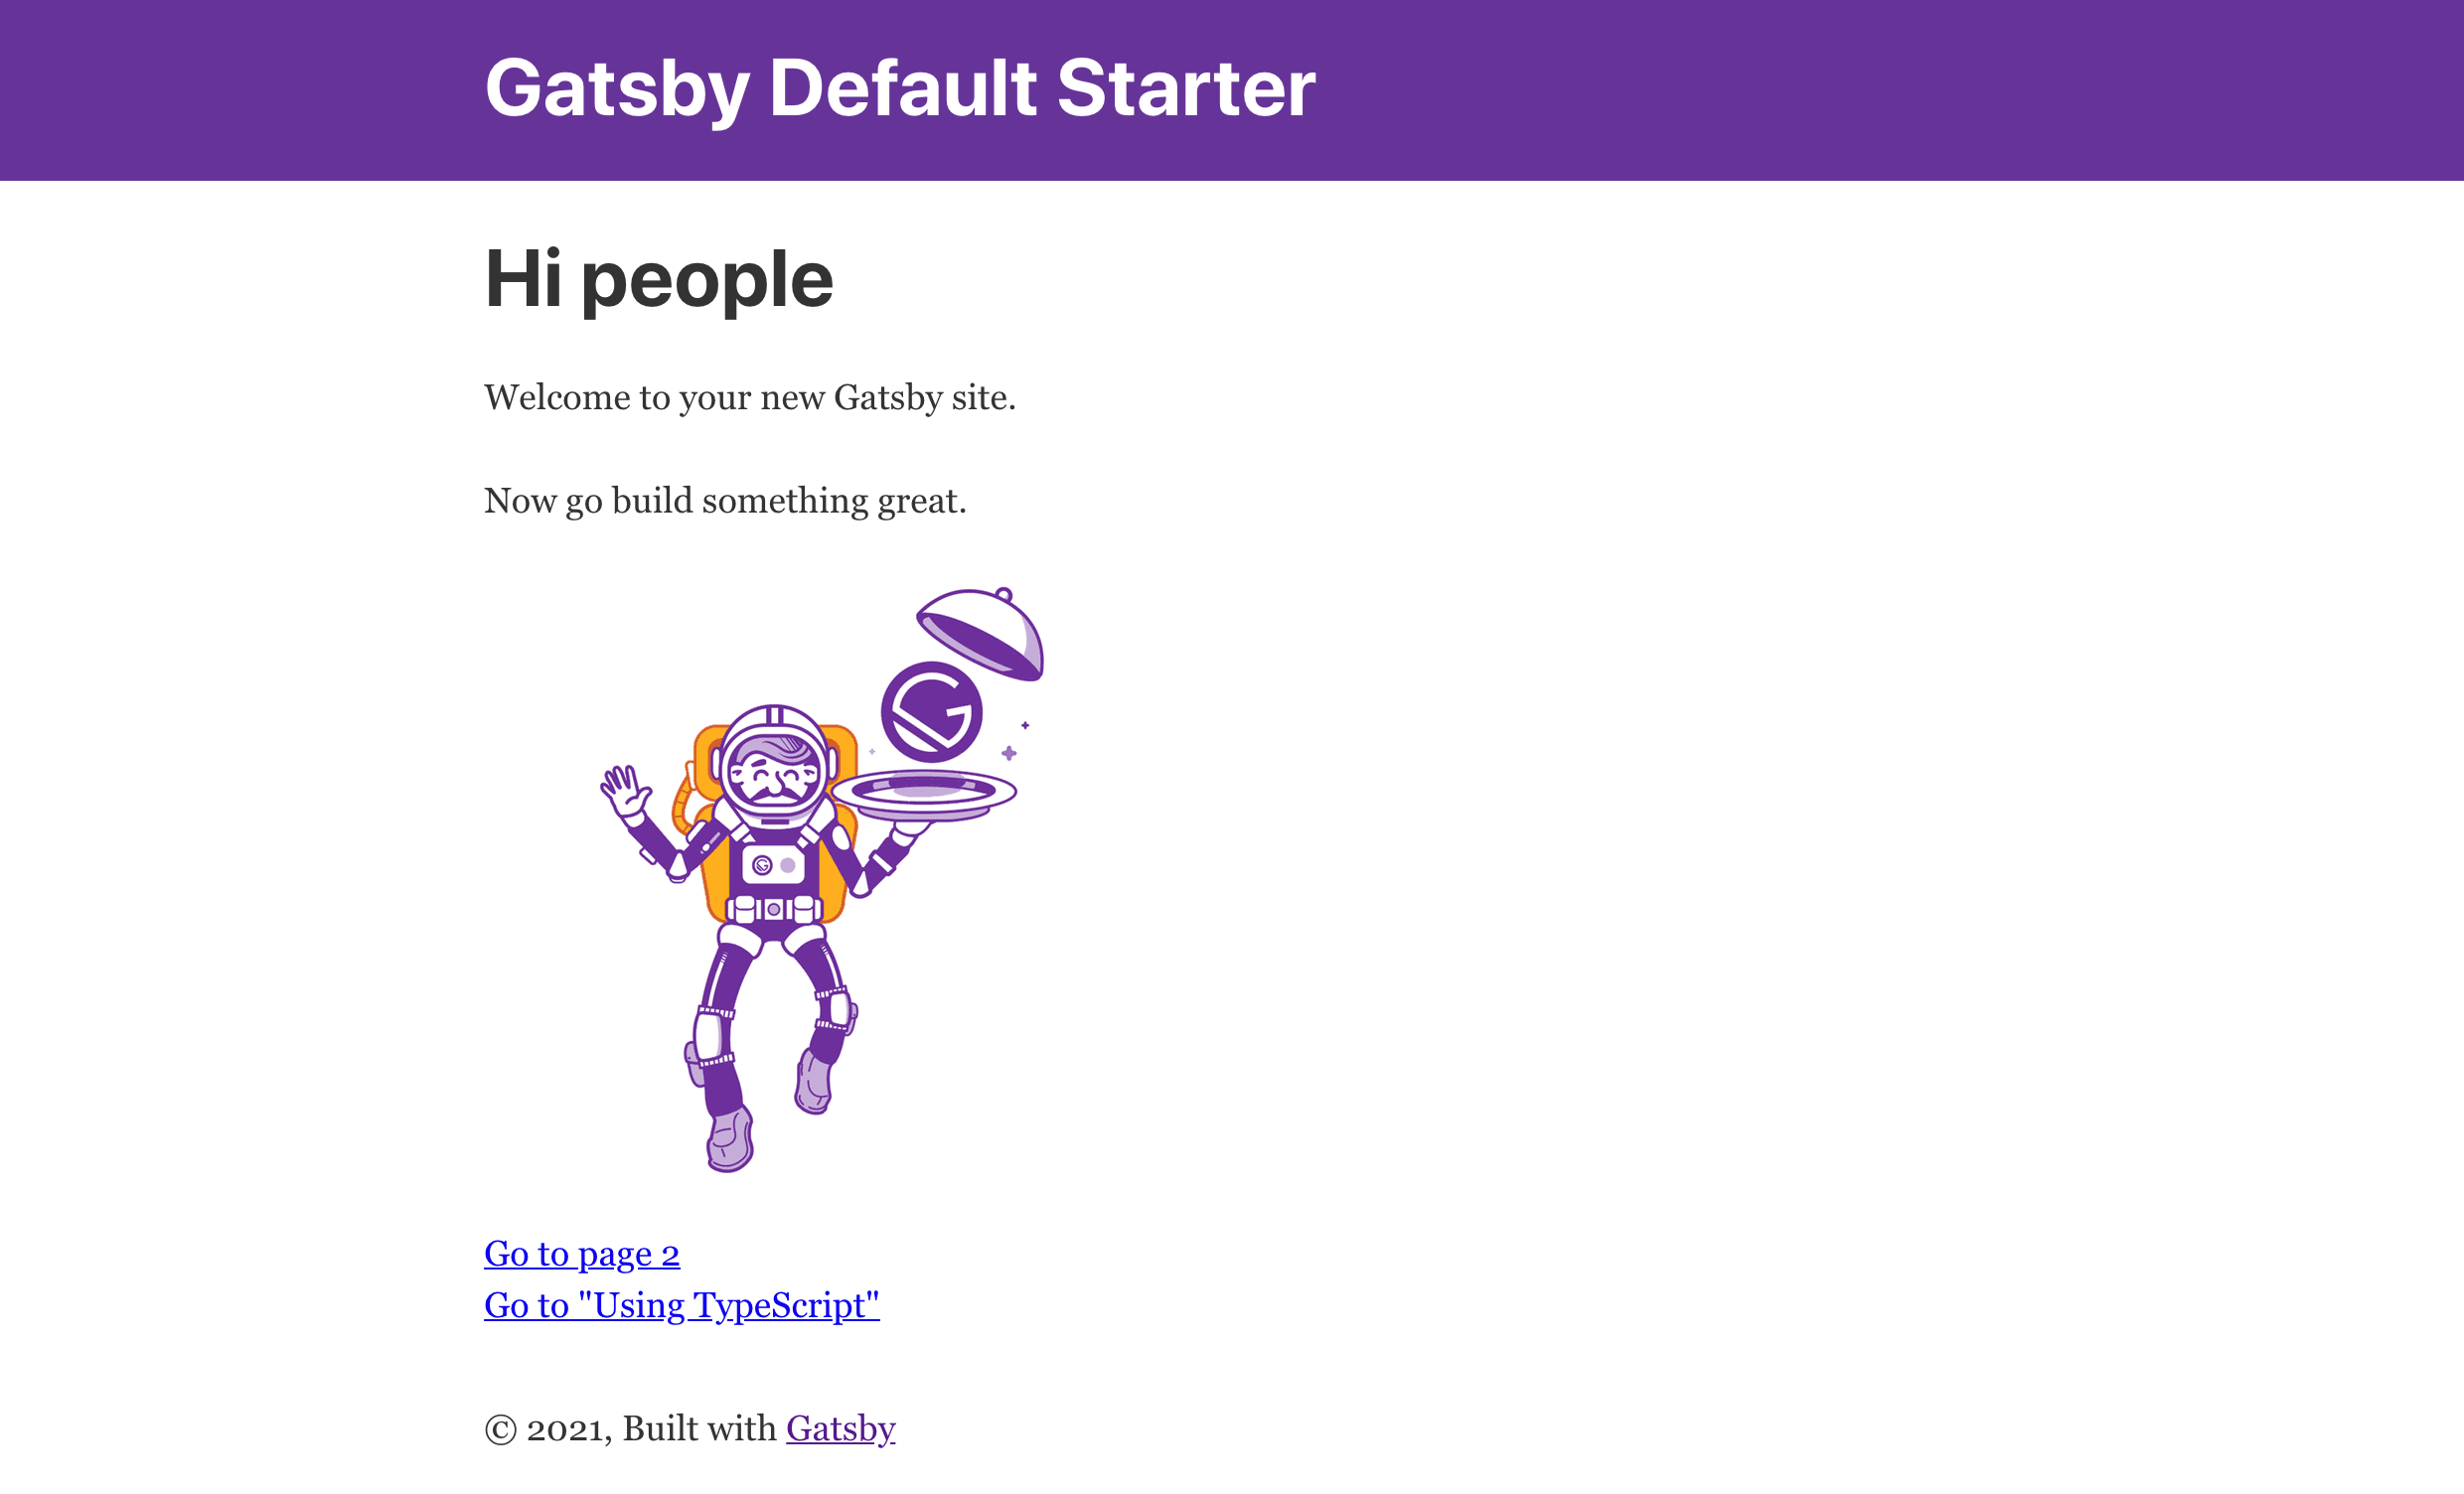
Head over to your preferred browser and type http://localhost:8000 in the address bar to find the site. It will look like this:
Note: There is a known issue with the plugin gatsby-plugin-sharp version 3.9.0 that may cause the following error when building your Gatsby site:
Output ERROR

ENOENT: no such file or directory, open 'your_file_path/gatsby-typescript-tutorial/.cache/caches/gatsby-plugin-sharp/diskstore-f6dcddbf3c9007cd2587894f75b5cd62.json'
A workaround for this error is to downgrade gatsby-plugin-sharp to version 3.8.0. To do this, open your package.json file and make the following highlighted change:
[gatsby-typescript-tutorial/package.json]
...
  "dependencies": {
    "gatsby": "^3.9.0",
    "gatsby-plugin-gatsby-cloud": "^2.9.0",
    "gatsby-plugin-image": "^1.9.0",
    "gatsby-plugin-manifest": "^3.9.0",
    "gatsby-plugin-offline": "^4.9.0",
    "gatsby-plugin-react-helmet": "^4.9.0",
    "gatsby-plugin-sharp": "3.8.0",
    "gatsby-source-filesystem": "^3.9.0",
    "gatsby-transformer-sharp": "^3.9.0",
    "prop-types": "^15.7.2",
    "react": "^17.0.1",
    "react-dom": "^17.0.1",
    "react-helmet": "^6.1.0"
  },
...
Save the file, then re-install your dependencies with the following command:
- npm install
Now use the Gatsby CLI to delete the public and .cache folders so that they can be re-built with the new dependency list:
- gatsby clean
You will now be able to start your Gatsby site on a local development server with gatsby develop. For more information on this solution, read through the GitHub Memory thread on Error: ENOENT: no such file or directory Gatsby error.
Next, you’ll remove all unnecessary files. This includes gatsby-node.js, gatsby-browser.js, and gatsby-ssr.js:
- rm gatsby-node.js
- rm gatsby-browser.js
- rm gatsby-ssr.js
Next, to finish setup, you’re going to remove some boilerplate code from your project’s index page. In your project’s root directory, head to the src directory, followed by pages and then open the index.js file.
For this tutorial, you are only going to work with a <StaticImage /> component, so you can delete code related to the <Link /> component, along with the h1 and p elements. Your file will then look like the following:
import * as React from "react"
import { StaticImage } from "gatsby-plugin-image"

import Layout from "../components/layout"
import Seo from "../components/seo"

const IndexPage = () => (
  <Layout>
    <Seo title="Home" />
    <StaticImage
      src="../images/gatsby-astronaut.png"
      width={300}
      quality={95}
      formats={["AUTO", "WEBP", "AVIF"]}
      alt="A Gatsby astronaut"
      style={{ marginBottom: `1.45rem` }}
    />
  </Layout>
)

export default IndexPage
Save and close the file.
Now that you’ve created your project and completed some initial setup, you are ready to install the necessary plugins.
Step 2 — Installing Dependencies
In order to set up support for TypeScript in Gatsby, you’ll need some additional plugins and dependencies, which you will install in this step.
The gatsby-plugin-typescript plugin already comes with a newly created Gatsby site. Unless you want to change any of its default options, you don’t have to add this plugin to your gatsby-config.js file explicitly. This Gatsby plugin makes writing .ts and .tsx files in TypeScript possible.
Since your app can read TypeScript files, you will now change Gatsby’s JavaScript files to a TypeScript file extension. In particular, change header.js, layout.js, and seo.js in src/components and index.js in src/pages to header.tsx, layout.tsx, seo.tsx, and index.tsx:
- mv src/components/header.js src/components/header.tsx
- mv src/components/layout.js src/components/layout.tsx
- mv src/components/seo.js src/components/seo.tsx
- mv src/pages/index.js src/pages/index.tsx
You are using the mv command to rename the files to the second argument. .tsx is the file extension, since these files use JSX.
There is one important caveat about the gatsby-plugin-typescript plugin, however: it doesn’t include type-checking at build time (a core function of TypeScript). If you’re using VS Code, this won’t be an issue because TypeScript is a supported language in Visual Studio. But if you’re using another editor, like Atom, you will need to do some extra configurations to achieve a full TypeScript development experience.
Since Gatsby is a React-based framework, adding some additional React-related typing is also recommended. To add type-checking for types specific to React, run the following command:
- npm add @types/react
To add type-checking for types related to the React DOM, use this command:
- npm add @types/react-dom
Now that you’ve become familiar with the plugin gatsby-plugin-typescript, you are ready to configure your Gatsby site for TypeScript in the next step.
Step 3 — Configuring TypeScript for Gatsby with the tsconfig.json File
tsconfig.json FileIn this step, you will create a tsconfig.json file. A tsconfig.json file has two primary purposes: establishing the root directory of the TypeScript project (include) and overriding the TypeScript compiler’s default configurations (compilerOptions). There are a couple of ways to create this file. If you have the tsc command line tool installed with npm, you could create a new tsconfig file with tsc --init. But the file is then populated with many default options and comments.
Instead, create a new file at the root of your directory (gatsby-typescript-project/) and name it tsconfig.json.
Next, create an object with two properties, compilerOptions and include, populated with the following code:
[label gatsby-typescript-tutorial/tsconfig.json]
{
  "compilerOptions": {
    "module": "commonjs",
    "target": "es6",
    "jsx": "preserve",
    "lib": ["dom", "es2015", "es2017"],
    "strict": true,
    "noEmit": true,
    "isolatedModules": true,
    "esModuleInterop": true,
    "skipLibCheck": true,
    "noUnusedLocals": true,
    "noUnusedParameters": true,
    "removeComments": false
  },
  "include": ["./src/**/*"]
}
Note:
This configuration is partially based on the gatsby-starter-typescript-plus starter.
Save this file and close it when you are done.
The include property points to an array of filenames or paths that the compiler knows to convert from TypeScript to JavaScript.
Here is a brief explanation of each option used in compilerOptions:
module- Sets the module system for the project;commonjsis used by default.target- Depending on what version of JavaScript you’re using, this option determines which features to downlevel and which to leave alone. This can be helpful if your project is deployed to older environments vs. newer environments.jsx- Setting for how JSX is treated in.tsxfiles. Thepreserveoption leaves the JSX unchanged.lib- An array of specified type-definitions of different JS libraries/APIs (dom,es2015, etc.).strict- When set totrue, this enables TypeScript’s type-checking abilities at build-time.noEmit- Since Gatsby already uses Babel to compile your code to readable JavaScript, you change this option totrueto leave TypeScript out it.isolatedModules- By choosing Babel as your compiler/transpiler, you are opting for compilation one file at a time, which may cause potential problems at runtime. Setting this option totrueallows TypeScript to warn you if you are about to run into this problem.esModuleIterop- Enabling this option allows your use of CommonJS (your setmodule) and ES modules (importing and exporting custom variables and functions) to better work together and allow namespace objects for all imports.noUnusedLocalsandnoUnusedParamters- Enabling these two options disables the errors TypeScript would normally report if you were to create an unused local variable or parameter.removeComments- Setting this tofalse(or not setting it at all) allows there to be comments present after any TypeScript files have been converted to JavaScript.
You can learn more about these different options and many more by visiting TypeScript’s reference guide for tsconfig.
Now that TypeScript is configured for Gatsby, you are going to complete your TypeScript integration by refactoring some of your boilerplate files in src/components and src/pages.
Step 4 — Refactoring seo.tsx for TypeScript
seo.tsx for TypeScriptIn this step, you’re going to add some TypeScript syntax to the seo.tsx file. This step goes in depth to explain some concepts of TypeScript; the next step will show how to refactor other boilerplate code in a more abbreviated manner.
One feature of TypeScript is its flexibility with its syntax. If you don’t want to add typing to your variables explicitly, you don’t have to. Gatsby believes that adopting TypeScript in your workflow “can and should be incremental”, and so this step will concentrate on three core TypeScript concepts:
- basic types
- defining types and interfaces
- working with build-time errors
Basic Types in TypeScript
TypeScript supports basic datatypes including: boolean, number, and string. The major syntactical difference with TypeScript, compared to JavaScript, is that variables can now be defined with an associated type.
For example, the following code block shows how to assign the basic types with the highlighted code:
let num: number;
num = 0

let str: string;
str = "TypeScript & Gatsby"

let typeScriptIsAwesome: boolean;
typeScriptIsAwesome = true;
In this code, num must be a number, str must be a string, and typeScriptIsAwesome must be a boolean.
Now you will examine the defaultProps and propTypes declarations in the seo.tsx file, found in the src/components directory. Open the file in your editor and look for the following highlighted lines:
...
import * as React from "react"
import PropTypes from "prop-types"
import { Helmet } from "react-helmet"
import { useStaticQuery, graphql } from "gatsby"

...
      ].concat(meta)}
    />
  )
}


SEO.defaultProps = {
  lang: `en`,
  meta: [],
  description: ``,
}

SEO.propTypes = {
  description: PropTypes.string,
  lang: PropTypes.string,
  meta: PropTypes.arrayOf(PropTypes.object),
  title: PropTypes.string.isRequired,
}

export default SEO
By default, a Gatsby site’s SEO component comes with a weak typing system using PropTypes. The defaultProps and propTypes are explicitly declared, using the imported PropsTypes class. For example, in the meta prop (or alias) of the propTypes object, its value is an array of objects, each of which is itself a prop of the PropTypes component. Some props are marked as required (isRequired) while others are not, implying they are optional.
Since you are using TypeScript, you will be replacing this typing system. Go ahead and delete defaultProps and propTypes (along with the import statement for the PropTypes at the top of the file). Your file will look like the following:
[label gatsby-typescript-tutorial/src/components/seo.tsx]
...
import * as React from "react"
import { Helmet } from "react-helmet"
import { useStaticQuery, graphql } from "gatsby"


...
      ].concat(meta)}
    />
  )
}

export default SEO
Now that you’ve removed the default typing, you’ll write out the type aliases with TypeScript.
Defining TypeScript Interfaces
In TypeScript, an interface is used to define the “shape” of a custom type. These are used to represent the value type of complex pieces of data like React components and function parameters. In the seo.tsx file, you’re going to build an interface to replace the defaultProps and propTypes definitions that were deleted.
Add the following highlighted lines:
[label gatsby-typescript-tutorial/src/components/seo.tsx]
...
import * as React from "react"
import { Helmet } from "react-helmet"
import { useStaticQuery, graphql } from "gatsby"

interface SEOProps {
  description?: string,
  lang?: string,
  meta?: Array<{name: string, content: string}>,
  title: string
}

...
The interface SEOProps accomplishes what SEO.propTypes did by setting each of the properties associated data type as well as marking some as required with the ? character.
Typing a Function
Just like in JavaScript, functions play an important role in TypeScript applications. You can even type functions by specifying the datatype of the arguments passed into them. In the seo.tsx file, you will now work on the defined SEO function component. Under where the interface for SEOProps was defined, you’re going to explicitly declare the type of the SEO component’s function arguments, along with a return type of SEOProps right after:
Add the following highlighted code:
...
interface SEOProps {
  description?: string,
  lang?: string,
  meta?: Array<{name: string, content: string}>,
  title: string
}

function SEO({ description='', lang='en', meta=[], title }: SEOProps) {
  ...
}
Here you set defaults for the SEO function arguments so that they adhere to the interface, and added the interface with : SEOProps. Remember that you at least have to include the title in the list of arguments passed to the SEO component because it was defined as a required property in the SEOProps interface you defined earlier.
Lastly, you can revise the metaDescription and defaultTitle constant declarations by setting their type, which is string in this case:
[label gatsby-typescript-tutorial/src/components/seo.tsx]
...
function SEO({ description='', lang='en', meta=[], title }: SEOProps) {
  const { site } = useStaticQuery(
    graphql`
      query {
        site {
          siteMetadata {
            title
            description
            author
          }
        }
      }
    `
  )

  const metaDescription: string = description || site.siteMetadata.description
  const defaultTitle: string = site.siteMetadata?.title
...
Another type in TypeScript is the any type. For situations where you’re dealing with a variable whose type is unclear or difficult to define, use any as a last resort to avoid any build-time errors.
An example of using the any type is when dealing with data fetched from a third-party, like an API request or a GraphQL query. In the seo.tsx file, where the destructured site property is defined with a GraphQL static query, set its type to any:
...
interface SEOProps {
  description?: string,
  lang?: string,
  meta?: Array<{name: string, content: string}>,
  title: string
}

function SEO({ description='', lang='en', meta=[], title }: Props) {
  const { site }: any = useStaticQuery(
    graphql`
      query {
        site {
          siteMetadata {
            title
            description
            author
          }
        }
      }
    `
  )
  ...
}
Save and exit the file.
It’s important to always keep the defined values consistent with their type. Otherwise, you will see build-time errors appear via the TypeScript compiler.
Build-Time Errors
It will be helpful to become accustomed to the errors TypeScript will catch and report at build-time. The idea is that TypeScript catches these errors, mostly type-related, at build-time, and this cuts down on the amount of debugging in the long run (in compile-time).
One example of a build-time error occurring is when you declare a variable of one type but assign it a value that is of another type. If you were to change the value of one of the keyword arguments passed to the SEO component to one of a different type, the TypeScript compiler will detect the inconsistency and report the error. The following is an image of what this looks like in VSCode:
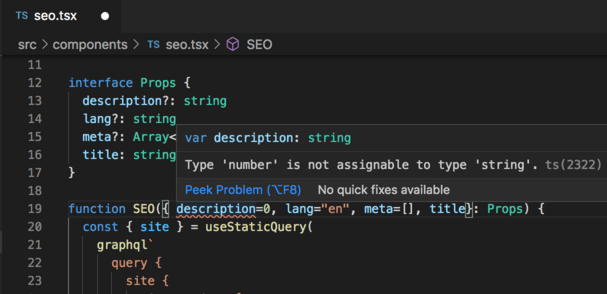
The error says Type 'number' is not assignable to type 'string'. This is because, when you set up your interface, you said the description property would be of type string. The value 0 is of type number. If you change the value of description back into a “string”, the error message will go away.
Step 5 — Refactoring the Rest of the Boilerplate
Lastly, you will refactor the remaining boilerplate files with TypeScript: layout.tsx and header.tsx. Like seo.tsx, these component files are located in the src/components directory.
Open src/components/layout.tsx. Towards the bottom, is the defined Layout.propTypes. Delete the following highlighted lines:
[label gatsby-typescript-tutorial/src/components/layout.tsx]
/**
 * Layout component that queries for data
 * with Gatsby's useStaticQuery component
 *
 * See: https://www.gatsbyjs.com/docs/use-static-query/
 */

import * as React from "react"
import PropTypes from "prop-types"
import { useStaticQuery, graphql } from "gatsby"
...

Layout.propTypes = {
  children: PropTypes.node.isRequired,
}

export default Layout
The children prop shows that its value is of type node per the PropTypes class. Plus, it’s a required prop. Since the children in the layout could be anything from simple text to React child components, use ReactNode as the associated type by importing near the top and adding it to the interface:
Add the following highlighted lines:
...
import * as React from "react"
import { useStaticQuery, graphql } from "gatsby"

import Header from "./header"
import "./layout.css"

interface LayoutProps {
  children: ReactNode
}

const Layout = ({ children }: LayoutProps) => {
  ...
Next, add a type to the data variable that stores a GraphQL query that fetches site title data. Since this query object is coming from a third-party entity like GraphQL, give data an any type. Lastly, add the string type to the siteTitle variable that works with that data:
[label gatsby-typescript-tutorial/src/components/layout.tsx]
...
const Layout = ({ children }: LayoutProps) => {
  const data: any = useStaticQuery(graphql`
  query MyQuery {
    site {
      siteMetadata {
        title
      }
    }
  }
`)

const siteTitle: string = data.site.siteMetadata?.title || `Title`

  return (
    <>
      <Header siteTitle={siteTitle} />
      <div
...
Save and close the file.
Now open the src/components/header.tsx file. This file also comes with predefined prop types, using the PropTypes class. Like seo.tsx and layout.tsx, replace Header.defaultProps and Header.propTypes with an interface using the same prop names:
import * as React from "react"
import { Link } from "gatsby"

interface HeaderProps {
  siteTitle: string
}

const Header = ({ siteTitle }: HeaderProps) => (
  <header
    style={{
      background: `rebeccapurple`,
      marginBottom: `1.45rem`,
    }}
  >
    <div
      style={{
        margin: `0 auto`,
        maxWidth: 960,
        padding: `1.45rem 1.0875rem`,
      }}
    >
      <h1 style={{ margin: 0 }}>
        <Link
          to="/"
          style={{
            color: `white`,
            textDecoration: `none`,
          }}
        >
          {siteTitle}
        </Link>
      </h1>
    </div>
  </header>
)

export default Header
Save and close the file.
With your files refactored for TypeScript, you can now restart the server to make sure everything is working. Run the following command:
- gatsby develop
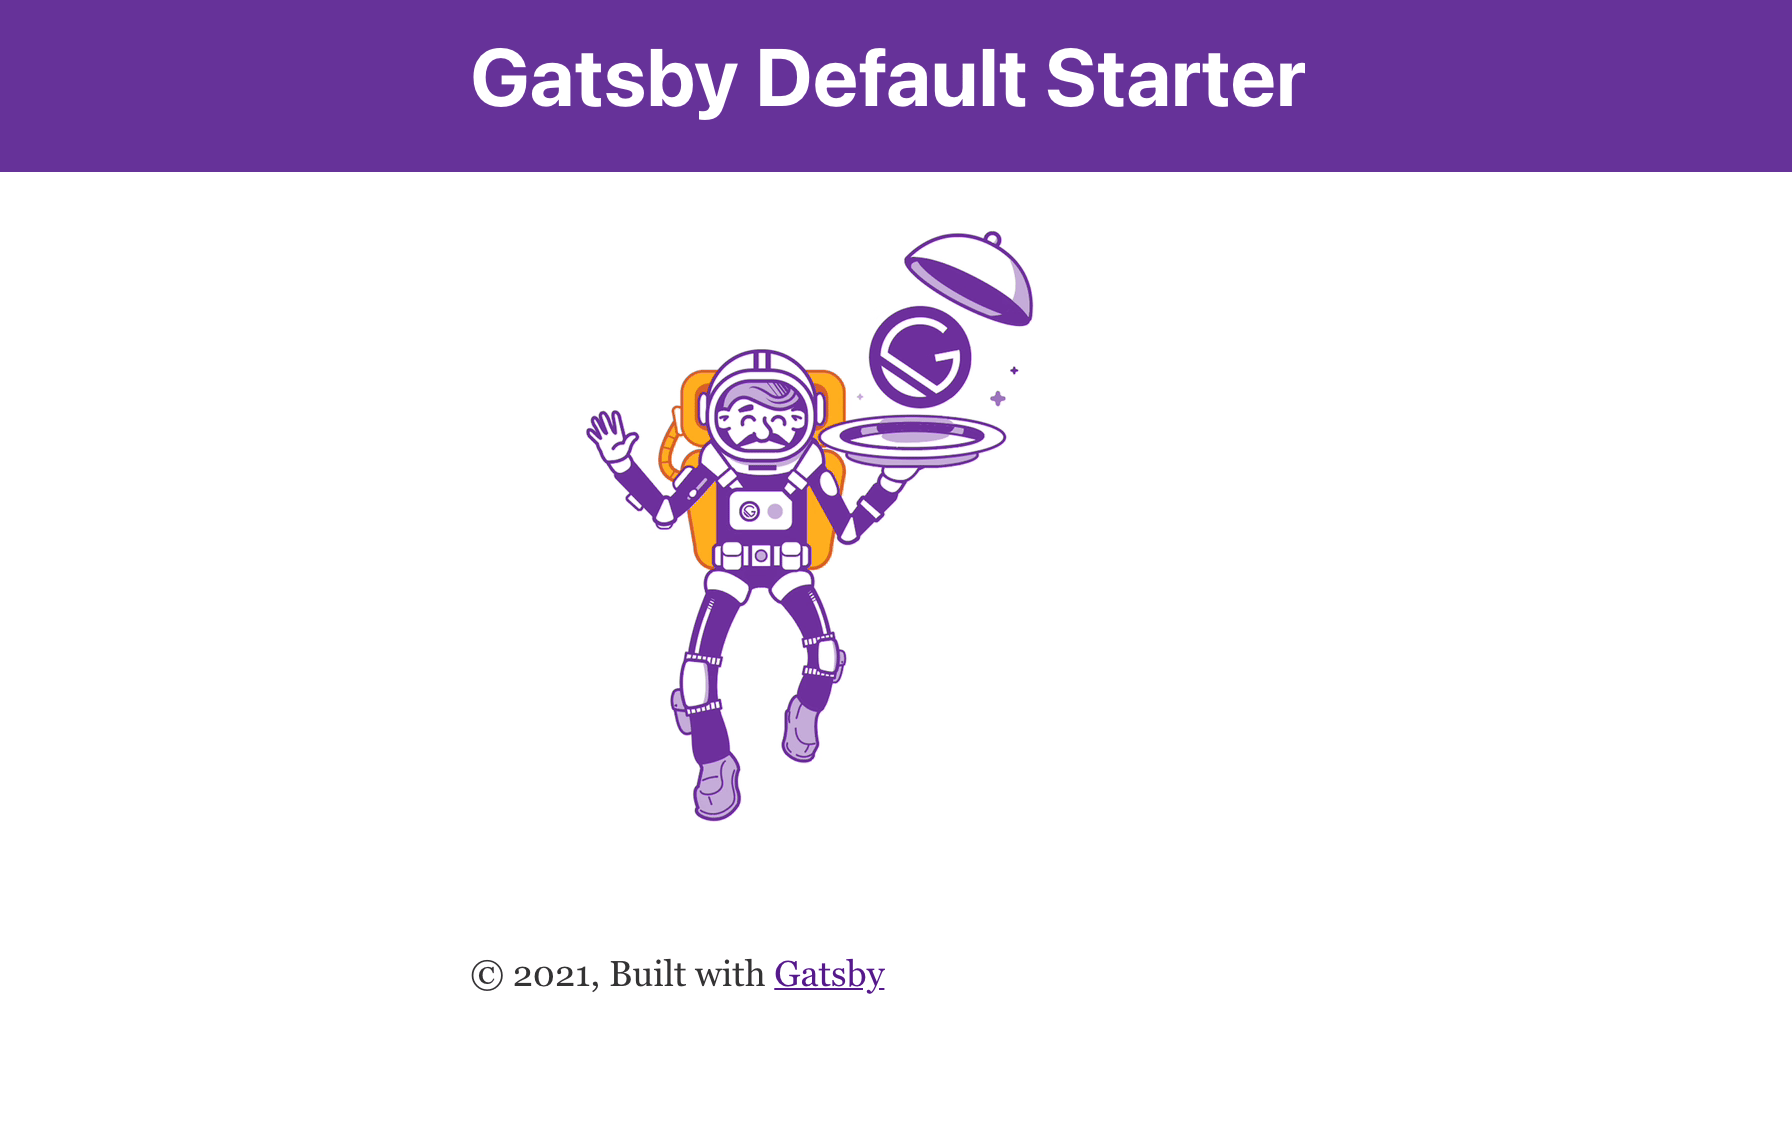
When you navigate to localhost:8000, your browser will render the following:
Conclusion
TypeScript’s static-typing capabilities go a long way in keeping debugging at a minimum. It’s also a great language for Gatsby sites since it’s supported by default. Gatsby itself is a useful front-end tool for creating static-sites, such as landing pages.
You now have two popular tools at your disposal. To learn more about TypeScript and all you can do with it, head over to our How To Code in TypeScript series.
Thanks for learning with the DigitalOcean Community. Check out our offerings for compute, storage, networking, and managed databases.
About the author
Developer and content writer currently based in Pittsburgh, PA.
Still looking for an answer?
This textbox defaults to using Markdown to format your answer.
You can type !ref in this text area to quickly search our full set of tutorials, documentation & marketplace offerings and insert the link!
 This work is licensed under a Creative Commons Attribution-NonCommercial- ShareAlike 4.0 International License.
Become a contributor for community
Get paid to write technical tutorials and select a tech-focused charity to receive a matching donation.

DigitalOcean Documentation
Full documentation for every DigitalOcean product.

Resources for startups and AI-native businesses
The Wave has everything you need to know about building a business, from raising funding to marketing your product.
The developer cloud
Scale up as you grow — whether you're running one virtual machine or ten thousand.

Start building today
From GPU-powered inference and Kubernetes to managed databases and storage, get everything you need to build, scale, and deploy intelligent applications.
