By Justin Ellingwood and Alex Garnett

Introduction
Modern development practices often distinguish between deploying and releasing software. Deployment is the step that involves getting the new code onto the servers. Releasing is the step where the new code begins to receive production traffic.
Blue-green deployment is a strategy for deploying and releasing software. It relies on maintaining two separate production-capable environments, nicknamed blue and green for ease of discussion. In this guide, we will discuss how to use blue-green deployments on DigitalOcean to improve the process of transitioning your users to a new version of your software.
Prerequisites
In order to complete this guide, you will need two Ubuntu 20.04 servers deployed in an environment that allows you to move IP addresses between hosts. On DigitalOcean, Reserved IPs can provide this functionality. These servers will represent two parallel environments that are alternatively used for staging and production. You can call these servers whatever you’d like, but in this guide, we will be referring to them as “blue” and “green”.
On each of these servers, you should have a non-root user with sudo configured for administrative functions. You can configure these users by following our Ubuntu 20.04 initial server setup guide.
What is Blue-Green Deployment?
The basic concept behind blue-green deployment, a technique made popular by this post from Martin Fowler, is that two sets of environments, each capable of serving your application in production, are maintained. These two environments should be nearly identical. By convention, these are referred to as the blue and the green environments.
Only one of these environments is active and receiving production traffic at any one time. In front of the web endpoints for these environments (either web servers or load balancers), a router or other traffic directing mechanism pushes all production traffic to the currently active environment.
When a new release is planned, it is deployed to the non-active environment. For blue-green deployments, the non-active environment functions as a final staging environment. It mirrors the production environment very closely and can be used for final testing before deciding to push changes live.
Once you have tested your deployment internally and have gained confidence in its robustness, you can quickly release the new version by adjusting the routing mechanism. Basically, you flip the switch at the traffic directing layer so that all production traffic begins to move to your new software version. The previously active environment becomes non-active and your previous staging environment becomes your new production environment.
At this point, your previous software version is non-active, but still accessible. If your newly active deployment suffers from any serious issues, you can revert to your previous version by modifying the routing mechanism again.
Step 1 - Creating a Local Application
To demonstrate this general concept, we will set up two server environments. Each will have a web server installed. Keep in mind that in this example, the web server represents an entire application stack which could include a load balancer, multiple web servers, and distributed or replicated databases in the backend. We are using a web server in this guide because it represents the smallest environment that can demonstrate this release pattern.
We will start to develop an “app” on our local computer. In reality, this will only be an index.html page that we can deploy to our servers. We will configure a git post receive hook on each of our servers so that we can deploy by issuing a git push. We will deploy the initial version of our application to both of our servers.
In this guide, we will be using a DigitalOcean Reserved IP address as our routing mechanism. Reserved IPs provide a mechanism for moving traffic from one server to another. We will create a Reserved IP and point it at our green server to set this as our initial production machine.
We will then modify our application and deploy it to our blue server. Production traffic will still be served from the unchanged green server at this point. We can then test the blue server to ensure that our deployment was successful and that there were no bugs. When we are ready, we can move the Reserved IP to the new version of the code by reassigning the Reserved IP address to the blue server.
We will start by creating our “application”. As stated above, this is actually just an index page that our web servers can display. It allows us to demonstrate different “versions” of the app without the overhead of actual development.
On your local system (or on another Droplet), install git using your platform’s preferred method. If your local machine is running Ubuntu, you can install by typing:
- sudo apt update
- sudo apt install git
On Mac, Windows, or a different Linux environment, you should install git following its documentation if it is not already installed.
We need to set a few configuration settings in order to commit to a git repository. We will set our name and email address by typing:
- git config --global user.name "Your Name"
- git config --global user.email "username@email.com"
With our configuration set, we can create a directory for our new application and move into it:
- mkdir ~/sample_app
- cd ~/sample_app
Initialize a git repository in our application directory by typing:
- git init
Now, create the index.html file that represents our application, using nano or your favorite text editor:
- nano index.html
Inside, we will just specify the version number of our application. This way, we can tell which version of our app is on each server:
App v1
Save and close the file when you are finished. If you are using nano, press Ctrl+X, then when prompted, Y and the Enter.
To finish up, we can add the index.html file to the git staging area and then commit by typing:
- git add .
- git commit -m "initializing repository with version 1"
With our file committed, we will stop our application development on our local machine momentarily and focus on setting up our blue and green web servers.
Step 2 – Configuring the Blue and Green Web Servers
Next, we’ll work on setting up our green and blue environments with functional web servers. We will use Apache in this guide. Log into your servers with your sudo user to get started.
Note: The steps in this section should be completed on both the blue and green servers.
We can install Apache with apt. Update the local package index and install the web server software by typing:
- sudo apt update
- sudo apt install apache2
This should install and start Apache on both of your web servers.
Next, we should create and configure a “deploy” user. This user will have access to Apache’s web root and will own the bare git repository where we will push our app to.
Create a deploy user by typing:
- sudo adduser --disabled-password deploy
This will create a new user with password authentication disabled.
We will give this new user ownership over Apache’s default web root. This is located at /var/www/html. Change the ownership of this directory by typing:
- sudo chown -R deploy:deploy /var/www/html
This is all we need for our deployment which only relies on moving files into the web root.
Note: If you are deviating from this guide and your deployment steps would require root privileges, you’ll want to configure passwordless sudo privileges for needed commands for use with the deploy account.
This can be done by creating a new sudoers file within the /etc/sudoers.d directory:
- sudo visudo -f /etc/sudoers.d/90-deployment
Within this file, you can add the commands that you need to run during deployment. These can be specified like this:
deploy ALL=(ALL) NOPASSWD: first_deployment_command, second_deployment_command, ...
Save and close the file when you are finished. This should allow the deploy user to correctly execute the required commands without a password.
Step 3 – Setting Up Git Deployment on the Green and Blue Web Servers
Now that we have Apache installed and a user configured to execute the deployment, we can configure a bare git repository to push our application to. We can then set up a post-receive hook that will automatically deploy the newest version of our main branch when we push it to our servers.
Note: The steps in this section should be completed on both the blue and green servers.
Start off by installing git on both of your servers:
- sudo apt install git
Next, we need to log in as our deploy user. We can do that with sudo by typing:
- sudo su - deploy
In our deploy user’s home directory, create a directory for our sample application, just like we did on our local computer. Move into the directory after creation:
- mkdir ~/sample_app
- cd ~/sample_app
We will initialize a git repo in this directory like we did on our local system. However, on our servers, we will include the --bare option. This will create a git repo without a working directory. Instead, the contents usually hidden in a .git directory will be placed into the main folder:
- git init --bare
We will set up a post-receive hook next. This is just a script that will deploy our changes after a git push occurs. You can learn more about this deployment strategy by reading this guide. We should place this script in the hooks directory of our repo. Create and open the file by typing:
- nano hooks/post-receive
Inside, paste in the following deployment script. This is basically the same script outlined in the article linked to above. We are using a GIT_DIR variable to indicate our git repo on the server, the WORK_TREE variable to specify our Apache document root, and HOSTNAME to grab our server’s hostname for progress messages. This script will deploy all changes in the main branch to the web directory. No changes should be needed in the script below:
#!/bin/bash

GIT_DIR=/home/deploy/sample_app
WORK_TREE=/var/www/html
HOSTNAME=$(hostname)

while read oldrev newrev ref
do
    if [[ $ref =~ .*/main$ ]];
    then
        echo "Main ref received.  Deploying main branch to $HOSTNAME..."
        git --work-tree=$WORK_TREE --git-dir=$GIT_DIR checkout -f
        echo "Git hooks deploy complete."
    else
        echo "Ref $ref successfully received.  Doing nothing: only the main branch may be deployed on this server."
    fi
done
If you are deviating from this guide and need more complex deployment steps, add them to the then clause in the script above. Make sure that any steps that require elevated privileges in this section use the sudo command. Also, make sure that all commands that use sudo here are added to the sudoers file as specified at the bottom of the last section.
Save and close the file when you are finished.
Modify the permissions on the post-receive hook so that git can execute it at the appropriate time:
- chmod +x hooks/post-receive
Step 4 – Configuring SSH Key Access on the Blue and Green Servers
Next, we will configure SSH keys so that git can push changes to our web servers without prompting for a password.
On your local or development computer, check to see if you have an SSH key already configured by typing:
- cat ~/.ssh/id_rsa.pub
If you already have an SSH key pair available, you should see something that looks like this:
Outputssh-rsa AAAAB3NzaC1yc2EAAAADAQABAAABAQDilFdzkgBcSKdh6tx5pLf+HH6Pv7z7jRZ7cSo6lQvecWOOgGl/wHCVZWx1ULvrF7VgJpgugLwxYsFh3E39sm1+7zeAlRxhFrbWvATwpAEwh5m0+48LTmvXCnJ8/om+GfmAwplmzGk/DNs5trVeagG62Css0rypdoNuLrVdCVKUXGXbO6KnpOsBqoM2HvZKtQ8j1gx+1UUnvK9LYes+ZzC2XZZeBh2dGABe7HNnd8+6e1f2ZjPEKAEV2fPJGAGaAQOnzSKJkUt/B9PdKFbCjnnG1sT0kQoxMRIAiqfR7wa7PUQCM5Orm5S92OTNcnRr8bWVjN18bWCyXkpxxWbIvVU/ user@devel
If the command executes correctly, copy the text that is displayed in its entirety. We will use this in the next section. You can safely skip there now.
If you do not have SSH keys on your local machine, you will probably see an error that looks like this:
Outputcat: /home/user/.ssh/id_rsa.pub: No such file or directory
If this is the case, you can create a new public and private key pair by typing:
- ssh-keygen
Press Enter through all of the prompts to accept the default values. When the keys are created, re-type the cat command to display the new public key:
- cat ~/.ssh/id_rsa.pub
This should execute correctly this time. Copy the displayed lines to use in the next section.
Back on your green and blue servers, we will authorize our account on our local or development machine to connect to our deploy users.
As your deploy user, create an ~/.ssh directory. Inside, open up a file called authorized_keys:
- mkdir ~/.ssh
- nano ~/.ssh/authorized_keys
Within this file, paste the output that you copied from your local machine:
ssh-rsa AAAAB3NzaC1yc2EAAAADAQABAAABAQDilFdzkgBcSKdh6tx5pLf+HH6Pv7z7jRZ7cSo6lQvecWOOgGl/wHCVZWx1ULvrF7VgJpgugLwxYsFh3E39sm1+7zeAlRxhFrbWvATwpAEwh5m0+48LTmvXCnJ8/om+GfmAwplmzGk/DNs5trVeagG62Css0rypdoNuLrVdCVKUXGXbO6KnpOsBqoM2HvZKtQ8j1gx+1UUnvK9LYes+ZzC2XZZeBh2dGABe7HNnd8+6e1f2ZjPEKAEV2fPJGAGaAQOnzSKJkUt/B9PdKFbCjnnG1sT0kQoxMRIAiqfR7wa7PUQCM5Orm5S92OTNcnRr8bWVjN18bWCyXkpxxWbIvVU/ user@devel
Save and close the file when you are finished.
Next, lock down the permissions so that SSH can use the file you created:
- chmod 600 ~/.ssh/authorized_keys
- chmod 700 ~/.ssh
Step 5 – Configure Git Remotes on the Local Development Machine
Now that we have SSH key access configured to our web servers and our application directory set up on each server, we can add our blue and green servers as remotes in our local git app repository.
On your local machine, move back into your application directory:
- cd ~/sample_app
Add remote references so that git can push changes to your green and blue web servers:
- git remote add blue deploy@blue_server_ip:sample_app
- git remote add green deploy@green_server_ip:sample_app
We should now be able to push our app to both of our servers. Let’s test it out by pushing version 1 of our application to both servers.
- git push blue main
- git push green main
You may have to accept each server’s key fingerprint on your first deploy. You should see output that looks something like this:
OutputThe authenticity of host '111.111.111.111 (111.111.111.111)' can't be established.
ECDSA key fingerprint is 30:a1:2c:8b:ec:98:a3:3c:7f:4a:db:46:2b:96:b5:06.
Are you sure you want to continue connecting (yes/no)? yes
Warning: Permanently added '111.111.111.111' (ECDSA) to the list of known hosts.
Counting objects: 3, done.
Writing objects: 100% (3/3), 246 bytes | 0 bytes/s, done.
Total 3 (delta 0), reused 0 (delta 0)
remote: Main ref received.  Deploying main branch to blue...
remote: Git hooks deploy complete.
To deploy@111.111.111.111:sample_app
 * [new branch]      main -> main
As you can see, the lines that begin with “remote:” contain the echo statements from the post-receive hook on our server. Remember to push your app to both of your servers.
We can test that the initial deployment of our app was successful with curl:
- curl blue_server_ip
- curl green_server_ip
For both of these calls, the response should be the following:
OutputApp v1
This indicates that our deployment script works correctly.
Setting Up a Reserved IP Address to Route Traffic
Now that we have the initial version of our application deployed, we can create a Reserved IP address and point it to our “green” server initially.
In the DigitalOcean control panel, click on the “Networking” tab and then the “Reserved IPs” menu item. In the menu provided, select your green server and click on the “Assign Reserved IP” button:
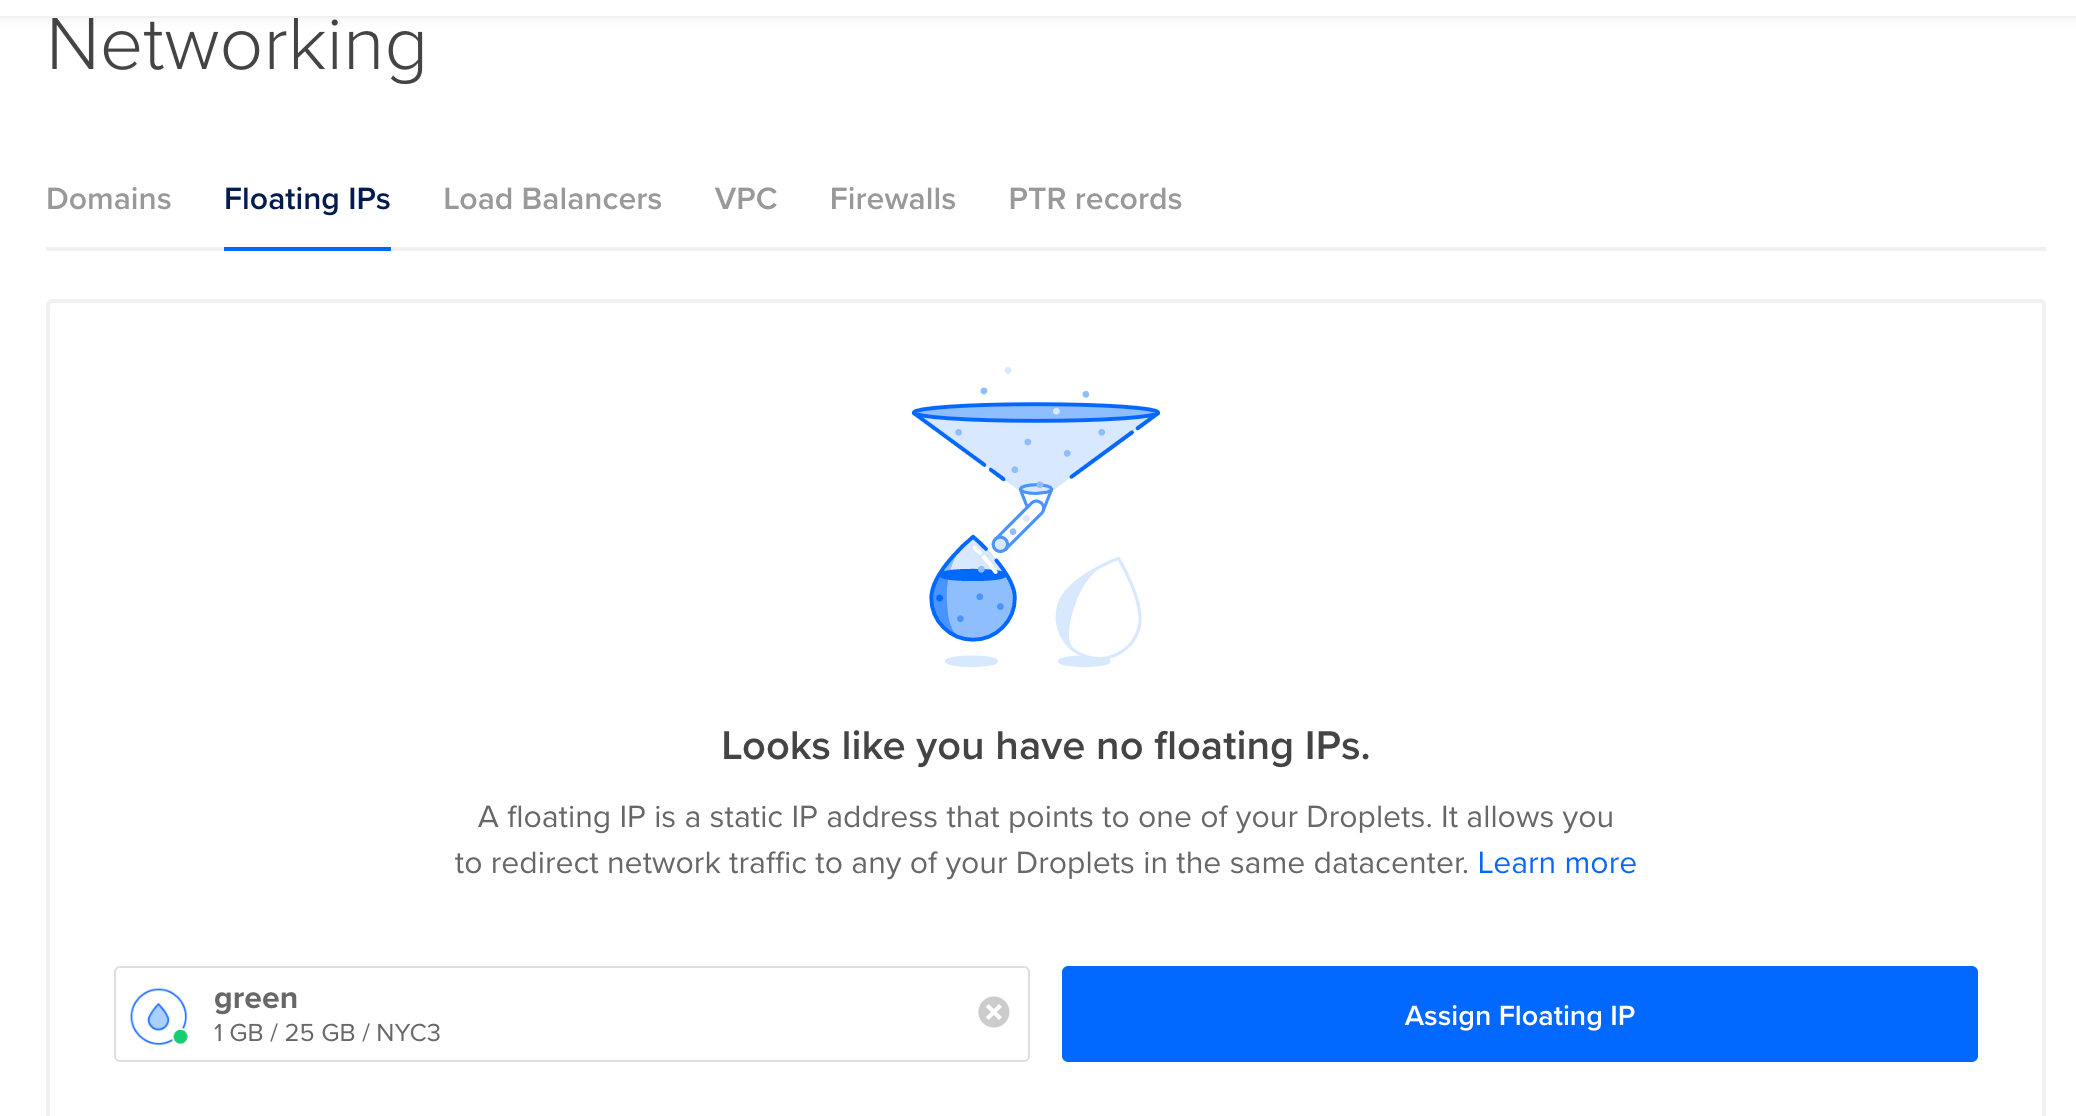
After a few seconds, the IP should be assigned to your green server:

You can now use this IP address as the primary entry point into your production application deployment. If you wanted to set up a domain name for your web app, you would point the domain to this Reserved IP address.
Test that your application is accessible through the Reserved IP address by typing:
- curl reserved_IP_addr
You should see version 1 of your application:
OutputApp v1
The green server is currently supplying this response.
Step 6 – Practicing Blue-Green Deployment
Now that our configuration is complete, we can demonstrate how blue-green deployment works in practice. Currently, our Reserved IP address is pointing to our green server. As stated previously, the Reserved IP address represents production traffic and would be the location where we would attach our application’s domain name.
On your local or development machine, we can make some changes to our application. Open the index file:
- cd ~/sample_app
- nano index.html
Let’s make a visible change to our application by incrementing the version number:
App v2
Save and close the file when you are finished.
Add the file to the git staging area and commit your changes by typing:
- git add .
- git commit -m "Application version 2"
Next, we can push our new changes to our non-active environment. This will give us the opportunity to test our deployment without impacting our production server.
Since our Reserved IP address is currently pointing to our green environment, we will deploy to our blue server. Push the new changes to the blue environment by typing the following on your local development machine:
- git push blue main
If we visit our Reserved IP address, we should see that version 1 of our application is still being served:
- curl reserved_IP_addr
OutputApp v1
However, if we check out our blue server’s regular IP address, we can test out version 2 of our application:
- curl blue_server_IP
OutputApp v2
This is what we expect and what we want. We can now run our blue server environment through whatever internal testing that we need. All the while, the green server will continue to serve our production traffic.
Once you have tested the newest version of your application and are confident that it is performing as expected, we can switch the production traffic over to the blue server.
To do so, visit the DigitalOcean control panel. Click on the “Networking” tab and then select the “Reserved IPs” navigation item. In the “Reserved IPs” list, you should see your Reserved IP, which is currently pointing to the green server:
Before we switch over, in one of your terminal windows, start a while loop so that we can make repeated requests through the Reserved IP address. This allow us to immediately see our production application version transition from v1 to v2:
- while true; do curl reserved_ip_addr; sleep 2; done
It should start outputting the results of the web requests:
OutputApp v1
App v1
App v1
App v1
Now, to make the switch and “release” your the new version of your software, click on the blue button on the right-hand side of the Reserved IP assignment to re-assign the IP address. Select your blue server:
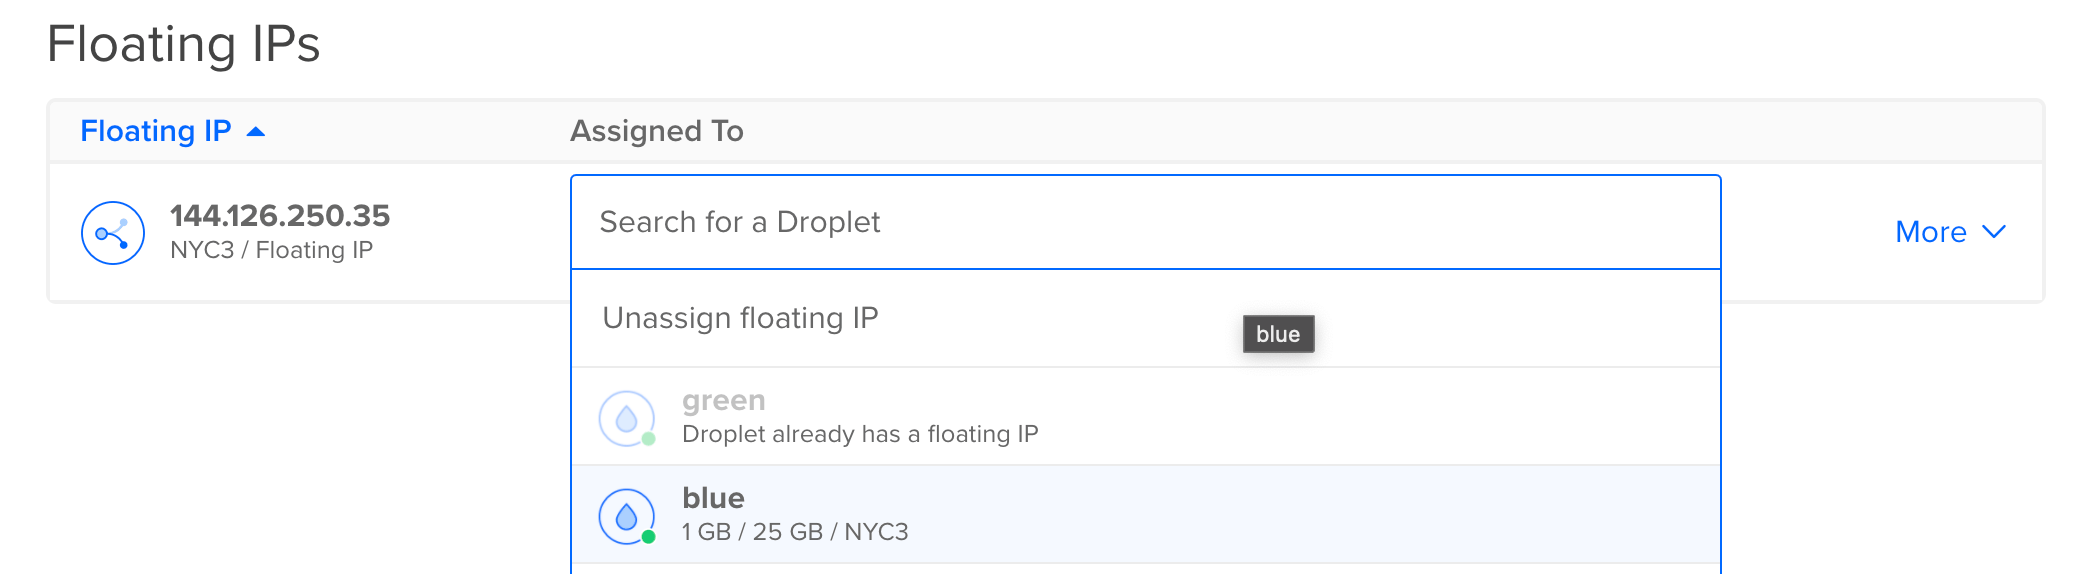
In a few seconds, your Reserved IP will be reassigned to your blue server. In your terminal window, the change over should be evident:
OutputApp v1
App v1
App v2
App v2
Stop the while loop by pressing “Ctrl+C”.
Your production traffic is now being routed to the new version of your application. Your previous production server, the green server, is now set up as both your rollback machine and your next staging area.
If, after moving traffic over to the new version of application, you discover a problem, this release strategy allows you to roll back to your previous version quickly and painlessly. To do so, just reverse the process and point your Reserved IP address back to the green server.
Step 7 – Dealing with Database Updates (Optional)
The scenario outlined above was scoped down in order to focus on the deployment and release strategy itself. We didn’t cover more complex, but common setups, like those involving databases.
There are a few different strategies that you can use to handle the persistent data between your two environments.
It is possible to maintain a separate database for each of your environments. However, this strategy would require that you replicate the data in the production database to the non-active database and stop transactions during the moments when you are initiating a switch. Basically, it would require a live database migration as well as a few moments of down time on each deployment. This could quickly become very time consuming and error prone.
A better alternative is usually to share a single database system between the green and blue environments. The application code will be switchable using the blue-green release strategy, while the database itself will be used by both environments.
The main concern with this approach is how to deploy and release updates that include non-backwards compatible database migrations. If we deploy a new release to staging that adds to or alters the database in a way that doesn’t work with the current production deployment, we will break our application.
To prevent this from happening, it is often best to deploy your migrations separate from your code base deployments and in stages where necessary. This modified process is sometimes called blue-turquoise-green deployment. Basically, it hinges on deploying an intermediate version of your application code that can handle both the old and new versions of your database.
The intermediate application code is almost completely the same as the older version, but with some additional logic that prepares it for the new data structures that will exist after the migration takes place. Often, this is accomplished by constructing the migrations so that they create completely new data structures instead of modifying existing ones. This way, you can keep the old data structure, let’s say a table, and create a new one that includes the breaking changes.
The intermediate turquoise deployment is deployed as the first step in the migration process. This deployment will at first read from and write to the old table, but it will check for the existence of the new structure. Next, the migration itself is run, creating the new version of the data structure alongside the old version. The turquoise deployment’s logic should be configured to recognize that the new structure is in place and it should start writing changes to both the old structure and the new structure. It will continue to read from the old structure for the time being.
At this point, all new activity will be recorded in both data structures. You can backfill the new structure with the data from the old structure, transforming it along the way to satisfy the conditions of the new structure. When this is complete, all of your records should exist in both locations. To continue the transition, the next application deployment might continue to write to both structures, but may read from the new structure. After everything is confirmed to be running smoothly, another deployment might cut off writes from the old structure and the old structure may be deleted.
This process can seem fairly involved at first, but it is usually not too much additional work in practice. The main work involves building a safety net that will use both the legacy and new structures temporarily. This gives you time to test your migrations in depth before committing to them, and allows you to roll back at any point to the previous working version of your data structure. For an example of how this data migration could take place, take a look at some of these slides from Mike Brittain at Etsy.
Conclusion
While there are many other strategies that can be employed to separate deployment from the actual release of your new code, blue-green deployment is a mechanism that is quick to implement. It provides a good staging environment that completely mirrors the production environment, while offering immediate rollback opportunities following a release if things didn’t go as expected.
Next, you may want to learn how to perform blue-green deployments using modern Kubernetes tooling such as ArgoCD.
Thanks for learning with the DigitalOcean Community. Check out our offerings for compute, storage, networking, and managed databases.
About the author(s)
Former Senior Technical Writer at DigitalOcean, specializing in DevOps topics across multiple Linux distributions, including Ubuntu 18.04, 20.04, 22.04, as well as Debian 10 and 11.
Former Senior DevOps Technical Writer at DigitalOcean. Expertise in topics including Ubuntu 22.04, Linux, Rocky Linux, Debian 11, and more.
Still looking for an answer?
This textbox defaults to using Markdown to format your answer.
You can type !ref in this text area to quickly search our full set of tutorials, documentation & marketplace offerings and insert the link!
Hello,
Good article, thank you Justin.
I came across this article while looking for the “new” floating IP feature.
I have a doubt and I will need your input for that: Will implementing the blue-green concept block us from using the floating IP for high availability implementation? Or is it possible to kind of combine blue-green concept with HA server infrastructure?
Honestly, even if the concept looks good, I still don’t see the main advantage of implementing this concept rather than using a 3 layers server structure (dev-preproduction-production) where all is managed directly by the app itself and where we are not depending of the server configuration.
Regards,
 This work is licensed under a Creative Commons Attribution-NonCommercial- ShareAlike 4.0 International License.
Become a contributor for community
Get paid to write technical tutorials and select a tech-focused charity to receive a matching donation.

DigitalOcean Documentation
Full documentation for every DigitalOcean product.

Resources for startups and AI-native businesses
The Wave has everything you need to know about building a business, from raising funding to marketing your product.
The developer cloud
Scale up as you grow — whether you're running one virtual machine or ten thousand.

Start building today
From GPU-powered inference and Kubernetes to managed databases and storage, get everything you need to build, scale, and deploy intelligent applications.
