
Status: Deprecated
This article covers a version of Ubuntu that is no longer supported. If you are currently operate a server running Ubuntu 12.04, we highly recommend upgrading or migrating to a supported version of Ubuntu:
- Upgrade to Ubuntu 14.04.
- Upgrade from Ubuntu 14.04 to Ubuntu 16.04
- Migrate the server data to a supported version
Reason: Ubuntu 12.04 reached end of life (EOL) on April 28, 2017 and no longer receives security patches or updates. This guide is no longer maintained.
See Instead: This guide might still be useful as a reference, but may not work on other Ubuntu releases. If available, we strongly recommend using a guide written for the version of Ubuntu you are using. You can use the search functionality at the top of the page to find a more recent version.
Introduction
Web frameworks are great tools for taking some of the pain out of developing web applications. They often handle some of the lower-level configuration in order to let you focus on the functionality and presentation of your application.
Martini is a package for the Go programming language that fulfills these functions. It provides routing, static file serving, error handling, and middleware and hooks into the existing Go web functionality. This allows you to easily plug it into existing Go code and simplify your workload.
In this guide, we will discuss how to use Martini to quickly build Go web applications on an Ubuntu 12.04 server.
Install Go with GVM
While Ubuntu 12.04 has Go packages available to install in their default repositories, Martini requires Go version 1.1 or later to function correctly. The version in the repositories does not meet this requirement.
Instead of installing Go from the repositories, we will use gvm, the Go Version Manager, to install a recent version of go. Before we can do this, however, we do need some dependencies from the repositories:
sudo apt-get update
sudo apt-get install curl git mercurial make binutils bison gcc
After you have installed the gvm dependencies, we can download and run the gvm installation script from the project’s GitHub page:
bash < <(curl -s https://raw.github.com/moovweb/gvm/master/binscripts/gvm-installer)
This will install the gvm scripts and files into a hidden directory within your home folder called .gvm. To use gvm to install a Go version, we first need to source the script so that our current shell session has the scripts available:
source ~/.gvm/scripts/gvm
Now that the gvm command is available in our current shell, we can install Go version 1.2 by issuing the following command:
gvm install go1.2
This will install a Go version compatible with Martini. Set this as the default by typing:
gvm use go1.2 --default
Set Up a Go Environment
Now that we have Go installed, we should set up a Go environment. Go expects things to be organized a certain way to build correctly. It expects a project directory with bin, src, and pkg subdirectories.
We will make this structure in our home directory:
cd ~
mkdir -p go/{bin,pkg,src}
Now we must set our Go path to reflect this project directory and add the go/bin directory to our regular path so that we can run our Go programs easily:
export GOPATH=$HOME/go
export PATH=$PATH:$GOPATH/bin
You can add these to your .bashrc so that they are executed whenever you log in:
echo "export GOPATH=$HOME/go" >> ~/.bashrc
echo "export PATH=$PATH:$GOPATH/bin" >> ~/.bashrc
You should now be ready to work on your first Martini application.
Creating Your First Martini Application
You can easily create a “Hello world” example program that will demonstrate some of the qualities of a Martini application.
We will call our program hello.go and put it in an application directory of the same name within the ~/go/src directory:
cd ~/go/src
mkdir hello
nano hello/hello.go
In this file, we will start with the generic Go package declaration for the main program. Following this, we will import the Martini package by listing the place where it can be acquired:
package main

import "github.com/codegangsta/martini"
Next, we will create our main function, which will contain the bulk of our program:
package main

import "github.com/codegangsta/martini"

func main() {

    server := martini.Classic()
    server.Get("/", func() string {

        return "<h1>Hello, world!</h1>"

    })

    server.Run()

}
Let’s take a look at what the code we inserted into the main() function does.
server := martini.Classic()
This line initializes a variable called server and assigns an instance of the “Classic” object to it. The classic() function creates an instance of Martini that contains some defaults and functionality that most applications would benefit from.
server.Get("/", func() string {

    return "<h1>Hello, world!</h1>"

})
This portion of the code sets up a URL handler that responds to HTTP get requests for the resource “/”, which is the root URL location. In other words, portion of the code will get executed when a user requests the base IP address or domain name of the server.
The function returns a string, which is then passed back as the response body and rendered in the user’s browser window.
server.Run()
This line is the one that actually starts the Martini server in order to listen for requests and route traffic.
Save and close the file when you are finished.
Next, we need to get the Martini package so that Go can run the program we just typed up:
go get github.com/codegangsta/martini
This will download the package to our path so that Go can find and use this resource.
Finally, we can run our program by typing:
go run hello.go
Martini serves apps on port 3000, so you can access your application by going to your IP address followed by the port number in your web browser:
<pre> http://<span class=“highlight”>your_ip</span>:3000 </pre>

Add Routing and Parameters
Our first iteration of our “hello world” program is complete, but we could improve it by taking advantage of Martini’s routing capabilities.
We have already created one route, which served requests for the base URL. This works well as a general default, but if we want to personalize it, we need to be able to take input from the user.
One way of getting input from a user is through the URL itself. We can set part of the URL as a parameter which we can call when designing the return value for our function.
Below the base URL route, let’s add another one:
. . .
server.Get("/", func() string {

    return "<h1>Hello, world!</h1>"

})

server.Get("/:who", func(args martini.Params) string {

    return "<h1>Hello " + args["who"] + "</h1>"

})
. . .
Our new handler responds to any request that follows the base URL up until another slash. Instead of matching a specific URL string, it uses a placeholder called :who. This placeholder is a parameter called “who” that will take the value of whatever the user enters after the first “/”.
You should also notice that the function declaration now takes an argument called args of the type martini.Params. This allows us to access the “who” parameter that will be set to the user’s requested URL value.
Inside the handler, we basically have the same return string, but we access the parameter by using the syntax args["who"]. This inserts the value of “who” into our string.
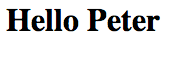
If we save this and run it again, we can access the same page that we had last time to going to the base URL. However, we can also dynamically greet users by name if they follow the base URL with “/your_name”:
<pre> http://<span class=“highlight”>your_ip</span>:3000/Peter </pre>
We can string together multiple words by replacing the spaces in the URL with “%20”:
<pre> http://<span class=“highlight”>your_ip</span>:3000/is%20a%20rather%20fine%20greeting </pre>

How To Proxy Your App Through Nginx
Although the Martini server is a great way to serve applications, it is probably not best practice to allow it exposed as the main server interface. We can use Nginx as a reverse proxy to pass the appropriate parameters to our application.
Install Nginx from Ubuntu’s repositories so that we can get started:
sudo apt-get install nginx
Our configuration will be relatively basic. It will just pass our requests straight to our Martini server.
Edit the default Nginx configuration file:
sudo nano /etc/nginx/sites-enabled/default
Inside, change the server_name declaration to match your IP address or domain name. If you are using a domain name, make sure to set up host names in your DigitalOcean control panel.
<pre> server_name <span class=“highlight”>your_ip_or_domain</span>; </pre>
Next, we will change the location / declaration to pass the request information to our Martini application. Delete or comment out the default location / section and add a new one that handles this pass:
location / {
    proxy_set_header X-Real-IP $remote_addr;
    proxy_set_header X-Forwarded-For $remote_addr;
    proxy_set_header Host $host;
    proxy_pass http://127.0.0.1:3000;
}
Save and close the file when you have made those changes.
Now, we will restart the server to implement our changes:
sudo service nginx restart
Now, we have our front-end server configured and ready to pass connections to our application. We need to start our program to accept these connections.
Currently, we have been running our program using the following syntax:
<pre> go run <span class=“highlight”>program_name</span> </pre>
We should instead install our program so that we can run it by name. We have already set up our system path to find programs that we will install with Go.
Install your program by typing:
go install hello
This will compile and save our program to the ~/go/bin directory.
Now, we can start our program simply by typing:
hello
This will start our Martini server, which will listen for requests on port 3000, just like it always has.
If we want to be able to access the command line, we should start it in the background instead. Stop the program by typing “CTRL-C” and then start it like this:
hello &
This will allow us to continue to type commands while our application works.
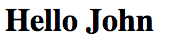
If you visit your server by going to its IP address or domain name, you should get routed to your application. If you follow the domain with a slash and a name, you will be greeted:
<pre> http://<span class=“highlight”>your_ip_or_domain</span>/John </pre>
Conclusion
Martini makes it easy to handle web requests in a Go program. Rather than re-writing everything from scratch, it attempts to create functionality that logically extends the existing server functionality in the core web packages.
Although our examples were rather simple in this article, Martini can handle much more complex configurations. It implements a middleware system for injecting other functionality into the serving process, and can be extended through the use of the community contributions. Martini simplifies web processes to let you focus on your application’s core functionality.
<div class=“author”>By Justin Ellingwood</div>
Thanks for learning with the DigitalOcean Community. Check out our offerings for compute, storage, networking, and managed databases.
About the author
Former Senior Technical Writer at DigitalOcean, specializing in DevOps topics across multiple Linux distributions, including Ubuntu 18.04, 20.04, 22.04, as well as Debian 10 and 11.
Still looking for an answer?
 This work is licensed under a Creative Commons Attribution-NonCommercial- ShareAlike 4.0 International License.
Become a contributor for community
Get paid to write technical tutorials and select a tech-focused charity to receive a matching donation.

DigitalOcean Documentation
Full documentation for every DigitalOcean product.

Resources for startups and AI-native businesses
The Wave has everything you need to know about building a business, from raising funding to marketing your product.
The developer cloud
Scale up as you grow — whether you're running one virtual machine or ten thousand.

Start building today
From GPU-powered inference and Kubernetes to managed databases and storage, get everything you need to build, scale, and deploy intelligent applications.
