By Sydney Rossman-Reich and Tony Tran

Introduction
Docker is a platform created to help developers build, scale, and run their applications reproducibly by separating their application from their application’s infrastructure and dependencies. At its core, Docker is software that manages application processes in abstractions called containers, using operating-system-level virtualization to deliver software in self-contained images. Docker is widely used for application development and deployment.
The use case highlighted in this tutorial will fit best for those who want to use Docker and multiple containers on a single Droplet.
This tutorial will guide you through spinning up a DigitalOcean Droplet with Docker and Docker Compose pre-installed, using the DigitalOcean Docker 1-Click App. After creating your Droplet, you will be guided through other use cases and common Docker commands. Because this 1-Click Droplet is based on a standard Ubuntu 20.04 Droplet, you can follow any of our Docker tutorials on your created Droplet after you finish this guide.
Software Included
By the end of this tutorial, you will have a Ubuntu 20.04 Droplet with the following additions through using the Docker 1-Click:
- Docker CE (version 20.10.7): Docker CE or Docker Community Edition is one of the fastest ways to get started with Docker and is ideal for developers and small-to-medium businesses who want to experiment with container-based applications.
- Docker Compose (version 1.27.0): Docker Compose is a tool to help developers define and share multi-container applications. With Compose, you can use a YAML file to define the services you need and spin these up (or tear them down) with a single command.
In addition to the package installation, this 1-Click also handles:
- Configuration of Docker following the official Docker recommendations
- Configuration of Docker Compose followingthe official Docker Compose recommendations
As of the time of this writing, this 1-Click solution will install Docker Compose v1, which uses docker-compose. Starting with Docker Compose v2, Docker has migrated towards using the compose CLI plugin command as documented in our latest Ubuntu 22.04 version of this tutorial, and away from the original docker-compose. While the installation differs, in general the actual usage involves dropping the hyphen from docker-compose calls to become docker compose. For full compatibility details, check the official Docker documentation on command compatibility between the new compose and the old docker-compose.
Step 1 — Creating a Docker Droplet
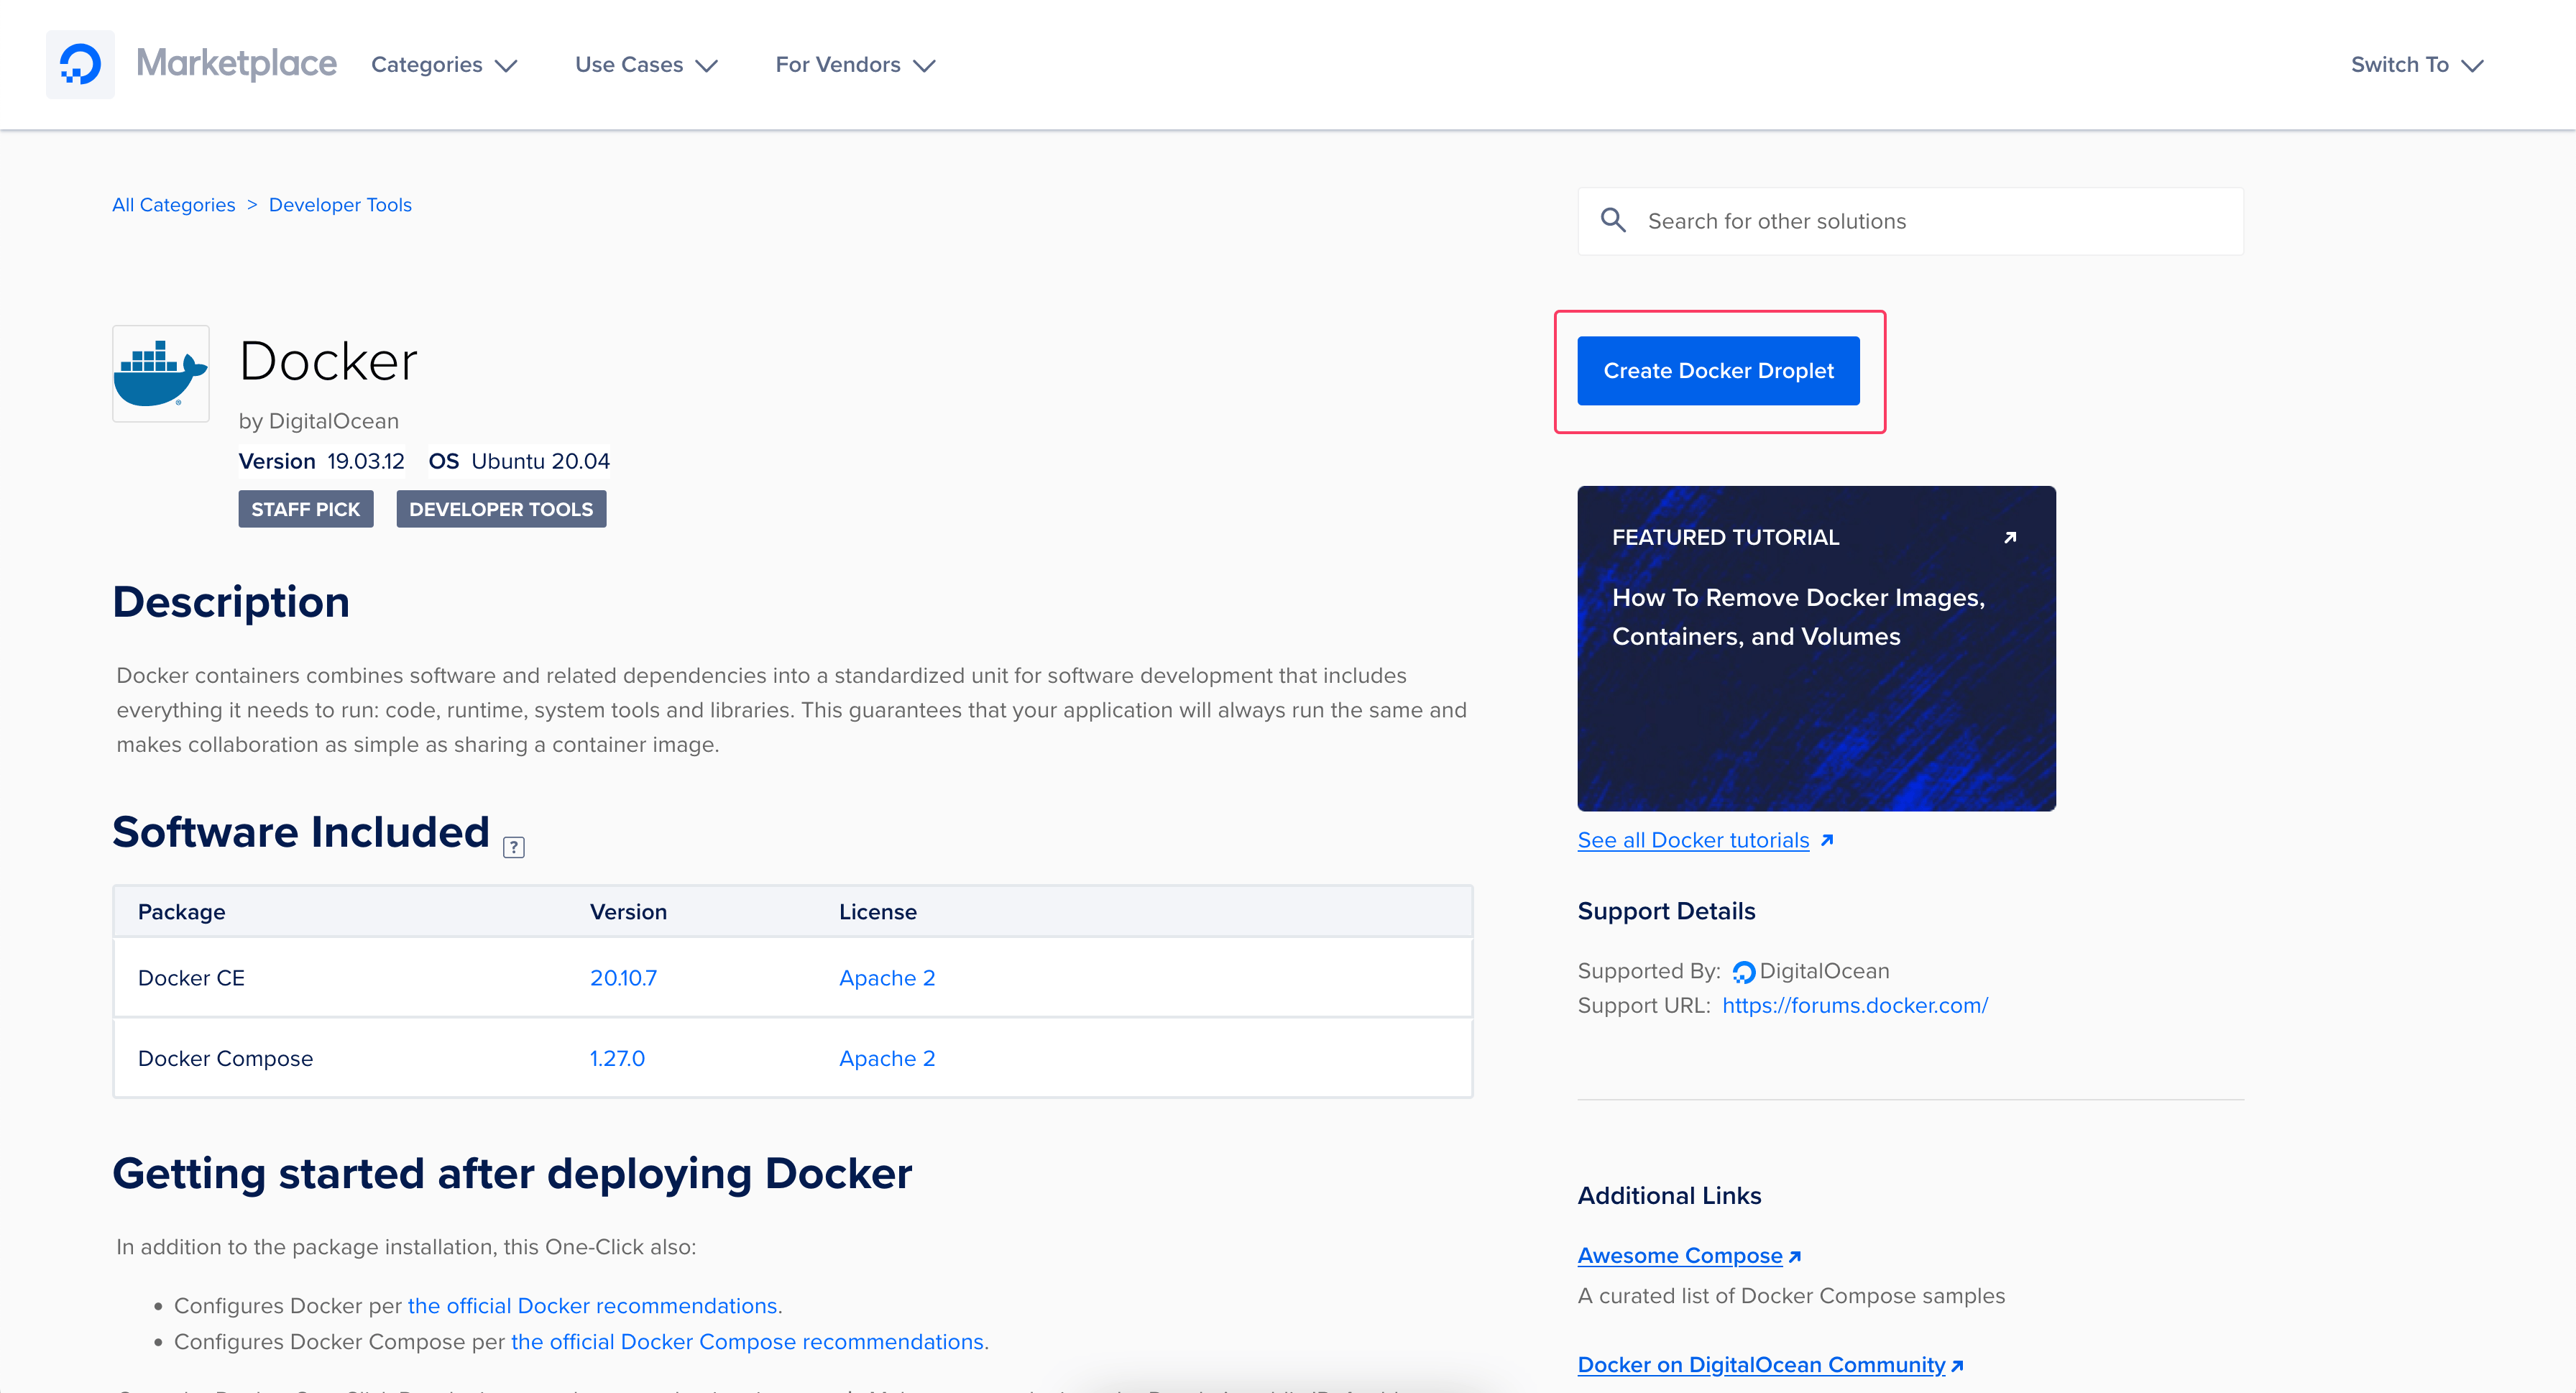
You’ll start by creating a Docker 1-Click Droplet that is available on our Marketplace, and will forward you to the DigitalOcean control panel. In addition to creating the Docker 1-Click App via the DigitalOcean control panel, you can also use the DigitalOcean API to create this Docker Droplet, but that won’t be covered in depth in this tutorial.
To create a Docker Droplet from the Docker 1-Click App, press the Create Docker Droplet button:
If you are not logged into your DigitalOcean account, you will need to login to proceed from here. If you don’t have an account, you will be prompted to sign up.
Next you’ll be taken to the Create Droplets page. Here you can customize your server settings before creating your Docker Droplet. How to Create your First Droplet describes all the choices you’ll need to make in detail, but below are the key settings to consider.
Choosing an image:
Your image will already be set to the Marketplace tab with Docker selected. If not set, switch to the Marketplace tab and search for Docker in the search keyword box. When properly set, your control panel will look similar to this:
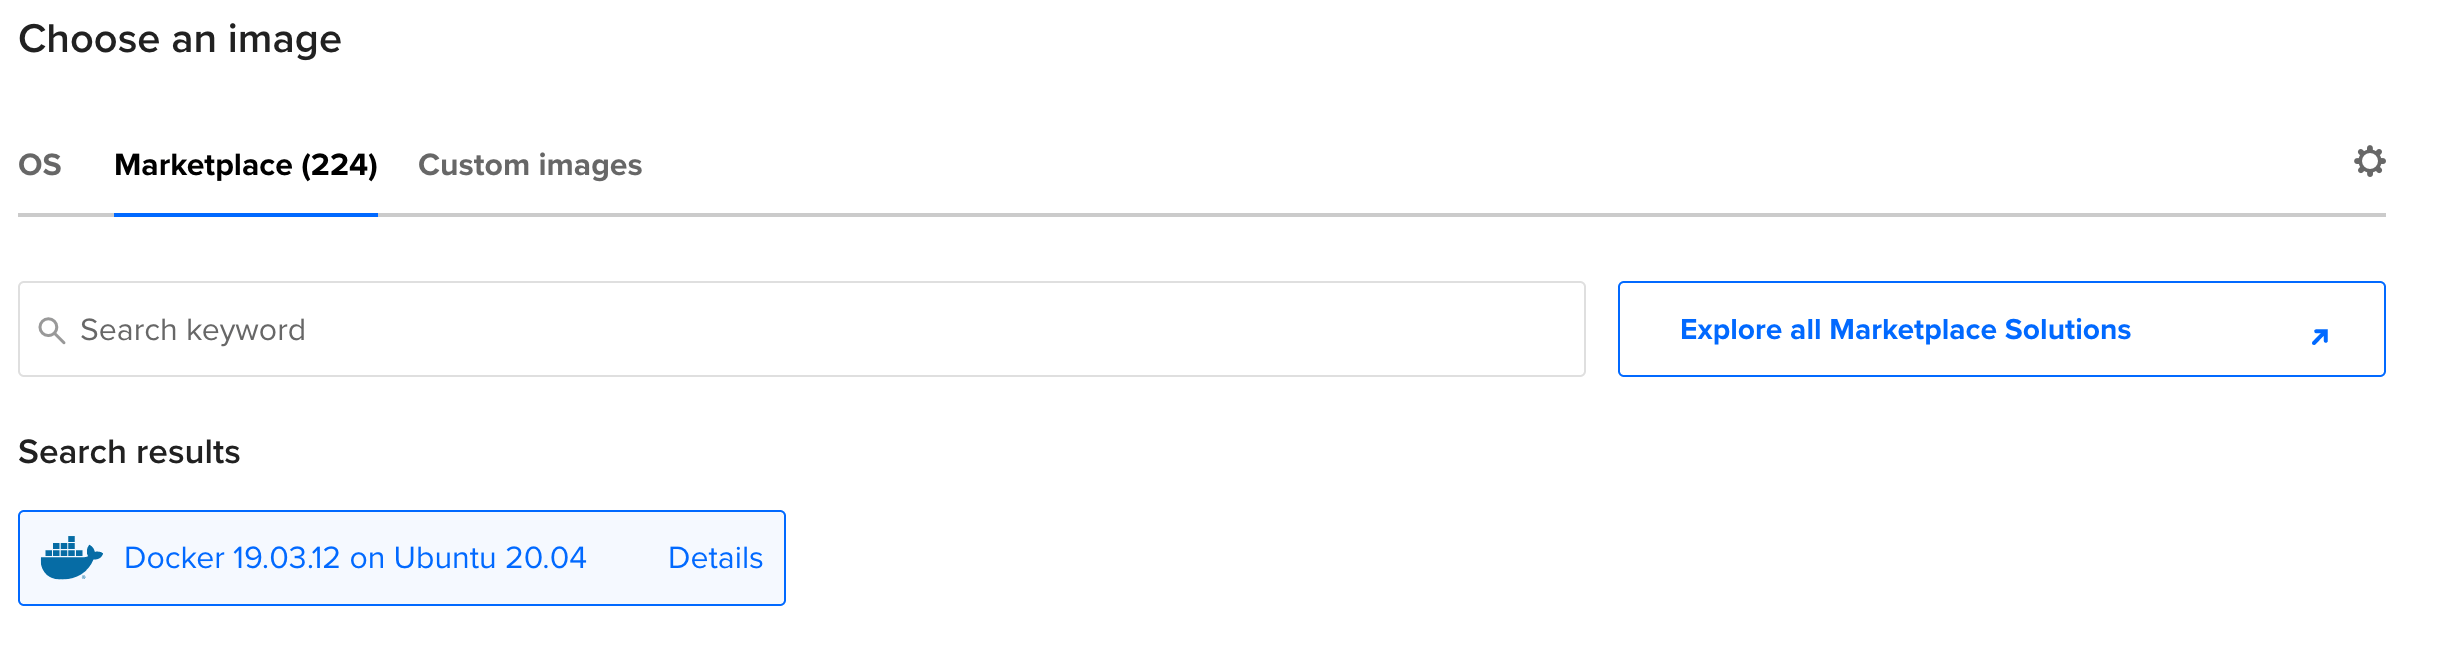
Docker 19.03.12 on Ubuntu 20.04 will be selected. Again, if it is not, use the search box to search for Docker.
Once the Docker image is properly selected, you can accept the defaults or adjust settings according to your use case. We typically recommend the following changes:
Choosing a datacenter region:
To avoid potential latency, it is recommended that you select a datacenter region closest to your user base. In some regions we have more than one datacenter. There is no difference between these same region datacenters (e.g., SFO3 and SFO2).
Choosing a plan:
To run a Droplet with Docker it is recommended to have at least 1GB of RAM.
Choosing an Authentication Method
The SSH Key option is recommended, rather than a Password for your Droplet. Authentication using SSH Keys is typically more secure.
Selecting additional options:
Adding improved metrics monitoring and alerting to your droplet helps you follow your Droplet resource usage over time. You may also want to consider enabling automated backups. You can also come back later to enable backup functionality on Droplets you’ve already created.
Choosing a hostname:
You can give your Droplet an identifying name that will be easier for you to remember, such as “Docker Droplet 1” or naming it after the application you will be using it for.
After you’ve made all your choices, click Create Droplet in the bottom bar of the Control Panel screen. Once the Droplet is created, its IP address will be displayed:

This IP address is important for connecting to your Droplet and for future configuration you may want to do. When you hover over the IP address, you can copy it to your clipboard.
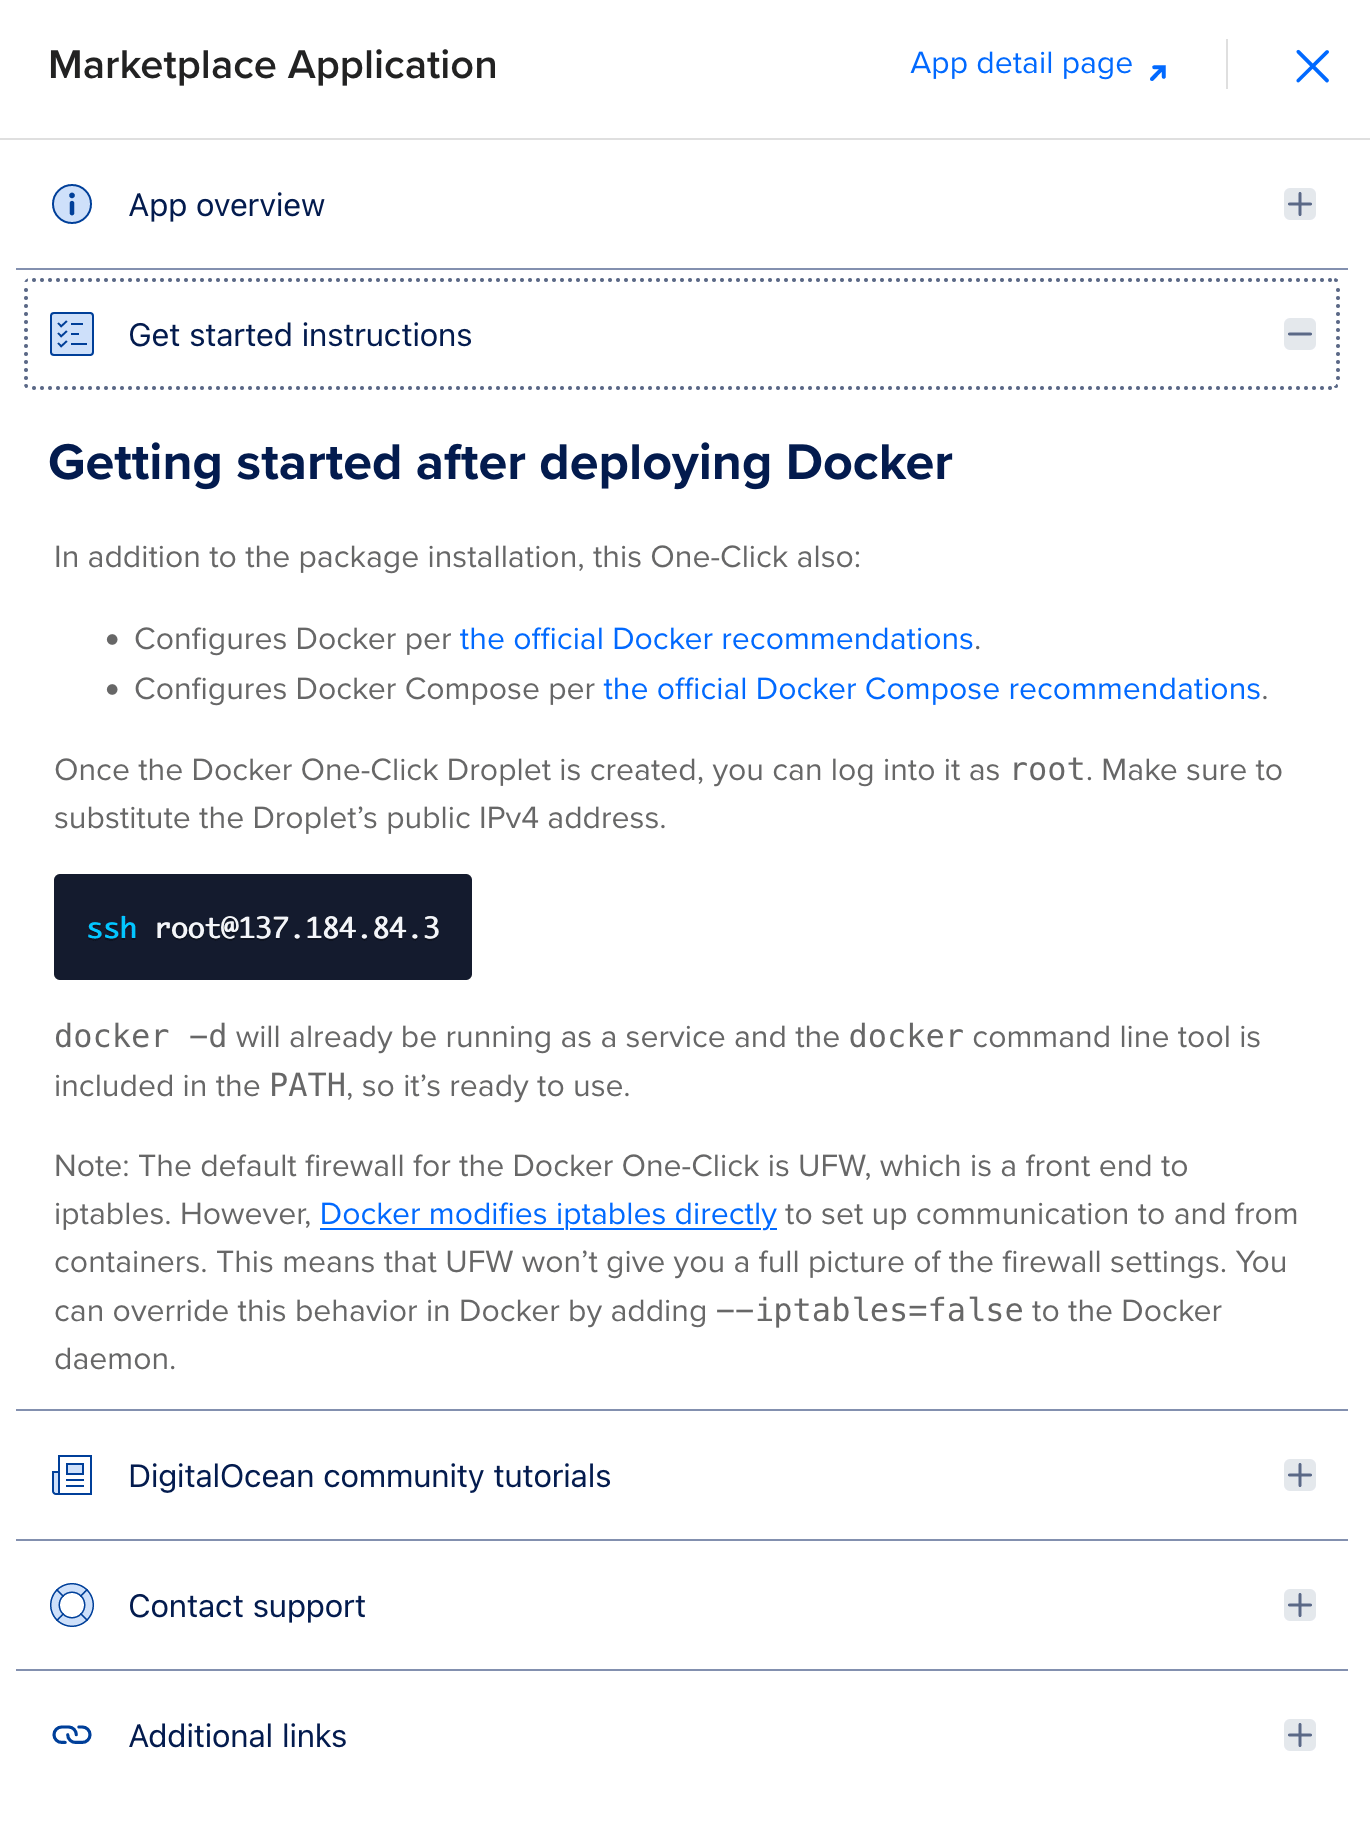
Droplets created through the 1-Click Marketplace also comes with additional resources that you can access by clicking Get started:

This will toggle a new panel, where you can gain additional information that is specific to your chosen 1-Click. This includes an overview, further steps to get started using your droplet, and links to relevant tutorials from our Community site. Furthermore, useful links such as where to get support and find more resources for Docker.
Step 2 — Accessing the Droplet via SSH to Enable Configuration
Once you’ve spun up your Docker Droplet, you’ll need to connect to your Droplet via SSH. That means you’ll connect to the server from the command line. If you haven’t used a terminal program like SSH or PuTTY before, check out How To Connect To Your Droplet with SSH. When you’re ready, open a terminal on your computer and log into your Droplet as root via SSH with this command, substituting the IP address with your Droplet’s IP address:
- ssh root@your_server_ip
Step 3 — Working with Docker and Creating Your First Container
Now that your Docker Droplet is up and running, you can now start working with Docker. Enter the following command to show a list of active and inactive Docker containers:
- docker ps -a
OutputCONTAINER ID IMAGE COMMAND CREATED STATUS PORTS NAMES
Your list of containers will be empty, given that this is a newly created Droplet and a new install of Docker. To start learning how to use Docker and create your first container, you can follow this tutorial starting from Step 3 of How To Install and Use Docker on Ubuntu 20.04. This tutorial will further guide you through using Docker images, and creating a container with an application.
For more information on using Docker, you can check out tutorials such as How To Remove Docker Images, Containers, and Volumes.
Step 4 — Creating a New User and Adjusting Permissions and Firewalls (Optional)
Your new Droplet will come with only one user, which is the default root user. While Docker can work as the root user, you also have the option to set up a new user and grant it administrative privileges through sudo. This, along with other security recommendations, can be found in our Initial Server Setup with Ubuntu 20.04 tutorial. If you want to use Docker through your new user, it is recommended to follow Step 2 of How To Install and Use Docker on Ubuntu 20.04 to allow execution of Docker commands in a more concise manner.
This Droplet comes configured with UFW as your firewall. It defaults to having ports 22 open for SSH, along with ports 2375 and 2376 for Docker. While these ports are open to grant external access into the Docker process, if this use case is not in the scope of your needs, you can choose to close access to these ports in your firewall.
Additionally, while UFW acts as a frontend to the low-level iptables firewall, Docker modifies iptables directly to set up communication to and from containers. This means that UFW won’t give you a full picture of the firewall settings. You can override this behavior in Docker by adding --iptables=false to the Docker daemon.
Conclusion
Your Docker 1-Click Droplet is now up and running, however the functionality of containers becomes more apparent when actual applications are deployed within them. Here are some tutorials covering popular use cases, all of which can be followed with your pre-installed software of Docker and Docker Compose:
- Docker Compose with Node.js: Node.js is a runtime for the JavaScript programming language, and is useful in the development of many applications.
- Docker Compose with Wordpress: Wordpress is a popular solution for hosting your own website.
- Docker Compose with Laravel: Laravel is a powerful framework to build websites using the PHP language.
- Docker Compose with Nginx: Nginx is a popular web server and reverse proxy server.
To learn even more about Docker, check out our many tutorials on Docker. If you’re interested in exploring container technology beyond just Docker, you can learn about container orchestration. Containers commonly paired with Kubernetes, such as in this tutorial on Building Optimized Containers for Kubernetes.
Thanks for learning with the DigitalOcean Community. Check out our offerings for compute, storage, networking, and managed databases.
About the author(s)
Still looking for an answer?
This textbox defaults to using Markdown to format your answer.
You can type !ref in this text area to quickly search our full set of tutorials, documentation & marketplace offerings and insert the link!
The hyperlink for “Docker Compose with NGINX” (at the very end) goes to the wrong link (looks like it was copy/pasted from the one above it about Laravel). Maybe the link should be this one?
 This work is licensed under a Creative Commons Attribution-NonCommercial- ShareAlike 4.0 International License.
Become a contributor for community
Get paid to write technical tutorials and select a tech-focused charity to receive a matching donation.

DigitalOcean Documentation
Full documentation for every DigitalOcean product.

Resources for startups and AI-native businesses
The Wave has everything you need to know about building a business, from raising funding to marketing your product.
The developer cloud
Scale up as you grow — whether you're running one virtual machine or ten thousand.

Start building today
From GPU-powered inference and Kubernetes to managed databases and storage, get everything you need to build, scale, and deploy intelligent applications.
