By Jonah Aragon and Tammy Fox

Introduction
phpMyAdmin is a free, web-facing control panel that can access and edit MySQL databases hosted on your server. It integrates with all existing and future databases on your Ajenti server automatically.
This tutorial will show you integrate phpMyAdmin into the Ajenti control panel.
Prerequisites
- Ajenti with Ajenti V installed (read How To Install The Ajenti Control Panel and Ajenti V on Ubuntu 14.04)
- A registered domain name that points to your Droplet (example.com is used throughout this tutorial)
- A subdomain (
phpmyadmin.example.com) that resolves to your Droplet (follow the directions for setting up an A record in How To Set Up a Host Name with DigitalOcean)
Step 1 — Creating the Website in Ajenti V
Before installing phpMyAdmin, you need to create the website for it in Ajenti.
In your browser, browse to your Ajenti control panel at https://panel.example.com:8000 (replacing example.com with your domain name), and log in. In the sidebar to the right, under the Web section, click Websites.
Under the New Website section there is a Name text field, type phpMyAdmin and click the Create button. Under the Websites section on that same page, click Manage next to the new phpMyAdmin line. On the page that appears, uncheck the box next to Maintenance mode. In the Website Files section below that, change Path from /srv/new-website to /srv/phpMyAdmin. Press the Set button next to that text field. Click Apply Changes at the bottom of the screen.
At the top of that page, click the Domains tab. Click Add and replace example.com with phpmyadmin.your_domain_name. Click Apply Changes at the bottom of the screen.
Now click the Content tab. Change the dropdown box to PHP FastCGI and click Create. This basically tells Ajenti to enable PHP for this website.
Click Apply Changes at the bottom of the screen. Configuration should now be complete. You should now be able to install phpMyAdmin.
Step 2 — Installing phpMyAdmin
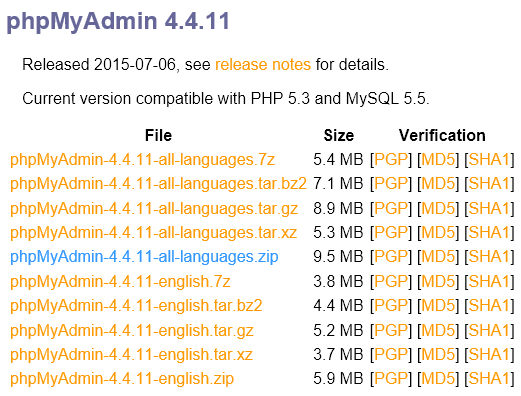
To install phpMyAdmin, first browse to www.phpmyadmin.net/downloads and download the latest version of phpMyAdmin in a .zip file format, shown highlighted in blue in the screenshot below.
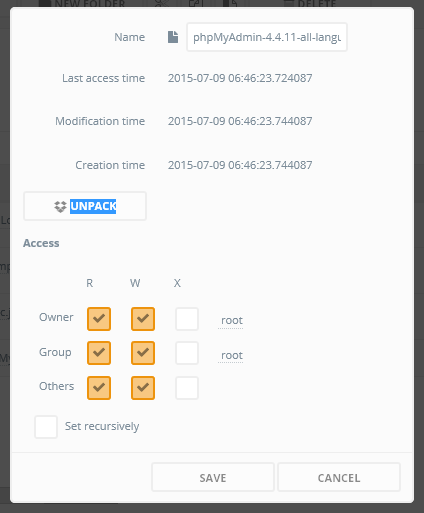
Back in the Ajenti control panel, browse to File Manager in the sidebar. Use the File Manager to browse to /srv. At the bottom of the page there is an Upload section. Click the Choose File button, and select the phpMyAdmin zip file you downloaded. After it finishes uploading, click the newly added file, named something like phpMyAdmin-x.x.xx-all-languages.zip. In the modal box that appears, click the Unpack button (highlighted in blue in the screenshot below).
When it finishes, click the X button next to Terminal 0 at the top of the screen. You should be taken back to the File Manager, and there should be a folder named something similar to phpMyAdmin-x.x.xx-all-languages. Click the menu button to the right of that folder.

In the Name text box, rename the folder to phpMyAdmin, and click Save.
Step 3 — Setting up a Database
We’re going to cover setting up a database in Ajenti, so you can login to phpMyAdmin. If you already have a database and login, feel free to skip ahead to step 4.
In the Ajenti control panel, in the sidebar there is a section called Software. Directly below that is a menu option named MySQL. Click that to access the MySQL control panel in Ajenti.

Under the Databases section, click the Create button. There you will be able to enter a name for your database. This can be anything you’d like. It won’t be seen by anybody but you.
The rest of the sections may automatically populate with default databases and users. This is fine, and you don’t need to touch them. Under the Users section, click the Create button. The Username and Password fields can be whatever you want, this is what you will login to phpMyAdmin with, so be sure to remember it or write it down. In the Hostname field, enter localhost.
That should be it, now we can start using phpMyAdmin.
Step 4 — Logging in
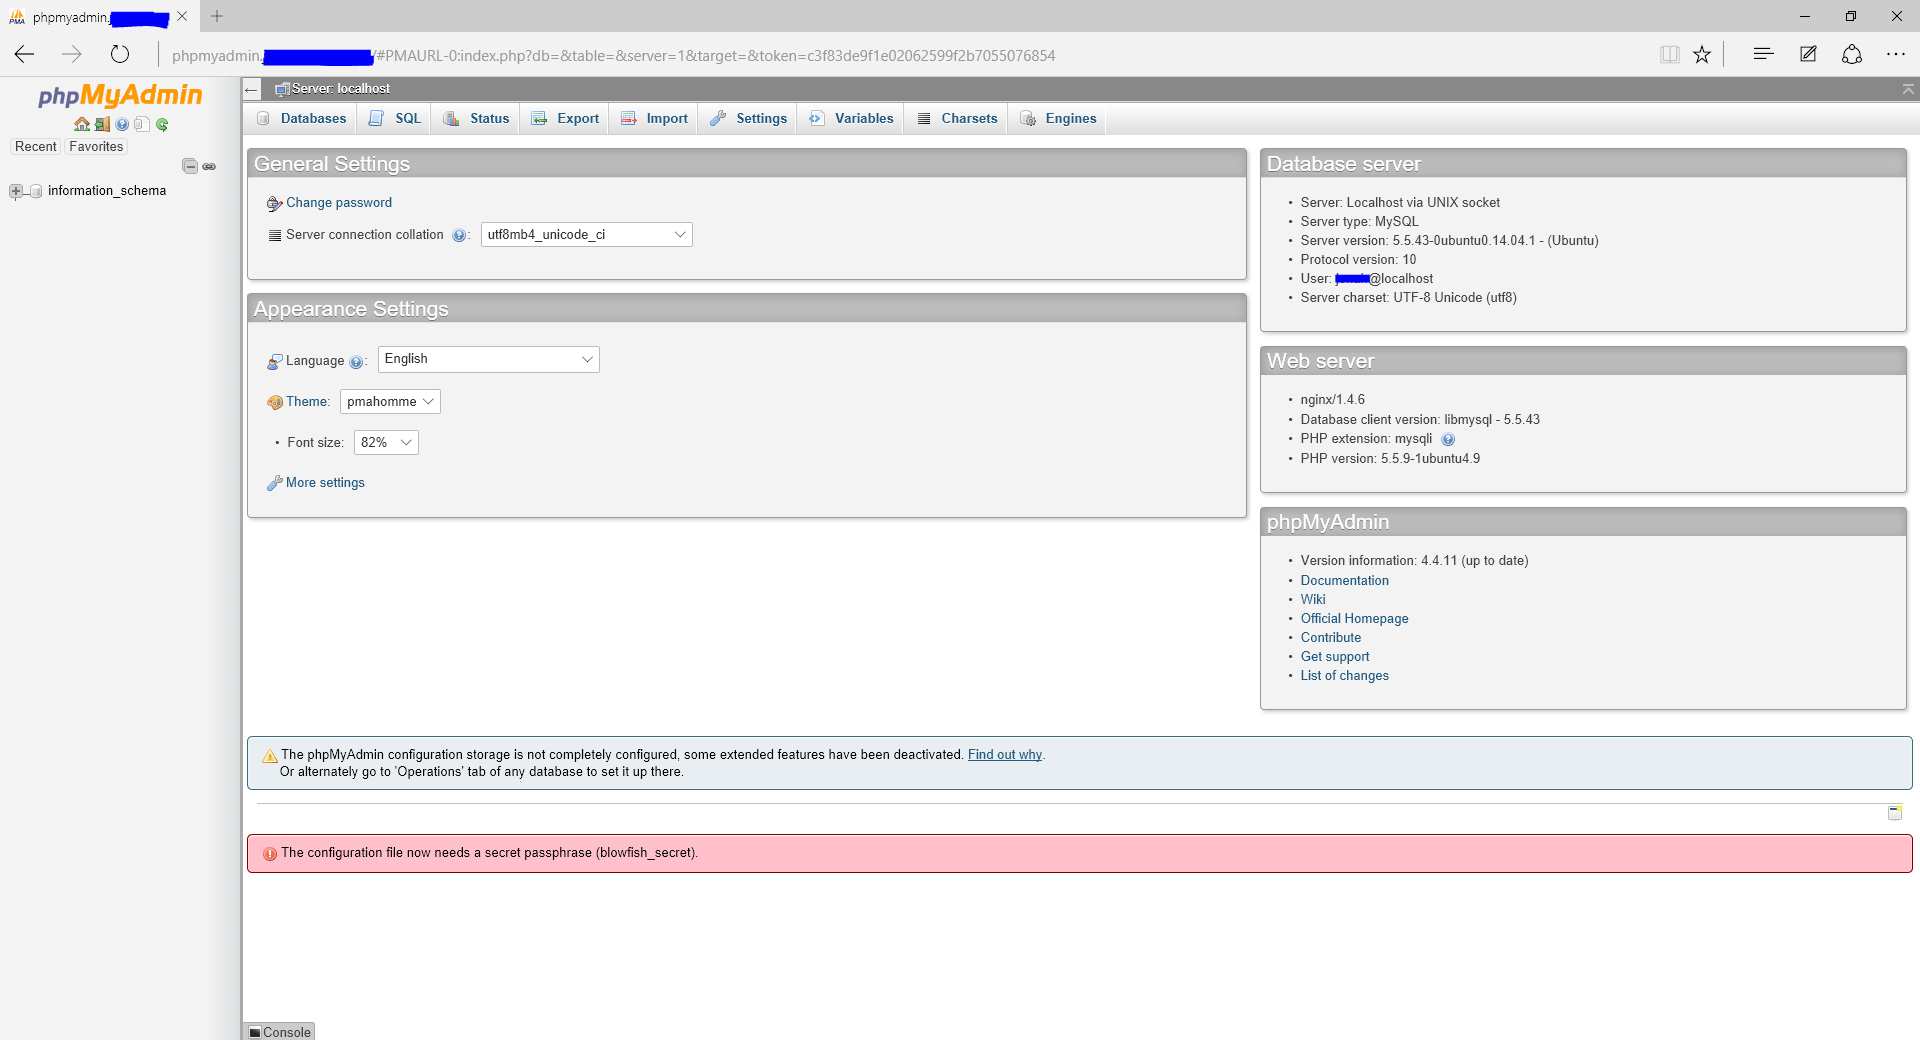
To access the phpMyAdmin web interface, browse to phpmyadmin.your_domain_name in your web browser. For the Username and Password fields, enter the credentials of your MySQL user, and press Go.
Conclusion
Congratulations! You now have phpMyAdmin installed on your server.
Thanks for learning with the DigitalOcean Community. Check out our offerings for compute, storage, networking, and managed databases.
Tutorial Series: Using the Ajenti Control Panel with Ajenti V
Ajenti is an open source, web-based control panel that can be used for a large variety of server management tasks. It can install packages and run commands, and you can view basic server information such as RAM in use, free disk space, etc. All this can be accessed from a web browser.
Optionally, an add-on package called Ajenti V allows you to manage multiple websites from the same control panel and easily configure email accounts for your domains.
Browse Series: 5 tutorials
About the author(s)
Sign up for DigitalOcean with this link and get a $10 credit: https://www.digitalocean.com/?refcode=fb6730f5bb99
Technical Editor, DigitalOcean
Still looking for an answer?
This textbox defaults to using Markdown to format your answer.
You can type !ref in this text area to quickly search our full set of tutorials, documentation & marketplace offerings and insert the link!
All the tutorial steps appear to have worked perfectly. However, I am unable to log into “phpmyadmin.[mysite].com”. The error message is “refused to connect.” I have correctly configured “phpmyadmin.[mysite].com” in my droplet as a CNAME. When I use whatsmydns.com it shows the CNAME record “phpmyadmin.[mysite].com” as “[mysite].com”, and the A record [mysite].com as the correct IP, so I have to assume the DNS has propagated. I there some configuration in Ajenti that I need to check?
 This work is licensed under a Creative Commons Attribution-NonCommercial- ShareAlike 4.0 International License.
Become a contributor for community
Get paid to write technical tutorials and select a tech-focused charity to receive a matching donation.

DigitalOcean Documentation
Full documentation for every DigitalOcean product.

Resources for startups and AI-native businesses
The Wave has everything you need to know about building a business, from raising funding to marketing your product.
The developer cloud
Scale up as you grow — whether you're running one virtual machine or ten thousand.

Start building today
From GPU-powered inference and Kubernetes to managed databases and storage, get everything you need to build, scale, and deploy intelligent applications.
