Sr Technical Content Strategist and Team Lead

Introduction
This article will provide a comprehensive overview of adding JavaScript to your HTML files, detailing the three core methods: placing scripts inline in the <head>, inline in the <body>, and linking to external .js files. Beyond just the ‘how,’ this article will delve into the critical ‘why,’ explaining the significant performance implications of each approach, including concepts like render-blocking, browser caching, and the use of modern attributes like defer and async.
To bridge theory and practice, the tutorial includes practical, real-world examples like creating a dark mode toggle and validating a web form. Finally, it will equip you with essential best practices for writing clean, maintainable code and a troubleshooting guide to help you solve common beginner errors using the browser’s developer console, to ensure you can start your web development projects with confidence.
Need to deploy a JavaScript project quickly? Check out DigitalOcean App Platform and deploy a JS project directly from GitHub in minutes.
Key Takeaways
- The best practice for adding JavaScript is to use an external
.jsfile for better organization, maintenance, and reusability. - Placing
<script>tags in the<head>is the worst for performance as it is render-blocking, forcing users to see a blank page. - Using the
deferattribute on external scripts is the recommended modern approach for optimal performance. - External JavaScript files offer a significant performance boost through browser caching, which inline scripts do not.
- A single
.jsfile can be linked across multiple pages, making updates and maintenance much more efficient. - The Developer Console (F12) is the most important tool for troubleshooting common JavaScript errors.
Method 1: How to Add an Inline Script to the <head>
<head>You can add JavaScript code in an HTML document by employing the dedicated HTML tag <script> that wraps around JavaScript code. The <script> tag can be placed in the <head> section of your HTML or in the <body> section, depending on when you want the JavaScript to load.
Generally, JavaScript code can go inside the document <head> section in order to keep it contained and out of the main content of your HTML document.
Let’s consider the following basic HTML document with a browser title of Today's Date:
<!DOCTYPE html>
<html lang="en-US">

<head>
    <meta charset="UTF-8">
    <meta name="viewport" content="width=device-width, initial-scale=1">
    <title>Today's Date</title>
</head>

<body>
</body>

</html>
To add a script that creates an alert, we can add a <script> tag and our JavaScript code below the <title> tag, as shown below:
<!DOCTYPE html>
<html lang="en-US">

<head>
    <meta charset="UTF-8">
    <meta name="viewport" content="width=device-width, initial-scale=1">
    <title>Today's Date</title>
    <script>
        let d = new Date();
        alert("Today's date is " + d);
    </script>
</head>

<body>
</body>

</html>
Placing the script here signals the browser to parse and execute the JavaScript before it begins rendering the content in the <body> of the page.
This approach is best suited for scripts that do not need to directly interact with elements on the page. When a script in the <head> runs, the browser has not yet built the Document Object Model (DOM) for the <body>. This means that any HTML elements like headings, paragraphs, or divs do not exist yet. As a result, code that tries to find or modify these elements (e.g., using document.getElementById()) will fail. This method is therefore ideal for setting up functions and variables for later use, or for including third-party analytics scripts that need to load as early as possible.
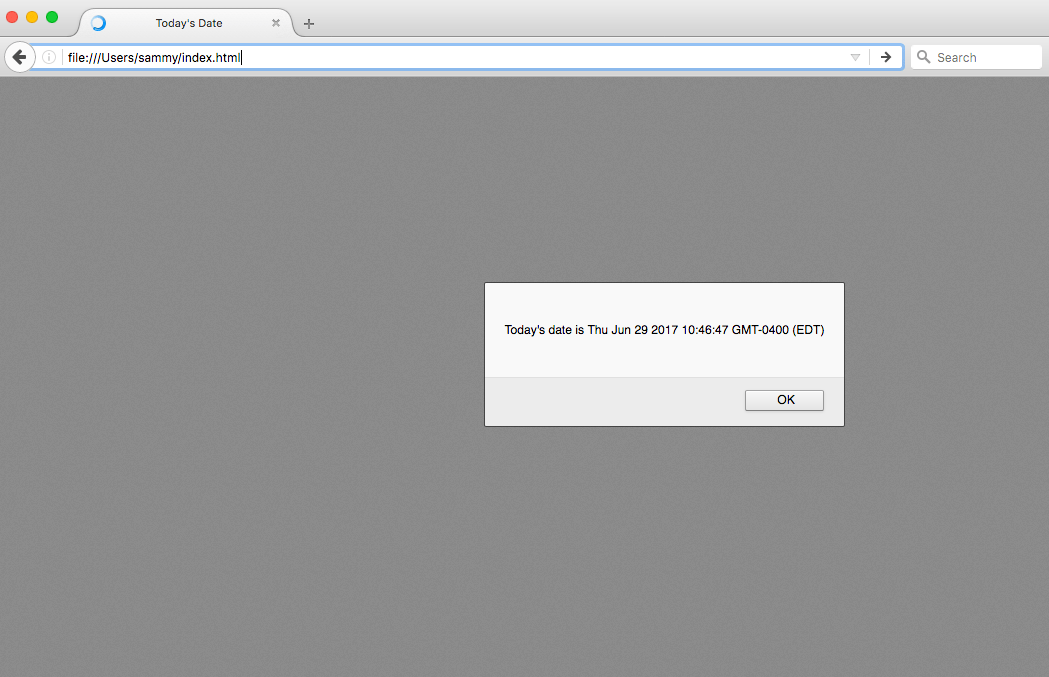
Once you load the page, you will receive an alert similar to this:
Method 2: How to Add an Inline Script to the <body>
<body>The <script> tag can also be placed in the <body> section. When a script is placed here, the HTML parser will pause its work to execute the script at the exact point where it appears in the document. This is the required method for any JavaScript code that needs to immediately find and modify an HTML element.
A common best practice is to place scripts just before the closing </body> tag. This placement ensures that all HTML elements on the page have been parsed and are available in the DOM before the script begins to run. It also improves perceived page performance, as the browser can render all the visible text and images first, allowing the user to see the page content before the potentially time-consuming JavaScript is executed. This allows the content to display without being blocked by JavaScript execution.
Let’s use this method to write the date directly into the HTML body.
<!DOCTYPE html>
<html lang="en-US">

<head>
    <meta charset="UTF-8">
    <meta name="viewport" content="width=device-width, initial-scale=1">
    <title>Today's Date</title>
</head>

<body>
  <script>
      let d = new Date();
      document.body.innerHTML = "<h1>Today's date is " + d + "</h1>"
  </script>
</body>

</html>
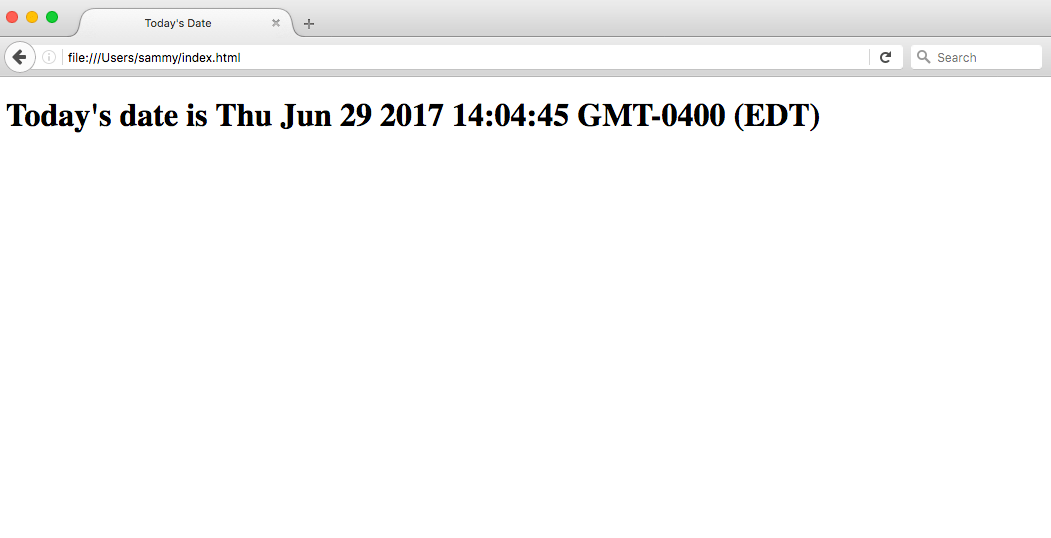
The output for the above HTML document loaded through a web browser would look similar to the following:
Scripts that are small or that run only on one page can work fine within an HTML file, but for larger scripts or scripts that will be used on many pages, it is not a very effective solution because including it can become unwieldy or difficult to read and understand. In the next section, we’ll go over how to handle a separate JavaScript file in your HTML document.
Method 3: How to Work with a Separate JavaScript File
For larger scripts or code that needs to be used across multiple pages, the most effective and professional solution is to place the JavaScript in a separate file with a .js extension. You can then link to this external file from your HTML using the <script> tag with the src (source) attribute.
The benefits of this approach are significant:
- Separation of Concerns: It keeps your HTML for structure, CSS for styling, and JavaScript for interactivity in separate files. This makes your project cleaner, more organized, and easier to debug.
- Reusability and Maintenance: A single script file, like
main-navigation.js, can be linked from every page of your website. If you need to update the navigation logic, you only have to edit that one file. - Browser Caching: When a user visits your site for the first time, their browser downloads the .js file. On subsequent visits or when navigating to other pages that use the same file, the browser will use its stored (cached) copy instead of downloading it again. This drastically improves loading times.
To demonstrate how to connect a JavaScript document to an HTML document, let’s create a small web project. It will consist of script.js in the js/ directory, style.css in the css/ directory, and a main index.html in the root of the project.
project/
├── css/
|   └── style.css
├── js/
|   └── script.js
└── index.html
Let’s move our JavaScript code that will show the date as an <h1> header to the script.js file:
let d = new Date();
document.body.innerHTML = "<h1>Today's date is " + d + "</h1>"
Next, let’s also edit the style.css file by adding a background color and style to the <h1> header:
body {
    background-color: #0080ff;
}

h1 {
    color: #fff;
    font-family: Arial, Helvetica, sans-serif;
}
Finally, we can reference both the script and the stylesheet from our index.html file. We use a <link> tag in the <head> for the CSS and a <script> tag with a src attribute in the <body> for the JavaScript.
<!DOCTYPE html>
<html lang="en-US">

<head>
    <meta charset="UTF-8">
    <meta name="viewport" content="width=device-width, initial-scale=1">
    <title>Today's Date</title>
    <link rel="stylesheet" href="css/style.css">
</head>

<body>
    <script src="js/script.js"></script>
</body>

</html>
Now, with JavaScript and CSS in place, our project is much more organized. When we load the index.html page into the web browser, we should see a styled page with the current date that looks similar to the following:

Now that we’ve placed the JavaScript in a file, we can call it in the same way from additional web pages and update them all in a single location. This method provides the most organized and scalable way to manage JavaScript in your web projects. For even more control over how external scripts load, you can look into using the async and defer attributes on the <script> tag.
What are some real-world examples?
Let’s look at some real-world examples based on what we learned so far.
1. Simple Dark Mode Toggle
Almost every modern website or app offers a dark mode. This can be achieved by toggling a CSS class with JavaScript.
HTML:
<!DOCTYPE html>
<html lang="en-US">

<head>
    <meta charset="UTF-8">
    <meta name="viewport" content="width=device-width, initial-scale=1">
    <title>Dark Mode</title>
    <link rel="stylesheet" href="css/style.css">
</head>

<body>
    <button id="theme-toggle">Toggle Dark Mode</button>
    <h1 id="title">DigitalOcean</h1>
    <p>This is some example text on the page.</p>
    <script src="js/script.js"></script>
</body>

</html>
CSS:
/* This class will be added or removed by JavaScript */
.dark-mode {
    background-color: #222;
    color: #eee;
}
JavaScript:
const toggleButton = document.getElementById('theme-toggle');

toggleButton.addEventListener('click', function() {
    document.body.classList.toggle('dark-mode');
});
The JavaScript first finds the button using its ID. It then attaches an event listener that waits for a click. When the button is clicked, the classList.toggle('dark-mode') command runs. If the <body> element doesn’t have the .dark-mode class, JavaScript adds it. If it already has it, JavaScript removes it. The browser instantly applies the CSS styles associated with that class.
2. Basic Form Validation
Websites need to ensure that users fill out forms correctly before they can be submitted. JavaScript can check this instantly without a page reload.
HTML:
<!DOCTYPE html>
<html lang="en-US">

<head>
    <meta charset="UTF-8">
    <meta name="viewport" content="width=device-width, initial-scale=1">
    <title>Form Validator</title>
</head>

<body>
    <form id="contact-form">
        <label for="email">Email:</label>
        <input type="text" id="email" placeholder="you@example.com">
        <button type="submit">Subscribe</button>
        <p id="error-message" style="color: red;"></p>
    </form>
    <script src="js/script.js"></script>
</body>

</html>
JavaScript:
const contactForm = document.getElementById('contact-form');
const emailInput = document.getElementById('email');
const errorMessage = document.getElementById('error-message');

contactForm.addEventListener('submit', function(event) {
    if (!emailInput.value.includes('@')) {
        event.preventDefault();

        errorMessage.textContent = 'Please enter a valid email address.';
    } else {
        errorMessage.textContent = '';
    }
});
The script listens for the submit event on the form. When you click the "Subscribe" button, the function runs. It first checks if the text inside the email input includes an @ symbol.
- If it doesn’t,
event.preventDefault()stops the form’s default submission behavior. It then displays a helpful error message to the user. - If it does, the script does nothing, and the form submits as usual.
What are the performance considerations for each method?
Let’s discuss the key performance considerations for each of the JavaScript loading methods discussed:
Inline Script in the <head>
-
Primary Issue: Render-Blocking
Placing a script in the
<head>has the most significant negative impact on performance. The browser must download, parse, and execute the JavaScript before it can move on to render any part of the page’s<body>. If your script is large or runs slowly, the user will stare at a blank white page until the script is finished. This increases the time to First Contentful Paint (FCP), a critical user experience metric. -
Caching: None
Inline scripts are part of the HTML document itself. They cannot be cached separately by the browser. Every time a user visits the page, the script is re-downloaded and re-parsed along with the rest of the HTML.
This method is generally the worst for performance and should be avoided unless the script is extremely small and absolutely must run before anything else.
Inline Script in the <body>
-
Primary Issue: Partial Render-Blocking
This method is a major improvement over placing scripts in the
<head>. The browser parses and renders the HTML until it encounters the<script>tag. At that point, it stops rendering to execute the script. By placing the script at the very end of the<body>(just before the</body>tag), you allow the entire visible page to be rendered first. -
Caching: None
Just like scripts in the
<head>, inline scripts in the<body>are part of the HTML and cannot be cached independently.
Placing a script at the end of the body is a good strategy for improving the perception of speed because content becomes visible quickly. However, it can still delay the page from becoming fully interactive.
External JavaScript File
This method offers the most flexibility and the best performance, primarily due to two factors: browser caching and special loading attributes.
-
Primary Advantage: Caching and Asynchronous Loading
-
Caching: This is the biggest performance win. An external
.jsfile is downloaded once on the first visit. For all subsequent pages that use the same script, the browser will load the file from its local cache, eliminating network delay and speeding up the site significantly. -
deferandasyncAttributes: External scripts unlock the use of two powerful attributes.-
<script defer src="..."></script>: This tells the browser to download the script in the background while it continues parsing the HTML. The script is only executed after the entire document has been parsed. This is the recommended modern approach as it is non-blocking and guarantees the script runs in the order it appears in the HTML. -
<script async src="..."></script>: This also downloads the script in the background without blocking rendering. However, it will execute the script the moment it finishes downloading, which can happen at any time and may interrupt rendering. It’s best for independent, third-party scripts (like ads or analytics) where execution order doesn’t matter.
-
-
Using an external file linked with the defer attribute is the best practice for optimal performance. It combines the benefits of non-blocking loading with powerful browser caching.
What are some best practices?
Here are some essential best practices and troubleshooting tips for working with JavaScript in your HTML files.
- Keep JavaScript in External Files: Always prefer linking to a
.jsfile (<script src="..."></script>) instead of writing JavaScript directly in your HTML. This keeps your code organized, easier to maintain, and allows the browser to cache the file for faster loading. - Load Scripts at the End of
<body>withdefer: For the best user experience, place your<script>tags just before the closing</body>tag and add thedeferattribute. This ensures your page content loads and displays quickly without being blocked by JavaScript. - Write Readable Code: Use clear, descriptive names for your variables and functions (e.g.,
calculateTotalPriceinstead ofcalc). Use comments//to explain why you wrote a piece of code, not what it does. - Don’t Repeat Yourself (DRY): If you find yourself writing the same lines of code in multiple places, wrap that code in a function. You can then call that function whenever you need it, making your code shorter and easier to update.
What are some common issues and how to troubleshoot them?
When your script doesn’t work, don’t panic! The browser’s Developer Tools are your best friend. Press F12 (or right-click the page and select “Inspect”) and click on the “Console” tab. Most errors will appear here in red.
-
Error: “Cannot read properties of null” or “is not defined”
- Meaning: Your JavaScript tried to access an HTML element that wasn’t loaded yet.
- Solution: This almost always means your
<script>tag is in the<head>or is too high up in the<body>. Move your script to the bottom of the<body>and add the defer attribute.
-
Error: “Uncaught SyntaxError”
- Meaning: You have a typo in your code.
- Solution: The console usually gives you a line number. Look closely at that line for missing parentheses
(), curly braces{}, quotes"", or other typos.
-
Problem: Script doesn’t run, no error in Console.
- Meaning: Your HTML file probably can’t find your
.jsfile. - Solution: Check the “Network” tab in the Developer Tools. If you see your script file listed with a 404 error, your file path in the
srcattribute is incorrect. Double-check your spelling and folder structure (e.g.,<script src="js/script.js"></script>).
- Meaning: Your HTML file probably can’t find your
-
Problem: The code runs but doesn’t do what I expect.
-
Meaning: This is a logic error. The syntax is correct, but the steps are wrong.
-
Solution: Use
console.log()to debug. Place it in your code to print the values of variables at different stages. This helps you trace the logic and see exactly where it’s going wrong.let userRole = 'guest'; console.log('User role before check:', userRole); // See what the value is if (userIsAdmin) { userRole = 'admin'; }
-
Frequently Asked Questions (FAQs)
1. What is the best way to add JavaScript to my HTML file?
The best way is to link to an external .js file with the defer attribute, placing the script tag just before the closing </body> tag (e.g., <script src="path/to/script.js" defer></script>).
2. Should I put JavaScript in the head or body?
You should almost always put your JavaScript <script> tags at the very end of the <body> section, just before the closing </body> tag.
Placing scripts in the <head> blocks the page from rendering, meaning your users will see a blank white page until the scripts are fully downloaded and executed. When you place scripts at the end of the <body>, the browser can render the entire HTML and CSS first, so users see your content much faster.
3. Can I add multiple script tags in one HTML file?
Yes, you can include as many <script> tags as you need in a single HTML file. The browser will download and execute them in the order they appear in the document.
This is commonly used to load third-party libraries before your custom scripts that depend on them.
<body>
    <script src="library.js"></script>

    <script src="my-app.js"></script>
</body>
4. What’s the main difference between async and defer?
Both attributes load scripts without blocking the page from rendering. The key difference is that defer guarantees the scripts will execute in the order they appear after the document has been fully parsed, while async executes the script as soon as it’s downloaded, which can be in any order.
5. How do I debug JavaScript that isn’t working?
Open browser Developer Tools (F12), check the Console tab for error messages, use the Network tab to verify file loading, and add console.log() statements to trace variable values.
Conclusion
In this tutorial, you learned the three core methods for adding JavaScript to HTML: inline in the <head>, inline in the <body>, and linking to an external .js file. You also explored performance implications including render-blocking, browser caching, and the defer and async attributes, along with real-world examples and a troubleshooting guide using the Developer Console.
You can now choose the right JavaScript loading strategy for your use case, write clean and maintainable code using external files, and debug common errors using browser Developer Tools. Using an external .js file with the defer attribute is the recommended approach for most production web projects.
To continue building your JavaScript skills, explore the following tutorials:
Thanks for learning with the DigitalOcean Community. Check out our offerings for compute, storage, networking, and managed databases.
Tutorial Series: How To Code in JavaScript
JavaScript is a high-level, object-based, dynamic scripting language popular as a tool for making webpages interactive.
Browse Series: 37 tutorials
About the author
I help Businesses scale with AI x SEO x (authentic) Content that revives traffic and keeps leads flowing | 3,000,000+ Average monthly readers on Medium | Sr Technical Writer(Team Lead) @ DigitalOcean | Ex-Cloud Consultant @ AMEX | Ex-Site Reliability Engineer(DevOps)@Nutanix
Still looking for an answer?
This textbox defaults to using Markdown to format your answer.
You can type !ref in this text area to quickly search our full set of tutorials, documentation & marketplace offerings and insert the link!
gentle introduction on how javascript and css work with html- foundational concepts gently introduced. Thank you!
I was hoping to find the bit “how to” as i needed to add a tag to all my html pages on the site…sounds like a bulk operation and was hoping to find that info here…but perhaps this was the wrong place …
Thank you very much for this tutorial! It is very clear and simple explained even for a newbie like me :)
This comment has been deleted
Pensei que não estava funcionando bem, mas foi por erro meu na hora de adicionar o código, já está funcionando no meu blog alcir.net. Obrigado !
 This work is licensed under a Creative Commons Attribution-NonCommercial- ShareAlike 4.0 International License.
Become a contributor for community
Get paid to write technical tutorials and select a tech-focused charity to receive a matching donation.

DigitalOcean Documentation
Full documentation for every DigitalOcean product.

Resources for startups and AI-native businesses
The Wave has everything you need to know about building a business, from raising funding to marketing your product.
The developer cloud
Scale up as you grow — whether you're running one virtual machine or ten thousand.

Start building today
From GPU-powered inference and Kubernetes to managed databases and storage, get everything you need to build, scale, and deploy intelligent applications.
