By Hanif Jetha and Justin Ellingwood

Introduction
Django is a powerful web framework that can help you get your Python application off the ground quickly. It includes several convenient features like an object-relational mapper, user authentication, and a customizable administrative interface for your application. It also includes a caching framework and encourages clean app design through its URL Dispatcher and Template system.
In this tutorial, you’ll learn how to build a scalable and portable Django Polls app with Docker containers. Out of the box, a Django app requires several modifications to run effectively inside of containers, like logging to standard output streams and configuring itself through environment variables passed into the container. In addition, offloading static assets like JavaScript and CSS stylesheets to object storage allows you to streamline and centralize the management of these files in a multi-container environment.
You’ll implement these modifications—inspired by the Twelve-Factor methodology for building scalable, cloud-native web apps—on a sample Django Polls app. Then, you’ll build the application image and run the containerized app with Docker.
By the end of this tutorial, you’ll have containerized the setup in How to Set Up a Scalable Django App. In subsequent tutorials in this series, you’ll learn how to use Docker Compose to pair the Django container with an Nginx reverse proxy, and deploy this architecture to a Kubernetes cluster.
It’s highly recommended to work through the tutorial to understand the changes you’re making to the app, but if you’d like to skip ahead, you can obtain the modified code from the polls-docker branch of the Polls app GitHub repository.
Prerequisites
To follow this tutorial, you’ll need:
- An Ubuntu 18.04 server, set up following this Initial Server Setup guide.
- Docker installed on your server, following Steps 1 and 2 of How To Install and Use Docker on Ubuntu 18.04. Ensure that you add your user to the
dockergroup as detailed in Step 2. - A DigitalOcean Space to store your Django project’s static files and a set of Access Keys for this Space. To learn how to create a Space, consult the How to Create Spaces product documentation. To learn how to create Access Keys for Spaces, consult Sharing Access to Spaces with Access Keys. With minor changes, you can use any S3-compatible object storage service.
- A DigitalOcean Managed PostgreSQL cluster. To learn how to create a cluster, consult the DigitalOcean Managed Databases product documentation. With minor changes, you can use any database that Django supports.
Step 1 — Creating the PostgreSQL Database and User
To begin, we’ll connect to the PostgreSQL server from the Ubuntu instance. Then, we’ll create a PostgreSQL database and user for the Django app, and configure the database to work effectively with Django.
Before we connect to the database from our Ubuntu machine (not the app container), we need to install the postgresql-client package from the Ubuntu repositories. First update the local apt package index and then download and install the package:
sudo apt update
sudo apt install postgresql-client
Hit Y and then ENTER when prompted to begin downloading and installing the packages.
Now that you’ve installed the client, we’ll use it to create a database and database user for our Django application.
To begin, grab the Connection Parameters for your cluster by navigating to Databases from the Cloud Control Panel, and clicking into your database. You should see a Connection Details box containing some Connection parameters for your cluster. Note these down.
Back on the command line, log in to your cluster using these credentials and the psql PostgreSQL client we just installed:
psql -U username -h host -p port -d database --set=sslmode=require
When prompted, enter the password displayed alongside the Postgres username, and hit ENTER.
You will be given a PostgreSQL prompt from which you can manage the database.
First, create a database for your project called polls:
CREATE DATABASE polls;
Note: Every Postgres statement must end with a semicolon, so make sure that your command ends with one if you are experiencing issues.
We can now switch to the polls database:
\c polls;
Next, create a database user for the project. Make sure to select a secure password:
CREATE USER sammy WITH PASSWORD 'password';
We’ll now modify a few of the connection parameters for the user we just created. This will speed up database operations so that the correct values do not have to be queried and set each time a connection is established.
We are setting the default encoding to UTF-8, which Django expects. We are also setting the default transaction isolation scheme to “read committed”, which blocks reads from uncommitted transactions. Lastly, we are setting the timezone. By default, our Django projects will be set to use UTC. These are all recommendations from the Django project itself.
Enter the following commands at the PostgreSQL prompt:
ALTER ROLE sammy SET client_encoding TO 'utf8';
ALTER ROLE sammy SET default_transaction_isolation TO 'read committed';
ALTER ROLE sammy SET timezone TO 'UTC';
Now we can give our new user access to administer our new database:
GRANT ALL PRIVILEGES ON DATABASE polls TO sammy;
When you are finished, exit out of the PostgreSQL prompt by typing:
\q
A Django app, properly configured, can now connect to and manage this database. In the next step, we’ll clone the Polls app code from GitHub and explicitly define its Python package dependencies.
Step 2 — Cloning App Repository and Declaring Dependencies
To begin the process of containerizing our Django Polls app, we’ll first clone the django-polls repository, which contains the complete code for the Django project’s tutorial Polls app.
Log in to your server, create a directory called polls-project and use git to clone the django-polls repo from GitHub:
mkdir polls-project
cd polls-project
git clone https://github.com/do-community/django-polls.git
Access the django-polls directory and list the repository contents:
cd django-polls
ls
OutputLICENSE README.md manage.py mysite polls templates
You should see the following objects:
manage.py: The main command-line utility used to manipulate the app.polls: Contains thepollsapp code.mysite: Contains Django project-scope code and settings.templates: Contains custom template files for the administrative interface.
To learn more about the project structure and files, consult Creating a Project from the official Django documentation.
In this directory we’ll also create a file called requirements.txt that will contain the Django app’s Python dependencies.
Open a file called requirements.txt in your editor of choice and paste in the following Python dependencies:
boto3==1.9.252
botocore==1.12.252
Django==2.2.6
django-storages==1.7.2
docutils==0.15.2
gunicorn==19.9.0
jmespath==0.9.4
psycopg2==2.8.3
python-dateutil==2.8.0
pytz==2019.3
s3transfer==0.2.1
six==1.12.0
sqlparse==0.3.0
urllib3==1.25.6
Here we install Django, the django-storages plugin for offloading static assets to object storage, the gunicorn WSGI server, the psycopg2 PostgreSQL adapter, as well as some additional dependency packages. Note that we explicitly list and version every Python package required by our app.
Save and close the file.
Now that we’ve cloned the app and defined its dependencies, we can move on to modifying it for portability.
Step 3 — Making Django Configurable by Environment Variables
One of the most important recommendations from the twelve-factor app methodology is extracting hard-coded config from your application’s codebase. This allows you to easily change the behavior of your application at runtime by modifying environment variables. Docker and Kubernetes both suggest this method of configuring containers, so we will adapt our application’s settings file to use this pattern.
The main settings file for our Django project (django-polls/mysite/settings.py) is a Python module that uses native data structures to configure the application. By default, most of the values in the file are hard-coded, meaning that you have to edit the configuration file to change the application behavior. We can use Python’s getenv function in the os module to configure Django to read configuration parameters from local environment variables instead.
To do this, we’ll go through settings.py and replace the hard-coded values of each of the variables we want to set at runtime with a call to os.getenv. The os.getenv function reads the value from a provided environment variable name. You can optionally provide a second parameter with a default value that will be used if the environment variable is not set.
This allows us to set variables like this:
. . .
SECRET_KEY = os.getenv('DJANGO_SECRET_KEY')
. . .
DEBUG = os.getenv('DJANGO_DEBUG', False)
. . .
For SECRET_KEY, Django will look for an environment variable called DJANGO_SECRET_KEY. Since this shouldn’t be hard-coded and needs to be the same across our application servers, we’ll want to set this externally with no fallback value. We want the application to fail if we do not provide this, since it could lead to problems if various copies of our application use different keys.
For DEBUG, Django will look for an environment variable called DJANGO_DEBUG. However, this time, we’ve provided a default value that will be used as fallback if the variable is not set. In this case, we’ve opted to set DEBUG to False if no value is provided so that we do not accidentally leak sensitive information unless the variable is intentionally defined and set to True…
To apply this technique, open the polls-project/django-polls/mysite/settings.py file in your editor of choice, and move through it, externalizing the following variables with the provided default values:
SECRET_KEY = os.getenv('DJANGO_SECRET_KEY')DEBUG = os.getenv('DEBUG', False)ALLOWED_HOSTS = os.getenv('DJANGO_ALLOWED_HOSTS', '127.0.0.1').split(',')
For ALLOWED_HOSTS, we fetch the DJANGO_ALLOWED_HOSTS environment variable, and split it into a Python list using , as a separator. If the variable isn’t set, ALLOWED_HOSTS is set to 127.0.0.1.
Once you’ve modified the above variables, navigate to the DATABASES variable and configure it as follows:
. . .
# Database
# https://docs.djangoproject.com/en/2.1/ref/settings/#databases

DATABASES = {
     'default': {
         'ENGINE': 'django.db.backends.{}'.format(
             os.getenv('DATABASE_ENGINE', 'sqlite3')
         ),
         'NAME': os.getenv('DATABASE_NAME', 'polls'),
         'USER': os.getenv('DATABASE_USERNAME', 'myprojectuser'),
         'PASSWORD': os.getenv('DATABASE_PASSWORD', 'password'),
         'HOST': os.getenv('DATABASE_HOST', '127.0.0.1'),
         'PORT': os.getenv('DATABASE_PORT', 5432),
         'OPTIONS': json.loads(
             os.getenv('DATABASE_OPTIONS', '{}')
         ),
     }
 }
 . . .
This will set the default database parameters using environment variables.
For DATABASES['default']['OPTIONS'], we used json.loads to deserialize a JSON object passed in through the DATABASE_OPTIONS environment variable. Most of the time, interpreting environment variables as simple strings makes the translation to Django settings easier to read. However, in this instance, being able to pass in an arbitrary data structure is valuable. Each database engine has a unique set of valid options, so being able to encode a JSON object with the appropriate parameters gives us much greater flexibility at the expense of some legibility.
To make use of the json library, import it at the top of settings.py:
"""
Django settings for mysite project.

Generated by 'django-admin startproject' using Django 2.1.

For more information on this file, see
https://docs.djangoproject.com/en/2.1/topics/settings/

For the full list of settings and their values, see
https://docs.djangoproject.com/en/2.1/ref/settings/
"""

import os
import json
. . .
The other area that requires special attention is DATABASES['default']['NAME']. For most database engines, this is the database name within the relational database management system. On the other hand, if you’re using SQLite, NAME is used to specify the database file so be sure to set this parameter accordingly.
Since the settings.py file is Python code, there are many different ways you can handle reading values from the environment. The method we’ve used here is just one possible technique for externalizing configuration from your codebase.
In this step we’ve configured the main Django settings variables in a generic and portable fashion, including the database parameters. In the following step, we’ll continue configuring settings for static files like Javascript and CSS stylesheets, which we’ll centralize and offload to an S3-compatible object storage service.
Step 4 — Offloading Static Assets
When running multiple Django containers in a production environment, it can be cumbersome to maintain specific versions of static assets and files across the entire fleet of running containers. To streamline this architecture, we can offload all shared elements and state to external storage. Instead of trying to keep these items in sync across replicas or implementing backup and loading routines to ensure data is locally available, we can implement access to these assets as network-accessible services.
In the last step, we configured Django so that we could pass in database connection parameters through environment variables. In this step, we’ll do the same for our object storage service, which we’ll use to store static assets that will be shared by Django containers.
The django-storages package provides remote storage backends (including S3-compatible object storage) that Django can use to offload files. We’ll configure the Polls app to use django-storages to upload static files to a DigitalOcean Space, as outlined in Step 7 of How to Set Up a Scalable Django App with DigitalOcean Managed Databases and Spaces. In this guide, we’ll use DigitalOcean Spaces, but you can use any S3-compatible object storage provider.
To begin, we’ll make some modifications to the same django-polls/mysite/settings.py file we’ve altered in previous steps.
Begin by opening up the mysite/settings.py file for editing and appending the storages app to Django’s list of INSTALLED_APPS:
. . .
INSTALLED_APPS = [
    . . .
    'django.contrib.staticfiles',
    'storages',
]
. . .
The storages app is installed via django-storages in the requirements.txt file we defined in Step 1.
Now, locate the STATIC_URL variable at the bottom of the file, and replace it with the following block:
. . .

# Static files (CSS, JavaScript, Images)
# https://docs.djangoproject.com/en/2.1/howto/static-files/

# Moving static assets to DigitalOcean Spaces as per:
# https://www.digitalocean.com/community/tutorials/how-to-set-up-object-storage-with-django
AWS_ACCESS_KEY_ID = os.getenv('STATIC_ACCESS_KEY_ID')
AWS_SECRET_ACCESS_KEY = os.getenv('STATIC_SECRET_KEY')

AWS_STORAGE_BUCKET_NAME = os.getenv('STATIC_BUCKET_NAME')
AWS_S3_ENDPOINT_URL = os.getenv('STATIC_ENDPOINT_URL')
AWS_S3_OBJECT_PARAMETERS = {
    'CacheControl': 'max-age=86400',
}
AWS_LOCATION = 'static'
AWS_DEFAULT_ACL = 'public-read'

STATICFILES_STORAGE = 'storages.backends.s3boto3.S3Boto3Storage'

STATIC_URL = '{}/{}/'.format(AWS_S3_ENDPOINT_URL, AWS_LOCATION)
STATIC_ROOT = 'static/'
We hard-code the following configuration variables:
STATICFILES_STORAGE: Sets the storage backend Django will use to offload static files. ThisS3Boto3Storagebackend should work with any S3-compatible backend, including DigitalOcean Spaces.AWS_S3_OBJECT_PARAMETERSSets the cache control headers on static files.AWS_LOCATION: Defines a directory calledstaticwithin the object storage bucket where all static files will be placed.- ``AWS_DEFAULT_ACL
: Defines the access control list (ACL) for the static files. Setting it topublic-read` ensures that the files are publicly accessible to end users. STATIC_URL: Specifies the base URL that Django should use when generating URLs for static files. Here, we combine the endpoint URL and the static files subdirectory to construct a base URL for static files.STATIC_ROOT: Specifies where to collect static files locally before copying them to object storage.
To maintain flexibility and portability, we set up many of the parameters to be configurable at runtime using environment variables, just as we did previously. These include:
AWS_ACCESS_KEY_ID: Set by theSTATIC_ACCESS_KEY_IDenvironment variable. The DigitalOcean Spaces access key identifier.AWS_SECRET_ACCESS_KEY: Set bySTATIC_SECRET_KEY. The DigitalOcean Spaces secret key.AWS_STORAGE_BUCKET_NAME: Set bySTATIC_BUCKET_NAME. The object storage bucket to which Django will upload assets.AWS_S3_ENDPOINT_URL: Set bySTATIC_ENDPOINT_URL. The endpoint URL used to access the object storage service. For DigitalOcean Spaces, this will be something likehttps://nyc3.digitaloceanspaces.com, depending on the region where your Spaces bucket is located.
When you’re done making changes to settings.py, save and close the file.
From now on, when you run manage.py collectstatic to assemble your project’s static files, Django will upload these to remote object storage. Django is also now configured to serve static assets from this object storage service.
At this point, if you’re using a DigitalOcean Space, you can optionally enable a CDN for your Space, which will speed up delivery of your Django project’s static files by caching them across a geographically-distributed network of edge servers. You can also optionally configure a custom subdomain for your Space. To learn more about CDNs, consult Using a CDN to Speed Up Static Content Delivery. Configuring a CDN goes beyond the scope of this tutorial, but the steps very closely match those in the Enabling CDN section of How to Set Up a Scalable Django App with DigitalOcean Managed Databases and Spaces.
In the next step, we’ll make a final set of changes to settings.py which will enable Django logging to STDOUT and STDERR so that these streams can be picked up by the Docker Engine and inspected using docker logs.
Step 5 — Configuring Logging
By default, Django logs information to standard output and standard error when running the development HTTP server or when the DEBUG option is set to True. However, when DEBUG is set to False or when using a different HTTP server, both of which are likely true in production environments, Django uses a different logging mechanism. Instead of logging everything of priority INFO and above to standard streams, it sends messages of priority ERROR or CRITICAL to an administrative email account.
This makes sense for many situations, but in Kubernetes and containerized environments, logging to standard output and standard error is highly recommended. Logging messages are collected in a centralized directory on the Node’s filesystem and are accessible interactively using kubectl and docker commands. This Node-level aggregation facilitates log collection by allowing operations teams to run a process on each node to watch and forward logs. To leverage this architecture, the application must write its logs to these standard sinks.
Fortunately, logging in Django uses the highly configurable logging module from the Python standard library, so we can define a dictionary to pass to logging.config.dictConfig to define our desired outputs and formatting. To learn more about this technique and others for configuring Django logging, consult Django Logging, The Right Way.
Once again, open up django-polls/mysite/settings.py in your editor.
We’ll first add an additional import statement to the top of the file so that we can manipulate the logging configuration:
import json
import os
import logging.config
. . .
The logging.config import allows us to override Django’s default logging behavior by passing in a dictionary of new logging configuration to the dictConfig function.
Now, navigate to the bottom of the file, and paste in the following block of logging configuration code:
. . .
# Logging Configuration

# Clear prev config
LOGGING_CONFIG = None

# Get loglevel from env
LOGLEVEL = os.getenv('DJANGO_LOGLEVEL', 'info').upper()

logging.config.dictConfig({
    'version': 1,
    'disable_existing_loggers': False,
    'formatters': {
        'console': {
            'format': '%(asctime)s %(levelname)s [%(name)s:%(lineno)s] %(module)s %(process)d %(thread)d %(message)s',
        },
    },
    'handlers': {
        'console': {
            'class': 'logging.StreamHandler',
            'formatter': 'console',
        },
    },
    'loggers': {
        '': {
            'level': LOGLEVEL,
            'handlers': ['console',],
        },
    },
})
Here, we set LOGGING_CONFIG to None to disable the default logging configuration provided by Django. We set LOGLEVEL to INFO by default, but check the DJANGO_LOGLEVEL environment variable so that we can override as necessary.
Finally, we use the dictConfig function to set a new configuration dictionary using the logging.config module. In the dictionary, we define the text format using formatters, define the output by setting up handlers, and configure which messages should go to each handler using loggers.
This is a fairly minimal configuration that allows you to specify a logging severity level using an environment variable called DJANGO_LOGLEVEL, and then log all messages at or above that level to standard streams. For an in-depth discussion of Django logging mechanisms, consult Logging from the official Django docs.
With this configuration, when we containerize the application, Docker will expose these logs through the docker logs command. Likewise, Kubernetes will capture the output and expose it through the kubectl logs command.
This concludes our code modifications to the Django Polls app. In the next step, we’ll begin the containerization process by writing the app’s Dockerfile.
Step 6 — Writing the Application Dockerfile
In this step we’ll define the container image that will run our Django app and the Gunicorn WSGI server that will serve it. It involves building a container image by defining the runtime environment, installing the application and its dependencies, and completing some basic configuration. While there are many possible ways to encapsulate an application in a container image, the practices followed in this step produce a slim, streamlined app image.
Choosing an Appropriate Parent Image
The first major decision that you will have to make when building a container image is the foundation to build from. Container images can either be built from SCRATCH, indicating an empty filesystem, or from an existing container image. Many different base container images are available, each defining a filesystem and providing a unique set of preinstalled packages. Images based on vanilla Linux distributions like Ubuntu 18.04 provide a generic operating environment, while more specialized images often include common libraries and tooling for specific programming languages.
Whenever possible, it’s often a good idea to use an image from one of Docker’s official repositories as a base. These images have been verified by Docker to follow best practices and are updated regularly for security fixes and improvements.
Since our application is built with Django, an image with a standard Python environment will provide a solid foundation and include many of the tools we need to get started. The official Docker repository for Python offers a wide selection of Python-based images, each installing a version of Python and some common tooling on top of an operating system.
While the appropriate level of functionality depends on your use case, images based on Alpine Linux are often a solid jumping off point. Alpine Linux offers a robust, but minimal, operating environment for running applications. Its default filesystem is very small, but includes a complete package management system with fairly extensive repositories to make adding functionality straightforward.
Note: You may have noticed in the list of tags for Python images that multiple tags are available for each image. Docker tags are mutable and maintainers can reassign the same tag to a different image in the future. As a result, many maintainers provide sets of tags with varying degrees of specificity to allow for different use cases. For example, the tag 3-alpine is used to point to the latest available Python 3 version on the latest Alpine version, so it will be reassigned to a different image when a new version of Python or Alpine is released. To make image builds more deterministic, it’s best to use the most specific tags you can find for the image you want to use.
In this guide, we’ll use the Python image tagged as 3.7.4-alpine3.10 as the parent image for our Django application. We specify the repository and tag of the parent image in our Dockerfile using the FROM instruction.
First, navigate out of the django-polls directory.
- cd ..
Then, open a file called Dockerfile in your editor of choice. Paste in the following parent image definition:
FROM python:3.7.4-alpine3.10
This defines the starting point for the custom Docker image we are building to run our application.
Adding Instructions to Set Up the Application
Once you’ve chosen a parent image, you can begin adding instructions to install dependencies, copy over our application files, and set up the running environment. This process generally mirrors the steps you would take to set up a server for your application, with some key differences to account for the container abstractions.
After the FROM line, paste in the following block of Dockerfile code:
. . .

ADD django-polls/requirements.txt /app/requirements.txt

RUN set -ex \
    && apk add --no-cache --virtual .build-deps postgresql-dev build-base \
    && python -m venv /env \
    && /env/bin/pip install --upgrade pip \
    && /env/bin/pip install --no-cache-dir -r /app/requirements.txt \
    && runDeps="$(scanelf --needed --nobanner --recursive /env \
        | awk '{ gsub(/,/, "\nso:", $2); print "so:" $2 }' \
        | sort -u \
        | xargs -r apk info --installed \
        | sort -u)" \
    && apk add --virtual rundeps $runDeps \
    && apk del .build-deps

ADD django-polls /app
WORKDIR /app

ENV VIRTUAL_ENV /env
ENV PATH /env/bin:$PATH

EXPOSE 8000
Let’s go over these instructions to explain some of the less obvious choices. To learn even more about building production-ready Dockerfiles for Django apps, consult A Production-Ready Dockerfile for your Django App.
First Docker will copy the requirements.txt file to /app/requirements.txt so that our application’s dependencies are available on the image’s filesystem. We will use this to install all of the Python packages that our application needs in order to run. We copy the dependencies file as a separate step from the rest of our codebase so that Docker can cache the image layer containing the dependencies file. Any time the requirements.txt file doesn’t change between builds, Docker can then reuse the cached layer instead of rebuilding it, speeding up the process.
Next, we have a single RUN instruction that executes a long list of commands, each chained together using the Linux && operator. To summarize, these commands:
- Install the PostgreSQL development files and basic build dependencies using Alpine’s
apkpackage manager - Create a virtual environment
- Install the Python dependencies listed in
requirements.txtwithpip - Compile a list of packages needed at runtime by analyzing the requirements of the installed Python packages
- Uninstall any unneeded build dependencies
We chain the commands together instead of executing each in a separate RUN step because of the way that Docker constructs image layers. For each ADD, COPY, and RUN instruction, Docker creates a new image layer on top of the existing filesystem, executes the instruction, and then saves the resulting layer. This means compressing commands in RUN instructions will result in fewer image layers.
Once an item has been written to an image layer, it cannot be removed in a subsequent layer to reduce the image size. If we install build dependencies but want to remove them once the application is set up, we need to do so within the same instruction to reduce the image size. In this RUN command, we install build dependencies, use them to build the app’s packages, and subsequently remove them using apk del.
After the RUN instruction, we use ADD to copy in the application code and WORKDIR to set the working directory for the image to our code directory.
Then, we use the ENV instruction to set two environment variables that will be available within containers spawned from our image. The first one sets VIRTUAL_ENV to /env and the second instruction modifies the PATH variable to include the /env/bin directory. These two lines emulate the results of sourcing the /env/bin/activate script, which is the traditional method of activating a virtual environment.
Finally, we use EXPOSE to inform Docker that the container will listen on port 8000 at runtime.
At this point, the Dockerfile is nearly complete. We just need to define the default command that will run when we start containers using the image.
Defining the Default Command
A Docker image’s default command determines what happens when a container is started without explicitly providing a command to execute. ENTRYPOINT and CMD instructions can be used independently or in tandem to define a default command within the Dockerfile.
When both ENTRYPOINT and CMD are defined, the ENTRYPOINT defines the executable that will be run by the container, and the CMD represents the default argument list for that command. Users can override the default argument list by appending alternative arguments on the command line: docker run <image> <arguments>. In this format, users will be unable to easily override the ENTRYPOINT command, so the ENTRYPOINT command is often set to a script that will set up the environment and perform different actions based on the argument list it receives.
When used alone, ENTRYPOINT configures the container’s executable, but does not define a default argument list. If only CMD is set, it will be interpreted as the default command and argument list, which can be overridden at runtime.
In our image, we want the container to run our application by default using the gunicorn application server. The argument list that we pass to gunicorn doesn’t need to be configurable at runtime, but we want the ability to easily run other commands if necessary to debug or perform management tasks (like collecting static assets or initializing the database). With these requirements in mind, it makes sense for us to use CMD to define a default command with no ENTRYPOINT.
The CMD instruction can be defined using any of the following formats:
CMD ["argument 1", "argument 2", . . . ,"argument n"]: The argument list format (used to define the default argument list for anENTRYPOINT)CMD ["command", "argument 1", "argument 2", . . . ,"argument n"]: TheexecformatCMD command "argument 1" "argument 2" . . . "argument n": The shell format
The first format only lists arguments and is used in conjunction with an ENTRYPOINT. The other two formats specify commands and their arguments, with a few key differences. The exec format, which is recommended, executes the command directly, passing in the argument list with no shell processing. The shell format, on the other hand, passes the entire list to sh -c. This is necessary if, for example, you need to substitute the value of an environment variable in a command, but is generally regarded as less predictable.
For our purposes, the final instruction in our Dockerfile looks like this:
. . .
CMD ["gunicorn", "--bind", ":8000", "--workers", "3", "mysite.wsgi:application"]
By default, containers using this image will execute gunicorn bound to localhost port 8000 with 3 workers, and run the application function in the wsgi.py file found in the mysite directory. You can optionally provide a command at runtime to execute a different process instead of gunicorn.
At this point you can use docker build to build your app image and docker run to run the container on your machine.
Building the Docker Image
By default, the docker build command looks for a Dockerfile in the current directory to find its build instructions. It also sends the build “context”, the local filesystem hierarchy that should be available during the build process, to the Docker daemon. Often, the current directory is set as the build context.
After accessing the directory containing your Dockerfile, run docker build, passing in an image and tag name with the -t flag, and use the current directory as build context. Here, we name the image django-polls and tag it with version v0:
- docker build -t django-polls:v0 .
The command will pass the Dockerfile and current directory as the build context to the Docker daemon. The daemon will build your image by creating a series of image layers as it processes the Dockerfile instructions.
When docker build completes, you should see the following output:
OutputSuccessfully built 8260b58f5713
Successfully tagged django-polls:v0
After successfully building the image, you’re able to run the app container using docker run. However, the run command will most likely fail here as we still haven’t configured the container’s running environment. Externalized variables like SECRET_KEY and database settings from settings.py will be either blank or set to default values.
In the final step, we’ll configure the container’s running environment using an environment variable file. Then, we’ll create the database schema, generate and upload the app’s static files to object storage, and finally test the app.
Step 7 — Configuring the Running Environment and Testing the App
Docker provides several methods for setting environment variables inside of the container. Since we have to set all of the variables we externalized in Step 1, we’ll use the --env-file method, which allows us to pass in a file containing a list of environment variables and their values.
Create a file called env in the polls-project directory, and paste in the following list of variables:
DJANGO_SECRET_KEY=your_secret_key
DEBUG=True
DJANGO_ALLOWED_HOSTS=your_server_IP_address
DATABASE_ENGINE=postgresql_psycopg2
DATABASE_NAME=polls
DATABASE_USERNAME=sammy
DATABASE_PASSWORD=your_database_password
DATABASE_HOST=your_database_host
DATABASE_PORT=your_database_port
STATIC_ACCESS_KEY_ID=your_space_access_key_id
STATIC_SECRET_KEY=your_space_secret_key
STATIC_BUCKET_NAME=your_space_name
STATIC_ENDPOINT_URL=https://nyc3.digitaloceanspaces.com
DJANGO_LOGLEVEL=info
Replace the following values in this file:
DJANGO_SECRET_KEY: Set this to a unique, unpredictable value, as detailed in the Django docs. One method of generating this key is provided in Adjusting the App Settings of the Scalable Django App tutorial.DJANGO_ALLOWED_HOSTS: Set this to the IP address of your Ubuntu server. For testing purposes, you can also set it to*, a wildcard that will match all hosts. Be sure to set this value appropriately when running Django in a production environment.DATABASE_USERNAME: Set this to the database user created in the previous step.DATABASE_PASSWORD: Set this to the user password created in the previous step.DATABASE_HOST: Set this to your database’s hostname.DATABASE_PORT: Set this to your databases’s port.STATIC_ACCESS_KEY_ID: Set this to your Space’s access key.STATIC_SECRET_KEY: Set this to your Space’s access key Secret.STATIC_BUCKET_NAME: Set this to your Space name.STATIC_ENDPOINT_URL: Set this to the appropriate Space endpoint URL.
When running Django in production, be sure to set DEBUG to False and adjust the log level according to your desired verbosity.
Save and close the file.
We’ll now use docker run to override the CMD set in the Dockerfile and create the database schema using the manage.py makemigrations and manage.py migrate commands:
- docker run --env-file env django-polls:v0 sh -c "python manage.py makemigrations && python manage.py migrate"
Here, we run the django-polls:v0 container image, pass in the environment variable file we just created, and override the Dockerfile command with sh -c "python manage.py makemigrations && python manage.py migrate", which will create the database schema defined by the app code. After running the command you should see:
OutputNo changes detected
Operations to perform:
  Apply all migrations: admin, auth, contenttypes, polls, sessions
Running migrations:
  Applying contenttypes.0001_initial... OK
  Applying auth.0001_initial... OK
  Applying admin.0001_initial... OK
  Applying admin.0002_logentry_remove_auto_add... OK
  Applying admin.0003_logentry_add_action_flag_choices... OK
  Applying contenttypes.0002_remove_content_type_name... OK
  Applying auth.0002_alter_permission_name_max_length... OK
  Applying auth.0003_alter_user_email_max_length... OK
  Applying auth.0004_alter_user_username_opts... OK
  Applying auth.0005_alter_user_last_login_null... OK
  Applying auth.0006_require_contenttypes_0002... OK
  Applying auth.0007_alter_validators_add_error_messages... OK
  Applying auth.0008_alter_user_username_max_length... OK
  Applying auth.0009_alter_user_last_name_max_length... OK
  Applying auth.0010_alter_group_name_max_length... OK
  Applying auth.0011_update_proxy_permissions... OK
  Applying polls.0001_initial... OK
  Applying sessions.0001_initial... OK
This indicates that the database schema has successfully been created.
Next, we’ll run another instance of the app container and use an interactive shell inside of it to create an administrative user for the Django project.
- docker run -i -t --env-file env django-polls:v0 sh
This will provide you with a shell prompt inside of the running container which you can use to create the Django user:
- python manage.py createsuperuser
Enter a username, email address, and password for your user, and after creating the user, hit CTRL+D to quit the container and kill it.
Finally, we’ll generate the static files for the app and upload them to the DigitalOcean Space using collectstatic:
- docker run --env-file env django-polls:v0 sh -c "python manage.py collectstatic --noinput"
Output
121 static files copied.
We can now run the app:
- docker run --env-file env -p 80:8000 django-polls:v0
Output[2019-10-17 21:23:36 +0000] [1] [INFO] Starting gunicorn 19.9.0
[2019-10-17 21:23:36 +0000] [1] [INFO] Listening at: http://0.0.0.0:8000 (1)
[2019-10-17 21:23:36 +0000] [1] [INFO] Using worker: sync
[2019-10-17 21:23:36 +0000] [7] [INFO] Booting worker with pid: 7
[2019-10-17 21:23:36 +0000] [8] [INFO] Booting worker with pid: 8
[2019-10-17 21:23:36 +0000] [9] [INFO] Booting worker with pid: 9
Here, we run the default command defined in the Dockerfile, gunicorn --bind :8000 --workers 3 mysite.wsgi:application, and expose container port 8000 so that port 80 on the Ubuntu server gets mapped to port 8000 of the django-polls:v0 container.
You should now be able to navigate to the polls app using your web browser by typing http://your_server_ip in the URL bar. Since there is no route defined for the / path, you’ll likely receive a 404 Page Not Found error, which is expected.
Navigate to http://your_server_ip/polls to see the Polls app interface:

To check out the admin interface, visit http://your_server_ip/admin. You should see the Polls app admin authentication window:
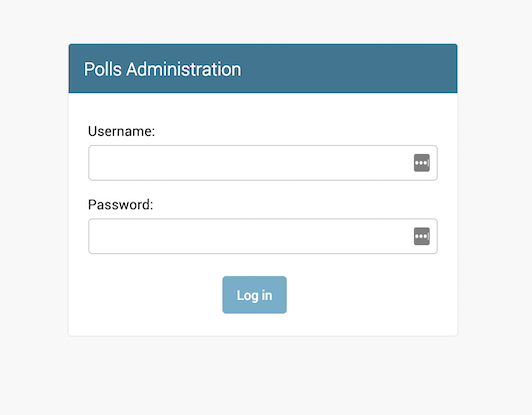
Enter the administrative username and password you created with the createsuperuser command.
After authenticating, you can access the Polls app’s administrative interface:
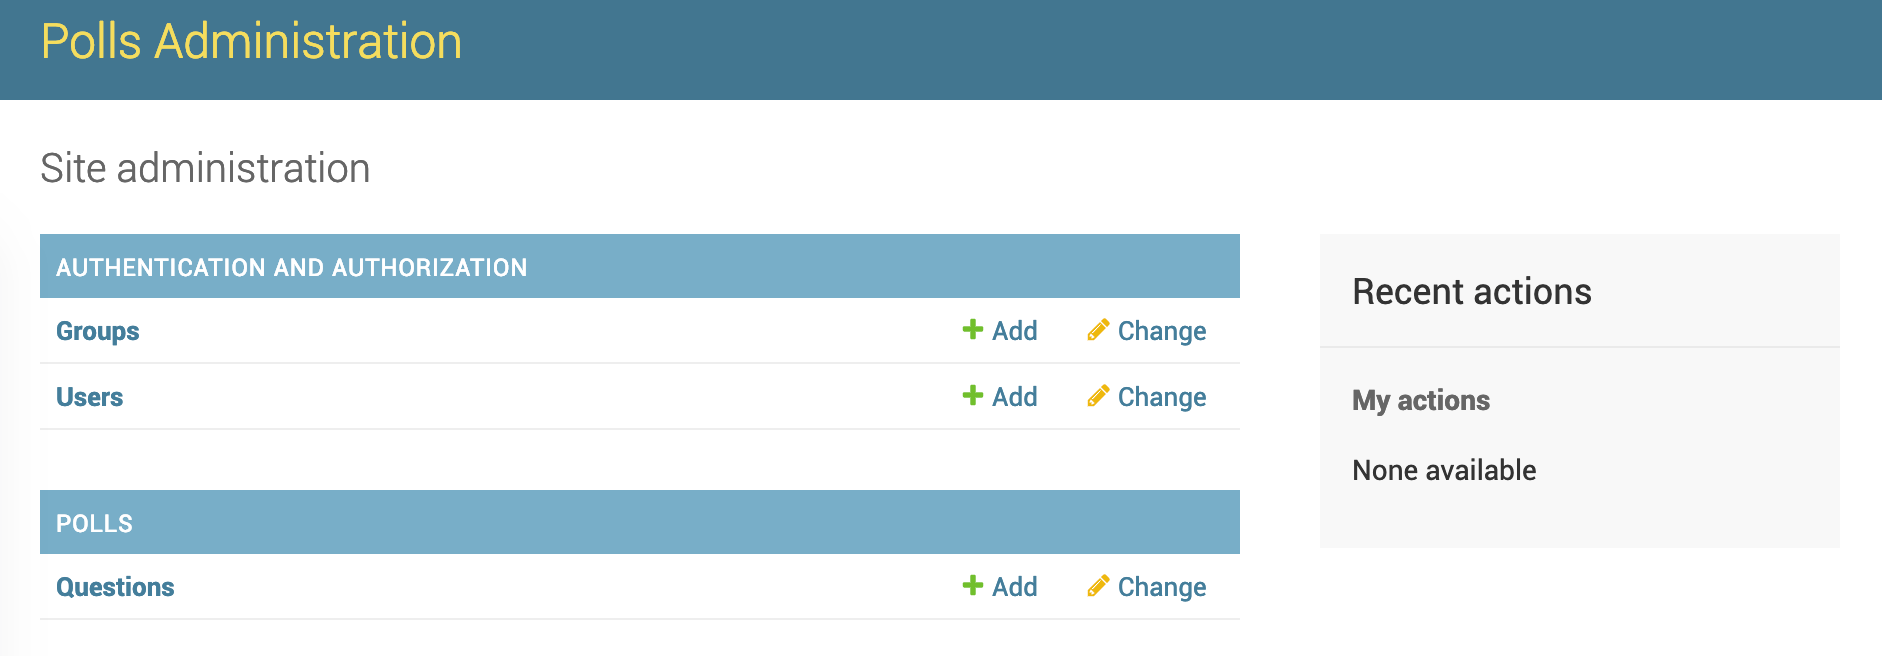
Note that static assets for the admin and polls apps are being delivered directly from object storage. To confirm this, consult Testing Spaces Static File Delivery.
When you are finished exploring, hit CTRL-C in the terminal window running the Docker container to kill the container.
Conclusion
In this tutorial you adapted a Django web app to work effectively in a container-based, cloud-native environment. You then wrote a minimal Dockerfile for the container image, built it locally, and ran it using Docker Engine. You can see a diff of the changes you implemented in the polls-docker branch of the Polls app GitHub repository. This branch contains all the modifications described in this tutorial.
From here, you can pair the Django/Gunicorn container with an Nginx reverse proxy container to handle and route incoming HTTP requests, and a Certbot container to obtain TLS certificates. You can manage this multi-container architecture using Docker Compose; this will be described in a subsequent tutorial.
Note that as-is, this setup is not production ready as you should always run Gunicorn behind an HTTP proxy to buffer slow clients. If not, your Django web app will be vulnerable to denial-of-service attacks. We also chose 3 as an arbitrary number of Gunicorn workers in this tutorial. In production, you should set the number of workers and threads using performance benchmarks.
In this architecture, we made a design choice to offload static assets to object storage so that containers wouldn’t have to bundle a version of these assets and serve them using Nginx, which can become cumbersome to manage in multi-container cluster environments like Kubernetes. Depending on your use case, this may not be an effective design, so you should adapt the steps in this tutorial accordingly.
Finally, now that you’ve fully containerized the Django Polls app, you can push the image to a container registry like Dockerhub and make it available to any system where Docker is available: Ubuntu servers, virtual machines, and container clusters like Kubernetes.
Thanks for learning with the DigitalOcean Community. Check out our offerings for compute, storage, networking, and managed databases.
Tutorial Series: From Containers to Kubernetes with Django
In this series, you will build and containerize a Django application. The series is designed to introduce you to the fundamentals of migrating an application to Kubernetes, including modernizing your app using the 12FA methodology, containerizing it, and deploying it to Kubernetes. The series also includes information on scaling and securing a containerized app with NGINX and Let’s Encrypt Docker containers.
About the author(s)
DevOps Engineer, Former Technical Writer and Editor at DigitalOcean. Expertise in topics including Ubuntu, Kubernetes, Docker, CentOS.
Former Senior Technical Writer at DigitalOcean, specializing in DevOps topics across multiple Linux distributions, including Ubuntu 18.04, 20.04, 22.04, as well as Debian 10 and 11.
Still looking for an answer?
This textbox defaults to using Markdown to format your answer.
You can type !ref in this text area to quickly search our full set of tutorials, documentation & marketplace offerings and insert the link!
Great tutorial, thank you for putting it together!
Small correction on a missing hyphen, this:
psql -U username -h host -p port -d database -set=sslmode=require
Should be changed to:
psql -U username -h host -p port -d database --set=sslmode=require
Just wondering when the next follow up article on using Docker compose would be available?
Do you have a recommended article I can read in the meantime?
Thank you for a great series!
great tutorial, very appreciate for this, but it keeps saying
python: can't open file 'manage.py': [Errno 2] No such file or directory
when using docker run
docker run --env-file env django-polls:v0 sh -c "python manage.py makemigrations && python manage.py migrate"
what’s wrong with it?
when i run makemigrations from inside the container
docker run --env-file env django-polls:v0 sh -c "python manage.py makemigrations && python manage.py migrate"
it gives me:
Is the server running on host "localhost" (127.0.0.1) and accepting
	TCP/IP connections on port 5432?
could not connect to server: Address not available
	Is the server running on host "localhost" (::1) and accepting
	TCP/IP connections on port 5432?
how to fix this?
There is something wrong with this line:
DEBUG = os.getenv('DEBUG', False)
If you set the env var to “False” the result will be that settings.DEBUG is True, since “False” is a non empty string, which is in boolean context True …
I suggest to use
from distutils.util import strtobool
DEBUG = strtobool(os.getenv('DEBUG'))
The link https://www.digitalocean.com/docs/spaces/how-to/administrative-access/#access-keys in the prerequisite section is broken FYI
There is a significant demand for an extensive tutorial on this topic, particularly regarding application security and addressing various vulnerabilities.
Great tutorial! Probably helpful to add a --rm to each of the docker run commands for one time tasks, so the host doesn’t accumulate a bunch of stopped containers that are not needed.
Nice tutorial! Spended much time fixing errors: “ValueError: Invalid endpoint:” and then “botocore.exceptions.ClientError: An error occurred (301) when calling the HeadObject operation: Moved Permanently”. I used Amazon S3 and didn`t get fast a good example of AWS_S3_ENDPOINT_URL = ‘https://s3.ap-south-1.amazonaws.com’. So, correct enpoint will be with ‘https://’ and ‘aws region code’ as my ‘ap-south-1’.
Also, from another tutorial I get AWS_S3_SIGNATURE_VERSION = ‘s3v4’ and dont have idea if it was really necessary.
 This work is licensed under a Creative Commons Attribution-NonCommercial- ShareAlike 4.0 International License.
Become a contributor for community
Get paid to write technical tutorials and select a tech-focused charity to receive a matching donation.

DigitalOcean Documentation
Full documentation for every DigitalOcean product.

Resources for startups and AI-native businesses
The Wave has everything you need to know about building a business, from raising funding to marketing your product.
The developer cloud
Scale up as you grow — whether you're running one virtual machine or ten thousand.

Start building today
From GPU-powered inference and Kubernetes to managed databases and storage, get everything you need to build, scale, and deploy intelligent applications.
