By Wayne Hartmann and Sharon Campbell

Introduction
In this tutorial we will learn how to set up PowerDNS in a master/slave configuration with automatic replication from the master DNS server to the slave. This tutorial is the second tutorial in our PowerDNS series for Ubuntu.
A master/slave configuration provides additional reliability. If one of your PowerDNS servers goes down, you will have a secondary server to handle the requests.
We recommend provisioning these servers in seperate data centers. If they are in two physical locations, then even a data center outage would not affect your DNS service.
By the end of this tutorial we will have two functional PowerDNS servers using master/slave replication.
Prerequisites
Please complete these requirements:
- Two 512 MB Droplets or larger with Ubuntu 14.04 64-bit. 512 MB should be plenty to run a PowerDNS server with a moderate number of zones/records
- A sudo user
- How To Install and Configure PowerDNS with a MariaDB Backend on Ubuntu 14.04 (details in Step 1)
- Glue records and nameserver settings for domains configured at your registrar
In our previous tutorial, we pointed three subdomains to a single PowerDNS server. We will now be using one of these subdomains to point at our slave server. In our examples our master server IP will be 111.111.111.111, and our slave server IP will be 222.222.222.222.
You will need to update the glue records with your provider accordingly. Please use the information below as a guide. See the previous PowerDNS tutorial for more information on configuring your DNS records.
- hostmaster.example-dns.com
111.111.111.111(Master Server) - ns1.example-dns.com
111.111.111.111(Master Server) - ns2.example-dns.com
222.222.222.222(Slave Server)
Note that you should set up both glue records and SOA records at your registrar for the domain used for the nameservers themselves. On the other hand, you need only SOA records for other domains whose zone files you want to host on your custom nameservers.
Step 1 — Install PowerDNS on Both Servers
First, we need to have two functional PowerDNS servers. One server will become our master server, while the second one will become our slave server.
If you haven’t done so already, please follow the previous tutorial, How To Install and Configure PowerDNS with a MariaDB Backend on Ubuntu 14.04.
You should follow the complete tutorial on your master server.
You can follow just Steps 1-7 on your slave server, since we don’t need Poweradmin on the secondary server.
When you have two functional PowerDNS servers, with at least one of them running Poweradmin, you can proceed to the next step.
Step 2 — Configure Master Server (ns1.example-dns.com)
We are now ready to configure our master PowerDNS server.
This should be the server that has Poweradmin installed, and will be considered your primary DNS server. If you have Poweradmin installed on both servers, you may use either one. If you’re following this example, this should be ns1.example-dns.com.
Back up the original configuration file.
- cd /etc/powerdns
- sudo mv pdns.conf pdns.conf.orig
Create our new configuration file.
- sudo nano pdns.conf
The details below are for a standard master server configuration with a single slave server. We will enter the slave server IP address, allowing it to communicate with this master server. Remember to substitute your own slave server IP address below.
Note: /32 is a single IP subnet, and required for this configuration.
allow-recursion=0.0.0.0/0
allow-axfr-ips=222.222.222.222/32
config-dir=/etc/powerdns
daemon=yes
disable-axfr=no
guardian=yes
local-address=0.0.0.0
local-port=53
log-dns-details=on
log-failed-updates=on
loglevel=3
module-dir=/usr/lib/powerdns
master=yes
slave=no
setgid=pdns
setuid=pdns
socket-dir=/var/run
version-string=powerdns
include-dir=/etc/powerdns/pdns.d
Restart the PowerDNS service for changes to take effect.
- sudo service pdns restart
Step 3 — Configure Slave Server (ns2.example-dns.com)
Now we are ready to configure our slave server. This server will replicate DNS zones from the master server we just configured. If you’re following along with the example, this should be ns2.example-dns.com.
Back up the original configuration file.
- cd /etc/powerdns
- sudo mv pdns.conf pdns.conf.orig
Create the new configuration file.
- sudo nano pdns.conf
The details below are for a standard slave server configuration with a 60-second refresh interval. You can copy the configuration exactly.
allow-recursion=0.0.0.0/0
config-dir=/etc/powerdns
daemon=yes
disable-axfr=yes
guardian=yes
local-address=0.0.0.0
local-port=53
log-dns-details=on
log-failed-updates=on
loglevel=3
module-dir=/usr/lib/powerdns
master=no
slave=yes
slave-cycle-interval=60
setgid=pdns
setuid=pdns
socket-dir=/var/run
version-string=powerdns
include-dir=/etc/powerdns/pdns.d
Every 60 seconds, the slave server will query the master server for zone updates. Typically when a zone is updated, the master server will send a notification to the slave servers assigned to that zone. However, if there is a connection issue during a zone update, this ensures the update will eventually propegate to the slave server when it is online again.
Next we need to tell PowerDNS how to communicate with the master server.
Log in to MariaDB with the PowerDNS username and password you created in the previous tutorial. Our example used powerdns_user.
- mysql -u powerdns_user -p
Enter your password at the prompt:
OutputEnter password:
Change to the PowerDNS database you configured in the previous tutorial. Our recommendation was powerdns.
- USE powerdns;
Next we will crate a new row in the supermasters table. This row will specify the master server IP address, and the Fully Qualified Domain Name (FQDN) of the slave server we are currently configuring.
- insert into supermasters values ('111.111.111.111', 'ns2.example-dns.com', 'admin');
We can now exit the MariaDB shell.
- exit;
Restart the PowerDNS service for changes to take effect.
- sudo service pdns restart
Step 4 — Test Master/Slave Connection
This step requires ns1.example-dns.com to be pointing to your master server, and ns2.example-dns.com to be pointing to your slave server.
If your glue records, SOA records, and A records haven’t propagated yet, you can add an override to your /etc/hosts file. You will want to do this on both servers.
Open the /etc/hosts using nano.
- sudo nano /etc/hosts
Add the entries to your /etc/hosts file.
111.111.111.111 ns1.example-dns.com
222.222.222.222 ns2.example-dns.com
Let’s make sure our two servers can communicate now.
From your master server, ping both hostnames.
- ping ns1.example-dns.com
Your result should look like this:
Output64 bytes from ns1.example-dns.com (111.111.111.111): icmp_seq=1 ttl=64 time=0.061 ms
Ping the slave server:
- ping ns2.example-dns.com
Expected result:
Output64 bytes from ns2.example-dns.com (222.222.222.222): icmp_seq=1 ttl=64 time=48.8 ms
Now, ping both hostnames from your slave server, using the same commands. Once you can ping both servers from both server, continue.
Step 5 — Configure a DNS Zone with Replication
If both servers are communicating properly we are ready to create our first DNS zone with master/slave replication.
Log in to Poweradmin on your master server by visitng http://111.111.111.111/poweradmin/ in your browser.
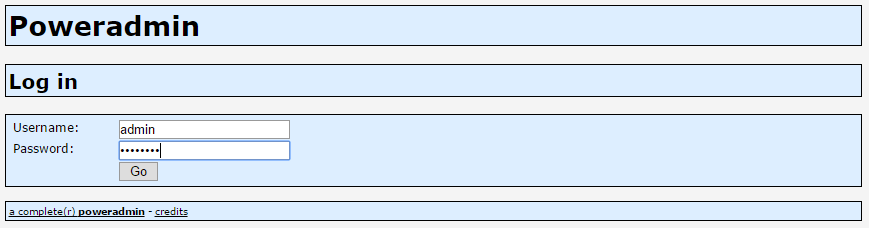
Log in with the admin credentials you set earlier.
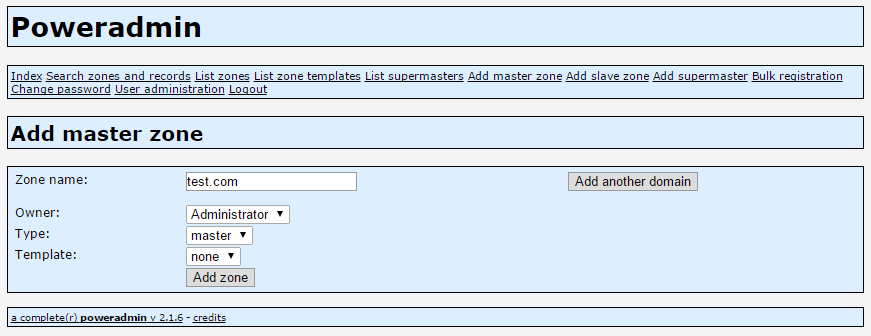
Click the Add master zone link to create a new zone file. You can test this with the original name or a new domain, test.com.

Enter your top-level domain name, and click the Add zone button to create the zone.
Create NS entries for your name servers:
Create at least one A record to test replication.
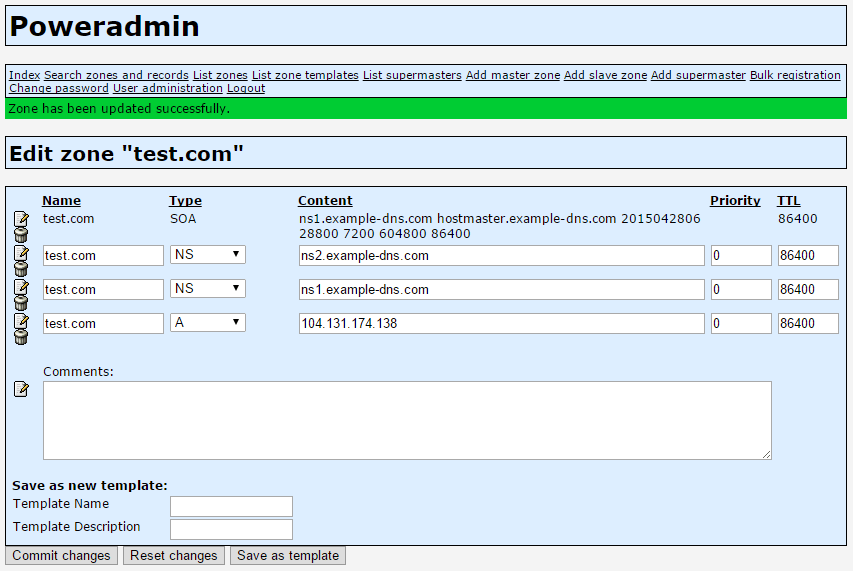
Note: If your Slave Server is not listed as a name server for the zone, it will not replicate the zone.
After a few seconds the new entries should propagate to your slave server.
Test the DNS record saved at ns1.example-dns.com using dig.
- dig test.com A @ns1.example-dns.com
It should respond with a result similar to the one below.
Outputroot@ns1:/etc/powerdns# dig test.com A @ns1.example-dns.com

; <<>> DiG 9.9.5-3ubuntu0.2-Ubuntu <<>> test.com A @ns1.example-dns.com
;; global options: +cmd
;; Got answer:
;; ->>HEADER<<- opcode: QUERY, status: NOERROR, id: 44833
;; flags: qr aa rd; QUERY: 1, ANSWER: 1, AUTHORITY: 0, ADDITIONAL: 1
;; WARNING: recursion requested but not available

;; OPT PSEUDOSECTION:
; EDNS: version: 0, flags:; udp: 2800
;; QUESTION SECTION:
;test.com.                      IN      A

;; ANSWER SECTION:
test.com.               86400   IN      A       104.131.174.138

;; Query time: 2 msec
;; SERVER: 45.55.217.94#53(45.55.217.94)
;; WHEN: Tue Apr 28 18:06:54 EDT 2015
;; MSG SIZE  rcvd: 53
Test the DNS record saved at ns2.example-dns.com using dig.
- dig test.com A @ns2.example-dns.com
It should respond with a result similar to the one below.
Outputroot@ns1:/etc/powerdns# dig test.com A @ns2.example-dns.com

; <<>> DiG 9.9.5-3ubuntu0.2-Ubuntu <<>> test.com A @ns2.example-dns.com
;; global options: +cmd
;; Got answer:
;; ->>HEADER<<- opcode: QUERY, status: NOERROR, id: 11530
;; flags: qr aa rd; QUERY: 1, ANSWER: 1, AUTHORITY: 0, ADDITIONAL: 1
;; WARNING: recursion requested but not available

;; OPT PSEUDOSECTION:
; EDNS: version: 0, flags:; udp: 2800
;; QUESTION SECTION:
;test.com.                      IN      A

;; ANSWER SECTION:
test.com.               86400   IN      A       104.131.174.138

;; Query time: 3 msec
;; SERVER: 45.55.217.132#53(45.55.217.132)
;; WHEN: Tue Apr 28 18:08:06 EDT 2015
;; MSG SIZE  rcvd: 53
Remember that the settings for test.com will only become active after setting your nameservers to ns1.example-dns.com and ns2.example-dns.com at your registrar.
Conclusion
We now have two functional PowerDNS servers using a MariaDB backend in a master/slave configuration.
Any time changes are made to a master zone on the master server, it will notify any slave servers listed with their own NS records.
The slave server will automatically query the Master Server for records that have not been updated recently, ensuring your DNS records stay in sync among your PowerDNS nodes.
Thanks for learning with the DigitalOcean Community. Check out our offerings for compute, storage, networking, and managed databases.
Tutorial Series: How To Configure DNS Servers with PowerDNS on Ubuntu 14.04
This tutorial series shows you how to set up custom DNS servers using PowerDNS on Ubuntu 14.04. At the end of this series you’ll have two nameservers running under your own custom domain.
About the author(s)
Current fan and former Editorial Manager at DigitalOcean. Hi! Expertise in areas including Ubuntu, Docker, Rails, and more.
Still looking for an answer?
This textbox defaults to using Markdown to format your answer.
You can type !ref in this text area to quickly search our full set of tutorials, documentation & marketplace offerings and insert the link!
When you add to the supermasters table, what is the account row for? you are using admin in this example, but can’t seem to find out what its used for?
I am a newbie in Centos and I now I am try to configure DNS and Reverse DNS server. After trying several times the error kept showing up and getting worst day by day. Now I am looking forward to get assistance from a good volunteer to help get rid of this error in order for my DNS and Reverse DNS server to work fine.
I will be pasting the content of the configuration files bellow for you to have clear pictur:
After the Installation and configuration when I use the dig command then I got the following dig masterdns.anisehq.com
; <<>> DiG 9.8.2rc1-RedHat-9.8.2-0.37.rc1.el6_7.2 <<>> masterdns.anisehq.com ;; global options: +cmd ;; Got answer: ;; ->>HEADER<<- opcode: QUERY, status: NOERROR, id: 5226 ;; flags: qr rd ra; QUERY: 1, ANSWER: 1, AUTHORITY: 0, ADDITIONAL: 0
;; QUESTION SECTION: ;masterdns.anisehq.com. IN A
;; ANSWER SECTION: masterdns.anisehq.com. 7199 IN A 110.74.133.89
;; Query time: 239 msec ;; SERVER: 192.168.101.4#53(192.168.101.4) ;; WHEN: Wed Aug 19 17:47:51 2015 ;; MSG SIZE rcvd: 55 It seems not been correct After the Installation and configuration when I use the nslookup command then I got the following nslookup 110.74.133.89 Server: 192.168.101.4 Address: 192.168.101.4#53
** server can’t find 89.133.74.110.in-addr.arpa.: NXDOMAIN There is problem with reverse DNS here
nslookup masterdns.anisehq.com Server: 192.168.101.4 Address: 192.168.101.4#53
Non-authoritative answer: Name: masterdns.anisehq.com Address: 110.74.133.89
Could you please help me to find out the error here. Thanks
Hi there and thanks for two very easy to follow guides for setting up PDNS. I am afraid, however, that I ran into trouble. I am working in a private environment running an evaluation until I am happy and then I am going to roll-out online.
So the difficulty that I ran into was at the MySQL level and I wasn’t sure why - the Master server was able to replicate the domain record to my slave, however none of the records were replicated, so when performing a dig on my slave, ns2, it was aware of the domain, but couldn’t point to it because none of the records were written to the records db-table.
So that was weird - I played around with UFW after a while in the hopes of getting it going but the problem did not appear to lie in that direction either. I looked around at all sorts of documentation, but I wasn’t able to resolve it at the time.
I am about to try the whole game again and I wondered if someone may be able to help with guidelines, or a, “Oh, I know what that is! Do this… and everything will work!” That would be great, thanks.
Thanks a lot for your guide. I’m thinking, in case of a disaster on the first DNS node (Master), how is it possible to make the second slave node to work as master and users be able to update their records?
 This work is licensed under a Creative Commons Attribution-NonCommercial- ShareAlike 4.0 International License.
Become a contributor for community
Get paid to write technical tutorials and select a tech-focused charity to receive a matching donation.

DigitalOcean Documentation
Full documentation for every DigitalOcean product.

Resources for startups and AI-native businesses
The Wave has everything you need to know about building a business, from raising funding to marketing your product.
The developer cloud
Scale up as you grow — whether you're running one virtual machine or ten thousand.

Start building today
From GPU-powered inference and Kubernetes to managed databases and storage, get everything you need to build, scale, and deploy intelligent applications.
