By Erika Heidi and Hazel Virdó

Introduction
Symfony is an open source web framework written in PHP, suitable for building projects of any size. It provides a well-designed structure, based on reusable components, on top of which you can build your own PHP application.
This tutorial will cover the steps necessary to manually deploy a basic Symfony application on a Ubuntu 14.04 server. We’ll see how to properly configure the server, taking security and performance measures into consideration, in order to accomplish a setup that is ready for production.
If you are looking for an introductory tutorial on Symfony, you can read how to install and get started with Symfony on Ubuntu 14.04.
Prerequisites
For this tutorial, you will need:
- A fresh Ubuntu 14.04 Droplet running LAMP or LEMP
- A sudo non-root user, which you can set up by following the Initial Server Setup tutorial
It’s important to keep in mind that deployment is a very extensive subject because each application will have its own specific needs. To keep things simple, we are going to use a sample to-do application built with Symfony. You can find its source code on GitHub.
Step 1 — Installing the Server Dependencies
In this step, we’ll install the server dependencies.
Start by updating the package manager cache.
- sudo apt-get update
We’ll need git to check out the application files, acl to set the right directory permissions when installing the application, and two PHP extensions (php5-cli to run PHP on the command line and php5-curl for Symfony). Install the required packages.
- sudo apt-get install git php5-cli php5-curl acl
Lastly, we’ll need composer to download the application dependencies. To install composer system-wide, run:
- sudo curl -sS https://getcomposer.org/installer | sudo php -- --install-dir=/usr/local/bin --filename=composer
You should now be ready to go.
Step 2 — Configuring MySQL
Let’s start by getting your MySQL setup ready for production. For the next step, you will need the password for the root MySQL account. Make sure you’ve set up MySQL securely (as detailed in step 2 of the LAMP and LEMP tutorials).
If you are using one of our one-clicks (LAMP / LEMP), you will find the MySQL root password in the message of the day text that is printed when you log on to your server. The contents of the message of the day can also be found in the file /etc/motd.tail.
Setting the Default Collation and Charset
Symfony recommends setting up the charset and collation of your database to utf8. Most databases will use Latin type collations by default, which will cause unexpected results when retrieving data previously stored in the database, like weird characters and unreadable text. There’s no way to configure this at application level, so we need to edit the MySQL configuration file to include a couple definitions.
Open the file /etc/mysql/my.cnf with your favorite command line editor.
- sudo nano /etc/mysql/my.cnf
Now, find the [mysqld] block. Add the collation-server and character-set-server options under Basic Settings.
[mysqld]
#
# * Basic Settings
#
collation-server     = utf8mb4_general_ci # Replaces utf8_general_ci
character-set-server = utf8mb4            # Replaces utf8
user            = mysql
pid-file        = /var/run/mysqld/mysqld.pid
socket          = /var/run/mysqld/mysqld.sock

. . .
Save and exit. Restart MySQL so the changes take effect.
- sudo service mysql restart
Creating a User and a Database for the Application
Now we need to create a MySQL database and a user for our application.
First, access the MySQL client using the MySQL root account.
- mysql -u root -p
You will be asked for a password. This should be the same password you used when running mysql_secure_installation.
Now, create the application database.
- CREATE DATABASE todo;
OutputQuery OK, 1 row affected (0.00 sec)
The database is now created. The next step is to create a MySQL user and provide them access to our newly created database.
- CREATE USER 'todo-user'@'localhost' IDENTIFIED BY 'todo-password';
OutputQuery OK, 0 rows affected (0.00 sec)
This will create a user named todo-user, with the password todo-password. It’s important to notice that these are simple example values that should be changed, and you should use a more complex password for your MySQL user for improved security.
We still need to grant this user the right permissions over our application database. This can be done with:
- GRANT ALL PRIVILEGES ON todo.* TO 'todo-user'@'localhost';
OutputQuery OK, 0 rows affected (0.00 sec)
This will grant the todo-user user all privileges on all tables inside the todo database. To apply the changes, run:
- FLUSH PRIVILEGES;
OutputQuery OK, 0 rows affected (0.00 sec)
To test if everything is working as expected, exit the MySQL client.
- quit;
Now log in again, this time using the new MySQL user and password you just created. In this example, we are using the username todo-user, with the password todo-password.
- mysql -u todo-user -p
You can check which databases this user has access to with:
- SHOW DATABASES;
The output should look like this:
Output+--------------------+
| Database           |
+--------------------+
| information_schema |
| todo               |
+--------------------+
2 rows in set (0.00 sec)
This means the new user was successfully created with the right privileges. You should only see two databases: information_schema and todo.
You can now exit the MySQL client.
- quit;
Step 3 — Checking Out the Application Code
Deployment is an extensive subject due to the unique nature of most applications, even if we only consider Symfony projects. It’s hard to generalize because each use case can require very specific deployment steps, like migrating a database or running extra setup commands.
In order to simplify the tutorial flow, we are going to use a basic demo application built with Symfony. You can also use your own Symfony application, but keep in mind that you might have to execute extra steps depending on your application needs.
Our application is a simple to-do list which allows you to add and remove items, and change each item’s status. The to-do items are stored in a MySQL database. The source code is available on GitHub.
We are going to use Git to check out the application code. The next step is to choose a location that will serve as our application root directory. Later on, we will configure the web server accordingly. For this tutorial, we are going to use /var/www/todo-symfony, so create that directory now.
- sudo mkdir -p /var/www/todo-symfony
Before cloning the repository, let’s change the folder owner and group so we are able to work with the project files using our regular user account. Replacesammy with your sudo non-root username.
- sudo chown sammy:sammy /var/www/todo-symfony
Now, move to the parent directory and clone the application.
- cd /var/www
- git clone https://github.com/php-demos/todo-symfony.git todo-symfony
OutputCloning into 'todo-symfony'...
remote: Counting objects: 76, done.
remote: Compressing objects: 100% (61/61), done.
remote: Total 76 (delta 6), reused 76 (delta 6), pack-reused 0
Unpacking objects: 100% (76/76), done.
Checking connectivity... done.
Step 4 — Fixing the Folder Permissions
The application files are now located at /var/www/todo-symfony, a directory owned by our system user (in this tutorial, we are using sammy as example). However, the web server user (usually www-data) also needs access to those files. Otherwise, the web server will be unable to serve the application. Apart from that, there are two directories that require a special permissions arrangement: app/cache and app/logs. These directories should be writable by both the system user and the web server user.
We’ll use ACL (Access Control Lists) for configuring these special permissions. ACLs enable more fine-grained access rights for files and directories, which is what we need to set up the correct permissions while avoiding too permissive arrangements.
First, we need to allow the user www-data access to the files inside the application folder. Give this user a read + execute permission (rX) in the whole directory.
- sudo setfacl -R -m u:www-data:rX todo-symfony
Next, we need to set up special permissions for the cache and logs folders. Give read + write + execute permissions (rwX) to the user www-data in order to enable the web server to write only in these directories.
- sudo setfacl -R -m u:www-data:rwX todo-symfony/app/cache todo-symfony/app/logs
Finally, we will define that all new files created inside the app/cache and app/logs folders follow the same permission schema we just defined, with read, write, and execute permissions to the web server user. This is done by repeating the setfacl command we just ran, but this time adding the -d option.
- sudo setfacl -dR -m u:www-data:rwX todo-symfony/app/cache todo-symfony/app/logs
If you want to check which permissions are currently in place in a given directory, you can use getfacl .
- getfacl todo-symfony/app/cache
You should get output similar to this:
Output# file: todo-symfony/app/cache
# owner: sammy
# group: sammy
user::rwx
user:www-data:rwx
group::rwx
mask::rwx
other::r-x
default:user::rwx
default:user:www-data:rwx
default:group::rwx
default:mask::rwx
default:other::r-x
From this output, you can see that even though the directory app/cache is owned by the user sammy, there’s an additional set of permissions for the user www-data. The default directives show which permissions new files created inside this directory will have.
Step 5 — Setting Up the Application
We have now the application files in place, but we still need to install the project dependencies and configure the application parameters.
Symfony is built to work well across different environments. By default, it will use development settings, which influences the way it handles cache and errors. Development environments have more extensive and detailed logs, less cached content, and errors are exhibited in a prominent way to simplify debugging. This is useful for developing the application, but it’s not a good practice for production environments.
To tune up the application for production, we need to define an environment variable that tells Symfony we’re running the application on a production environment.
- export SYMFONY_ENV=prod
Next, we need to install the project dependencies. Access the application folder and run composer install.
- cd todo-symfony
- composer install --no-dev --optimize-autoloader
At the end of the installation process, you should be prompted to provide some information that will populate the parameters.yml file. This file contains important information for the application, like the database connection settings. You can press ENTER to accept the default values for all of these, except for the database name, username, and password. For those, use the values you created in step 2.
OutputCreating the "app/config/parameters.yml" file
Some parameters are missing. Please provide them.
database_host (127.0.0.1):
database_port (null):
database_name (symfony): todo
database_user (root): todo-user
database_password (null): todo-password
. . .
When the installation finishes, we can check the database connection with the doctrine:schema:validate console command.
- php app/console doctrine:schema:validate
Output[Mapping]  OK - The mapping files are correct.
[Database] FAIL - The database schema is not in sync with the current mapping file.
The OK line means that the database connection is working. The FAIL line is expected because we haven’t created the database schema yet, so let’s do that next:
- php app/console doctrine:schema:create
OutputATTENTION: This operation should not be executed in a production environment.

Creating database schema...
Database schema created successfully!
This will create all the application tables in the configured database, according to the metadata information obtained from the application entities.
When migrating an existing application, you should avoid using doctrine:schema:create and doctrine:schema:update commands directly, and do a database migration instead. In our case, a migration is not necessary because the application is supposed to be installed with a clean, empty database.
Now you should clear the cache.
- php app/console cache:clear --env=prod --no-debug
OutputClearing the cache for the prod environment with debug false
And lastly, generate the application assets.
- php app/console assetic:dump --env=prod --no-debug
OutputDumping all prod assets.
Debug mode is off.

14:02:39 [file+] /var/www/todo-symfony/app/../web/css/app.css
14:02:39 [dir+] /var/www/todo-symfony/app/../web/js
14:02:39 [file+] /var/www/todo-symfony/app/../web/js/app.js
Step 6 — Setting Up the Web Server
The only thing left to do is to configure the web server. This will involve 2 steps: setting the date.timezone directive in php.ini, and updating the default website config file (either on Apache or Nginx) for serving our application.
We’ll see how to accomplish these steps on both LEMP and LAMP environments.
Configuration Steps for Nginx + PHP-FPM
Let’s start by editing the default php.ini file to define the server’s timezone. This is a requirement for running Symfony applications, and it’s usually commented out on fresh server installations.
Open the file /etc/php5/fpm/php.ini.
- sudo nano /etc/php5/fpm/php.ini
Search for the line containing date.timezone. Uncomment the directive by removing the ; sign at the beginning of the line, and add the appropriate timezone for your application. In this example we’ll use Europe/Amsterdam, but you can choose any supported timezone.
[Date]
; Defines the default timezone used by the date functions
; http://php.net/date.timezone
date.timezone = Europe/Amsterdam
Save the file and exit. To apply the changes, restart PHP.
- sudo service php5-fpm restart
Next, we need to replace the default website config file with a one customized for serving a Symfony application. Create a backup of the current default website config first.
- cd /etc/nginx/sites-available
- sudo mv default default-bkp
Create a new file to replace the old one.
- sudo nano /etc/nginx/sites-available/default
Paste the following content in the file. Don’t forget to replace the server_name values to reflect your server domain name or IP address.
- server {
- server_name example.com www.example.com your_server_ip;
- root /var/www/todo-symfony/web;
-
- location / {
- # try to serve file directly, fallback to app.php
- try_files $uri /app.php$is_args$args;
- }
-
- location ~ ^/app\.php(/|$) {
- fastcgi_pass unix:/var/run/php5-fpm.sock;
- fastcgi_split_path_info ^(.+\.php)(/.*)$;
- include fastcgi_params;
- fastcgi_param SCRIPT_FILENAME $document_root$fastcgi_script_name;
- # Prevents URIs that include the front controller. This will 404:
- # http://domain.tld/app.php/some-path
- # Remove the internal directive to allow URIs like this
- internal;
- }
-
- error_log /var/log/nginx/symfony_error.log;
- access_log /var/log/nginx/symfony_access.log;
- }
Save the file and exit. To apply the changes, restart Nginx.
- sudo service nginx restart
Configuration Steps for Apache + PHP5 Web Server
Let’s start by editing the default php.ini file to define the server’s timezone. This is a requirement for running Symfony applications, and it’s usually commented out on fresh server installations.
Open the file /etc/php5/apache2/php.ini:
- sudo nano /etc/php5/apache2/php.ini
Search for the line containing date.timezone. Uncomment the directive by removing the ; sign at the beginning of the line, and add the appropriate timezone for your application. In this example we’ll use Europe/Amsterdam, but you can choose any supported timezone.
[Date]
; Defines the default timezone used by the date functions
; http://php.net/date.timezone
date.timezone = Europe/Amsterdam
Save the file and exit. Now we need to replace the default website config file with a custom one, tailored for serving a Symfony application. Create a backup of the current default website config.
- cd /etc/apache2/sites-available
- sudo mv 000-default.conf default-bkp.conf
Create a new file to replace the old one.
- sudo nano /etc/apache2/sites-available/000-default.conf
Paste the following content in the file.
<VirtualHost *:80>

    DocumentRoot /var/www/todo-symfony/web
    <Directory /var/www/todo-symfony/web>
        AllowOverride None
        Order Allow,Deny
        Allow from All

        <IfModule mod_rewrite.c>
            Options -MultiViews
            RewriteEngine On
            RewriteCond %{REQUEST_FILENAME} !-f
            RewriteRule ^(.*)$ app.php [QSA,L]
        </IfModule>
    </Directory>

    # uncomment the following lines if you install assets as symlinks
    # or run into problems when compiling LESS/Sass/CoffeScript assets
    # <Directory /var/www/project>
    #     Options FollowSymlinks
    # </Directory>

    ErrorLog /var/log/apache2/symfony_error.log
    CustomLog /var/log/apache2/symfony_access.log combined
</VirtualHost>
If you’re using a domain name to access your server instead of just the IP address, you can optionally define the ServerName and ServerAlias values, as shown below. If not, you can omit them.
<VirtualHost *:80>
    ServerName example.com
    ServerAlias www.example.com

    DocumentRoot /var/www/todo-symfony/web
. . .
Save the file and exit. We also need to enable mod_rewrite for Apache.
- sudo a2enmod rewrite
To apply all the changes, restart Apache.
- sudo service apache2 restart
Step 7 — Accessing the Application
Your server should be ready to serve the demo Symfony application. Visit http://your_server_ip in your browser, and you should see a page like this:
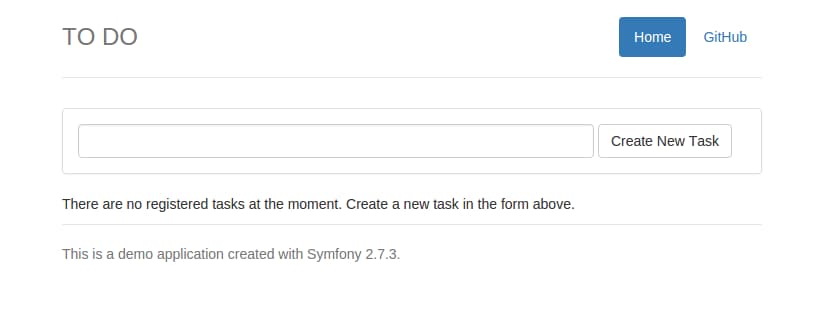
You can use the form to create new tasks and test the application’s functionality.
Conclusion
Deploying any application to production requires a special attention to details, such as creating a dedicated database user with limited access and setting the right directory permissions on the application folder. These steps are necessary for increasing server and application security on production environments. In this tutorial, we saw the specific steps that should be taken in order to manually deploy a basic Symfony application to production on a Ubuntu 14.04 server.
Thanks for learning with the DigitalOcean Community. Check out our offerings for compute, storage, networking, and managed databases.
About the author(s)
Dev/Ops passionate about open source, PHP, and Linux. Former Senior Technical Writer at DigitalOcean. Areas of expertise include LAMP Stack, Ubuntu, Debian 11, Linux, Ansible, and more.
former DO tech editor publishing articles here with the community, then founded the DO product docs team (https://do.co/docs). to all of my authors: you are incredible. working with you was a gift. love is what makes us great.
Still looking for an answer?
This textbox defaults to using Markdown to format your answer.
You can type !ref in this text area to quickly search our full set of tutorials, documentation & marketplace offerings and insert the link!
you should put “export SYMFONY_ENV=prod” in your .profile so it’s available the next time you login
Congratulations for the great article, but…
Faltou a versão tupiniquim :)
Hey Erika!
Thanks so much for the tutorial. Any thoughts on doing an updated version for Symfony 3 and Ubuntu 16? There’s bin a few changes with app vs bin and I think it could be really useful.
Looking for the [mysqld] block on /etc/mysql/my.cnf but not found. How can i add the collation-server and character-set-server ? I’m on Ubuntu 16.04 and below is what i see
#
# The MySQL database server configuration file.
#
# You can copy this to one of:
# - "/etc/mysql/my.cnf" to set global options,
# - "~/.my.cnf" to set user-specific options.
#
# One can use all long options that the program supports.
# Run program with --help to get a list of available options and with
# --print-defaults to see which it would actually understand and use.
#
# For explanations see
# http://dev.mysql.com/doc/mysql/en/server-system-variables.html

#
# * IMPORTANT: Additional settings that can override those from this file!
#   The files must end with '.cnf', otherwise they'll be ignored.
#


!includedir /etc/mysql/conf.d/
!includedir /etc/mysql/mysql.conf.d/
how to do schema:update or assetic:dump or fixtures but not using SSH ?
Symfony 4 now requires php 7.1.3 in order to run, you can install the newest one following this instruction.
I’m deploying manually without using github. Went into an annoying bug when I was trying to clean out the dev bundle on the composer step, and the whole removing process exploded because one of the development bundle relies on the APP_ENV environment, but the “dotenv” bundle got removed first by the composer…
So I’ll have to remove all the dev bundles in the composer.json except the dotenv bundle, then run “composer update --no-dev” to remove those first, and then remove the dotenv bundle
Hi there, I figured out how to run php files and a symfony app on a lemp stack (so, with nginx).
Check it out here : https://youtu.be/dmTTjk4wjZg and download the conf file and adapt it to your needs.
All the best
 This work is licensed under a Creative Commons Attribution-NonCommercial- ShareAlike 4.0 International License.
Become a contributor for community
Get paid to write technical tutorials and select a tech-focused charity to receive a matching donation.

DigitalOcean Documentation
Full documentation for every DigitalOcean product.

Resources for startups and AI-native businesses
The Wave has everything you need to know about building a business, from raising funding to marketing your product.
The developer cloud
Scale up as you grow — whether you're running one virtual machine or ten thousand.

Start building today
From GPU-powered inference and Kubernetes to managed databases and storage, get everything you need to build, scale, and deploy intelligent applications.
