Not using Ubuntu 16.04?
Choose a different version or distribution.
Introduction
Hadoop is a Java-based programming framework that supports the processing and storage of extremely large datasets on a cluster of inexpensive machines. It was the first major open source project in the big data playing field and is sponsored by the Apache Software Foundation.
Hadoop 2.7 is comprised of four main layers:
- Hadoop Common is the collection of utilities and libraries that support other Hadoop modules.
- HDFS, which stands for Hadoop Distributed File System, is responsible for persisting data to disk.
- YARN, short for Yet Another Resource Negotiator, is the “operating system” for HDFS.
- MapReduce is the original processing model for Hadoop clusters. It distributes work within the cluster or map, then organizes and reduces the results from the nodes into a response to a query. Many other processing models are available for the 2.x version of Hadoop.
Hadoop clusters are relatively complex to set up, so the project includes a stand-alone mode which is suitable for learning about Hadoop, performing simple operations, and debugging.
In this tutorial, we’ll install Hadoop in stand-alone mode and run one of the example example MapReduce programs it includes to verify the installation.
Prerequisites
To follow this tutorial, you will need:
- An Ubuntu 16.04 server with a non-root user with
sudoprivileges: You can learn more about how to set up a user with these privileges in our Initial Server Setup with Ubuntu 16.04 guide.
Once you’ve completed this prerequisite, you’re ready to install Hadoop and its dependencies.
Before you begin, you might also like to take a look at An Introduction to Big Data Concepts and Terminology or An Introduction to Hadoop
Step 1 — Installing Java
To get started, we’ll update our package list:
- sudo apt-get update
Next, we’ll install OpenJDK, the default Java Development Kit on Ubuntu 16.04.
- sudo apt-get install default-jdk
Once the installation is complete, let’s check the version.
- java -version
Outputopenjdk version "1.8.0_91"
OpenJDK Runtime Environment (build 1.8.0_91-8u91-b14-3ubuntu1~16.04.1-b14)
OpenJDK 64-Bit Server VM (build 25.91-b14, mixed mode)
This output verifies that OpenJDK has been successfully installed.
Step 2 — Installing Hadoop
With Java in place, we’ll visit the Apache Hadoop Releases page to find the most recent stable release. Follow the binary for the current release:
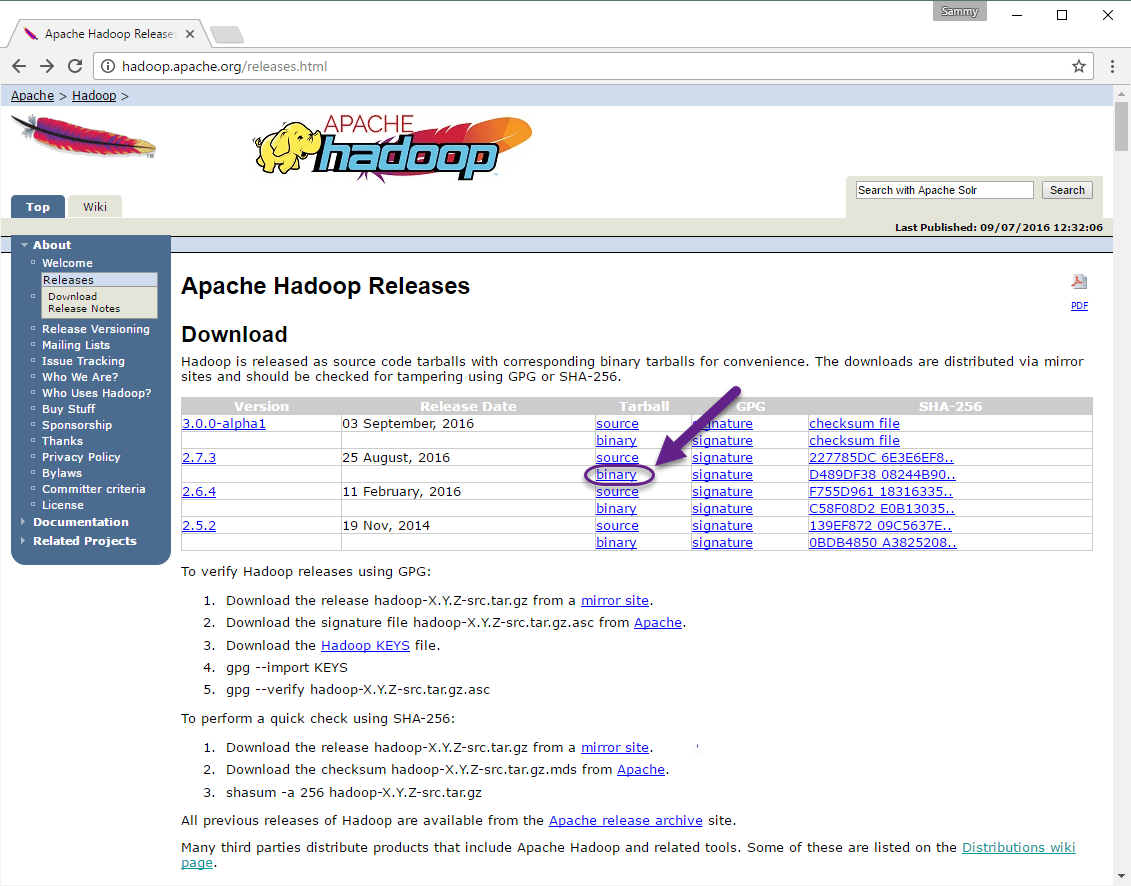
On the next page, right-click and copy the link for the latest stable release binary.
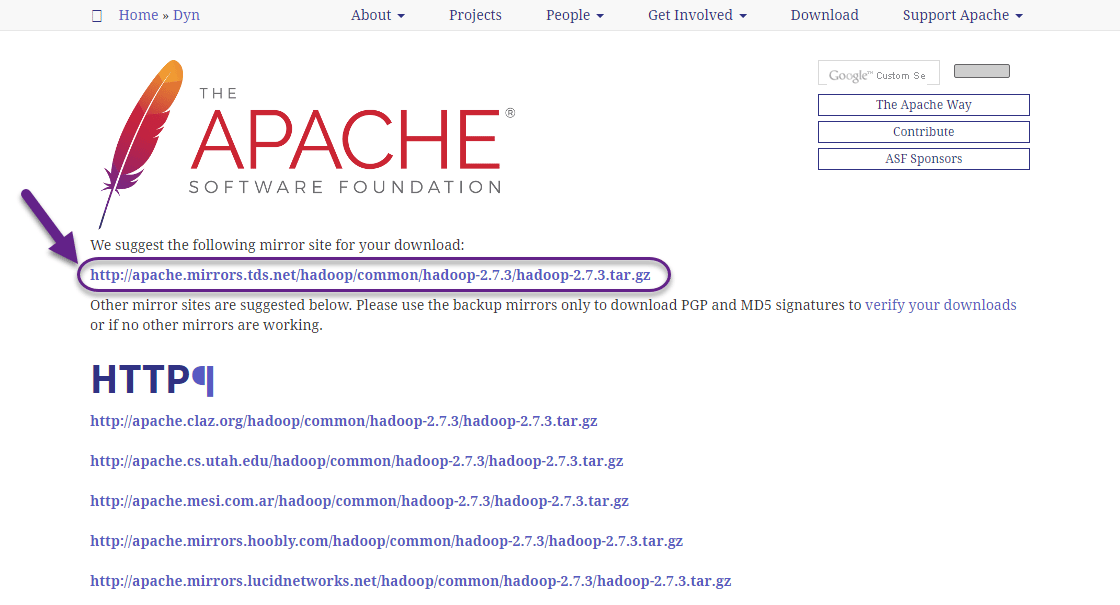
On the server, we’ll use wget to fetch it:
- wget http://apache.mirrors.tds.net/hadoop/common/hadoop-2.7.3/hadoop-2.7.3.tar.gz
Note: The Apache website will direct you to the best mirror dynamically, so your URL may not match the URL above.
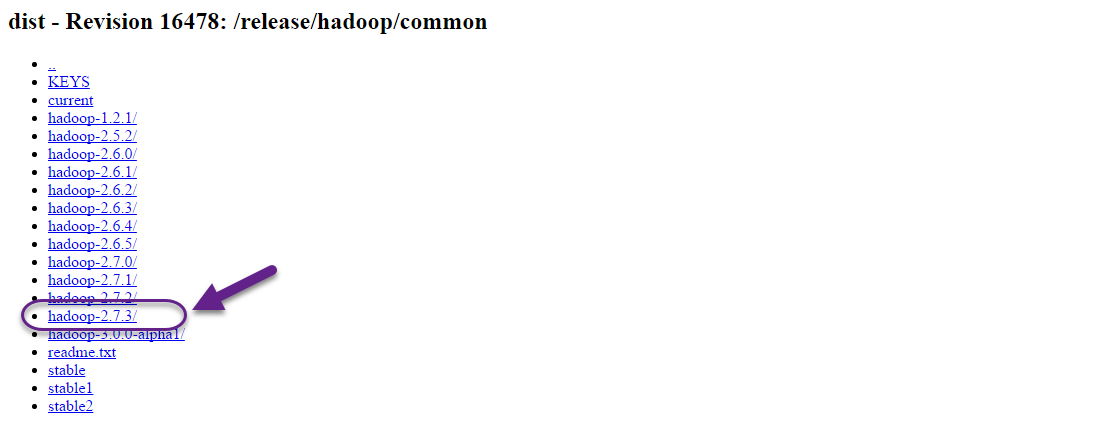
In order to make sure that the file we downloaded hasn’t been altered, we’ll do a quick check using SHA-256. Return the releases page, then follow the Apache link:

Enter the directory for the version you downloaded:
Finally, locate the .mds file for the release you downloaded, then copy the link for the corresponding file:
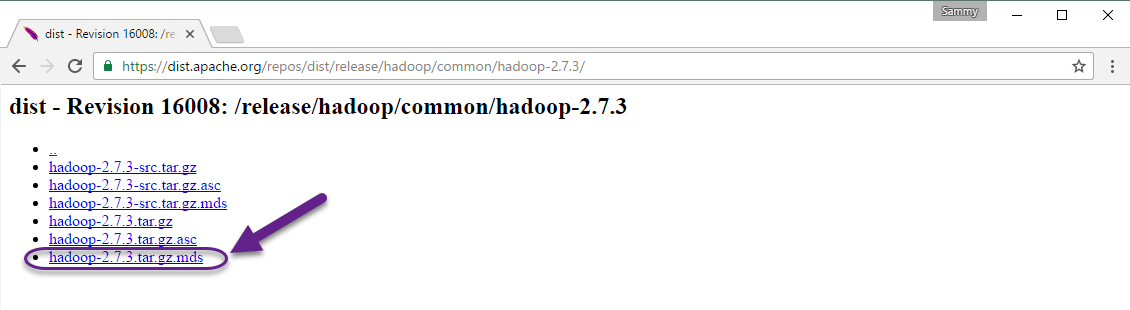
Again, we’ll right-click to copy the file location, then use wget to transfer the file:
- wget https://dist.apache.org/repos/dist/release/hadoop/common/hadoop-2.7.3/hadoop-2.7.3.tar.gz.mds
Then run the verification:
- shasum -a 256 hadoop-2.7.3.tar.gz
Outputd489df3808244b906eb38f4d081ba49e50c4603db03efd5e594a1e98b09259c2 hadoop-2.7.3.tar.gz
Compare this value with the SHA-256 value in the .mds file:
- cat hadoop-2.7.3.tar.gz.mds
...
hadoop-2.7.3.tar.gz: SHA256 = D489DF38 08244B90 6EB38F4D 081BA49E 50C4603D B03EFD5E 594A1E98 B09259C2
...
You can safely ignore the difference in case and the spaces. The output of the command we ran against the file we downloaded from the mirror should match the value in the file we downloaded from apache.org.
Now that we’ve verified that the file wasn’t corrupted or changed, we’ll use the tar command with the -x flag to extract, -z to uncompress, -v for verbose output, and -f to specify that we’re extracting from a file. Use tab-completion or substitute the correct version number in the command below:
- tar -xzvf hadoop-2.7.3.tar.gz
Finally, we’ll move the extracted files into /usr/local, the appropriate place for locally installed software. Change the version number, if needed, to match the version you downloaded.
- sudo mv hadoop-2.7.3 /usr/local/hadoop
With the software in place, we’re ready to configure its environment.
Step 3 — Configuring Hadoop’s Java Home
Hadoop requires that you set the path to Java, either as an environment variable or in the Hadoop configuration file.
The path to Java, /usr/bin/java is a symlink to /etc/alternatives/java, which is in turn a symlink to default Java binary. We will use readlink with the -f flag to follow every symlink in every part of the path, recursively. Then, we’ll use sed to trim bin/java from the output to give us the correct value for JAVA_HOME.
To find the default Java path
- readlink -f /usr/bin/java | sed "s:bin/java::"
Output/usr/lib/jvm/java-8-openjdk-amd64/jre/
You can copy this output to set Hadoop’s Java home to this specific version, which ensures that if the default Java changes, this value will not. Alternatively, you can use the readlink command dynamically in the file so that Hadoop will automatically use whatever Java version is set as the system default.
To begin, open hadoop-env.sh:
- sudo nano /usr/local/hadoop/etc/hadoop/hadoop-env.sh
Then, choose one of the following options:
Option 1: Set a Static Value
 . . .
#export JAVA_HOME=${JAVA_HOME}
export JAVA_HOME=/usr/lib/jvm/java-8-openjdk-amd64/jre/
 . . .
Option 2: Use Readlink to Set the Value Dynamically
 . . .
#export JAVA_HOME=${JAVA_HOME}
export JAVA_HOME=$(readlink -f /usr/bin/java | sed "s:bin/java::")
 . . .
Note: With respect to Hadoop, the value of JAVA_HOME in hadoop-env.sh overrides any values that are set in the environment by /etc/profile or in a user’s profile.
Step 4 — Running Hadoop
Now we should be able to run Hadoop:
- /usr/local/hadoop/bin/hadoop
OutputUsage: hadoop [--config confdir] [COMMAND | CLASSNAME]
  CLASSNAME            run the class named CLASSNAME
 or
  where COMMAND is one of:
  fs                   run a generic filesystem user client
  version              print the version
  jar <jar>            run a jar file
                       note: please use "yarn jar" to launch
                             YARN applications, not this command.
  checknative [-a|-h]  check native hadoop and compression libraries availability
  distcp <srcurl> <desturl> copy file or directories recursively
  archive -archiveName NAME -p <parent path> <src>* <dest> create a hadoop archive
  classpath            prints the class path needed to get the
  credential           interact with credential providers
                       Hadoop jar and the required libraries
  daemonlog            get/set the log level for each daemon
The help means we’ve successfully configured Hadoop to run in stand-alone mode. We’ll ensure that it is functioning properly by running the example MapReduce program it ships with. To do so, create a directory called input in our home directory and copy Hadoop’s configuration files into it to use those files as our data.
- mkdir ~/input
- cp /usr/local/hadoop/etc/hadoop/*.xml ~/input
Next, we can use the following command to run the MapReduce hadoop-mapreduce-examples program, a Java archive with several options. We’ll invoke its grep program, one of many examples included in hadoop-mapreduce-examples, followed by the input directory, input and the output directory grep_example. The MapReduce grep program will count the matches of a literal word or regular expression. Finally, we’ll supply a regular expression to find occurrences of the word principal within or at the end of a declarative sentence. The expression is case-sensitive, so we wouldn’t find the word if it were capitalized at the beginning of a sentence:
- /usr/local/hadoop/bin/hadoop jar /usr/local/hadoop/share/hadoop/mapreduce/hadoop-mapreduce-examples-2.7.3.jar grep ~/input ~/grep_example 'principal[.]*'
When the task completes, it provides a summary of what has been processed and errors it has encountered, but this doesn’t contain the actual results.
Output . . .
        File System Counters
                FILE: Number of bytes read=1247674
                FILE: Number of bytes written=2324248
                FILE: Number of read operations=0
                FILE: Number of large read operations=0
                FILE: Number of write operations=0
        Map-Reduce Framework
                Map input records=2
                Map output records=2
                Map output bytes=37
                Map output materialized bytes=47
                Input split bytes=114
                Combine input records=0
                Combine output records=0
                Reduce input groups=2
                Reduce shuffle bytes=47
                Reduce input records=2
                Reduce output records=2
                Spilled Records=4
                Shuffled Maps =1
                Failed Shuffles=0
                Merged Map outputs=1
                GC time elapsed (ms)=61
                Total committed heap usage (bytes)=263520256
        Shuffle Errors
                BAD_ID=0
                CONNECTION=0
                IO_ERROR=0
                WRONG_LENGTH=0
                WRONG_MAP=0
                WRONG_REDUCE=0
        File Input Format Counters
                Bytes Read=151
        File Output Format Counters
                Bytes Written=37
Note: If the output directory already exists, the program will fail, and rather than seeing the summary, the ouput will look something like:
Output . . .
        at java.lang.reflect.Method.invoke(Method.java:498)
        at org.apache.hadoop.util.RunJar.run(RunJar.java:221)
        at org.apache.hadoop.util.RunJar.main(RunJar.java:136)
Results are stored in the output directory and can be checked by running cat on the output directory:
- cat ~/grep_example/*
Output6       principal
1       principal.
The MapReduce task found one occurrence of the word principal followed by a period and six occurrences where it was not. Running the example program has verified that our stand-alone installation is working properly and that non-privileged users on the system can run Hadoop for exploration or debugging.
Conclusion
In this tutorial, we’ve installed Hadoop in stand-alone mode and verified it by running an example program it provided. To learn how write your own MapReduce programs, you might want to visit Apache Hadoop’s MapReduce tutorial which walks through the code behind the example. When you’re ready to set up a cluster, see the Apache Foundation Hadoop Cluster Setup guide.
Thanks for learning with the DigitalOcean Community. Check out our offerings for compute, storage, networking, and managed databases.
About the author
Still looking for an answer?
This textbox defaults to using Markdown to format your answer.
You can type !ref in this text area to quickly search our full set of tutorials, documentation & marketplace offerings and insert the link!
Thanks Melissa…!!!
Awesome content and its too helpful for me. This guide structured properly and very fine manner.
Warmly Thanks again…fantastic.
Hi Melissa,
Excellent job. Everything worked perfectly as you described.
Dean
Hi… Mellissa … Can you please update tutorial for multi-node hadoop installation on ubuntu-16.04. Thanks in advance…
Hi Melissa Thanks for the great job. Working perfectly. I’m new to hadoop. I came across hadoop about 4 weeks ago as i’m doing a Master Degree in Data Science so the second semester we have hadoop module. My question is after following the instruction I have got to the final result but the problem is I don’t know how to go back to it after closed it. Maybe because I always use microsoft windows client and this my first time to challenge myself on the ubuntu client.
Regards,
Ola
hi
iam getting below error after giving command to run the mapreduced files
JAR does not exist or is not a normal file: /usr/local/hadoop/share/hadoop/mapreduce/hadoop-mapreduce-examples-2.7.3.jar
thanks in advance
Hi Melissa, Ich Liebe Dich… :P. I am doing my Master program, this module is going me to the hell but you saved me. I became your die hard fan. Tell me, do you have more session about Big Data? I want to read and follow. Please provide me some more lecture-like Multi node, MapReduce in Ubuntu, etc.
BW Riyad
If you run hadoop command directly, you will get 'Command not found" error. To fix this, you need to do the following and restart your terminal.
Edit ~/.bashrc file and add the following line:
export PATH=$PATH:/usr/local/hadoop/bin/
To edit ~/.bashrc file, you can use:
sudo nano ~/.bashrc
*Remember to restart the terminal.
Hi I am getting below error while formating namenode
java.lang.ExceptionInInitializerError at javax.crypto.KeyGenerator.nextSpi(java.base@9-Ubuntu/KeyGenerator.java:348) at javax.crypto.KeyGenerator.<init>(java.base@9-Ubuntu/KeyGenerator.java:168) at javax.crypto.KeyGenerator.getInstance(java.base@9-Ubuntu/KeyGenerator.java:231) at org.apache.hadoop.security.token.SecretManager.<init>(SecretManager.java:143) at org.apache.hadoop.security.token.delegation.AbstractDelegationTokenSecretManager.<init>(AbstractDelegationTokenSecretManager.java:119) at org.apache.hadoop.hdfs.security.token.delegation.DelegationTokenSecretManager.<init>(DelegationTokenSecretManager.java:96) at org.apache.hadoop.hdfs.server.namenode.FSNamesystem.createDelegationTokenSecretManager(FSNamesystem.java:5780) at org.apache.hadoop.hdfs.server.namenode.FSNamesystem.<init>(FSNamesystem.java:850) at org.apache.hadoop.hdfs.server.namenode.FSNamesystem.<init>(FSNamesystem.java:708) at org.apache.hadoop.hdfs.server.namenode.NameNode.format(NameNode.java:1095) at org.apache.hadoop.hdfs.server.namenode.NameNode.createNameNode(NameNode.java:1544) at org.apache.hadoop.hdfs.server.namenode.NameNode.main(NameNode.java:1671) Caused by: java.lang.SecurityException: Can not initialize cryptographic mechanism at javax.crypto.JceSecurity.<clinit>(java.base@9-Ubuntu/JceSecurity.java:91) … 12 more Caused by: java.lang.NullPointerException at sun.nio.fs.UnixPath.normalizeAndCheck(java.base@9-Ubuntu/UnixPath.java:75) at sun.nio.fs.UnixPath.<init>(java.base@9-Ubuntu/UnixPath.java:69) at sun.nio.fs.UnixFileSystem.getPath(java.base@9-Ubuntu/UnixFileSystem.java:280) at java.nio.file.Paths.get(java.base@9-Ubuntu/Paths.java:84) at javax.crypto.JceSecurity.setupJurisdictionPolicies(java.base@9-Ubuntu/JceSecurity.java:254) at javax.crypto.JceSecurity.access$000(java.base@9-Ubuntu/JceSecurity.java:49) at javax.crypto.JceSecurity$1.run(java.base@9-Ubuntu/JceSecurity.java:82) at javax.crypto.JceSecurity$1.run(java.base@9-Ubuntu/JceSecurity.java:79) at java.security.AccessController.doPrivileged(java.base@9-Ubuntu/Native Method) at javax.crypto.JceSecurity.<clinit>(java.base@9-Ubuntu/JceSecurity.java:78) … 12 more 17/05/09 10:59:16 INFO util.ExitUtil: Exiting with status 1 17/05/09 10:59:16 INFO namenode.NameNode: SHUTDOWN_MSG: /************************************************************ SHUTDOWN_MSG: Shutting down NameNode at root/127.0.1.1 ************************************************************/
 This work is licensed under a Creative Commons Attribution-NonCommercial- ShareAlike 4.0 International License.
Become a contributor for community
Get paid to write technical tutorials and select a tech-focused charity to receive a matching donation.

DigitalOcean Documentation
Full documentation for every DigitalOcean product.

Resources for startups and AI-native businesses
The Wave has everything you need to know about building a business, from raising funding to marketing your product.
The developer cloud
Scale up as you grow — whether you're running one virtual machine or ten thousand.

Start building today
From GPU-powered inference and Kubernetes to managed databases and storage, get everything you need to build, scale, and deploy intelligent applications.
