
Introduction
As you work with Node.js, you may find yourself developing a project that stores and queries data. In this case, you will need to choose a database solution that makes sense for your application’s data and query types.
In this tutorial, you will integrate a MongoDB database with an existing Node application. NoSQL databases like MongoDB can be useful if your data requirements include scalability and flexibility. MongoDB also integrates well with Node since it is designed to work asynchronously with JSON objects.
To integrate MongoDB into your project, you will use the Object Document Mapper (ODM) Mongoose to create schemas and models for your application data. This will allow you to organize your application code following the model-view-controller (MVC) architectural pattern, which lets you separate the logic of how your application handles user input from how your data is structured and rendered to the user. Using this pattern can facilitate future testing and development by introducing a separation of concerns into your codebase.
At the end of the tutorial, you will have a working shark information application that will take a user’s input about their favorite sharks and display the results in the browser:
Prerequisites
- A local development machine or server running Ubuntu 18.04, along with a non-root user with
sudoprivileges and an active firewall. For guidance on how to set these up on an 18.04 server, please see this Initial Server Setup guide. - Node.js and npm installed on your machine or server, following these instructions on installing with the PPA managed by NodeSource.
- MongoDB installed on your machine or server, following Step 1 of How To Install MongoDB in Ubuntu 18.04.
Step 1 — Creating a Mongo User
Before we begin working with the application code, we will create an administrative user that will have access to our application’s database. This user will have administrative privileges on any database, which will give you the flexibility to switch and create new databases as needed.
First, check that MongoDB is running on your server:
- sudo systemctl status mongodb
The following output indicates that MongoDB is running:
Output● mongodb.service - An object/document-oriented database
   Loaded: loaded (/lib/systemd/system/mongodb.service; enabled; vendor preset: enabled)
   Active: active (running) since Thu 2019-01-31 21:07:25 UTC; 21min ago
...
Next, open the Mongo shell to create your user:
- mongo
This will drop you into an administrative shell:
OutputMongoDB shell version v3.6.3
connecting to: mongodb://127.0.0.1:27017
MongoDB server version: 3.6.3
...
>
You will see some administrative warnings when you open the shell due to your unrestricted access to the admin database. You can learn more about restricting this access by reading How To Install and Secure MongoDB on Ubuntu 16.04, for when you move into a production setup.
For now, you can use your access to the admin database to create a user with userAdminAnyDatabase privileges, which will allow password-protected access to your application’s databases.
In the shell, specify that you want to use the admin database to create your user:
- use admin
Next, create a role and password by adding a username and password with the db.createUser command. After you type this command, the shell will prepend three dots before each line until the command is complete. Be sure to replace the user and password provided here with your own username and password:
- db.createUser(
- {
- user: "sammy",
- pwd: "your_password",
- roles: [ { role: "userAdminAnyDatabase", db: "admin" } ]
- }
- )
This creates an entry for the user sammy in the admin database. The username you select and the admin database will serve as identifiers for your user.
The output for the entire process will look like this, including the message indicating that the entry was successful:
Output> db.createUser(
...  {
...    user: "sammy",
...    pwd: "your_password",
...    roles: [ { role: "userAdminAnyDatabase", db: "admin" } ]
...  }
...)
Successfully added user: {
        "user" : "sammy",
        "roles" : [
                {
                        "role" : "userAdminAnyDatabase",
                        "db" : "admin"
                }
        ]
}
With your user and password created, you can now exit the Mongo shell:
- exit
Now that you have created your database user, you can move on to cloning the starter project code and adding the Mongoose library, which will allow you to implement schemas and models for the collections in your databases.
Step 2 — Adding Mongoose and Database Information to the Project
Our next steps will be to clone the application starter code and add Mongoose and our MongoDB database information to the project.
In your non-root user’s home directory, clone the nodejs-image-demo repository from the DigitalOcean Community GitHub account. This repository includes the code from the setup described in How To Build a Node.js Application with Docker.
Clone the repository into a directory called node_project:
- git clone https://github.com/do-community/nodejs-image-demo.git node_project
Change to the node_project directory:
- cd node_project
Before modifying the project code, let’s take a look at the project’s structure using the tree command.
Tip: tree is a useful command for viewing file and directory structures from the command line. You can install it with the following command:
- sudo apt install tree
To use it, cd into a given directory and type tree. You can also provide the path to the starting point with a command like:
- tree /home/sammy/sammys-project
Type the following to look at the node_project directory:
- tree
The structure of the current project looks like this:
Output├── Dockerfile
├── README.md
├── app.js
├── package-lock.json
├── package.json
└── views
    ├── css
    │   └── styles.css
    ├── index.html
    └── sharks.html
We will be adding directories to this project as we move through the tutorial, and tree will be a useful command to help us track our progress.
Next, add the mongoose npm package to the project with the npm install command:
- npm install mongoose
This command will create a node_modules directory in your project directory, using the dependencies listed in the project’s package.json file, and will add mongoose to that directory. It will also add mongoose to the dependencies listed in your package.json file. For a more detailed discussion of package.json, please see Step 1 in How To Build a Node.js Application with Docker.
Before creating any Mongoose schemas or models, we will add our database connection information so that our application will be able to connect to our database.
In order to separate your application’s concerns as much as possible, create a separate file for your database connection information called db.js. You can open this file with nano or your favorite editor:
- nano db.js
First, import the mongoose module using the require function:
const mongoose = require('mongoose');
This will give you access to Mongoose’s built-in methods, which you will use to create the connection to your database.
Next, add the following constants to define information for Mongo’s connection URI. Though the username and password are optional, we will include them so that we can require authentication for our database. Be sure to replace the username and password listed below with your own information, and feel free to call the database something other than 'sharkinfo' if you would prefer:
const mongoose = require('mongoose');

const MONGO_USERNAME = 'sammy';
const MONGO_PASSWORD = 'your_password';
const MONGO_HOSTNAME = '127.0.0.1';
const MONGO_PORT = '27017';
const MONGO_DB = 'sharkinfo';
Because we are running our database locally, we have used 127.0.0.1 as the hostname. This would change in other development contexts: for example, if you are using a separate database server or working with multiple nodes in a containerized workflow.
Finally, define a constant for the URI and create the connection using the mongoose.connect() method:
...
const url = `mongodb://${MONGO_USERNAME}:${MONGO_PASSWORD}@${MONGO_HOSTNAME}:${MONGO_PORT}/${MONGO_DB}?authSource=admin`;

mongoose.connect(url, {useNewUrlParser: true});
Note that in the URI we’ve specified the authSource for our user as the admin database. This is necessary since we have specified a username in our connection string. Using the useNewUrlParser flag with mongoose.connect() specifies that we want to use Mongo’s new URL parser.
Save and close the file when you are finished editing.
As a final step, add the database connection information to the app.js file so that the application can use it. Open app.js:
- nano app.js
The first lines of the file will look like this:
const express = require('express');
const app = express();
const router = express.Router();

const path = __dirname + '/views/';
...
Below the router constant definition, located near the top of the file, add the following line:
...
const router = express.Router();
const db = require('./db');

const path = __dirname + '/views/';
...
This tells the application to use the database connection information specified in db.js.
Save and close the file when you are finished editing.
With your database information in place and Mongoose added to your project, you are ready to create the schemas and models that will shape the data in your sharks collection.
Step 3 — Creating Mongoose Schemas and Models
Our next step will be to think about the structure of the sharks collection that users will be creating in the sharkinfo database with their input. What structure do we want these created documents to have? The shark information page of our current application includes some details about different sharks and their behaviors:
In keeping with this theme, we can have users add new sharks with details about their overall character. This goal will shape how we create our schema.
To keep your schemas and models distinct from the other parts of your application, create a models directory in the current project directory:
- mkdir models
Next, open a file called sharks.js to create your schema and model:
- nano models/sharks.js
Import the mongoose module at the top of the file:
const mongoose = require('mongoose');
Below this, define a Schema object to use as the basis for your shark schema:
const mongoose = require('mongoose');
const Schema = mongoose.Schema;
You can now define the fields you would like to include in your schema. Because we want to create a collection with individual sharks and information about their behaviors, let’s include a name key and a character key. Add the following Shark schema below your constant definitions:
...
const Shark = new Schema ({
        name: { type: String, required: true },
        character: { type: String, required: true },
});
This definition includes information about the type of input we expect from users — in this case, a string — and whether or not that input is required.
Finally, create the Shark model using Mongoose’s model() function. This model will allow you to query documents from your collection and validate new documents. Add the following line at the bottom of the file:
...
module.exports = mongoose.model('Shark', Shark)
This last line makes our Shark model available as a module using the module.exports property. This property defines the values that the module will export, making them available for use elsewhere in the application.
The finished models/sharks.js file looks like this:
const mongoose = require('mongoose');
const Schema = mongoose.Schema;

const Shark = new Schema ({
        name: { type: String, required: true },
        character: { type: String, required: true },
});

module.exports = mongoose.model('Shark', Shark)
Save and close the file when you are finished editing.
With the Shark schema and model in place, you can start working on the logic that will determine how your application will handle user input.
Step 4 — Creating Controllers
Our next step will be to create the controller component that will determine how user input gets saved to our database and returned to the user.
First, create a directory for the controller:
- mkdir controllers
Next, open a file in that folder called sharks.js:
- nano controllers/sharks.js
At the top of the file, we’ll import the module with our Shark model so that we can use it in our controller’s logic. We’ll also import the path module to access utilities that will allow us to set the path to the form where users will input their sharks.
Add the following require functions to the beginning of the file:
const path = require('path');
const Shark = require('../models/sharks');
Next, we’ll write a sequence of functions that we will export with the controller module using Node’s exports shortcut. These functions will include the three tasks related to our user’s shark data:
- Sending users the shark input form.
- Creating a new shark entry.
- Displaying the sharks back to users.
To begin, create an index function to display the sharks page with the input form. Add this function below your imports:
...
exports.index = function (req, res) {
    res.sendFile(path.resolve('views/sharks.html'));
};
Next, below the index function, add a function called create to make a new shark entry in your sharks collection:
...
exports.create = function (req, res) {
    var newShark = new Shark(req.body);
    console.log(req.body);
    newShark.save(function (err) {
            if(err) {
            res.status(400).send('Unable to save shark to database');
        } else {
            res.redirect('/sharks/getshark');
        }
  });
               };
This function will be called when a user posts shark data to the form on the sharks.html page. We will create the route with this POST endpoint later in the tutorial when we create our application’s routes. With the body of the POST request, our create function will make a new shark document object, here called newShark, using the Shark model that we’ve imported. We’ve added a console.log method to output the shark entry to the console in order to check that our POST method is working as intended, but you should feel free to omit this if you would prefer.
Using the newShark object, the create function will then call Mongoose’s model.save() method to make a new shark document using the keys you defined in the Shark model. This callback function follows the standard Node callback pattern: callback(error, results). In the case of an error, we will send a message reporting the error to our users, and in the case of success, we will use the res.redirect() method to send users to the endpoint that will render their shark information back to them in the browser.
Finally, the list function will display the collection’s contents back to the user. Add the following code below the create function:
...
exports.list = function (req, res) {
        Shark.find({}).exec(function (err, sharks) {
                if (err) {
                        return res.send(500, err);
                }
                res.render('getshark', {
                        sharks: sharks
             });
        });
};
This function uses the Shark model with Mongoose’s model.find() method to return the sharks that have been entered into the sharks collection. It does this by returning the query object — in this case, all of the entries in the sharks collection — as a promise, using Mongoose’s exec() function. In the case of an error, the callback function will send a 500 error.
The returned query object with the sharks collection will be rendered in a getshark page that we will create in the next step using the EJS templating language.
The finished file will look like this:
const path = require('path');
const Shark = require('../models/sharks');

exports.index = function (req, res) {
    res.sendFile(path.resolve('views/sharks.html'));
};

exports.create = function (req, res) {
    var newShark = new Shark(req.body);
    console.log(req.body);
    newShark.save(function (err) {
            if(err) {
            res.status(400).send('Unable to save shark to database');
        } else {
            res.redirect('/sharks/getshark');
        }
  });
               };

exports.list = function (req, res) {
        Shark.find({}).exec(function (err, sharks) {
                if (err) {
                        return res.send(500, err);
                }
                res.render('getshark', {
                        sharks: sharks
             });
        });
};
Keep in mind that though we are not using arrow functions here, you may wish to include them as you iterate on this code in your own development process.
Save and close the file when you are finished editing.
Before moving on to the next step, you can run tree again from your node_project directory to view the project’s structure at this point. This time, for the sake of brevity, we’ll tell tree to omit the node_modules directory using the -I option:
- tree -I node_modules
With the additions you’ve made, your project’s structure will look like this:
Output├── Dockerfile
├── README.md
├── app.js
├── controllers
│   └── sharks.js
├── db.js
├── models
│   └── sharks.js
├── package-lock.json
├── package.json
└── views
    ├── css
    │   └── styles.css
    ├── index.html
    └── sharks.html
Now that you have a controller component to direct how user input gets saved and returned to the user, you can move on to creating the views that will implement your controller’s logic.
Step 5 — Using EJS and Express Middleware to Collect and Render Data
To enable our application to work with user data, we will do two things: first, we will include a built-in Express middleware function, urlencoded(), that will enable our application to parse our user’s entered data. Second, we will add template tags to our views to enable dynamic interaction with user data in our code.
To work with Express’s urlencoded() function, first open your app.js file:
- nano app.js
Above your express.static() function, add the following line:
...
app.use(express.urlencoded({ extended: true }));
app.use(express.static(path));
...
Adding this function will enable access to the parsed POST data from our shark information form. We are specifying true with the extended option to enable greater flexibility in the type of data our application will parse (including things like nested objects). Please see the function documentation for more information about options.
Save and close the file when you are finished editing.
Next, we will add template functionality to our views. First, install the ejs package with npm install:
- npm install ejs
Next, open the sharks.html file in the views folder:
- nano views/sharks.html
In Step 3, we looked at this page to determine how we should write our Mongoose schema and model:
Now, rather than having a two column layout, we will introduce a third column with a form where users can input information about sharks.
As a first step, change the dimensions of the existing columns to 4 to create three equal-sized columns. Note that you will need to make this change on the two lines that currently read <div class="col-lg-6">. These will both become <div class="col-lg-4">:
...
<div class="container">
    <div class="row">
        <div class="col-lg-4">
            <p>
                <div class="caption">Some sharks are known to be dangerous to humans, though many more are not. The sawshark, for example, is not considered a threat to humans.
                </div>
                <img src="https://assets.digitalocean.com/articles/docker_node_image/sawshark.jpg" alt="Sawshark">
            </p>
        </div>
        <div class="col-lg-4">
            <p>
                <div class="caption">Other sharks are known to be friendly and welcoming!</div>
                <img src="https://assets.digitalocean.com/articles/docker_node_image/sammy.png" alt="Sammy the Shark">
            </p>
        </div>
    </div>
  </div>

 </html>
For an introduction to Bootstrap’s grid system, including its row and column layouts, please see this introduction to Bootstrap.
Next, add another column that includes the named endpoint for the POST request with the user’s shark data and the EJS template tags that will capture that data. This column will go below the closing </p> and </div> tags from the preceding column and above the closing tags for the row, container, and HTML document. These closing tags are already in place in your code; they are also marked below with comments. Leave them in place as you add the following code to create the new column:
...
       </p> <!-- closing p from previous column -->
   </div> <!-- closing div from previous column -->
<div class="col-lg-4">
            <p>
                <form action="/sharks/addshark" method="post">
                    <div class="caption">Enter Your Shark</div>
                    <input type="text" placeholder="Shark Name" name="name" <%=sharks[i].name; %>
                    <input type="text" placeholder="Shark Character" name="character" <%=sharks[i].character; %>
                    <button type="submit">Submit</button>
                </form>
            </p>
        </div>
    </div> <!-- closing div for row -->
</div> <!-- closing div for container -->

</html> <!-- closing html tag -->
In the form tag, you are adding a "/sharks/addshark" endpoint for the user’s shark data and specifying the POST method to submit it. In the input fields, you are specifying fields for "Shark Name" and "Shark Character", aligning with the Shark model you defined earlier.
To add the user input to your sharks collection, you are using EJS template tags (<%=, %>) along with JavaScript syntax to map the user’s entries to the appropriate fields in the newly created document. For more about JavaScript objects, please see our article on Understanding JavaScript Objects. For more on EJS template tags, please see the EJS documentation.
The entire container with all three columns, including the column with your shark input form, will look like this when finished:
...
<div class="container">
    <div class="row">
        <div class="col-lg-4">
            <p>
                <div class="caption">Some sharks are known to be dangerous to humans, though many more are not. The sawshark, for example, is not considered a threat to humans.
                </div>
                <img src="https://assets.digitalocean.com/articles/docker_node_image/sawshark.jpg" alt="Sawshark">
            </p>
        </div>
        <div class="col-lg-4">
            <p>
                <div class="caption">Other sharks are known to be friendly and welcoming!</div>
                <img src="https://assets.digitalocean.com/articles/docker_node_image/sammy.png" alt="Sammy the Shark">
            </p>
        </div>
	<div class="col-lg-4">
            <p>
                <form action="/sharks/addshark" method="post">
                    <div class="caption">Enter Your Shark</div>
                    <input type="text" placeholder="Shark Name" name="name" <%=sharks[i].name; %>
                    <input type="text" placeholder="Shark Character" name="character" <%=sharks[i].character; %>
                    <button type="submit">Submit</button>
                </form>
            </p>
        </div>
    </div>
  </div>

</html>
Save and close the file when you are finished editing.
Now that you have a way to collect your user’s input, you can create an endpoint to display the returned sharks and their associated character information.
Copy the newly modified sharks.html file to a file called getshark.html:
- cp views/sharks.html views/getshark.html
Open getshark.html:
- nano views/getshark.html
Inside the file, we will modify the column that we used to create our sharks input form by replacing it with a column that will display the sharks in our sharks collection. Again, your code will go between the existing </p> and </div> tags from the preceding column and the closing tags for the row, container, and HTML document. Remember to leave these tags in place as you add the following code to create the column:
...
       </p> <!-- closing p from previous column -->
   </div> <!-- closing div from previous column -->
<div class="col-lg-4">
           <p>
              <div class="caption">Your Sharks</div>
                  <ul>
                     <% sharks.forEach(function(shark) { %>
                        <p>Name: <%= shark.name %></p>
                        <p>Character: <%= shark.character %></p>
                     <% }); %>
                  </ul>
            </p>
        </div>
    </div> <!-- closing div for row -->
</div> <!-- closing div for container -->

</html> <!-- closing html tag -->
Here you are using EJS template tags and the forEach() method to output each value in your sharks collection, including information about the most recently added shark.
The entire container with all three columns, including the column with your sharks collection, will look like this when finished:
...
<div class="container">
    <div class="row">
        <div class="col-lg-4">
            <p>
                <div class="caption">Some sharks are known to be dangerous to humans, though many more are not. The sawshark, for example, is not considered a threat to humans.
                </div>
                <img src="https://assets.digitalocean.com/articles/docker_node_image/sawshark.jpg" alt="Sawshark">
            </p>
        </div>
        <div class="col-lg-4">
            <p>
                <div class="caption">Other sharks are known to be friendly and welcoming!</div>
                <img src="https://assets.digitalocean.com/articles/docker_node_image/sammy.png" alt="Sammy the Shark">
            </p>
        </div>
	<div class="col-lg-4">
            <p>
              <div class="caption">Your Sharks</div>
                  <ul>
                     <% sharks.forEach(function(shark) { %>
                        <p>Name: <%= shark.name %></p>
                        <p>Character: <%= shark.character %></p>
                     <% }); %>
                  </ul>
            </p>
        </div>
    </div>
  </div>

</html>
Save and close the file when you are finished editing.
In order for the application to use the templates you’ve created, you will need to add a few lines to your app.js file. Open it again:
- nano app.js
Above where you added the express.urlencoded() function, add the following lines:
...
app.engine('html', require('ejs').renderFile);
app.set('view engine', 'html');
app.use(express.urlencoded({ extended: true }));
app.use(express.static(path));

...
The app.engine method tells the application to map the EJS template engine to HTML files, while app.set defines the default view engine.
Your app.js file should now look like this:
const express = require('express');
const app = express();
const router = express.Router();
const db = require('./db');

const path = __dirname + '/views/';
const port = 8080;

router.use(function (req,res,next) {
  console.log('/' + req.method);
  next();
});

router.get('/',function(req,res){
  res.sendFile(path + 'index.html');
});

router.get('/sharks',function(req,res){
  res.sendFile(path + 'sharks.html');
});

app.engine('html', require('ejs').renderFile);
app.set('view engine', 'html');
app.use(express.urlencoded({ extended: true }));
app.use(express.static(path));
app.use('/', router);

app.listen(port, function () {
  console.log('Example app listening on port 8080!')
})
Now that you have created views that can work dynamically with user data, it’s time to create your project’s routes to bring together your views and controller logic.
Step 6 — Creating Routes
The final step in bringing the application’s components together will be creating routes. We will separate our routes by function, including a route to our application’s landing page and another route to our sharks page. Our sharks route will be where we integrate our controller’s logic with the views we created in the previous step.
First, create a routes directory:
- mkdir routes
Next, open a file called index.js in this directory:
- nano routes/index.js
This file will first import the express, router, and path objects, allowing us to define the routes we want to export with the router object, and making it possible to work dynamically with file paths. Add the following code at the top of the file:
const express = require('express');
const router = express.Router();
const path = require('path');
Next, add the following router.use function, which loads a middleware function that will log the router’s requests and pass them on to the application’s route:
...

router.use (function (req,res,next) {
  console.log('/' + req.method);
  next();
});
Requests to our application’s root will be directed here first, and from here users will be directed to our application’s landing page, the route we will define next. Add the following code below the router.use function to define the route to the landing page:
...

router.get('/',function(req,res){
  res.sendFile(path.resolve('views/index.html'));
});
When users visit our application, the first place we want to send them is to the index.html landing page that we have in our views directory.
Finally, to make these routes accessible as importable modules elsewhere in the application, add a closing expression to the end of the file to export the router object:
...

module.exports = router;
The finished file will look like this:
const express = require('express');
const router = express.Router();
const path = require('path');

router.use (function (req,res,next) {
  console.log('/' + req.method);
  next();
});

router.get('/',function(req,res){
  res.sendFile(path.resolve('views/index.html'));
});

module.exports = router;
Save and close this file when you are finished editing.
Next, open a file called sharks.js to define how the application should use the different endpoints and views we’ve created to work with our user’s shark input:
- nano routes/sharks.js
At the top of the file, import the express and router objects:
const express = require('express');
const router = express.Router();
Next, import a module called shark that will allow you to work with the exported functions you defined with your controller:
const express = require('express');
const router = express.Router();
const shark = require('../controllers/sharks');
Now you can create routes using the index, create, and list functions you defined in your sharks controller file. Each route will be associated with the appropriate HTTP method: GET in the case of rendering the main sharks information landing page and returning the list of sharks to the user, and POST in the case of creating a new shark entry:
...

router.get('/', function(req, res){
    shark.index(req,res);
});

router.post('/addshark', function(req, res) {
    shark.create(req,res);
});

router.get('/getshark', function(req, res) {
    shark.list(req,res);
});
Each route makes use of the related function in controllers/sharks.js, since we have made that module accessible by importing it at the top of this file.
Finally, close the file by attaching these routes to the router object and exporting them:
...

module.exports = router;
The finished file will look like this:
const express = require('express');
const router = express.Router();
const shark = require('../controllers/sharks');

router.get('/', function(req, res){
    shark.index(req,res);
});

router.post('/addshark', function(req, res) {
    shark.create(req,res);
});

router.get('/getshark', function(req, res) {
    shark.list(req,res);
});

module.exports = router;
Save and close the file when you are finished editing.
The last step in making these routes accessible to your application will be to add them to app.js. Open that file again:
- nano app.js
Below your db constant, add the following import for your routes:
...
const db = require('./db');
const sharks = require('./routes/sharks');
Next, replace the app.use function that currently mounts your router object with the following line, which will mount the sharks router module:
...
app.use(express.static(path));
app.use('/sharks', sharks);

app.listen(port, function () {
        console.log("Example app listening on port 8080!")
})
You can now delete the routes that were previously defined in this file, since you are importing your application’s routes using the sharks router module.
The final version of your app.js file will look like this:
const express = require('express');
const app = express();
const router = express.Router();
const db = require('./db');
const sharks = require('./routes/sharks');

const path = __dirname + '/views/';
const port = 8080;

app.engine('html', require('ejs').renderFile);
app.set('view engine', 'html');
app.use(express.urlencoded({ extended: true }));
app.use(express.static(path));
app.use('/sharks', sharks);

app.listen(port, function () {
  console.log('Example app listening on port 8080!')
})
Save and close the file when you are finished editing.
You can now run tree again to see the final structure of your project:
- tree -I node_modules
Your project structure will now look like this:
Output├── Dockerfile
├── README.md
├── app.js
├── controllers
│   └── sharks.js
├── db.js
├── models
│   └── sharks.js
├── package-lock.json
├── package.json
├── routes
│   ├── index.js
│   └── sharks.js
└── views
    ├── css
    │   └── styles.css
    ├── getshark.html
    ├── index.html
    └── sharks.html
With all of your application components created and in place, you are now ready to add a test shark to your database!
If you followed the initial server setup tutorial in the prerequisites, you will need to modify your firewall, since it currently only allows SSH traffic. To permit traffic to port 8080 run:
- sudo ufw allow 8080
Start the application:
- node app.js
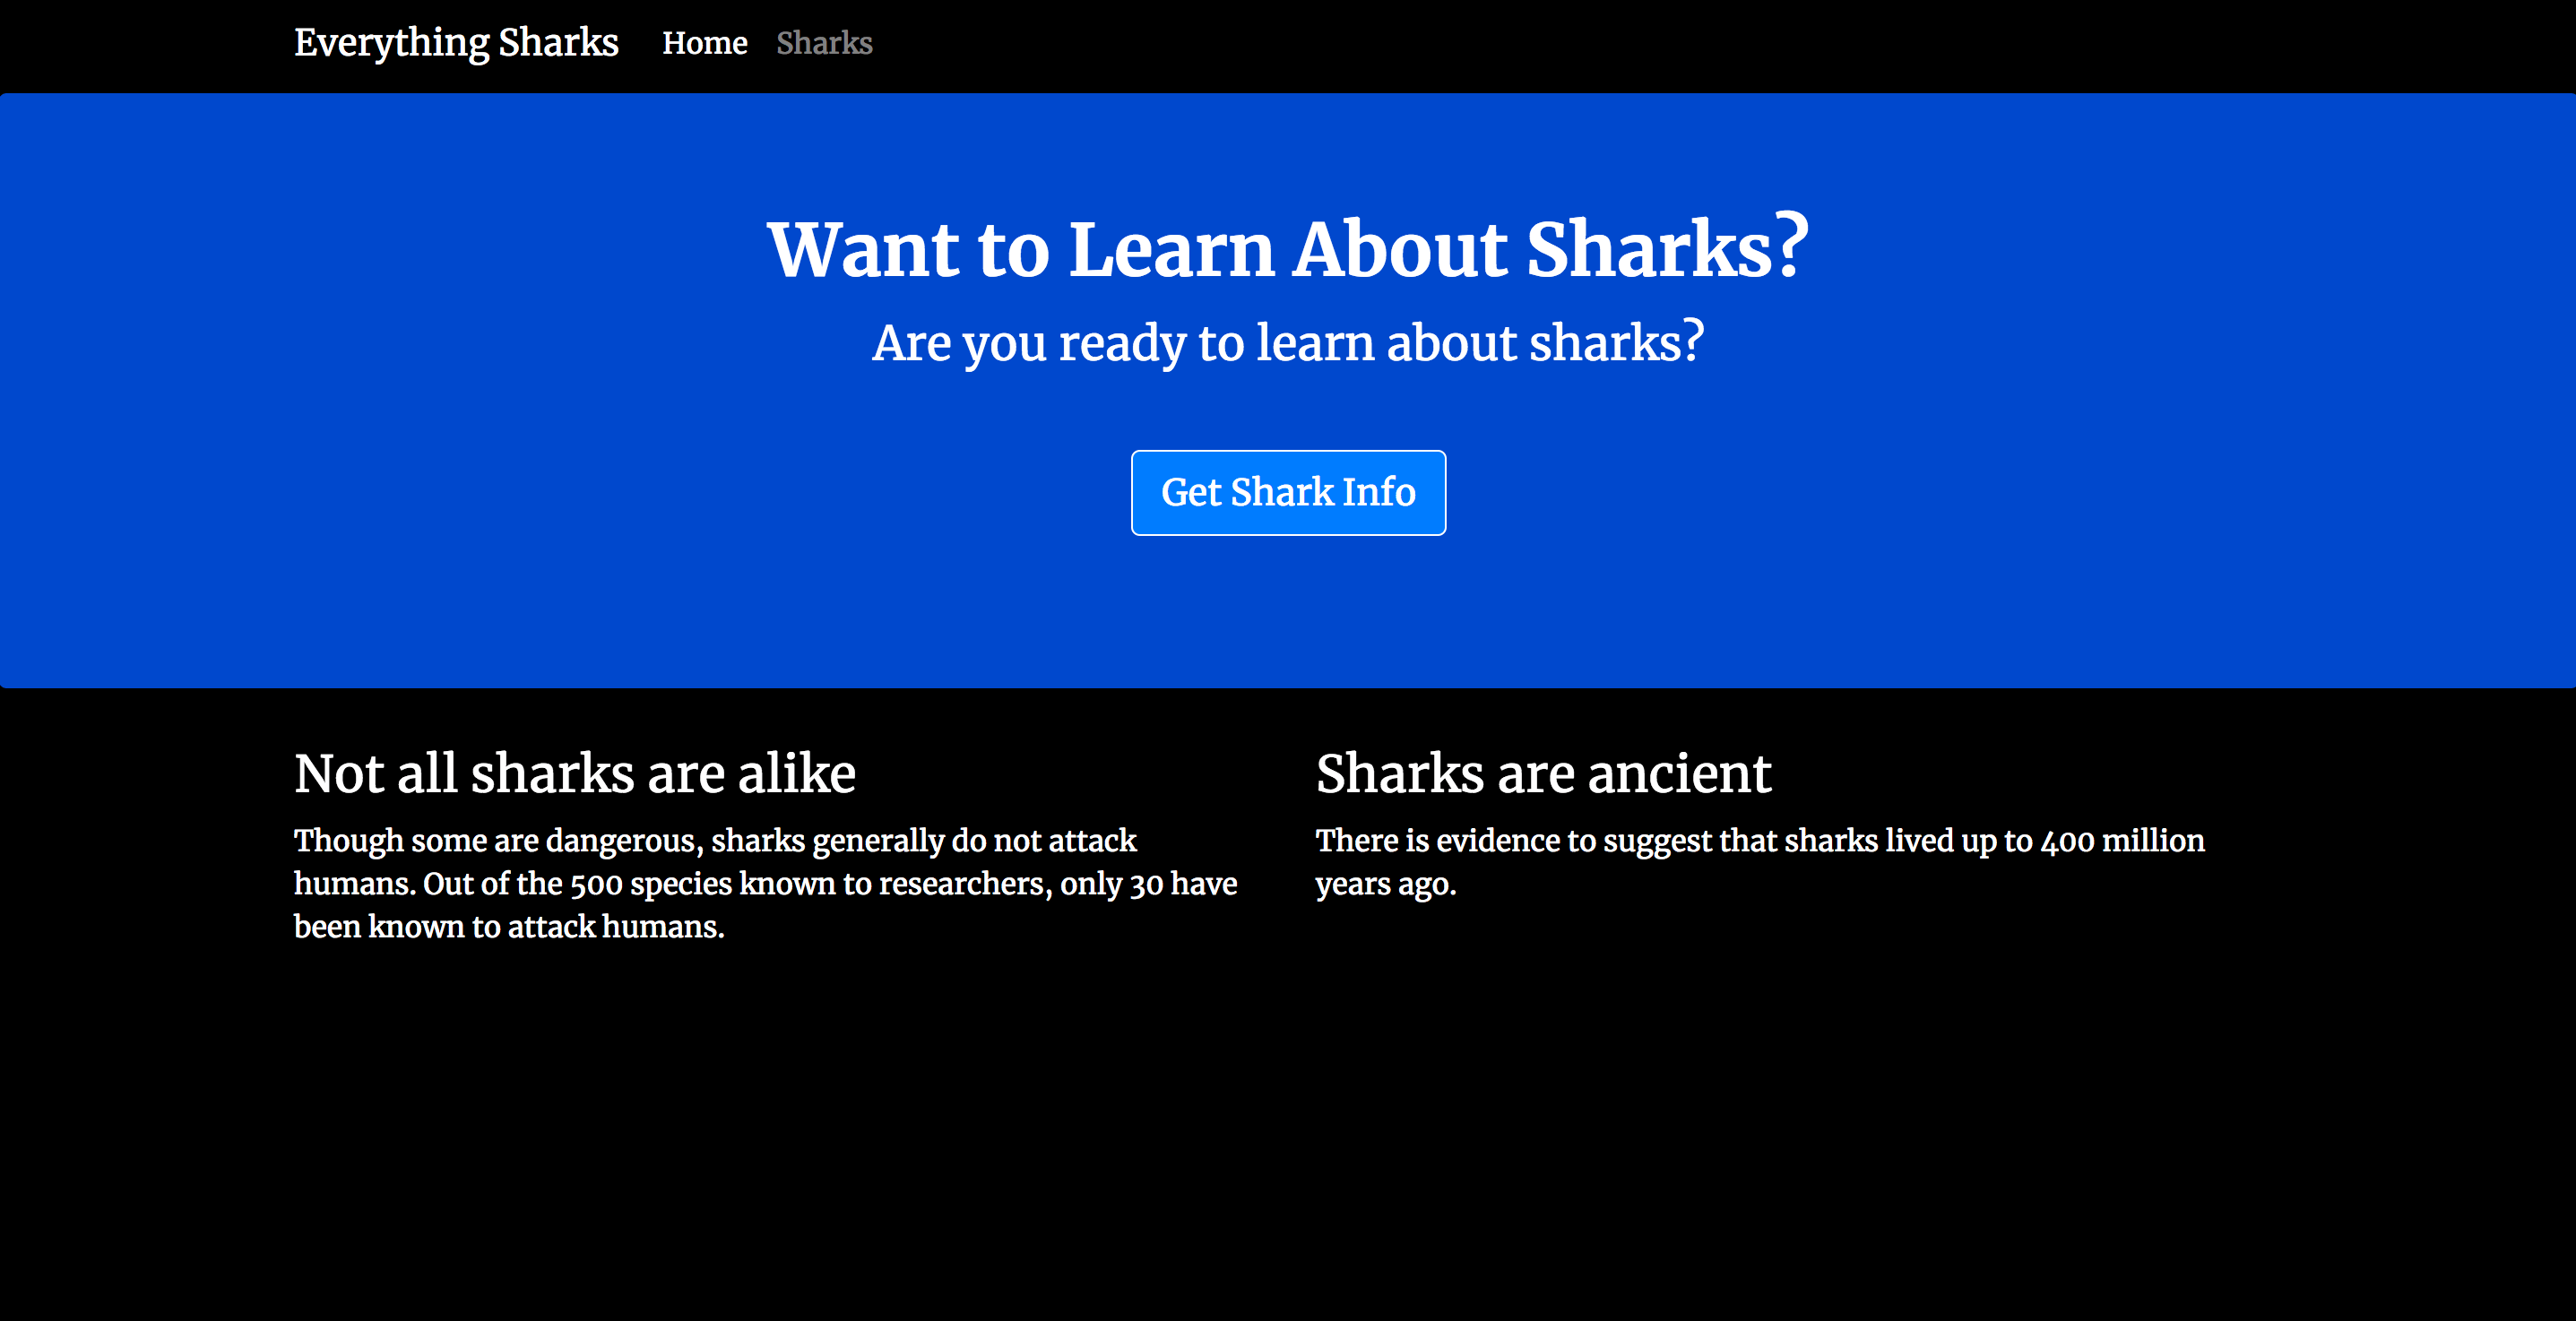
Next, navigate your browser to http://your_server_ip:8080. You will see the following landing page:
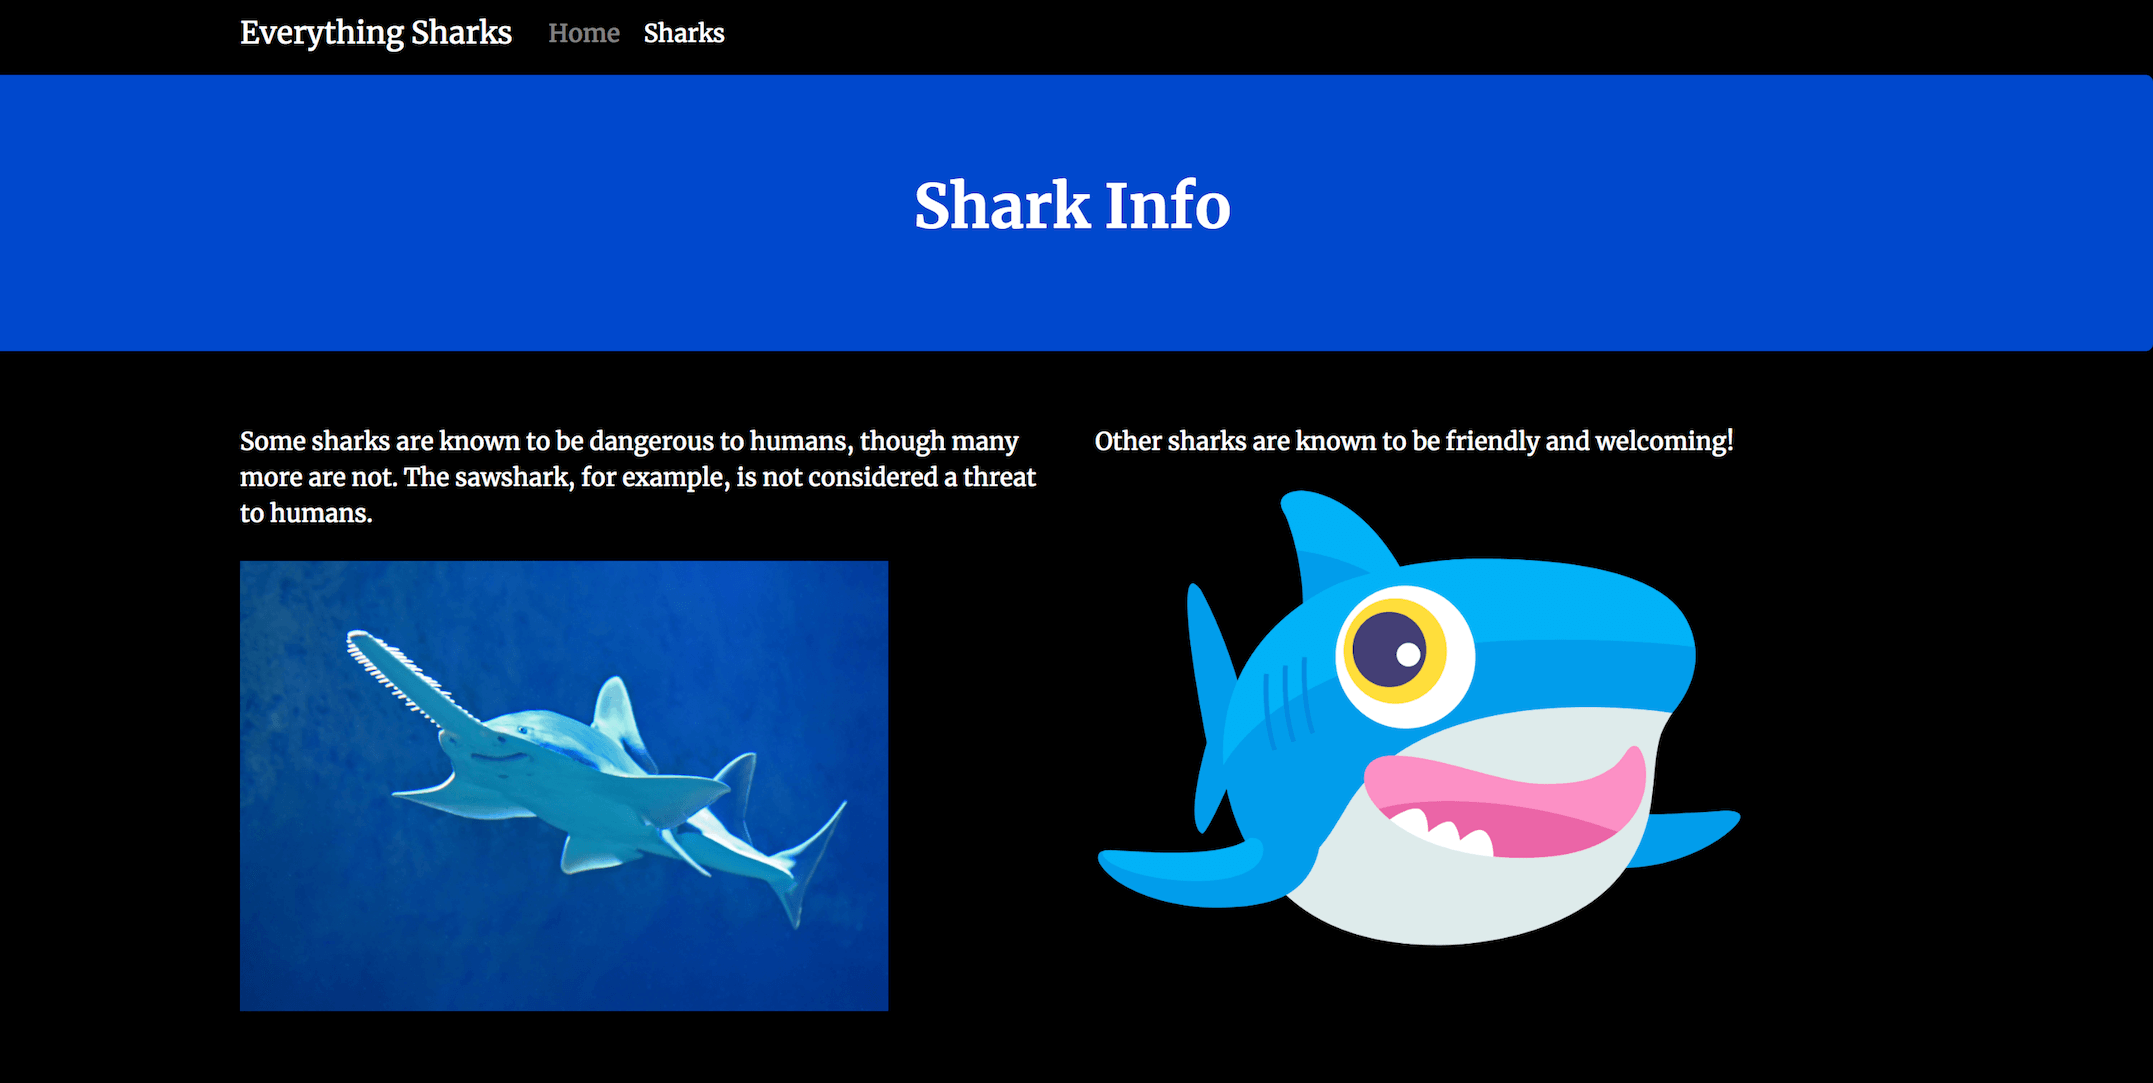
Click on the Get Shark Info button. You will see the following information page, with the shark input form added:

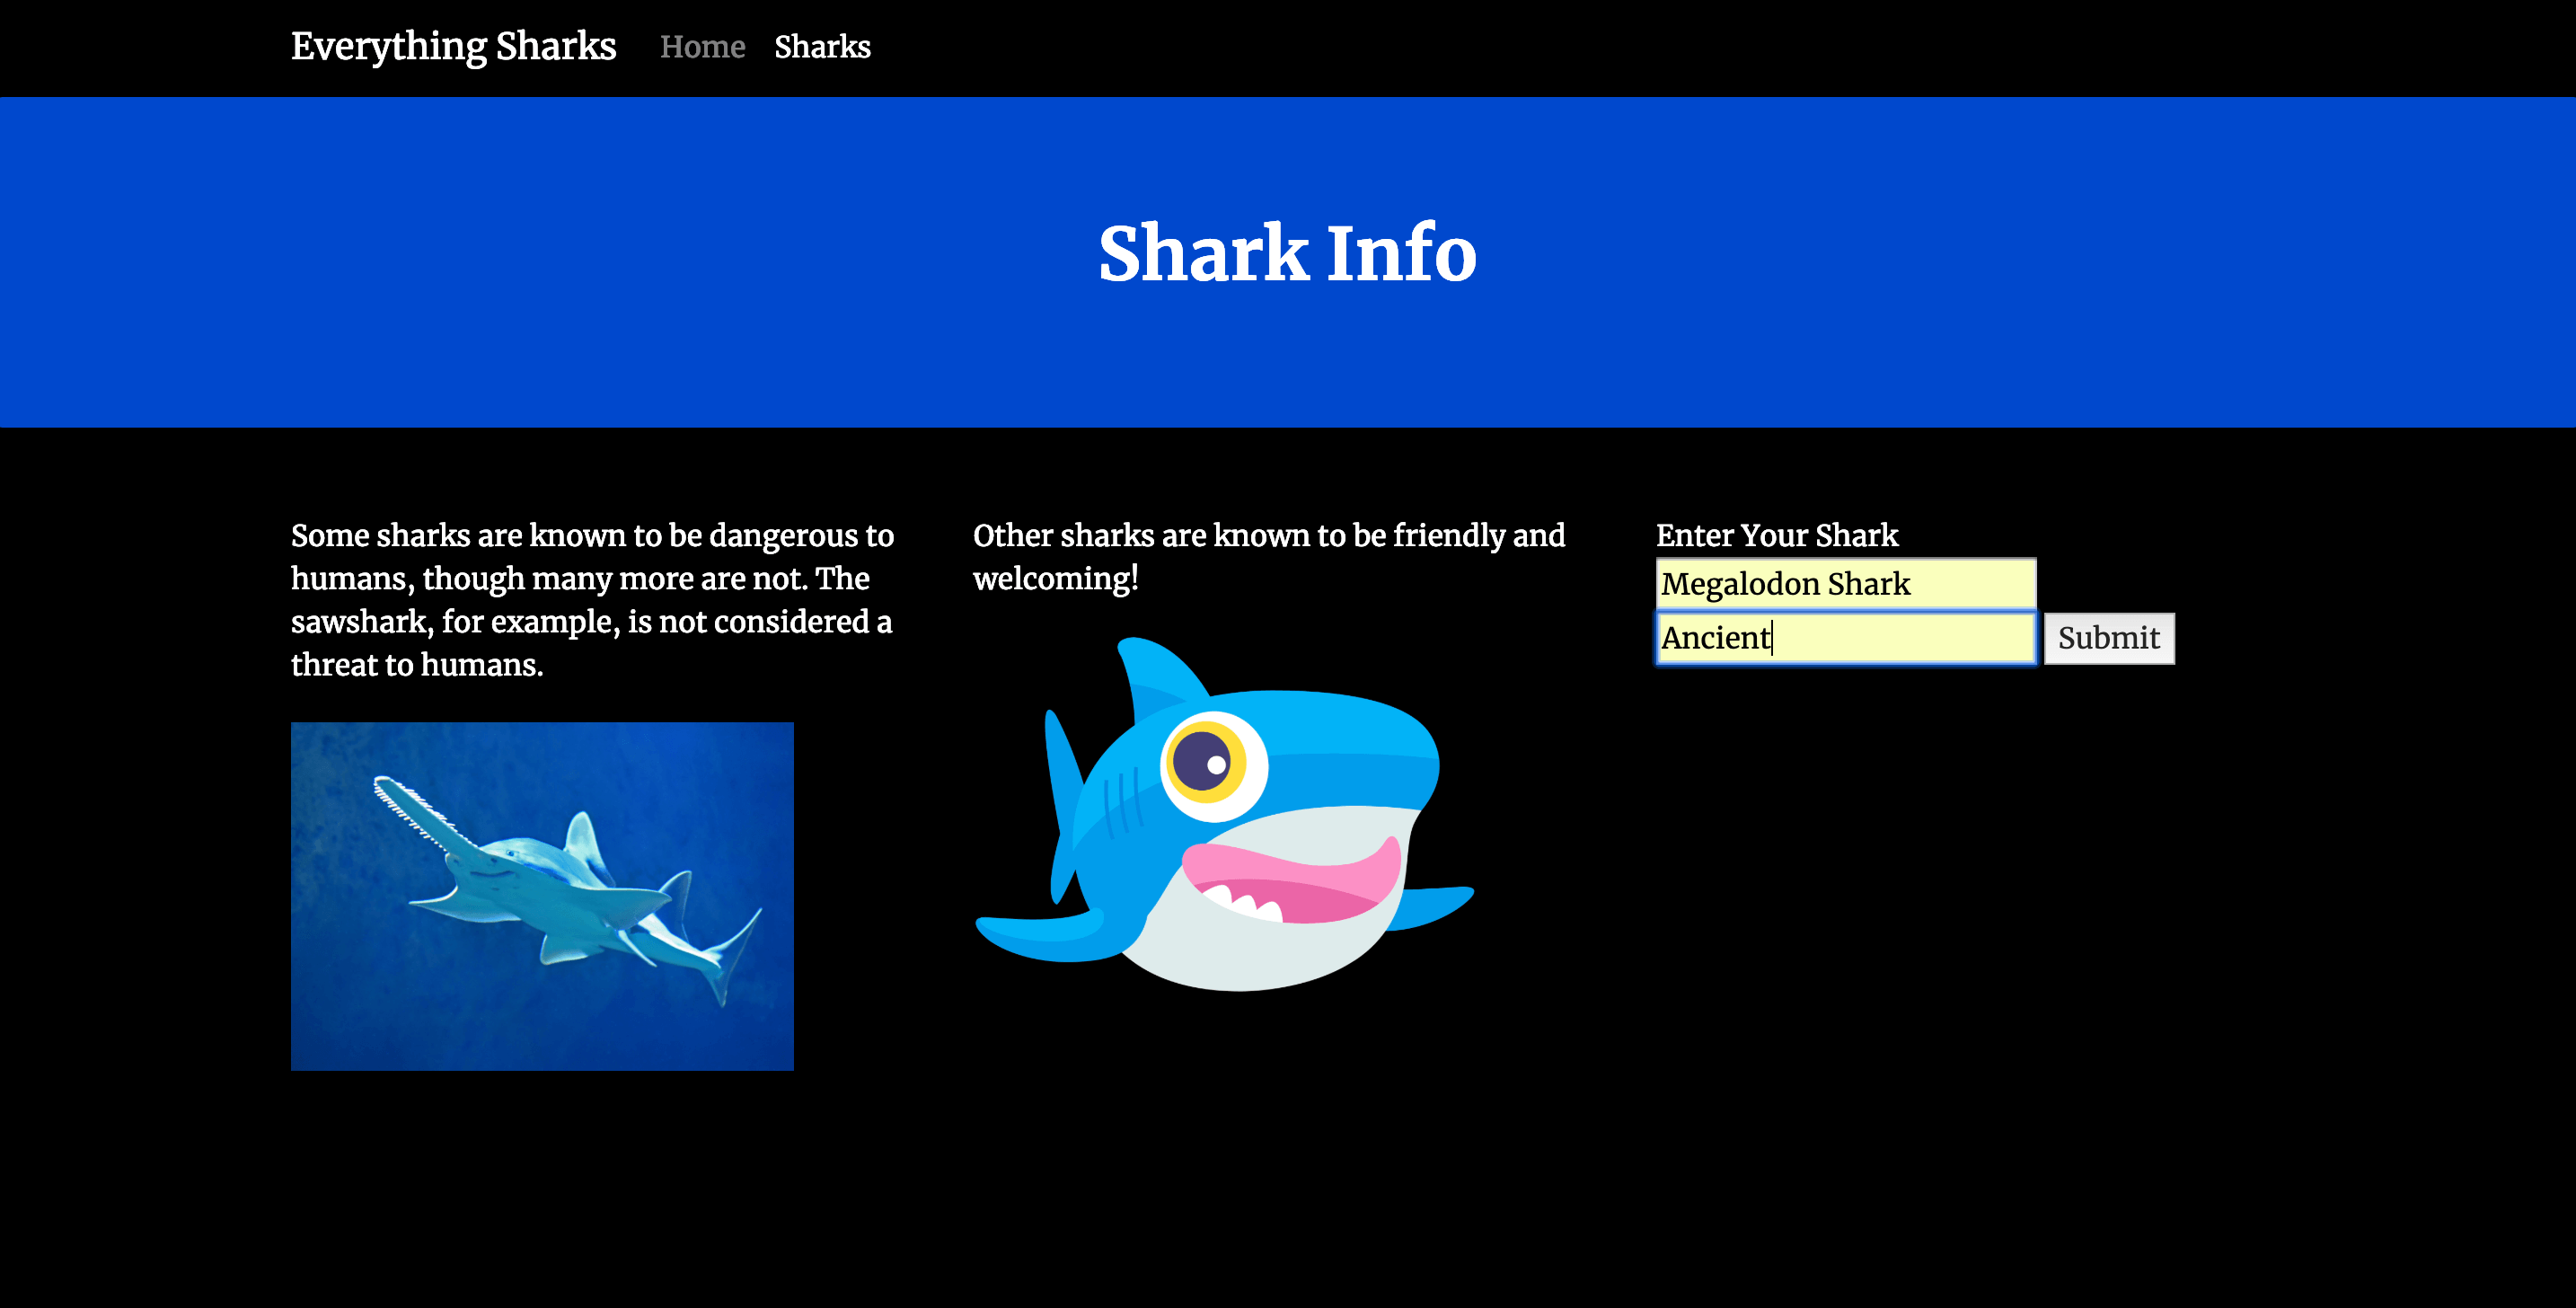
In the form, add a shark of your choosing. For the purpose of this demonstration, we will add Megalodon Shark to the Shark Name field, and Ancient to the Shark Character field:
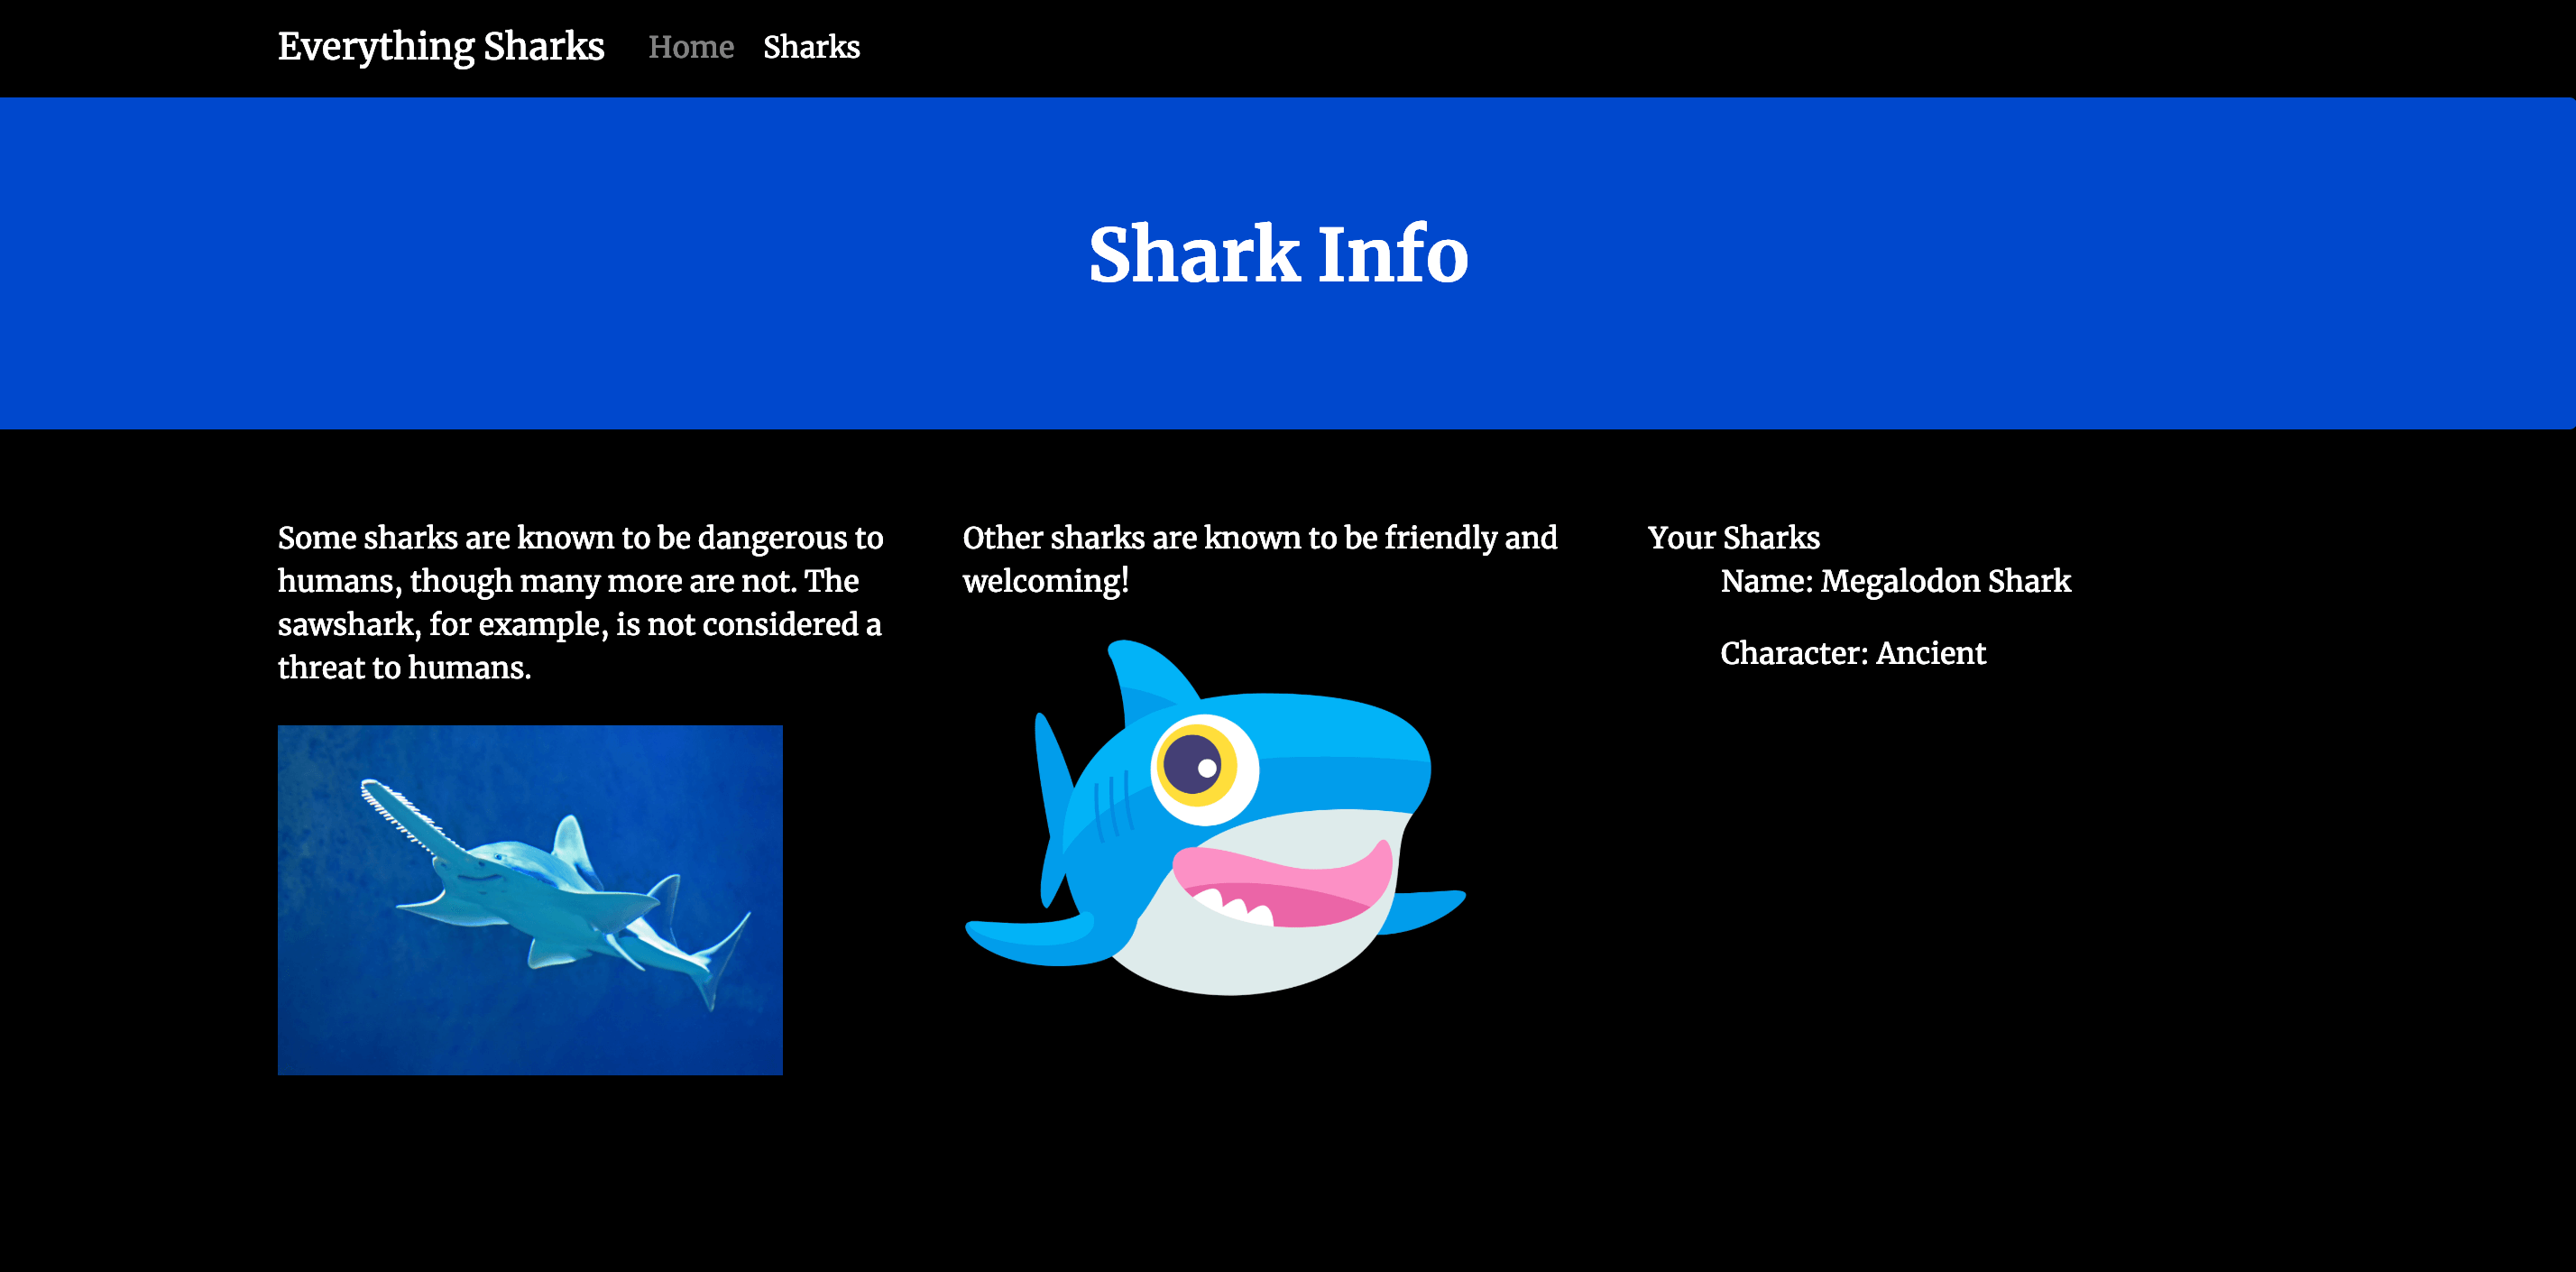
Click on the Submit button. You will see a page with this shark information displayed back to you:
You will also see output in your console indicating that the shark has been added to your collection:
OutputExample app listening on port 8080!
{ name: 'Megalodon Shark', character: 'Ancient' }
If you would like to create a new shark entry, head back to the Sharks page and repeat the process of adding a shark.
You now have a working shark information application that allows users to add information about their favorite sharks.
Conclusion
In this tutorial, you built out a Node application by integrating a MongoDB database and rewriting the application’s logic using the MVC architectural pattern. This application can act as a good starting point for a fully-fledged CRUD application.
For more resources on the MVC pattern in other contexts, please see our Django Development series or How To Build a Modern Web Application to Manage Customer Information with Django and React on Ubuntu 18.04.
For more information on working with MongoDB, please see our library of tutorials on MongoDB.
Thanks for learning with the DigitalOcean Community. Check out our offerings for compute, storage, networking, and managed databases.
Tutorial Series: From Containers to Kubernetes with Node.js
In this series, you will build and containerize a Node.js application with a MongoDB database. The series is designed to introduce you to the fundamentals of migrating an application to Kubernetes, including modernizing your app using the 12FA methodology, containerizing it, and deploying it to Kubernetes. The series also includes information on deploying your app with Docker Compose using an Nginx reverse proxy and Let’s Encrypt.
Browse Series: 7 tutorials
About the author
Former Developer at DigitalOcean community. Expertise in areas including Ubuntu, Docker, Ruby on Rails, Debian, and more.
Still looking for an answer?
This textbox defaults to using Markdown to format your answer.
You can type !ref in this text area to quickly search our full set of tutorials, documentation & marketplace offerings and insert the link!
Apologies if I got this wrong as I quickly scanned through but I get the impression that this MongoDB instance is tied to the Docker instance which contains the server. I would be interested to know how to create a scalable MongoDB cluster which exists in the same Kubernete. Unless I misunderstood wouldn’t scaling the Node service also create multiple databases?
Please review views/getshark.hml change <link href=“css/styles.css” rel=“stylesheet”> to <link href=“…/css/styles.css” rel=“stylesheet”>
in order to load the styles (the route is http://localhost:8080/sharks/getshark instead of http://localhost:8080/getshark)
The console error is: “The resource from “http://localhost:8080/sharks/css/styles.css” was blocked due to MIME type (“text/html”) mismatch (X-Content-Type-Options: nosniff).”
I had a problem with the following line
const url = `mongodb://${MONGO_USERNAME}:${MONGO_PASSWORD}@${MONGO_HOSTNAME}:${MONGO_PORT}/${MONGO_DB}?authSource=admin`;
For hours I could not connect to my database but when I removed the auth with admin, -> ‘authSource=admin’ , everything worked fine. It seems as though the user I create is not in the admin db for some reason I do not know.
I know this code is a little old, but Im´trying to figure out this error.
TypeError: Cannot read property ‘sendFile’ of undefined at Object.exports.index (/Users/alex/Desktop/node_docker_curso/controllers/sharks.js:5:9) at /Users/alex/Desktop/node_docker_curso/routes/sharks.js:6:11 at Layer.handle [as handle_request] (/Users/alex/Desktop/node_docker_curso/node_modules/express/lib/router/layer.js:95:5) at next (/Users/alex/Desktop/node_docker_curso/node_modules/express/lib/router/route.js:144:13) at Route.dispatch (/Users/alex/Desktop/node_docker_curso/node_modules/express/lib/router/route.js:114:3) at Layer.handle [as handle_request] (/Users/alex/Desktop/node_docker_curso/node_modules/express/lib/router/layer.js:95:5) at /Users/alex/Desktop/node_docker_curso/node_modules/express/lib/router/index.js:284:15 at Function.process_params (/Users/alex/Desktop/node_docker_curso/node_modules/express/lib/router/index.js:346:12) at next (/Use
 This work is licensed under a Creative Commons Attribution-NonCommercial- ShareAlike 4.0 International License.
Become a contributor for community
Get paid to write technical tutorials and select a tech-focused charity to receive a matching donation.

DigitalOcean Documentation
Full documentation for every DigitalOcean product.

Resources for startups and AI-native businesses
The Wave has everything you need to know about building a business, from raising funding to marketing your product.
The developer cloud
Scale up as you grow — whether you're running one virtual machine or ten thousand.

Start building today
From GPU-powered inference and Kubernetes to managed databases and storage, get everything you need to build, scale, and deploy intelligent applications.
