By Joe Morgan and Timothy Nolan

The author selected Creative Commons to receive a donation as part of the Write for DOnations program.
Note: This tutorial shows how to deploy static assets and sites using React and App Platform. If you are looking to deploy a React application with dynamic, back-end code, check out the App Platform React sample in the official documentation.
Introduction
DigitalOcean’s App Platform is a Platform as a Service (PaaS) product that lets you configure and deploy applications from a source repository. After configuring your app, DigitalOcean will build and deploy the application on every change, giving you the benefit of a full web server and deployment pipeline with minimal configuration. This can be a quick and efficient way to deploy your React applications, and if you are using React to build a site with no backend, you can use App Platform’s free tier.
In this tutorial, you’ll deploy a React application to the DigitalOcean App Platform using the free Starter tier. You’ll build an application with Create React App, push the code to a GitHub repository, then configure the application as a DigitalOcean app. You’ll connect the app to your source code and deploy the project as a set of static files.
By the end of this tutorial, you’ll be able to configure a React application to deploy automatically on every push to the main branch of a GitHub repository.
Prerequisites
-
On your local machine, you will need a development environment running Node.js; this tutorial was tested on Node.js version 10.22.0 and npm version 6.14.6. To install this on macOS or Ubuntu 20.04, follow the steps in How to Install Node.js and Create a Local Development Environment on macOS or the Installing Node.js with Apt Using a NodeSource PPA section of How To Install Node.js on Ubuntu 20.04.
-
Git installed on your local machine. You can follow the tutorial Contributing to Open Source: Getting Started with Git to install and set up Git on your computer.
-
A DigitalOcean account.
-
An account on GitHub, which you can create by going to the Create your Account page.
-
You will also need a basic knowledge of JavaScript, HTML, and CSS, which you can find in our How To Build a Website With HTML series, How To Build a Website With CSS series, and in How To Code in JavaScript.
Step 1 — Creating a React Project
In this step, you’ll create a React application using Create React App and build a deployable version of it.
To start, create a new application using Create React App on your local machine. In a terminal, run the command to build an application called digital-ocean-app:
- npx create-react-app digital-ocean-app
The npx command will run a Node package without downloading it to your machine. The create-react-app script will install all of the dependencies and will build a base project in the digital-ocean-app directory. For more on Create React App, check out the tutorial How To Set Up a React Project with Create React App.
The code will download the dependencies and will create a base project. It may take a few minutes to finish. When it is complete, you will receive a success message. Your version may be slightly different if you use yarn instead of npm:
OutputSuccess! Created digital-ocean-app at your_file_path/digital-ocean-app
Inside that directory, you can run several commands:

  npm start
    Starts the development server.

  npm build
    Bundles the app into static files for production.

  npm test
    Starts the test runner.

  npm eject
    Removes this tool and copies build dependencies, configuration files
    and scripts into the app directory. If you do this, you can’t go back!

We suggest that you begin by typing:

  cd digital-ocean-app
  npm start

Happy hacking!
Now that you have a base project, run it locally so you can test how the project will appear on the server. First, change into the directory:
- cd digital-ocean-app
Run the project using the npm start script:
- npm start
When the command runs, you’ll receive output with the URL for the local development server:
OutputCompiled successfully!

You can now view digital-ocean-app in the browser.

  Local:            http://localhost:3000
  On Your Network:  http://192.168.1.110:3000

Note that the development build is not optimized.
To create a production build, use npm build.
Open a browser to http://localhost:3000 and you’ll find your project:
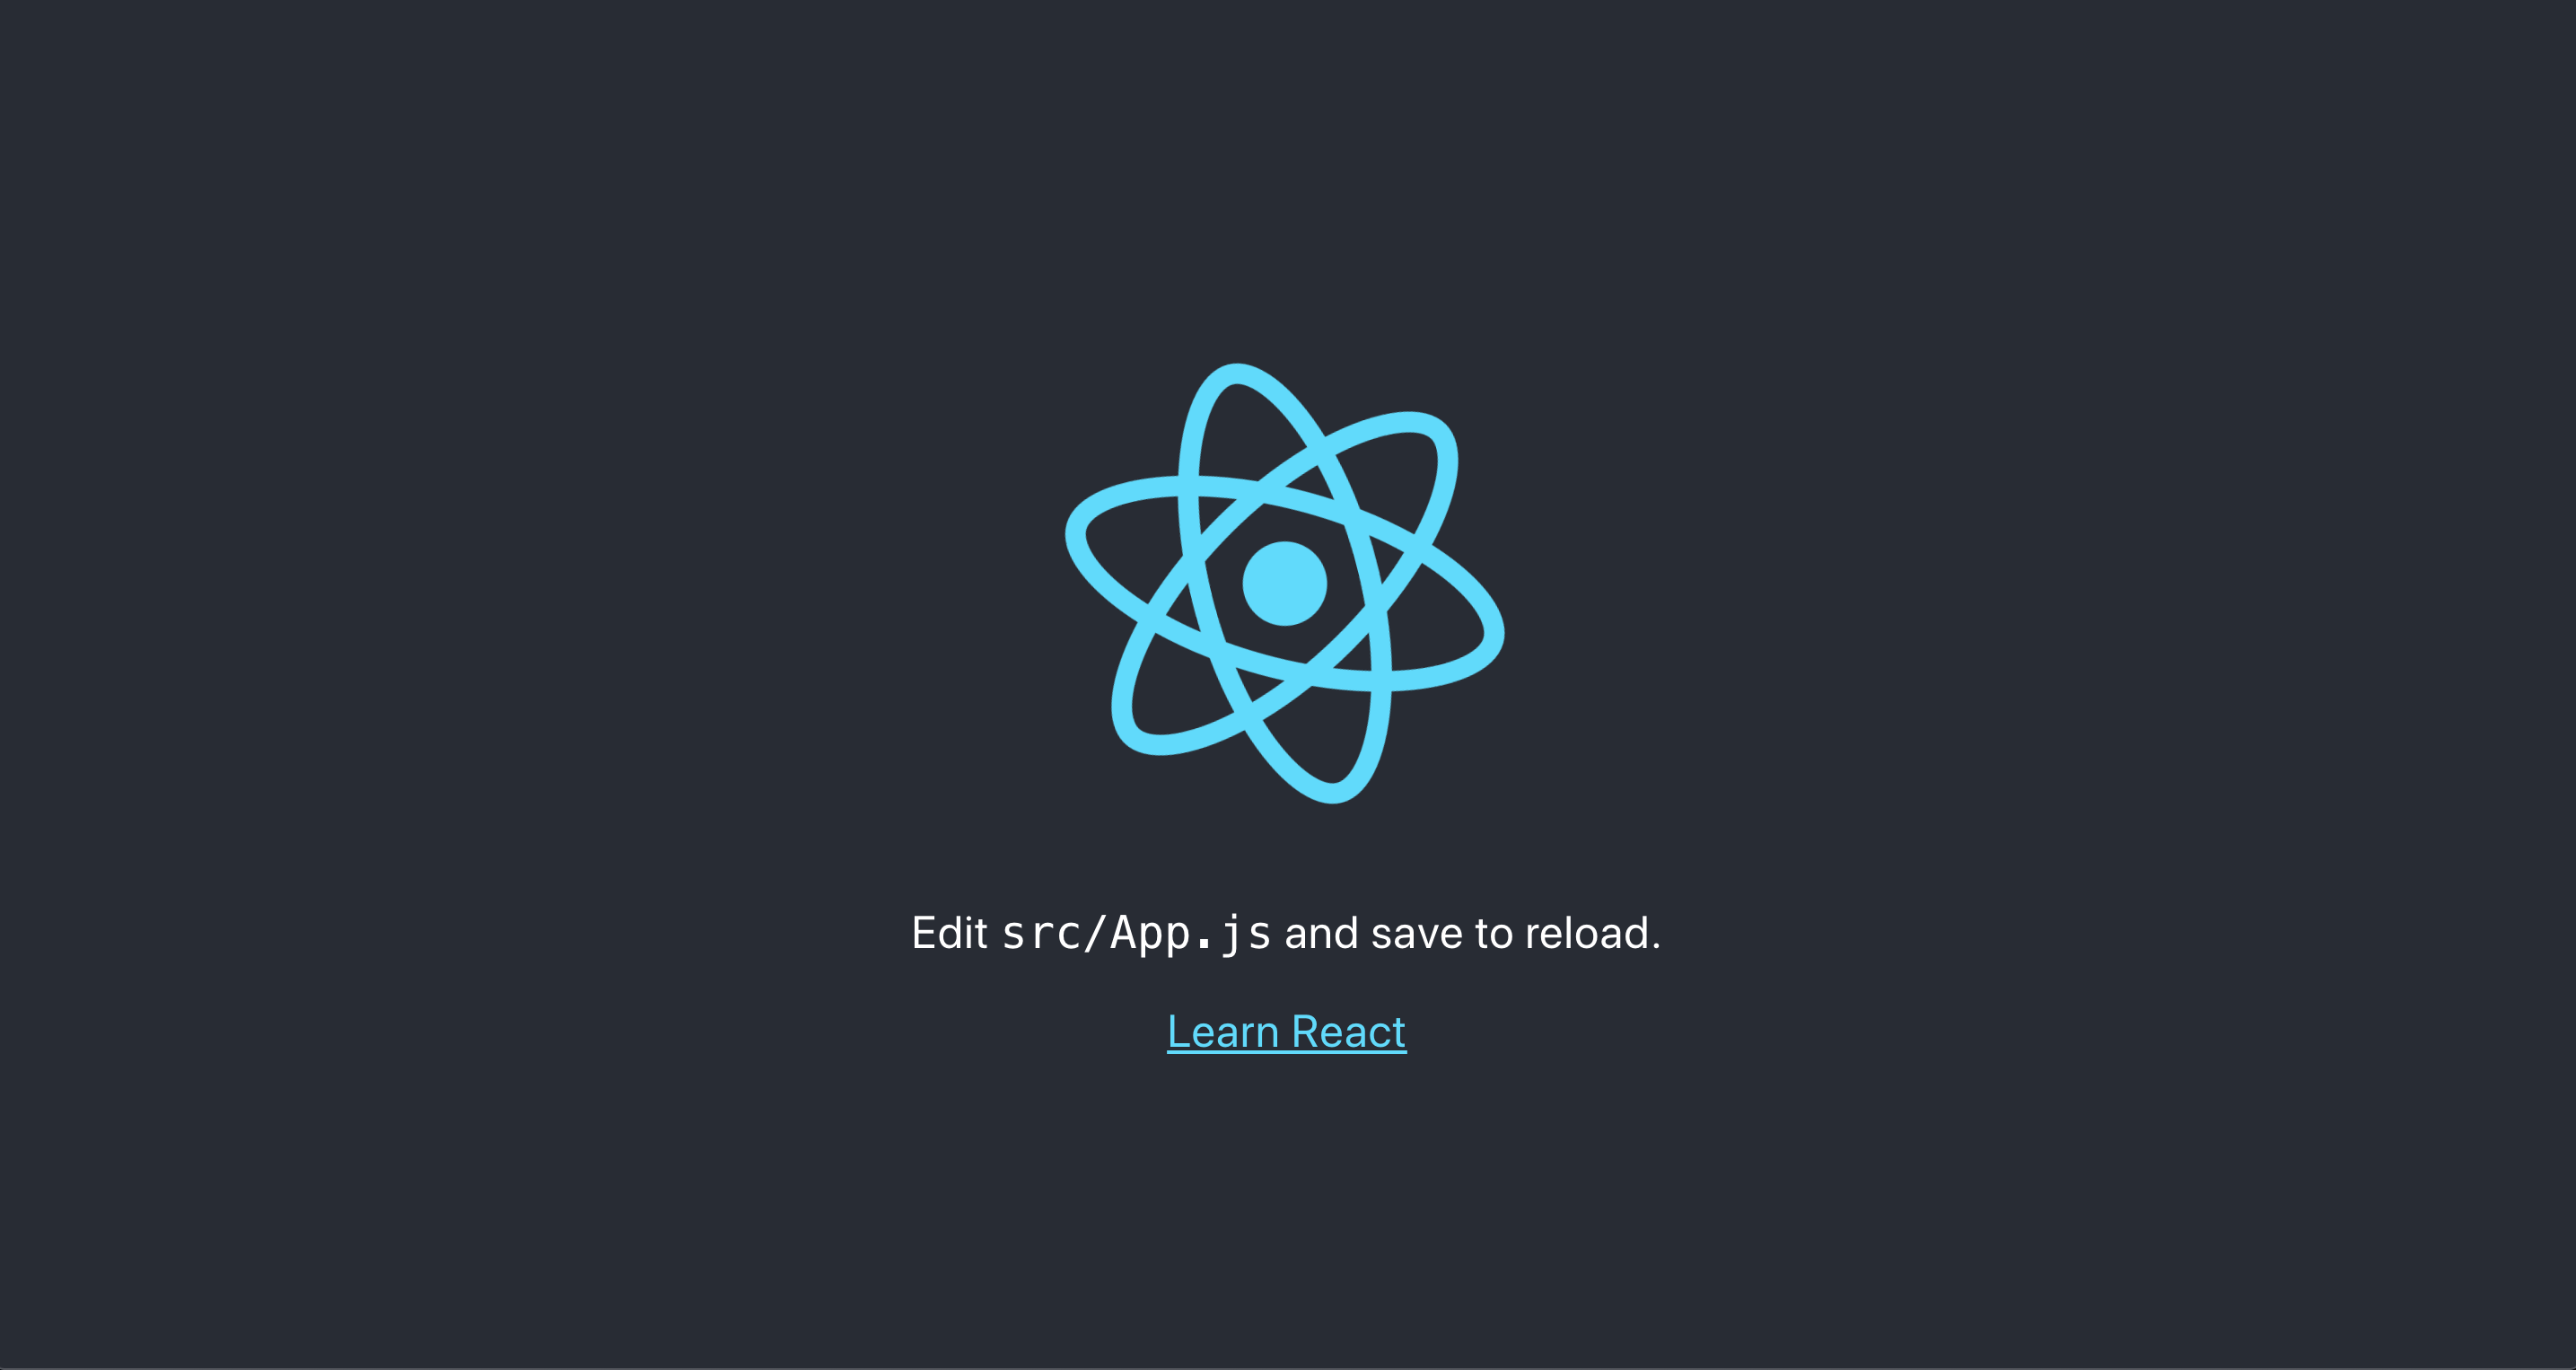
Stop the project by typing either CTRL+C or ⌘+C in the terminal.
Now that you have a working React application, you can push the code to a GitHub repository.
Step 2 — Pushing the Code to GitHub
To deploy your app, App Platform retrieves your source code from a hosted code repository. In this step, you will push your React app code to a GitHub repository so that App Platform can access it later.
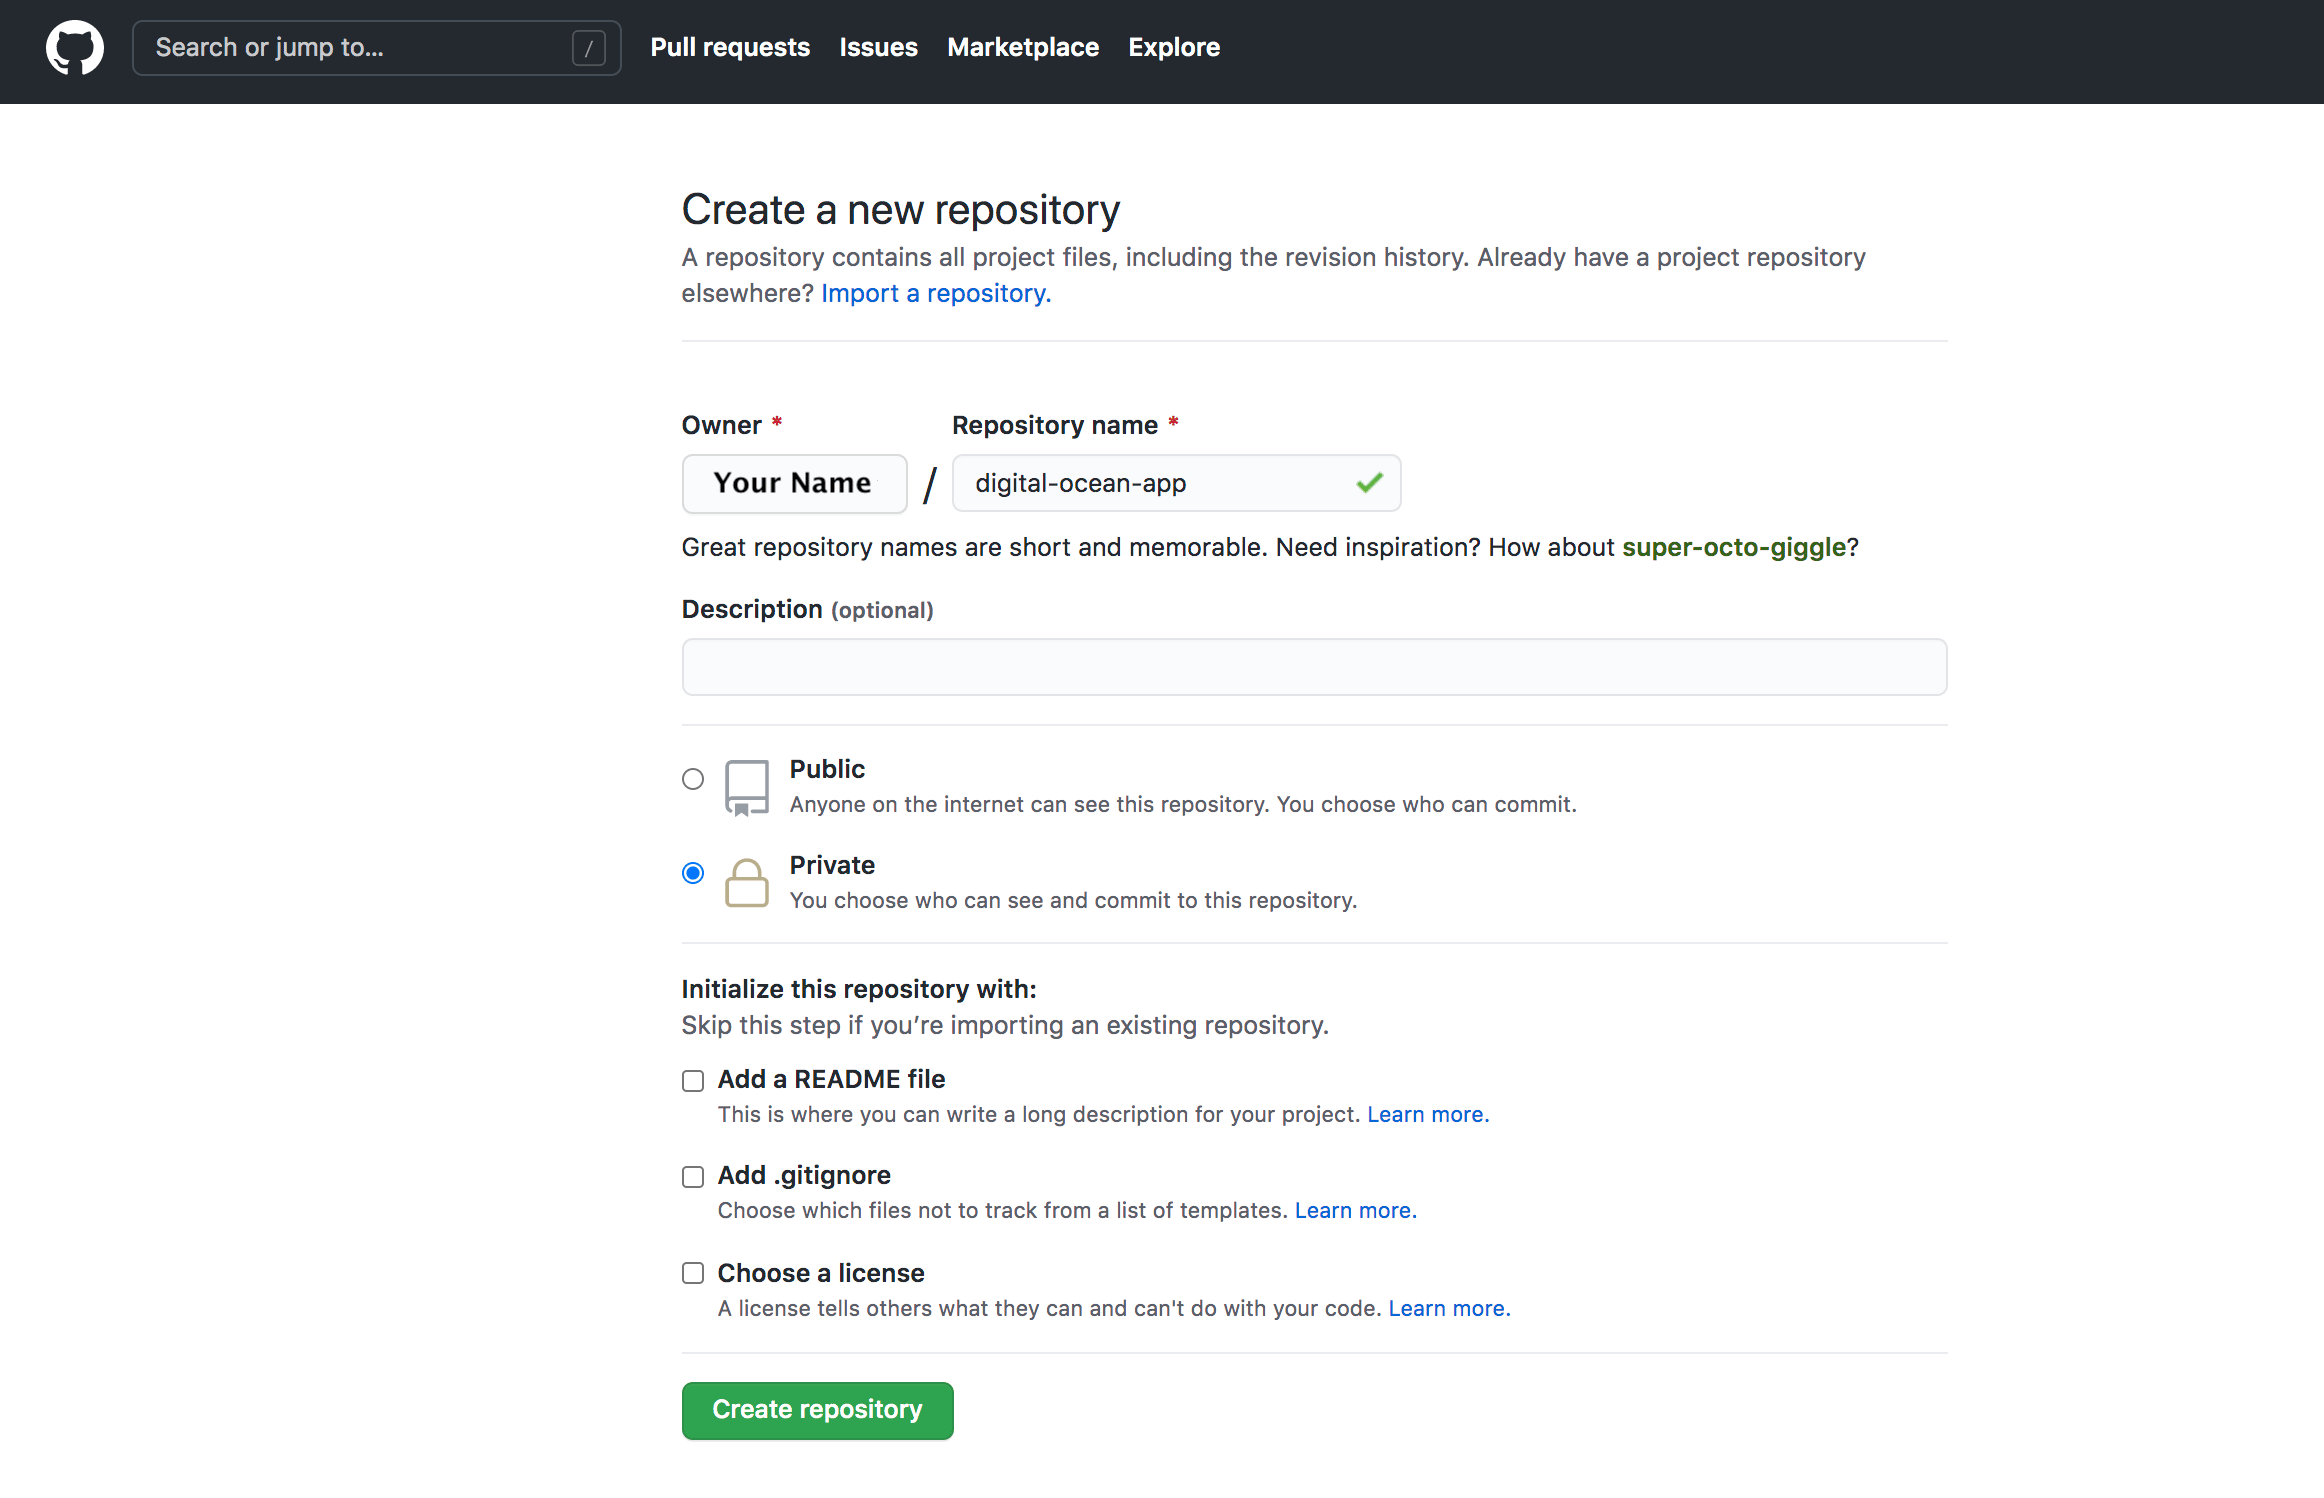
Log in to your GitHub account. After you log in, create a new repository called digital-ocean-app. You can make the repository either private or public:
Create React App automatically initializes your project with git, so you can set up to push the code directly to GitHub. First, add the repository that you’d like to use with the following command:
- git remote add origin https://github.com/your_name/digital-ocean-app.git
Next, declare that you want to push to the main branch with the following:
- git branch -M main
Finally, push the code to your repository:
- git push -u origin main
Enter your GitHub credentials when prompted to push your code.
When you push the code you will receive a success message. Your message will be slightly different:
OutputCounting objects: 22, done.
Delta compression using up to 4 threads.
Compressing objects: 100% (22/22), done.
Writing objects: 100% (22/22), 187.50 KiB | 6.94 MiB/s, done.
Total 22 (delta 0), reused 0 (delta 0)
To github.com:your_name/digital-ocean-app.git
   4011c66..647d2e1  main -> main
You’ve now copied your code to the GitHub repository.
In this step, you pushed your project to GitHub so that you can access it using DigitalOcean Apps. Next, you’ll create a new DigitalOcean App using your project and set up automatic deployment.
Step 3 — Deploying to DigitalOcean App Platform
In this step, you’ll deploy a React application to the DigitalOcean App Platform. You’ll connect your GitHub repository to DigitalOcean, configure the project to build, and build your initial project. After the project is live, each change will trigger a new build and update.
By the end of this step, you’ll be able to deploy an application with continous delivery on DigitalOcean.
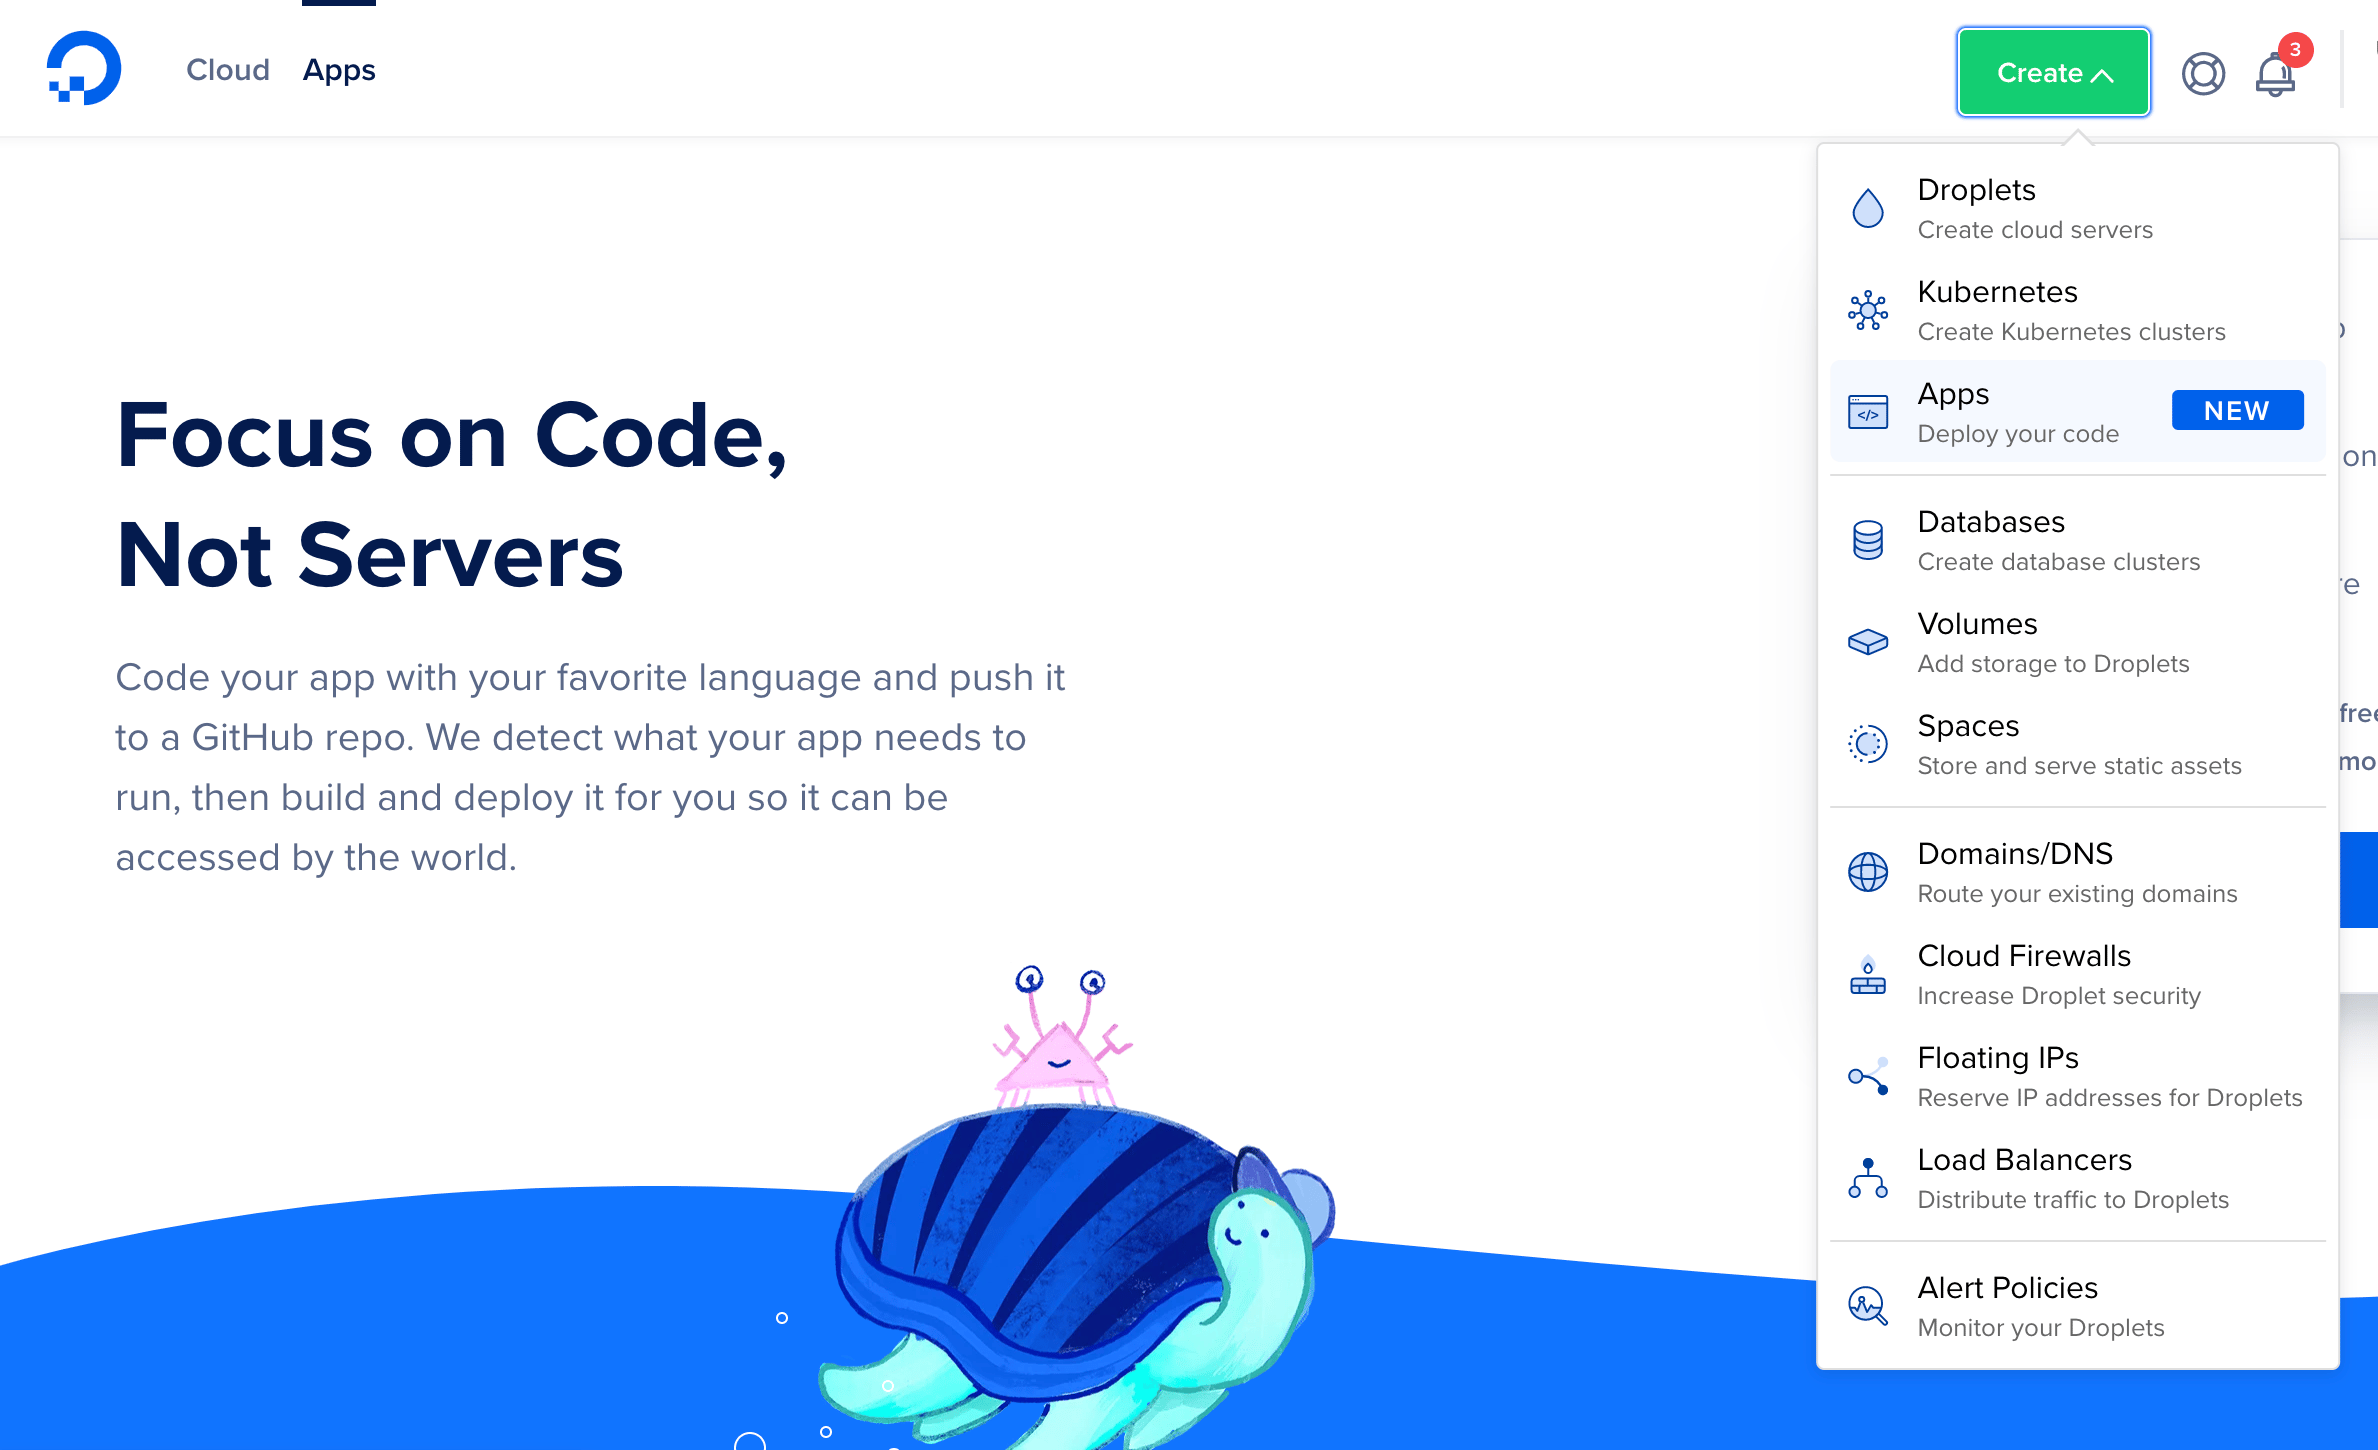
To begin, log in to your DigitalOcean account and press the Create button, then select Apps:
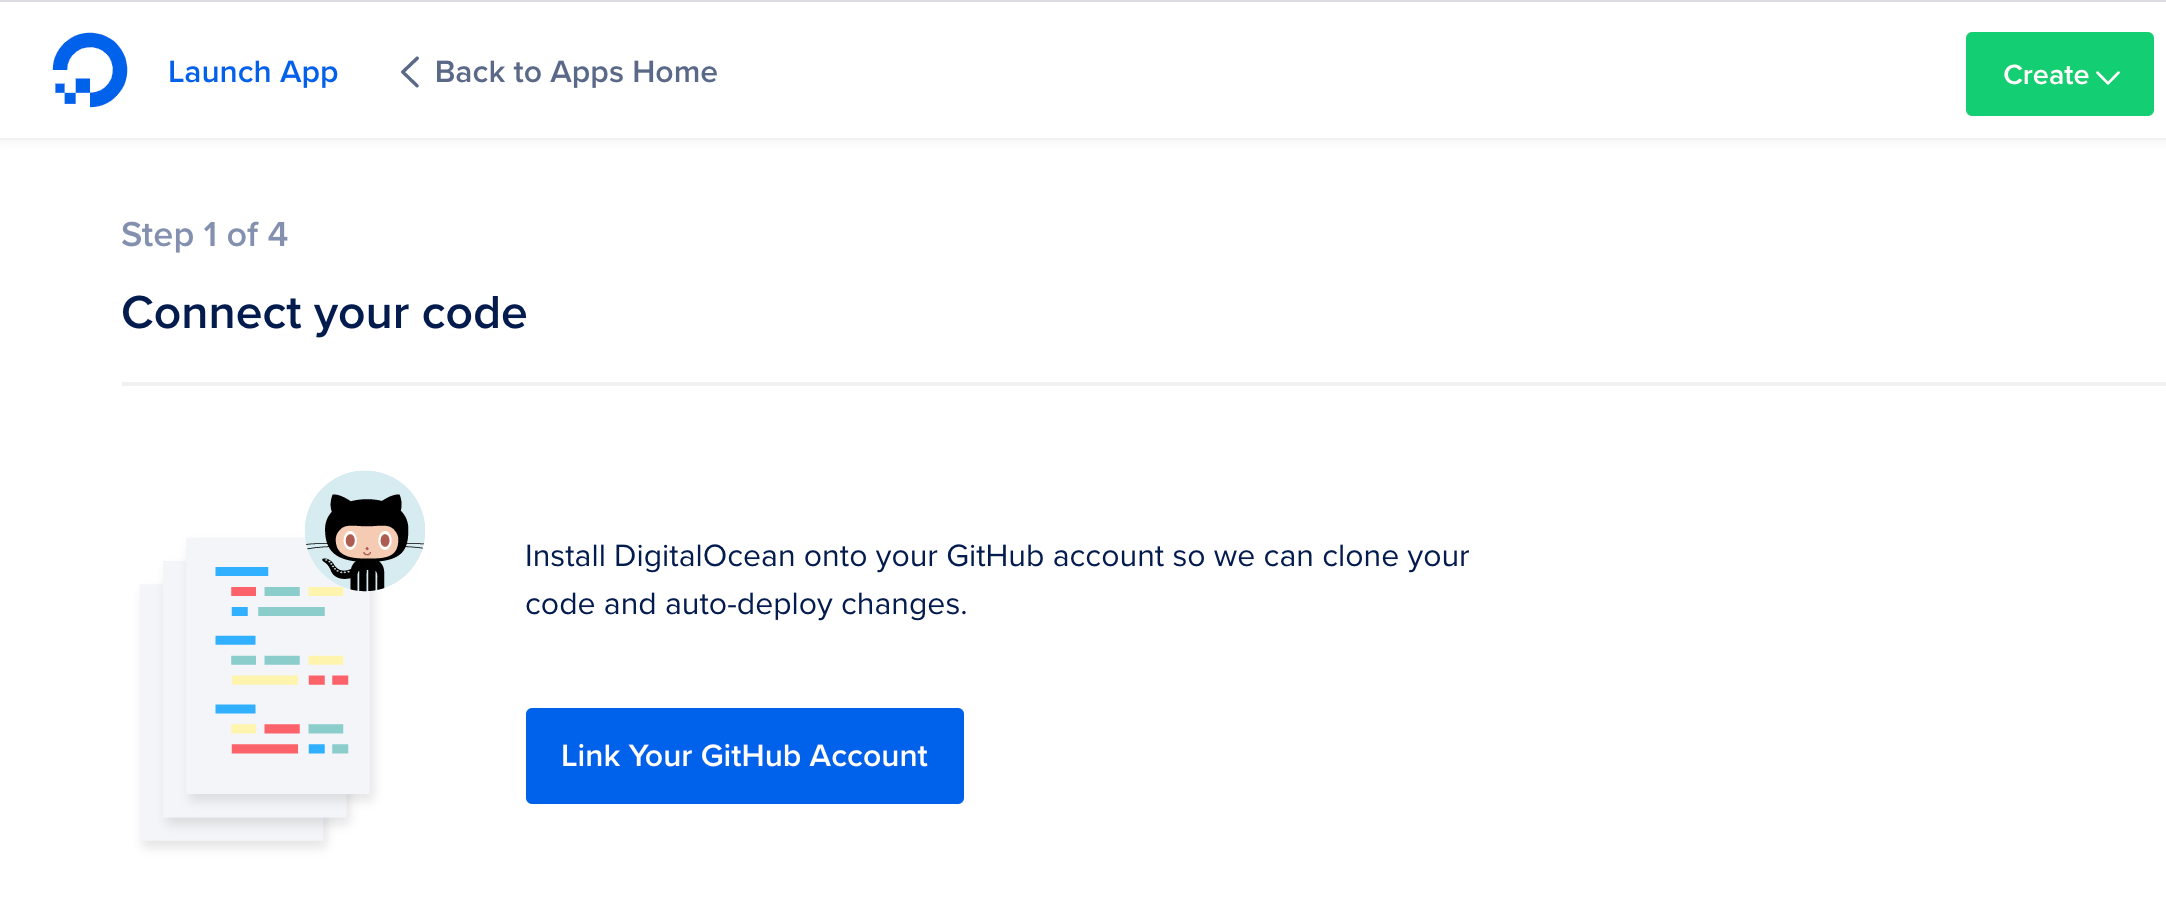
You’ll next be prompted to link your GitHub repository. If you have not yet connected it, you will need to log in with your username and password and give DigitalOcean authorization to access your repositories:
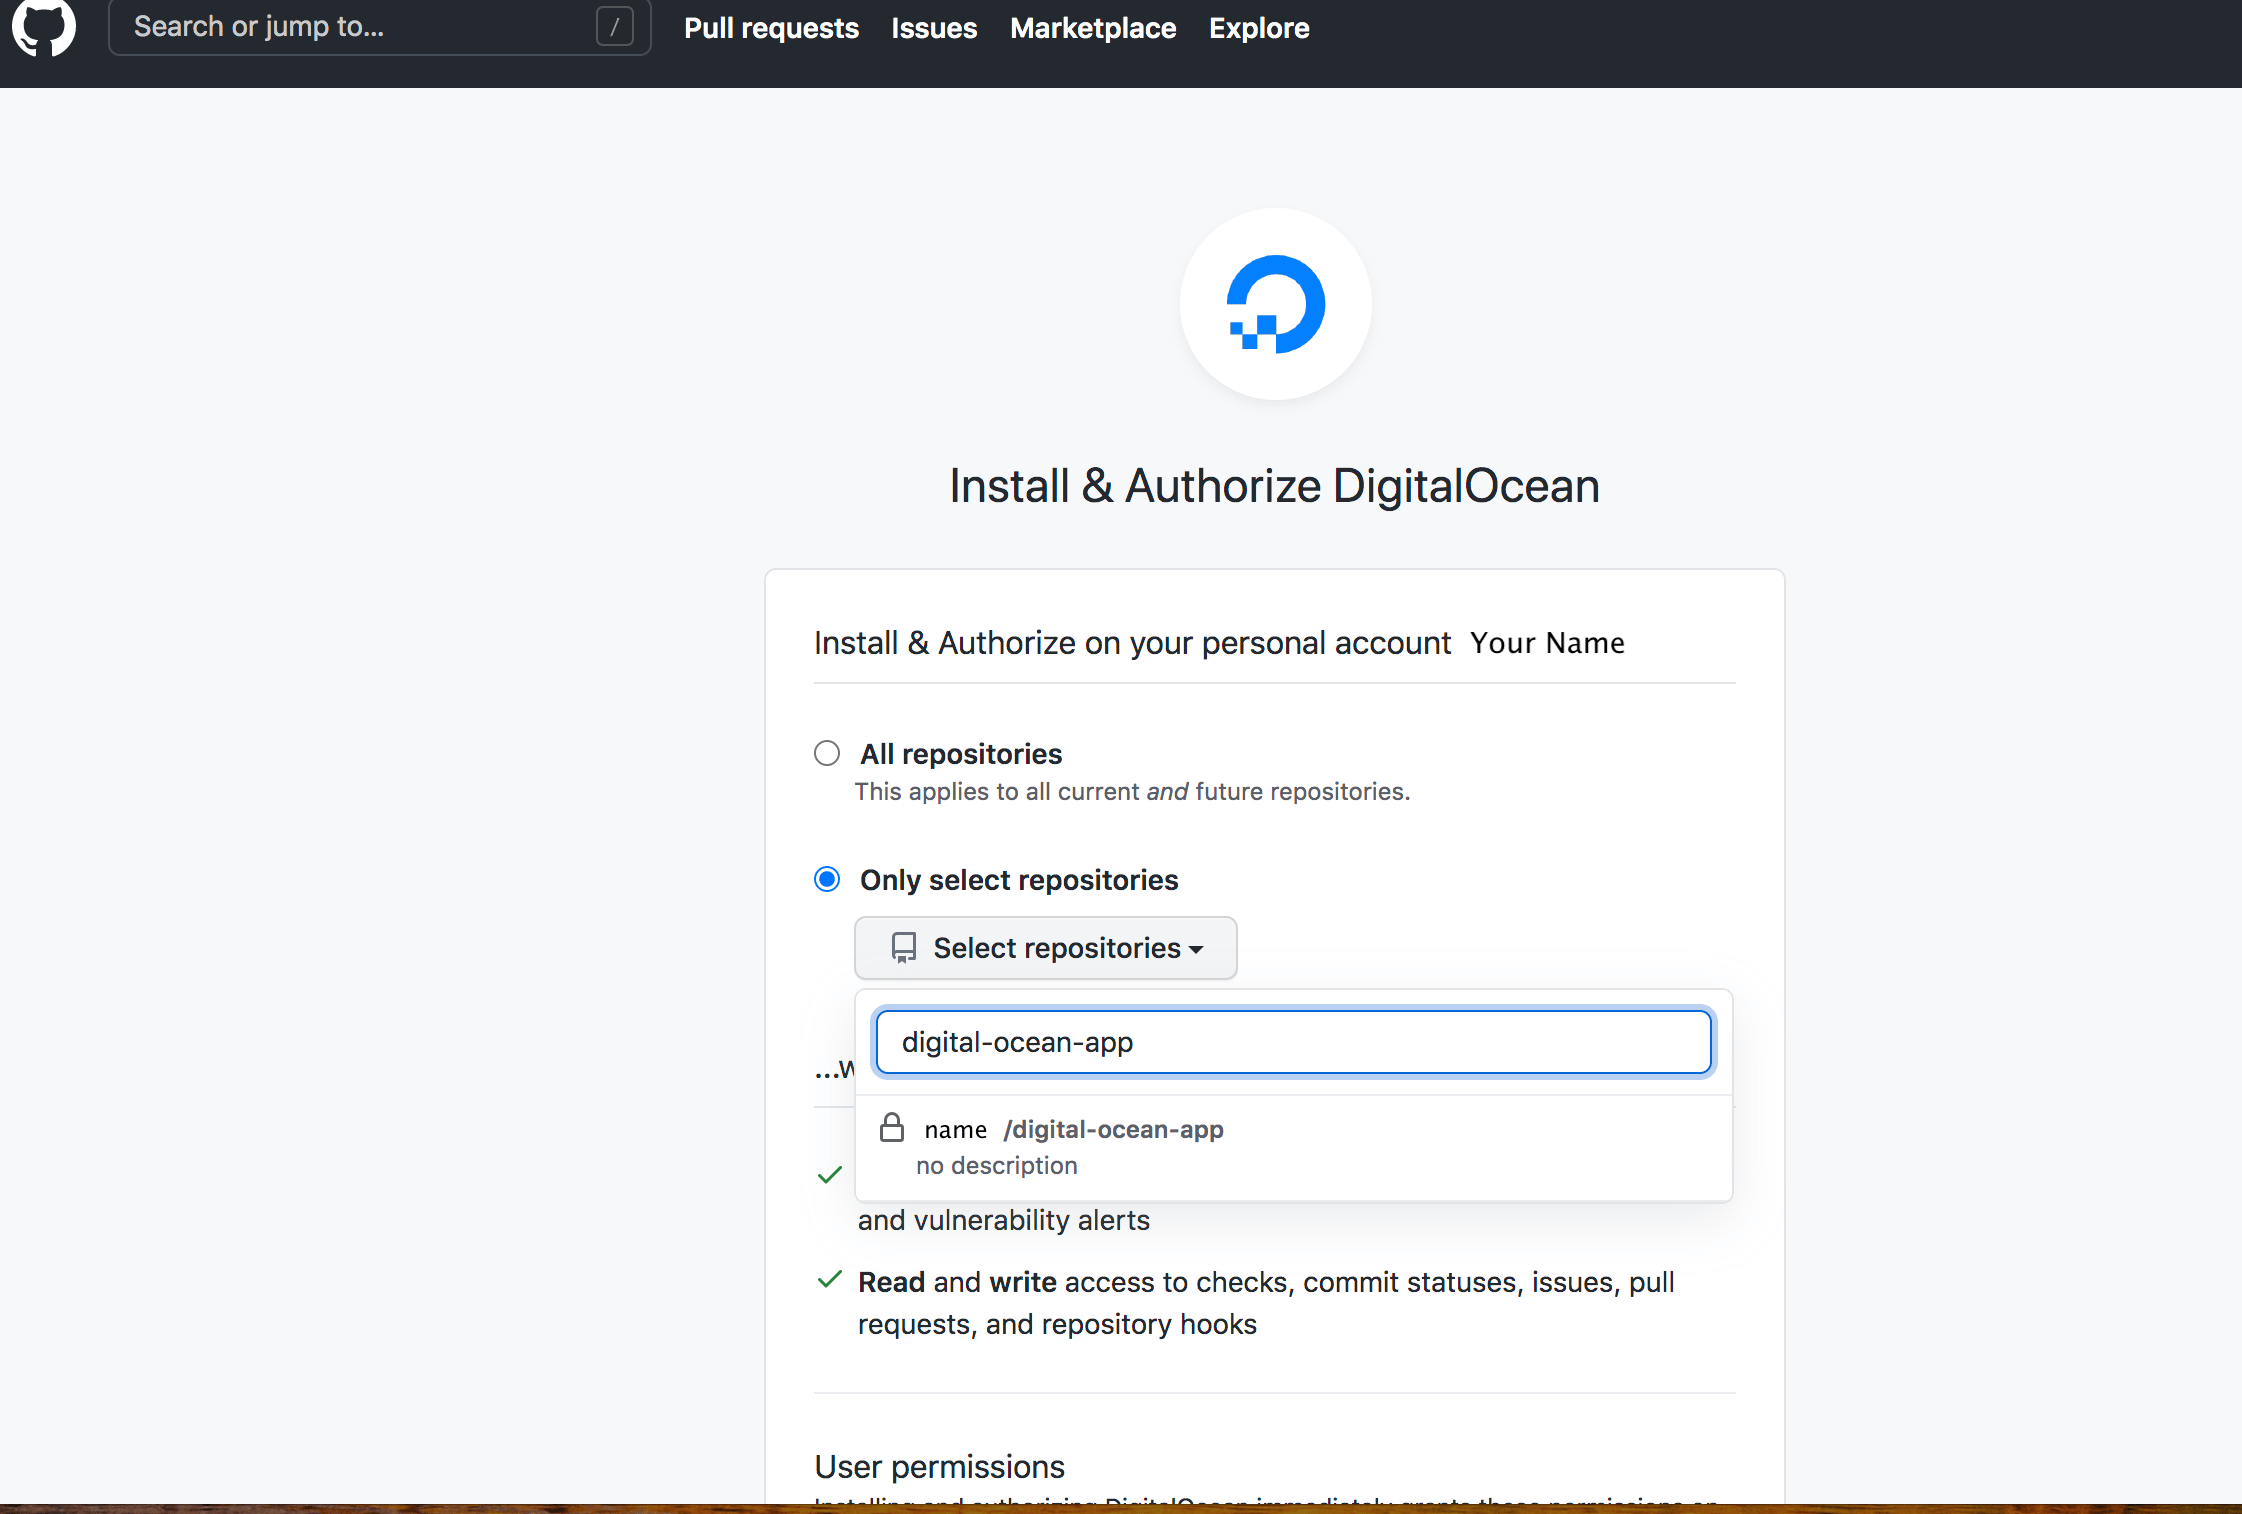
Once you link your account, select the repository you’d like to connect on the GitHub authorization screen. In this case, you are using the digital-ocean-app repository, but you can connect more repositories if you would like:
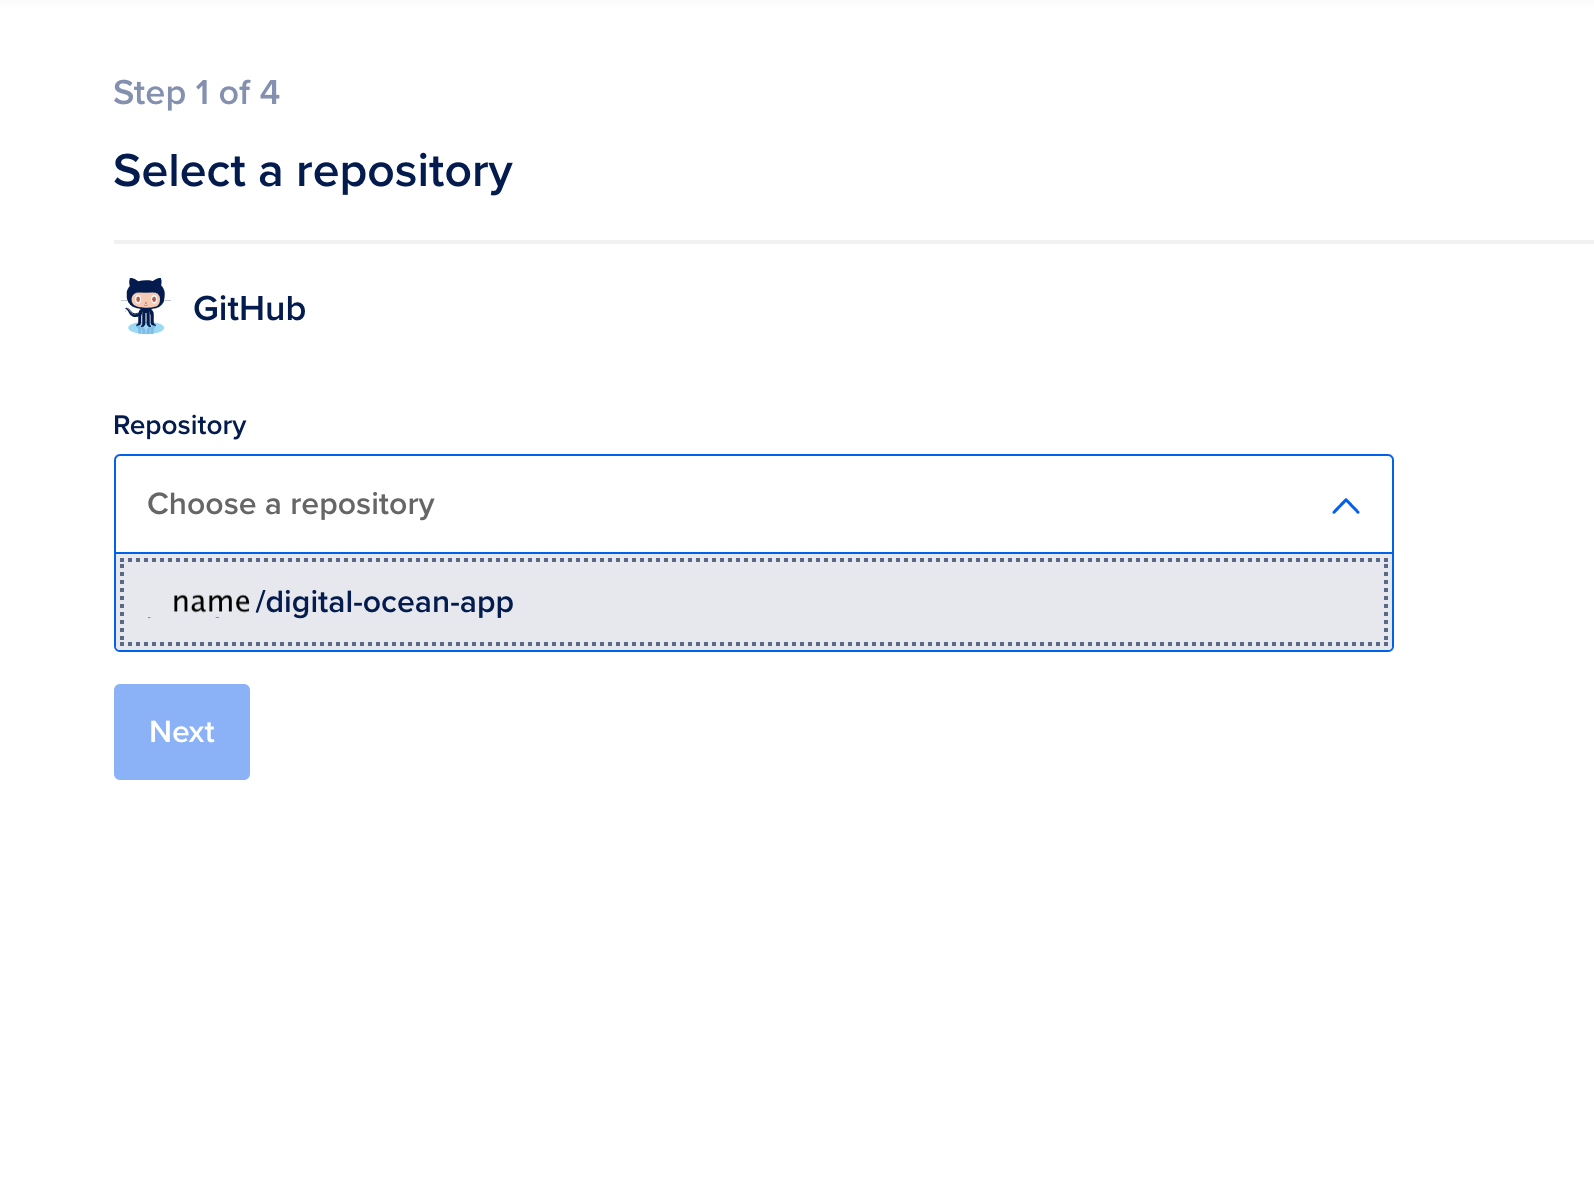
After selecting the repository, you will reconnect to the DigitalOcean interface. Select digital-ocean-app from the list of repositories, then press Next. This will connect your App directly to the GitHub repo:
Now that you have selected your repository, you need to configure the DigitalOcean App. In this example, the server will be based in North America by choosing New York in the Region field, and the deployment branch will be main. For your app, choose the region that is closest to your physical location:
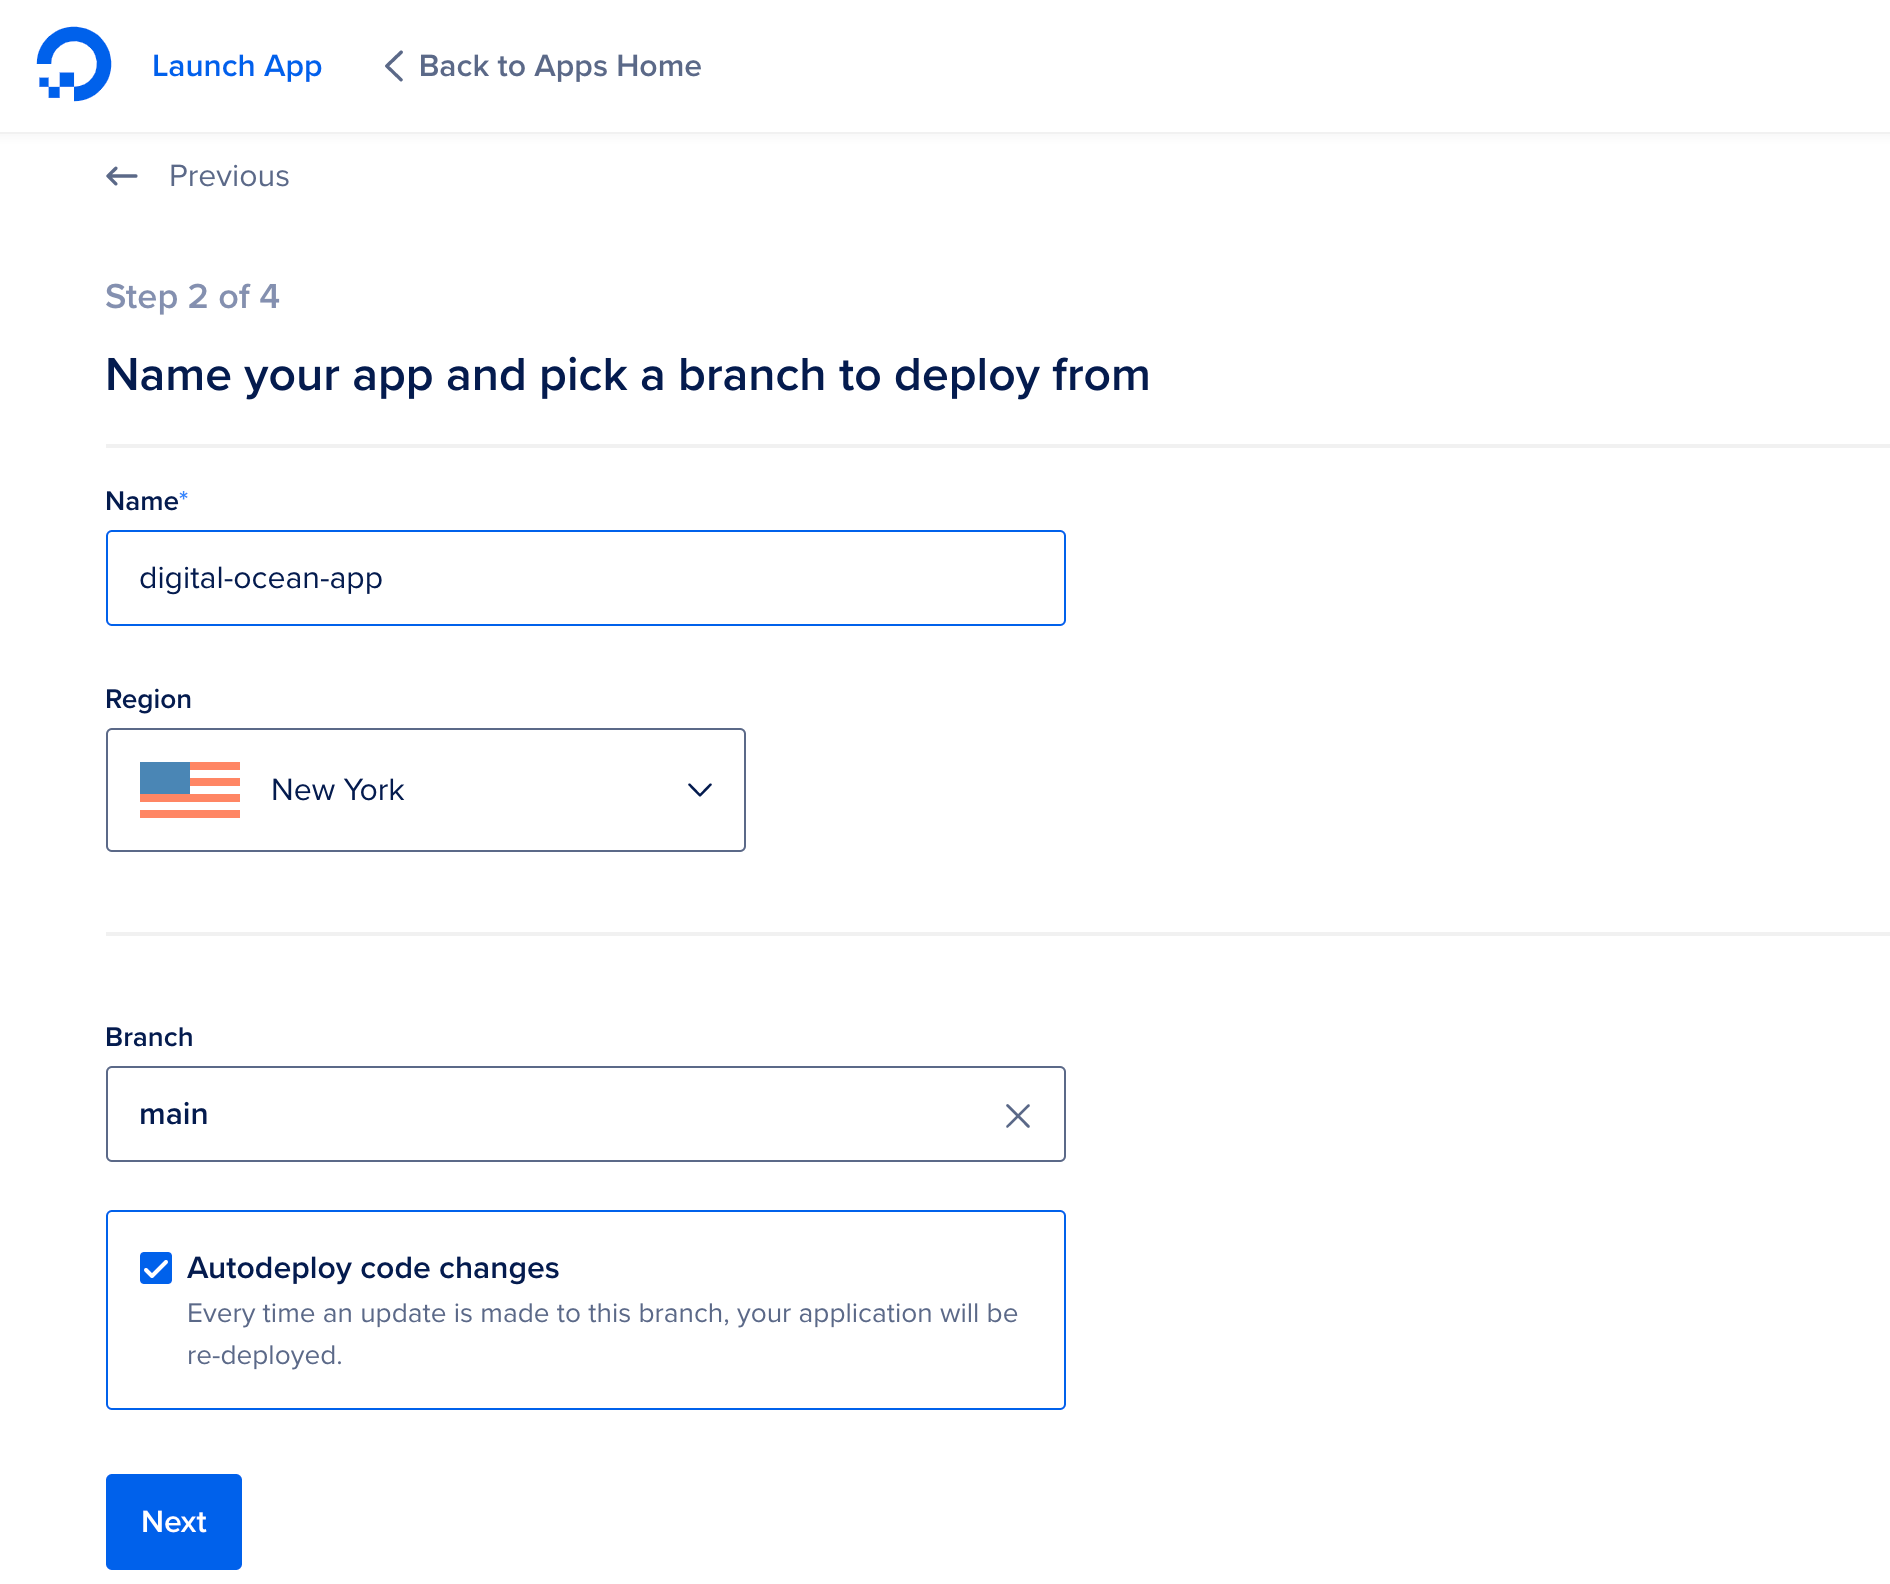
For this tutorial, you are checking Autodeploy code changes. This will automatically rebuild your app every time you update the code.
Press Next to move on to the Configure your app screen.
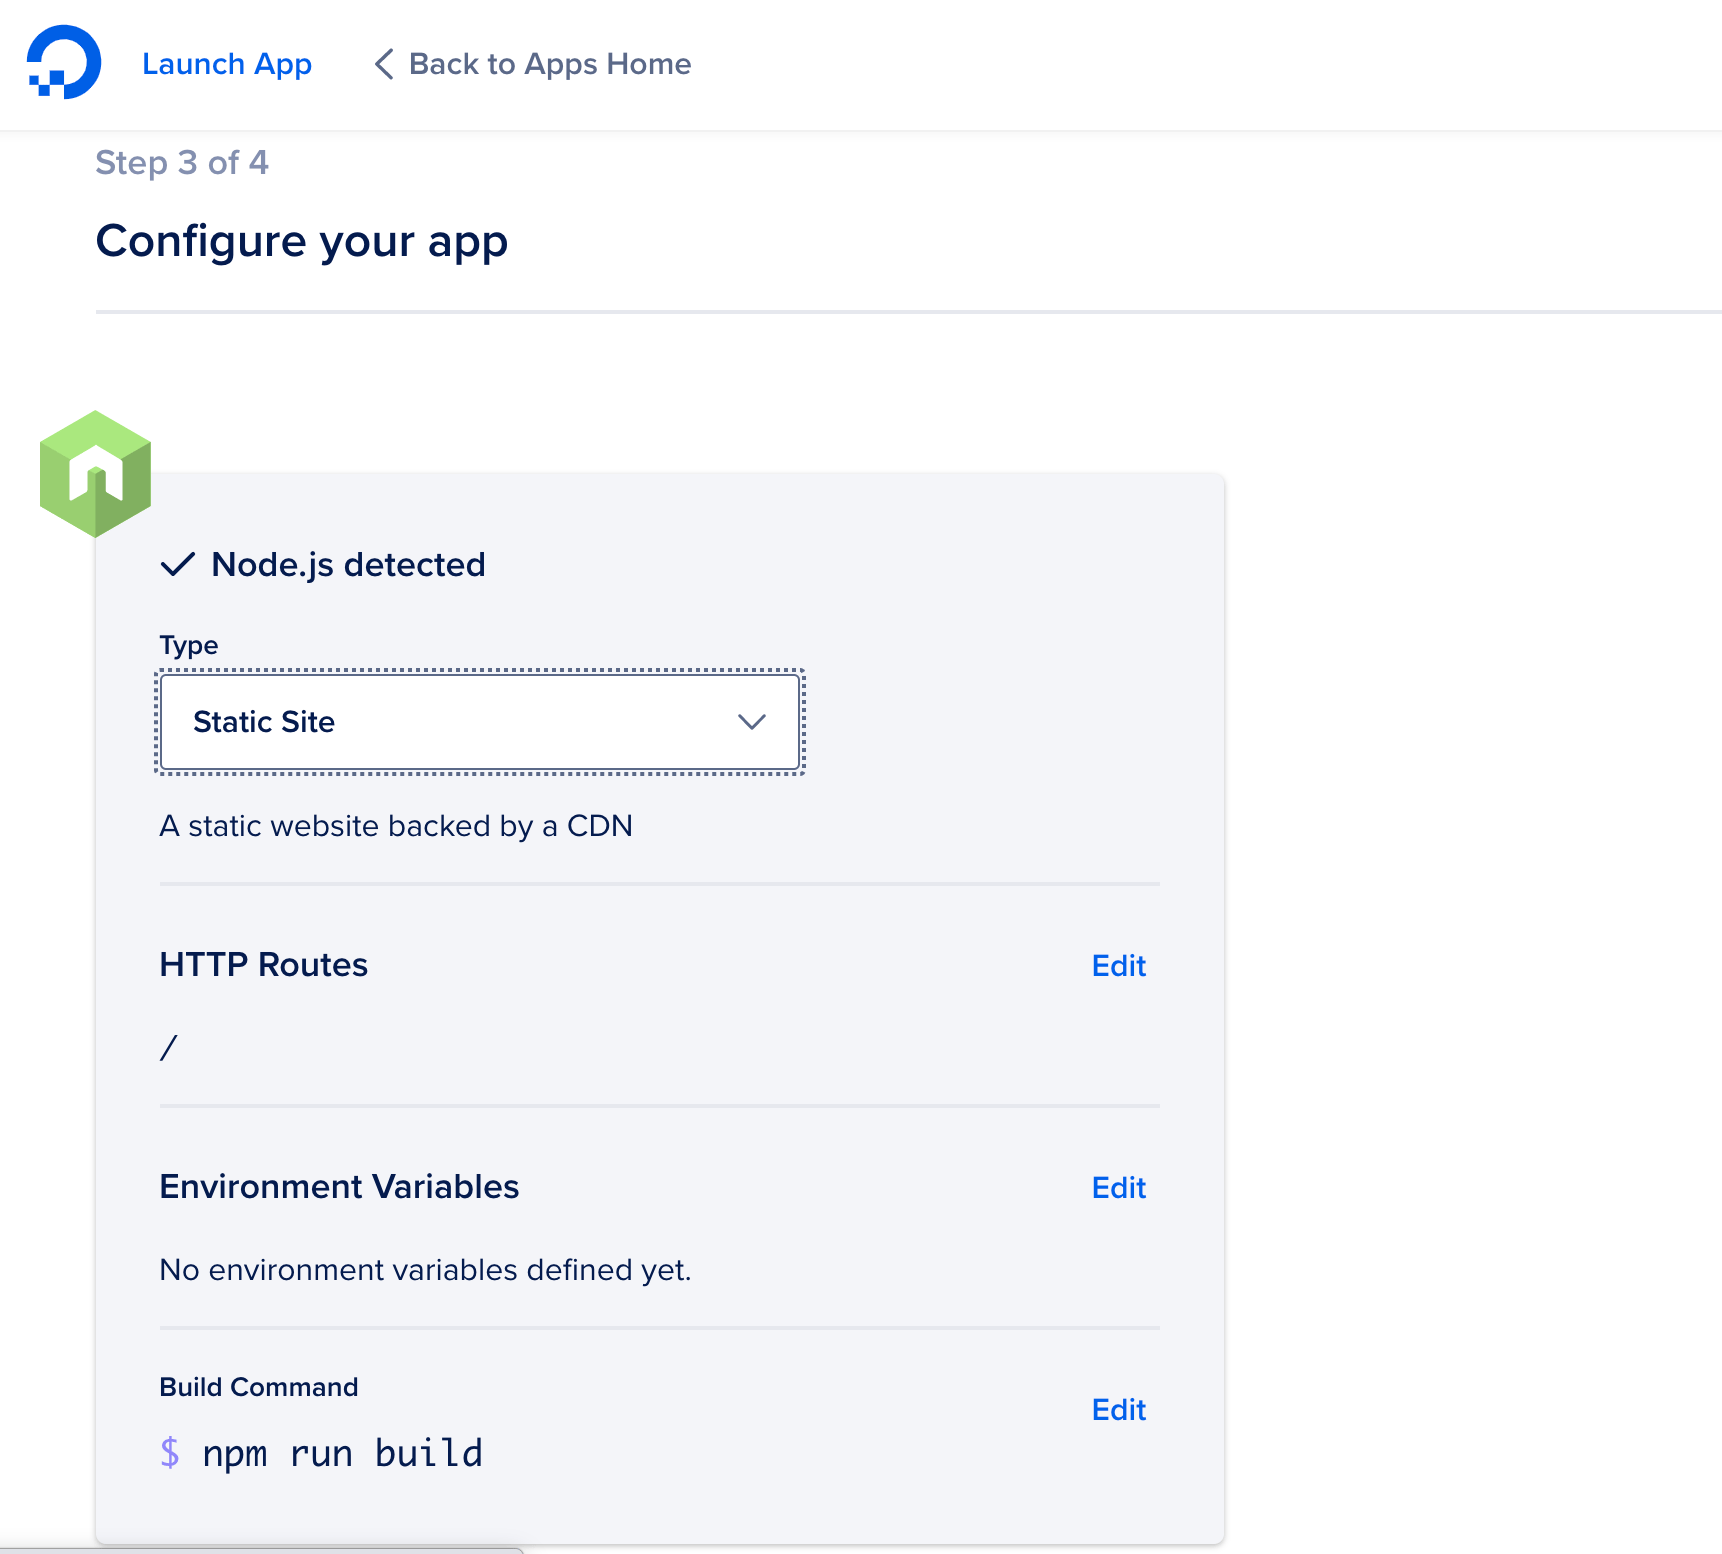
Next, select the type of application you will run. Since React will build static assets, select Static Site from the dropdown menu in the Type field.
Note: Create React App is not a static site generator like Gatsby, but you are using static assets, since the server does not need to run any server-side code such as Ruby or PHP. The app will use Node to run the install and build steps, but will not execute application code at the free tier.
You also have the option to use a custom build script. But in this case, you can stick with the default npm run build command. You may want to create a custom build script if you have a different build script for a quality assurance (QA) or a production environment:
Press Next to move on to the Finalize and launch page.
Here you can select the price plan. The free Starter tier is made for static sites, so choose that one:
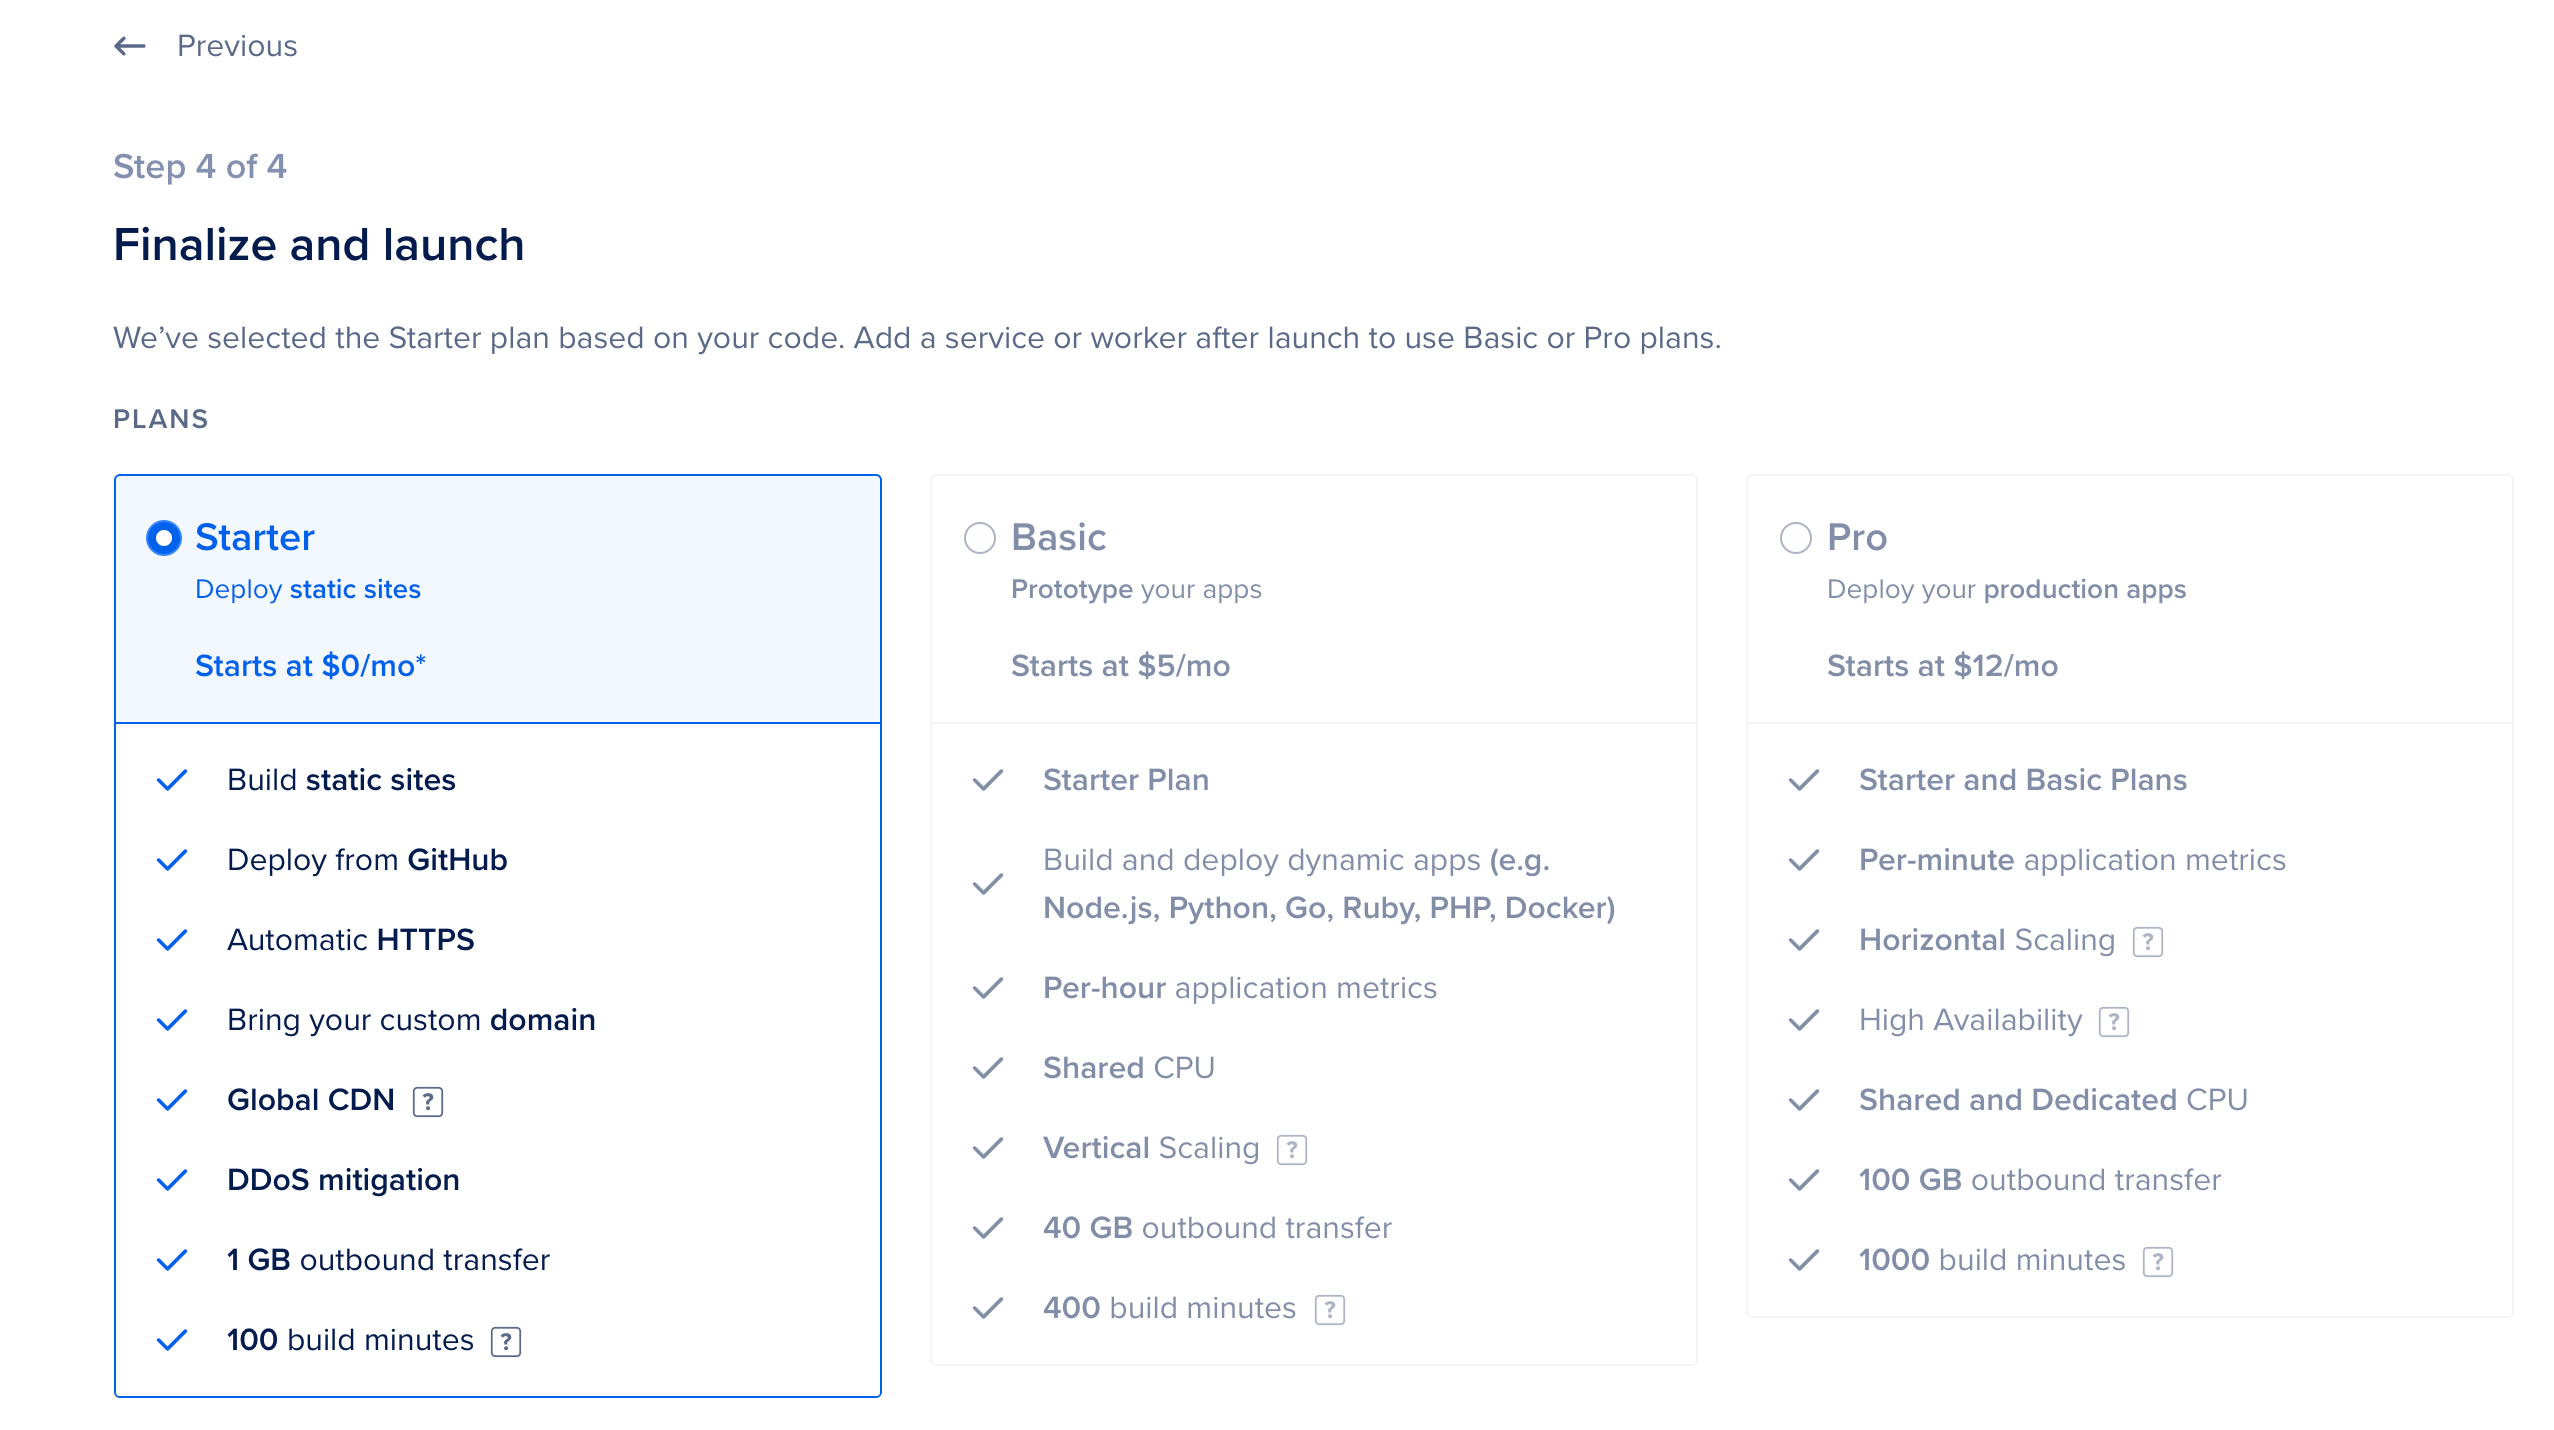
Press the Launch Starter App button and DigitalOcean will start building your application.
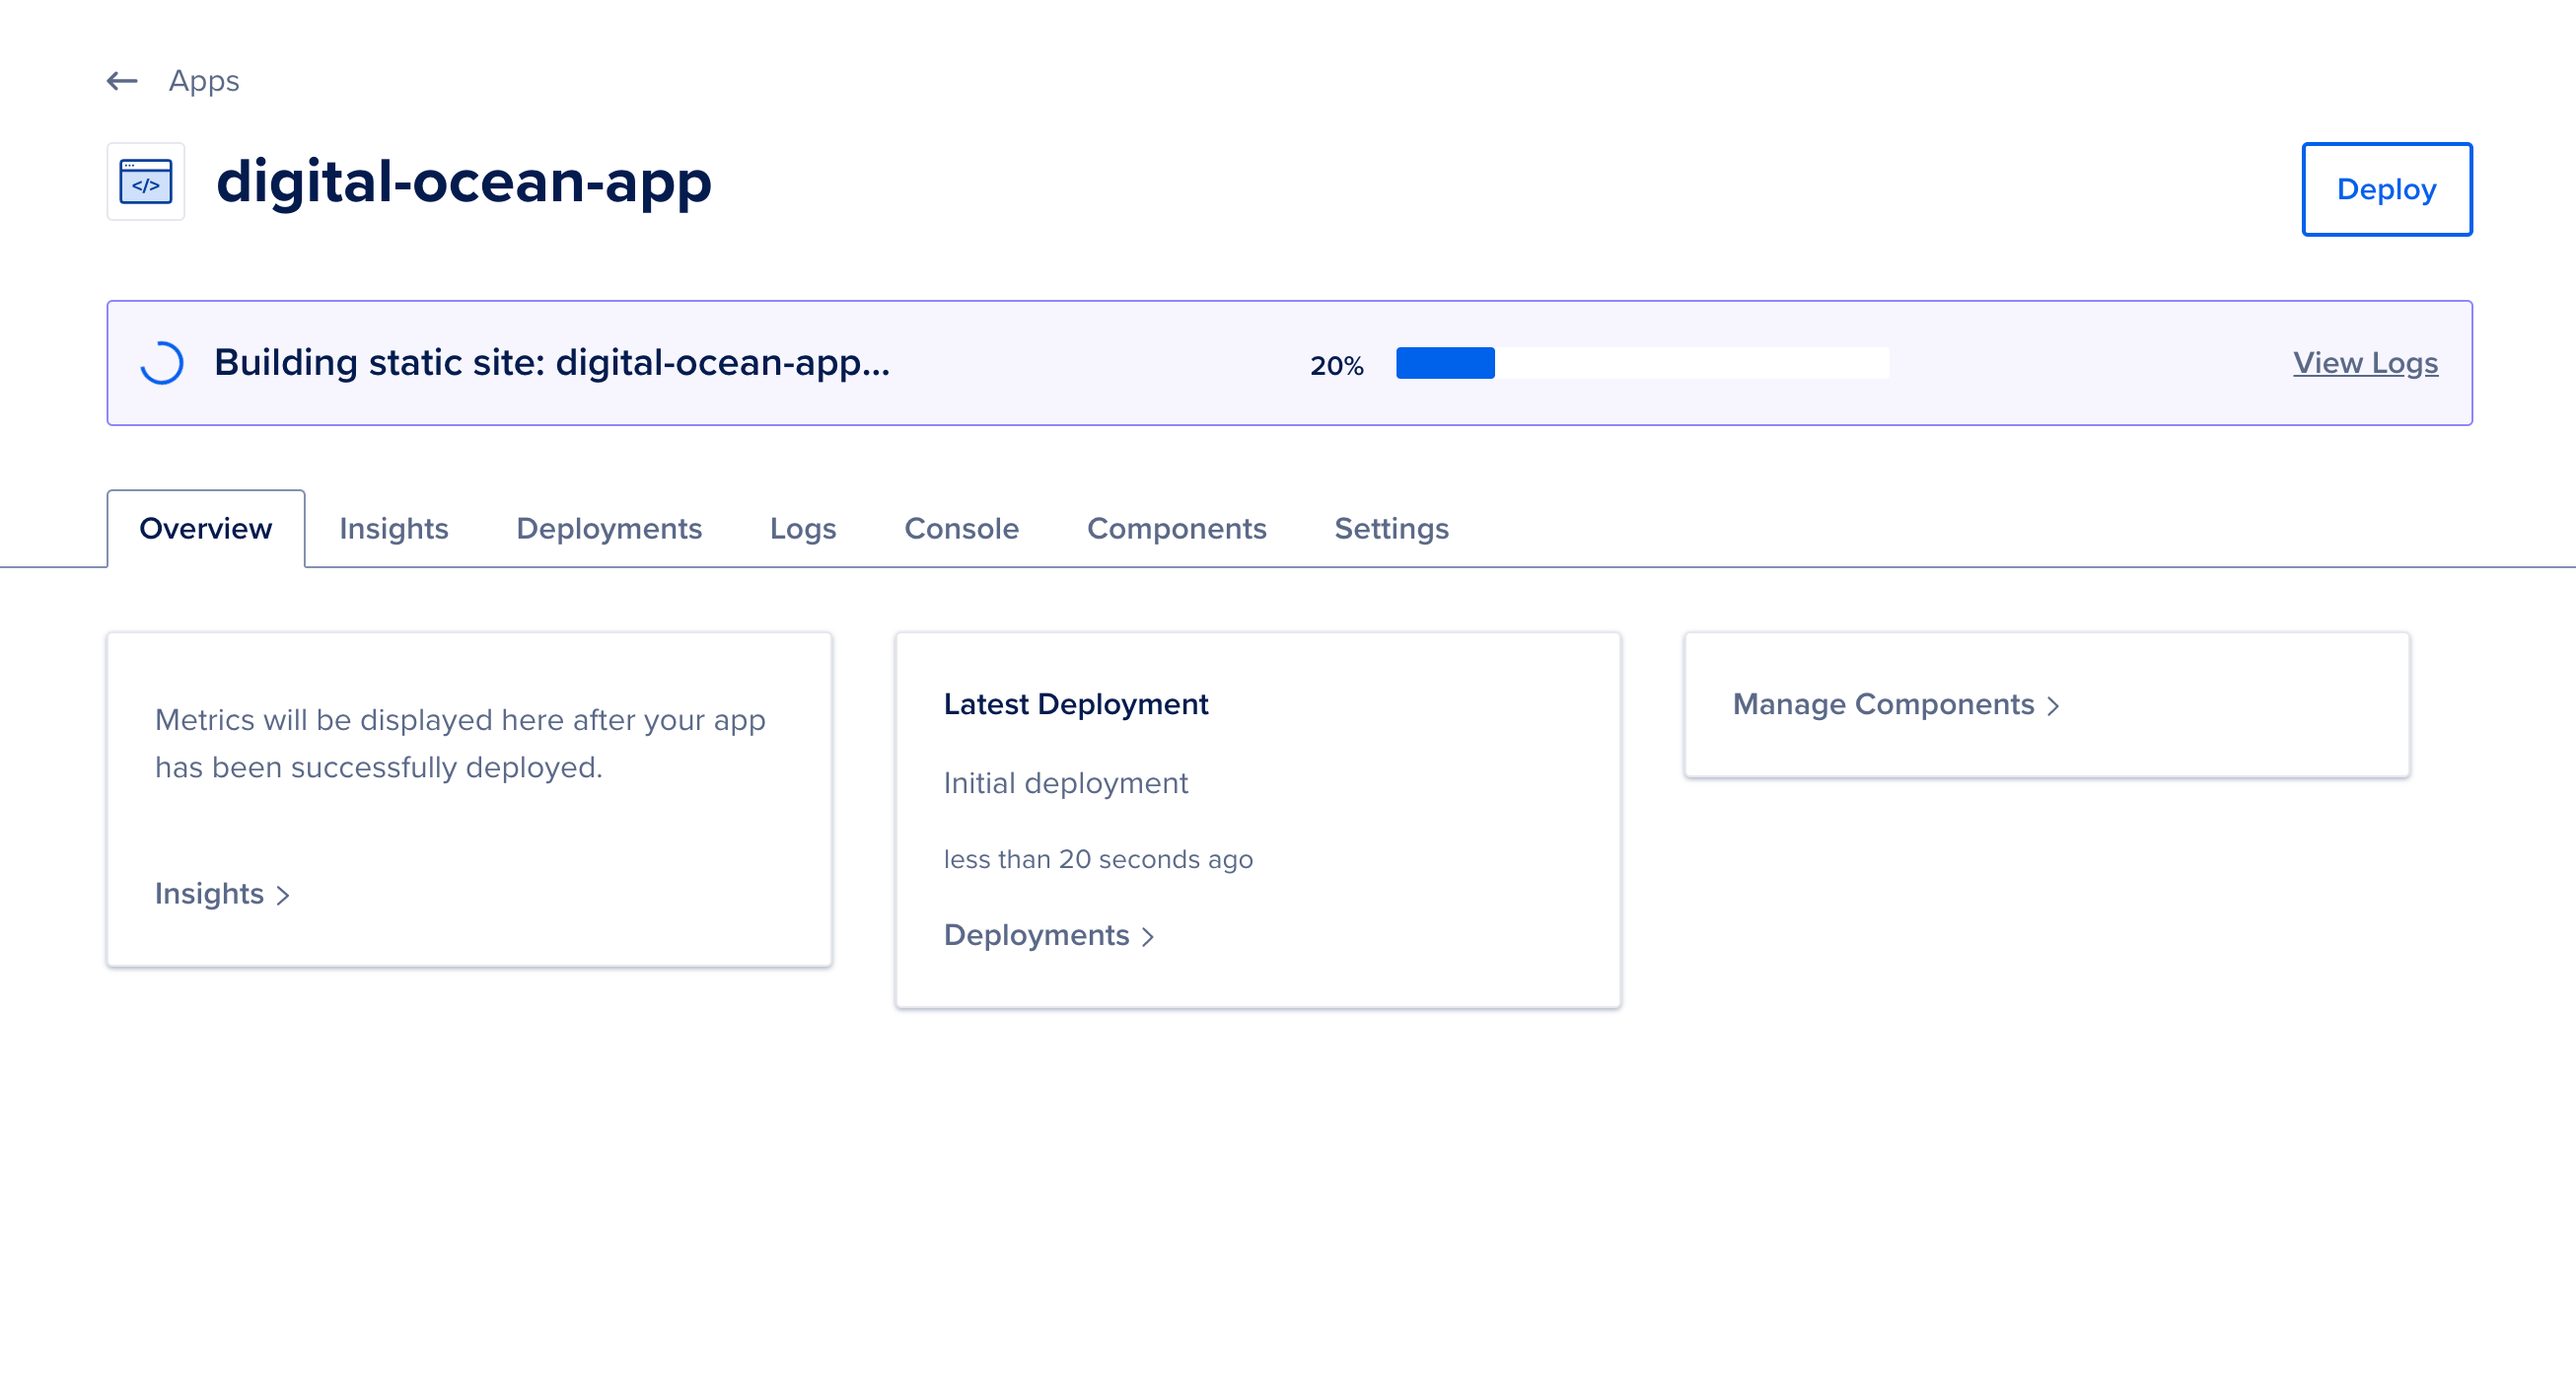
The app will run the npm ci and npm build scripts in your repo. This will download all of the dependencies and create the build directory with a compiled and minified version of all of your JavaScript, HTML files, and other assets. You could also create a custom script in your package.json and update the Commands in the Components tab of your application on App Platform.
It will take a few minutes for the build to run, but when it is finished, you will receive a success message and a link to your new site. Your link will have a unique name and will be slightly different:
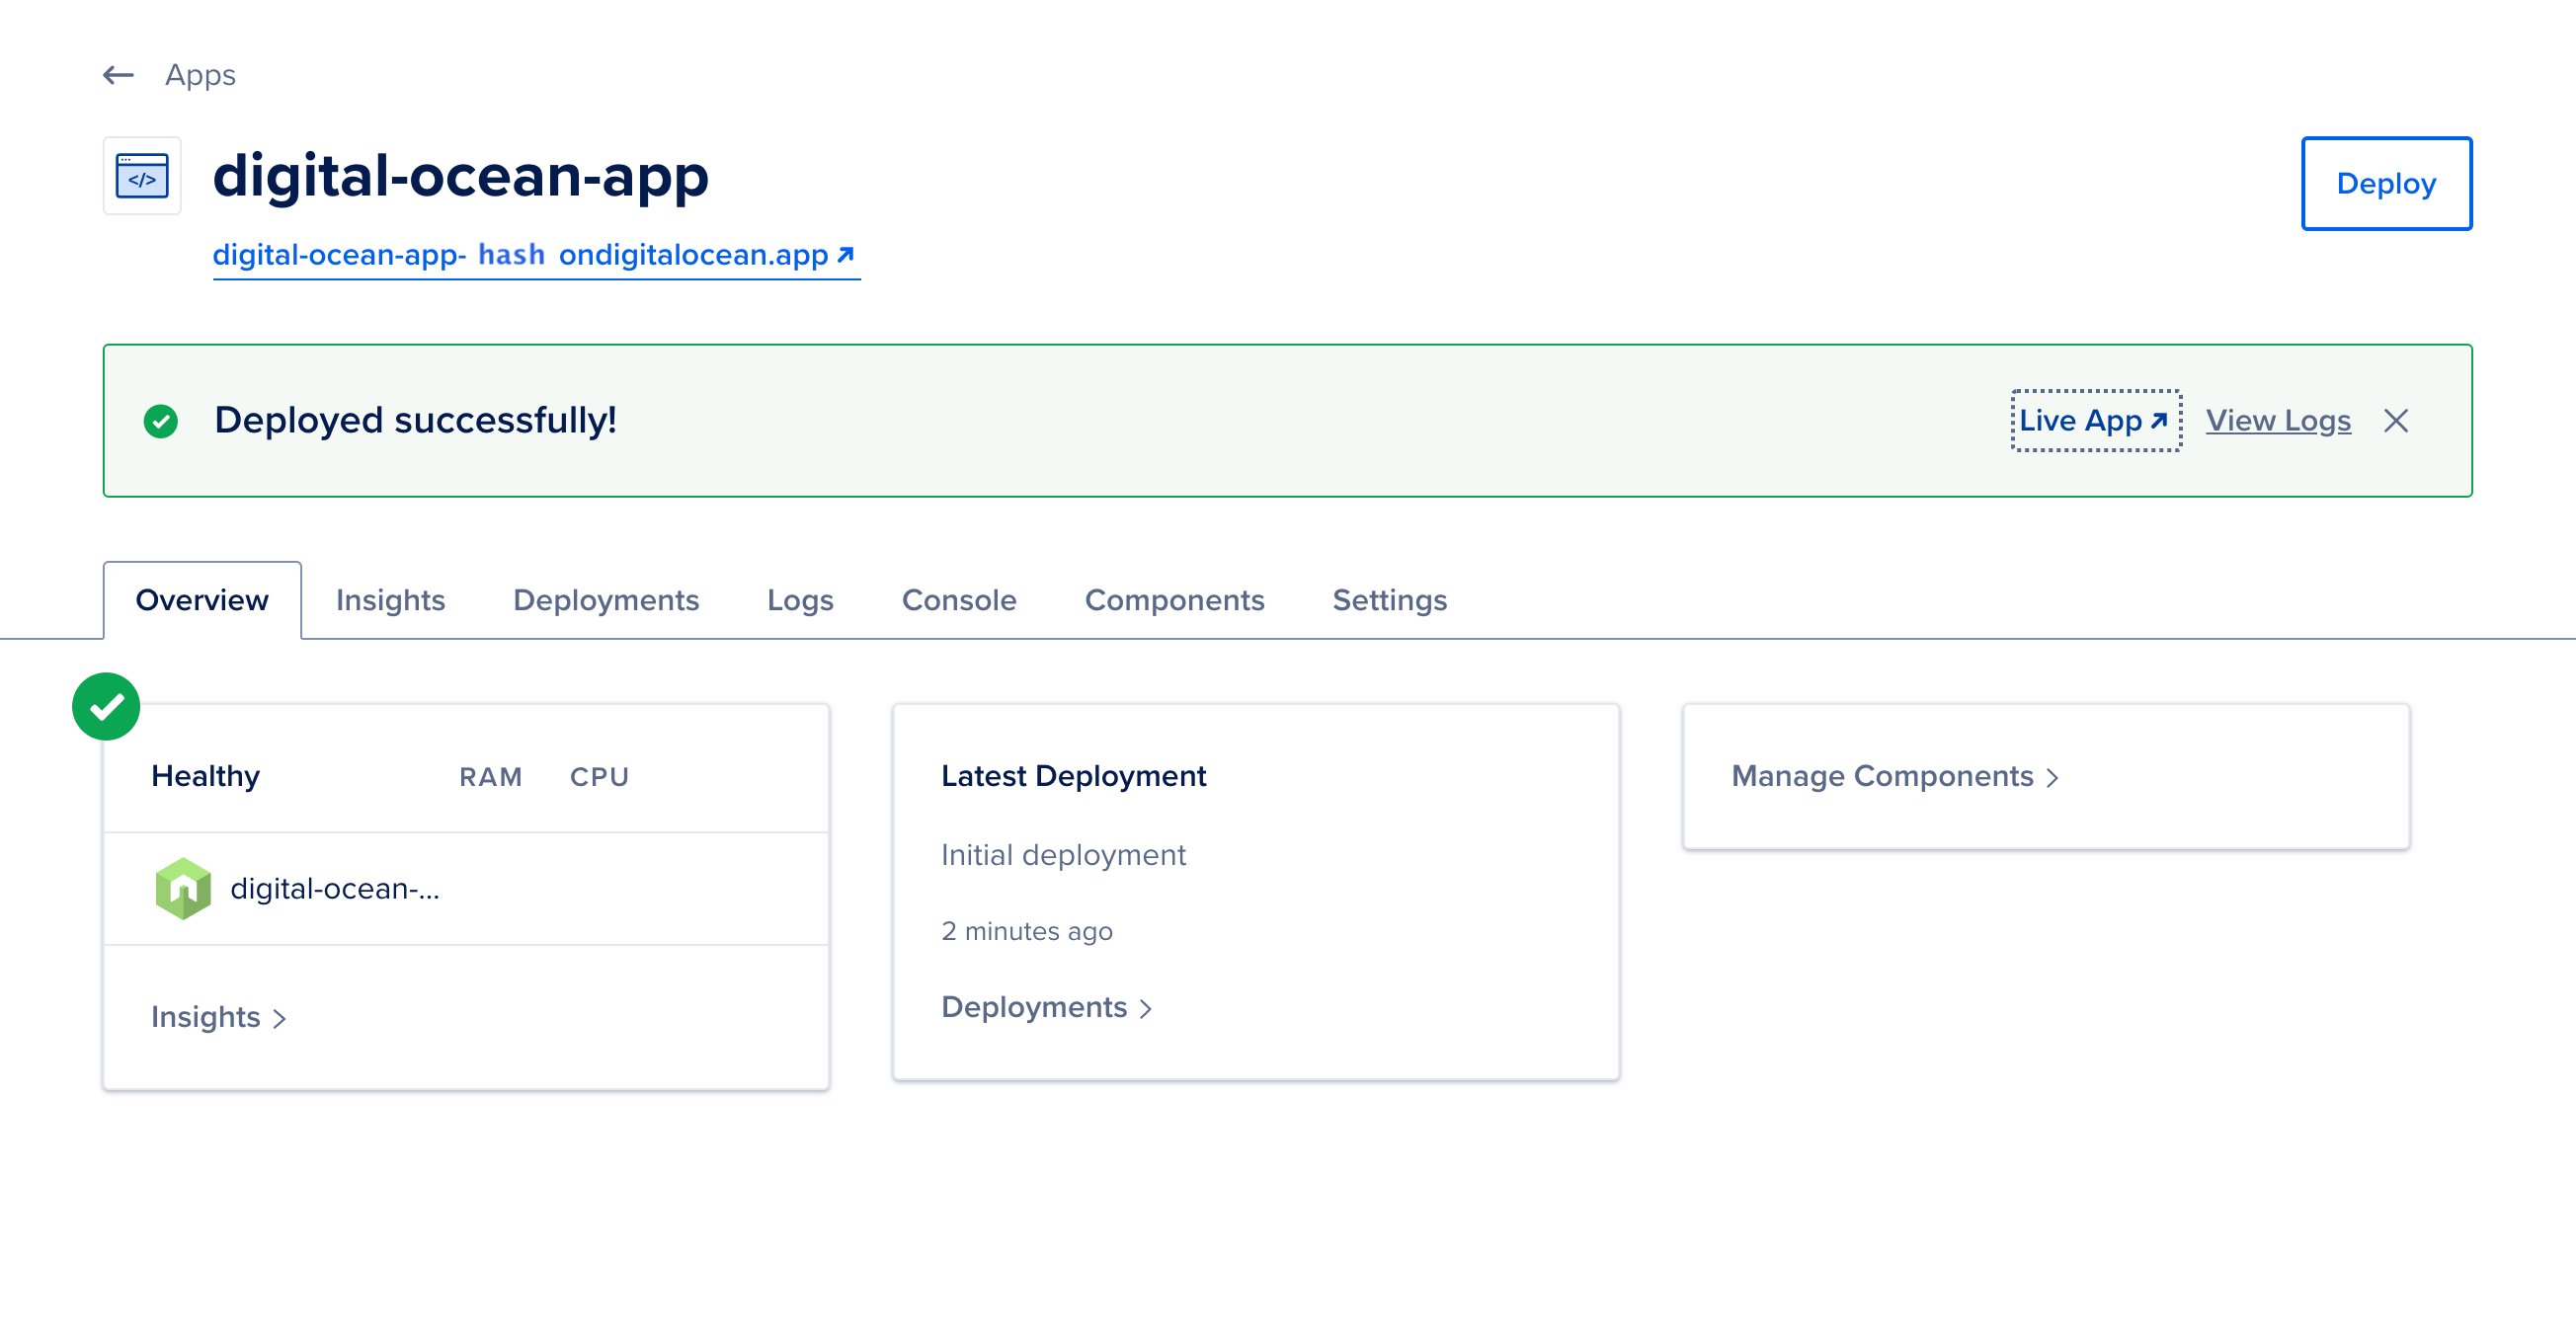
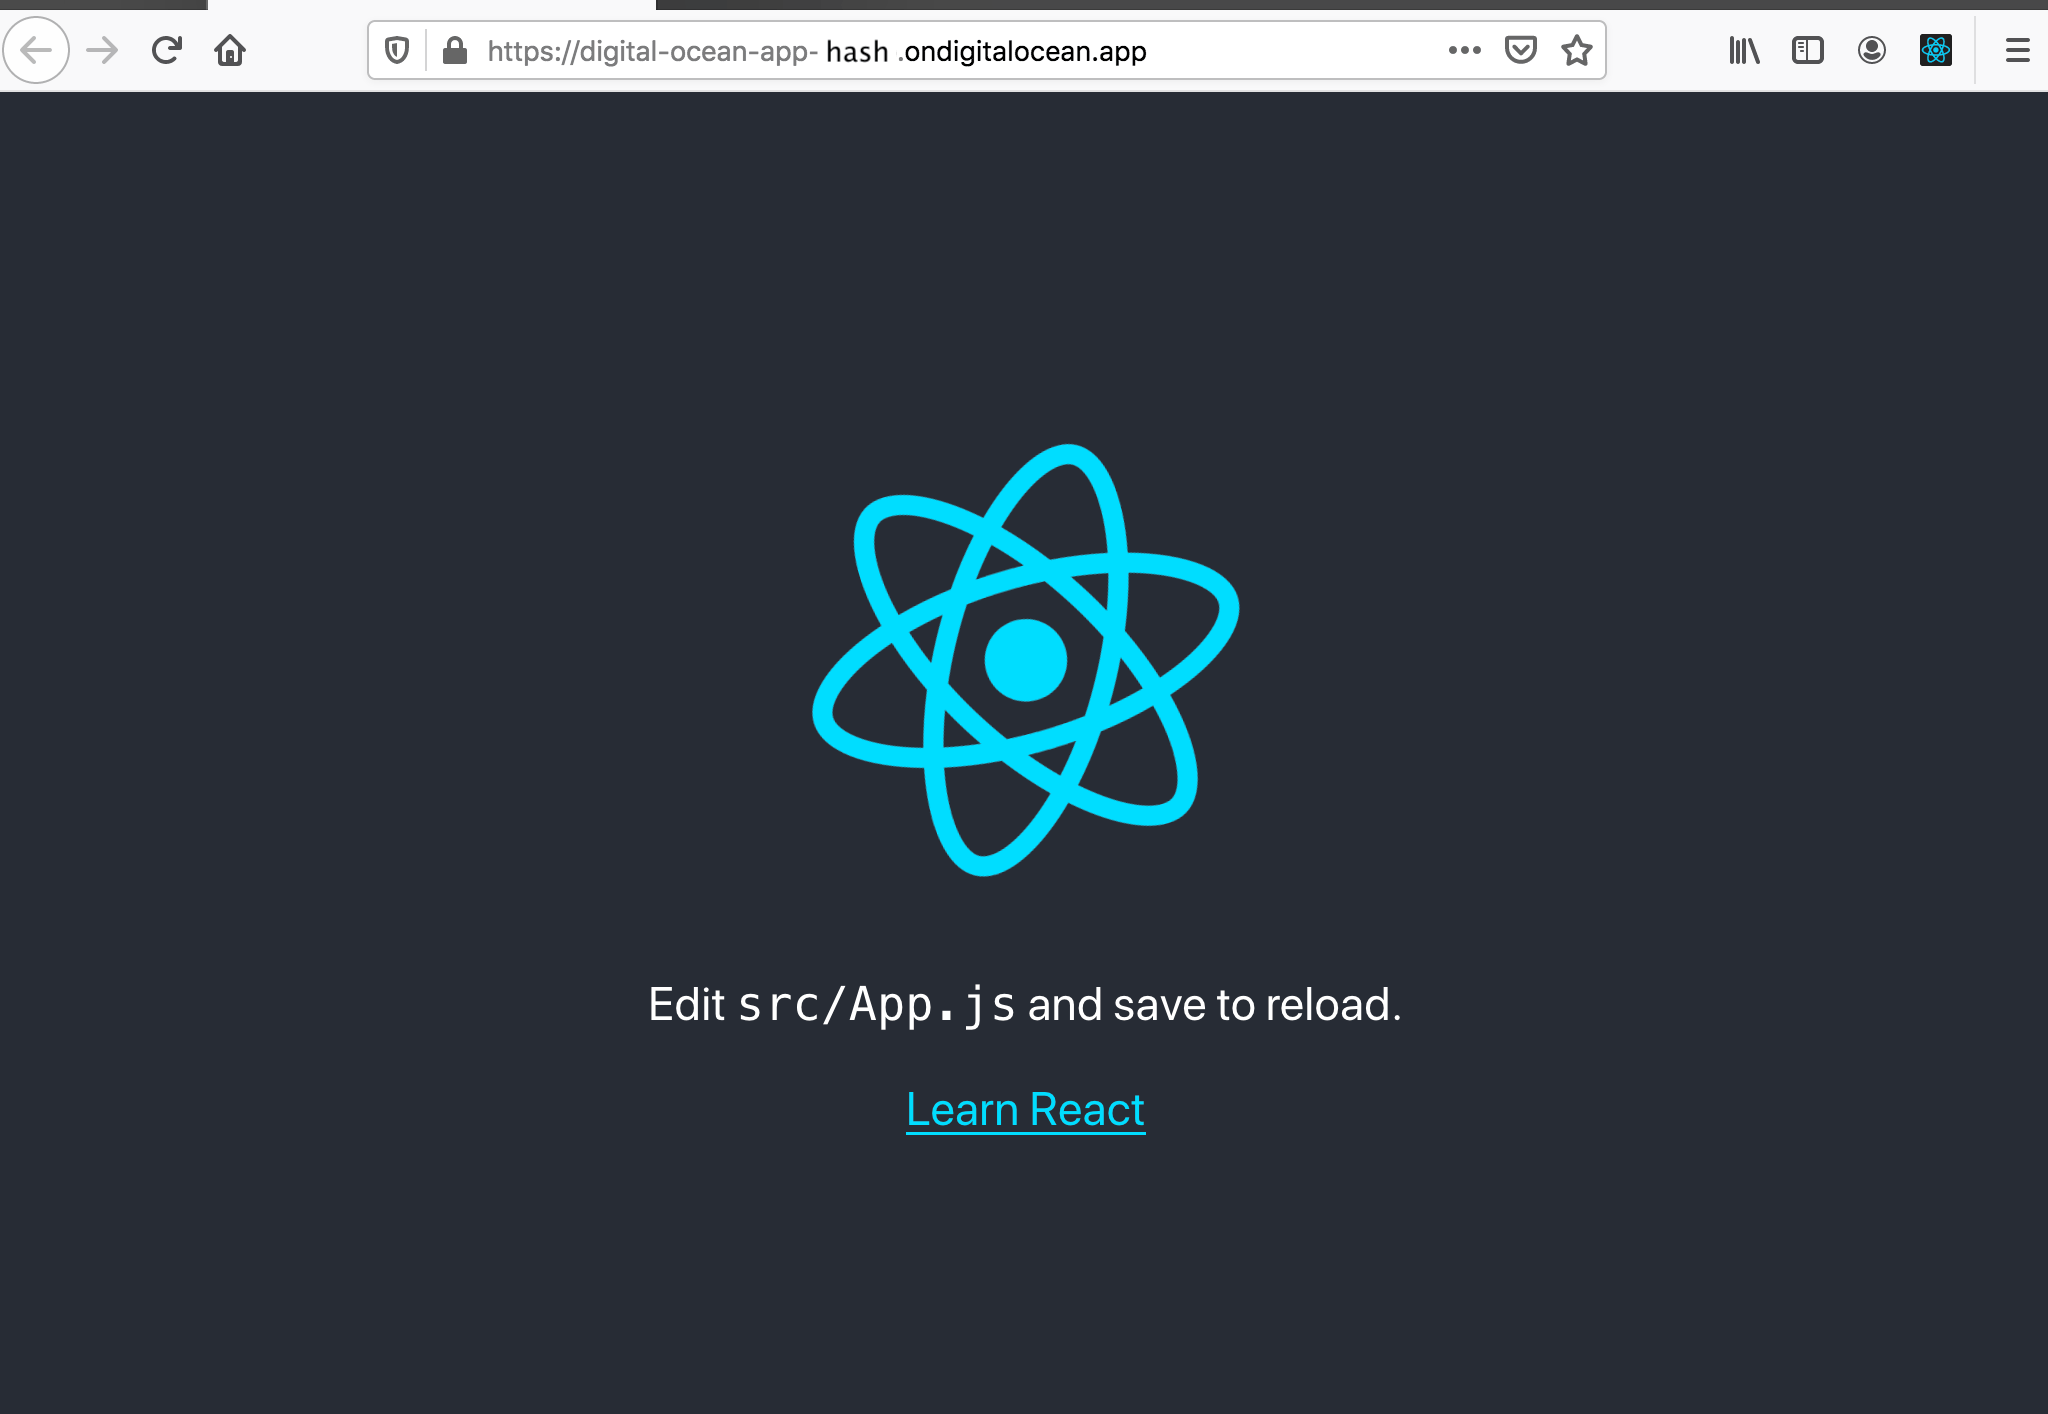
Press Live App to access your project in the browser. It will be the same as the project you tested locally, but this will be live on the web with a secure URL:
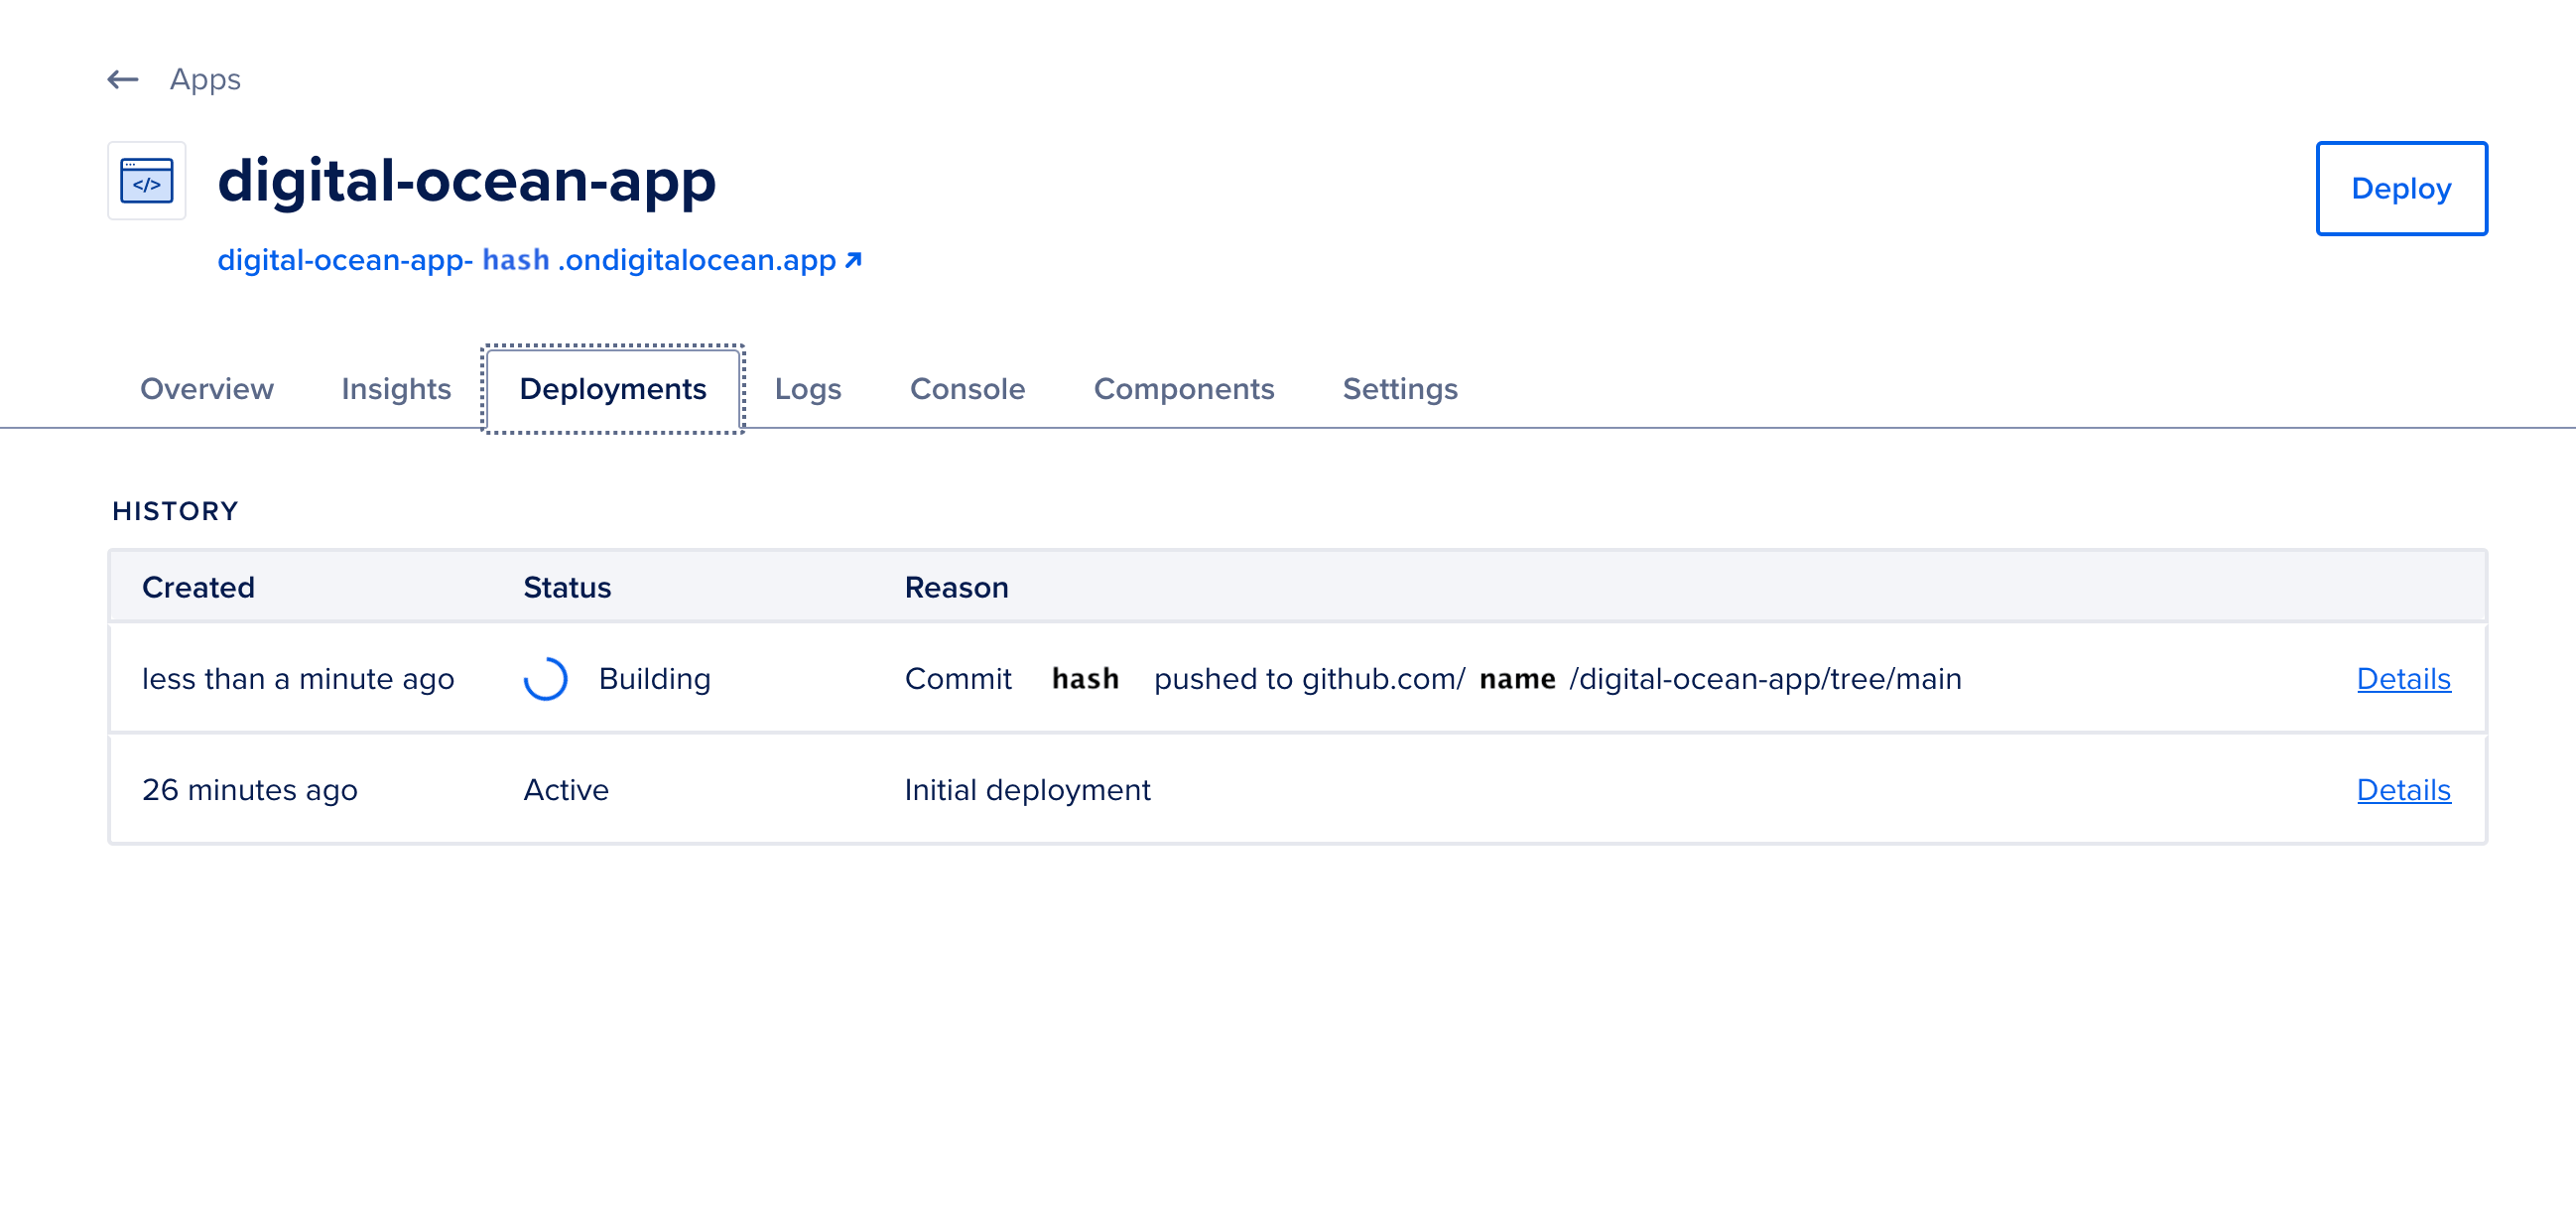
Now that your project is configured, any time you make a change to the linked repository, you’ll run a new build. In this case, if you push a change to the main branch, DigitalOcean will automatically run a new deployment. There is no need to log in; it will run as soon as you push the change:
In this step, you created a new DigitalOcean app on App Platform. You connected your GitHub account and configured the app to build the main branch. After configuring the application, you learned that the app will deploy a new build after every change.
Conclusion
DigitalOcean’s App Platform gives you a quick tool for deploying applications. With a small initial set up, your app will deploy automatically after every change. This can be used in conjunction with React to quickly get your web application up and running.
A possible next step for a project like this would be to change the domain name of the app. To do this, take a look at the official documentation for App Platform.
Thanks for learning with the DigitalOcean Community. Check out our offerings for compute, storage, networking, and managed databases.
Tutorial Series: How To Code in React.js
React is a popular JavaScript framework for creating front-end applications, such as user interfaces that allow users to interact with programs. Originally created by Facebook, it has gained popularity by allowing developers to create fast applications using an intuitive programming paradigm that ties JavaScript with an HTML-like syntax known as JSX.
In this series, you will build out examples of React projects to gain an understanding of this framework, giving you the knowledge you need to pursue front-end web development or start out on your way to full stack development.
Browse Series: 21 tutorials
About the author(s)
Author of Simplifying JavaScript. Writing featured in Slate, FreeCodeCamp, and here! I like to break things and put them back together. 🛠
Former Senior Technical Editor at DigitalOcean, fiction writer and podcaster elsewhere, always searching for the next good nautical pun! Areas of expertise include Node.js, PostgreSQL, CSS, JavaScript.
Still looking for an answer?
This textbox defaults to using Markdown to format your answer.
You can type !ref in this text area to quickly search our full set of tutorials, documentation & marketplace offerings and insert the link!
I loved every post on React! it was very well explained and easy to follow! Thank you very much for sharing your knowledge.
Greetings from TKY Japan
Every time the code gets pushed, app builds automatically, but it takes more than 20min. Is this supposed to be like that? You’ve mentioned it might take couple minutes.
This worked perfectly fine. In this demo, you had only one route “/” and it was setup. But what if there are many routes i.e “/a”, “/b”, “/c”.
is there any way to configure a wildcard route to redirect all the requests to “/”.
I followed this tutorial and it worked perfectly, but my app (React) is being started in development mode. Any idea how I can change this? I am sort of new to React so I don’t know if I have to change anything in the project. Thank you!
After doing the above, how can I connect this app to DNS? instead of the default digital ocean link shown there?
Hello! Does the HTML content generated on the server (server side rendering) or on the client side (client side rendering)?
If I try to access a sub route in my app I get a 404 error. How can I configure the app to always go trough my index.html file thus use the React routing system?
I have tried this word for word, sep for step, about half a dozen times and in each case it fails during the build with the following:
[2023-07-05 01:37:16] │ npm notice
[2023-07-05 01:37:16] │ npm notice New major version of npm available! 8.19.4 -> 9.7.2
[2023-07-05 01:37:16] │ npm notice Changelog: https://github.com/npm/cli/releases/tag/v9.7.2
[2023-07-05 01:37:16] │ npm notice Run npm install -g npm@9.7.2 to update!
[2023-07-05 01:37:16] │ npm notice
[2023-07-05 01:37:16] │ npm ERR! code EUSAGE
[2023-07-05 01:37:16] │ npm ERR!
[2023-07-05 01:37:16] │ npm ERR! npm ci can only install packages when your package.json and package-lock.json or npm-shrinkwrap.json are in sync. Please update your lock file with npm install before continuing.
[2023-07-05 01:37:16] │ npm ERR!
[2023-07-05 01:37:16] │ npm ERR! Invalid: lock file’s typescript@5.1.6 does not satisfy typescript@4.9.5
[2023-07-05 01:37:16] │ npm ERR!
[2023-07-05 01:37:16] │ npm ERR! Clean install a project
[2023-07-05 01:37:16] │ npm ERR!
[2023-07-05 01:37:16] │ npm ERR! Usage:
[2023-07-05 01:37:16] │ npm ERR! npm ci
[2023-07-05 01:37:16] │ npm ERR!
[2023-07-05 01:37:16] │ npm ERR! Options:
[2023-07-05 01:37:16] │ npm ERR! [-S|–save|–no-save|–save-prod|–save-dev|–save-optional|–save-peer|–save-bundle]
[2023-07-05 01:37:16] │ npm ERR! [-E|–save-exact] [-g|–global] [–global-style] [–legacy-bundling]
[2023-07-05 01:37:16] │ npm ERR! [–omit <dev|optional|peer> [–omit <dev|optional|peer> …]]
[2023-07-05 01:37:16] │ npm ERR! [–strict-peer-deps] [–no-package-lock] [–foreground-scripts]
[2023-07-05 01:37:16] │ npm ERR! [–ignore-scripts] [–no-audit] [–no-bin-links] [–no-fund] [–dry-run]
[2023-07-05 01:37:16] │ npm ERR! [-w|–workspace <workspace-name> [-w|–workspace <workspace-name> …]]
[2023-07-05 01:37:16] │ npm ERR! [-ws|–workspaces] [–include-workspace-root] [–install-links]
[2023-07-05 01:37:16] │ npm ERR!
[2023-07-05 01:37:16] │ npm ERR! aliases: clean-install, ic, install-clean, isntall-clean
[2023-07-05 01:37:16] │ npm ERR!
[2023-07-05 01:37:16] │ npm ERR! Run “npm help ci” for more info
[2023-07-05 01:37:16] │
[2023-07-05 01:37:16] │ npm ERR! A complete log of this run can be found in:
[2023-07-05 01:37:16] │ npm ERR! /home/apps/.npm/_logs/2023-07-05T01_37_08_617Z-debug-0.log
[2023-07-05 01:37:16] │ unable to invoke layer creator
[2023-07-05 01:37:16] │ installing node_modules: exit status 1
[2023-07-05 01:37:16] │
[2023-07-05 01:37:16] │ ERROR: failed to build: exit status 1
[2023-07-05 01:37:16] │
[2023-07-05 01:37:16] │
[2023-07-05 01:37:16] │ For documentation on the buildpacks used to build your app, please see:
[2023-07-05 01:37:16] │
[2023-07-05 01:37:16] │ Node.js v0.3.6 https://do.co/apps-buildpack-node
[2023-07-05 01:37:16] │
[2023-07-05 01:37:16] │ ✘ build failed
 This work is licensed under a Creative Commons Attribution-NonCommercial- ShareAlike 4.0 International License.
Become a contributor for community
Get paid to write technical tutorials and select a tech-focused charity to receive a matching donation.

DigitalOcean Documentation
Full documentation for every DigitalOcean product.

Resources for startups and AI-native businesses
The Wave has everything you need to know about building a business, from raising funding to marketing your product.
The developer cloud
Scale up as you grow — whether you're running one virtual machine or ten thousand.

Start building today
From GPU-powered inference and Kubernetes to managed databases and storage, get everything you need to build, scale, and deploy intelligent applications.
