Tutorial

How To Install ISPConfig3 on an Ubuntu 14.04 Server

How To Install ISPConfig3 on an Ubuntu 14.04 Server

Introduction

Although the command line is a powerful tool that can allow you to work quickly and easily in many circumstances, there are instances where a visual interface is helpful. If you are configuring many different services on one machine, or administering portions of your system for clients, tools like ISPConfig can make this a much simpler task.

ISPConfig is a control panel for your server that allows you to easily configure domains, email addresses, site configurations, and user accounts. We will be installing the panel on an Ubuntu 14.04 server.

Prerequisites

Before we get started, you should have a domain name pointed at the server that you will be using. To find out how to configure your domain name with DigitalOcean, click here.

You will also need a non-root user with sudo privileges. You can learn how to set up a non-root account by following steps 1-4 in our Ubuntu 14.04 initial server setup guide. Log in as this user to get started.

Upgrade the System

The first thing we should do is upgrade the base system. This will ensure that the packages on our system are the newest packaged versions.

We should update our local package index before we do this so that apt knows about the latest package versions:

sudo apt-get update
sudo apt-get upgrade

Our system should now be up to date and we can get going with the rest of the installation.

Verify Hostnames are Configured Correctly

We will start by making sure our hostnames are configured correctly. In this guide, we are going to be assuming that the domain name that we are setting up is server.test.com and the IP address for the server is 111.111.111.111.

We need to verify that our hostname is configured correctly. We should look at our hosts file:

sudo nano /etc/hosts

It may look something like this:

127.0.0.1           localhost server.test.com server

We want to make our hostnames use our public IP address. You can do this by splitting up the line into two lines and pointing the domain name portion to our public IP address:

<pre> 127.0.0.1 localhost <span class=“highlight”>111.111.111.111 server.test.com server</span> </pre>

Save and close the file when you are finished.

We should also edit our hostname file to make sure that it contains the correct domain name as well:

sudo nano /etc/hostname

If your whole hostname is not displayed, modify the value:

<pre> <span class=“highlight”>server.test.com</span> </pre>

You should make sure the system uses the new value by typing:

sudo hostname -F /etc/hostname

Change System Settings

There are a few items that Ubuntu configures in an unconventional way that we need to undo in order for our software to function properly.

The first thing we need to do is disable AppArmor, which is incompatible with ISPConfig. First, we should stop the service:

sudo service apparmor stop

We can also tell it to unload its profiles by typing:

sudo service apparmor teardown

After this is done, we need to tell our server not to start this service at boot:

sudo update-rc.d -f apparmor remove

We can actually delete all of the associated files and packages by typing:

sudo apt-get remove apparmor

Another configuration that we need to modify is the default system shell. Ubuntu uses the dash shell for system processes, but ISPConfig leverages additional functionality that is provided specifically by bash. We can set bash to be the default system shell by typing:

sudo dpkg-reconfigure dash

At the prompt, select “No” to have the utility reconfigure the system shell pointer to use bash instead of dash.

Install Additional Components

Now that we have our base system ready to go, we can begin installing some of the services that ISPConfig can manage and some software that supports ISPConfig.

We will be installing basic LAMP (Linux, Apache, MySQL, PHP) components, mail software, anti-virus scanning software for our mail, and other packages.

We will do this all in one big apt command, so this will be a lot of packages installed at once:

sudo apt-get install apache2 apache2-utils libapache2-mod-suphp libapache2-mod-fastcgi libapache2-mod-python libapache2-mod-fcgid apache2-suexec libapache2-mod-php5 php5 php5-fpm php5-gd php5-mysql php5-curl php5-intl php5-memcache php5-memcached php5-ming php5-ps php5-xcache php5-pspell php5-recode php5-snmp php5-sqlite php5-tidy php5-xmlrpc php5-xsl php5-imap php5-cgi php-pear php-auth php5-mcrypt mcrypt php5-imagick imagemagick libruby memcached phpmyadmin postfix postfix-mysql postfix-doc mysql-server openssl getmail4 rkhunter binutils dovecot-imapd dovecot-pop3d dovecot-mysql dovecot-sieve mailman amavisd-new spamassassin clamav clamav-daemon zoo unzip zip arj nomarch lzop cabextract apt-listchanges libnet-ldap-perl libauthen-sasl-perl daemon libio-string-perl libio-socket-ssl-perl libnet-ident-perl libnet-dns-perl bind9 dnsutils vlogger webalizer awstats geoip-database libclass-dbi-mysql-perl squirrelmail pure-ftpd-common pure-ftpd-mysql snmp

During the installation, you will be asked a few questions. You will be asked to select a language for mailman. Select en (English) to continue. You will also be asked to select and confirm a password for the MySQL administrative user.

Another prompt that you will get is whether to create a self-signed SSL certificate for dovecot. You should select “Yes”. You will have to enter the “commonName” for your SSL certificate. This is just your fully qualified domain name:

server.test.com

For postfix, you will be asked what kind of mail configuration you need. Select Internet Site. You will then be asked to choose the system mail name. You should set this to your domain name as well:

server.test.com

For phpMyAdmin, the software has the ability to automatically configure itself based on your web server. Select “apache2” and press “SPACE” to select that option. Hit “TAB” then “ENTER” to make the selection.

Later on, you will asked whether you wish to configure the database for phpMyAdmin with dbconfig-common. Choose “Yes” here. You will need to enter the password of the MySQL administrator account that you selected above. You can then select and confirm a password for the phpMyAdmin user.

At this point, all of your components should be installed.

Configure the Backend Components

Now that everything is installed, we need to start configuring our services and tools.

Mail Configuration

Let’s start by enabling some functionality in postfix. Open the default configuration file with your editor:

sudo nano /etc/postfix/master.cf

We just need to uncomment some of the lines in this file. Specifically the line that deals with the submission service and the first three option lines beneath, and the smtps service and the first three option lines for that one as well:

submission inet n       -       -       -       -       smtpd
  -o syslog_name=postfix/submission
  -o smtpd_tls_security_level=encrypt
  -o smtpd_sasl_auth_enable=yes
. . .
smtps     inet  n       -       -       -       -       smtpd
  -o syslog_name=postfix/smtps
  -o smtpd_tls_wrappermode=yes
  -o smtpd_sasl_auth_enable=yes

Now, we need to append an additional option under both of these services. It will be the same for each:

<pre> submission inet n - - - - smtpd -o syslog_name=postfix/submission -o smtpd_tls_security_level=encrypt -o smtpd_sasl_auth_enable=yes <span class=“highlight”>-o smtpd_client_restrictions=permit_sasl_authenticated,reject</span> . . . smtps inet n - - - - smtpd -o syslog_name=postfix/smtps -o smtpd_tls_wrappermode=yes -o smtpd_sasl_auth_enable=yes <span class=“highlight”>-o smtpd_client_restrictions=permit_sasl_authenticated,reject</span> </pre>

Save and close the file when you are finished.

Another mail related service that we should configure is mailman, which can handle mailing lists.

We can start off by telling it to create a new list:

sudo newlist mailman

You will be asked to provide the email that will be associated with the list. You will also be asked to select a password.

The script will output a long list of aliases. You should add those to the bottom of the your /etc/aliases file:

sudo nano /etc/aliases

It should look something like this:

<pre> postmaster: root <span class=“highlight”>mailman: “|/var/lib/mailman/mail/mailman post mailman”</span> <span class=“highlight”>mailman-admin: “|/var/lib/mailman/mail/mailman admin mailman”</span> <span class=“highlight”>mailman-bounces: “|/var/lib/mailman/mail/mailman bounces mailman”</span> <span class=“highlight”>mailman-confirm: “|/var/lib/mailman/mail/mailman confirm mailman”</span> <span class=“highlight”>mailman-join: “|/var/lib/mailman/mail/mailman join mailman”</span> <span class=“highlight”>mailman-leave: “|/var/lib/mailman/mail/mailman leave mailman”</span> <span class=“highlight”>mailman-owner: “|/var/lib/mailman/mail/mailman owner mailman”</span> <span class=“highlight”>mailman-request: “|/var/lib/mailman/mail/mailman request mailman”</span> <span class=“highlight”>mailman-subscribe: “|/var/lib/mailman/mail/mailman subscribe mailman”</span> <span class=“highlight”>mailman-unsubscribe: “|/var/lib/mailman/mail/mailman unsubscribe mailman”</span> </pre>

Save and close the file after you’re done. You need to make postfix aware of the aliases you added. You can do that by typing:

sudo newaliases

We can start the mailman service by typing:

sudo service mailman start

Restart the postfix service to enable mail changes:

sudo service postfix restart

While we’re dealing with services, we should also stop and disable spamassassin. ISPConfig calls this as needed and it does not need to be running all of the time:

sudo service spamassassin stop

We can then tell the server to not start it again at boot:

sudo update-rc.d -f spamassassin remove

LAMP Configuration

We need to enable mcrypt functionality in PHP:

sudo php5enmod mcrypt

Another thing we need to do is enable some of the Apache modules we installed.

sudo a2enmod rewrite ssl actions include cgi dav_fs suexec dav auth_digest fastcgi alias

We also need to make some adjustments to some of the Apache configuration files.

One of the modules that we enabled will currently intercept all of our PHP files. We want to stop it from doing this. Open the suphp configuration file:

<pre> sudo nano /etc/apache2/mods-available/suphp.conf </pre> <pre> <IfModule mod_suphp.c> <FilesMatch “.ph(p3?|tml)$”> SetHandler application/x-httpd-suphp </FilesMatch> suPHP_AddHandler application/x-httpd-suphp . . . </pre>

We are going to replace the top block with a single command. It should look like this when you are finished:

<pre> <IfModule mod_suphp.c> <span class=“highlight”>AddType application/x-httpd-suphp .php .php3 .php4 .php5 .phtml</span> suPHP_AddHandler application/x-httpd-suphp </pre>

Save and close the file when you are done.

We are going to have to manually create the symbolic link for the mailman Apache file. We can do that by typing:

sudo ln -s /etc/mailman/apache.conf /etc/apache2/conf-available/mailman.conf

We can then enable that by typing:

sudo a2enconf mailman

If you plan on creating sites that host Ruby files, you should comment out the processing of .rb files in the mime.types file. ISPConfig will handle this itself:

<pre> sudo nano /etc/mime.types </pre> <pre> application/x-rss+xml rss <span class=“highlight”>#</span>application/x-ruby rb application/x-rx </pre>

Save and close the file when you are done.

Now, we can restart Apache to implement our changes:

sudo service apache2 restart

Miscellaneous Configuration

We still need to edit a few more pieces of the system.

Since ISPConfig is often used to subdivide server space for reselling purposes, providing clients with FTP access is often a requirement. We’ve already installed the necessary software, but we need to make some adjustments.

Start by editing the FTP server’s configuration:

sudo nano /etc/default/pure-ftpd-common

We need to make sure our FTP users are confined to a chroot environment so that they do not interfere with the rest of the system. We can do this by changing the VIRTUALCHROOT setting to true:

<pre> VIRTUALCHROOT=<span class=“highlight”>true</span> </pre>

Since FTP is inherently insecure we should at least protect it with TLS encryption. We can set this up by creating a flag file that simply contains the 1 character:

sudo nano /etc/pure-ftpd/conf/TLS

1

Now, we need to create a self-signed certificate that the process can use. We can do this by calling:

sudo openssl req -x509 -nodes -days 365 -newkey rsa:2048 -keyout /etc/ssl/private/pure-ftpd.pem -out /etc/ssl/private/pure-ftpd.pem

This certificate will be valid for one year. You will have to answer some prompts. Fill them out with your information. The Common Name is perhaps the most important part.

We need to lock down the key file afterwards by typing:

sudo chmod 600 /etc/ssl/private/pure-ftpd.pem

When all of this is done, we can restart the service:

sudo service pure-ftpd-mysql restart

This will allow our FTP daemon to use encryption.

One of the reasons we are getting FTP set up on this system is because we have installed a monitoring daemon called awstats that is configured to expect the existence of this service.

ISPConfig will call awstats as necessary, so it does not need to rely on the cron job that is usually used to poll the server. We can remove this by typing:

sudo rm /etc/cron.d/awstats

Install ISPConfig

We are finally ready to install the actual ISPConfig software.

We can do that by downloading the latest stable version onto our server. As of this writing, the latest stable version that has a direct link available is version 3. We will update the installation once we get everything installed.

Now, you should change to your home directory and download the project using wget:

cd ~
wget http://www.ispconfig.org/downloads/ISPConfig-3-stable.tar.gz

After the download is complete, extract the directory structure and move into the install subdirectory of the extracted folder structure:

tar xzvf ISPConfig*
cd ispconfig3_install/install/

Now, we are ready to install the software. Do so by typing:

sudo php -q install.php

You will be taken through a very lengthy installation processes.

Luckily, the only detail you actually need to enter is your MySQL root password! For every other entry, just press “ENTER” to use the default value and skip ahead.

When you are finished with the installation, go ahead and update to the latest version by typing:

sudo php -q update.php

Again, just press “ENTER” to use the defaults for each command.

When you are finished, you can visit your ISPConfig service by visiting your domain name followed by :8080 in your web browser:

<pre> https://<span class=“highlight”>server_domain_name</span>:8080 </pre>

You will get an SSL warning since we are using self-signed certificates:

ISPConfig SSL warning

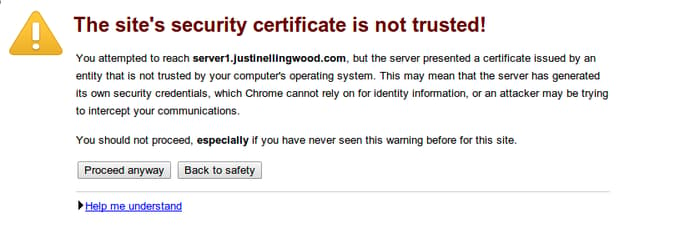
Click “proceed” or “continue” to accept the certificate.

You will be taken to a login screen.

ISPConfig login screen

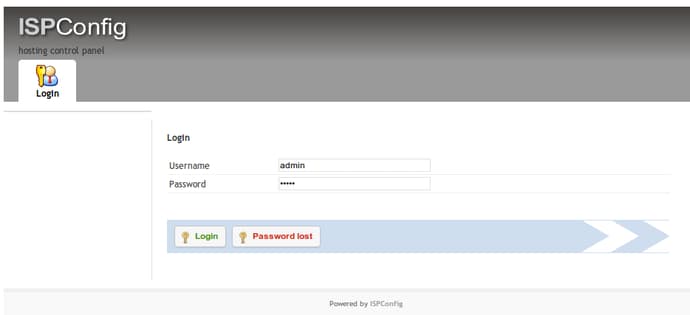
The default username and password are both admin:

Username: admin
Password: admin

Enter those values and you will be taken to the ISPConfig3 interface:

ISPConfig main interface

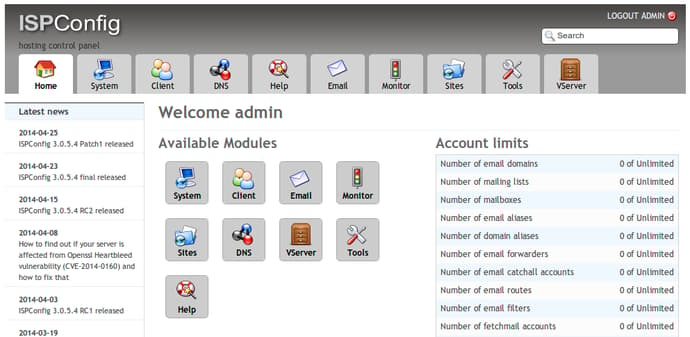
Once you get here, you should change the admin user’s password by clicking on the “System” button, then clicking the “CP Users” link under the “User Management” category of the left-hand navigation menu.

Click on the admin user account in the main window. You will have the option to change the password for the admin user on this page.

Conclusion

You should now have your ISPConfig panel installed and configured. You should be able to manage domains, mail, and accounts from within this interface.

<div class=“author”>By Justin Ellingwood</div>

Thanks for learning with the DigitalOcean Community. Check out our offerings for compute, storage, networking, and managed databases.

Learn more about our products

About the author(s)

Justin Ellingwood
Justin Ellingwood
See author profile
Category:
Tutorial

Still looking for an answer?

Ask a questionSearch for more help

Was this helpful?
 
50 Comments
Leave a comment...

This textbox defaults to using Markdown to format your answer.

You can type !ref in this text area to quickly search our full set of tutorials, documentation & marketplace offerings and insert the link!

Can you please give the code/ instructions for nginx for this part; sudo nano /etc/apache2/mods-available/suphp.conf

<IfModule mod_suphp.c> <FilesMatch “.ph(p3?|tml)$”> SetHandler application/x-httpd-suphp </FilesMatch> suPHP_AddHandler application/x-httpd-suphp . . .

We are going to replace the top block with a single command. It should look like this when you are finished:

<IfModule mod_suphp.c%gt; AddType application/x-httpd-suphp .php .php3 .php4 .php5 .phtml suPHP_AddHandler application/x-httpd-suphp

Andrew SB
DigitalOcean Employee
DigitalOcean Employee badge
May 6, 2014

@Rod Thompson: There isn’t a direct substitution for nginx. Instead of suphp you should use php5-fpm in combination with fcgiwrap. That part is a per-requisite for the mailman apache configuration. In nginx, you’d do something like the following to set up mailman:

<pre> location /cgi-bin/mailman { root /usr/lib/; fastcgi_split_path_info (^/cgi-bin/mailman/[^/])(.)$; include /etc/nginx/fastcgi_params; fastcgi_param SCRIPT_FILENAME $document_root$fastcgi_script_name; fastcgi_param PATH_INFO $fastcgi_path_info; fastcgi_param PATH_TRANSLATED $document_root$fastcgi_path_info; fastcgi_intercept_errors on; fastcgi_pass unix:/var/run/fcgiwrap.socket; }

    location /images/mailman {
           alias /usr/share/images/mailman;
    }

    location /pipermail {
           alias /var/lib/mailman/archives/public;
           autoindex on;
    }

</pre>

Though I’d encourage you to stick with Apache for this one. I’m a big nginx fan, but in this case it is a much more forward set up with Apache than nginx.

Hi,

I have installed ispconfig 3 in ubuntu 14.04. How do I enable the webmail?

Hi,

Thanks for the “How-To”.

Would I be correct in thinking it needs to be installed on a new droplet, and not one already in use?

Terence.

As Rob Thompson mentioned, is the there a syntax error in this below as I can’t restart the Apache server because I’m getting an error due to not having a closing “>” <IfModule mod_suphp.c%gt; AddType application/x-httpd-suphp .php .php3 .php4 .php5 .phtml suPHP_AddHandler application/x-httpd-suphp

Thanks

Justin Ellingwood
DigitalOcean Employee
DigitalOcean Employee badge
May 9, 2014

a.tricky.1: Yep, I made an error in creating the “>” html element. It should be fixed above.

terence.milbourn: While it doesn’t explicitly require you to install on a new droplet, that’s usually the best way to ensure that the operation will go smoothly.

I’ve installed all ok but my main domain can’t send or receive emails. I’ve installed everything on domain1.com and all my domains target to the same server and works well (domain2.com, domain3.com, …) but the main domain (domain1.com) can’t receive or send emails neither to itself neither to out. Someone can help me ?

Kamal Nasser
DigitalOcean Employee
DigitalOcean Employee badge
May 13, 2014

@phelippematte: What is domain1.com actually called?

Thanks for the great tutorial. I will certainly try this out. Is there any particular reason for the use of a self signed certificate? I have my certificates signed by digicert and would prefer to use those instead.

Andrew SB
DigitalOcean Employee
DigitalOcean Employee badge
June 2, 2014

@thomashrb: The self signed certs are just to get SSL up and running and running. If you have certs from digicert, that’s even better.

Now this is the solution that finally got my email up and running. Great writeup for a wonderful tool!

Hi, I am a total noob when it comes to this kind of stuff. I successfully installed ISPConfig 3 and set up my mailbox’s. Now that its done I believe I need to install something like squirrelmail but have no idea how to go about this. I just want to be able to use these email addresses I set up through ISPConfig.

Thanks,

Here si the link with the proper installation tutorials for almost all linux distributions on the Ispconfig website http://www.ispconfig.org/page/en/documentation.html

hello everyone!! i have tried this tutorial step by step in two of my setups, i was not able to get the emails working. i cant send/receive emails. any idea??

Dear guys,

I’ve 2 questions. I followed complete article after login with root user and fortunately everything related to installing ISPConfig went good but I’m unable to access ISPConfig as domain.com:8080.

My question is: Did root user created problems during my setup? If no then what can be possibilities to identify why ISPConfig not accessing.

I checked firewall settings and added 8080 entry under Input ACCEPT but still not working.

sudo iptables -A INPUT -p tcp --dport 80 -j ACCEPT

Please advise me.

Thanks

Andrew SB
DigitalOcean Employee
DigitalOcean Employee badge
June 26, 2014

@ almeidamarcell: Not sure if that’s just a typo in the comment, but your firewall rule opens port 80 not port 8080.

I went through this tutorial and everything seemed to go smooth but now I get a 502 bad gateway error when I access https://my-ip-address:8080.

Any ideas?

I went through this tutorial as well with the same result: http://www.howtoforge.com/the-perfect-server-ubuntu-14.04-nginx-bind-mysql-php-postfix-dovecot-and-ispconfig3

Where did I go wrong? Thanks!

Ok I figured out how to solve the 502 bad gateway error.

First, edit /etc/nginx/sites-available/default and uncomment these lines so your file looks like this:

location ~ \.php$ {
        fastcgi_split_path_info ^(.+\.php)(/.+)$;
        # NOTE: You should have "cgi.fix_pathinfo = 0;" in php.ini

        # With php5-cgi alone:
        fastcgi_pass 127.0.0.1:9000;
#       # With php5-fpm:
#       fastcgi_pass unix:/var/run/php5-fpm.sock;
        fastcgi_index index.php;
        include fastcgi_params;
}

Next, make sure your php5-fpm is listening to the same port. Edit the listen line of your /etc/php5/fpm/pool.d/www.conf file to look like this:

listen = 127.0.0.1:9000

Squirrelamail things

Link squirrel mail config to apache2 sudo ln -s /etc/squirrelmail/apache.conf /etc/apache2/conf-enabled/squirrelmail.conf

Open config sudo nano /etc/apache2/conf-enabled/squirrelmail.conf

And then add…

Alias /squirrelmail /usr/share/squirrelmail
<Location /squirrelmail>
<IfModule suphp_module>
suPHP_Engine Off
AddHandler php5-script  .php
</IfModule>
php_admin_value open_basedir "/usr/share/squirrelmail/:/usr/share/squirrelmail/config/:/etc/mailname/:/var/lib/squirrelmail/data:/var/spool/squirrelmail/attach"
</Location>

And finally, restart apache: sudo service apache2 restart :)

Hi, I have done the setup as per the manual above, created one mail box, but now I am unable to send/ receive email. Can anyone guide me on the probable issue.

Great tutorial, thank you.

I only have a problem when I’m trying to upload pictures using wordpress media uploader. I get ‘HTTP error’

I’ve tried to fiddle with .htaccess, checked is suPHP is working, I’m using fasCGI and so on but still don’t get why it isn’t working. error log shows nothing and neither does syslog when I tail it.

Please help.

Great “how to” and just what I needed.

I have some questions.

  1. How can ISPConfig work with only one IP address for host, DNS and client sites etc?

  2. If it works with only one IP, how many sites? Is there a theoretical limit?

  3. Can ISPConfig manage servers on multiple droplets? Is that the way it gets around only having one IP address per droplet?

Terence.

Awesome Tutorial :-)

Hi, my server is not able to receive any emails from other domain. what changes need to be made. also how to rotate ipv6 on postfix

installed ISPConfig using the correct MySQL username and password ,

I get the login form, but the error returned to me when I try the default login admin/admin is Username or Password empty

database not connecting to website after restart mysql (“service mysql restart” on Ubuntu) website & panel work properly every time i got error plz help me …

Hi All, I’ve installed ISPConfig 3 on my vps Ubuntu 14.04. But when I go to https://myserver.com:8080, I get to see this message: Index of / and all my domains in a row.

But not the login page, can somebody help me out.

after all setup,everything works fine,except my all domain can’t send or receive emails, tried google for this solution more than 6 days,and all solution not work! please help!

mail.err:
Dec 24 11:55:25 server postfix/postfix-script[23082]: fatal: cannot execute /usr/sbin/postconf!
Dec 24 12:45:01 server postfix/smtpd[27085]: fatal: no SASL authentication mechanisms
some code in mail.log:
Dec 25 13:08:31 server dovecot: master: Dovecot v2.2.9 starting up (core dumps disabled)
Dec 25 13:08:31 server dovecot: ssl-params: Generating SSL parameters
Dec 25 13:08:33 server dovecot: ssl-params: SSL parameters regeneration completed
Dec 25 13:08:50 server postfix/master[12762]: daemon started -- version 2.11.0, configuration /etc/postfix
Dec 25 13:08:53 server amavis[12994]: starting. /usr/sbin/amavisd-new at server.server.com amavisd-new-2.7.1 (20120429), Unicode aware, LANG="en_US.UTF-8"
Dec 25 13:08:53 server amavis[12999]: Net::Server: Group Not Defined.  Defaulting to EGID '123 123'
Dec 25 13:08:53 server amavis[12999]: Net::Server: User Not Defined.  Defaulting to EUID '113'
Dec 25 13:08:53 server amavis[12999]: Module Amavis::Conf        2.303
Dec 25 13:08:53 server amavis[12999]: Module Archive::Zip        1.30
Dec 25 13:08:53 server amavis[12999]: Module BerkeleyDB          0.54
Dec 25 13:08:53 server amavis[12999]: Module Compress::Zlib      2.06
Dec 25 13:08:53 server amavis[12999]: Module Convert::TNEF       0.18
Dec 25 13:08:53 server amavis[12999]: Module Convert::UUlib      1.4
Dec 25 13:08:53 server amavis[12999]: Module Crypt::OpenSSL::RSA 0.28
Dec 25 13:08:53 server amavis[12999]: Module Digest::MD5         2.52
Dec 25 13:08:53 server amavis[12999]: Module Digest::SHA         5.84_01
Dec 25 13:08:53 server amavis[12999]: Module File::Temp          0.23
Dec 25 13:08:53 server amavis[12999]: Module IO::Socket::INET6   2.71
Dec 25 13:08:53 server amavis[12999]: Module MIME::Entity        5.505
Dec 25 13:08:53 server amavis[12999]: Module MIME::Parser        5.505
Dec 25 13:08:53 server amavis[12999]: Module MIME::Tools         5.505
Dec 25 13:08:53 server amavis[12999]: Module Mail::DKIM::Signer  0.4
Dec 25 13:08:53 server amavis[12999]: Module Mail::DKIM::Verifier 0.4
Dec 25 13:08:53 server amavis[12999]: Module Mail::Header        2.12
Dec 25 13:08:53 server amavis[12999]: Module Mail::Internet      2.12
Dec 25 13:08:53 server amavis[12999]: Module Net::DNS            0.68
Dec 25 13:08:53 server amavis[12999]: Module Net::Server         2.007
Dec 25 13:08:53 server amavis[12999]: Module Socket6             0.25
Dec 25 13:08:53 server amavis[12999]: Module Time::HiRes         1.9725
Dec 25 13:08:53 server amavis[12999]: Module Unix::Syslog        1.1
Dec 25 13:08:53 server amavis[12999]: Amavis::DB code      loaded
Dec 25 13:08:53 server amavis[12999]: SQL base code        NOT loaded
Dec 25 13:08:53 server amavis[12999]: SQL::Log code        NOT loaded
Dec 25 13:08:53 server amavis[12999]: SQL::Quarantine      NOT loaded
Dec 25 13:08:53 server amavis[12999]: Lookup::SQL code     NOT loaded
Dec 25 13:08:53 server amavis[12999]: Lookup::LDAP code    NOT loaded
Dec 25 13:08:53 server amavis[12999]: AM.PDP-in proto code loaded
Dec 25 13:08:53 server amavis[12999]: SMTP-in proto code   loaded
Dec 25 13:08:53 server amavis[12999]: Courier proto code   NOT loaded
Dec 25 13:08:53 server amavis[12999]: SMTP-out proto code  loaded
Dec 25 13:08:53 server amavis[12999]: Pipe-out proto code  NOT loaded
Dec 25 13:08:53 server amavis[12999]: BSMTP-out proto code NOT loaded
Dec 25 13:08:53 server amavis[12999]: Local-out proto code loaded
Dec 25 13:08:53 server amavis[12999]: OS_Fingerprint code  NOT loaded
Dec 25 13:08:53 server amavis[12999]: ANTI-VIRUS code      NOT loaded
Dec 25 13:08:53 server amavis[12999]: ANTI-SPAM code       NOT loaded
Dec 25 13:08:53 server amavis[12999]: ANTI-SPAM-EXT code   NOT loaded
Dec 25 13:08:53 server amavis[12999]: ANTI-SPAM-C code     NOT loaded
Dec 25 13:08:53 server amavis[12999]: ANTI-SPAM-SA code    NOT loaded
Dec 25 13:08:53 server amavis[12999]: Unpackers code       loaded
Dec 25 13:08:53 server amavis[12999]: DKIM code            loaded
Dec 25 13:08:53 server amavis[12999]: Tools code           NOT loaded
Dec 25 13:08:53 server amavis[12999]: Found $file            at /usr/bin/file
Dec 25 13:08:53 server amavis[12999]: No $altermime,         not using it

anyone?

First, thank you for this “how to”.

I have problems with “fastcgi”:

Package ‘libapache2-mod-fastcgi’ has no installation candidate

I try to activate “multiverse” packages from sources.list but not work.

Version: Ubuntu 14.04.2 LTS. (update & upgrade OK).

Thks!

sudo nano /etc/apt/sources.list

uncomment the 3/4 multiverse lines. Something like this:

deb http://archive.ubuntu.com/ubuntu quantal main multiverse universe deb http://archive.ubuntu.com/ubuntu quantal-updates main multiverse universe deb http://security.ubuntu.com/ubuntu quantal-security main universe multiverse

Ctrl+o to save, ctrl X to exit. then run apt-get update, and try again! GL

Thank you! I forgot reply and thank your help , my apologies!.

ok i install ISP on apache. how can I replace with nginx ?

what next needs to be installed? some security ? or how to replace with nginx? looking very easy VPS with CPanel. love it. but what next

Follow the guide. It works I guess. How can I start hosting a few sites now? What NameServers should I use for the new domains?

Hi, I am getting below error when trying to visit the ispconfig panel:

*Secure Connection Failed

An error occurred during a connection to <my_domain_name>:8080. SSL received a record that exceeded the maximum permissible length. (Error code: ssl_error_rx_record_too_long) *

Please let me know the solution.

Thanks

i am trying to move 5 Wordpress websites from shared hosting to here. what is the best option ? I have Ubuntu 15.04 and want to install ISPConfig but first I need to have a domain? So what domain I have to use? I dont want to have some downtime on all websites.

can i install ispconfig on already installed LAMP with nginx? does it overwrite some files or its working fine ? thx

Hi!, i’m using ISPConfig 3 on multi server setup, and i need improve HD space of the web server.

I think this procedure is posible but i don’t know if is 100% safe:

  1. Power off web server VPS (hostname web1).
  2. Take web1 snapshot.
  3. Destroy web1 VPS.
  4. Create new VPS with same name (web1) using web1 snapshot.

I saw that some times if i destroy VPS and create it again with the same hostname it keep same IP, that is posible?.

After installing i receive the following error Forbidden

You don’t have permission to access / on this server. i can access ispconfig via https:servername:8080

my error log shows:

[Thu Jul 16 06:45:12.948257 2015] [mpm_prefork:notice] [pid 9475] AH00163: Apache/2.4.7 (Ubuntu) mod_fastcgi/mod_fastcgi-SNAP-0910052141 mod_fcgid/2.3.9 PHP/5.5.9-1ubuntu4.11 mod_python/3.3.1 Python/2.7.6 OpenSSL/1.0.1f configured – resuming normal operations [Thu Jul 16 06:45:12.948309 2015] [core:notice] [pid 9475] AH00094: Command line: ‘/usr/sbin/apache2’

my apache.conf shows

<Directory /var/www> Options FollowSymLinks AllowOverride FileInfo </Directory>

I get an error when I enter this command:

sudo apt-get install apache2 apache2-utils libapache2-mod-suphp libapache2-mod-fastcgi libapache2-mod-python libapache2-mod-fcgid apache2-suexec libapache2-mod-php5 php5 php5-fpm php5-gd php5-mysql php5-curl php5-intl php5-memcache php5-memcached php5-ming php5-ps php5-xcache php5-pspell php5-recode php5-snmp php5-sqlite php5-tidy php5-xmlrpc php5-xsl php5-imap php5-cgi php-pear php-auth php5-mcrypt mcrypt php5-imagick imagemagick libruby memcached phpmyadmin postfix postfix-mysql postfix-doc mysql-server openssl getmail4 rkhunter binutils dovecot-imapd dovecot-pop3d dovecot-mysql dovecot-sieve mailman amavisd-new spamassassin clamav clamav-daemon zoo unzip zip arj nomarch lzop cabextract apt-listchanges libnet-ldap-perl libauthen-sasl-perl daemon libio-string-perl libio-socket-ssl-perl libnet-ident-perl libnet-dns-perl bind9 dnsutils vlogger webalizer awstats geoip-database libclass-dbi-mysql-perl squirrelmail pure-ftpd-common pure-ftpd-mysql snmp

And this error!!

Reading package lists… Done Building dependency tree Reading state information… Done Package libapache2-mod-fastcgi is not available, but is referred to by another package. This may mean that the package is missing, has been obsoleted, or is only available from another source

E: Package ‘libapache2-mod-fastcgi’ has no installation candidate

my libapache2-mod-fastcgi no install! look please

…@… :~$ sudo apt-get install libapache2-mod-fastcgi Reading package lists… Done Building dependency tree Reading state information… Done Package libapache2-mod-fastcgi is not available, but is referred to by another package. This may mean that the package is missing, has been obsoleted, or is only available from another source

E: Package ‘libapache2-mod-fastcgi’ has no installation candidate …@…:~$

what do i do? What do I do? already installed all the rest , I can continue?

Kamal Nasser
DigitalOcean Employee
DigitalOcean Employee badge
August 4, 2015

Hi @israeldocanto, edit /etc/apt/sources.list and comment out the following lines:

deb http://mirrors.digitalocean.com/ubuntu trusty multiverse
deb http://mirrors.digitalocean.com/ubuntu trusty-updates multiverse

Then, update apt’s repo cache:

sudo apt-get update

You should then be able to install libapache2-mod-fastcgi.

@kamaln7 You’re the mannn! libraryyy = ON!! Thankss

I did everything as the tutorial asked , I still do not install wordpress by ispconfig . FileZilla and go to see it was not created any directory, can not access the / wp -admin and try to http and https in front , says that the page is not on the server, and in the ispconfig contained everything ok , I have to change something I did get to install wordpress ? can anyone direct me to a tutorial ?

For those who are trying very hard to install this, you can make use of this auto-installer: https://github.com/dclardy64/ISPConfig-3-Debian-Installer

Saves much time and is neat!

but it’s ubuntu i have not debian, does it work?

I recommend looking into ISPConfig3 documentation from their own website as well as some scripts that handle installation. Test them in a sandbox environment first.

Don’t forget to set up your domain records to point to your server including the MX record or your mail won’t work.

https://www.digitalocean.com/community/articles/how-to-set-up-a-host-name-with-digitalocean

Thank you. Worked great!!! Just as a side note, you might want to include that in order to have everything set up correctly, the droplet that will be using ISPConfig needs to be created using an FQDN. If not, instructions on how to do that would be helpful for newbies. You can also link to the create a droplet help page that states it’s recommended to name hostname with FQDN.

Thanks.

I got many errors saying apacha did not start, mysql asking for password, i typed all the passwords and words i typed previously none of them worked, then i skiped this mysql step, i have a feeling my installation gone wrong, how can i wipe and do all again? Also i got confused when it asked my server name(in the beginning) hostname, also some of steps didnt appear like postfix and asking mysql password.

To activate the new configuration, you need to run: service apache2 restart nonroot@asga:~$ sudo nano /etc/apache2/mods-available/suphp.conf nonroot@asga:~$ sudo ln -s /etc/mailman/apache.conf /etc/apache2/conf-available/mailman.conf nonroot@asga:~$ sudo a2enconf mailman Enabling conf mailman. To activate the new configuration, you need to run: service apache2 reload nonroot@asga:~$ service apache2 reload

  • Reloading web server apache2 *
  • The apache2 configtest failed. Not doing anything. Output of config test was: AH00526: Syntax error on line 4 of /etc/apache2/mods-enabled/fastcgi.conf: FastCgiIpcDir /var/lib/apache2/fastcgi: access for server (uid 1001, gid 1001) failed: write not allowed Action ‘configtest’ failed. The Apache error log may have more information. nonroot@asga:~$ To activate the new configuration, you need to run: nonroot@asga:~$ sudo a2enconf mailman

nonroot@asga:~$ sudo service apache2 restart

  • Restarting web server apache2 (98)Address already in use: AH00072: make_sock: could not bind to address [::]:80 (98)Address already in use: AH00072: make_sock: could not bind to address 0.0.0.0: 80 no listening sockets available, shutting down AH00015: Unable to open logs Action ‘start’ failed. The Apache error log may have more information. [fail]

Hi… what should i do if i’ve already installed the LAMP, what the install packages command line would be, because i followed the other tutorials where it installs LAMP, but in this tutorial says to install it again and the commands are togheter in one line, how to change that?

Err… Hi Justin, in this step here: Install Additional Components Now that we have our base system ready to go, we can begin installing some of the services that ISPConfig can manage and some software that supports ISPConfig… …We will do this all in one big apt command, so this will be a lot of packages installed at once: Then comes the whole packets command lines… but i’ve already php7 installed, mysql, apache, i have LAMP! Because i followed the basic steps tutorials in here DigitalOcean, so what lines there i would have to do, or remove?

Not working for me: When you are finished, you can visit your ISPConfig service by visiting your domain name followed by :8080 in your web browser:

https://server_domain_name:8080

page does not open the certificate… maybe because i left blank the FQDN part? The tutorial said just to ENTER in all… how do i fix that now? Any command to fix that?

this tutorial is outdated.go to ispconfig webpage and tutorial page you will see lots of fresh guides

This comment has been deleted

    HI Justin,

    Is it too heavy if i try this on a 512mb droplet?

    Join the Tech Talk
    Success! Thank you! Please check your email for further details.

    Please complete your information!

    Become a contributor for community

    Get paid to write technical tutorials and select a tech-focused charity to receive a matching donation.

    DigitalOcean Documentation

    Full documentation for every DigitalOcean product.

    Resources for startups and SMBs

    The Wave has everything you need to know about building a business, from raising funding to marketing your product.

    Get our newsletter

    Stay up to date by signing up for DigitalOcean’s Infrastructure as a Newsletter.

    New accounts only. By submitting your email you agree to our Privacy Policy

    The developer cloud

    Scale up as you grow — whether you're running one virtual machine or ten thousand.

    Get started for free

    Sign up and get $200 in credit for your first 60 days with DigitalOcean.*

    *This promotional offer applies to new accounts only.