Full-Stack Software Developer

The author selected the Internet Archive to receive a donation as part of the Write for DOnations program.
Introduction
WordPress is a popular CMS (Content Management System). It allows you to edit posts within a visual editor, as opposed to hand-coding pages of your website with raw HTML, and offers additional features, such as collaborative editing and revision history.
Traditionally, WordPress has functioned as both the backend and frontend of a website. The posts are edited within the Admin editor, and the backend dynamically generates each public page of your site when a visitor hits it by passing it through a PHP theme.
A new paradigm in WordPress is using it only for the content part of your site (also known as running headless), and using Gatsby to statically generate the frontend. By leveraging both and decoupling content from the user interface (UI), you can keep the content editor and collaborative features of WordPress, but also enjoy the faster load times and React-based UI ecosystem of Gatsby.
In this tutorial, you will provision WordPress to talk to Gatsby, set up a new Gatsby project based on a starter template, define the connection to WordPress in your Gatsby configuration, and put it all together to statically generate some pages based on posts that live inside your WordPress installation.
Prerequisites
Before you start on this guide, here are a few things you will need:
- An environment with sufficient resources to support building and serving your site. If you are using the same server to both host WordPress and build your Gatsby site, the recommended minimum amount of RAM is 2GB. If you would like to use a DigitalOcean Droplet, check out our How to Create a Droplet from the DigitalOcean Control Panel article.
- A working WordPress installation that is reachable from where Gatsby is running. If you are brand new to WordPress, you might want to start with a guide on What is WordPress first, but for general setup, there are also guides for multiple environments, such as Docker. This tutorial was tested on a LAMP stack set up by following How To Install WordPress on Ubuntu 20.04 with a LAMP Stack.
- Node.js, installed locally, for running Gatsby and building your site. The installation procedure varies by operating system, but there are guides for installing Node.js on Ubuntu and installing Node.js on Mac, and you can always find the latest release on the official NodeJS download page.
- The Gatsby CLI tool, installed locally. For how to install this and to learn some of the Gatsby basics, you can follow Step 1 of the How to Set Up Your First Gatsby Website tutorial.
- Some familiarity with JavaScript, for working in Gatsby. There is a lot of depth to JavaScript, but a good starting spot is our How to Code in JavaScript series. Additionally, it will help to have some knowledge of HTML, such as understanding HTML elements, and if you want to customize the UI of your posts beyond what is covered in this tutorial, it will also help to know some React and JSX.
This tutorial was tested on WordPress v5.7.1, Gatsby v3.3.0, and Node.js v14.17.0. Additionally, the WordPress setup was tested on both Windows 10 and Ubuntu 20.04 with Apache v2.4.41 and PHP v7.4.3.
Step 1 — Installing and Configuring the Required WordPress Plugins
In this first step, you will give WordPress the ability to talk to Gatsby by installing some plugins and adjusting settings. You will also verify that your local or hosted WordPress instance supports these changes, and record some details about your specific setup that will be needed later.
Start by logging into the admin dashboard of your WordPress instance by navigating to https://your_domain_name/wp-admin in your browser and inputting your credentials. Then go to the plugins page by clicking Plugins in the left sidebar. Next, navigate to the plugin installation page by clicking Add New at the top of the page, or in the same sidebar. If your WordPress installation uses standard paths, you will also be able to find this page at https://your_domain/wp-admin/plugin-install.php. This will bring you to the plugins page, as shown in the following image:
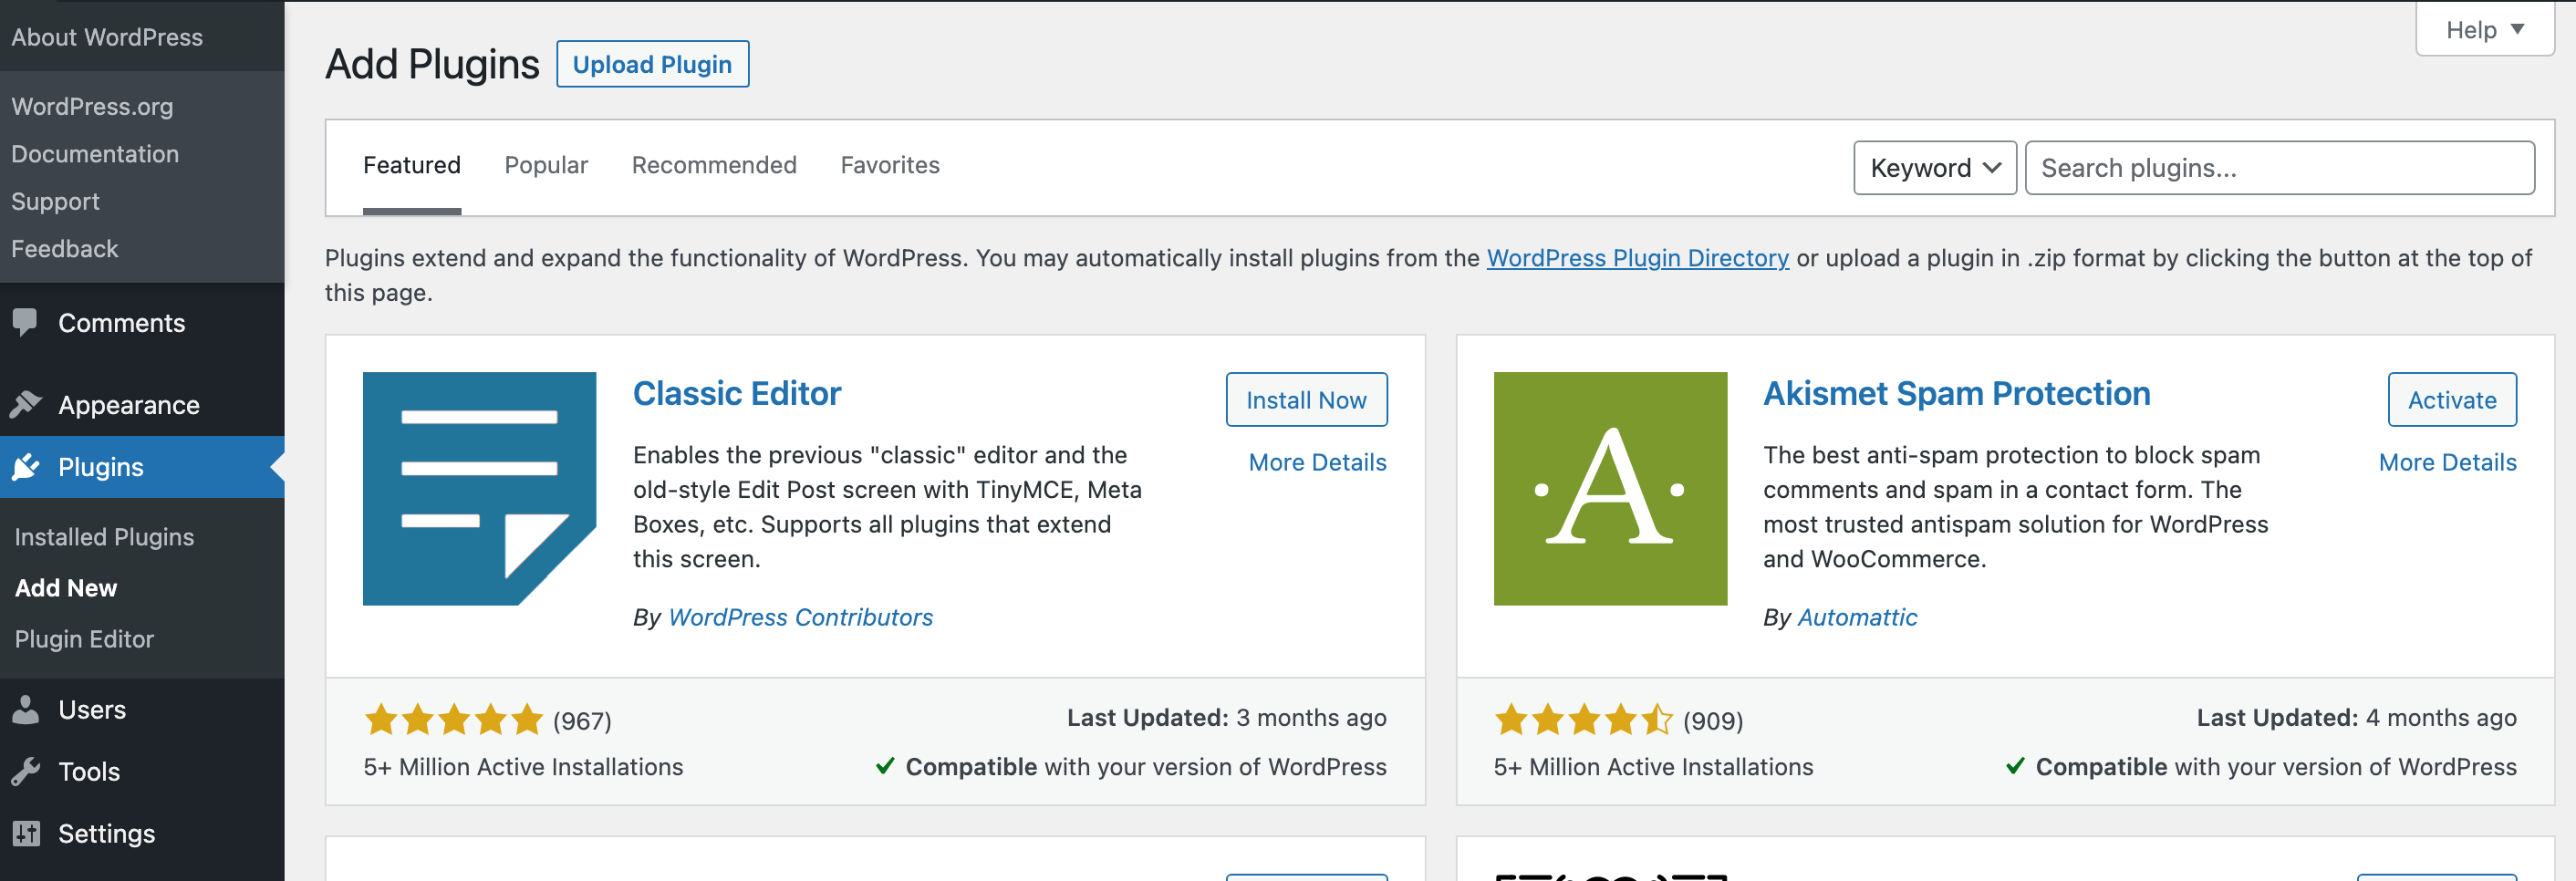
The two required plugins are as follows, and will be installed in this order:
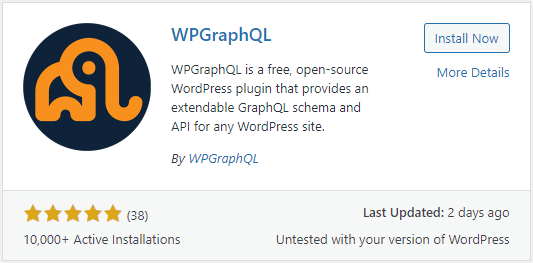
- WPGraphQL: This enables WordPress data to be queried by the GraphQL standard, as an alternative to WordPress’s standard REST endpoints. This is important because Gatsby uses GraphQL by default. This tutorial will use v1.3.5 of this plugin. For more information on this plugin, check out the WPGraphQL GitHub repository or the WordPress WPGraphQL Plugin Directory.
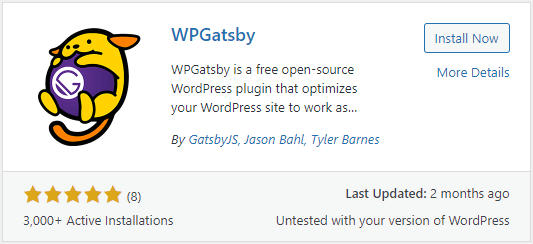
- WPGatsby: This plugin keeps WordPress in-sync with Gatsby, enables rich previews, and exposes hooks into the sync system. This tutorial will use v1.0.8 of this plugin. For more information on this plugin, check out the WPGatsby GitHub repository or the WordPress WPGatsby Plugin Directory.
Install and activate both of these plugins by searching for them and then pressing their associated Install Now buttons. Once they are installed, select the Activate button. After both plugins have been installed and activated, you will see some new settings panels within your WordPress admin dashboard. The following image shows these new settings panels.
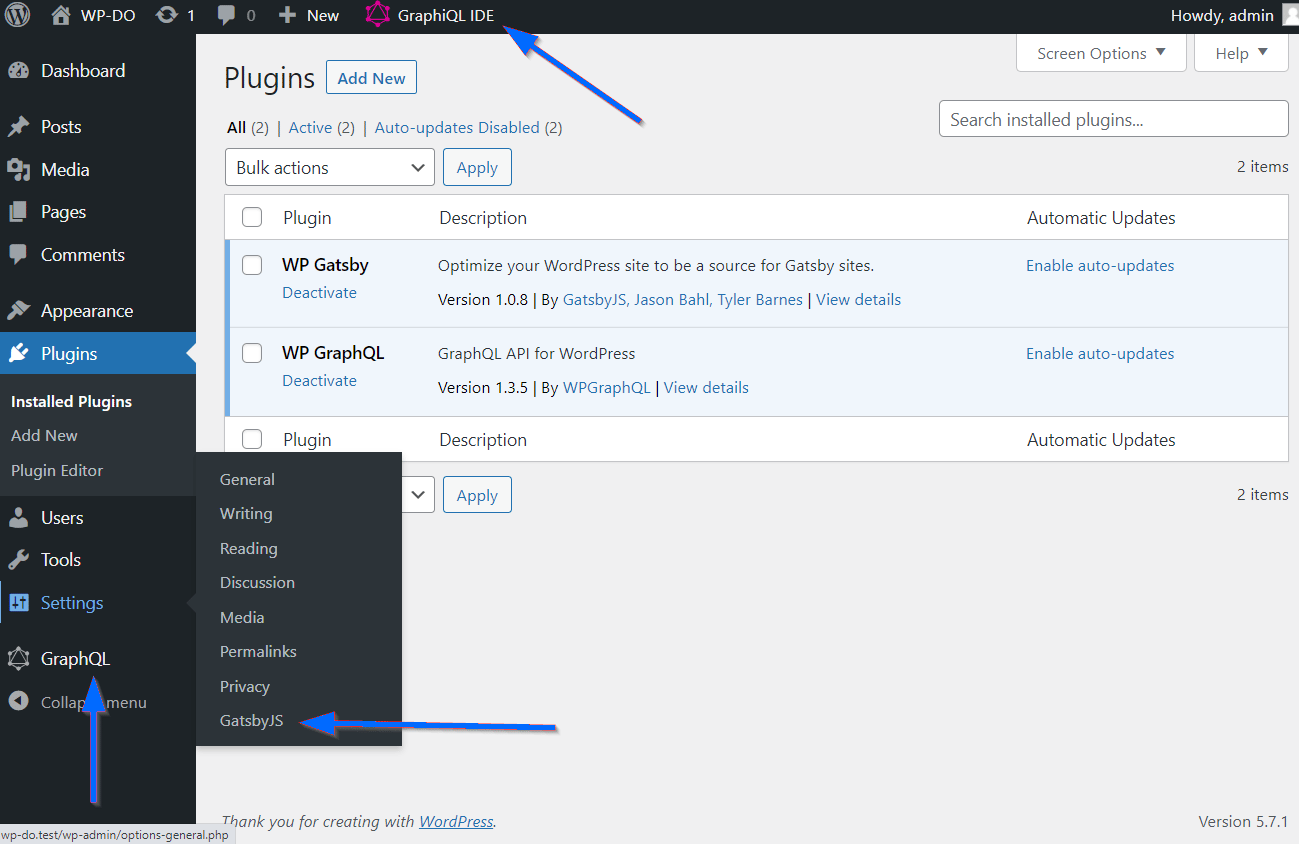
To verify that the GraphQL connection will be available for connecting to Gatsby, open the Settings panel, under the GraphQL sub-section in the Admin sidebar.
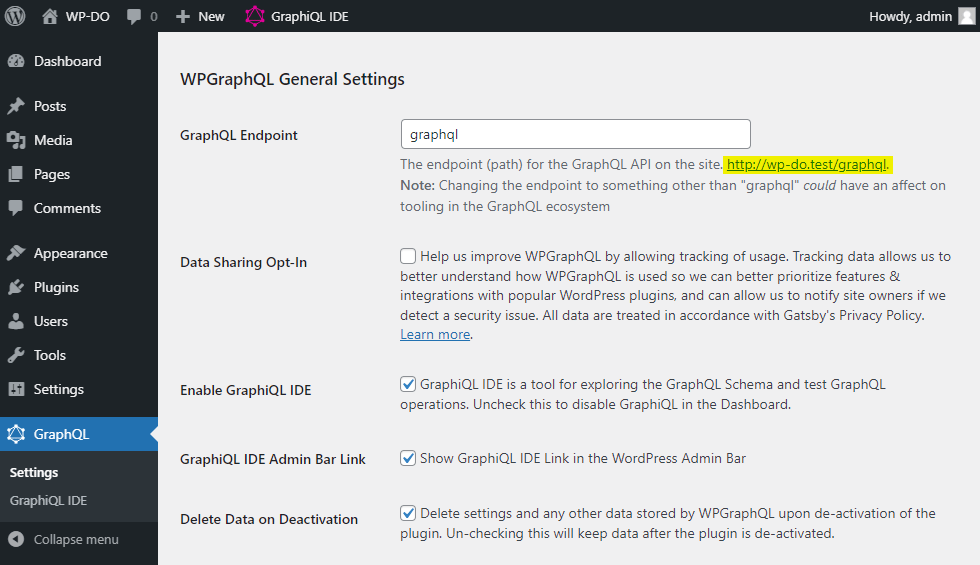
Take special note of the GraphQL endpoint. You can find this in the section labeled GraphQL Endpoint, below the text entry box. It is also highlighted in yellow in the screenshot. You will need this later, so to save some time you can copy it into your clipboard and/or paste it into a temporary text document.
For the best results with WPGraphQL, it is recommended to use a WordPress permalink setting other than plain, especially if this is a new WordPress installation where changing the URL structure will not affect a live website. To navigate to your permalink settings, click on Settings in the left sidebar of your WordPress admin dashboard, then click on Permalinks in that expanded section. From the permalink settings page, change your setting to any option other than plain, and then press Save Changes to update your site.
Setting your permalinks to something other than plain comes with some specific technical requirements; with the Apache web server, you need to enable the mod_rewrite module and set the AllowOverride directive to all. These will enable WordPress to dynamically route new paths. Step 3 of the WordPress on Ubuntu 20.04 tutorial covers this, with step-by-step instructions. If you ran Let’s Encrypt to provide an SSL certificate for your site, as is instructed in the How To Secure Apache with Let’s Encrypt on Ubuntu 20.04 tutorial, you will have to complete these steps for the new virtual host at /etc/apache2/sites-available/your_domain-le-ssl.conf.
Now that you have a GraphQL endpoint configured, you will test this connection. You can do so immediately; no Gatsby is installation required yet. You can use the GraphiQL IDE for a visual query builder tool (accessible through the sidebar), or you can even query the endpoint directly with your favorite network request tool of choice.
If you prefer the command line and have cURL installed, you could use the following command to retrieve all post titles:
- curl --location --request POST 'https://your_domain/graphql' \
- --header 'Content-Type: application/json' \
- --data-raw '{
- "query": "query { posts { nodes { title } } }"
- }'
This command makes a request to your GraphQL endpoint for a JSON response containing your WordPress posts, but only with their titles. With GraphQL, this is also called a query; the tutorial Understanding Queries in GraphQL explains them more in-depth.
The response JSON to your query will be something like this:
Output{"data":{"posts":{"nodes":[{"title":"Hello world!"}]}},"extensions":{"debug":[{"type":"DEBUG_LOGS_INACTIVE","message":"GraphQL Debug logging is not active. To see debug logs, GRAPHQL_DEBUG must be enabled."}]}}
Now that you have successfully installed and configured the required WordPress plugins to communicate with Gatsby, you can move on to setting up your new Gatsby project.
Step 2 — Setting Up a New Gatsby Project
In this step, you will set up a new Gatsby project based on a starter template specifically designed for sourcing data from WordPress. It will require using the Gatsby CLI to download and install the starter and its dependencies.
To speed up your development process and reduce the amount of setup that is required, you will start by using the Gatsby CLI and the Gatsby WordPress Blog Starter template.
Navigate to the local parent directory that will hold your Gatsby project, then run the following command to have the Gatsby CLI download and pre-install most of what you will need to get started building your site:
- gatsby new my-wordpress-gatsby-site https://github.com/gatsbyjs/gatsby-starter-wordpress-blog
You can replace my-wordpress-gatsby-site with whatever you would like the directory name to be for your local Gatsby files.
It will take a while for Gatsby to download and install all the necessary dependencies and assets. Once it has finished, you will receive a message similar to this one:
Output...
Your new Gatsby site has been successfully bootstrapped. Start developing it by running:

  cd my-wordpress-gatsby-site
  gatsby develop
Normally with a Gatsby site, this is the point at which you would hand-edit the gatsby-config.js file with details about your site known as metadata. However, in addition to pulling posts from WordPress, this starter also pulls the metadata in for you automatically; no need to hand-code the site title or description.
Having scaffolded a new Gatsby project, you are now ready to modify its configuration to tell it to pull data from WordPress.
Step 3 — Configuring Gatsby to Use WordPress Data
Now that you have a working Gatsby project, the next step is for you to configure it to pull in the data from WordPress. You will do this by editing the main Gatsby configuration file and working with the gatsby-source-wordpress plugin.
Thanks to the starter template you used, the gatsby-source-wordpress plugin will already be installed as a dependency and have a settings entry in the Gatsby config file; you just need to tweak it slightly.
Move into your local Gatsby directory that was created in the previous step:
- cd my-wordpress-gatsby-site
Then, open the file named ./gatsby-config.js in your text editor of choice. This is the main configuration file for all Gatsby projects.
Within the config file, you will find an existing settings entry for gatsby-source-wordpress within the plugins array. You can now take your specific GraphQL endpoint you copied from the previous step and replace the default demo endpoint, https://wpgatsbydemo.wpengine.com/graphql, with your value, as highlighted in the following code:
module.exports = {
	plugins: [
		{
			resolve: `gatsby-source-wordpress`,
			options: {
				url:
					process.env.WPGRAPHQL_URL ||
					`https://your_domain/graphql`,
			},
		},
		...
	],
	...
}
Save and close this file so that future builds of the site will use the updated value.
Note: url is the only required setting option, but there are a lot that are available; take a look at the Gatsby GitHub repostory for more. For example, there are options for enabling debug output, connecting to an HTACCESS, password-protected site, and performance related options, such as schema.requestConcurrency, which is especially important if your WordPress site is running on a server with limited resources.
Before moving on to customizing how Gatsby uses your WordPress data to build pages, build and preview your site as-is to make sure everything is working correctly. You can do this by running the following command:
- npm run develop
Or, if you are using the yarn package manager:
- yarn develop
Warning: If you get an error at this step, especially if it is an error about a missing dependency or can't resolve '...' in '...\.cache, it might be that part of the dependency install process has failed. This is a known issue in Gatsby projects. Try running npm i again (or yarn install if using yarn) to check for and install any missing dependencies. If that fails to fix the issue, completely rebuild your dependencies by deleting the node_modules folder, deleting package-lock.json or yarn.lock, and then running npm i or yarn install.
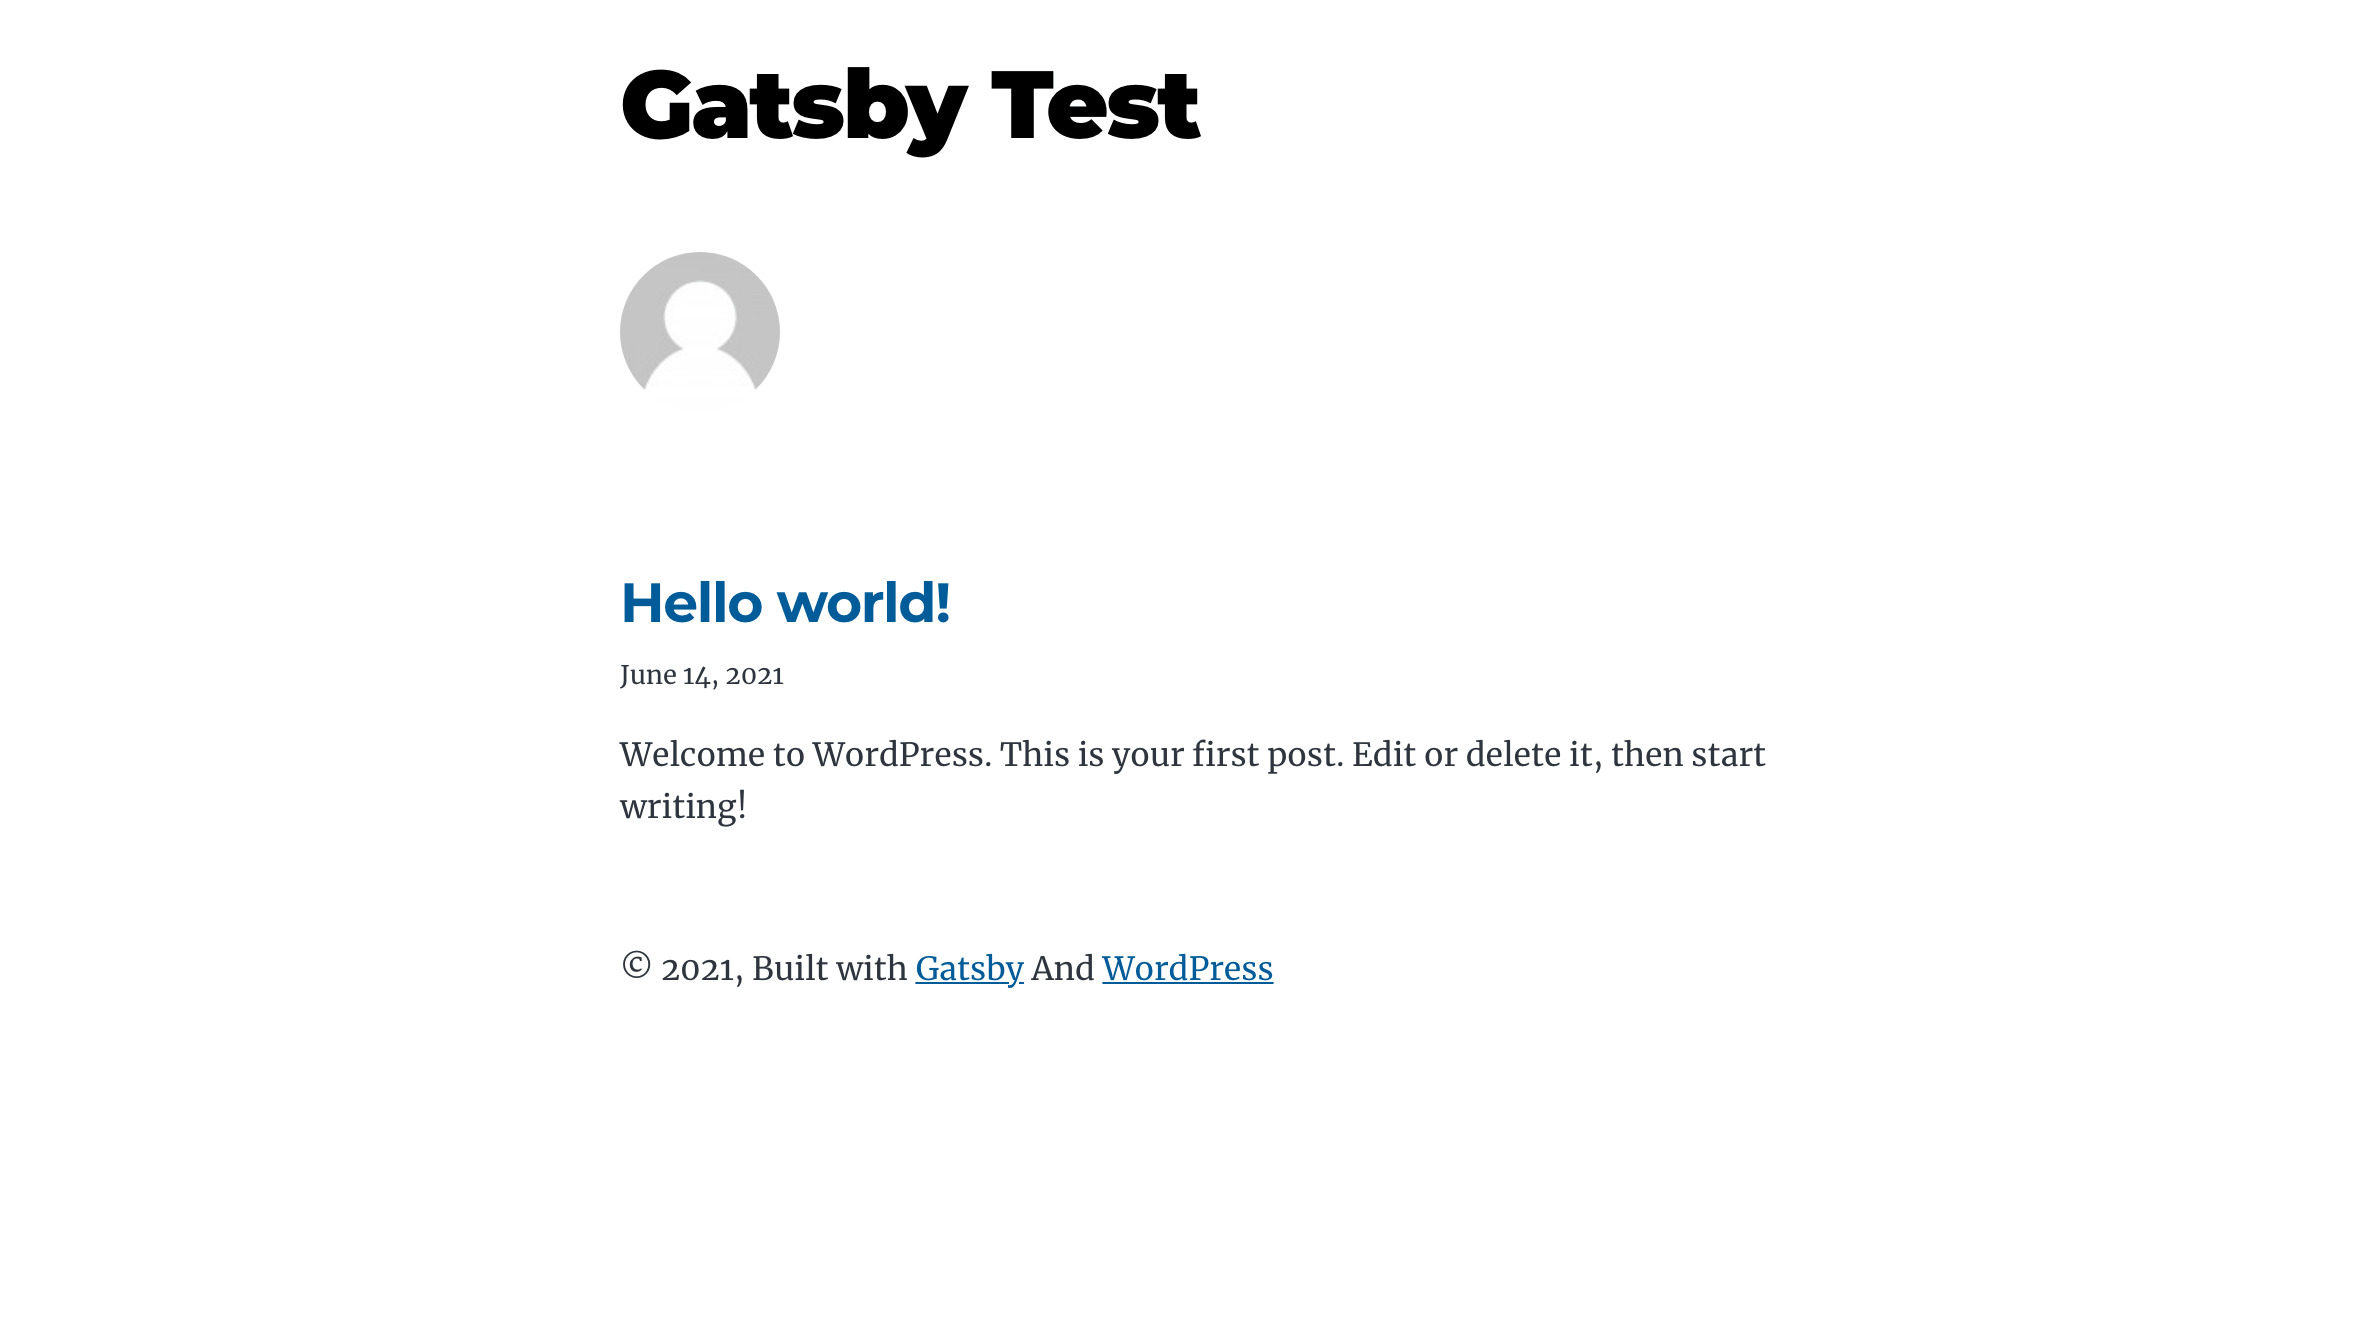
This command will run the gatsby develop process, which will pull in data from WordPress, combine it with the starter template’s pre-built UI files, and start a local development server so you can view a preview of the actual generated website in a browser. This command also runs Gatsby in a mode that supports hot-reloading, so that if you make edits to your local files, you will see those changes reflected instantly in your web browser.
Navigate to localhost:8000 in your browser and you will find your Gatsby site with WordPress content:
With your Gatsby project now pulling data from WordPress, the next step will be to customize the actual template files so that you can make your Gatsby site look and act just how you want it to.
Step 4 — Customizing the Starter Template Files
The Gatsby WordPress starter template provides a lot of default functionality, but in this step you will explore how you can customize the template files to make the project your own, in both form and function. By editing some Gatsby source files, you will bring a new piece of WordPress content—the post excerpt—into your Gatsby site and style it with CSS.
For most Gatsby sites, your starter template included, there are a few key files and folders to be aware of when it comes to customization:
./gatsby-node.js: This could be considered the center of the Static Site Generation process. It has the code for querying WordPress for all your content, then passing it through template files to generate the static output. If you want to modify what content ends up on your site, this is the main entry-point. In terms of WordPress development, this is similar to working with The Loop and similar concepts../src/templates: This contains individual template files, each of which should contain and export a React component responsible for rendering the content passed in. If you want to change how content looks, integrate third-party UI libraries, or build skeletons around content, this is the usual place to do it. In terms of WordPress development, these are similar to Template Files../src/components: Typically, each file in this folder is a singular React component that is dedicated to a specific UI task, and is meant to be pulled into template files. Think of these as UI building blocks, but not as templates. If you have a UI element that you want to share across multiple template files, this is a good place to put it and avoid copying and pasting the same code over and over. Some examples of this would be menus, author bio displays, header and footer elements, etc. In terms of WordPress development, these are similar to Template Partials../src/css: This contains CSS files that are shared across the site, as opposed to inline-styling, or a popularcss-in-jssolution, such asstyled-components. In this tutorial, and with your specific starter template, this folder provides the majority of styling for your new site. In terms of WordPress development, this is equivalent tostyle.css, or any number of stylesheets that a theme can inject into a page through WordPress’s enqueue system.
For an example of how you can edit the existing template files, open ./src/templates/blog-post.js in your text editor.
In WordPress, there is a special text value for each post called the excerpt, which is a short descriptive summary of the post. By default, this Gatsby template file pulls in the WordPress excerpt, but only uses it for SEO purposes, putting it in the <meta name="description" /> tag. You can modify the blog post template file to include the post excerpt visually, like so, adding the highlighted code to your file:
const BlogPostTemplate = ({ data: { previous, next, post } }) => {
	...
	return (
		<Layout>
			...
			<h1 itemProp="headline">{parse(post.title)}</h1>

			<p>{post.date}</p>

			{/* Checking for and adding the post excerpt if the current post has one*/}
			{post.excerpt && (
				<div className="post-excerpt">{parse(post.excerpt)}</div>
			)}

      {/* if we have a featured image for this post let's display it */}
        {featuredImage?.fluid && (
          <Image
            fluid={featuredImage.fluid}
              alt={featuredImage.alt}
              style={{ marginBottom: 50 }}
          />
        )}
      ...
		</Layout>
	)
}
In this code, you are checking if the post has an excerpt (important since it is not mandatory in WordPress), and if it does, displaying the text content of the excerpt inside a <div> element. The parse() function comes from html-react-parser, and is being used here to make sure that the <p> tag that will hold your excerpt is parsed into HTML rather than plain text, so you can echo out the content directly. An alternative approach would be to use dangerouslySetInnerHTML, with <div className="post-excerpt" dangerouslySetInnerHTML={{__html: post.excerpt}} ></div>.
Save and close the blog-post.js file.
Since the excerpt is a summary of the post, it might help the visitors to your site if you visually separate it from the body of the post, highlighting it at the top of the page and making it easy to find. You can do this by editing the main shared CSS file at ./src/css/style.css:
.post-list-item header {
  margin-bottom: var(--spacing-4);
}

/* CSS targeting your new post excerpt element */
.post-excerpt {
  box-shadow: 0px 1px 9px 1px rgb(0 0 0 / 50%);
  padding: 6px;
  border-radius: 8px;
  margin-bottom: 14px;
}

.post-excerpt p {
  margin-bottom: 0px;
}
In your CSS, you have now used box-shadow to add a shadow effect around the excerpt container, contrasting it with the actual body of the post, as well as added padding, rounded edges, and spacing between itself and adjacent elements. Furthermore, you removed the default bottom margin from the text of the excerpt, since spacing is now provided by the container .post-excerpt element.
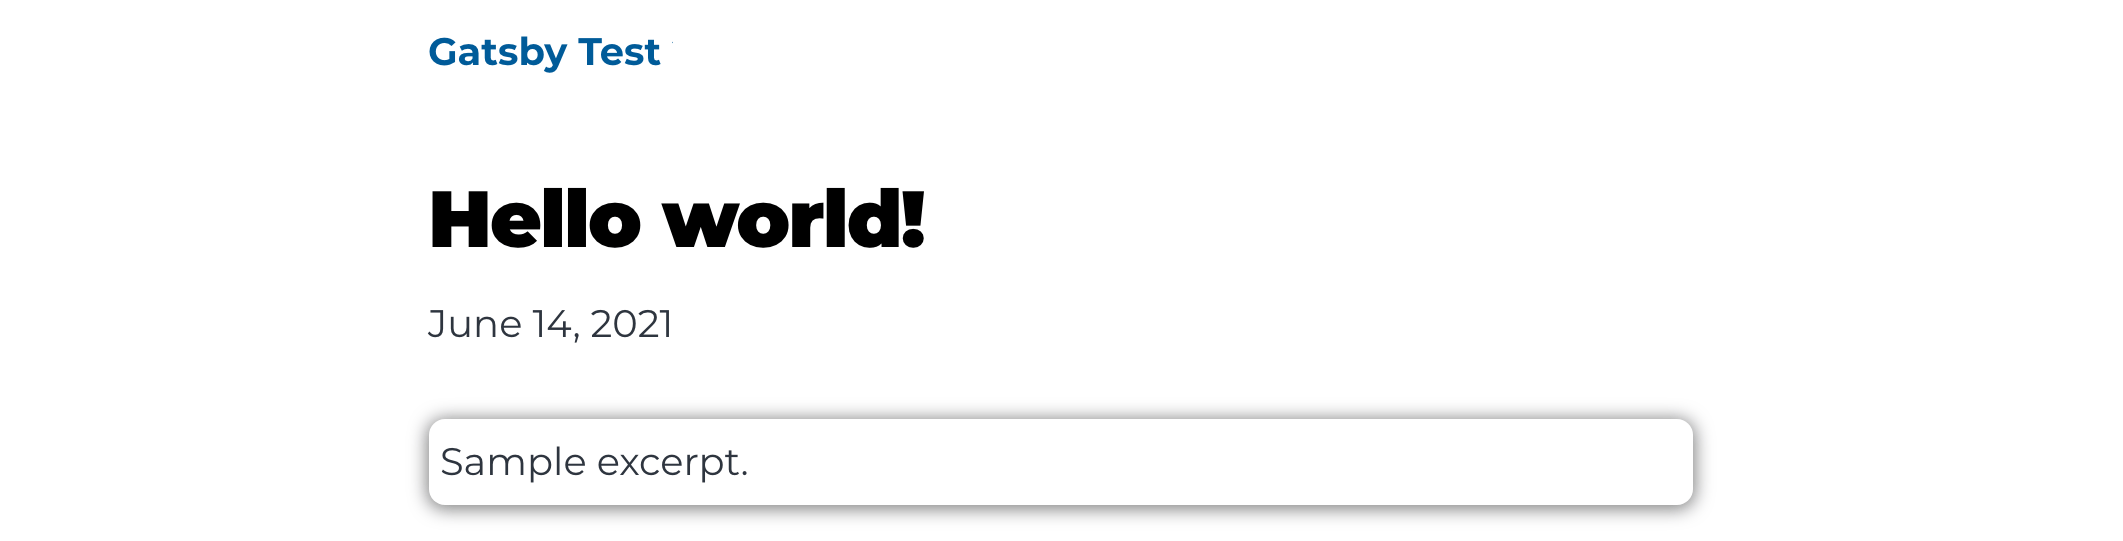
Save the style.css file. To test this out, add an excerpt in WordPress to take advantage of this new visual feature. In the sidebar of the WordPress admin view, navigate to the Posts tab, then select the sample Hello world! post. This will take you to the WordPress post editor view. In the newer block-based editor, the excerpt field appears under the Post tab in the right sidebar, near the bottom. In the legacy editor, the location of the excerpt field is customizable, so it might appear in different locations depending on your theme and custom settings.
Add in an excerpt, then select the Update button at the top of the screen. Then, go to your Gatsby site at localhost:8000, and select the Hello world! blog post. You will find the excerpt you wrote rendered on the page:
Note: If you are looking for pre-built themes that don’t require any additional coding or configuration, similar to how WordPress themes work, there is a growing number of both official and community themes for using WordPress with Gatsby.
You have just embedded and styled a post excerpt from WordPress into a custom Gatsby static site. This used data that was already configured for use by your starter template. The next step will explore how to bring new pieces of data via GraphQL and integrate them into your Gatsby site.
Step 5 — Using WordPress Data in Gatsby with Custom Templates
In the previous steps, you edited an existing template and used some standard WordPress data (post title and post content) to render your blog posts with Gatsby’s static output. For many sites, this alone might be all that is needed. However, to showcase how decoupling the UI from WordPress gives you greater flexibility, in this step you will explore how you would add support for a special video post type in Gatsby, going beyond that existing blog post template.
In this scenario, you are adding support for posts that each showcase a single video, sourced from YouTube. You will make it so that you or your content collaborators can copy and paste a YouTube URL into the WordPress post editor and the Gatsby site itself will show the video inside a customized YouTube embed widget.
For the post template, create a new file under /src/templates, and name it video-post.js. Before building the UI of the page that will be generated, you can write a GraphQL query to retrieve data for it. In Gatsby, this is called a Page Query, and uses the graphql tag.
Add the following code to the video-post.js file:
import React from "react"
import { graphql } from "gatsby"

export const pageQuery = graphql`
  query VideoPostById(
    # these variables are passed in via createPage.pageContext in gatsby-node.js
    $id: String!
  ) {
    # selecting the current post by id
    post: wpPost(id: { eq: $id }) {
      id
      content
      title
      date(formatString: "MMMM DD, YYYY")
    }
  }
`
In this snippet, you are using the post ID to query for specific values belonging to that exact post—such as the actual post content, title, and date.
Next, you can add the actual React component that returns JSX, which will be rendered as the webpage. A good place to start is by copying most of the structure from the existing blog-post.js template file and adding the following highlighted lines:
import React from "react"
import { graphql } from "gatsby"
import parse from "html-react-parser"

import Bio from "../components/bio"
import Layout from "../components/layout"
import Seo from "../components/seo"

const VideoPostTemplate = ({ data: { post } }) => {
  return (
    <Layout>
      <Seo title={post.title} description={post.excerpt} />

      <article
        className="blog-post"
        itemScope
        itemType="http://schema.org/Article"
      >
        <header>
          <h1 itemProp="headline">{parse(post.title)}</h1>
          <p>{post.date}</p>
        </header>

        <footer>
          <Bio />
        </footer>
      </article>
    </Layout>
  )
}

export default VideoPostTemplate;

export const pageQuery = graphql`
  query VideoPostById(
    # these variables are passed in via createPage.pageContext in gatsby-node.js
    $id: String!
  ) {
    # selecting the current post by id
    post: wpPost(id: { eq: $id }) {
      id
      content
      title
      date(formatString: "MMMM DD, YYYY")
    }
  }
`
In addition to creating the React component, you also used export default to make sure that the component is the default item exported from the file. This is important because of how the file is imported later on by Gatsby when it compiles the template against data from WordPress.
Now, you can add some logic to your React component to check if there is a raw YouTube URL embedded in the body of the post:
...

const VideoPostTemplate = ({ data: { post } }) => {
  // RegEx to find YouTube IDs
  const youtubeIdPattern = /watch\?v=([a-z_0-9-]+)|youtu\.be\/([a-z_0-9-]+)|youtube\.com\/embed\/([a-z_0-9-]+)/i;

  const matches = youtubeIdPattern.exec(post.content);
  let videoId;

  if (matches) {
    // Use first available match
    videoId = matches[1] || matches[2] || matches[3];
  }

  return (
    <Layout>
      <Seo title={post.title} description={post.excerpt} />

      <article
        className="blog-post"
        itemScope
        itemType="http://schema.org/Article"
      >
        <header>
          <h1 itemProp="headline">{parse(post.title)}</h1>
          <p>{post.date}</p>
        </header>

        <footer>
          <Bio />
        </footer>
      </article>
    </Layout>
  )
}
...
In this code, youtubeIdPattern is a Regular Expression (or RegEx), which is a search pattern you are executing against the body of the post with youtubeIdPattern.exec(post.content) to try and find any YouTube IDs which were included. If matches are found, the variable videoId is set to the first match.
Finally, you can add the JSX that renders the video based on the videoId you’ve extracted:
...

  return (
    <Layout>
      <Seo title={post.title} description={post.excerpt} />

      <article
        className="blog-post"
        itemScope
        itemType="http://schema.org/Article"
      >
        <header>
          <h1 itemProp="headline">{parse(post.title)}</h1>
          <p>{post.date}</p>
        </header>

        {videoId ? (
          <div className="video-embed">
            <iframe width="512" height="288" src={`https://www.youtube-nocookie.com/embed/${videoId}?controls=0&autoplay=1`} title={post.title} frameborder="0" allow="accelerometer; autoplay; clipboard-write; encrypted-media; gyroscope; picture-in-picture" allowfullscreen></iframe>
          </div>
        ) : (
          <div className="no-video-found">
            <p>Sorry, could not find a video in this post!</p>
          </div>
        )}

        <hr />

        <footer>
          <Bio />
        </footer>
      </article>
    </Layout>
  )
}
...
If a videoId is found, your code returns a customized, privacy-enhanced YouTube embed, served through an iframe, set to autoplay. Otherwise, it returns a message that no video was found. It also adds a horizontal break between the video embed and the footer of the post.
Now that your component template file is built, you will tell Gatsby to use the new template for posts that are set to the Video type within WordPress, and not use the regular blog post template for them.
Make sure to save your changes in video-post.js, then open gatsby-node.js in your text editor.
First, modify the getPosts() function, which the starter uses as the main GraphQL query to the WordPress backend for posts. You’ll modify the query to pull in the postFormats that the given post belongs to:
...
async function getPosts({ graphql, reporter }) {
  const graphqlResult = await graphql(/* GraphQL */ `
    query WpPosts {
      # Query all WordPress blog posts sorted by date
      allWpPost(sort: { fields: [date], order: DESC }) {
        edges {
          previous {
            id
          }

          ...

          post: node {
            id
            uri
            postFormats {
              formats: nodes {
                name
              }
            }
          }

          next {
            id
          }
        }
      }
    }
  `)

  ...

  return graphqlResult.data.allWpPost.edges
}
Next, you need to implement the logic that separates the video posts and sends them to their unique template file for rendering. For this, you can hook into the existing createIndividualBlogPostPages() function in the starter.
You can pull the data from the GraphQL query you modified and use that to determine if the current post is a video post or not:
const createIndividualBlogPostPages = async ({ posts, gatsbyUtilities }) =>
  Promise.all(
    posts.map(({ previous, post, next }) => {
      const postFormats = post.postFormats.formats;
      const isVideo = postFormats.length && postFormats[0].name === 'Video';
...
          // We also use the next and previous id's to query them and add links!
          previousPostId: previous ? previous.id : null,
          nextPostId: next ? next.id : null,
        },
      })}
    )
  )
Then, change the component property in createPage to use the corresponding template file:
const createIndividualBlogPostPages = async ({ posts, gatsbyUtilities }) =>
  Promise.all(
    posts.map(({ previous, post, next }) => {
      const postFormats = post.postFormats.formats;
      const isVideo = postFormats.length && postFormats[0].name === 'Video';

      return gatsbyUtilities.actions.createPage({
        // Use the WordPress uri as the Gatsby page path
        // This is a good idea so that internal links and menus work 👍
        path: post.uri,

        // Use special video template if post format === Video, else use blog post template
        component: isVideo ? path.resolve(`./src/templates/video-post.js`) : path.resolve(`./src/templates/blog-post.js`),

        ...
      });
    })
  )
To keep things concise, this code statement uses a ternary operator, which is a way to return one value if another is truthy (truth-like) and a different value if it is falsy, all without an if/else statement. The code uses isVideo from your previous post format check, and if true, returns the path of the new video template. If false, it tells Gatsby to use the regular blog post template. The Node.js path.resolve() function is used to turn the relative path (./src/...) into an absolute path (the full filepath), which Gatsby requires to load a component file.
Save and exit the file.
Next, style your video embed by editing ./src/css/style.css again:
.video-embed {
  /* Shadow effect around box to give it contrast */
  box-shadow: 0px 2px 12px 4px rgb(0 0 0 / 50%);
  /* All four declarations below help center our video and give it space */
  display: block;
  line-height: 0px;
  margin: 20px auto;
  max-width: 512px;
}
In adding the this CSS, you’ve given the video embed a shadow effect around it, which also gives it contrast with the page, as well as centered it and given it space away from other elements.
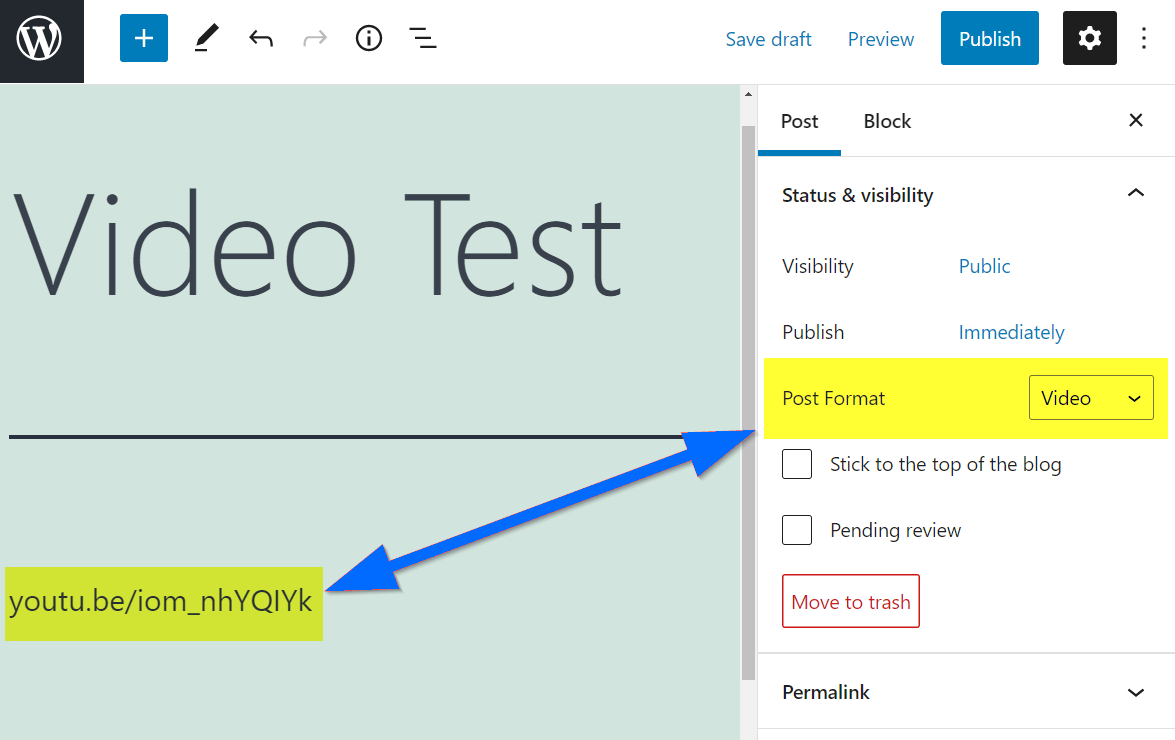
To test the functionality of this new code, you can create a new post in WordPress that matches the criteria required by the template. From your WordPress Admin Dashboard, click on Posts in the left sidebar, then Add New to start building a new post. Give your post a title, and then make sure it meets these two criteria:
- The Post Format will be set to Video. You can find the format dropdown in the right sidebar
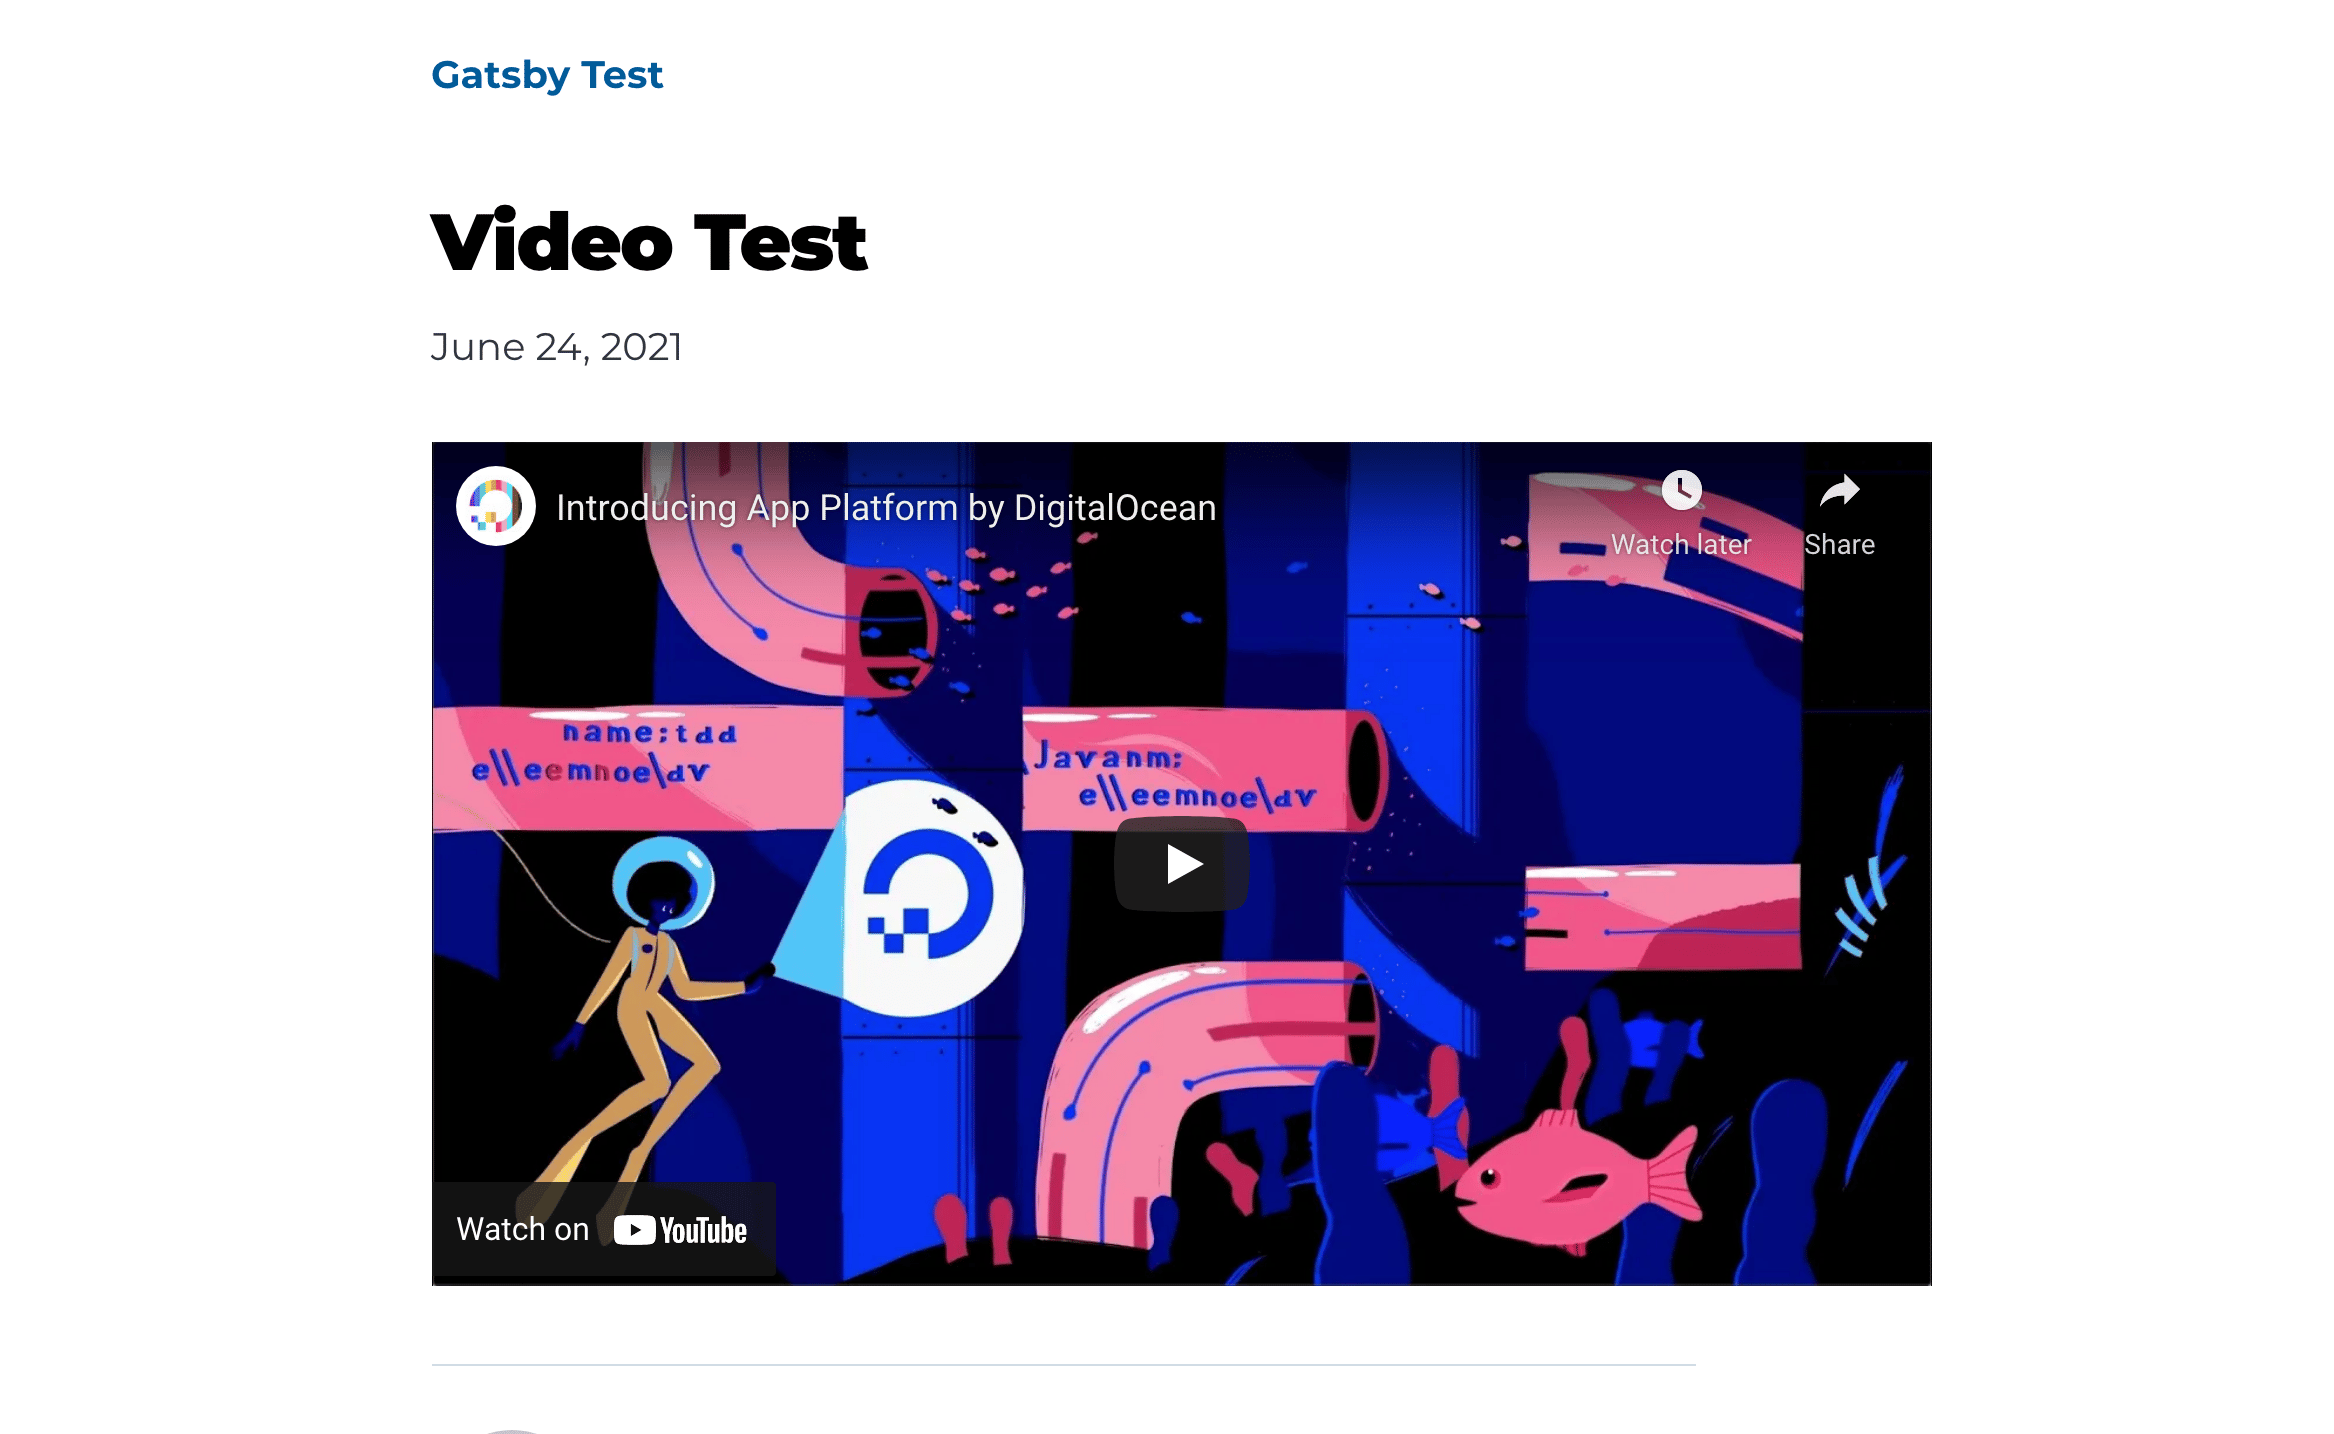
- The post body will contain a YouTube URL (and not as an embed). To test this, you can use this short link to a DigitalOcean promotional video:
youtu.be/iom_nhYQIYk.
After filling out the post, select Publish (or Update if this is an existing post) and click to confirm the prompt that appears, so that your post goes live and Gatsby can fetch it over the GraphQL connection.
Navigate to localhost:8000 in your browser and select your test video post. The YouTube video will be rendered in the browser, as shown in the following image:
Conclusion
By working through the steps in this tutorial, you now have a statically generated Gatsby site that sources its content from a WordPress backend. In decoupling content from UI, you have opened up new possibilities for speeding up your site, reduced the barriers to cross-discipline content collaboration, and taken advantage of the rich ecosystem that Gatsby and React provide for UI development.
If you would like to read more Gatsby tutorials, try out the other tutorials in the How To Create Static Web Sites with Gatsby.js series.
Thanks for learning with the DigitalOcean Community. Check out our offerings for compute, storage, networking, and managed databases.
Tutorial Series: How To Create Static Web Sites with Gatsby.js
Gatsby is a React framework that allows you to create static and serverless apps. Gatsby websites are different from traditional websites because they are usually deployed on a content delivery network (CDN) and are content agnostic. In this tutorial, you will learn the basics of creating a site with Gatsby, allowing you to create static sites that are optimized for your users.
About the author
I love learning new things and sharing knowledge along the way!
Still looking for an answer?
This textbox defaults to using Markdown to format your answer.
You can type !ref in this text area to quickly search our full set of tutorials, documentation & marketplace offerings and insert the link!
 This work is licensed under a Creative Commons Attribution-NonCommercial- ShareAlike 4.0 International License.
Become a contributor for community
Get paid to write technical tutorials and select a tech-focused charity to receive a matching donation.

DigitalOcean Documentation
Full documentation for every DigitalOcean product.

Resources for startups and AI-native businesses
The Wave has everything you need to know about building a business, from raising funding to marketing your product.
The developer cloud
Scale up as you grow — whether you're running one virtual machine or ten thousand.

Start building today
From GPU-powered inference and Kubernetes to managed databases and storage, get everything you need to build, scale, and deploy intelligent applications.
