
Introduction
Chef is a configuration management system that allows you to build and manage your infrastructure in a controlled and repeatable way. With Chef, you can ensure that your infrastructure decisions are all centrally documented and can be reimplemented easily at any time.
In previous articles, we have discussed basic Chef terminology, how to install the software(with Chef 12 or Chef 11), how to work with cookbooks, and how to work with roles and environments.
In this article, we will discuss how to use a plugin for knife, the Chef configuration tool, to work with your DigitalOcean droplets. Using this tool, we can create infrastructure droplets and configure them easily from within our Chef system.
We will assume that you have installed and configured your server and workstation, and that you know how to create and bootstrap new nodes.
Install the Knife DigitalOcean Plugin
Before we can begin working with DigitalOcean droplets from within our Chef system, we need to install the DigitalOcean plugin for the knife tool.
We can do this simply by installing a gem.
With the way our workstation is configured, if we were to type in:
gem install knife-digital_ocean
We would get an error like this:
Fetching: knife-digital_ocean-0.4.0.gem (100%)
ERROR:  While executing gem ... (Gem::FilePermissionError)
    You don't have write permissions into the /opt/chef/embedded/lib/ruby/gems/1.9.1 directory.
Similarly, if we run this command with sudo, we will get a command not found:
sudo gem install knife-digital_ocean
sudo: gem: command not found
The problem is that we have specified the path to our Chef executables within our user’s environment, but we do not have the privileges necessary to execute the command correctly.
We can get around this by using the full path to the Chef gem executable:
sudo /opt/chef/embedded/bin/gem install knife-digital_ocean
This will install the DigitalOcean knife plugin, allowing you to take advantage of the included functionality.
Configure the Knife Plugin with your DigitalOcean Credentials
In order to use the knife plugin, you need to give knife authorization to use your DigitalOcean account. This can be done using your account’s API key and Client ID.
In your DigitalOcean control panel, click on the API link in the left-hand navigation menu. You should see the “Client ID” of your account here:

You will need this value for your configuration file in a moment.
If you have already generated an API key, you will need to collect that value from another application that is using it to connect to your DigitalOcean account. It is not possible to retrieve the current API value from the interface, as a security measure.
If you have not generated an API key yet, or if you have lost or do not need your old key anymore, you can generate a new key by typing the “Generate New Key” button:
Once you generate a new key, you will need to copy the value generated before leaving the screen. As mentioned above, you will not be able to access this value after leaving this page, so you will either have to generate a new value or retrieve your API key from an application that is already using it.
Once you have both the Client ID and the API key, you are ready to configure knife to use these values.
On your workstation, navigate to the Chef configuration directory within your Chef repo:
cd ~/chef-repo/.chef
We will be editing the knife.rb file located within:
nano knife.rb
log_level                :info
log_location             STDOUT
node_name                'station1'
client_key               '/home/demo/chef-repo/.chef/station1.pem'
validation_client_name   'chef-validator'
validation_key           '/home/demo/chef-repo/.chef/chef-validator.pem'
chef_server_url          'https://chef_server.com:443'
syntax_check_cache_path  '/home/demo/chef-repo/.chef/syntax_check_cache'
cookbook_path [ '/home/demo/chef-repo/cookbooks' ]
At the bottom of the file, we need to add our credentials, like this:
<pre> log_level :info log_location STDOUT node_name ‘station1’ client_key ‘/home/demo/chef-repo/.chef/station1.pem’ validation_client_name ‘chef-validator’ validation_key ‘/home/demo/chef-repo/.chef/chef-validator.pem’ chef_server_url ‘https://chef_server.com:443’ syntax_check_cache_path ‘/home/demo/chef-repo/.chef/syntax_check_cache’ cookbook_path [ ‘/home/demo/chef-repo/cookbooks’ ] knife[:digital_ocean_client_id] = ‘<span class=“highlight”>your_client_id</span>’ knife[:digital_ocean_api_key] = ‘<span class=“highlight”>your_api_key</span>’ </pre>
Save and close the file when you are done.
Now, we can test to see if knife can connect to the DigitalOcean servers by asking for a list of our currently active droplets. Make sure you are in your Chef repo before running the knife command:
cd ~/chef-repo
knife digital_ocean droplet list
ID       Name             Size   Region      IPv4             Image                         Status
111111   irssi            512MB  New York 1  111.111.111.111  479972 (N/A)                  active
222222   try              4GB    New York 2  222.222.222.222  1575388 (Ubuntu-Init)         active
333333   nftables         4GB    New York 2  333.333.333.333  308287 (Debian 7.0 x64)       active
4444444  snmp             4GB    New York 2  444.444.444.444  1575388 (Ubuntu-Init)         active
5555555  node             4GB    New York 2  555.555.555.555  1575388 (Ubuntu-Init)         active
If you get a list of your current droplets, you’ve connected successfully and your authentication is working.
Configure SSH Keys on your Chef Workstation
Now that you can connect to your DigitalOcean account using the knife tool, we need to go one step further to help automate the droplet creation process. We need to create an SSH key for our Chef workstation to embed in the droplets we will be created.
On our Workstation computer, we should create a new SSH key by typing:
ssh-keygen
Press enter through the prompts to accept the default values. This will create a hidden subdirectory in your user’s home directory called .ssh with a public and private key inside.
Change into this directory right now by typing:
cd ~/.ssh
ls
id_rsa id_rsa.pub known_hosts
The file that we need right now is the id_rsa.pub file. You can view the contents of this file by typing:
cat id_rsa.pub
sh-rsa AAAAB3NzaC1yc2EAAAAxAQABAAABAQCv60WjxoM39LgPDbiW7ne3gu18q0NIV.....................lANpl5qmhDQ+GS/sO............mHWL2irjuB9xBXr00+44vSd2q/vtXdGXhdSMTf4/XK17fjKSG/9y3yD6nml6q9XgQxx9Vf/IKaKdlK0hbC1ds0+8/83PTb9dF3L7hf3Ch/ghvj5++twJFdFeG+VI7EDuKNA4zL8C5FdY.....................XIIeZvZ/z9Kp.....................nyiIuEAmn8fbnosWcsovw0IS1Hz6HsjYo4bu/gA82LWt3sdRUBZ/7ZsVD3ELip
email@domain.com
Back in the DigitalOcean control panel, click on the “SSH Keys” link in the left-hand menu. Click on the “Add SSH Key” button in the upper-right corner:

On the next page, create a name for your new key and then paste the contents of the file into the area given:
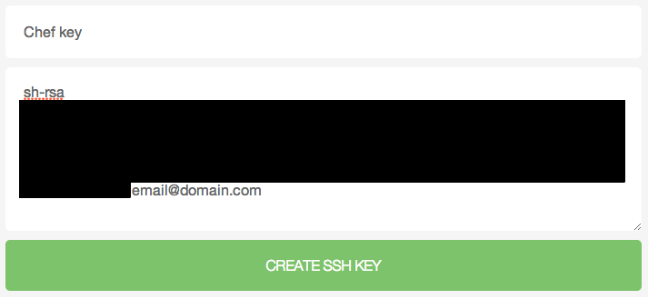
Click on the “Create SSH Key” button below when you are finished.
You now should have the ability to embed the SSH key from your Chef server into new droplets. This should allow you to create droplets from within the interface and then login to configure your server with the cookbooks and roles that you’ve created, all in a single step.
Working with the Knife Plugin
Let’s begin working with the knife plugin.
We can start by once again querying for the droplets associated with your DigitalOcean account:
knife digital_ocean droplet list
ID       Name             Size   Region      IPv4             Image                         Status
111111   irssi            512MB  New York 1  111.111.111.111  479972 (N/A)                  active
222222   try              4GB    New York 2  222.222.222.222  1575388 (Ubuntu-Init)         active
333333   nftables         4GB    New York 2  333.333.333.333  308287 (Debian 7.0 x64)       active
4444444  snmp             4GB    New York 2  444.444.444.444  1575388 (Ubuntu-Init)         active
5555555  node             4GB    New York 2  555.555.555.555  1575388 (Ubuntu-Init)         active
This gives us an overview of our droplets.
The knife plugin is rather simple, but contains all of the pieces you need to control the droplets within your account, perhaps with the exception of DNS functionality. The main functionality is creating and destroying droplets with the information that you can get from querying.
Querying for Information Using the Knife Plugin
We can find out all of the information we may need for our create and destroy commands using different knife queries.
To find out which standard DigitalOcean images that we have available to use as base images, we can type this. The -G flag stands for “global”:
knife digital_ocean image list -G
ID       Distribution  Name                                             Global
361740   Arch Linux    Arch Linux 2013.05 x32                           +
350424   Arch Linux    Arch Linux 2013.05 x64                           +
1602     CentOS        CentOS 5.8 x32                                   +
1601     CentOS        CentOS 5.8 x64                                   +
376568   CentOS        CentOS 6.4 x32                                   +
. . .
This will give all of the standard DigitalOcean images, including all one-click applications that you can use to deploy a new droplet. The ID column is the item that you need to pay attention to in order to deploy from the correct image.
Similarly, if you want a list of your snapshots, backups, etc., you can type the same command without the -G flag:
knife digital_ocean image list
ID       Distribution  Name             Global
11xxxxx  Ubuntu        Dokku            -
15xxxxx  Ubuntu        Ubuntu-Init      -
15xxxxx  Ubuntu        Ubuntu-LAMP      -
15xxxxx  Ubuntu        Ubuntu-WP        -
You can use the image IDs from this list as base images as well for increased flexibility.
To find out which regions are available to deploy your droplet, type:
knife digital_ocean region list
ID  Name
1   New York 1
2   Amsterdam 1
3   San Francisco 1
4   New York 2
5   Amsterdam 2
For a list of sizes to deploy your droplet, you can type:
knife digital_ocean size list
ID  Name
63  1GB
62  2GB
64  4GB
65  8GB
61  16GB
. . .
To list the SSH keys that we can embed within an image, we can issue this command:
knife digital_ocean sshkey list
ID     Name
11111  Home key
22222  Chef key
Creating and Destroying Droplets
We now know how to get all of the information necessary to create and destroy droplets.
We can start with destroying a droplet, since destruction always requires less effort than creation.
All we need to destroy a droplet is the droplet’s ID. This is available in the first column of the droplet listing:
knife digital_ocean droplet list
<pre> ID Name Size Region IPv4 Image Status <span class=“highlight”>111111</span> irssi 512MB New York 1 111.111.111.111 479972 (N/A) active <span class=“highlight”>222222</span> try 4GB New York 2 222.222.222.222 1575388 (Ubuntu-Init) active <span class=“highlight”>333333</span> nftables 4GB New York 2 333.333.333.333 308287 (Debian 7.0 x64) active <span class=“highlight”>4444444</span> snmp 4GB New York 2 444.444.444.444 1575388 (Ubuntu-Init) active <span class=“highlight”>5555555</span> node 4GB New York 2 555.555.555.555 1575388 (Ubuntu-Init) active </pre>
Once you have the ID of the droplet you wish to delete, you can use it by typing:
<pre> knife digital_ocean droplet destroy <span class=“highlight”>111111</span> </pre>
This should queue the droplet for deletion.
In order to create a droplet, you will need more information. Any of the fields that you usually need to fill out in the DigitalOcean control panel will need to be entered as parameters into this command.
The command will look like this:
<pre> knife digital_ocean droplet create --server-name <span class=“highlight”>name_for_server</span> --image <span class=“highlight”>image_id</span> --location <span class=“highlight”>region_id</span> --size <span class=“highlight”>size_id</span> --ssh-keys <span class=“highlight”>ssh_key_ids</span> --bootstrap --run-list “<span class=“highlight”>nodes_run_list</span>” </pre>
For instance, to create an x86_64 Ubuntu 12.04 instance called “hello” on a 1G droplet in the NY2 region with an SSH key of 1111, we can type this:
<pre> knife digital_ocean droplet create --server-name hello --image 1505447 --location 4 --size 63 --ssh-keys 22222 </pre>
Make sure that you are passing in the SSH key of your Chef workstation so that you will be able to connect to it is online.
If we want to bootstrap the droplet as it is created and pass a run_list to install and configure some software, we can add the additional parameters. Here, we can tell it to configure our new server as a web server:
<pre> knife digital_ocean droplet create --server-name hello --image 1505447 --location 4 --size 63 --ssh-keys 22222 --bootstrap --run-list “role[web_server]” </pre>
This will apply all of the recipes and attributes inherent in the role just as if we had edited the node’s run_list after creating it.
Conclusion
Using the DigitalOcean knife plugin, you can easily spin up new infrastructure resources as you require them. For instance, if your database is getting more traffic than it previously was, it is trivial to spin up additional database servers to manage that load.
By including functionality to create new VPS instances in the same environment where you manage your infrastructure, it becomes easy to scale out your infrastructure with well-designed cookbooks, roles, and attributes. Scaling can simply become a question of when instead of how.
<div class=“author”>By Justin Ellingwood</div>
Thanks for learning with the DigitalOcean Community. Check out our offerings for compute, storage, networking, and managed databases.
Tutorial Series: Getting Started Managing Your Infrastructure Using Chef
Chef is a powerful configuration management system that can be used to programmatically control your infrastructure environment. Leveraging the Chef system allows you to easily recreate your environments in a predictable manner by automating the entire system configuration. In this series, we will introduce you to Chef concepts and demonstrate how to install and utilize the its powerful features to manage your servers.
About the author
Former Senior Technical Writer at DigitalOcean, specializing in DevOps topics across multiple Linux distributions, including Ubuntu 18.04, 20.04, 22.04, as well as Debian 10 and 11.
Still looking for an answer?
This textbox defaults to using Markdown to format your answer.
You can type !ref in this text area to quickly search our full set of tutorials, documentation & marketplace offerings and insert the link!
FYI, if you are on a mac and trying to install this and you have xcode 5.1 installed, you can run sudo ARCHFLAGS=-Wno-error=unused-command-line-argument-hard-error-in-future gem install knife-digital_ocean and it will fix the installation errors you see.
@sebastian: Knife uses API v1, you can get your Client ID and API Key here: cloud.digitalocean.com/api_access.
This was an excellent set of tutorials.
One question. Can the above method be used on Vagrant boxes where DO is the provider?
Very helpful article, but it may need an update.
-
API v1 doesn’t seem to work anymore. You need knife[:digital_ocean_access_token] instead of knife[:digital_ocean_api_key] in your knife.rb
-
-G flag is not there. You need to use -P to see public images.
knife digital_ocean droplet destroy 111111
is now
knife digital_ocean droplet destroy -S 111111
Under Configure the Knife Plugin with your DigitalOcean Credentials you only need knife[:digital_ocean_access_token] = ‘your_access_token’
Fails on the latest Chef. This documentation needs to be updated.
Unable to activate knife-digital_ocean-2.6.0, because droplet_kit-2.2.2 conflicts with droplet_kit (~> 1.3.0) (Gem::ConflictError)```
 This work is licensed under a Creative Commons Attribution-NonCommercial- ShareAlike 4.0 International License.
Become a contributor for community
Get paid to write technical tutorials and select a tech-focused charity to receive a matching donation.

DigitalOcean Documentation
Full documentation for every DigitalOcean product.

Resources for startups and AI-native businesses
The Wave has everything you need to know about building a business, from raising funding to marketing your product.
The developer cloud
Scale up as you grow — whether you're running one virtual machine or ten thousand.

Start building today
From GPU-powered inference and Kubernetes to managed databases and storage, get everything you need to build, scale, and deploy intelligent applications.
