By Joe Morgan, Timothy Nolan and Vinayak Baranwal

The author selected Creative Commons to receive a donation as part of the Write for DOnations program.
Introduction
Authentication in React applications manages user access to protected pages and resources. When a user logs in, your application stores authentication credentials (typically a token) and checks for them before rendering private routes. The authentication state must persist across page refreshes, which requires storing tokens in browser storage rather than component state.
How authentication state persists: When you store tokens in localStorage or sessionStorage, they survive page refreshes and browser restarts (for localStorage). This means your app can check for an existing token on mount and automatically authenticate users without requiring a new login. Without persistent storage, users would need to log in every time they refresh the page or open a new tab.
This tutorial walks through building a React application with token-based authentication using React Router v6 for protected routes. You’ll create a mock API that returns authentication tokens, implement a login page that fetches and stores tokens, and set up authentication checks that preserve the user’s intended route. The tutorial covers different token storage methods (localStorage, sessionStorage) and their security implications, implements logout functionality and error handling, and demonstrates how to decode JWT tokens to check expiration.
Why auth logic shouldn’t live in individual components: Centralizing authentication logic in a custom hook or React Context ensures consistent behavior across your app, makes it easier to update auth flows, and prevents code duplication. When auth logic is scattered across components, you risk inconsistent token checks, missed edge cases, and maintenance headaches.
After completing this tutorial, you will understand how to implement secure authentication in React applications, choose appropriate token storage strategies based on security and UX requirements, and handle common authentication scenarios including protected routes, token expiration, and logout.
Need to deploy a React project quickly? Check out DigitalOcean App Platform and deploy a React project directly from GitHub in minutes.
Key Takeaways
-
Authentication state persists across page refreshes when stored in
localStorageorsessionStorage. Tokens stored in component state (useState) are lost on refresh, requiring users to log in again. Browser storage APIs maintain tokens between sessions, enabling automatic re-authentication. -
React Router v6 uses
Routesinstead ofSwitchand requireselementprops instead of children. The new API is more declarative and type-safe. Protected routes are implemented using a wrapper component that checks authentication before rendering. -
Centralize authentication logic in a custom hook or React Context. Keeping auth logic in individual components leads to duplication and inconsistent behavior. A custom
useTokenhook orAuthContextprovides a single source of truth for authentication state. -
localStoragepersists across browser sessions;sessionStorageis tab-specific. UselocalStoragefor “remember me” functionality andsessionStoragefor more secure, session-only authentication. Both are vulnerable to XSS attacks, so always sanitize user input. -
JWT tokens can be decoded on the client to check expiration without a server round-trip. The payload contains an
expclaim (Unix timestamp) that you can compare to the current time. However, always validate tokens on the server as client-side checks are for UX only. -
CSRF protection is critical when using cookie-based authentication. Cookies are automatically sent with requests, making them vulnerable to cross-site request forgery. Use CSRF tokens, SameSite cookie attributes, and verify the Origin header on the server.
Prerequisites
-
A development environment running Node.js version 18.x and npm version 9.x. To install Node.js on macOS or Ubuntu, follow the steps in How to Install Node.js and Create a Local Development Environment on macOS or How To Install Node.js on Ubuntu.
-
A React development environment set up with Create React App, with the non-essential boilerplate removed. To set this up, follow Step 1 — Creating an Empty Project of the How To Manage State on React Class Components tutorial. This tutorial uses
auth-tutorialas the project name. -
Familiarity with fetching data from APIs in React. For more on working with APIs, see How To Call Web APIs with the useEffect Hook in React.
-
Basic knowledge of JavaScript, HTML, and CSS. Learn more in our How To Build a Website With HTML series, How To Style HTML with CSS, and How To Code in JavaScript.
Step 1 — Building a Login Page
Login pages intercept unauthenticated users before they reach protected routes. Instead of redirecting users to a dedicated login route (which loses their intended destination), render the login form on any route when no authentication token exists. This preserves the user’s navigation intent of visiting /dashboard while logged out shows the login form, and after authentication, they land on /dashboard rather than being redirected elsewhere.
Why render login on any route: When users visit a protected route like /dashboard while unauthenticated, showing the login form on that same route maintains their navigation context. After login, they’re already on their intended destination without additional redirects. This creates a smoother user experience compared to redirecting to /login and then requiring another navigation step.
Install React Router using npm. There are two versions: a web version for React applications and a native version for React Native. Install the web version:
- npm install react-router-dom
The installation completes with output similar to:
Output...
+ react-router-dom@6.28.0
added 11 packages from 6 contributors, removed 10 packages and audited 1945 packages in 12.794s
...
Next, create two components called Dashboard and Preferences to act as private pages. These will represent components that a user should not see until they have successfully logged into the application.
First, create the directories:
- mkdir src/components/Dashboard
- mkdir src/components/Preferences
Open Dashboard.js in a text editor:
- nano src/components/Dashboard/Dashboard.js
Inside of Dashboard.js, add an <h2> tag with the content of Dashboard:
import React from 'react';

export default function Dashboard() {
  return(
    <h2>Dashboard</h2>
  );
}
Save and close the file.
Repeat the same steps for Preferences. Open the component:
- nano src/components/Preferences/Preferences.js
Add the content:
import React from 'react';

export default function Preferences() {
  return(
    <h2>Preferences</h2>
  );
}
Save and close the file.
Now that you have some components, you need to import the components and create routes inside of App.js. Check out the tutorial How To Handle Routing in React Apps with React Router for a full introduction to routing in React applications. For deploying your React application, see How To Deploy a React Application with Nginx on Ubuntu.
To begin, open App.js:
- nano src/components/App/App.js
Then import Dashboard and Preferences by adding the following highlighted code:
import React from 'react';
import './App.css';
import Dashboard from '../Dashboard/Dashboard';
import Preferences from '../Preferences/Preferences';

function App() {
  return (
    <></>
  );
}

export default App;
Next, import BrowserRouter, Routes, and Route from react-router-dom. React Router v6 uses Routes instead of Switch, and routes use the element prop instead of children:
import React from 'react';
import './App.css';
import { BrowserRouter, Route, Routes } from 'react-router-dom';
import Dashboard from '../Dashboard/Dashboard';
import Preferences from '../Preferences/Preferences';

function App() {
  return (
    <></>
  );
}

export default App;
Add a surrounding <div> with a className of wrapper and an <h1> tag to serve as a template for the application. Be sure that you are importing App.css so that you can apply the styles.
Next, create routes for the Dashboard and Preferences components. Add BrowserRouter, then add a Routes component as a child. Inside of the Routes, add a Route with a path and element prop for each component:
import React from 'react';
import './App.css';
import { BrowserRouter, Route, Routes } from 'react-router-dom';
import Dashboard from '../Dashboard/Dashboard';
import Preferences from '../Preferences/Preferences';

function App() {
  return (
    <div className="wrapper">
      <h1>Application</h1>
      <BrowserRouter>
        <Routes>
          <Route path="/dashboard" element={<Dashboard />} />
          <Route path="/preferences" element={<Preferences />} />
        </Routes>
      </BrowserRouter>
    </div>
  );
}

export default App;
Save and close the file.
The final step is to add some padding to the main <div> so your component is not directly at the edge of the browser. To do this, you will change the CSS.
Open App.css:
- nano src/components/App/App.css
Replace the contents with a class of .wrapper with padding of 20px:
.wrapper {
    padding: 20px;
}
Save and close the file. The browser reloads automatically, displaying the basic components:

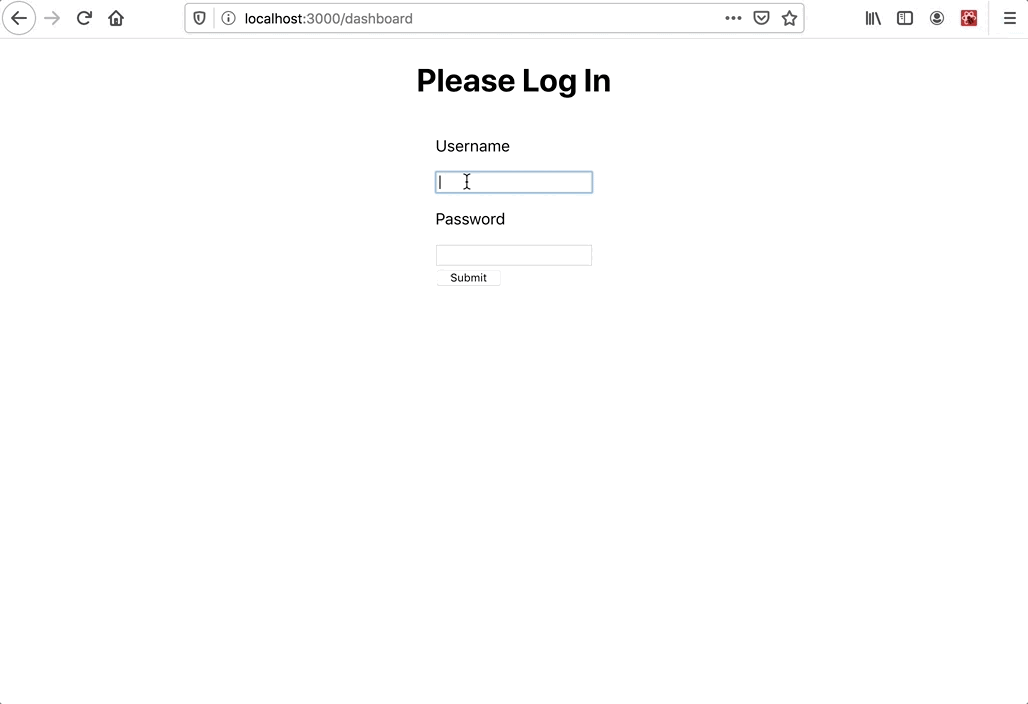
Visit http://localhost:3000/dashboard to see the dashboard page:

The routes work, but /dashboard and /preferences are currently accessible to anyone, including unauthenticated users. These should be protected routes.
Two approaches to protect routes:
-
Redirect to dedicated login route: Create a
/loginroute and redirect unauthenticated users there. This works, but users lose their intended destination and must navigate back after login. -
Render login form on any route (used in this tutorial): Show the login form on the current route when no token exists. After authentication, users remain on their intended destination. For example, visiting
/dashboardwhile logged out shows the login form, and after login, users land directly on/dashboard.
This tutorial uses the second approach for better user experience.
To begin, make a new directory for the Login component:
- mkdir src/components/Login
Next, open Login.js in a text editor:
- nano src/components/Login/Login.js
Create a basic form with a submit <button> and an <input> for the username and the password. Be sure to set the input type for the password to password:
import React from 'react';

export default function Login() {
  return(
    <form>
      <label>
        <p>Username</p>
        <input type="text" />
      </label>
      <label>
        <p>Password</p>
        <input type="password" />
      </label>
      <div>
        <button type="submit">Submit</button>
      </div>
    </form>
  )
}
For more on forms in React, check out the tutorial How To Build Forms in React. To learn about managing state in React components, see How To Manage State with Hooks on React Components.
Next, add an <h1> tag asking the user to log in. Wrap the <form> and the <h1> in a <div> with a className of login-wrapper. Finally, import Login.css:
import React from 'react';
import './Login.css';

export default function Login() {
  return(
    <div className="login-wrapper">
      <h1>Please Log In</h1>
      <form>
        <label>
          <p>Username</p>
          <input type="text" />
        </label>
        <label>
          <p>Password</p>
          <input type="password" />
        </label>
        <div>
          <button type="submit">Submit</button>
        </div>
      </form>
    </div>
  )
}
Save and close the file.
Add styling to center the login form. Open Login.css:
- nano src/components/Login/Login.css
Center the component on the page by adding a display of flex, then setting the flex-direction to column to align the elements vertically and adding align-items to center to make the component centered in the browser:
.login-wrapper {
    display: flex;
    flex-direction: column;
    align-items: center;
}
For more information on using Flexbox, see our CSS Flexbox Cheatsheet
Save and close the file.
Render the login component in App.js when no authentication token exists. Open App.js:
- nano src/components/App/App.js
In Step 3, you will implement persistent token storage. For now, store the token in component state using the useState Hook to test the login flow. Note that tokens stored in component state are lost on page refresh.
Import useState from react, then call useState and set return values to token and setToken:
import React, { useState } from 'react';
import { BrowserRouter, Route, Routes } from 'react-router-dom';
import './App.css';
import Dashboard from '../Dashboard/Dashboard';
import Preferences from '../Preferences/Preferences';

function App() {
  const [token, setToken] = useState();
  return (
    <div className="wrapper">
      <h1>Application</h1>
      <BrowserRouter>
        <Routes>
          <Route path="/dashboard" element={<Dashboard />} />
          <Route path="/preferences" element={<Preferences />} />
        </Routes>
      </BrowserRouter>
    </div>
  );
}

export default App;
Import the Login component. Add a conditional statement to display Login if the token is falsy.
Pass the setToken function to the Login component:
import React, { useState } from 'react';
import { BrowserRouter, Route, Routes } from 'react-router-dom';

import './App.css';
import Dashboard from '../Dashboard/Dashboard';
import Login from '../Login/Login';
import Preferences from '../Preferences/Preferences';

function App() {
  const [token, setToken] = useState();

  if(!token) {
    return <Login setToken={setToken} />
  }

  return (
    <div className="wrapper">
      <h1>Application</h1>
      <BrowserRouter>
        <Routes>
          <Route path="/dashboard" element={<Dashboard />} />
          <Route path="/preferences" element={<Preferences />} />
        </Routes>
      </BrowserRouter>
    </div>
  );
}

export default App;
Since no token exists yet, the login form displays on all routes. In the next step, you will create an API endpoint that returns a token after successful authentication.
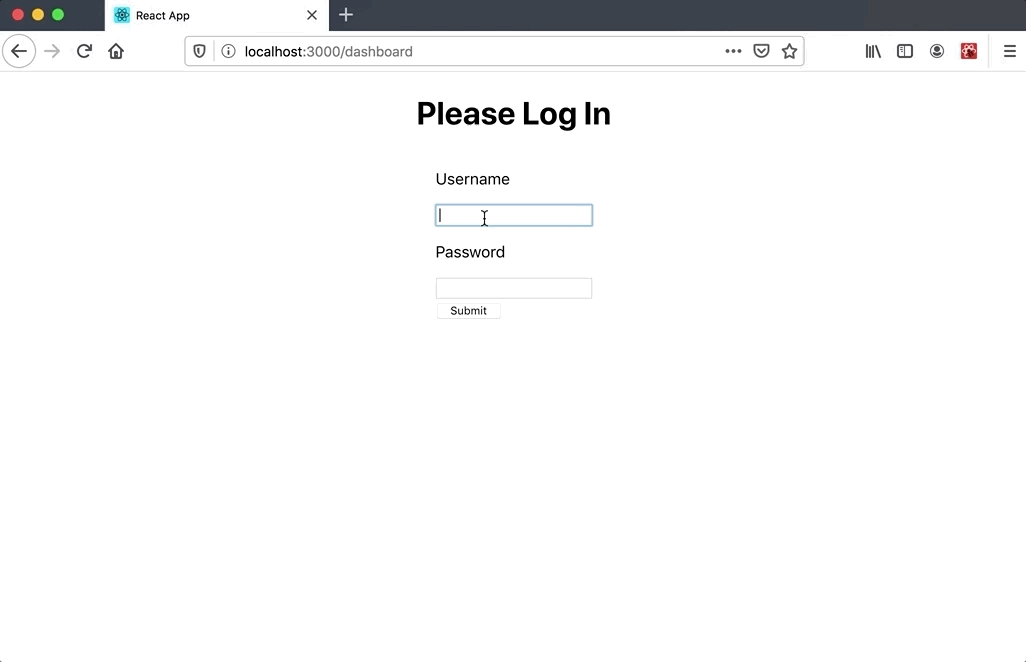
Save and close the file. The browser reloads automatically, showing the login page on all routes. Visit the dashboard page to confirm the login form appears:
You’ve created a login form that displays on all routes when no authentication token exists. The form prevents access to protected routes like /dashboard and /preferences until authentication succeeds. In the next step, you will create a mock API server that returns authentication tokens.
Step 2 — Creating a Token API
Mock APIs simulate backend authentication during development without requiring a production server. Express provides a simple way to create a development server that returns tokens in the same format your production API will use. This lets you test authentication flows, handle API responses, and develop the frontend independently.
Why use a mock API: During development, you may not have a backend ready, or you want to test authentication flows without hitting a production server. A mock API returns predictable responses, making it easier to test error handling, loading states, and token management. For production applications, replace the mock API with your actual authentication endpoint.
Create a simple Express server that returns a token. For a detailed introduction to Express, see Basic Express Server in Node.js. If you’re building a full-stack application, consider How To Build a To-Do Application Using Django and React for a complete example.
To start, install express. Since the server is not a requirement of the final build, be sure to install as a devDependency.
You’ll also need to install cors. This library will enable cross origin resource sharing for all routes.
Warning: Do not enable CORS for all routes in a production application. This can lead to security vulnerabilities.
- npm install --save-dev express cors
The installation completes with output similar to:
Output...
+ cors@2.8.5
+ express@4.17.1
removed 10 packages, updated 2 packages and audited 2059 packages in 12.597s
...
Next, open a new file called server.js in the root of your application. Do not add this file to the /src directory since you do not want it to be part of the final build.
- nano server.js
Import express, then initialize a new app by calling express() and saving the result to a variable called app:
const express = require('express');
const app = express();
After creating the app, add cors as a middleware. First, import cors, then add it to the application by calling the use method on app:
const express = require('express');
const cors = require('cors');
const app = express();

app.use(cors());
Add a route handler for /login that returns a token. The handler receives req (request data) and res (response object). Use res.send to return a JavaScript object containing a token:
const express = require('express');
const cors = require('cors');
const app = express();

app.use(cors());

app.use('/login', (req, res) => {
  res.send({
    token: 'test123'
  });
});
Finally, run the server on port 8080 using app.listen:
const express = require('express');
const cors = require('cors');
const app = express();

app.use(cors());

app.use('/login', (req, res) => {
  res.send({
    token: 'test123'
  });
});

app.listen(8080, () => console.log('API is running on http://localhost:8080'));
Save and close the file. In a new terminal window or tab, start the server:
- node server.js
The server starts and displays:
OutputAPI is running on http://localhost:8080/login
Visit the login page in your browser to see the JSON object response:

Note: Visiting the URL in a browser sends a GET request, while the login form will send a POST request. The current route handler accepts both methods. In production, restrict routes to specific HTTP methods using app.post() for POST requests and app.get() for GET requests. See Express routing documentation for details.
Now that you have a running API server, you need to make a request from your login page. Open Login.js:
- nano src/components/Login/Login.js
In the previous step, you passed a new prop called setToken to the Login component. Add in the PropType from the new prop and destructure the props object to pull out the setToken prop.
import React from 'react';
import PropTypes from 'prop-types';

import './Login.css';

export default function Login({ setToken }) {
  return(
    <div className="login-wrapper">
      <h1>Please Log In</h1>
      <form>
        <label>
          <p>Username</p>
          <input type="text" />
        </label>
        <label>
          <p>Password</p>
          <input type="password" />
        </label>
        <div>
          <button type="submit">Submit</button>
        </div>
      </form>
    </div>
  )
}

Login.propTypes = {
  setToken: PropTypes.func.isRequired
}
Next, create a local state to capture the Username and Password. Since you do not need to manually set data, make the <inputs> uncontrolled components. You can find detailed information about uncontrolled components in How To Build Forms in React.
import React, { useState } from 'react';
import PropTypes from 'prop-types';

import './Login.css';

export default function Login({ setToken }) {
  const [username, setUserName] = useState();
  const [password, setPassword] = useState();
  return(
    <div className="login-wrapper">
      <h1>Please Log In</h1>
      <form>
        <label>
          <p>Username</p>
          <input type="text" onChange={e => setUserName(e.target.value)}/>
        </label>
        <label>
          <p>Password</p>
          <input type="password" onChange={e => setPassword(e.target.value)}/>
        </label>
        <div>
          <button type="submit">Submit</button>
        </div>
      </form>
    </div>
  )
}

Login.propTypes = {
  setToken: PropTypes.func.isRequired
};
Create a function to make a POST request to the server. In larger applications, place API calls in a separate service directory. For this tutorial, the function is defined in the component file. For more on API calls in React, see How To Call Web APIs with the useEffect Hook in React.
Create an async function called loginUser. The function will take credentials as an argument, then it will call the fetch method using the POST option:
import React, { useState } from 'react';
import PropTypes from 'prop-types';
import './Login.css';

async function loginUser(credentials) {
 return fetch('http://localhost:8080/login', {
   method: 'POST',
   headers: {
     'Content-Type': 'application/json'
   },
   body: JSON.stringify(credentials)
 })
   .then(data => data.json())
}

export default function Login({ setToken }) {
...
Finally, create a form submit handler called handleSubmit that will call loginUser with the username and password. Call setToken with a successful result. Call handleSubmit using the onSubmit event handler on the <form>:
import React, { useState } from 'react';
import PropTypes from 'prop-types';
import './Login.css';

async function loginUser(credentials) {
 return fetch('http://localhost:8080/login', {
   method: 'POST',
   headers: {
     'Content-Type': 'application/json'
   },
   body: JSON.stringify(credentials)
 })
   .then(data => data.json())
}

export default function Login({ setToken }) {
  const [username, setUserName] = useState();
  const [password, setPassword] = useState();

  const handleSubmit = async e => {
    e.preventDefault();
    const token = await loginUser({
      username,
      password
    });
    setToken(token);
  }

  return(
    <div className="login-wrapper">
      <h1>Please Log In</h1>
      <form onSubmit={handleSubmit}>
        <label>
          <p>Username</p>
          <input type="text" onChange={e => setUserName(e.target.value)} />
        </label>
        <label>
          <p>Password</p>
          <input type="password" onChange={e => setPassword(e.target.value)} />
        </label>
        <div>
          <button type="submit">Submit</button>
        </div>
      </form>
    </div>
  )
}

Login.propTypes = {
  setToken: PropTypes.func.isRequired
};
Note: In production applications, handle component unmounting during async operations. If a user navigates away before a Promise resolves, you may need to cancel the request or ignore the response. See How To Call Web APIs with the useEffect Hook in React for cleanup patterns.
Save and close the file. Ensure the API server is still running, then visit http://localhost:3000/dashboard in your browser.
The login page appears. Enter any username and password, then submit the form. The API returns a token, and the app redirects to the dashboard.
The login flow works: submitting the form calls the API and stores the returned token. However, the token is stored in component state (JavaScript memory), which means it’s lost on page refresh or when opening a new tab. Users would need to log in again after each refresh.
The problem: Component state (useState) doesn’t persist across page reloads. When the browser refreshes, React reinitializes components, and any state stored in memory is lost.
In the next step, you will implement persistent token storage using browser storage APIs (localStorage or sessionStorage) so authentication persists across page refreshes and browser sessions.
Step 3 — Storing a User Token with sessionStorage and localStorage
sessionStorage and localStorageToken storage location determines session persistence and security trade-offs. localStorage keeps users logged in across browser sessions and tabs, while sessionStorage clears when the tab closes. Both are accessible to JavaScript, making them vulnerable to XSS attacks, but they provide better user experience than storing tokens only in component state.
Storage options comparison:
- Component state (
useState): Lost on page refresh. No persistence. sessionStorage: Persists for the browser tab session. Cleared when the tab closes. Not shared across tabs.localStorage: Persists across browser sessions and tabs. Survives browser restarts. Shared across all tabs from the same origin.- Cookies: Automatically sent with requests. Require CSRF protection. Can be
httpOnly(not accessible to JavaScript, more secure).
Security consideration: Any data stored outside component memory (including localStorage, sessionStorage, and cookies accessible to JavaScript) is vulnerable to Cross-Site Scripting (XSS) attacks. If malicious code runs on your domain, it can access these storage mechanisms. Always sanitize user input and use Content Security Policy (CSP) headers to mitigate XSS risks.
This tutorial covers sessionStorage and localStorage as modern alternatives to cookies for token storage. Cookies are covered in Step 8 when discussing CSRF protection.
Session Storage
To test the benefits of storing outside of memory, convert the in-memory storage to sessionStorage. Open App.js:
- nano src/components/App/App.js
Remove the call to useState and create two new functions called setToken and getToken. Then call getToken and assign the results to a variable called token:
import React from 'react';
import { BrowserRouter, Route, Routes } from 'react-router-dom';

import './App.css';
import Dashboard from '../Dashboard/Dashboard';
import Login from '../Login/Login';
import Preferences from '../Preferences/Preferences';

function setToken(userToken) {
}

function getToken() {
}

function App() {
  const token = getToken();

  if(!token) {
    return <Login setToken={setToken} />
  }

  return (
    <div className="wrapper">
      <h1>Application</h1>
      <BrowserRouter>
        <Routes>
          <Route path="/dashboard" element={<Dashboard />} />
          <Route path="/preferences" element={<Preferences />} />
        </Routes>
      </BrowserRouter>
    </div>
  );
}

export default App;
Using the same function names (setToken, getToken) and variable names (token) means the Login component and the rest of App.js don’t need changes. The interface remains the same, but the implementation now uses persistent storage.
Implement setToken to save the token to sessionStorage. The setItem method requires a key (string) and a value (string), so convert the userToken object to a JSON string using JSON.stringify:
import React from 'react';
import { BrowserRouter, Route, Routes } from 'react-router-dom';

import './App.css';
import Dashboard from '../Dashboard/Dashboard';
import Login from '../Login/Login';
import Preferences from '../Preferences/Preferences';

function setToken(userToken) {
  sessionStorage.setItem('token', JSON.stringify(userToken));
}

function getToken() {
}

function App() {
  const token = getToken();

  if(!token) {
    return <Login setToken={setToken} />
  }

  return (
    <div className="wrapper">
      <h1>Application</h1>
      <BrowserRouter>
        <Routes>
          <Route path="/dashboard" element={<Dashboard />} />
          <Route path="/preferences" element={<Preferences />} />
        </Routes>
      </BrowserRouter>
    </div>
  );
}

export default App;
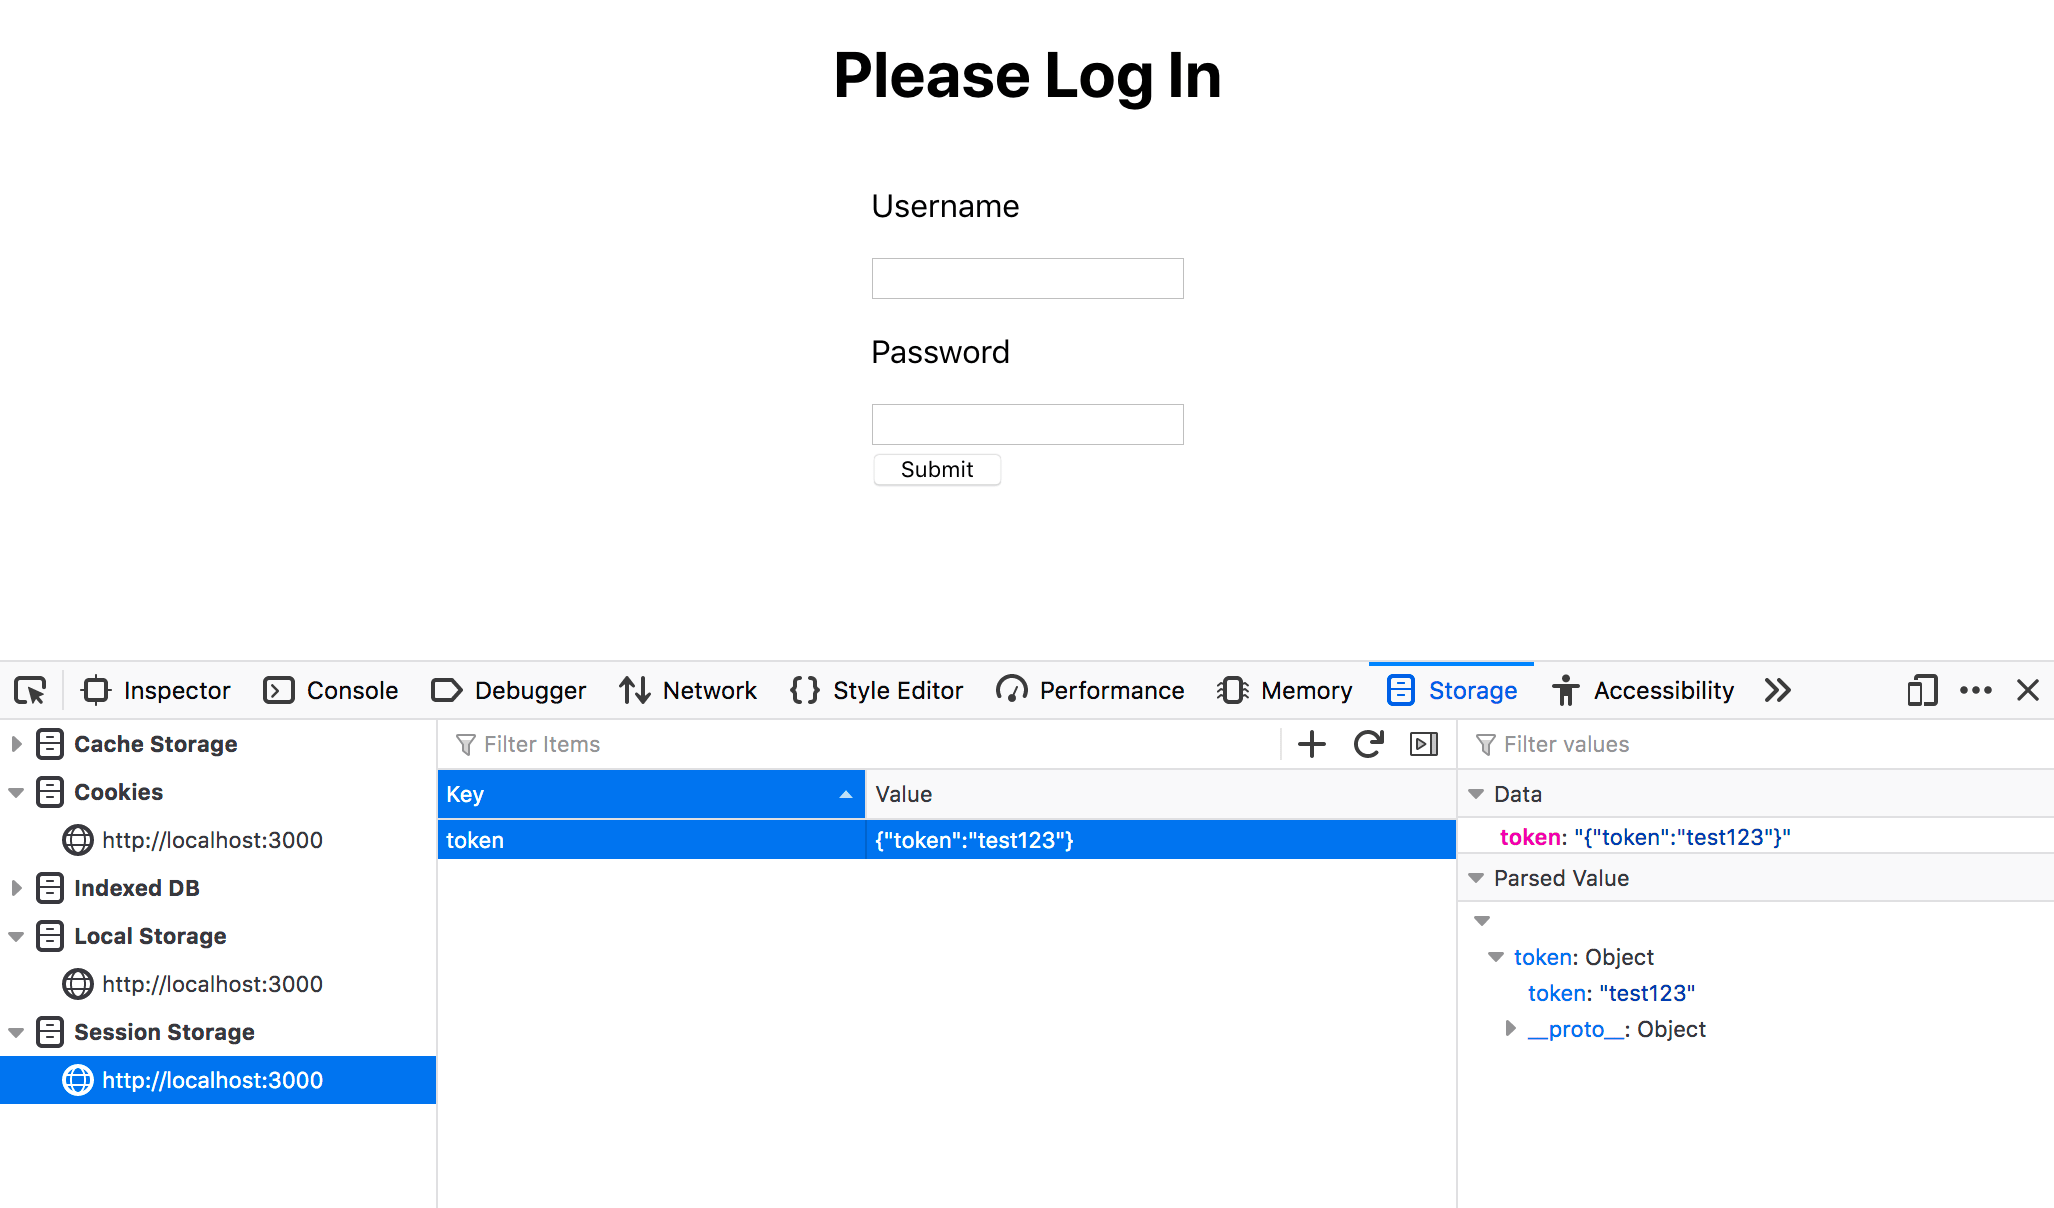
Save the file. The browser reloads automatically. After submitting the login form, the token saves to sessionStorage, but the login page still displays because React hasn’t re-rendered. Open your browser’s developer tools (F12) and check the Storage tab to verify the token is stored. The following image shows Firefox’s developer tools; Chrome and other modern browsers have similar storage inspection tools.
Implement getToken to retrieve the token from sessionStorage. The getItem method returns the stored string (or null if no value exists). Parse the JSON string back to an object, then return the token property:
import React from 'react';
import { BrowserRouter, Route, Routes } from 'react-router-dom';
import './App.css';
import Dashboard from '../Dashboard/Dashboard';
import Login from '../Login/Login';
import Preferences from '../Preferences/Preferences';

function setToken(userToken) {
  sessionStorage.setItem('token', JSON.stringify(userToken));
}

function getToken() {
  const tokenString = sessionStorage.getItem('token');
  if (!tokenString) {
    return null;
  }
  const userToken = JSON.parse(tokenString);
  return userToken?.token;
}

function App() {
  const token = getToken();

  if(!token) {
    return <Login setToken={setToken} />
  }

  return (
    <div className="wrapper">
      <h1>Application</h1>
      <BrowserRouter>
        <Routes>
          <Route path="/dashboard" element={<Dashboard />} />
          <Route path="/preferences" element={<Preferences />} />
        </Routes>
      </BrowserRouter>
    </div>
  );
}

export default App;
Why use optional chaining (?.): On first visit, sessionStorage.getItem('token') returns null, and JSON.parse(null) returns null. Without optional chaining, accessing userToken.token when userToken is null throws a TypeError. The ?. operator safely returns undefined instead of throwing an error.
Save and close the file. If a token exists in sessionStorage, the browser refresh automatically navigates to the protected pages:

To test the login flow again, clear the stored token. In your browser’s developer tools, either delete the token from the Storage tab or run sessionStorage.clear() in the console.
The problem: After logging in, the token saves to sessionStorage, but the login page still displays. This happens because React doesn’t know the token was stored, and the component needs to re-render when the token changes.

Why React doesn’t re-render: Storing data in sessionStorage doesn’t trigger React re-renders. React only re-renders when state changes. To fix this, use React state to track the token, and update that state when storing or retrieving tokens. This triggers re-renders and updates the UI.
Solution: Create a custom Hook that combines storage operations with React state. This centralizes token management logic and makes it reusable across components.
Creating a Custom Token Hook
What is a custom Hook: A custom Hook is a JavaScript function that uses React Hooks (like useState, useEffect) and encapsulates reusable logic. By convention, custom Hooks start with use* (e.g., useToken, useAuth). Custom Hooks let you extract component logic into reusable functions, making code more maintainable and testable.
Open a new file in the App directory called useToken.js:
- nano src/components/App/useToken.js
File organization: This Hook could be defined directly in App.js, but extracting it to a separate file demonstrates how custom Hooks work independently of components. As your application grows and you reuse this Hook in multiple components, keeping it in a separate file makes it easier to maintain and test.
In useToken.js, import useState from react. Since this file contains no JSX, you don’t need to import React. Create and export a function called useToken that uses useState to manage token state:
import { useState } from 'react';

export default function useToken() {
  const [token, setToken] = useState();

}
Add the getToken function as an arrow function inside useToken. Place it before the state declaration, then initialize useState with getToken() to load any existing token on component mount:
import { useState } from 'react';

export default function useToken() {
  const getToken = () => {
    const tokenString = sessionStorage.getItem('token');
    if (!tokenString) {
      return null;
    }
    const userToken = JSON.parse(tokenString);
    return userToken?.token;
  };
  const [token, setToken] = useState(getToken());

}
Add a saveToken function that stores the token in both sessionStorage and React state. Saving to state triggers a re-render, updating the UI:
import { useState } from 'react';

export default function useToken() {
  const getToken = () => {
    const tokenString = sessionStorage.getItem('token');
    if (!tokenString) {
      return null;
    }
    const userToken = JSON.parse(tokenString);
    return userToken?.token;
  };

  const [token, setToken] = useState(getToken());

  const saveToken = userToken => {
    sessionStorage.setItem('token', JSON.stringify(userToken));
    setToken(userToken.token);
  };
}
Return an object with token and setToken (mapped to saveToken). Using an object instead of an array allows components to destructure only the values they need. This maintains the same interface as before, so App.js doesn’t need changes:
import { useState } from 'react';

export default function useToken() {
  const getToken = () => {
    const tokenString = sessionStorage.getItem('token');
    if (!tokenString) {
      return null;
    }
    const userToken = JSON.parse(tokenString);
    return userToken?.token;
  };

  const [token, setToken] = useState(getToken());

  const saveToken = userToken => {
    sessionStorage.setItem('token', JSON.stringify(userToken));
    setToken(userToken.token);
  };

  return {
    setToken: saveToken,
    token
  }
}
Save and close the file.
Next, open App.js:
- nano src/components/App/App.js
Remove the getToken and setToken functions from App.js, and remove the useState import. Import and use the useToken Hook instead:
import React from 'react';
import { BrowserRouter, Route, Routes } from 'react-router-dom';
import './App.css';
import Dashboard from '../Dashboard/Dashboard';
import Login from '../Login/Login';
import Preferences from '../Preferences/Preferences';
import useToken from './useToken';

function App() {

  const { token, setToken } = useToken();

  if(!token) {
    return <Login setToken={setToken} />
  }

  return (
    <div className="wrapper">
      <h1>Application</h1>
      <BrowserRouter>
        <Routes>
          <Route path="/dashboard" element={<Dashboard />} />
          <Route path="/preferences" element={<Preferences />} />
        </Routes>
      </BrowserRouter>
    </div>
  );
}

export default App;
Save and close the file. The browser refreshes automatically. After logging in, the app immediately navigates to the protected page because useState in the custom Hook triggers a re-render when the token state updates:
The custom Hook stores tokens in sessionStorage and manages React state. Refreshing the page keeps the user logged in because the token persists in sessionStorage. However, opening the application in a new tab logs the user out because sessionStorage is tab-specific, and data isn’t shared across tabs and is cleared when the tab closes.
When to use sessionStorage: Use sessionStorage when you want session-only authentication that clears when the tab closes. This is more secure for shared computers.
When to use localStorage: Use localStorage when you want authentication to persist across tabs and browser sessions. This provides better user experience but requires users to explicitly log out on shared computers.
Using localStorage to Save Data Across Windows
localStorage persists across browser sessions and tabs, unlike sessionStorage which is tab-specific. This means users stay logged in when opening new tabs or restarting the browser.
Security consideration: On shared computers, localStorage tokens persist even after closing the browser. The next user could access the application without logging in if the previous user didn’t log out. For shared computers, consider:
- Adding session timeout warnings
- Implementing “Remember Me” as an opt-in feature
- Using
sessionStorageby default andlocalStorageonly when explicitly requested - Providing clear logout functionality
For personal devices, localStorage provides better user experience with minimal security risk when combined with proper XSS protection.
To convert to localStorage, open useToken.js:
- nano src/components/App/useToken.js
Replace all sessionStorage references with localStorage. The API methods (getItem, setItem) are identical:
import { useState } from 'react';

export default function useToken() {
  const getToken = () => {
    const tokenString = localStorage.getItem('token');
    if (!tokenString) {
      return null;
    }
    const userToken = JSON.parse(tokenString);
    return userToken?.token;
  };

  const [token, setToken] = useState(getToken());

  const saveToken = userToken => {
    localStorage.setItem('token', JSON.stringify(userToken));
    setToken(userToken.token);
  };

  return {
    setToken: saveToken,
    token
  }
}
Save the file. The browser refreshes automatically. Log in again (the previous token was in sessionStorage, not localStorage). After logging in, the token persists in localStorage, so you remain logged in when opening new tabs or restarting the browser.
You’ve implemented persistent token storage using sessionStorage and localStorage, and created a custom useToken Hook that combines storage operations with React state management. The Hook triggers re-renders when tokens change, ensuring the UI updates correctly. You’ve also learned the trade-offs between sessionStorage (tab-specific, more secure) and localStorage (persists across sessions, better UX).
Step 4 — Implementing Protected Routes with React Router v6
Protected routes require authentication before rendering. In React Router v6, you create a wrapper component that checks for a token and redirects unauthenticated users to the login page, preserving their intended destination.
Why use a ProtectedRoute component: Instead of checking authentication in every component or using conditional rendering in App.js, a dedicated ProtectedRoute component centralizes route protection logic. This makes it easier to add protected routes, handle redirects, and maintain consistent authentication behavior.
Create a new file for the ProtectedRoute component:
- nano src/components/ProtectedRoute/ProtectedRoute.js
Inside ProtectedRoute.js, import Navigate from react-router-dom and create a component that checks for a token:
import { Navigate } from 'react-router-dom';

export default function ProtectedRoute({ children, token }) {
  if (!token) {
    return <Navigate to="/login" replace />;
  }

  return children;
}
The ProtectedRoute component takes children (the route component to protect) and token as props. If no token exists, it redirects to /login using Navigate with the replace prop to avoid adding an entry to the browser history.
Now update App.js to use ProtectedRoute:
import React from 'react';
import { BrowserRouter, Route, Routes } from 'react-router-dom';
import './App.css';
import Dashboard from '../Dashboard/Dashboard';
import Login from '../Login/Login';
import Preferences from '../Preferences/Preferences';
import ProtectedRoute from '../ProtectedRoute/ProtectedRoute';
import useToken from './useToken';

function App() {
  const { token, setToken } = useToken();

  return (
    <div className="wrapper">
      <h1>Application</h1>
      <BrowserRouter>
        <Routes>
          <Route path="/login" element={<Login setToken={setToken} />} />
          <Route
            path="/dashboard"
            element={
              <ProtectedRoute token={token}>
                <Dashboard />
              </ProtectedRoute>
            }
          />
          <Route
            path="/preferences"
            element={
              <ProtectedRoute token={token}>
                <Preferences />
              </ProtectedRoute>
            }
          />
        </Routes>
      </BrowserRouter>
    </div>
  );
}

export default App;
With this approach, unauthenticated users visiting /dashboard or /preferences are redirected to /login.
Note: In React Router v6, you can also use the Outlet component for nested routes and route protection. For simpler applications, the ProtectedRoute wrapper component shown here is sufficient and easier to understand.
Step 5 — Decoding JWT Tokens and Checking Expiration
JWT tokens contain expiration information in their payload. You can decode the token on the client to check if it’s expired without making a server request, improving user experience by showing immediate feedback.
Why decode tokens on the client: While you should always validate tokens on the server, client-side decoding lets you check expiration before making API calls, show appropriate error messages, and automatically log out users with expired tokens.
First, install a JWT decoding library. While you can decode JWTs manually (they’re base64-encoded), using a library handles edge cases and provides better error handling:
- npm install jwt-decode
Update your useToken.js hook to decode and validate tokens:
import { useState } from 'react';
import { jwtDecode } from 'jwt-decode';

export default function useToken() {
  const getToken = () => {
    const tokenString = localStorage.getItem('token');
    if (!tokenString) {
      return null;
    }

    const userToken = JSON.parse(tokenString);
    const token = userToken?.token;

    if (!token) {
      return null;
    }

    // Decode the token to check expiration
    try {
      const decoded = jwtDecode(token);
      const currentTime = Date.now() / 1000; // Convert to seconds

      // If token is expired, remove it and return null
      if (decoded.exp < currentTime) {
        localStorage.removeItem('token');
        return null;
      }

      return token;
    } catch (error) {
      // If decoding fails, token is invalid
      localStorage.removeItem('token');
      return null;
    }
  };

  const [token, setToken] = useState(getToken());

  const saveToken = userToken => {
    localStorage.setItem('token', JSON.stringify(userToken));
    setToken(userToken.token);
  };

  const removeToken = () => {
    localStorage.removeItem('token');
    setToken(null);
  };

  return {
    setToken: saveToken,
    token,
    removeToken
  };
}
The getToken function now decodes the JWT and checks the exp claim (expiration timestamp in seconds). If the token is expired or invalid, it removes it from storage and returns null, effectively logging the user out.
Warning: Client-side token decoding is for UX only. Always validate tokens on your server. Malicious users can modify client-side code or send fake tokens. Never trust client-side validation for security decisions.
Step 6 — Implementing Logout and Error Handling
Logout removes the token from storage and redirects to the login page. Error handling prevents the app from breaking when API calls fail and provides user feedback.
Why implement logout: Without a logout function, users must manually clear browser storage or wait for tokens to expire. A logout button provides a clear way to end sessions and is essential for shared computers.
Update your Dashboard component to include a logout button:
import React from 'react';
import { useNavigate } from 'react-router-dom';

export default function Dashboard({ removeToken }) {
  const navigate = useNavigate();

  const handleLogout = () => {
    removeToken();
    navigate('/login');
  };

  return (
    <div>
      <h2>Dashboard</h2>
      <button onClick={handleLogout}>Logout</button>
    </div>
  );
}
Update App.js to pass removeToken to protected routes:
import React from 'react';
import { BrowserRouter, Route, Routes } from 'react-router-dom';
import './App.css';
import Dashboard from '../Dashboard/Dashboard';
import Login from '../Login/Login';
import Preferences from '../Preferences/Preferences';
import ProtectedRoute from '../ProtectedRoute/ProtectedRoute';
import useToken from './useToken';

function App() {
  const { token, setToken, removeToken } = useToken();

  return (
    <div className="wrapper">
      <h1>Application</h1>
      <BrowserRouter>
        <Routes>
          <Route path="/login" element={<Login setToken={setToken} />} />
          <Route
            path="/dashboard"
            element={
              <ProtectedRoute token={token}>
                <Dashboard removeToken={removeToken} />
              </ProtectedRoute>
            }
          />
          <Route
            path="/preferences"
            element={
              <ProtectedRoute token={token}>
                <Preferences />
              </ProtectedRoute>
            }
          />
        </Routes>
      </BrowserRouter>
    </div>
  );
}

export default App;
Now add error handling to the login component:
import React, { useState } from 'react';
import PropTypes from 'prop-types';
import './Login.css';

async function loginUser(credentials) {
  const response = await fetch('http://localhost:8080/login', {
    method: 'POST',
    headers: {
      'Content-Type': 'application/json'
    },
    body: JSON.stringify(credentials)
  });

  if (!response.ok) {
    throw new Error(`Login failed: ${response.statusText}`);
  }

  const data = await response.json();
  return data;
}

export default function Login({ setToken }) {
  const [username, setUserName] = useState();
  const [password, setPassword] = useState();
  const [error, setError] = useState(null);
  const [loading, setLoading] = useState(false);

  const handleSubmit = async e => {
    e.preventDefault();
    setError(null);
    setLoading(true);

    try {
      const token = await loginUser({
        username,
        password
      });
      setToken(token);
    } catch (err) {
      setError(err.message || 'An error occurred during login');
    } finally {
      setLoading(false);
    }
  };

  return(
    <div className="login-wrapper">
      <h1>Please Log In</h1>
      {error && <div className="error-message">{error}</div>}
      <form onSubmit={handleSubmit}>
        <label>
          <p>Username</p>
          <input
            type="text"
            onChange={e => setUserName(e.target.value)}
            disabled={loading}
          />
        </label>
        <label>
          <p>Password</p>
          <input
            type="password"
            onChange={e => setPassword(e.target.value)}
            disabled={loading}
          />
        </label>
        <div>
          <button type="submit" disabled={loading}>
            {loading ? 'Logging in...' : 'Submit'}
          </button>
        </div>
      </form>
    </div>
  );
}

Login.propTypes = {
  setToken: PropTypes.func.isRequired
};
The login component now handles errors, shows loading states, and provides user feedback. Error handling prevents the app from crashing when API calls fail and provides user feedback about what went wrong.
Step 7 — Using React Context for Authentication
React Context provides a way to share authentication state across components without prop drilling. For larger applications, Context is more scalable than passing props through multiple component layers.
Why use Context for authentication: When authentication state is needed in many components (navigation bars, user menus, protected routes), passing props becomes cumbersome. Context provides a clean way to access auth state anywhere in the component tree.
Create an authentication context:
import React, { createContext, useContext, useState } from 'react';
import useToken from '../components/App/useToken';

const AuthContext = createContext(null);

export function AuthProvider({ children }) {
  const { token, setToken, removeToken } = useToken();
  const [user, setUser] = useState(null);

  const login = async (credentials) => {
    // Login logic here
    const response = await fetch('http://localhost:8080/login', {
      method: 'POST',
      headers: {
        'Content-Type': 'application/json'
      },
      body: JSON.stringify(credentials)
    });

    if (!response.ok) {
      throw new Error('Login failed');
    }

    const data = await response.json();
    setToken(data);
    // Optionally decode token to set user info
    return data;
  };

  const logout = () => {
    removeToken();
    setUser(null);
  };

  const value = {
    token,
    user,
    login,
    logout,
    isAuthenticated: !!token
  };

  return (
    <AuthContext.Provider value={value}>
      {children}
    </AuthContext.Provider>
  );
}

export function useAuth() {
  const context = useContext(AuthContext);
  if (!context) {
    throw new Error('useAuth must be used within an AuthProvider');
  }
  return context;
}
Wrap your app with the AuthProvider:
import React from 'react';
import { BrowserRouter, Route, Routes } from 'react-router-dom';
import { AuthProvider } from '../../contexts/AuthContext';
import './App.css';
import Dashboard from '../Dashboard/Dashboard';
import Login from '../Login/Login';
import Preferences from '../Preferences/Preferences';
import ProtectedRoute from '../ProtectedRoute/ProtectedRoute';

function App() {
  return (
    <AuthProvider>
      <div className="wrapper">
        <h1>Application</h1>
        <BrowserRouter>
          <Routes>
            <Route path="/login" element={<Login />} />
            <Route
              path="/dashboard"
              element={
                <ProtectedRoute>
                  <Dashboard />
                </ProtectedRoute>
              }
            />
            <Route
              path="/preferences"
              element={
                <ProtectedRoute>
                  <Preferences />
                </ProtectedRoute>
              }
            />
          </Routes>
        </BrowserRouter>
      </div>
    </AuthProvider>
  );
}

export default App;
Update ProtectedRoute to use the context:
import { Navigate } from 'react-router-dom';
import { useAuth } from '../../contexts/AuthContext';

export default function ProtectedRoute({ children }) {
  const { isAuthenticated } = useAuth();

  if (!isAuthenticated) {
    return <Navigate to="/login" replace />;
  }

  return children;
}
Now any component can access authentication state using useAuth(), eliminating the need to pass props through multiple layers.
Step 8 — Understanding CSRF Protection for Cookie-Based Authentication
CSRF (Cross-Site Request Forgery) attacks exploit the fact that browsers automatically send cookies with requests. When using cookie-based authentication, you must implement CSRF protection to prevent malicious sites from making authenticated requests on behalf of users.
Why CSRF protection matters: If your authentication relies on cookies (instead of tokens in localStorage), a malicious website can trick users into making authenticated requests to your API. For example, an attacker could embed a form that submits to your API, and if the user is logged in, the browser automatically includes the authentication cookie.
CSRF protection strategies:
-
CSRF Tokens: Generate a unique token for each session and require it in requests. The token must match the one stored on the server.
-
SameSite Cookie Attribute: Set cookies with
SameSite=StrictorSameSite=Laxto prevent them from being sent in cross-site requests. -
Origin Header Verification: Check that the
OriginorRefererheader matches your domain. -
Double Submit Cookie: Store the CSRF token in both a cookie and a form field, requiring both to match.
Here’s an example of implementing CSRF protection in your Express server:
const express = require('express');
const cors = require('cors');
const cookieParser = require('cookie-parser');
const crypto = require('crypto');

const app = express();

app.use(cors({
  origin: 'http://localhost:3000',
  credentials: true // Allow cookies
}));
app.use(cookieParser());
app.use(express.json());

// Generate CSRF token
app.get('/api/csrf-token', (req, res) => {
  const token = crypto.randomBytes(32).toString('hex');
  res.cookie('csrf-token', token, {
    httpOnly: false, // Must be accessible to JavaScript
    sameSite: 'strict',
    secure: process.env.NODE_ENV === 'production'
  });
  res.json({ csrfToken: token });
});

// Verify CSRF token middleware
function verifyCsrfToken(req, res, next) {
  const token = req.headers['x-csrf-token'];
  const cookieToken = req.cookies['csrf-token'];

  if (!token || !cookieToken || token !== cookieToken) {
    return res.status(403).json({ error: 'Invalid CSRF token' });
  }

  next();
}

app.post('/login', verifyCsrfToken, (req, res) => {
  // Login logic here
  res.json({ token: 'test123' });
});

app.listen(8080, () => console.log('API is running on http://localhost:8080'));
In your React app, fetch the CSRF token before making authenticated requests:
let csrfToken = null;

export async function getCsrfToken() {
  if (!csrfToken) {
    const response = await fetch('http://localhost:8080/api/csrf-token', {
      credentials: 'include' // Include cookies
    });
    const data = await response.json();
    csrfToken = data.csrfToken;
  }
  return csrfToken;
}

export async function loginUser(credentials) {
  const token = await getCsrfToken();

  return fetch('http://localhost:8080/login', {
    method: 'POST',
    headers: {
      'Content-Type': 'application/json',
      'X-CSRF-Token': token
    },
    credentials: 'include', // Include cookies
    body: JSON.stringify(credentials)
  }).then(data => data.json());
}
Note: CSRF protection is not needed for token-based authentication stored in localStorage because tokens must be explicitly included in request headers and aren’t automatically sent with requests. However, if you use cookies for authentication, CSRF protection is essential since cookies are automatically sent. Regardless of your authentication method, always implement proper security measures like HTTPS, input validation, and rate limiting.
Troubleshooting
Token Not Persisting After Page Refresh
Problem: After logging in, refreshing the page logs you out.
Solutions:
- Verify tokens are stored in
localStorageorsessionStorage(check browser DevTools > Application > Storage) - Ensure
getToken()runs on component mount and initializes state correctly - Check for errors in the browser console that might prevent token retrieval
- Verify the token format matches what your code expects (object with
tokenproperty)
“Cannot read property ‘token’ of null” Error
Problem: Error occurs when accessing userToken.token after JSON.parse().
Solution: Add a null check before parsing:
const tokenString = localStorage.getItem('token');
if (!tokenString) return null;
const userToken = JSON.parse(tokenString);
return userToken?.token;
Login Form Doesn’t Submit
Problem: Clicking submit doesn’t trigger the login request.
Solutions:
- Ensure the form has
onSubmit={handleSubmit}and the button hastype="submit" - Check that the API server is running on the correct port (default: 8080)
- Verify CORS is enabled on the server if making cross-origin requests
- Check browser console for network errors or CORS issues
Protected Routes Not Working
Problem: Users can access protected routes without authentication.
Solutions:
- Verify
ProtectedRoutecomponent checks for token before rendering - Ensure token is passed to
ProtectedRouteor accessed via Context - Check that routes are wrapped correctly in
App.js - Verify React Router v6 syntax (
elementprop, not children)
Token Expires While User Is Active
Problem: User gets logged out unexpectedly during active use.
Solutions:
- Implement token refresh logic using refresh tokens
- Check token expiration before making API calls
- Add automatic token refresh when expiration is near
- Consider extending token expiration for active users
localStorage Disabled or Quota Exceeded
Problem: Tokens don’t save in private/incognito mode or storage quota is full.
Solutions:
- Check if
localStorageis available:if (typeof(Storage) !== "undefined") - Handle
QuotaExceededErrorwhen setting items - Fall back to
sessionStorageor in-memory storage - Clear old tokens before storing new ones
- Inform users if storage is unavailable
Multiple Tabs Not Syncing Authentication State
Problem: Logging out in one tab doesn’t log out in other tabs.
Solution: Listen for storage events to sync state across tabs:
useEffect(() => {
  const handleStorageChange = (e) => {
    if (e.key === 'token') {
      // Update auth state when token changes in another tab
      setToken(e.newValue ? JSON.parse(e.newValue) : null);
    }
  };
  window.addEventListener('storage', handleStorageChange);
  return () => window.removeEventListener('storage', handleStorageChange);
}, []);
API Returns Different Token Format
Problem: Your API returns { accessToken: '...' } instead of { token: '...' }.
Solution: Update the code to match your API’s response format:
// If API returns { accessToken: '...' }
const token = userToken?.accessToken;

// Or if API returns { data: { token: '...' } }
const token = userToken?.data?.token;
401 Unauthorized Errors
Problem: API returns 401 even with a valid token.
Solutions:
- Verify token is sent in request headers:
Authorization: Bearer ${token} - Check token expiration (decode JWT to see
expclaim) - Ensure token format matches what the server expects
- Verify server validates tokens correctly
- Check if token needs to be refreshed
Frequently Asked Questions
1. How do I protect routes in React?
Use a ProtectedRoute wrapper component that checks authentication before rendering. In React Router v6, wrap protected routes with a component that verifies the token exists. If no token is found, redirect to the login page using Navigate:
function ProtectedRoute({ children, token }) {
  if (!token) {
    return <Navigate to="/login" replace />;
  }
  return children;
}
Then use it in your routes:
<Route
  path="/dashboard"
  element={
    <ProtectedRoute token={token}>
      <Dashboard />
    </ProtectedRoute>
  }
/>
2. Where should I store auth tokens?
Store tokens in localStorage for persistence across sessions, or sessionStorage for tab-specific sessions. Both are accessible to JavaScript, making them vulnerable to XSS attacks, so always sanitize user input and use HTTPS.
localStorage: Persists across browser sessions and tabs. Use for “remember me” functionality.sessionStorage: Cleared when the tab closes. Use for more secure, session-only authentication.- Cookies: Automatically sent with requests, requiring CSRF protection. Use with
httpOnlyflag for server-side only access.
For production applications, consider using secure, httpOnly cookies managed by your backend, which are less vulnerable to XSS attacks.
3. Is localStorage safe for authentication?
localStorage is vulnerable to XSS attacks but is acceptable for many applications when combined with proper security measures. Any JavaScript running on your domain can access localStorage, so if an attacker injects malicious scripts, they can steal tokens.
Mitigation strategies:
- Sanitize all user input to prevent XSS
- Use Content Security Policy (CSP) headers
- Implement token expiration and refresh tokens
- Use HTTPS to prevent man-in-the-middle attacks
- Consider httpOnly cookies for sensitive applications
For high-security applications (banking, healthcare), prefer httpOnly cookies with CSRF protection, as they’re not accessible to JavaScript.
4. Do React apps need OAuth?
OAuth is required when authenticating with third-party providers (Google, GitHub, Facebook) but not for custom authentication. If you’re building your own authentication system with username/password, you can use token-based authentication as shown in this tutorial.
Use OAuth when:
- Users should log in with social accounts
- You want to delegate authentication to a trusted provider
- You need to access third-party APIs on behalf of users
Use custom authentication when:
- You control the user database
- You need full control over the authentication flow
- You want to avoid third-party dependencies
Many applications use a hybrid approach: OAuth for social login and custom authentication for email/password.
5. How do I handle token expiration?
Decode the JWT token on the client to check expiration, then refresh or log out the user. Use a library like jwt-decode to read the exp claim:
import { jwtDecode } from 'jwt-decode';

const decoded = jwtDecode(token);
const currentTime = Date.now() / 1000;

if (decoded.exp < currentTime) {
  // Token expired, remove it and redirect to login
  localStorage.removeItem('token');
  navigate('/login');
}
For production, implement refresh tokens: short-lived access tokens (15-30 minutes) and longer-lived refresh tokens (7-30 days) that can be used to obtain new access tokens without re-authentication.
6. How do I implement “Remember Me” functionality?
Store tokens in localStorage for persistent sessions and sessionStorage for temporary sessions. Add a checkbox to your login form:
const [rememberMe, setRememberMe] = useState(false);

const handleSubmit = async (e) => {
  e.preventDefault();
  const token = await loginUser(credentials);

  if (rememberMe) {
    localStorage.setItem('token', JSON.stringify(token));
  } else {
    sessionStorage.setItem('token', JSON.stringify(token));
  }
};
When rememberMe is checked, the token persists across browser sessions. Otherwise, it’s cleared when the tab closes.
Conclusion
Authentication in React applications requires balancing security, user experience, and maintainability. By centralizing authentication logic in custom hooks or React Context, implementing protected routes with React Router v6, and choosing appropriate token storage strategies, you can build secure, user-friendly authentication flows.
Key principles to remember:
- Store tokens in browser storage (
localStorageorsessionStorage) to persist across page refreshes - Use protected route components to enforce authentication requirements
- Decode JWT tokens on the client to check expiration, but always validate on the server
- Implement error handling and loading states for better user experience
- Consider CSRF protection when using cookie-based authentication
- Use React Context for authentication state in larger applications to avoid prop drilling
Each storage solution and authentication approach has trade-offs. localStorage provides convenience but requires XSS protection. sessionStorage is more secure but less convenient. Cookies require CSRF protection but are less vulnerable to XSS. Choose based on your security requirements and user experience goals.
As your application grows, consider implementing refresh tokens, multi-factor authentication, and session management features. For production applications, always use HTTPS, implement rate limiting, and follow security best practices.
If you would like to read more React tutorials, check out our React Topic page, or explore related tutorials like How To Build a To-Do Application Using Django and React and How To Deploy a React Application with Nginx on Ubuntu.
Thanks for learning with the DigitalOcean Community. Check out our offerings for compute, storage, networking, and managed databases.
Tutorial Series: How To Code in React.js
React is a popular JavaScript framework for creating front-end applications, such as user interfaces that allow users to interact with programs. Originally created by Facebook, it has gained popularity by allowing developers to create fast applications using an intuitive programming paradigm that ties JavaScript with an HTML-like syntax known as JSX.
In this series, you will build out examples of React projects to gain an understanding of this framework, giving you the knowledge you need to pursue front-end web development or start out on your way to full stack development.
Browse Series: 21 tutorials
About the author(s)
Author of Simplifying JavaScript. Writing featured in Slate, FreeCodeCamp, and here! I like to break things and put them back together. 🛠
Former Senior Technical Editor at DigitalOcean, fiction writer and podcaster elsewhere, always searching for the next good nautical pun! Areas of expertise include Node.js, PostgreSQL, CSS, JavaScript.
Building future-ready infrastructure with Linux, Cloud, and DevOps. Full Stack Developer & System Administrator. Technical Writer @ DigitalOcean | GitHub Contributor | Passionate about Docker, PostgreSQL, and Open Source | Exploring NLP & AI-TensorFlow | Nailed over 50+ deployments across production environments.
Still looking for an answer?
This textbox defaults to using Markdown to format your answer.
You can type !ref in this text area to quickly search our full set of tutorials, documentation & marketplace offerings and insert the link!
Gr8 stuff in here!!!1 thanks a lot really helpful article! I still have to go through docs for some parts!!!Happy to stumble upon this guide!
Awesome little tutorial. Why is express a Dev-dependency? Wouldn’t we need the server if the app was launched on heroku or something similar?
Do ya’ll plan on extending the tutorial to the backend logic? I’d love to see how to set unique tokens per user and authenticate the validity of the tokens after the user logs in. Right now it seems as long as the user’s token is set, they can access the restricted content… so any user can just set any value through the local or the session storage and get instant access.
Is this where you would use something like PassportJS to authenticate the validity of the token?
Thanks for the great work! I look forward to reading more!
You do a great job. Please continue to logout Authentication. God Bless You.
Thanks Joe.
Is there some error handling missing for the async function loginUser in Login.js?
I already had a jwt token being generated from a backend server and I’m getting an invalid credential error from the backend (expected - I’m deliberately entering the wrong data) but this system still logs me in anyway due to what I’m assuming is the assigning of setToken(token) in the Login function.
Awesome !!! really got me to understand much more about react
thank you !
If user will manually write anything as “token” to localstorage he will get access to website, if I understand correctly?
Hey Joe,
I’m trying to decide on how to store a jwt token for a user. I’ve read that using http only cookies are better than local or session storage. But you mention: " This tutorial will cover sessionStorage and localStorage, since these are more modern than using cookies. "
How do you advise developers to choose where to store their users JWT tokens (LS, SS, Cookie). At this point, I’m not interesting in any kind of Server side session based auth, so really just struggling to find any kind of consistent advice on best practice for storing tokens on the client side.
The reason I ask is because many sites have mentioned that Local Storage is a big ‘no no’ when it comes to having a production ready secure web app. But every other website I read says something different.
Nicely laid out and very descriptive. You have put all the links to be referred for further information and I found it is beneficial. I learned a lot. Thank you once again!!!
 This work is licensed under a Creative Commons Attribution-NonCommercial- ShareAlike 4.0 International License.
Become a contributor for community
Get paid to write technical tutorials and select a tech-focused charity to receive a matching donation.

DigitalOcean Documentation
Full documentation for every DigitalOcean product.

Resources for startups and AI-native businesses
The Wave has everything you need to know about building a business, from raising funding to marketing your product.
The developer cloud
Scale up as you grow — whether you're running one virtual machine or ten thousand.

Start building today
From GPU-powered inference and Kubernetes to managed databases and storage, get everything you need to build, scale, and deploy intelligent applications.
