By Joe Morgan and Timothy Nolan

The author selected Creative Commons to receive a donation as part of the Write for DOnations program.
Introduction
In React development, web application programming interfaces (APIs) are an integral part of single-page application (SPA) designs. APIs are the primary way for applications to programmatically communicate with servers to provide users with real-time data and to save user changes. In React applications, you will use APIs to load user preferences, display user information, fetch configuration or security information, and save application state changes.
In this tutorial, you’ll use the useEffect and useState Hooks to fetch and display information in a sample application, using JSON server as a local API for testing purposes. You’ll load information when a component first mounts and save customer inputs with an API. You’ll also refresh data when a user makes a change and learn how to ignore API requests when a component unmounts. By the end of this tutorial, you’ll be able to connect your React applications to a variety of APIs and you’ll be able to send and receive real-time data.
Prerequisites
-
You will need a development environment running Node.js; this tutorial was tested on Node.js version 10.22.0 and npm version 6.14.6. To install this on macOS or Ubuntu 18.04, follow the steps in How to Install Node.js and Create a Local Development Environment on macOS or the Installing Using a PPA section of How To Install Node.js on Ubuntu 18.04.
-
A React development environment set up with Create React App, with the non-essential boilerplate removed. To set this up, follow Step 1 — Creating an Empty Project of the How To Manage State on React Class Components tutorial. This tutorial will use
api-tutorialas the project name. -
You will be using React components and Hooks in this tutorial, including the
useStateanduseEffectHooks. You can learn about components and Hooks in our tutorials How To Manage State with Hooks on React Components and How To Handle Async Data Loading, Lazy Loading, and Code Splitting with React. -
You will also need a basic knowledge of JavaScript and HTML, which you can find in our How To Build a Website with HTML series and in How To Code in JavaScript. Basic knowledge of CSS would also be useful, which you can find at the Mozilla Developer Network.
Step 1 — Creating a Project and a Local API
In this step, you’ll create a local REST API using JSON server, which you will use as a test data source. Later, you’ll build an application to display a grocery list and to add items to the list. JSON server will be your local API and will give you a live URL to make GET and POST requests. With a local API, you have the opportunity to prototype and test components while you or another team develops live APIs.
By the end of this step, you’ll be able to create local mock APIs that you can connect to with your React applications.
On many agile teams, front-end and API teams work on a problem in parallel. In order to develop a front-end application while a remote API is still in development, you can create a local version that you can use while waiting for a complete remote API.
There are many ways to make a mock local API. You can create a simple server using Node or another language, but the quickest way is to use the JSON server Node package. This project creates a local REST API from a JSON file.
To begin, install json-server:
- npm install --save-dev json-server
When the installation is finished, you’ll receive a success message:
Output+ json-server@0.16.1
added 108 packages from 40 contributors and audited 1723 packages in 14.505s

73 packages are looking for funding
  run `npm fund` for details

found 0 vulnerabilities
json-server creates an API based on a JavaScript object. The keys are the URL paths and the values are returned as a response. You store the JavaScript object locally and commit it to your source control.
Open a file called db.json in the root of your application. This will be the JSON that stores the information you request from the API:
- nano db.json
Add an object with the key of list and an array of values with an id and a key of item. This will list the item for the grocery list. The key list will eventually give you a URL with an endpoint of /list:
{
  "list": [
    { "id": 1, "item": "bread" },
    { "id": 2, "item": "grapes" }
  ]
}
In this snippet, you have hard-coded bread and grapes as a starting point for your grocery list.
Save and close the file. To run the API server, you will use json-server from the command line with an argument point to the API configuration file. Add it as a script in your package.json.
Open package.json:
- nano package.json
Then add a script to run the API. In addition, add a delay property. This will throttle the response, creating a delay between your API request and the API response. This will give you some insights into how the application will behave when waiting for a server response. Add a delay of 1500 milliseconds. Finally, run the API on port 3333 using the -p option so it won’t conflict with the create-react-app run script:
{
  "name": "do-14-api",
  "version": "0.1.0",
  "private": true,
  "dependencies": {
    "@testing-library/jest-dom": "^4.2.4",
    "@testing-library/react": "^9.3.2",
    "@testing-library/user-event": "^7.1.2",
    "react": "^16.13.1",
    "react-dom": "^16.13.1",
    "react-scripts": "3.4.3"
  },
  "scripts": {
    "api": "json-server db.json -p 3333 --delay 1500",
    "start": "react-scripts start",
    "build": "react-scripts build",
    "test": "react-scripts test",
    "eject": "react-scripts eject"
  },
  "eslintConfig": {
    "extends": "react-app"
  },
  "browserslist": {
    "production": [
      ">0.2%",
      "not dead",
      "not op_mini all"
    ],
    "development": [
      "last 1 chrome version",
      "last 1 firefox version",
      "last 1 safari version"
    ]
  },
  "devDependencies": {
    "json-server": "^0.16.1"
  }
}
Save and close the file. In a new terminal or tab, start the API server with the following command:
- npm run api
Keep this running during the rest of the tutorial.
When you run the command, you will receive an output that lists the API resources:
Output> json-server db.json -p 3333


  \{^_^}/ hi!

  Loading db.json
  Done

  Resources
  http://localhost:3333/list

  Home
  http://localhost:3333

  Type s + enter at any time to create a snapshot of the database
Open http://localhost:3333/list and you’ll find the live API:
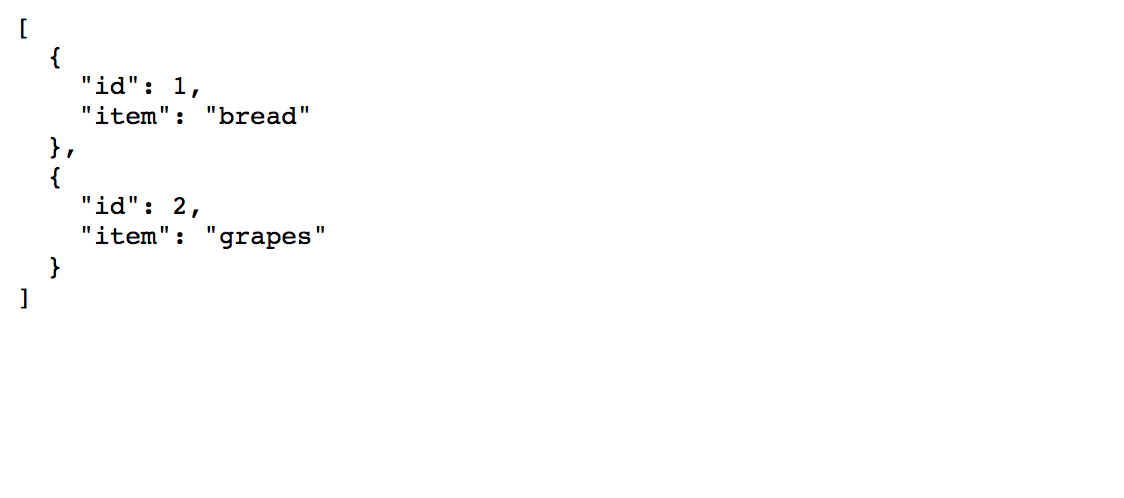
When you open an endpoint in your browser, you are using the GET method. But json-server is not limited to the GET method. You can perform many other REST methods as well. For example, you can POST new items. In a new terminal window or tab, use curl to POST a new item with a type of application/json:
- curl -d '{"item":"rice"}' -H 'Content-Type: application/json' -X POST http://localhost:3333/list
Note that you must stringify the content before you send it. After running the curl command, you’ll receive a success message:
Output{
  "item": "rice",
  "id": 3
}
If you refresh the browser, the new item will appear:
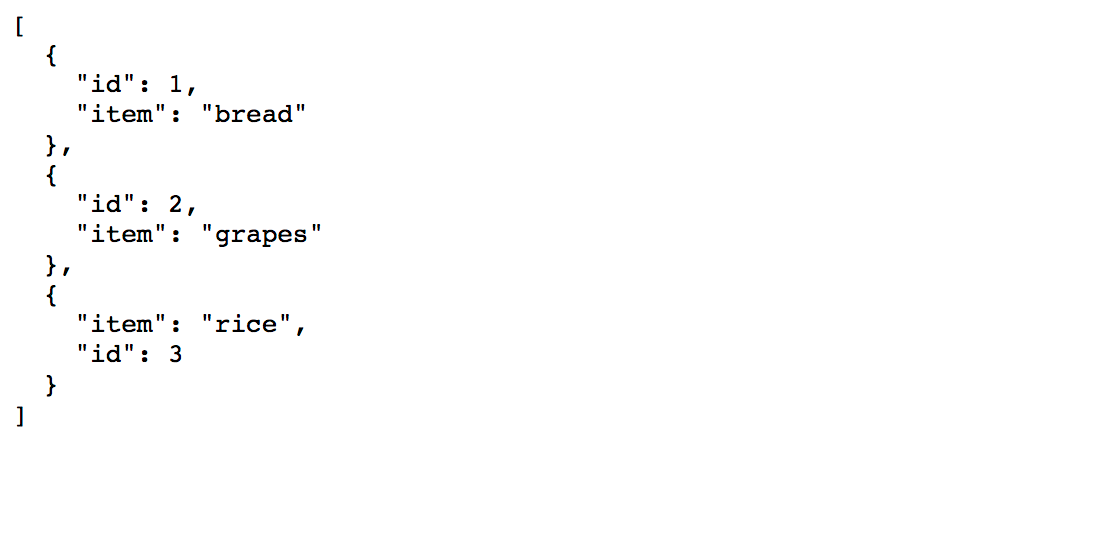
The POST request will also update the db.json file. Be mindful of the changes, since there are no barriers to accidentally saving unstructured or unhelpful content as you work on your application. Be sure to check any changes before committing into version control.
In this step, you created a local API. You learned how to create a static file with default values and how to fetch or update those values using RESTful actions such as GET and POST. In the next step, you’ll create services to fetch data from the API and to display in your application.
Step 2 — Fetching Data from an API with useEffect
useEffectIn this step, you’ll fetch a list of groceries using the useEffect Hook. You’ll create a service to consume APIs in separate directories and call that service in your React components. After you call the service, you’ll save the data with the useState Hook and display the results in your component.
By the end of this step, you’ll be able to call web APIs using the Fetch method and the useEffect Hook. You’ll also be able to save and display the results.
Now that you have a working API, you need a service to fetch the data and components to display the information. Start by creating a service. You can fetch data directly inside any React component, but your projects will be easier to browse and update if you keep your data retrieval functions separate from your display components. This will allow you to reuse methods across components, mock in tests, and update URLs when endpoints change.
Create a directory called services inside the src directory:
- mkdir src/services
Then open a file called list.js in your text editor:
- nano src/services/list.js
You’ll use this file for any actions on the /list endpoint. Add a function to retrieve the data using the fetch function:
export function getList() {
  return fetch('http://localhost:3333/list')
    .then(data => data.json())
}
The only goal of this function is to access the data and to convert the response into JSON using the data.json() method. GET is the default action, so you don’t need any other parameters.
In addition to fetch, there are other popular libraries such as Axios that can give you an intuitive interface and will allow you to add default headers or perform other actions on the service. But fetch will work for most requests.
Save and close the file. Next, open App.css and add some minimal styling:
- nano src/components/App/App.css
Add a class of wrapper with a small amount of padding by replacing the CSS with the following:
.wrapper {
    padding: 15px;
}
Save and close the file. Now you need to add in code to retrieve the data and display it in your application.
Open App.js:
- nano src/components/App/App.js
In functional components, you use the useEffect Hook to fetch data when the component loads or some information changes. For more information on the useEffect Hook, check out How To Handle Async Data Loading, Lazy Loading, and Code Splitting with React. You’ll also need to save the results with the useState Hook.
Import useEffect and useState, then create a variable called list and a setter called setList to hold the data you fetch from the service using the useState Hook:
import React, { useEffect, useState } from 'react';
import './App.css';

function App() {
  const [list, setList] = useState([]);
  return(
    <>
    </>
  )
}

export default App;
Next, import the service, then call the service inside your useEffect Hook. Update the list with setList if the component is mounted. To understand why you should check if the component is mounted before setting the data, see Step 2 — Preventing Errors on Unmounted Components in How To Handle Async Data Loading, Lazy Loading, and Code Splitting with React.
Currently you are only running the effect once when the page loads, so the dependency array will be empty. In the next step, you’ll trigger the effect based on different page actions to ensure that you always have the most up-to-date information.
Add the following highlighted code:
import React, { useEffect, useState } from 'react';
import './App.css';
import { getList } from '../../services/list';

function App() {
  const [list, setList] = useState([]);

  useEffect(() => {
   let mounted = true;
   getList()
     .then(items => {
       if(mounted) {
         setList(items)
       }
     })
   return () => mounted = false;
 }, [])

  return(
    <>
    </>
  )
}

export default App;
Finally, loop over the items with .map and display them in a list:
import React, { useEffect, useState } from 'react';
import './App.css';
import { getList } from '../../services/list';

function App() {
  const [list, setList] = useState([]);

  useEffect(() => {
    let mounted = true;
    getList()
      .then(items => {
        if(mounted) {
          setList(items)
        }
      })
    return () => mounted = false;
  }, [])

  return(
    <div className="wrapper">
     <h1>My Grocery List</h1>
     <ul>
       {list.map(item => <li key={item.item}>{item.item}</li>)}
     </ul>
   </div>
  )
}

export default App;
Save and close the file. When you do, the browser will refresh and you’ll find a list of items:

In this step, you set up a service to retrieve data from an API. You learned how to call the service using the useEffect Hook and how to set the data on the page. You also displayed the data inside your JSX.
In the next step, you’ll submit data to the API using POST and use the response to alert your users that an actions was successful.
Step 3 — Sending Data to an API
In this step, you’ll send data back to an API using the Fetch API and the POST method. You’ll create a component that will use a web form to send the data with the onSubmit event handler and will display a success message when the action is complete.
By the end of this step, you’ll be able to send information to an API and you’ll be able to alert the user when the request resolves.
Sending Data to a Service
You have an application that will display a list of grocery items, but it’s not a very useful grocery app unless you can save content as well. You need to create a service that will POST a new item to the API.
Open up src/services/list.js:
- nano src/services/list.js
Inside the file, add a function that will take an item as an argument and will send the data using the POST method to the API. As before, you can use the Fetch API. This time, you’ll need more information. Add an object of options as the second argument. Include the method—POST—along with headers to set the Content-Type to application/json. Finally, send the new object in the body. Be sure to convert the object to a string using JSON.stringify.
When you receive a response, convert the value to JSON:
export function getList() {
  return fetch('http://localhost:3333/list')
    .then(data => data.json())
}

export function setItem(item) {
 return fetch('http://localhost:3333/list', {
   method: 'POST',
   headers: {
     'Content-Type': 'application/json'
   },
   body: JSON.stringify({ item })
 })
   .then(data => data.json())
}
Save and close the file.
Note: In production applications, you’ll need to add error handling and checking. For example, if you misspelled the endpoint, you’d still receive a 404 response and the data.json() method would return an empty object. To solve the issue, instead of converting the response to JSON, you could check the data.ok property. If it is falsy, you could throw an error and then use the .catch method in your component to display a failure message to the users.
Now that you have created a service, you need to consume the service inside your component.
Open App.js:
- nano src/components/App/App.js
Add a form element surrounding an input and a submit button:
import React, { useEffect, useState } from 'react';
import './App.css';
import { getList } from '../../services/list';

function App() {
  const [list, setList] = useState([]);

  useEffect(() => {
    let mounted = true;
    getList()
      .then(items => {
        if(mounted) {
          setList(items)
        }
      })
    return () => mounted = false;
  }, [])

  return(
    <div className="wrapper">
      <h1>My Grocery List</h1>
      <ul>
        {list.map(item => <li key={item.item}>{item.item}</li>)}
      </ul>
      <form>
       <label>
         <p>New Item</p>
         <input type="text" />
       </label>
       <button type="submit">Submit</button>
     </form>
    </div>
  )
}

export default App;
Be sure to surround the input with a label so that the form is accessible by a screen reader. It’s also a good practice to add a type="submit" to the button so that it’s clear the role is to submit the form.
Save the file. When you do, the browser will refresh and you’ll find your form.

Next, convert the input to a controlled component. You’ll need a controlled component so that you can clear the field after the user successfully submits a new list item.
First, create a new state handler to hold and set the input information using the useState Hook:
import React, { useEffect, useState } from 'react';
import './App.css';
import { getList } from '../../services/list';

function App() {
  const [itemInput, setItemInput] = useState('');
  const [list, setList] = useState([]);

  useEffect(() => {
    let mounted = true;
    getList()
      .then(items => {
        if(mounted) {
          setList(items)
        }
      })
    return () => mounted = false;
  }, [])

  return(
    <div className="wrapper">
      <h1>My Grocery List</h1>
      <ul>
        {list.map(item => <li key={item.item}>{item.item}</li>)}
      </ul>
      <form>
        <label>
          <p>New Item</p>
          <input type="text" onChange={event => setItemInput(event.target.value)} value={itemInput} />
        </label>
        <button type="submit">Submit</button>
      </form>
    </div>
  )
}

export default App;
After creating the state handlers, set the value of the input to itemInput and update the value by passing the event.target.value to the setItemInput function using the onChange event handler.
Now your users can fill out a form with new list items. Next you will connect the form to your service.
Create a function called handleSubmit. handleSubmit will take an event as an argument and will call event.preventDefault() to stop the form from refreshing the browser.
Import setItem from the service, then call setItem with the itemInput value inside the handleSubmit function. Connect handleSubmit to the form by passing it to the onSubmit event handler:
import React, { useEffect, useState } from 'react';
import './App.css';
import { getList, setItem } from '../../services/list';

function App() {
  const [itemInput, setItemInput] = useState('');
  const [list, setList] = useState([]);

  useEffect(() => {
    let mounted = true;
    getList()
      .then(items => {
        if(mounted) {
          setList(items)
        }
      })
    return () => mounted = false;
  }, [])

  const handleSubmit = (e) => {
    e.preventDefault();
    setItem(itemInput)
  };

  return(
    <div className="wrapper">
      <h1>My Grocery List</h1>
      <ul>
        {list.map(item => <li key={item.item}>{item.item}</li>)}
      </ul>
      <form onSubmit={handleSubmit}>
        <label>
          <p>New Item</p>
          <input type="text" onChange={event => setItemInput(event.target.value)} value={itemInput} />
        </label>
        <button type="submit">Submit</button>
      </form>
    </div>
  )
}

export default App;
Save the file. When you do, you’ll be able to submit values. Notice that you’ll receive a successful response in the network tab. But the list doesn’t update and the input doesn’t clear.
Showing a Success Message
It’s always a good practice to give the user some indication that their action was successful. Otherwise a user may try and resubmit a value multiple times or may think their action failed and will leave the application.
To do this, create a stateful variable and setter function with useState to indicate whether to show a user an alert message. If alert is true, display an <h2> tag with the message Submit Successful.
When the setItem promise resolves, clear the input and set the alert message:
import React, { useEffect, useState } from 'react';
import './App.css';
import { getList, setItem } from '../../services/list';

function App() {
  const [alert, setAlert] = useState(false);
  const [itemInput, setItemInput] = useState('');
  const [list, setList] = useState([]);

  useEffect(() => {
    let mounted = true;
    getList()
      .then(items => {
        if(mounted) {
          setList(items)
        }
      })
    return () => mounted = false;
  }, [])

  const handleSubmit = (e) => {
    e.preventDefault();
    setItem(itemInput)
      .then(() => {
        setItemInput('');
        setAlert(true);
      })
  };

  return(
    <div className="wrapper">
      <h1>My Grocery List</h1>
      <ul>
        {list.map(item => <li key={item.item}>{item.item}</li>)}
      </ul>
      {alert && <h2> Submit Successful</h2>}
      <form onSubmit={handleSubmit}>
        <label>
          <p>New Item</p>
          <input type="text" onChange={event => setItemInput(event.target.value)} value={itemInput} />
        </label>
        <button type="submit">Submit</button>
      </form>
    </div>
  )
}

export default App;
Save the file. When you do, the page will refresh and you’ll see a success message after the API request resolves.

There are many other optimizations you can add. For example, you may want to disable form inputs while there is an active request. You can learn more about disabling form elements in How To Build Forms in React.
Now you have alerted a user that the result was successful, but the alert message doesn’t go away and the list doesn’t update. To fix this, start by hiding the alert. In this case, you’d want to hide the information after a brief period, such as one second. You can use the setTimeout function to call setAlert(false), but you’ll need to wrap it in useEffect to ensure that it does not run on every component render.
Inside of App.js create a new effect and pass the alert to the array of triggers. This will cause the effect to run any time alert changes. Notice that this will run if alert changes from false to true, but it will also run when alert changes from true to false. Since you only want to hide the alert if it is displayed, add a condition inside the effect to only run setTimeout if alert is true:
import React, { useEffect, useState } from 'react';
import './App.css';
import { getList, setItem } from '../../services/list';

function App() {
  const [alert, setAlert] = useState(false);
  const [itemInput, setItemInput] = useState('');
  const [list, setList] = useState([]);
    ...

  useEffect(() => {
    if(alert) {
      setTimeout(() => {
        setAlert(false);
      }, 1000)
    }
  }, [alert])

  const handleSubmit = (e) => {
    e.preventDefault();
    setItem(itemInput)
      .then(() => {
        setItemInput('');
        setAlert(true);
      })
  };

  return(
    <div className="wrapper">
      ...
    </div>
  )
}

export default App;
Run the setTimeout function after 1000 milliseconds to ensure the user has time to read the change.
Save the file. Now you have an effect that will run whenever alert changes. If there is an active alert, it will start a timeout function that will close the alert after one second.

Refreshing Fetched Data
Now you need a way to refresh the stale list of data. To do this, you can add a new trigger to the useEffect Hook to rerun the getList request. To ensure you have the most relevant data, you need a trigger that will update anytime there is a change to the remote data. Fortunately, you can reuse the alert state to trigger another data refresh since you know it will run any time a user updates the data. As before, you have to plan for the fact that the effect will run every time alert changes including when the alert message disappears.
This time, the effect also needs to fetch data when the page loads. Create a conditional that will exit the function before the data fetch if list.length is truthy—indicating you have already fetched the data—and alert is false—indicating you have already refreshed the data. Be sure to add alert and list to the array of triggers:
import React, { useEffect, useState } from 'react';
import './App.css';
import { getList, setItem } from '../../services/list';

function App() {
  const [alert, setAlert] = useState(false);
  const [itemInput, setItemInput] = useState('');
  const [list, setList] = useState([]);

  useEffect(() => {
    let mounted = true;
    if(list.length && !alert) {
      return;
    }
    getList()
      .then(items => {
        if(mounted) {
          setList(items)
        }
      })
    return () => mounted = false;
  }, [alert, list])

  ...

  return(
    <div className="wrapper">
      ...
    </div>
  )
}

export default App;
Save the file. When you do, the data will refresh after you submit a new item:

In this case, alert is not directly related to the list state. However, it does occur at the same time as an event that will invalidate the old data, so you can use it to refresh the data.
Preventing Updates on Unmounted Components
The last problem you need to account for is making sure you do not set state on an unmounted component. You have a solution to the problem with let mounted = true in your effect to fetch data, but the solution will not work for handleSubmit, since it is not an effect. You can’t return a function to set the value to false when it is unmounted. Further, it would be inefficient to add the same check to every function.
To solve this problem, you can make a shared variable that is used by multiple functions by lifting mounted out of the useEffect Hook and holding it on the level of the component. You’ll still use the function to set the value to false at the end of the useEffect.
Inside App.js, declare mounted at the start of the function. Then check if the component is mounted before setting data in the other asynchronous functions. Make sure to remove the mounted declaration inside the useEffect function:
import React, { useEffect, useState } from 'react';
import './App.css';
import { getList, setItem } from '../../services/list';

function App() {
  const [alert, setAlert] = useState(false);
  const [itemInput, setItemInput] = useState('');
  const [list, setList] = useState([]);
  let mounted = true;

  useEffect(() => {
    if(list.length && !alert) {
      return;
    }
    getList()
      .then(items => {
        if(mounted) {
          setList(items)
        }
      })
    return () => mounted = false;
  }, [alert, list])

  useEffect(() => {
    if(alert) {
      setTimeout(() => {
        if(mounted) {
          setAlert(false);
        }
      }, 1000)
    }
  }, [alert])

  const handleSubmit = (e) => {
    e.preventDefault();
    setItem(itemInput)
      .then(() => {
        if(mounted) {
          setItemInput('');
          setAlert(true);
        }
      })
  };

  return(
    <div className="wrapper">
      ...
    </div>
  )
}

export default App;
When you make the change, you’ll receive an error in the terminal where you are running your React app:
ErrorAssignments to the 'mounted' variable from inside React Hook useEffect will be lost after each render. To preserve the value over time, store it in a useRef Hook and keep the mutable value in the '.current' property. Otherwise, you can move this variable directly inside useEffect react-hooks/exhaustive-deps
React is alerting you that variables are not stable. Whenever there is a re-render, it will recalculate the variable. Normally, this will ensure up-to-date information. In this case, you are relying on that variable to persist.
The solution is another Hook called useRef. The useRef Hook will preserve a variable for the lifetime of the component. The only trick is to get the value you need to use the .current property.
Inside App.js, convert mounted to a reference using the useRef Hook. Then convert each usage of mounted to mounted.current:
import React, { useEffect, useRef, useState } from 'react';
import './App.css';
import { getList, setItem } from '../../services/list';

function App() {
  const [alert, setAlert] = useState(false);
  const [itemInput, setItemInput] = useState('');
  const [list, setList] = useState([]);
  const mounted = useRef(true);

  useEffect(() => {
    mounted.current = true;
    if(list.length && !alert) {
      return;
    }
    getList()
      .then(items => {
        if(mounted.current) {
          setList(items)
        }
      })
    return () => mounted.current = false;
  }, [alert, list])

  useEffect(() => {
    if(alert) {
      setTimeout(() => {
        if(mounted.current) {
          setAlert(false);
        }
      }, 1000)
    }
  }, [alert])

  const handleSubmit = (e) => {
    e.preventDefault();
    setItem(itemInput)
      .then(() => {
        if(mounted.current) {
          setItemInput('');
          setAlert(true);
        }
      })
  };

  return(
    <div className="wrapper">
       ...
    </div>
  )
}

export default App;
In addition, be cautious about setting the variable in the cleanup function for useEffect. The cleanup function will always run before the effect reruns. That means that the cleanup function () => mounted.current = false will run every time the alert or list change. To avoid any false results, be sure to update the mounted.current to true at the start of the effect. Then you can be sure it will only be set to false when the component is unmounted.
Save and close the file. When the browser refreshes, you’ll be able to save new list items:

Note: It is a common problem to accidentally rerun an API multiple times. Every time a component is removed and then remounted, you will rerun all the original data fetching. To avoid this, consider a caching method for APIs that are particularly data heavy or slow. You can use anything from memoizing the service calls, to caching with service workers, to a custom Hook. There are a few popular custom Hooks for caching service calls, including useSWR and react query.
No matter which approach you use, be sure to consider how you will invalidate the cache because there are times where you’ll want to fetch the newest data.
In this step, you sent data to an API. You learned how to update the user when the data is submitted and how to trigger a refresh on your list data. You also avoided setting data on unmounted components by using the useRef Hook to store the status of the component so that it can be used by multiple services.
Conclusion
APIs give you the ability to connect to many useful services. They allow you to store and retrieve data even after a user closes their browser or stops using an application. With well organized code, you can isolate your services from your components so that your components can focus on rendering data without knowing where the data is originating. Web APIs extend your application far beyond the capabilities of a browser session or storage. They open your application to the whole world of web technologies.
If you would like to read more React tutorials, check out our React Topic page, or return to the How To Code in React.js series page.
Thanks for learning with the DigitalOcean Community. Check out our offerings for compute, storage, networking, and managed databases.
Tutorial Series: How To Code in React.js
React is a popular JavaScript framework for creating front-end applications, such as user interfaces that allow users to interact with programs. Originally created by Facebook, it has gained popularity by allowing developers to create fast applications using an intuitive programming paradigm that ties JavaScript with an HTML-like syntax known as JSX.
In this series, you will build out examples of React projects to gain an understanding of this framework, giving you the knowledge you need to pursue front-end web development or start out on your way to full stack development.
Browse Series: 21 tutorials
About the author(s)
Author of Simplifying JavaScript. Writing featured in Slate, FreeCodeCamp, and here! I like to break things and put them back together. 🛠
Former Senior Technical Editor at DigitalOcean, fiction writer and podcaster elsewhere, always searching for the next good nautical pun! Areas of expertise include Node.js, PostgreSQL, CSS, JavaScript.
Still looking for an answer?
This textbox defaults to using Markdown to format your answer.
You can type !ref in this text area to quickly search our full set of tutorials, documentation & marketplace offerings and insert the link!
there is a typo: {list.map(item => <li key={item.item}>{item.item}</li>)} should be {list.map(item => <li key={item.id}>{item.item}</li>)}
I’ve been through each tutorial in this series and you do a really good job explaining things!
For some reason I cant find db.json in my root directory, am I missing something?
I ran npm install --save-dev json-server in my project’s folder.
Thanks!
Hello, I am wondering if it is possible to call setTimeout in the handleSubmit procedure like here below? I tried and it seems it is working.
  const handleSubmit = (e) => {
    e.preventDefault();
    setItem(itemInput)
      .then(() => {
        setItemInput('');
        setAlert(true);
        setTimeout(() => {
          setAlert(false);
        }, 1000)
      })
  };
Hello @JoeMorgan, At the end of the “Refreshing Fetched Data” section, my app didn’t really refresh data. It got updated in “db.json” and I could see that the data was fetched (in the Network tab). But the list state didn’t update. I think the reason is that conditional if (mounted) {}. Why is this happening ? After I added the code in the “Preventing Updates on Unmounted Components”, it did work and data got refreshed. Please explain why this is happening.
useEffect(() => {
        let mounted = true;
        if (list.length && !alert) {
            return;
        }
        getList().then((items) => {
            if (mounted) {
                console.log("fetched data");
                setList(items);
            }
        });
        return () => (mounted = false);
    }, [alert, list]);
Thank you.
This is a great series of tutorials. In this one, the api-tutorial, I can’t get started. Everything is going right until I go to http://localhost:3333/list. All I see is {}, no data. Any ideas?
The using of the mounted variable is a bad pratice in the useEffect hook. Just put a console.log in the API call to see that the API is continuously load.
You have to write the code like this : const [isMounted, setIsMounted] = useState(false);
useEffect(() => { !isMounted && getList() .then(items => { setList(items); setIsMounted(true); } }) }, [isMounted])
nice article, but when you make duplicates of things like item.item, it becomes very hard to understand. How can i tell if something your passing in item or item? Its not obvious. I should probably know the pattern, but in the night time…
I see that we set mounted.current = true at the beginning of the first useEffect hook call and set it to false in its return statement.
Why does this first useEffect call decide when the component is mounted/unmounted, and not the other useEffect calls?
( I love these tutorials and I have been learning so much. Thank you! )
 This work is licensed under a Creative Commons Attribution-NonCommercial- ShareAlike 4.0 International License.
Become a contributor for community
Get paid to write technical tutorials and select a tech-focused charity to receive a matching donation.

DigitalOcean Documentation
Full documentation for every DigitalOcean product.

Resources for startups and AI-native businesses
The Wave has everything you need to know about building a business, from raising funding to marketing your product.
The developer cloud
Scale up as you grow — whether you're running one virtual machine or ten thousand.

Start building today
From GPU-powered inference and Kubernetes to managed databases and storage, get everything you need to build, scale, and deploy intelligent applications.
