By Joe Morgan and Timothy Nolan

The author selected Creative Commons to receive a donation as part of the Write for DOnations program.
Introduction
Forms are a crucial component of React web applications. They allow users to directly input and submit data in components ranging from a login screen to a checkout page. Since most React applications are single page applications (SPAs), or web applications that load a single page through which new data is displayed dynamically, you won’t submit the information directly from the form to a server. Instead, you’ll capture the form information on the client-side and send or display it using additional JavaScript code.
React forms present a unique challenge because you can either allow the browser to handle most of the form elements and collect data through React change events, or you can use React to fully control the element by setting and updating the input value directly. The first approach is called an uncontrolled component because React is not setting the value. The second approach is called a controlled component because React is actively updating the input.
In this tutorial, you’ll build forms using React and handle form submissions with an example app that submits requests to buy apples. You’ll also learn the advantages and disadvantages of controlled and uncontrolled components. Finally, you’ll dynamically set form properties to enable and disable fields depending on the form state. By the end of this tutorial, you’ll be able to make a variety of forms using text inputs, checkboxes, select lists, and more.
Prerequisites
-
You will need a development environment running Node.js; this tutorial was tested on Node.js version 10.20.1 and npm version 6.14.4. To install this on macOS or Ubuntu 18.04, follow the steps in How to Install Node.js and Create a Local Development Environment on macOS or the Installing Using a PPA section of How To Install Node.js on Ubuntu 18.04.
-
A React development environment set up with Create React App, with the non-essential boilerplate removed. To set this up, follow Step 1 — Creating an Empty Project of the How To Manage State on React Class Components tutorial. This tutorial will use
form-tutorialas the project name. -
You will be using React events and Hooks, including the
useStateand theuseReducerHooks. You can learn about events in our How To Handle DOM and Window Events with React tutorial, and Hooks at How to Manage State with Hooks on React Components. -
You will also need a basic knowledge of JavaScript and HTML, which you can find in our How To Build a Website with HTML series and in How To Code in JavaScript. Basic knowledge of CSS would also be useful, which you can find at the Mozilla Developer Network.
Step 1 — Creating a Basic Form with JSX
In this step, you’ll create an empty form with a single element and a submit button using JSX. You’ll handle the form submit event and pass the data to another service. By the end of this step, you’ll have a basic form that will submit data to an asynchronous function.
To begin, open App.js:
- nano src/components/App/App.js
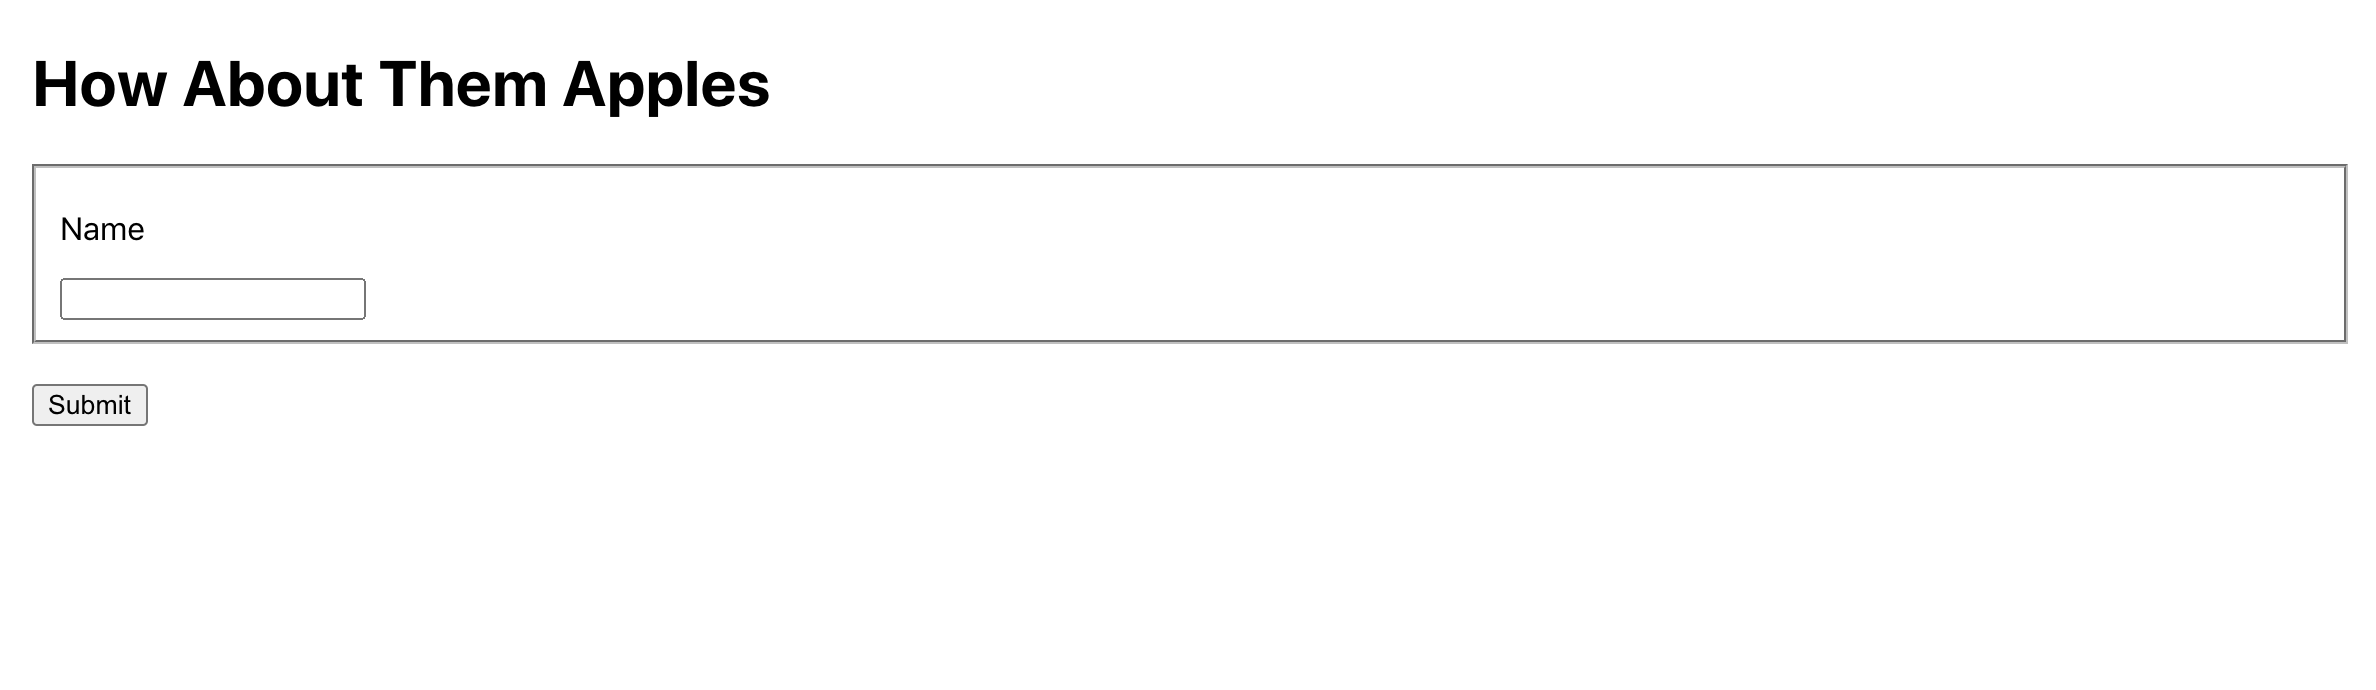
You are going to build a form for purchasing apples. Create a <div> with a className of <wrapper>. Then add an <h1> tag with the text “How About Them Apples” and an empty form element by adding the following highlighted code:
import React from 'react';
import './App.css';

function App() {
  return (
    <div className="wrapper">
      <h1>How About Them Apples</h1>
      <form>
      </form>
    </div>
  )
}

export default App;
Next, inside the <form> tag, add a <fieldset> element with an <input> element surrounded by a <label> tag. By wrapping the <input> element with a <label> tag, you are aiding screen readers by associating the label with the input. This will increase the accessibility of your application.
Finally, add a submit <button> at the bottom of the form:
import React from 'react';
import './App.css';

function App() {
  return(
    <div className="wrapper">
      <h1>How About Them Apples</h1>
      <form>
      <fieldset>
         <label>
           <p>Name</p>
           <input name="name" />
         </label>
       </fieldset>
       <button type="submit">Submit</button>
      </form>
    </div>
  )
}

export default App;
Save and close the file. Then open App.css to set the styling:
- nano src/components/App/App.css
Add padding to the .wrapper and margin to the fieldset to give some space between elements:
.wrapper {
    padding: 5px 20px;
}

.wrapper fieldset {
    margin: 20px 0;
}
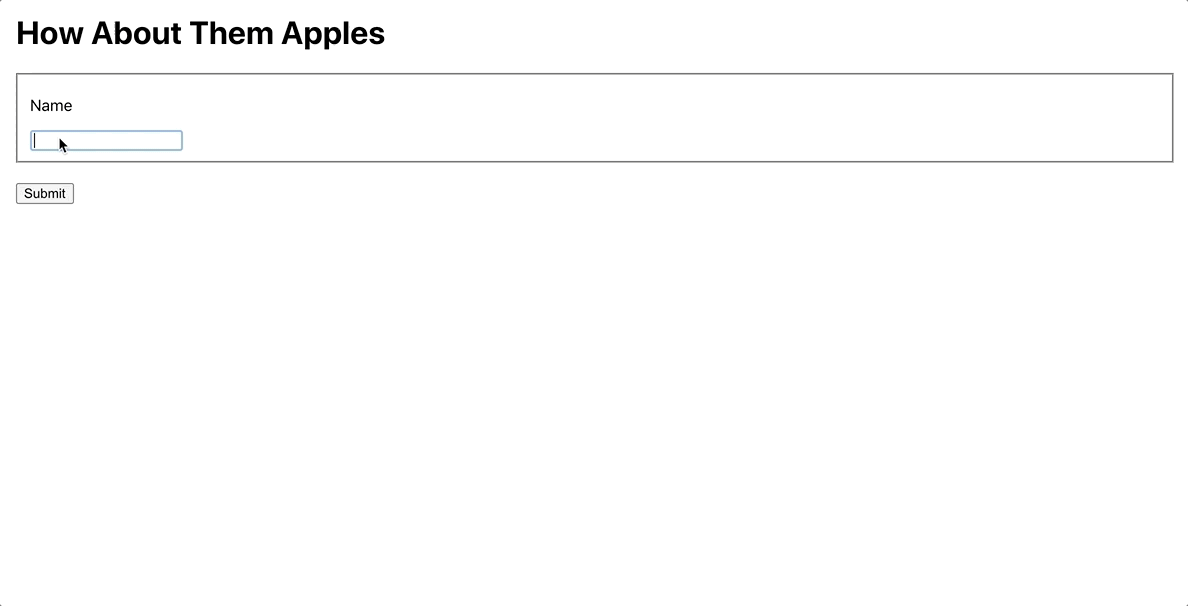
Save and close the file. When you do, the browser will reload and you’ll see a basic form.
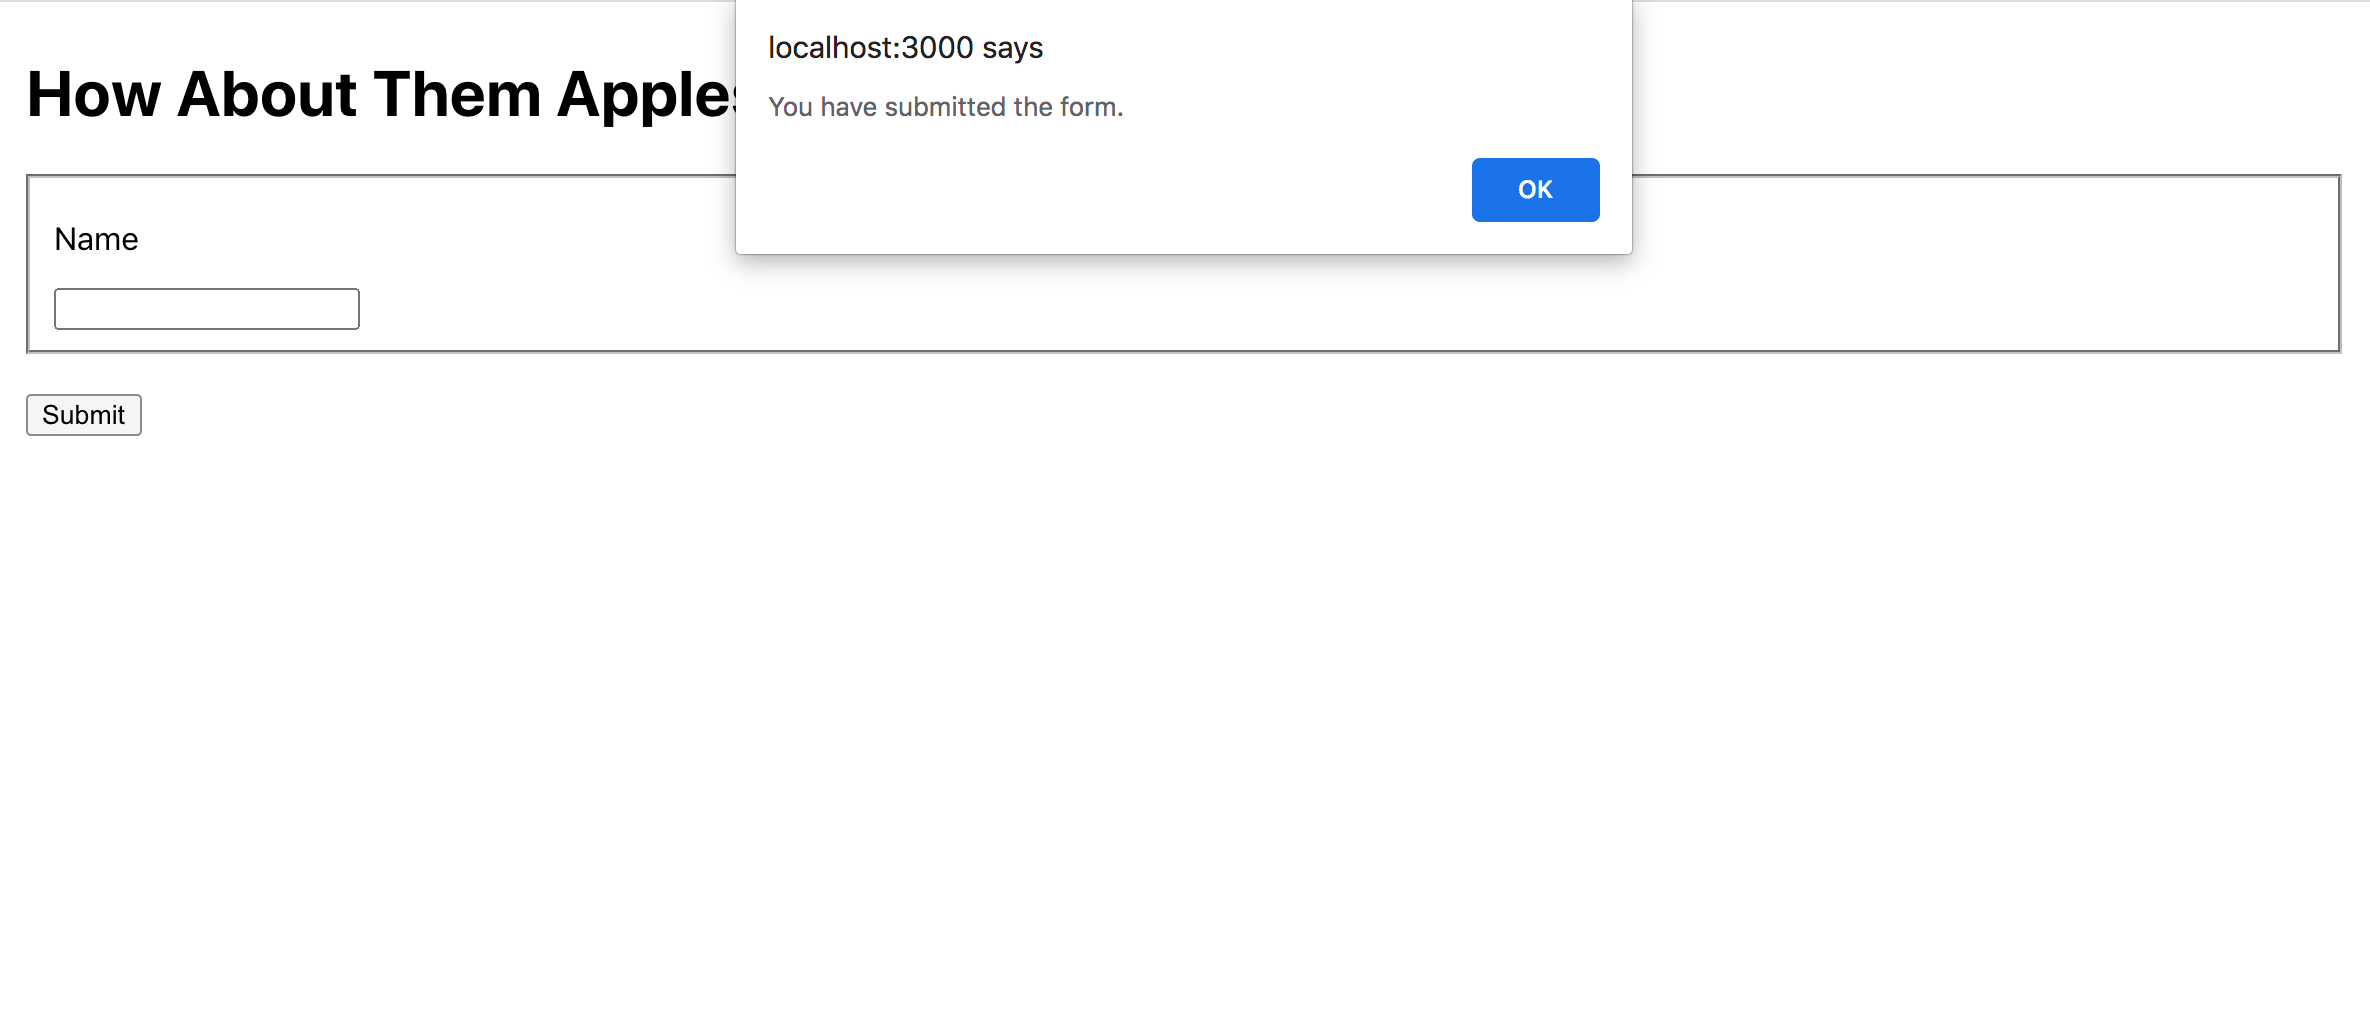
If you click on the Submit button, the page will reload. Since you are building a single page application, you will prevent this standard behavior for a button with a type="submit". Instead, you’ll handle the submit event inside the component.
Open App.js:
- nano src/components/App/App.js
To handle the event, you’ll add an event handler to the <form> element, not the <button>. Create a function called handleSubmit that will take the SyntheticEvent as an argument. TheSyntheticEvent is a wrapper around the standard Event object and contains the same interface. Call .preventDefault to stop the page from submitting the form then trigger an alert to show that the form was submitted:
import React from 'react';
import './App.css';

function App() {
  const handleSubmit = event => {
   event.preventDefault();
   alert('You have submitted the form.')
 }

  return(
    <div className="wrapper">
      <h1>How About Them Apples</h1>
      <form onSubmit={handleSubmit}>
        <fieldset>
          <label>
            <p>Name</p>
            <input name="name" />
          </label>
        </fieldset>
        <button type="submit">Submit</button>
      </form>
    </div>
  )
}

export default App;
Save the file. When you do the browser will reload. If you click the submit button, the alert will pop up, but the window will not reload.
In many React applications, you’ll send the data to an external service, like a Web API. When the service resolves, you’ll often show a success message, redirect the user, or do both.
To simulate an API, add a setTimeout function in the handleSubmit function. This will create an asynchronous operation that waits a certain amount of time before completing, which behaves similarly to a request for external data. Then use the useState Hook to create a submitting variable and a setSubmitting function. Call setSubmitting(true) when the data is submitted and call setSubmitting(false) when the timeout is resolved:
import React, { useState } from 'react';
import './App.css';

function App() {
  const [submitting, setSubmitting] = useState(false);
  const handleSubmit = event => {
    event.preventDefault();
   setSubmitting(true);

   setTimeout(() => {
     setSubmitting(false);
   }, 3000)
 }

  return(
    <div className="wrapper">
      <h1>How About Them Apples</h1>
      {submitting &&
       <div>Submtting Form...</div>
     }
      <form onSubmit={handleSubmit}>
        <fieldset>
          <label>
            <p>Name</p>
            <input name="name" />
          </label>
        </fieldset>
        <button type="submit">Submit</button>
      </form>
    </div>
  )
}

export default App;
In addition, you will alert the user that their form is submitting by displaying a short message in the HTML that will display when submitting is true.
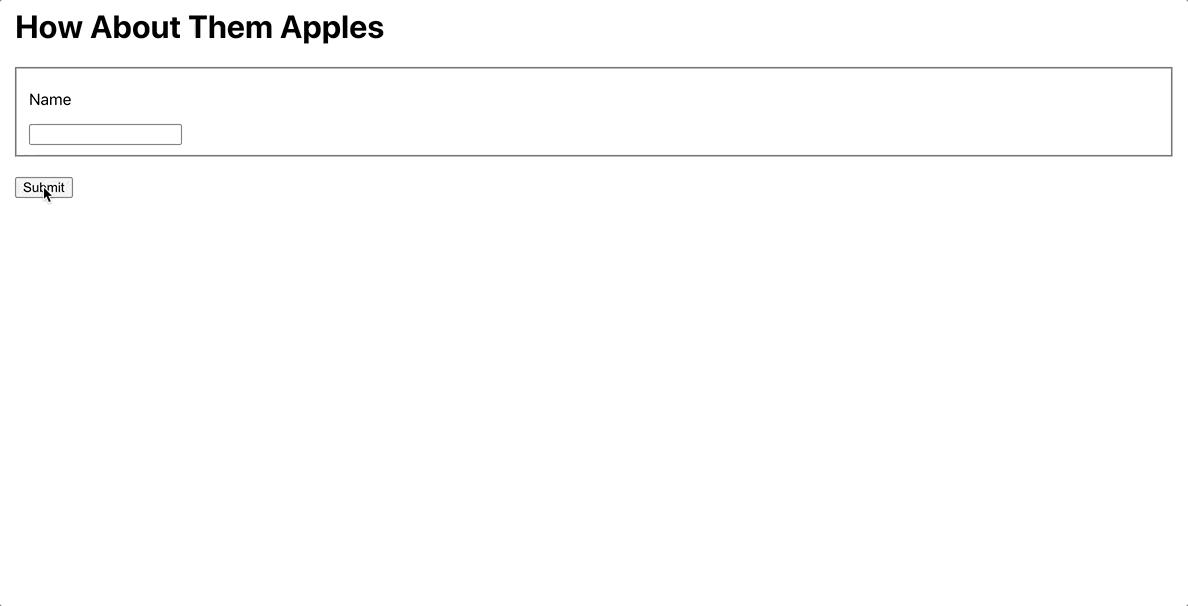
Save the file. When you do, the browser will reload and you’ll receive the message on submit:
Now you have a basic form that handles the submit event inside the React component. You’ve connected it to your JSX using the onSubmit event handler and you are using Hooks to conditionally display an alert while the handleSubmit event is running.
In the next step, you’ll add more user inputs and save the data to state as the user fills out the form.
Step 2 — Collecting Form Data Using Uncontrolled Components
In this step, you’ll collect form data using uncontrolled components. An uncontrolled component is a component that does not have a value set by React. Instead of setting the data on the component, you’ll connect to the onChange event to collect the user input. As you build the components, you’ll learn how React handles different input types and how to create a reusable function to collect form data into a single object.
By the end of this step, you’ll be able to build a form using different form elements, including dropdowns and checkboxes. You’ll also be able to collect, submit, and display form data.
Note: In most cases, you’ll use controlled components for your React application. But it’s a good idea to start with uncontrolled components so that you can avoid subtle bugs or accidental loops that you might introduce when incorrectly setting a value.
Currently, you have a form that can submit information, but there is nothing to submit. The form has a single <input> element, but you are not collecting or storing the data anywhere in the component. In order to be able to store and process the data when the user submits a form, you’ll need to create a way to manage state. You’ll then need to connect to each input using an event handler.
Inside App.js, use the useReducer Hook to create a formData object and a setFormData function. For the reducer function, pull the name and value from the event.target object and update the state by spreading the current state while adding the name and value at the end. This will create a state object that preserves the current state while overwriting specific values as they change:
import React, { useReducer, useState } from 'react';
import './App.css';

const formReducer = (state, event) => {
 return {
   ...state,
   [event.target.name]: event.target.value
 }
}

function App() {
  const [formData, setFormData] = useReducer(formReducer, {});
  const [submitting, setSubmitting] = useState(false);

  const handleSubmit = event => {
    event.preventDefault();
    setSubmitting(true);

    setTimeout(() => {
      setSubmitting(false);
    }, 3000)
  }

  return(
    <div className="wrapper">
      <h1>How About Them Apples</h1>
      {submitting &&
        <div>Submtting Form...</div>
      }
      <form onSubmit={handleSubmit}>
        <fieldset>
          <label>
            <p>Name</p>
            <input name="name" onChange={setFormData}/>
          </label>
        </fieldset>
        <button type="submit">Submit</button>
      </form>
    </div>
  )
}

export default App;
After making the reducer, add setFormData to the onChange event handler on the input. Save the file. When you do, the browser will reload. However, if you try and type in the input, you’ll get an error:
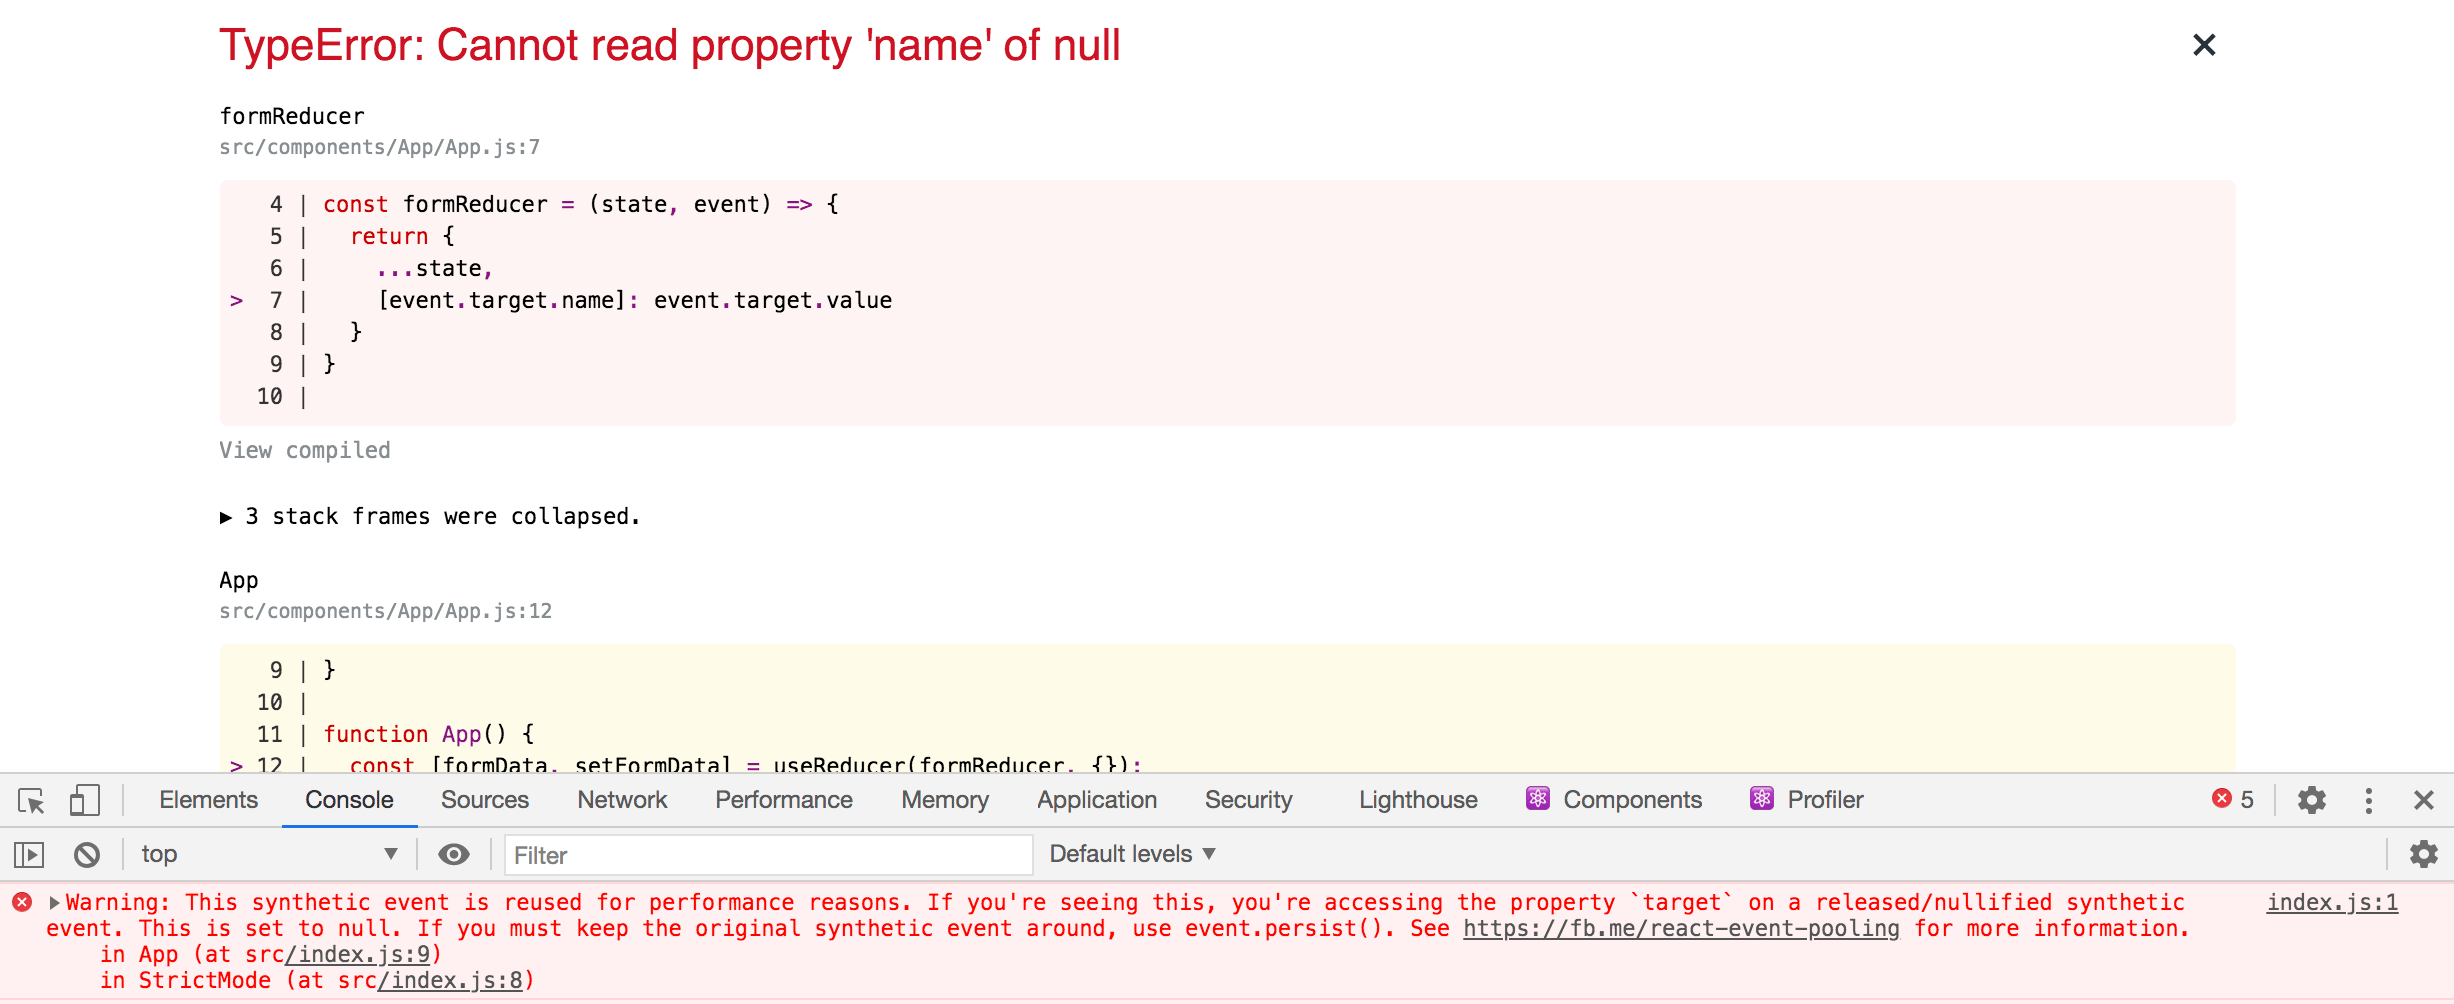
The problem is that the SyntheticEvent is reused and cannot be passed to an asynchronous function. In other words, you can’t pass the event directly. To fix this, you’ll need to pull out the data you need before calling the reducer function.
Update the reducer function to take an object with a property of name and value. Then create a function called handleChange that pulls the data from the event.target and passes the object to setFormData. Finally, update the onChange event handler to use the new function:
import React, { useReducer, useState } from 'react';
import './App.css';

const formReducer = (state, event) => {<^>
 return {
   ...state,
   [event.name]: event.value
 }
}

function App() {
  const [formData, setFormData] = useReducer(formReducer, {});
  const [submitting, setSubmitting] = useState(false);

  const handleSubmit = event => {
    event.preventDefault();
    setSubmitting(true);

    setTimeout(() => {
      setSubmitting(false);
    }, 3000);
  }

  const handleChange = event => {
    setFormData({
      name: event.target.name,
      value: event.target.value,
    });
  }

  return(
    <div className="wrapper">
      <h1>How About Them Apples</h1>
      {submitting &&
        <div>Submtting Form...</div>
      }
      <form onSubmit={handleSubmit}>
        <fieldset>
          <label>
            <p>Name</p>
            <input name="name" onChange={handleChange}/>
          </label>
        </fieldset>
        <button type="submit">Submit</button>
      </form>
    </div>
  )
}

export default App;
Save the file. When you do the page will refresh and you’ll be able to enter data.
Now that you are collecting the form state, update the user display message to show the data in an unordered list (<ul>) element.
Convert the data to an array using Object.entries, then map over the data converting each member of the array to an <li> element with the name and the value. Be sure to use the name as the key prop for the element:
...
  return(
    <div className="wrapper">
      <h1>How About Them Apples</h1>
      {submitting &&
       <div>
         You are submitting the following:
         <ul>
           {Object.entries(formData).map(([name, value]) => (
             <li key={name}><strong>{name}</strong>:{value.toString()}</li>
           ))}
         </ul>
       </div>
      }
      <form onSubmit={handleSubmit}>
        <fieldset>
          <label>
            <p>Name</p>
            <input name="name" onChange={handleChange}/>
          </label>
        </fieldset>
        <button type="submit">Submit</button>
      </form>
    </div>
  )
}

export default App;
Save the file. When you do the page will reload and you’ll be able to enter and submit data:
Now that you have a basic form, you can add more elements. Create another <fieldset> element and add in a <select> element with different apple varieties for each <option>, an <input> with a type="number" and a step="1" to get a count that increments by 1, and an <input> with a type="checkbox" for a gift wrapping option.
For each element, add the handleChange function to the onChange event handler:
...
  return(
    <div className="wrapper">
      <h1>How About Them Apples</h1>
      {submitting &&
        <div>
          You are submitting the following:
          <ul>
            {Object.entries(formData).map(([name, value]) => (
              <li key={name}><strong>{name}</strong>: {value.toString()}</li>
            ))}
          </ul>
        </div>
      }
      <form onSubmit={handleSubmit}>
        <fieldset>
          <label>
            <p>Name</p>
            <input name="name" onChange={handleChange}/>
          </label>
        </fieldset>
        <fieldset>
         <label>
           <p>Apples</p>
           <select name="apple" onChange={handleChange}>
               <option value="">--Please choose an option--</option>
               <option value="fuji">Fuji</option>
               <option value="jonathan">Jonathan</option>
               <option value="honey-crisp">Honey Crisp</option>
           </select>
         </label>
         <label>
           <p>Count</p>
           <input type="number" name="count" onChange={handleChange} step="1"/>
         </label>
         <label>
           <p>Gift Wrap</p>
           <input type="checkbox" name="gift-wrap" onChange={handleChange} />
         </label>
       </fieldset>
        <button type="submit">Submit</button>
      </form>
    </div>
  )
}

export default App;
Save the file. When you do, the page will reload and you’ll have a variety of input types for your form:
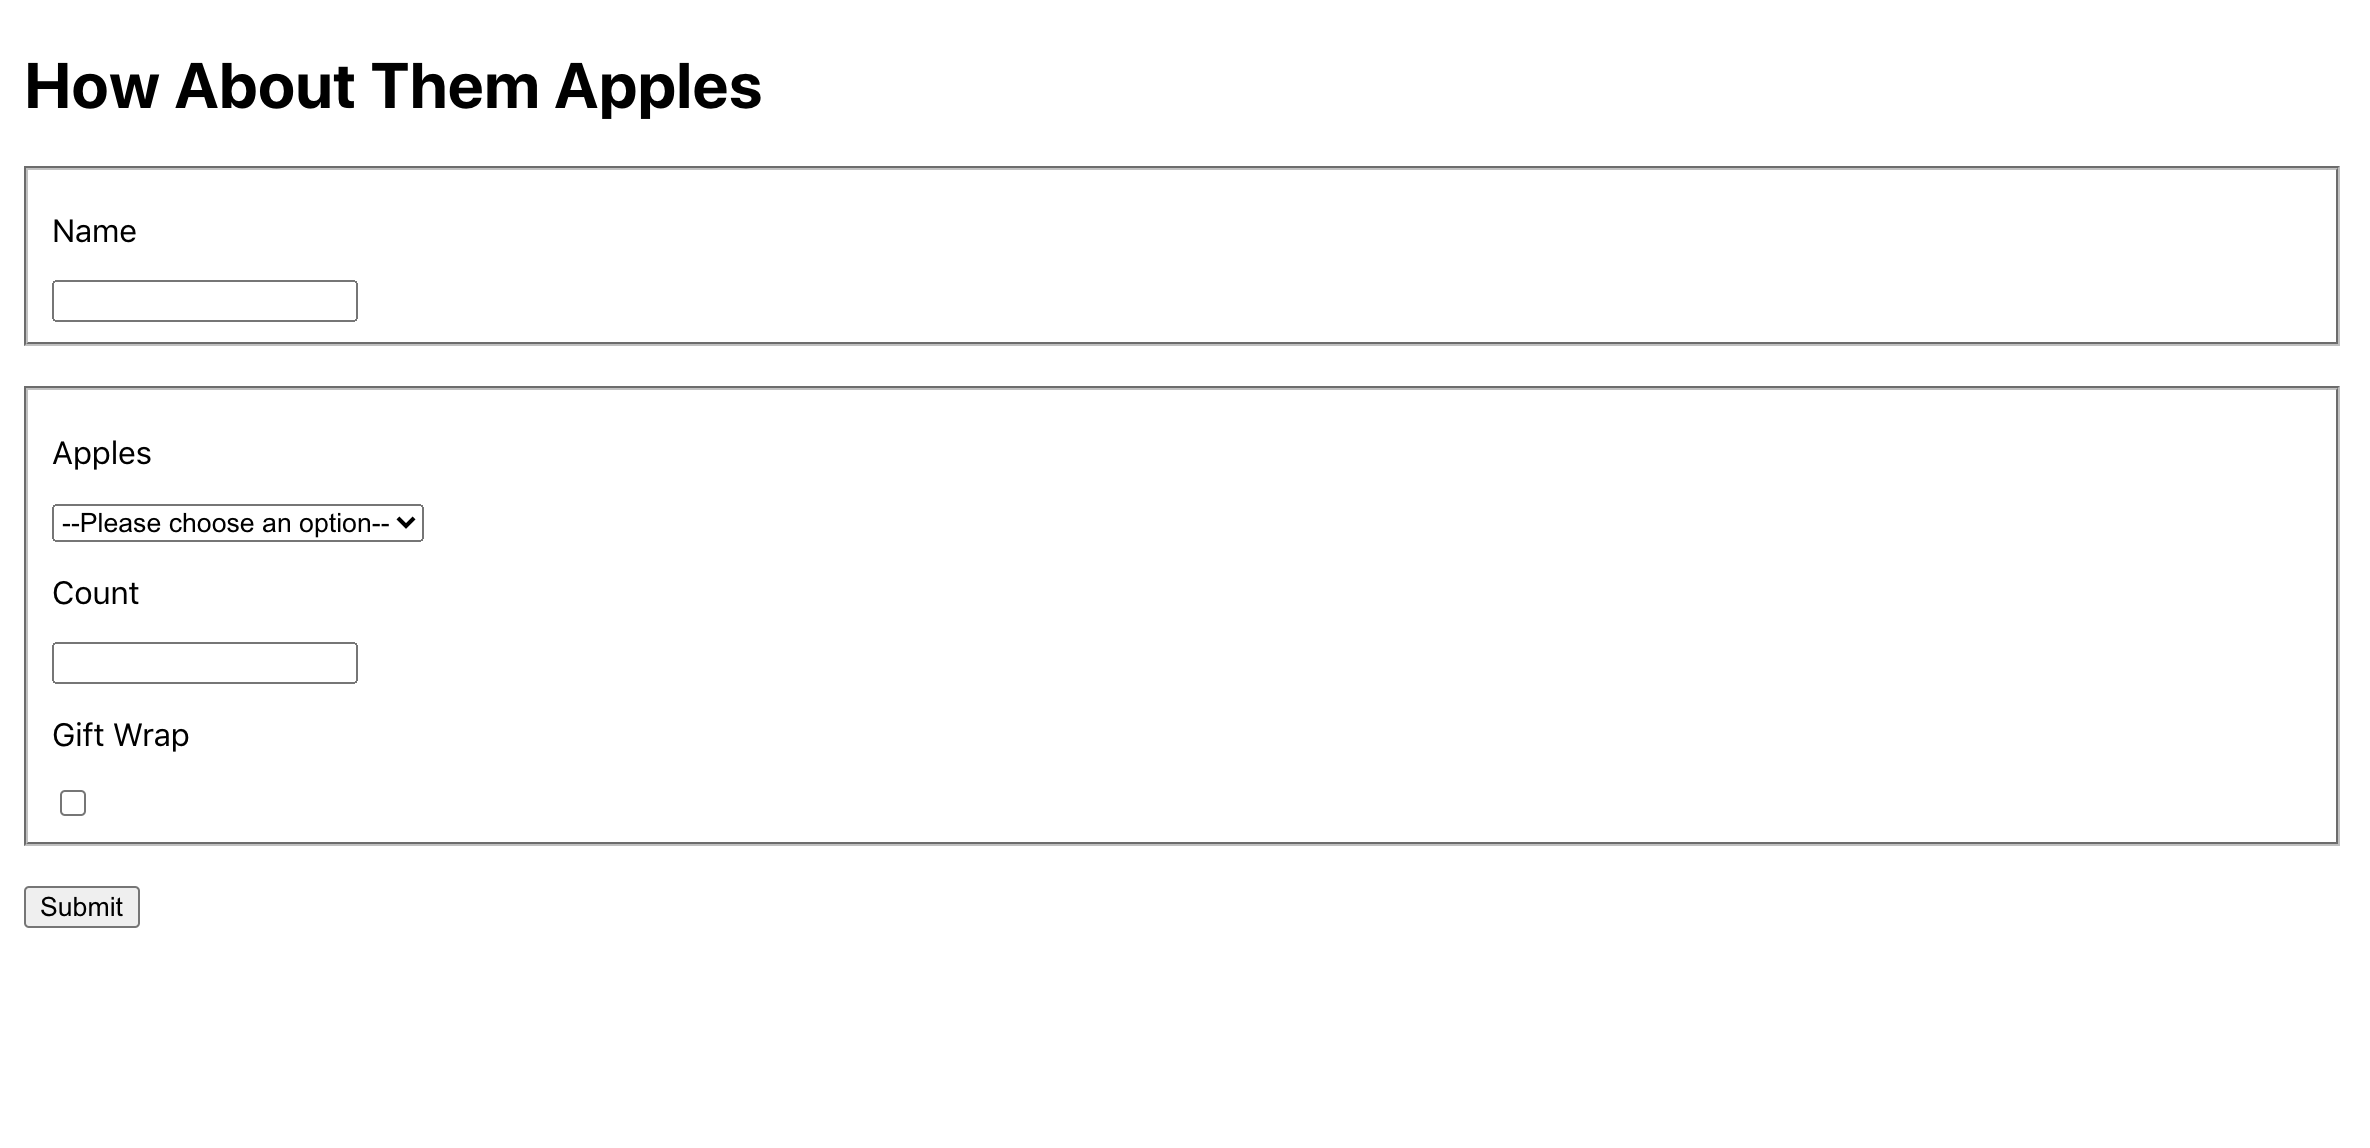
There is one special case here to take into consideration. The value for the gift wrapping checkbox will always be "on", regardless of whether the item is checked or not. Instead of using the event’s value , you’ll need to use the checked property.
Update the handleChange function to see if the event.target.type is checkbox. If it is, pass the event.target.checked property as the value instead of event.target.value:
import React, { useReducer, useState } from 'react';
import './App.css';

...

function App() {
  const [formData, setFormData] = useReducer(formReducer, {});
  const [submitting, setSubmitting] = useState(false);

  const handleSubmit = event => {
    event.preventDefault();
    setSubmitting(true);

    setTimeout(() => {
      setSubmitting(false);
    }, 3000);
  }

  const handleChange = event => {
   const isCheckbox = event.target.type === 'checkbox';
   setFormData({
     name: event.target.name,
     value: isCheckbox ? event.target.checked : event.target.value,
   })
 }
...
In this code, you use the ? ternary operator to make the conditional statement.
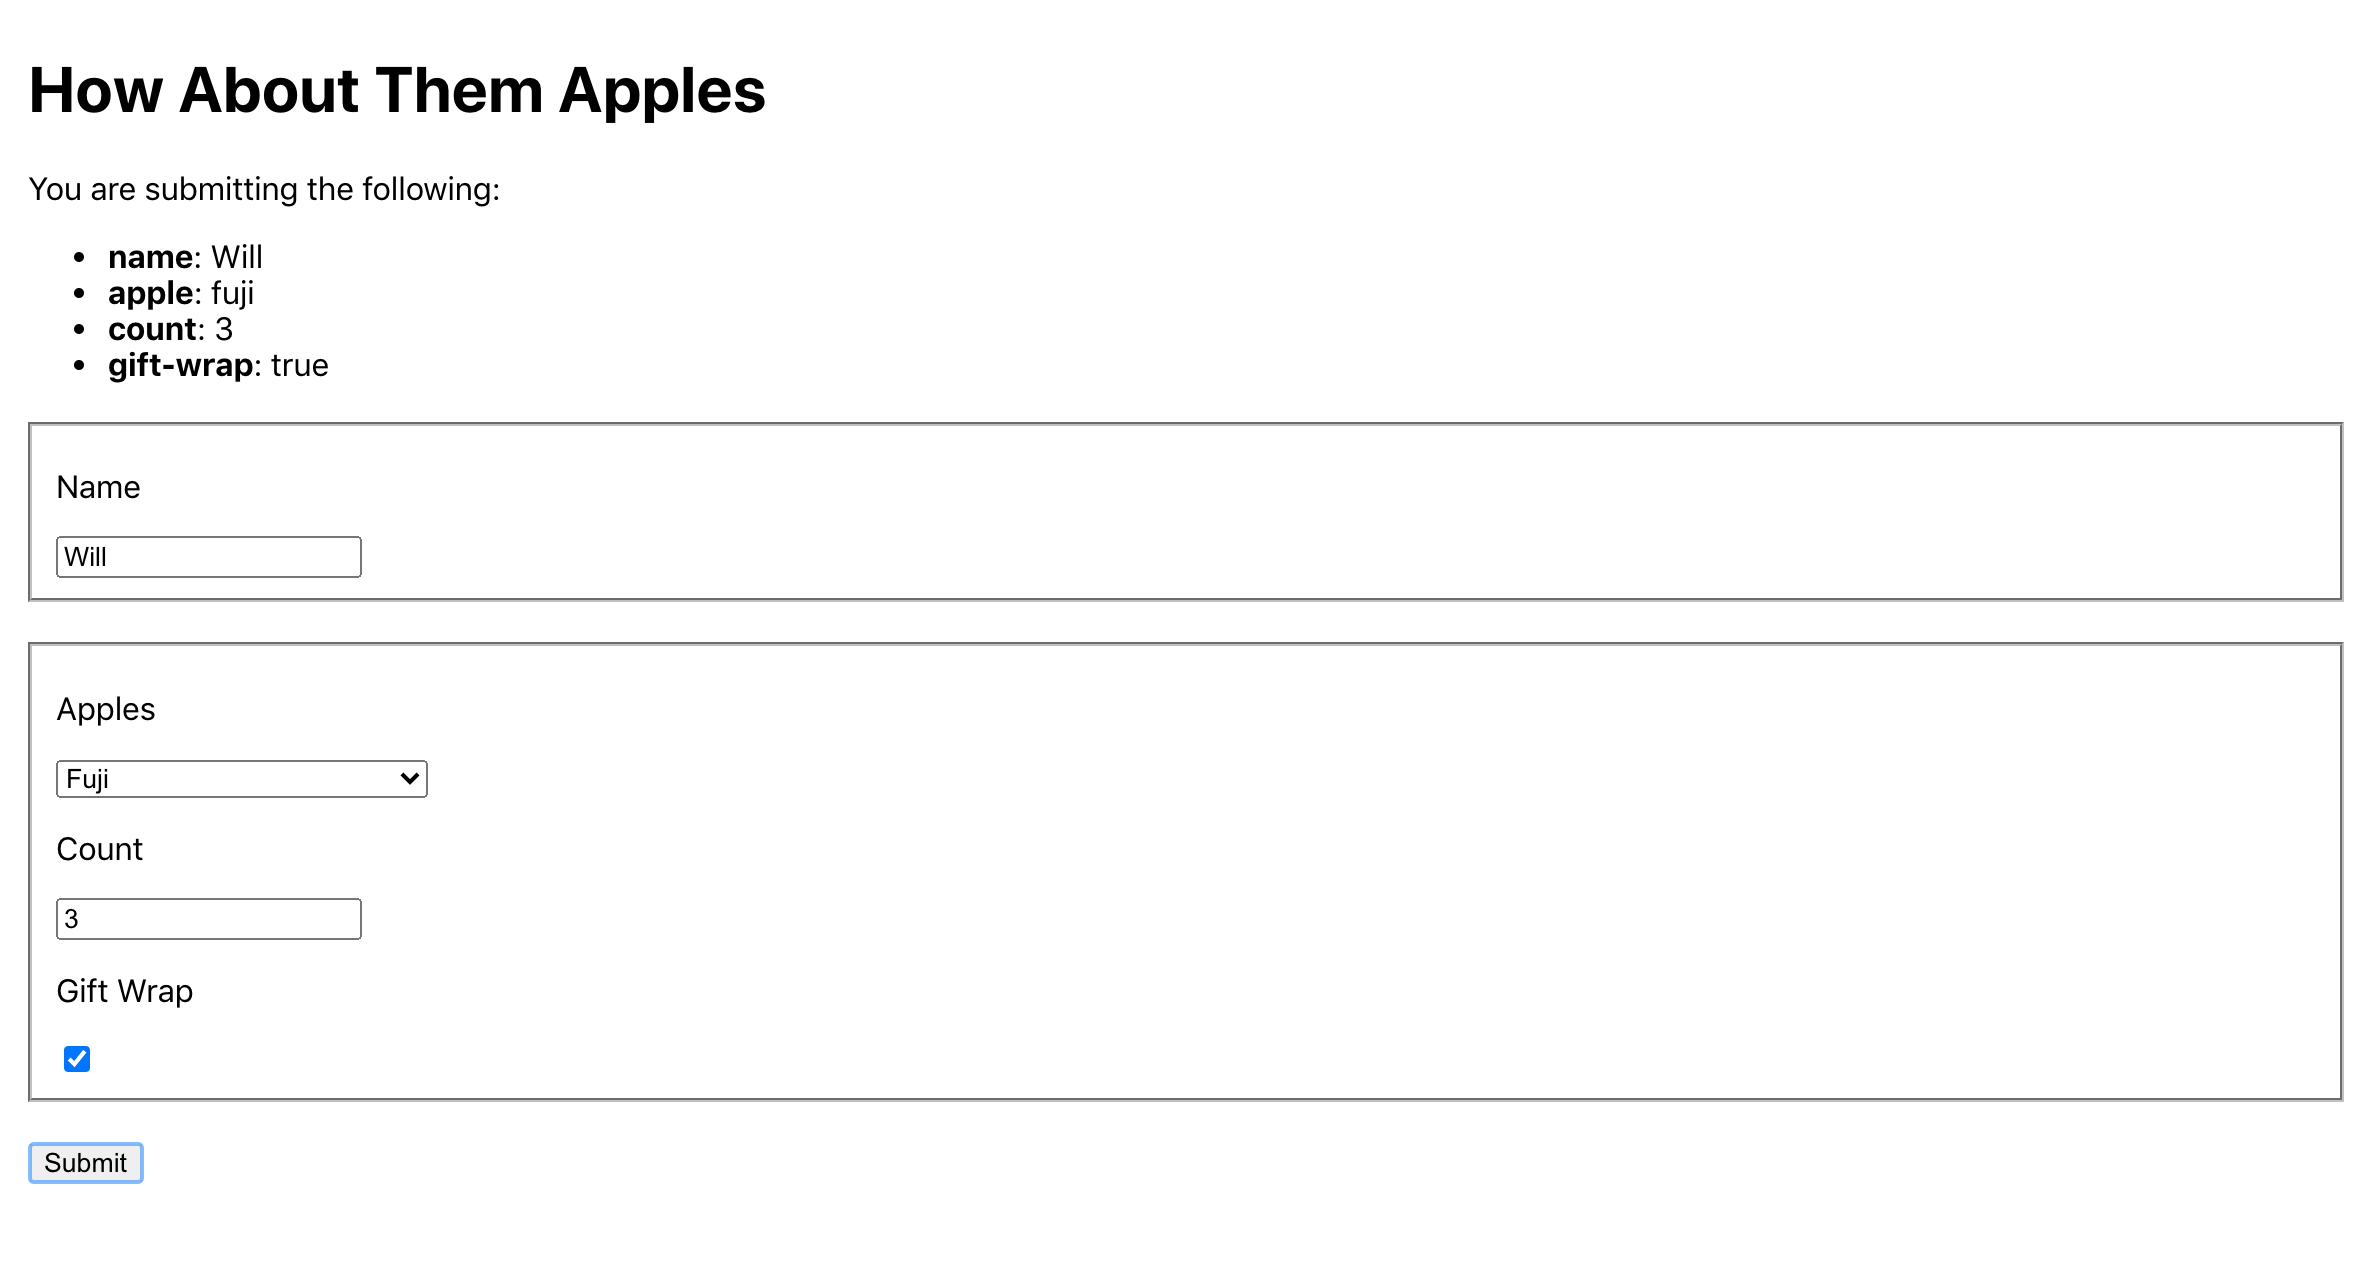
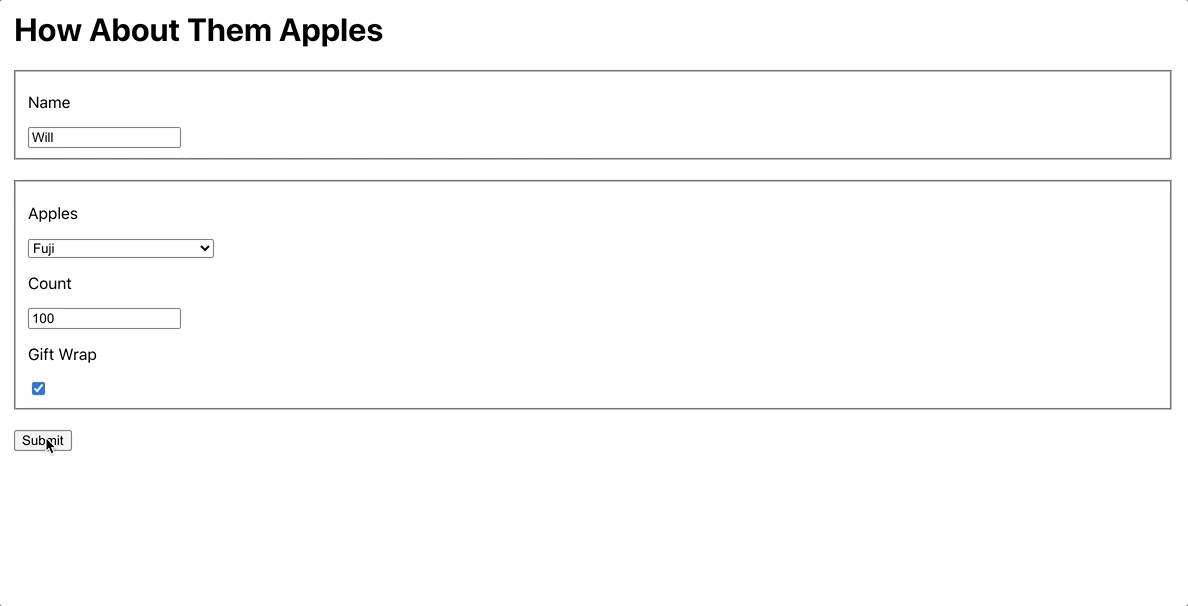
Save the file. After the browser refreshes, fill out the form and click submit. You’ll find that the alert matches the data in the form:
In this step, you learned how to create uncontrolled form components. You saved the form data to a state using the useReducer Hook and reused that data in different components. You also added different types of form components and adjusted your function to save the correct data depending on the element type.
In the next step, you’ll convert the components to controlled components by dynamically setting the component value.
Step 3 — Updating Form Data Using Controlled Components
In this step, you’ll dynamically set and update data using controlled components. You’ll add a value prop to each component to set or update the form data. You’ll also reset the form data on submit.
By the end of this step, you’ll be able to dynamically control form data using React state and props.
With uncontrolled components, you don’t have to worry about synchronizing data. Your application will always hold on to the most recent changes. But there are many situations where you’ll need to both read from and write to an input component. To do this, you’ll need the component’s value to be dynamic.
In the previous step, you submitted a form. But after the form submission was successful, the form still contained the old stale data. To erase the data from each input, you’ll need to change the components from uncontrolled components to controlled components.
A controlled component is similar to an uncontrolled component, but React updates the value prop. The downside is that if you are not careful and do not properly update the value prop the component will appear broken and won’t seem to update.
In this form, you are already storing the data, so to convert the components, you’ll update the value prop with data from the formData state. There is one problem, though: the value cannot be undefined. If your value is undefined, you’ll receive an error in your console.
Since your initial state is an empty object, you’ll need to set the value to be either the value from formData or a default value such as an empty string. For example, the value for the name would be formData.name || '':
...
  return(
    <div className="wrapper">
      <h1>How About Them Apples</h1>
      {submitting &&
        <div>
          You are submitting the following:
          <ul>
            {Object.entries(formData).map(([name, value]) => (
              <li key={name}><strong>{name}</strong>: {value.toString()}</li>
            ))}
          </ul>
        </div>
      }
      <form onSubmit={handleSubmit}>
        <fieldset>
          <label>
            <p>Name</p>
            <input name="name" onChange={handleChange} value={formData.name || ''}/>
          </label>
        </fieldset>
        <fieldset>
          <label>
            <p>Apples</p>
            <select name="apple" onChange={handleChange} value={formData.apple || ''}>
                <option value="">--Please choose an option--</option>
                <option value="fuji">Fuji</option>
                <option value="jonathan">Jonathan</option>
                <option value="honey-crisp">Honey Crisp</option>
            </select>
          </label>
          <label>
            <p>Count</p>
            <input type="number" name="count" onChange={handleChange} step="1" value={formData.count || ''}/>
          </label>
          <label>
            <p>Gift Wrap</p>
            <input type="checkbox" name="gift-wrap" onChange={handleChange} checked={formData['gift-wrap'] || false}/>
          </label>
        </fieldset>
        <button type="submit">Submit</button>
      </form>
    </div>
  )
}

export default App;
As before, the checkbox is a little different. Instead of setting a value, you’ll need to set the checked attribute. If the attribute is truthy, the browser will show the box as checked. Set the initial checked attribute to false with formData['gift-wrap'] || false.
If you want to pre-fill the form, add some default data to the formData state. Set a default value for the count by giving formState a default value of { count: 100 }. You could also set the default values in the initial object, but you’d need to filter out the falsy values before displaying the form information:
...

function App() {
  const [formData, setFormData] = useReducer(formReducer, {
   count: 100,
 });
  const [submitting, setSubmitting] = useState(false);
...
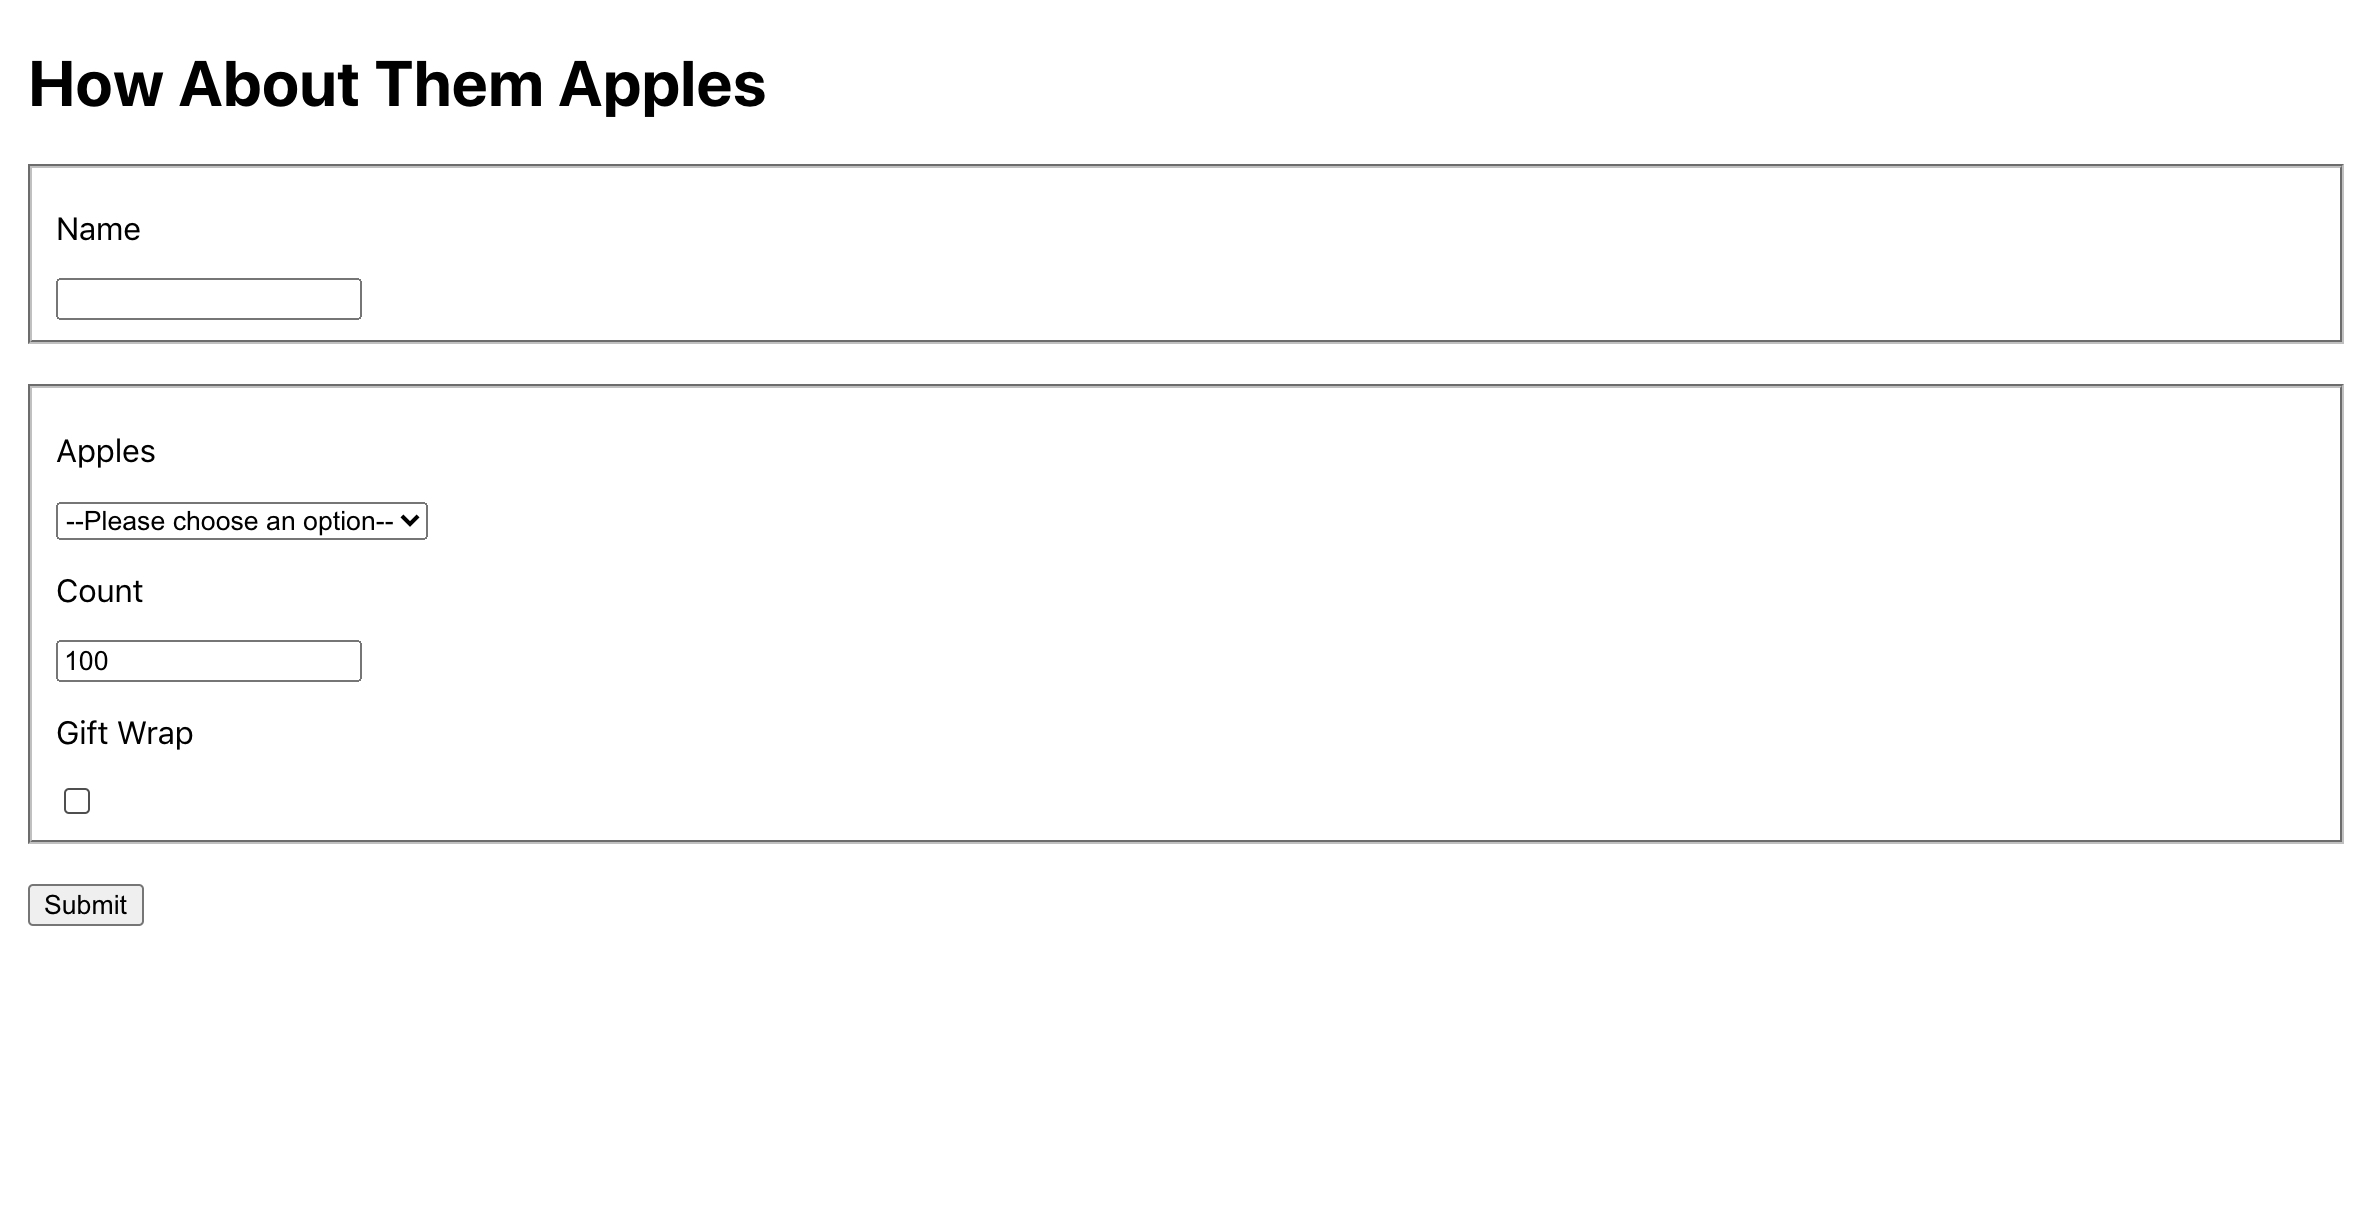
Save the file. When you do, the browser will reload and you’ll see the input with the default data:
Note: The value attribute is different from the placeholder attribute, which is native on browsers. The placeholder attribute shows information but will disappear as soon as the user makes a change; it is not stored on the component. You can actively edit the value, but a placeholder is just a guide for users.
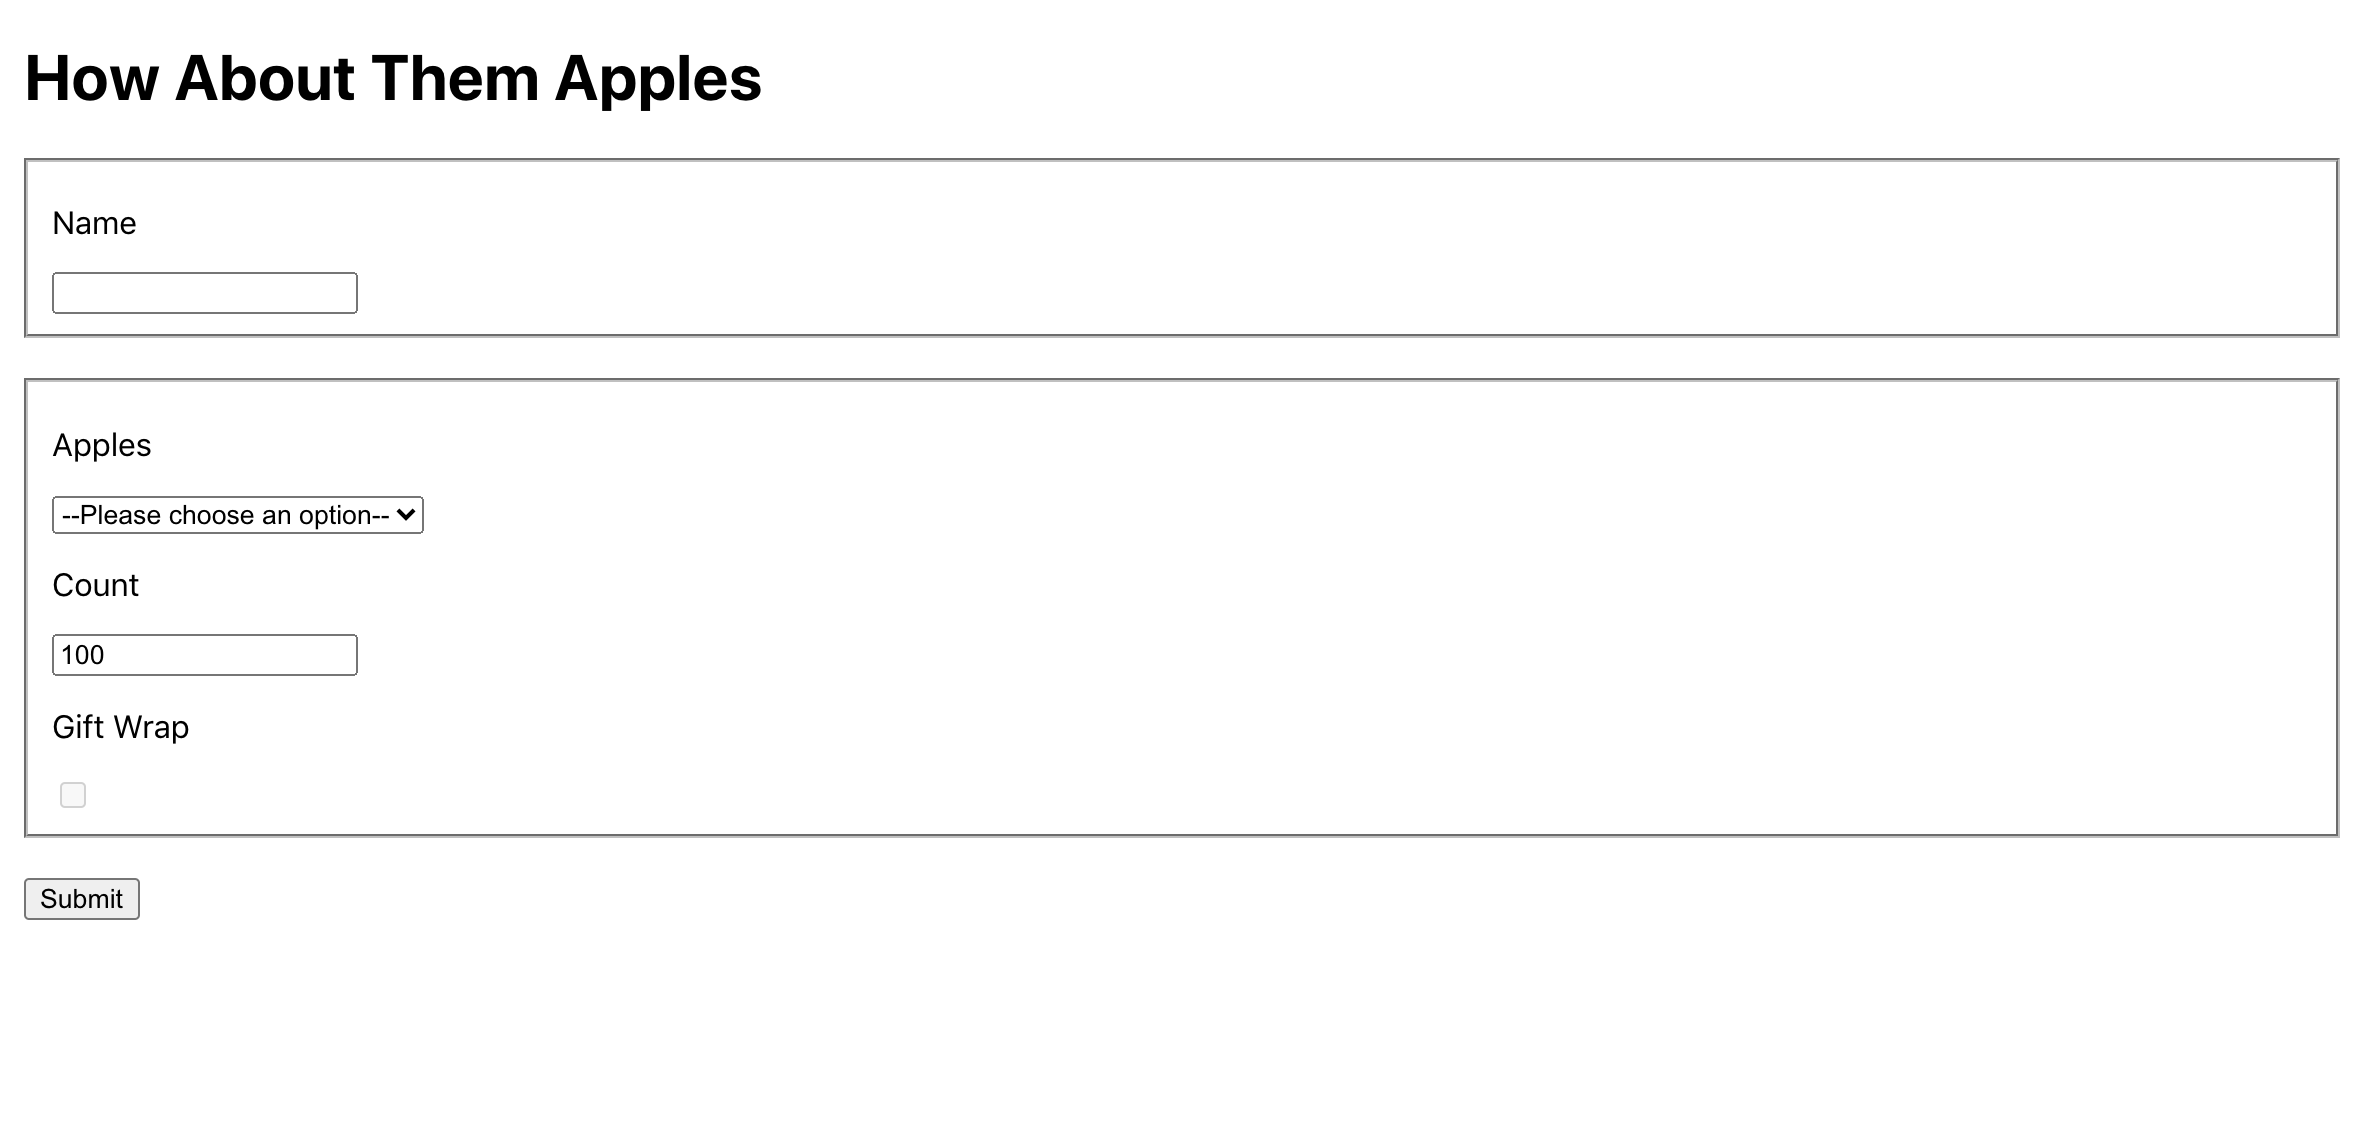
Now that you have active components, you can clear the data on submit. To do so, add a new condition in your formReducer. If event.reset is truthy, return an object with empty values for each form element. Be sure to add a value for each input. If you return an empty object or an incomplete object, the components will not update since the value is undefined.
After you add the new event condition in the formReducer, update your submit function to reset the state when the function resolves:
import React, { useReducer, useState } from 'react';
import './App.css';

const formReducer = (state, event) => {
  if(event.reset) {
   return {
     apple: '',
     count: 0,
     name: '',
     'gift-wrap': false,
   }
 }
  return {
    ...state,
    [event.name]: event.value
  }
}

function App() {
  const [formData, setFormData] = useReducer(formReducer, {
    count: 100
  });
  const [submitting, setSubmitting] = useState(false);

  const handleSubmit = event => {
    event.preventDefault();
    setSubmitting(true);

    setTimeout(() => {
      setSubmitting(false);
      setFormData({
       reset: true
     })
    }, 3000);
  }

...
Save the file. When you do, the browser will reload and the form will clear on submit.
In this step, you converted your uncontrolled components to controlled components by setting the value or the checked attributes dynamically. You also learned how to refill data by setting a default state and how to clear the data by updating the form reducer to return default values.
In this next step, you’ll set form component properties dynamically and disable a form while it is submitting.
Step 4 — Dynamically Updating Form Properties
In this step, you’ll dynamically update form element properties. You’ll set properties based on previous choices and disable your form during submit to prevent accidental multiple submissions.
Currently, each component is static. They do not change as the form changes. In most applications, forms are dynamic. Fields will change based on the previous data. They’ll validate and show errors. They may disappear or expand as you fill in other components.
Like most React components, you can dynamically set properties and attributes on components and they will re-render as the data changes.
Try setting an input to be disabled until a condition is met by another input. Update the gift wrapping checkbox to be disabled unless the user selects the fuji option.
Inside App.js, add the disabled attribute to the checkbox. Make the property truthy if the formData.apple is fuji:
...
        <fieldset>
          <label>
            <p>Apples</p>
            <select name="apple" onChange={handleChange} value={formData.apple || ''}>
                <option value="">--Please choose an option--</option>
                <option value="fuji">Fuji</option>
                <option value="jonathan">Jonathan</option>
                <option value="honey-crisp">Honey Crisp</option>
            </select>
          </label>
          <label>
            <p>Count</p>
            <input type="number" name="count" onChange={handleChange} step="1" value={formData.count || ''}/>
          </label>
          <label>
            <p>Gift Wrap</p>
            <input
             checked={formData['gift-wrap'] || false}
             disabled={formData.apple !== 'fuji'}
             name="gift-wrap"
             onChange={handleChange}
             type="checkbox"
            />
          </label>
        </fieldset>
        <button type="submit">Submit</button>
      </form>
    </div>
  )
}

export default App;
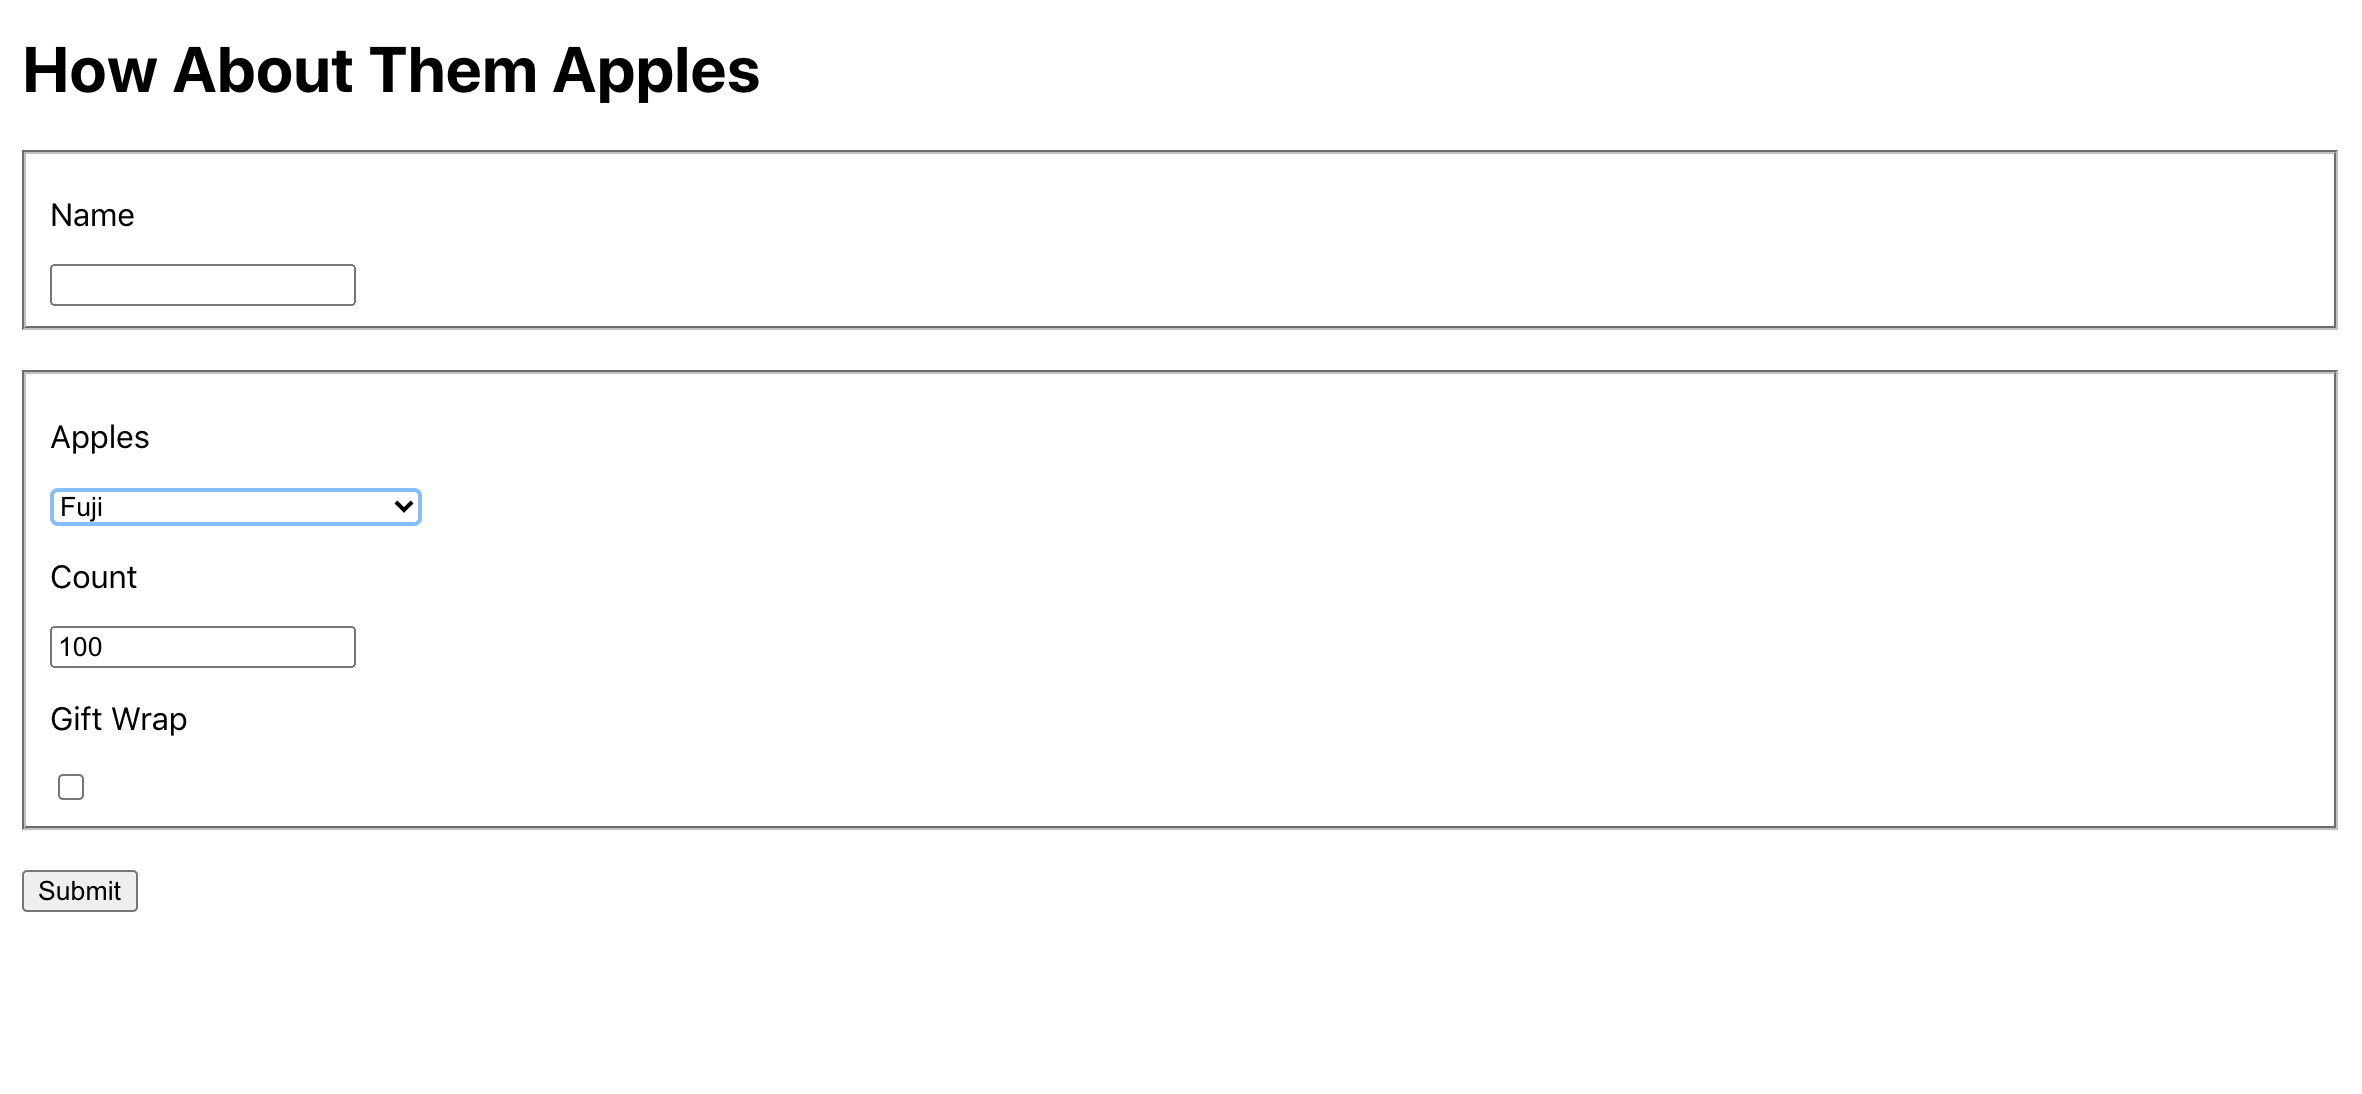
Save the file. When you do, the browser will reload and the checkbox will be disabled by default:
If you select the apple type of Fuji, the element will be enabled:
In addition to changing properties on individual components, you can modify entire groups of components by updating the fieldset component.
As an example, you can disable the form while the form is actively submitting. This will prevent double submissions and prevent the user from changing fields before the handleSubmit function fully resolves.
Add disabled={submitting} to each <fieldset> element and the <button> element:
...
      <form onSubmit={handleSubmit}>
        <fieldset disabled={submitting}>
          <label>
            <p>Name</p>
            <input name="name" onChange={handleChange} value={formData.name || ''}/>
          </label>
        </fieldset>
        <fieldset disabled={submitting}>
          <label>
            <p>Apples</p>
            <select name="apple" onChange={handleChange} value={formData.apple || ''}>
                <option value="">--Please choose an option--</option>
                <option value="fuji">Fuji</option>
                <option value="jonathan">Jonathan</option>
                <option value="honey-crisp">Honey Crisp</option>
            </select>
          </label>
          <label>
            <p>Count</p>
            <input type="number" name="count" onChange={handleChange} step="1" value={formData.count || ''}/>
          </label>
          <label>
            <p>Gift Wrap</p>
            <input
              checked={formData['gift-wrap'] || false}
              disabled={formData.apple !== 'fuji'}
              name="gift-wrap"
              onChange={handleChange}
              type="checkbox"
            />
          </label>
        </fieldset>
        <button type="submit" disabled={submitting}>Submit</button>
      </form>
    </div>
  )
}

export default App;
Save the file, and the browser will refresh. When you submit the form, the fields will be disabled until the submitting function resolves:

You can update any attribute on an input component. This is helpful if you need to change the maxvalue for a number input or if you need to add a dynamic pattern attribute for validation.
In this step, you dynamically set attributes on form components. You added a property to dynamically enable or disable a component based on the input from another component and you disabled entire sections using the <fieldset> component.
Conclusion
Forms are key to rich web applications. In React, you have different options for connecting and controlling forms and elements. Like other components, you can dynamically update properties including the value input elements. Uncontrolled components are best for simplicity, but might not fit situations when a component needs to be cleared or pre-populated with data. Controlled components give you more opportunities to update the data, but can add another level of abstraction that may cause unintentional bugs or re-renders.
Regardless of your approach, React gives you the ability to dynamically update and adapt your forms to the needs of your application and your users.
If you would like to read more React tutorials, check out our React Topic page, or return to the How To Code in React.js series page.
Thanks for learning with the DigitalOcean Community. Check out our offerings for compute, storage, networking, and managed databases.
Tutorial Series: How To Code in React.js
React is a popular JavaScript framework for creating front-end applications, such as user interfaces that allow users to interact with programs. Originally created by Facebook, it has gained popularity by allowing developers to create fast applications using an intuitive programming paradigm that ties JavaScript with an HTML-like syntax known as JSX.
In this series, you will build out examples of React projects to gain an understanding of this framework, giving you the knowledge you need to pursue front-end web development or start out on your way to full stack development.
Browse Series: 21 tutorials
About the author(s)
Author of Simplifying JavaScript. Writing featured in Slate, FreeCodeCamp, and here! I like to break things and put them back together. 🛠
Former Senior Technical Editor at DigitalOcean, fiction writer and podcaster elsewhere, always searching for the next good nautical pun! Areas of expertise include Node.js, PostgreSQL, CSS, JavaScript.
Still looking for an answer?
This textbox defaults to using Markdown to format your answer.
You can type !ref in this text area to quickly search our full set of tutorials, documentation & marketplace offerings and insert the link!
Hello
Why i get this error in console: Warning: A component is changing an uncontrolled input to be controlled. This is likely caused by the value changing from undefined to a defined value, which should not happen. Decide between using a controlled or uncontrolled input element for the lifetime of the component. More info: https://reactjs.org/link/controlled-components
Thanks for the tutorial and regards from Switzerland :-)
Thanks for the tutorial. I followed the tutorial and realised I could everything you did on the controlled component on the uncontrolled component without controlling the value prop with react. Dynamically disabling the checkbox works in the same way as that of the controlled component. So I don’t get the difference between the two.
 This work is licensed under a Creative Commons Attribution-NonCommercial- ShareAlike 4.0 International License.
Become a contributor for community
Get paid to write technical tutorials and select a tech-focused charity to receive a matching donation.

DigitalOcean Documentation
Full documentation for every DigitalOcean product.

Resources for startups and AI-native businesses
The Wave has everything you need to know about building a business, from raising funding to marketing your product.
The developer cloud
Scale up as you grow — whether you're running one virtual machine or ten thousand.

Start building today
From GPU-powered inference and Kubernetes to managed databases and storage, get everything you need to build, scale, and deploy intelligent applications.
