Full-Stack Software Developer

The author selected the Internet Archive to receive a donation as part of the Write for DOnations program.
Introduction
In building a website or application, often one of the most difficult tasks is pulling data from multiple sources and collating it into a uniform output. A common way to solve this is to use entirely different build systems for different parts of a site, but this sometimes adds complexity while making uniformity harder to achieve. This is where Gatsby, a data-driven Static Site Generator (SSG), can provide a solution.
One of the core objectives of Gatsby is to solve this problem for developers, and source plugins are the main way it does so. A source plugin is a bundle of code that handles bringing data into the Gatsby ecosystem from a given source. Sources can be from the local filesystem as with Markdown files, databases, published data feeds, or even completely dynamic remote data sources such as APIs.
In this tutorial, you will build your own custom source plugin to bring new data into Gatsby from a real-world API. You will also format the data so that it can be accessed throughout Gatsby, and by the end of the tutorial, have a working project that builds static HTML from your new dynamic data source.
Prerequisites
Before starting, here are a few things you will need:
- A local installation of Node.js for running Gatsby and building your site. The installation procedure varies by operating system, but DigitalOcean has guides for Ubuntu 20.04 and macOS, and you can always find the latest release on the official Node.js download page.
- Some familiarity with JavaScript, for working in Gatsby. The JavaScript language is an expansive topic, but a good starting spot is our How To Code in JavaScript series.
- Some familiarity with web APIs, Node.js, and JSON.
- A new Gatsby project, scaffolded from
gatsby-starter-default. For satisfying this requirement and building a new Gatsby project from scratch, you can refer to Step 1 of the How To Set Up Your First Gatsby Website tutorial. - Some familiarity with React and JSX, as well as HTML elements, if you want to customize the user interface (UI) of your posts beyond what is covered in this tutorial.
This tutorial was tested on Node.js v14.16.1, npm v6.14.12, Gatsby v3.13.0, and node-fetch v2.6.2.
Step 1 — Scaffolding Files and Installing Dependencies
When building something, the first step is always to get your tools and parts in order. In this step, you will put the initial building blocks of your source plugin in place by creating the necessary file structure and installing the dependencies your code will rely on.
Since this will be a local plugin, create a directory within your Gatsby project to hold the source code of the plugin under a root-level plugins directory. You can do this by manually creating the folder in your file browser, or from the command line in the root of your project with the mkdir command:
- mkdir -p plugins/my-custom-source-plugin
Note: If you want to develop your plugin outside of your Gatsby project directory, you can do so, but it requires some extra steps to get Gatsby to pull the files into your site. For more on this, check out the official Gatsby documentation.
Next, you need to create a package.json file to mark this directory as a Node.js package with its own dependencies. To create this file and pre-fill some required fields, use the following command:
- cd plugins/my-custom-source-plugin
- npm init -y
This command navigates to your newly created plugin folder and then uses npm init to initialize a new package. The -y flag skips some questions that are irrelevant to this project and fills in the package.json file with the minimum required values.
Now that package.json exists, you can add dependencies to your plugin that will make coding out functionality easier. Go ahead and install the only extra dependency you will be needing in this tutorial, node-fetch, by using the following command:
- npm install node-fetch@^2
Finally, create the gatsby-node.js file that will end up holding the main code of the source plugin:
- touch gatsby-node.js
Note: If you are frequently building Gatsby plugins, you might find their plugin template helpful.
Now that you have created the file structure to support your plugin and installed the initial dependencies, you will move on to giving instructions to Gatsby on how to find and load your plugin.
Step 2 — Loading and Configuring the Plugin
As is the case with any Gatsby plugin or theme, Gatsby has to be instructed on where and how to load the plugin from. To do this, you edit the main Gatsby config file gatsby-config.js , which resides in the root of your Gatsby project. Open the file in your editor of choice and add the following highlighted line:
module.exports = {
...
  plugins: [
    `gatsby-plugin-react-helmet`,
    `gatsby-plugin-image`,
    {
      resolve: `gatsby-source-filesystem`,
      options: {
        name: `images`,
        path: `${__dirname}/src/images`,
      },
    },
    `my-custom-source-plugin`,
    `gatsby-transformer-sharp`,
...
Because your plugin’s source code lives in the plugins directory, all that is required to get Gatsby to load it is to pass in the name of the sub-directory where it can be found within that folder. Your plugin also does not take any options at the moment, so there is no need to pass an options object to it in the Gatsby configuration block.
Save gatsby-config.js and exit from the file.
You have now configured Gatsby to load your custom source plugin, as well as told it exactly where to find the source code it should execute. In the next step, you will build out this source code to pull data into the Node.js runtime from your custom remote source.
Step 3 — Pulling Raw Data Into Node.js
In the previous step, you configured Gatsby to load and execute your custom source plugin’s code, but you still need to build out this code to accomplish the task of bringing new data into the Gatsby ecosystem. In this step, you will write the code that does this, fetching remote data via node-fetch and preparing it for use in future steps.
Source plugins can pull data from almost anywhere, local or remote, but in this tutorial your source plugin will be specifically pulling titles and excerpts from the Computer Programming Books category in Wikipedia via their public API.
Open your my-custom-source-plugin/gatsby-node.js file in your plugins directory and add the following code:
const fetch = require('node-fetch').default

/**
 * Fetch a list of computer books from Wikipedia, with excerpts
 */
async function getWikiProgrammingBooks() {
  const BASE_ENDPOINT = "https://en.wikipedia.org/w/api.php?action=query&format=json&utf8=1&redirects=1";

  // Get list of books
  const listEndpoint = new URL(BASE_ENDPOINT);
  listEndpoint.searchParams.append('list', 'categorymembers');
  listEndpoint.searchParams.append("cmtitle", "Category:Computer_programming_books");
  listEndpoint.searchParams.append("cmlimit", "10");
  const listResults = await (await fetch(listEndpoint.toString())).json();


  // Extract out the page IDs from the list
  const pageIds = listResults.query.categorymembers.map((listing) => listing.pageid);

  // Fetch details for page IDs
  const extractEndpoint = new URL(BASE_ENDPOINT);
  extractEndpoint.searchParams.append("pageids", pageIds.join("|"));
  extractEndpoint.searchParams.append("prop", "extracts|info");
  extractEndpoint.searchParams.append("exintro", "");
  extractEndpoint.searchParams.append("explaintext", "");
  extractEndpoint.searchParams.append("inprop", "url");

  const bookResult = await (await fetch(extractEndpoint.toString())).json();

  return Object.values(bookResult.query.pages);
}
In this code, you have created a reusable function that can be called to return a list of computer programming books, along with their page IDs (a unique ID within Wikipedia) and excerpts/extracts. In the first part of the function, you build up the right API URL to use to fetch the initial list of titles and IDs belonging to a specific category (Computer Programming Books). The URL constructor and interface is used to make modifying the query string more readable and manageable.
You use the fetch method from node-fetch to make a GET request to the constructed URL, which returns a list of the book titles with their IDs. That response is then turned into an array of just the pageid values, subsequently used to query the Wikipedia API again, this time requesting extracts and meta info generated for the given page ID. The page IDs are joined by the pipe character (|), as the Wikipedia API uses this format to accept multiple IDs through a single string value.
Finally, since the results for page excerpts come back as an object with each book listing nested under its own ID as a key, you use Object.values() to omit the page ID key and convert the results into an array before returning them.
If you were to log the output of this function, it would look something like this:
[
  {
    "pageid": 379671,
    "ns": 0,
    "title": "The C Programming Language",
    "extract": "The C Programming Language (sometimes termed K&R, after its authors' initials) is a computer programming book written by Brian Kernighan and Dennis Ritchie...",
    "fullurl": "https://en.wikipedia.org/wiki/The_C_Programming_Language",
    ...
  },
  ...
]
Make sure to save your changes, but keep this file open as you will be adding more code to it in the next step.
In this step you used node-fetch to retrieve remote source content and expose it within the gatsby-node.js file. In the next step, you will normalize the content as you use it to create new Gatsby nodes to use throughout the Gatsby project.
Step 4 — Normalizing Data and Creating Nodes
Fetching remote content and bringing it into gatsby-node.js in the previous step doesn’t mean that it is now accessible throughout Gatsby; in order to share data in a universal way, Gatsby uses the concept of nodes, which are shared across a unified GraphQL data layer. In this step, you will create these nodes, formatting your new content to match.
Although you can now retrieve and access the results from Wikipedia by calling getWikiProgrammingBooks(), you still need to add the code to integrate this with Gatsby’s node system. In the same gatsby-node.js file from the previous step, add this new block of code to handle generating the nodes:
const fetch = require('node-fetch').default

...

exports.sourceNodes = async ({ actions, createContentDigest, createNodeId }) => {
  // Arbitrary node type constant
  const BOOK_TYPE = 'BookWikiPage';

  // Get books
  const bookResults = await getWikiProgrammingBooks();

  // Convert raw book results to nodes
  for (const book of bookResults) {
    actions.createNode({
      ...book,
      id: createNodeId(`${BOOK_TYPE}-${book.pageid}`),
      parent: null,
      children: [],
      internal: {
        type: BOOK_TYPE,
        contentDigest: createContentDigest(book)
      }
    })
  }
};
In this code block, you are iterating over each book returned by getWikiProgrammingBooks and creating a Gatsby node for it via the createNode method. Each property and value passed into createNode has importance, and is worth consideration:
...bookis used to spread the key-value pairs from your Wikipedia API object into the Gatsby node you are creating. This means that later on you can accessnode.title, as it will be copied frombook.title.idis a globally unique value within Gatsby. To make each book’s ID unique within your own plugin, you are combining the book type with the Wikipedia page ID to form an ID string. However, because you can’t be sure what IDs other plugins are using, you’ve used the best practice of passing your ID tocreateNodeId, which is a Gatsby helper function that ensures the ID is turned into something globally unique.parentis a field that can be used to link your node to another via ID, marking this node as a child. Since each book is its own entity, unconnected to other nodes, you have left this asnull, signifying it does not have a parent.childrenis similar toparentas a way to link nodes, but takes an array of IDs. Since each book has no children, you have left the array empty.internalis an object that groups together fields highly-specific to Gatsby’s internal node management system and other plugins. It can only contain official fields, which is why you did not spread thebookobject into it.typeis a globally unique string that describes the type of node you are creating, and will be used later when querying for nodes via GraphQL.contentDigestis a hash string, which is built from the contents of the node and the GatsbycreateContentDigesthelper utility. This field helps Gatsby detect when a node has changed, as the hash string will change if any properties of thebookobject are modified.
You have just added code that takes your source content and creates new Gatsby nodes with it, sharing them across the Gatsby environment. In the next step, you will verify that these nodes appear in the GraphQL data layer and can be queried.
Step 5 — (Optional) Inspecting Node Output with the GraphQL API
By now, you have pulled your source content into Gatsby and used it to create new nodes. As an alternative to manually debugging with breakpoints or log statements, in this step you will use the interactive GraphQL IDE to verify that these new nodes are being created and are able to be queried with the GraphQL API.
Go ahead and start up your local development server by running this command from the root of your Gatsby project:
- npm run develop
Note: At the time of writing this tutorial, a problem with Gatsby’s dependency chain introduced an error that can return the message Error: Cannot find module 'gatsby-core-utils' when attempting to start the development server. If you encounter this error, run the following:
- npm install gatsby-core-utils
This will re-install the Gatsby core utilities and will resolve the dependency problem. For more information on this, check out the GitHub issue for this Gatsby error.
In addition to launching a live version of your Gatsby site, the develop command also exposes a local GraphQL server and IDE. To verify that your code in gatsby-node.js is creating all the book nodes, you will use this GraphQL query to fetch the book titles, page IDs, and Gatsby IDs:
{
  allBookWikiPage {
    edges {
      node {
        title
        pageid
        id
      }
    }
  }
}
To run this query, either open up the interactive GraphQL IDE at localhost:8000/___graphql and paste the query into the left side before executing, or query it via cURL:
- curl --location --request POST 'http://localhost:8000/___graphql' \
- --header 'Content-Type: application/json' \
- --data-raw '{
- "query": "{ allBookWikiPage { edges { node { title pageid id } } } }"
- }'
The response JSON will look something like this:
{
  "data": {
    "allBookWikiPage": {
      "edges": [
        {
          "node": {
            "title": "The C Programming Language",
            "pageid": 379671,
            "id": "818771ca-40aa-5cfd-b9e7-fddff093d5ec"
          }
        },
        ...
      ]
    }
  },
  "extensions": {}
}
Having verified that your new custom source nodes have been created and are accessible in the GraphQL data layer, the next step is to use them to create visible content for visitors of your site or application.
Step 6 — (Optional) Creating Pages Based on Nodes
So far, all of the previous steps have been focused on creating internal Gatsby nodes, including the last step of verifying their creation and ability to be retrieved. However, these nodes are only visible to code running in your Gatsby project, not to visitors of your site or application. In this step, you will add a React page template file and wire it up to your nodes so that your source plugin content turns into actual public-facing webpages.
There are multiple ways to create pages based on Gatsby nodes, but for this tutorial you will be using the File System Route API, which creates pages based on a special filename syntax.
First, create an empty file in src/pages with a filename of {BookWikiPage.title}.js. The curly braces tell Gatsby that the filename is using the File System Route API, and inside the braces, BookWikiPage.title tells Gatsby to create a page for each unique book title. Note that you are no longer working on files within the plugins directory, but are now working inside of the main Gatsby project.
Next, add code to that file that will take the book node and display it as a webpage:
import { graphql } from "gatsby";
import * as React from "react";
import Layout from "../components/layout";
import Seo from "../components/seo";

export default function BookPageTemplate({ data: { bookWikiPage } }) {
  const { title, extract, fullurl } = bookWikiPage;
  return (
    <Layout>
      <Seo title={title} />
      <h1>{title}</h1>
      <blockquote>{extract}</blockquote>

      <i>This article uses material from the Wikipedia article <a href={fullurl} target="_blank" rel="noreferrer">"{title}"</a>, which is released under the <a href="https://creativecommons.org/licenses/by-sa/3.0/">Creative Commons Attribution-Share-Alike License 3.0</a>.</i>
    </Layout>
  );
}

export const pageQuery = graphql`
  query ($id: String!) {
    bookWikiPage(id: { eq: $id }) {
      title
      extract
      fullurl
    }
  }
`;
At the end of your code is an exported variable called pageQuery, which uses the Gatsby GraphQL tag. Gatsby will evaluate the GraphQL query that follows it, passing the results to the BookPageTemplate function.
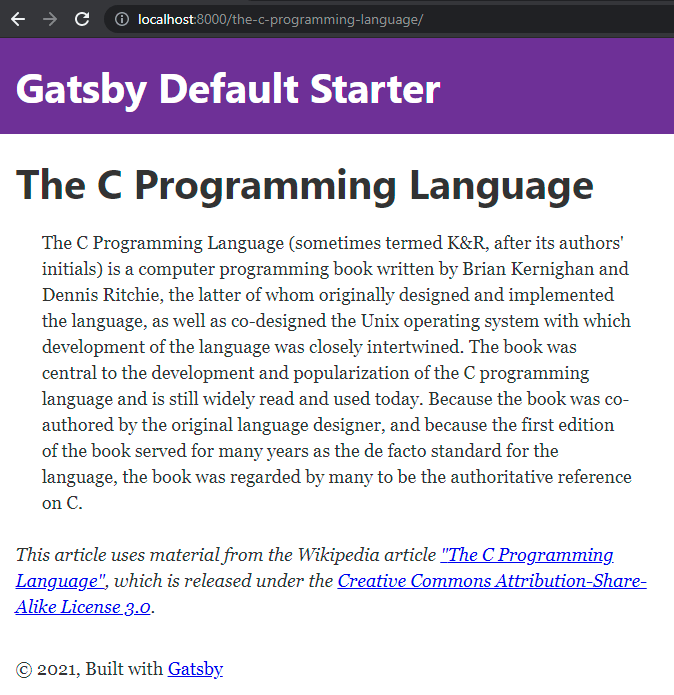
The BookPageTemplate function, which is a React component, then takes the results of the GraphQL query and displays them as part of a web page by embedding the values into the JSX that it returns. The title of the book is used as the main heading and title of the page, the extract is displayed as a block quote, and a link to the full Wikipedia entry page is embedded at the bottom.
You also mark the BookPageTemplate function as the default export by using export default before its declaration, as Gatsby expects to find the React component responsible for producing the final rendered page as the default export of each page template file.
Having added the React template code to the file, save the changes and close it. Navigate to http://localhost:8000/the-c-programming-language/ to render a sample page:
Note: For a more manual approach to creating pages based on nodes, you can use the createPages API inside of gatsby-node.js.
To display a listing of these new nodes and their associated pages, you will also create a dedicated listing page, which will display all the books in one location. Under src/pages, create a new file with the filename of books.js. Next, add the following code into it:
import { graphql, Link } from "gatsby";
import * as React from "react";
import Layout from "../components/layout";
import Seo from "../components/seo";

export default function BookListingsPageTemplate({ data: { allBookWikiPage } }) {
  return (
    <Layout>
      <Seo title="Programming Books Listing" />
      <p>Here are some computer programming books that have their own Wikipedia entries:</p>

      {allBookWikiPage.edges.map((edge) => {
        const node = edge.node;
        return (
          <details key={node.title}>
            <summary>{node.title}</summary>

            <div className="details-body">
              <p>{node.extract}</p>
              <div className="links">
                <Link href={node.gatsbyPath}>Internal Page</Link>
                <a rel="noreferrer" href={node.fullurl}>Wikipedia Page</a>
              </div>
            </div>
          </details>
        )
      })}
    </Layout>
  );
}

export const pageQuery = graphql`
  query {
    allBookWikiPage {
      edges {
        node {
          title
          extract
          gatsbyPath(filePath: "/{BookWikiPage.title}")
          fullurl
        }
      }
    }
  }
`;
Similar to the {BookWikiPage.title}.js page template, this file also uses the GraphQL pageQuery tag to pull in data from the GraphQL layer and pass it to a React component. However, while the previous template rendered a single book based on ID, this template will render a listing of all the books, while linking to the individual book pages created previously.
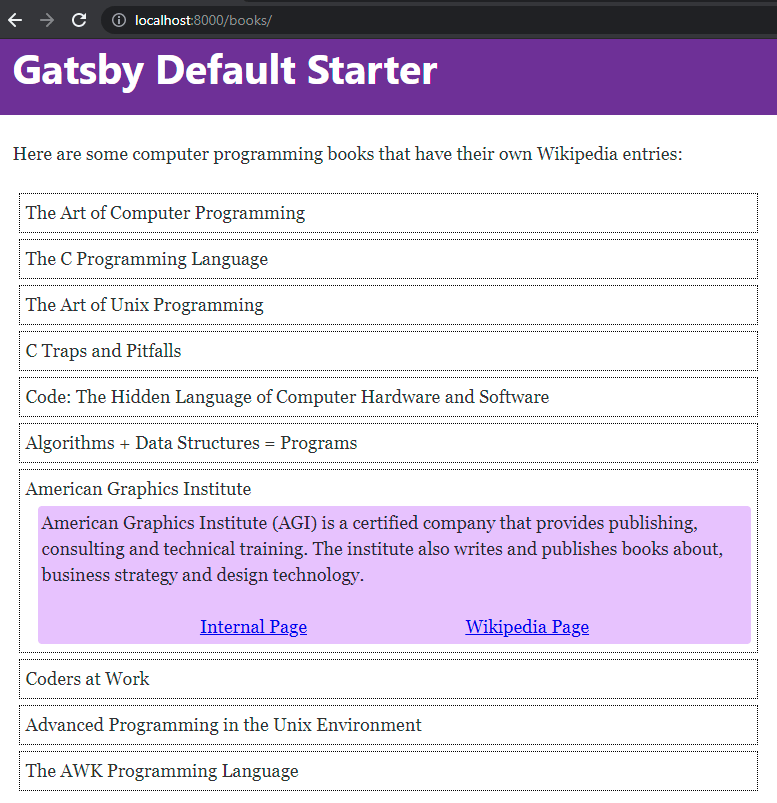
Each book listing uses a <details> element, which enables the listing to expand to show the full excerpt of the book and links or to collapse to show just the title. Following best practices, you also pass a unique value to key while iterating through the array, using the Gatsby Link component for internal links and a tags for external links.
The gatsbyPath(filePath: "/{BookWikiPage.title}") string in the GraphQL query uses the special gatsbyPath() function to retrieve the public path that will be created based on the File System Route API filename that is passed in.
Save and exit from this file.
Note: When changing data sources for components, the hot re-loading feature will sometimes return an error like the following: error Cannot query field "gatsbyPath" on type "BookWikiPage" graphql/template-strings. To fix this error, restart the development server manually by ending the process and running npm run develop again.
With all the books on one page, even with collapsible sections things have gotten a little crowded, so the final step is to add some styling to make it easier for visitors to read the listing. Create a new stylesheet file at src/styles/books.css. You can do this in your file browser or with the command line from the root of your Gatsby project:
- mkdir -p ./src/styles
- touch ./src/styles/books.css
Next, add the following CSS into the file:
details {
  border: 1px dotted black;
  margin: 6px;
  padding: 6px;
}

.details-body {
  background-color: #eedeff;
  margin: 4px 0px 2px 12px;
  padding: 4px;
  border-radius: 4px;
}

.links {
  display: flex;
  justify-content: space-evenly;
}
This CSS adds a border around each book listing, spacing and margins within the listing, and spacing between the internal and external book links. After adding the CSS into the file, save and close it before moving on.
Finally, update the book listing page template to pull this CSS file in:
import { graphql, Link } from "gatsby";
import * as React from "react";
import Layout from "../components/layout";
import Seo from "../components/seo";
import "../styles/books.css";
Save and close this file with the newly added CSS import line.
To see the results, run the develop command again to bring up the development server and preview the new pages:
- npm run develop
You can now access your book listing page at localhost:8000/books/.
You have now not only built a Gatsby source plugin from scratch, but also used it to generate pages based on a React template.
Conclusion
By following the steps in this tutorial, you have now finished building a custom source plugin that brings outside content into your Gatsby project and used it to power new pages within your site.
There is a lot of depth to source plugins. If you are interested in following best practices and learning more advanced source plugin concepts, here are some areas that might interest you:
- If you want to share your plugin with the world, you can do so by publishing it to npm. You can follow this guide on publishing npm packages and follow it up with this workflow for submitting to the Gatsby plugin library.
- For source plugins that do a lot of work with inputs that stay the same for periods of time, you can consider taking advantage of the Gatsby cache mechanism between builds.
- If your nodes are related to each other, or to nodes created by other plugins, you can link them together via relationships. This is briefly covered in this tutorial, but you can find additional details in the Gatsby documentation.
- A transformer plugin is a plugin that only handles taking nodes of one type and converting them into new or modified nodes. You can read more about them in the Gatsby transformer plugin documentation.
If you would like to read more about Gatsby, check out the rest of the How To Create Static Web Sites with Gatsby.js series.
Thanks for learning with the DigitalOcean Community. Check out our offerings for compute, storage, networking, and managed databases.
Tutorial Series: How To Create Static Web Sites with Gatsby.js
Gatsby is a React framework that allows you to create static and serverless apps. Gatsby websites are different from traditional websites because they are usually deployed on a content delivery network (CDN) and are content agnostic. In this tutorial, you will learn the basics of creating a site with Gatsby, allowing you to create static sites that are optimized for your users.
About the author
I love learning new things and sharing knowledge along the way!
Still looking for an answer?
This textbox defaults to using Markdown to format your answer.
You can type !ref in this text area to quickly search our full set of tutorials, documentation & marketplace offerings and insert the link!
 This work is licensed under a Creative Commons Attribution-NonCommercial- ShareAlike 4.0 International License.
Become a contributor for community
Get paid to write technical tutorials and select a tech-focused charity to receive a matching donation.

DigitalOcean Documentation
Full documentation for every DigitalOcean product.

Resources for startups and AI-native businesses
The Wave has everything you need to know about building a business, from raising funding to marketing your product.
The developer cloud
Scale up as you grow — whether you're running one virtual machine or ten thousand.

Start building today
From GPU-powered inference and Kubernetes to managed databases and storage, get everything you need to build, scale, and deploy intelligent applications.
