By Dave Berning
Developer and Author

The author selected Open Sourcing Mental Illness to receive a donation as part of the Write for DOnations program.
Introduction
DRY is a programming strategy that stands for “Don’t Repeat Yourself”. It encourages code re-usability through modular architecture, where code is re-used rather than repeated. This often results in code that is dynamic and scalable. In short, this principle guides programmers to avoid repeating code and hardcoding any values in your application.
Vue.js includes several strategies to modularize and re-use repeated snippets of code. In this tutorial, you will try out these strategies by making a sample Vue.js application DRY. The tutorial will introduce ways to keep your template and script DRY within your component. You will use layout components that establish an HTML structure that you can place content into via slots. Then, you will use mixins, which are JavaScript files that contain data, methods, and computed properties that mix together with existing component options. Finally, you are going to use the new Composition API that was introduced in Vue 3. The Composition API is a different way to structure your components, and promotes the unification of component properties.
Prerequisites
- Node.js version
14.16.0or greater installed on your computer. To install this on macOS or Ubuntu 20.04, follow the steps in How To Install Node.js and Create a Local Development Environment on macOS or the Option 2 — Installing Node.js with Apt Using a NodeSource PPA section of How To Install Node.js on Ubuntu 20.04. - Vue CLI installed on your machine, which you can get by following Step 1 of How To Generate a Vue.js Single Page App With the Vue CLI.
- You will also need a basic knowledge of JavaScript, HTML, and CSS, which you can find in our How To Build a Website With HTML series, How To Build a Website With CSS series, and in How To Code in JavaScript.
Step 1 — Setting Up the Example Application
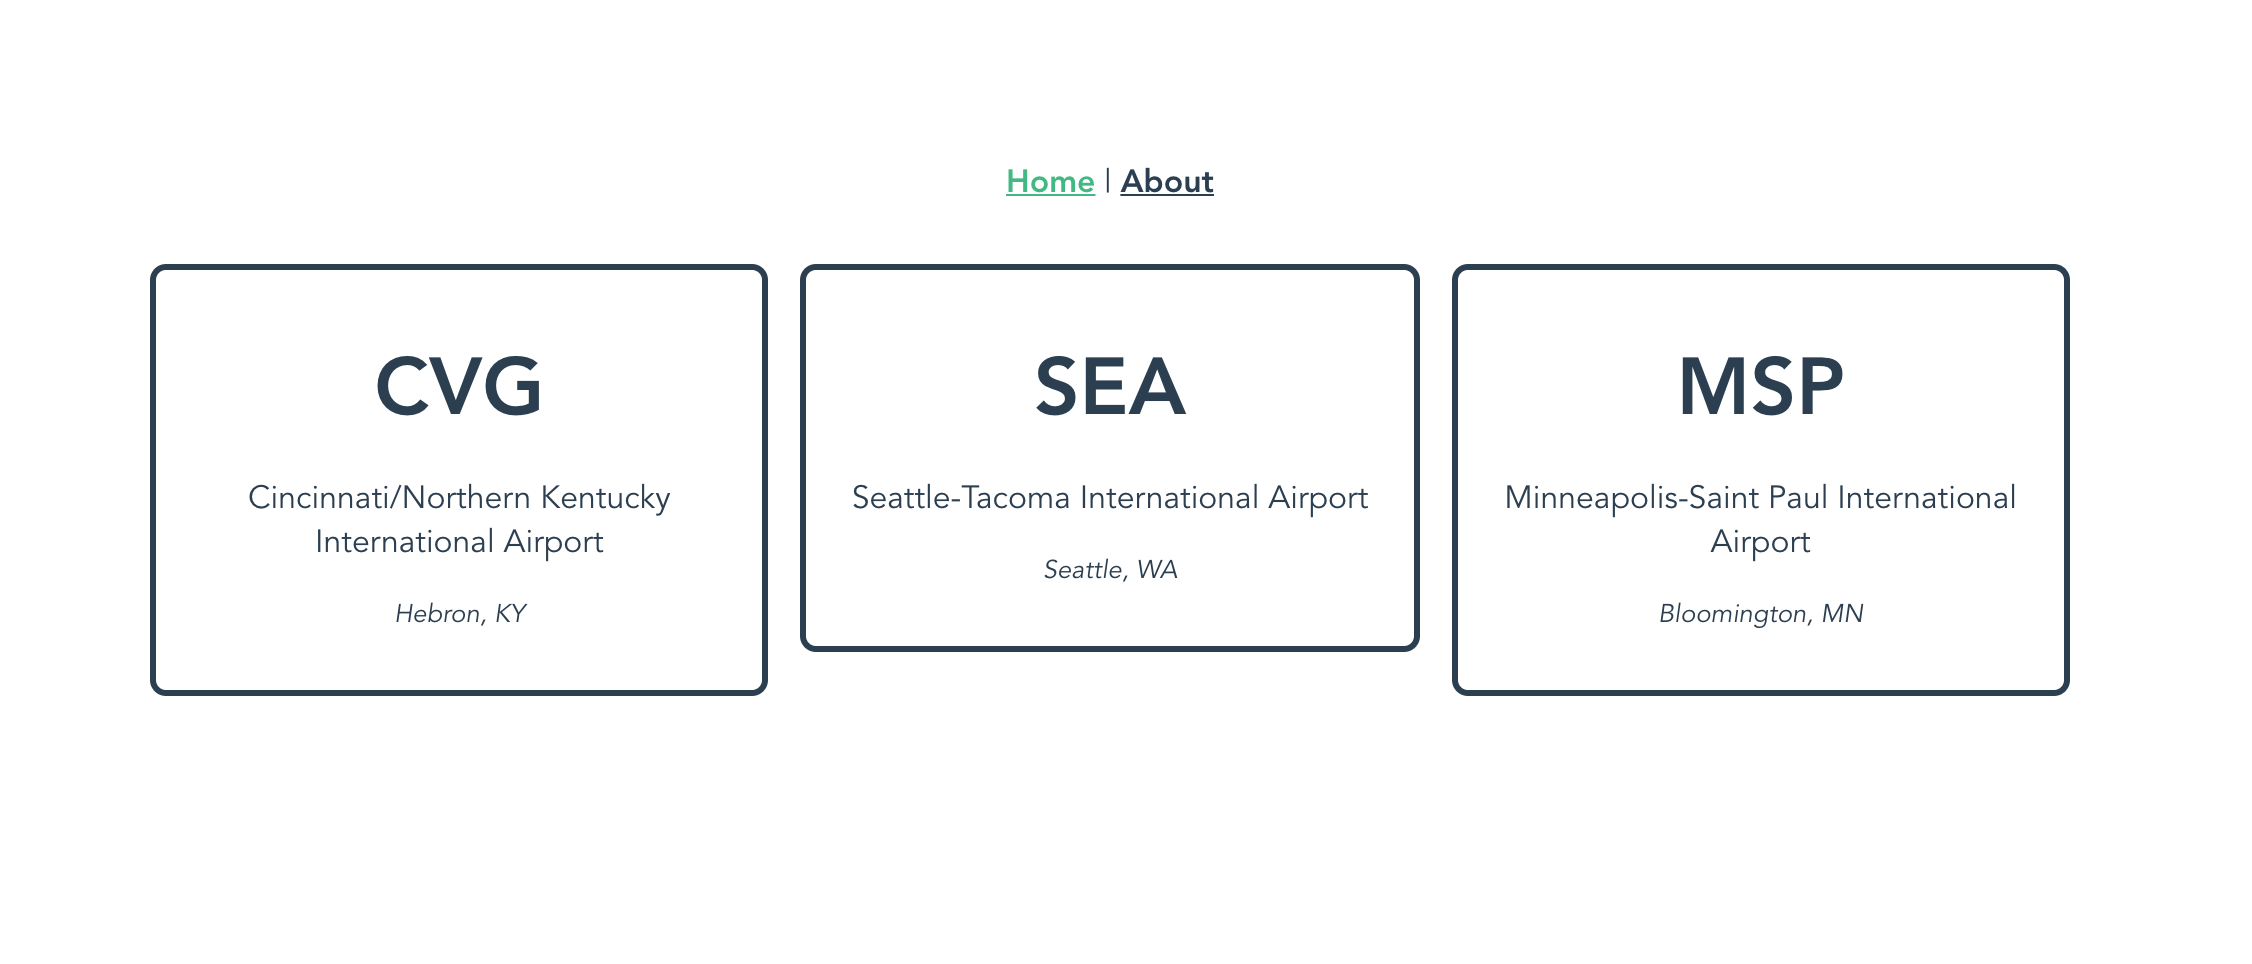
To illustrate how you can create scalable and DRY Vue.js code, you’ll first set up an example application. This example application will be a main/detail application that shows a list of airport cards. When clicked, these cards will navigate you to another view with additional details on that airport.
First, you’ll need to create a new Vue.js application. Do this by running the following command in your terminal:
- vue create favorite-airports
When prompted, select Manually select features. The following options to select are: Choose Vue version, Babel, and Router. Once selected, hit the RETURN key and continue filling out the prompts as follows:
OutputVue CLI v4.5.15
? Please pick a preset: Manually select features
? Check the features needed for your project: Choose Vue version, Babel, Router
? Choose a version of Vue.js that you want to start the project with 3.x
? Use history mode for router? (Requires proper server setup for index fallback in production) Yes
? Where do you prefer placing config for Babel, ESLint, etc.? In dedicated config files
Once the favorite-airports project is created, open your terminal window and cd (change directory) into the favroite-airports root folder. Once you’ve changed the directory, create a new directory to hold all of your local data for this project:
- mkdir src/data
Inside this folder, create a new Javascript file named src/data/airports.js and open it in your text editor of choice. To provide your app with sample data, add the following contents to the file:
export default [
  {
    name: 'Cincinnati/Northern Kentucky International Airport',
    abbreviation: 'CVG',
    city: 'Hebron',
    state: 'KY',
    destinations: {
      passenger: [ 'Toronto', 'Seattle/Tacoma', 'Austin', 'Charleston', 'Denver', 'Fort Lauderdale', 'Jacksonville', 'Las Vegas', 'Los Angeles', 'Baltimore', 'Chicago', 'Detroit', 'Dallas', 'Tampa' ],
      cargo: [ 'Anchorage', 'Baltimore', ' Chicago' , 'Indianapolis', 'Phoenix', 'San Francisco', 'Seattle', 'Louisville', 'Memphis' ]
    }
  },
  {
    name: 'Seattle-Tacoma International Airport',
    abbreviation: 'SEA',
    city: 'Seattle',
    state: 'WA',
    destinations: {
      passenger: [ 'Dublin', 'Mexico City', 'Vancouver', 'Albuquerque', 'Atlanta', 'Frankfurt', 'Amsterdam', 'Salt Lake City', 'Tokyo', 'Honolulu' ],
      cargo: [ 'Spokane', 'Chicago', 'Dallas', ' Shanghai', 'Cincinnati', 'Luxenbourg', 'Anchorage', 'Juneau', 'Calgary', 'Ontario' ]
    }
  },
  {
    name: 'Minneapolis-Saint Paul International Airport',
    abbreviation: 'MSP',
    city: 'Bloomington',
    state: 'MN',
    destinations: {
      passenger: [ 'Dublin', 'Paris', 'Punta Cana', 'Winnipeg', 'Tokyo', 'Denver', 'Tulsa', 'Washington DC', 'Orlando', 'Mexico City' ],
      cargo: [ 'Cincinnati', 'Omaha', 'Winnipeg', 'Chicago', 'St. Louis', 'Portland', 'Philadelphia', 'Milwaukee', 'Ontario' ]
    }
  }
]
This is an array of objects consisting of a few airports in the United States. In the main view of this application, you are going to iterate through this data to generate cards consisting of the name , abbreviation, city, and state properties.
Save data/airports.js and return to the terminal.
When you’ve completed that step, create a single-file component (SFC) with the name AirportCard.vue. This file will live in the components directory of your project and will contain all the styles and logic for the airport cards. Open AirportCard.vue in your text editor and add the following:
<template>
  <div class="airport">
    <p>{{ airport.abbreviation }}</p>
    <p>{{ airport.name }}</p>
    <p>{{ airport.city }}, {{ airport.state }}</p>
  </div>
</template>

<script>
export default {
  props: {
    airport: {
      type: Object,
      required: true
    }
  }
}
</script>

<style scoped>
.airport {
  border: 3px solid;
  border-radius: .5rem;
  padding: 1rem;
  margin-bottom: 1rem;
}

.airport p:first-child {
  font-weight: bold;
  font-size: 2.5rem;
  margin: 1rem 0;
}

.airport p:last-child {
  font-style: italic;
  font-size: .8rem;
}
</style>
You may notice that there is some CSS included in this code snippet. In the AirportCard.vue component, the wrapper <div> contains the class of airport. This CSS adds some styling to the generated HTML by adding borders to give each airport the appearance of a “card”. The :first-child and :last-child are pseudo selectors that apply different styling to the first and last <p> tags in the HTML inside the <div> element with the class of airport. In addition to that, you may also notice that this component contains a prop, which in Vue.js is a way to pass data down from a parent component to a child component.
Save and exit from the file.
Before wrapping up this setup, replace the existing views/Home.vue component code with the following:
<template>
  <div class="wrapper">
    <div v-for="airport in airports" :key="airport.abbreviation">
      <airport-card :airport="airport" />
    </div>
  </div>
</template>

<script>
import allAirports from '@/data/airports.js'
import AirportCard from '@/components/AirportCard.vue'

export default {
  components: {
    AirportCard
  },
  data() {
    return {
      airports: allAirports
    }
  }
}
</script>

<style>
#app {
  font-family: Avenir, Helvetica, Arial, sans-serif;
  -webkit-font-smoothing: antialiased;
  -moz-osx-font-smoothing: grayscale;
  text-align: center;
  color: #2c3e50;
  margin-top: 60px;
}

.wrapper {
  display: grid;
  grid-template-columns: 1fr 1fr 1fr;
  grid-column-gap: 1rem;
  max-width: 960px;
  margin: 0 auto;
}

p,
h3 {
  grid-column: span 3;
}
</style>
This code contains a v-for loop that iterates through the airports.js data and renders a series of AirportCards.vue components with airport data passed in via the prop :airport. Save this code and return to the command line.
With the project set up, run the local development server using the npm run serve command in your terminal:
- npm run serve
This will start a server on your localhost, usually at port 8080. Open your web browser of choice and visit localhost:8080 to see the following:
Now that your example application is set up, in the next step you are going to create two different Vue.js components that you can later use as page layouts.
Step 2 — Using slot to Create Layout Components
slot to Create Layout ComponentsLayout components are components that use slot elements to compose HTML templates that can be re-used with different content. These are great for when you have multiple templates that you want to re-use, such as a two-column or three-column layout.
To create a layout component, you’ll first create a directory for them to live in. You could put them in the components folder, but since these components have a very specific job, your project will be more legible to other programmers if you differentiate them. Create a directory called layouts in the src directory:
- mkdir src/layouts
Next, create a file in your layouts directory named DefaultLayout.vue. The DefaultLayout.vue component will be a wrapper that contains the view’s content and centers it in the browser window. Open DefaultLayout.vue in your text editor and add the following:
<template>
  <div class="default-layout">
    <slot />
  </div>
</template>

<style scoped>
  .default-layout {
    max-width: 960px;
    margin: 0 auto;
  }
</style>
This component is a div with a class of default-layout. You can leverage this class to add some styles. The CSS styles you see in the component above restrict its width to a max of 960px, with side margins being automatic. This will center the div horizontally in the browser window. The slot element is a default slot. Anything that is placed between two <layout-default> tags will be injected to where this <slot /> is. You can try this out by refactoring the Home.vue that you modified in the previous step.
Save your DefaultLayout.vue file. In your text editor, open src/views/Home.vue and import the DefaultLayout.vue component.
...
<script>
import allAirports from '@/data/airports.js'
import AirportCard from '@/components/AirportCard.vue'
import DefaultLayout from '@/layouts/DefaultLayout.vue'

export default {
  components: {
    AirportCard,
    DefaultLayout
  },
  data() {
    return {
      airports: allAirports
    }
  }
}
</script>
...
With the DefaultLayout.vue component imported, you can now replace the containing <div /> with <default-layout />.
<template>
  <default-layout class="wrapper">
    <div v-for="airport in airports" :key="airport.abbreviation">
      <airport-card :airport="airport" />
    </div>
  </default-layout>
</template>
...
You can now remove the max-width and margin properties in the .wrapper class that contain and center the div. Save this file, and open localhost:8080 in your browser window. Visually, nothing will change, but you now have a new layout component to contain any content in a centered div.
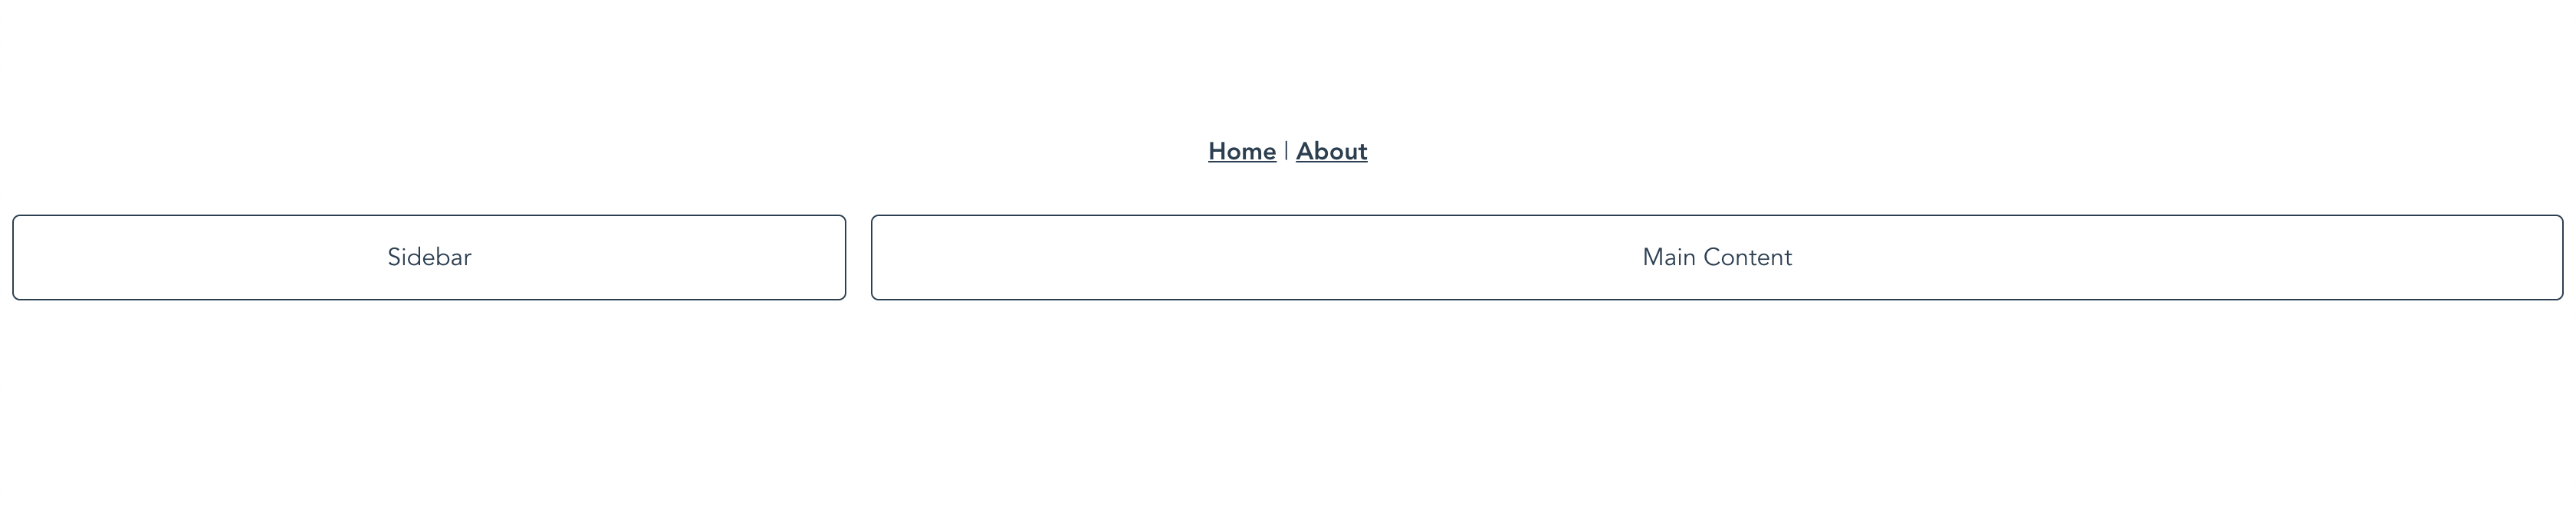
Before you move on to the next step, you will create one more layout component. This is going to be a two-column layout. One column will be for supplemental information, and the other will be for the main content of the view. Create a new file at src/layouts/TwoColumnLayout.vue. Once created, open TwoColumnLayout.vue component in your text editor and add the following:
<template>
  <div class="two-column-layout">
    <aside>
      <slot name="sideBar" />
    </aside>
    <main>
      <slot name="content" />
    </main>
  </div>
</template>

<style>
  .two-column-layout {
    display: grid;
    grid-template-columns: 1fr 1fr 1fr;
    grid-column-gap: 1rem;
  }

  .two-column-layout aside,
  .two-column-layout main {
    border: 1px solid;
    border-radius: 5px;
  }

  .two-column-layout aside {
    grid-column: span 1;
  }

  .two-column-layout main {
    grid-column: span 2;
  }
</style>
In this component, you have two named slots, one for the sidebar and the other for the main content. On the containing <div>, you are using CSS to create a grid of three columns, with one spanning one column and the other spanning two.
To use this layout, create a new view for the airport detail view at src/views/AirportDetail.vue, then add the following code to the new file:
<template>
  <two-column-layout>
    <template v-slot:sideBar>
      <p>Sidebar</p>
    </template>
    <template v-slot:content>
      <p>Main Content</p>
    </template>
  </two-column-layout>
</template>

<script>
import TwoColumnLayout from '@/layouts/TwoColumnLayout.vue'

export default {
  components: {
    TwoColumnLayout
  },
}
</script>
This new view imports TwoColumnLayout.vue then uses v-slot to fill the named slots with the right content.
Save this file. To make this view viewable, add a route in the Vue router file:
import { createRouter, createWebHistory } from 'vue-router'
import Home from '../views/Home.vue'
import AirportDetail from '../views/AirportDetail'

const routes = [
  {
    path: '/',
    name: 'Home',
    component: Home
  },
  {
    path: '/airport/:code',
    name: 'AirportDetail',
    component: AirportDetail
  },
  {
    path: '/about',
    name: 'About',
    // route level code-splitting
    // this generates a separate chunk (about.[hash].js) for this route
    // which is lazy-loaded when the route is visited.
    component: () => import(/* webpackChunkName: "about" */ '../views/About.vue')
  }
]
...
Here you are registering a route that, when visited, will load the AirportDetail.vue component. The :code in the path is an argument that you can leverage later to grab a specific airport’s data.
Save your file, then open your browser to localhost:8080/airport/cvg. You will find the following:
In this step, you created layout components by leveraging slots. These layout components can help keep your app DRY by eliminating duplicate code when creating a structure of the webpage. In the next step, you are going try out mixins to share methods and properties between components.
Step 3 — Using Mixins to Share Methods and Properties
Mixins are a way to redistribute reusable component options to any number of components. When a mixin is imported, the mixin’s component options are “mixed in” to the current component. To illustrate this, this step will first run through an example of mixin syntax, and will then add mixins into your example app.
Say you have two files with unique properties. The first has a data method and a computed property, like the following:
<script>
  export default {
    data() {
      return {
        firstName: 'Dave',
        lastName: 'Berning'
      }
    },
    computed: {
      fullName() {
        return `${this.firstName} ${this.lastName}`
      }
    }
  }
</script>
The second is a file containing some component options that you want to re-use:
export default {
  data() {
    return {
      counter: 0
    }
  },
  methods: {
    increment() {
      this.counter++
    }
  }
}
You can mix these two files together by importing the mixin (someMixin) into the component (sample-component). In this hypothetical component, you import it with the import keyword and assign it using the mixin property:
<script>
import someMixin from '@/mixins/someMixin'

export default {
  data() {
    return {
      firstName: 'Dave',
      lastName: 'Berning'
    }
  },
  mixins: [ 'someMixin' ],
  computed: {
    fullName() {
      return `${this.firstName} ${this.lastName}`
    }
  }
}
</script>
When imported, the hypothetical component has access to all methods, data, computed properties, and any other component options that it might contain.
Next, you will create a mixin that contains a method and a data property. This function will combine the airport name and abbreviation and store it into a data property.
In your terminal, create a new directory using the mkdir command:
- mkdir src/mixins
Make a file named src/mixins/airport.js and export an object containing the follow properties:
export default {
  data() {
    return {
      airportWithCode: ''
    }
  },
  methods: {
    getAirportWithCode(airport) {
      this.airportWithCode = `${airport.name} - ${airport.abbreviation}`
    }
  }
}
This object will now have a data method and a method sets the data to an airport’s name and abbreviation. Save this file.
With this created, import it into the Home.vue view. You are going to leverage this method and data property to display the string that is returned when the user clicks a card:
<template>
  <default-layout class="wrapper">
    <div v-for="airport in airports" :key="airport.abbreviation" @click="getAirportWithCode(airport)">
      <airport-card :airport="airport" />
    </div>
    <p>test: {{ airportWithCode }}</p>
  </default-layout>
</template>

<script>
import allAirports from '@/data/airports.js'
import AirportCard from '@/components/AirportCard.vue'
import DefaultLayout from '@/layouts/DefaultLayout.vue'
import airportMixin from '@/mixins/airport.js'

  export default {
    components: {
      AirportCard,
      DefaultLayout
    },
    mixins: [ airportMixin ],
    data() {
      return {
        airports: allAirports
      }
    }
  }
</script>
...
Since you have access to the methods and data within that mixin, you can reference them like any other component option. You’ve done this in this code snippet to store an airportWithCode value when the user clicks a card, then render the string value in a paragraph element. Save the file.
Next, re-use this same mixin in AirportDetail.vue. Open AirportDetail.vue in your text editor, then write a JavaScript filter to return the airport object if the abbreviation matches the :code argument that was defined in the router earlier:
...
<script>
import TwoColumnLayout from '@/layouts/TwoColumnLayout.vue'
import allAirports from '@/data/airports.js'

export default {
  components: {
    TwoColumnLayout
  },
  data() {
    return {
      airport: ''
    }
  },
  methods: {
  getAirportByCode() {
    return allAirports.filter(airport => airport.abbreviation === this.$route.params.code.toUpperCase())[0]
    }
  },
  mounted() {
    this.airport = this.getAirportByCode()
  }
}
</script>
In this snippet, you are creating a new method named getAirportByCode that filters through the airport data and returns the airport object whose abbreviation matches the abbreviation in the route URL. On mounting, you are assigning the airport data property to that object that is returned.
Save the file. Next, import the mixin you used earlier. You’ll leverage the same data and method properties you did before:
<template>
  <two-column-layout>
    <template v-slot:sideBar>
      <p>Sidebar</p>
    </template>
    <template v-slot:content>
      <p>Main Content</p>
      <p>{{ airportWithCode }}</p>
    </template>
  </two-column-layout>
</template>

<script>
import TwoColumnLayout from '@/layouts/TwoColumnLayout.vue'
import allAirports from '@/data/airports.js'
import airportMixin from '@/mixins/airport.js'

export default {
  components: {
    TwoColumnLayout
  },
  mixins: [ airportMixin ],
  data() { ... },
  methods: { ... },
  mounted() {
    this.airport = this.getAirportByCode()
    this.getAirportWithCode(this.airport)
  }
}
</script>
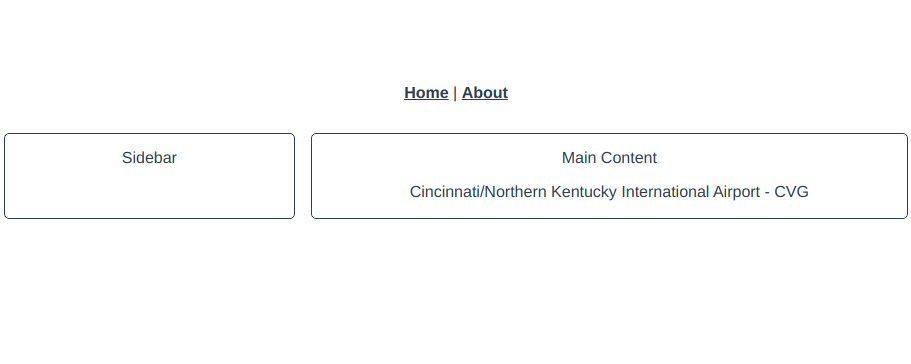
Since you have determined the specific airport with getAirportByCode() and set it to this.airport, you can now use the getAirportWithCode method to set the value of airportWithCode from the mixin. You can then display the value by adding that variable to the template.
Save this file, and open localhost:8080/airport/cvg in the browser window. You will find the string value of airportWithCode rendered in the main content section, as shown in the following image:
In this step, you used mixins to share methods and computed properties between components. Mixins can be a great way to organize components and leverage reusable code throughout your application. Next, you are going to learn about the new Composition API, why it was created, and how it can improve the composition of your next Vue application.
Step 4 — Using the Composition API
The mixins and layout components that you have tried out so far in this tutorial are usable in all major versions of Vue, including Vue 2 and earlier. These constitute the Options API. But in Vue 3 there is another API you can use to make your application DRY: the Composition API.
The Composition API is a new way to set up components. Instead of having separate sections for data, computed, methods, and props, you have a single setup hook that everything lives in. Within this setup property, everything the component needs to operate before it is created will go in here. Additionally, everything needed to define options in the Options API needs to be imported. But this is not so for the Composition API.
In this step, you are going to refactor one of your components from using the Options API to the new Composition API.
In your text editor, open the AirportDetail.vue component. Right now, you have a mixin imported into this component. That mixin provides some functions and data properties. But in the Composition API, everything that your component needs to render will live inside the setup method; there’s no need to import this method.
Remove your mixin import, and add the setup method under mounted:
...
<script>
import TwoColumnLayout from '@/layouts/TwoColumnLayout.vue'
import allAirports from '@/data/airports.js'

export default {
  components: { ... },
  methods: {
    getAirportByCode() {
      return allAirports.filter(airport => airport.abbreviation === this.$route.params.code.toUpperCase())[0]
    }
  },
  mounted() { ... },
  setup() {

  }
}
</script>
With your setup method created, start refactoring this by adding the new onMounted lifecycle hook. The onMounted function accepts one argument, typically an anonymous function:
...
<script>
import TwoColumnLayout from '@/layouts/TwoColumnLayout.vue'
import allAirports from '@/data/airports.js'
import { onMounted } from 'vue'

export default {
  components: { ... },
  methods: {
    getAirportByCode() {
      return allAirports.filter(airport => airport.abbreviation === this.$route.params.code.toUpperCase())[0]
    }
  },
  mounted() { ... },
  setup() {
    onMounted(() => {

    })
  }
}
</script>
When this component is mounted, you’ll store the current airport object into a reactive data property. To make a variable or constant reactive, you need to wrap the value in a ref function, which you will import from vue. The name of the constant will be the name of your reference in your setup and template sections of the component. Also, remove the getAirportByCode from methods and define it like a regular JavaScript function inside of setup:
...
<script>
import TwoColumnLayout from '@/layouts/TwoColumnLayout.vue'
import allAirports from '@/data/airports.js'
import { onMounted, ref } from 'vue'

export default {
  components: { ... },
  mounted() { ... },
  setup() {
    function getAirportByCode() {
      return allAirports.filter(airport => airport.abbreviation === this.$route.params.code.toUpperCase())[0]
    }

    onMounted(() => {
      const airport = ref(getAirportByCode())
    })
  }
}
</script>
After you do that, you can go ahead and delete the old mounted and methods properties from the component file.
Since you aren’t using a mixin now, you will define getAirportWithCode inside of your setup function and assign it to a variable airportWithCode so you can use it in your view:
...
<script>
import TwoColumnLayout from '@/layouts/TwoColumnLayout.vue'
import allAirports from '@/data/airports.js'
import { onMounted, ref } from 'vue'

export default {
  components: {
    TwoColumnLayout
  },
  setup() {
    const airportWithCode = ref('')

    function getAirportByCode() {
      return allAirports.filter(airport => airport.abbreviation === this.$route.params.code.toUpperCase())[0]
    }

    function getAirportWithCode(airport) {
      return `${airport.name} - ${airport.abbreviation}`
    }

      onMounted(() => {
        const airport = ref(getAirportByCode())
      })
    }
  }
</script>
One very important thing about reactive data properties with the Composition API is that ref returns an object. To access the values, you need to access its .value property:
...
<script>
import TwoColumnLayout from '@/layouts/TwoColumnLayout.vue'
import allAirports from '@/data/airports.js'
import { onMounted, ref } from 'vue'

export default {
  components: {
    TwoColumnLayout
  },
  setup() {
    const airportWithCode = ref('')

    function getAirportByCode() {
      return allAirports.filter(airport => airport.abbreviation === this.$route.params.code.toUpperCase())[0]
    }

    function getAirportWithCode(airport) {
      return `${airport.name} - ${airport.abbreviation}`
    }

    onMounted(() => {
      const airport = ref(getAirportByCode())
      airportWithCode.value = getAirportWithCode(airport.value)
    })
  }
}
</script>
There are now two things that you need to do before this can be completely converted to using the Composition API. The first thing you need to change is this.$route in the getAirportByCode function. In the Composition API, you cannot access the route or router with this.$route and this.$router, respectively.
To access the route, import the useRoute from the vue-router package. It’s better to save this into a const that you can reference throughout the application:
...
<script>
import TwoColumnLayout from '@/layouts/TwoColumnLayout.vue'
import allAirports from '@/data/airports.js'
import { onMounted, ref } from 'vue'
import { useRoute } from 'vue-router'

export default {
  components: {
    TwoColumnLayout
  },
  setup() {
    const route = useRoute()
    const airportWithCode = ref('')

    function getAirportByCode() {
      return allAirports.filter(airport => airport.abbreviation === route.params.code.toUpperCase())[0]
    }

    function getAirportWithCode(airport) {
      return `${airport.name} - ${airport.abbreviation}`
    }

    onMounted(() => {
      const airport = ref(getAirportByCode())
      airportWithCode.value = getAirportWithCode(airport.value)
    })
  }
}
</script>
When that is done, return the object in your setup function. The properties returned in this object can be used in the template:
...
  setup() {
    const route = useRoute()
    const airportWithCode = ref('')

    function getAirportByCode() {
      return allAirports.filter(airport => airport.abbreviation === route.params.code.toUpperCase())[0]
    }

    function getAirportWithCode(airport) {
      return `${airport.name} - ${airport.abbreviation}`
    }

    onMounted(() => {
      const airport = ref(getAirportByCode())
      airportWithCode.value = getAirportWithCode(airport.value)
    })

    return { airportWithCode }
  }
}
</script>
Save your code and reload localhost:8080/airport/cvg in your browser. After refactoring the code, there will be no change in what is rendered. However, you are now taking advantage of the Composition API.
Conclusion
In this tutorial, you tried out a few strategies to make your application DRY. Specifically, you re-used layout components in multiple views, then modularized properties and methods with mixins. Finally, you re-factored your app to use the new Composition API that was introduced in Vue 3. This API is a new way to set up components before they get created, making functional in more situations.
If you’d like to learn more about Mixins or the Composition API, it’s highly encouraged to review the official Vue documentation. For more tutorials on Vue, check out the How To Develop Websites with Vue.js series page.
Thanks for learning with the DigitalOcean Community. Check out our offerings for compute, storage, networking, and managed databases.
Tutorial Series: How To Develop Websites with Vue.js
This series provides a starting point for building websites with the front-end JavaScript framework Vue.js. Created in 2014 by Evan You (formally of Google), Vue.js is often described as a combination of React and Angular, borrowing the prop-driven development of React and the templating power of Angular. By the end of this series, you will have the tools to develop websites that focus on traditional HTML and CSS, while still taking advantage of the robustness and scalability of a front-end framework.
About the author
I'm a software engineer from Cincinnati. I work on TypeScript apps with Vue.js. Currently a Senior Front-End Engineer at Enodo, based in Chicago.
Still looking for an answer?
This textbox defaults to using Markdown to format your answer.
You can type !ref in this text area to quickly search our full set of tutorials, documentation & marketplace offerings and insert the link!
This comment has been deleted
This comment has been deleted
 This work is licensed under a Creative Commons Attribution-NonCommercial- ShareAlike 4.0 International License.
Become a contributor for community
Get paid to write technical tutorials and select a tech-focused charity to receive a matching donation.

DigitalOcean Documentation
Full documentation for every DigitalOcean product.

Resources for startups and AI-native businesses
The Wave has everything you need to know about building a business, from raising funding to marketing your product.
The developer cloud
Scale up as you grow — whether you're running one virtual machine or ten thousand.

Start building today
From GPU-powered inference and Kubernetes to managed databases and storage, get everything you need to build, scale, and deploy intelligent applications.
