Founder of DocumentWrite

The author selected /dev/color to receive a donation as part of the Write for DOnations program.
Introduction
When a user codes and deploys a website, they often want an online audience to find and read the website they’ve created. Search engine optimization (SEO) is the practice of making a website discoverable by this online audience. Optimizing search involves making changes to your Gatsby app so that it will show up in the results for search engines like Google, Bing, and DuckDuckGo. This is often done by fine-tuning the metadata that ends up in the HTML for your site.
In this tutorial, you will configure Gatsby’s SEO component that comes with SEO tooling right out of the box. You will add meta tags to your site using Gatsby React Helmet. Meta tags are important because they give search engines information about your site. Usually the better understanding Google has about your site, the more accurately it can index your webpage. You will also create social media cards for Twitter, and Open Graph meta tags in Facebook. There are over one billion people using some form of social media, so optimizing for social media is an efficient way to get your website in front of many internet users.
Prerequisites
-
Node.js version 14.16.0 installed on your computer. To install this on macOS or Ubuntu 20.04, follow the steps in How to Install Node.js and Create a Local Development Environment on macOS or the Installing Using a PPA section of How To Install Node.js on Ubuntu 20.04.
-
Gatsby.js and the Gatsby CLI tool installed. You can find out how to install this in the How To Set Up Your First Gatsby Website tutorial.
-
An understanding of JavaScript will be useful. You can learn more about JavaScript at our How To Code in JavaScript series. Although Gatsby uses React, you don’t need to know React in order to get started. However, if you would like to learn the basic concepts, check out our How To Code in React series.
Step 1 — Creating an Empty Project
In this section, you are going to create a new project based on the Gatsby starter default template. You are going to create a whale-watching website, and in the following steps you will improve its SEO. This will give you a solid project that you can optimize with meta tags and social media assets.
First, use the CLI tool to start a new project named gatsby-seo-project:
- gatsby new gatsby-seo-project https://github.com/gatsbyjs/gatsby-starter-default
This creates a new website from the starter template in the gatsby-starter-default GitHub repository from Gatsby.
Once the project is created, move into the src/images folder of the project:
- cd gatsby-seo-project/src/images
Once you are in the images folder, download a picture of a whale from the stock photography website like Unsplash:
- wget 'https://unsplash.com/photos/JRsl_wfC-9A/download?force=true&w=640'
Wget is a Gnu command that downloads files from the internet.
Next, list all of the images in the same images directory with the ls command:
- ls
You will receive the following output:
Output'download?force=true&w=640' gatsby-astronaut.png gatsby-icon.png
'download?force=true&w=640' is a hard name to remember, so rename it to whale-watching.png:
- mv 'download?force=true&w=640' whale-watching.png
Now that you have your whale image, go to the root of your project and open src/pages/index.js. Make the highlighted change in the following code to customize your website:
import * as React from "react"
import { Link } from "gatsby"
import { StaticImage } from "gatsby-plugin-image"
import Layout from "../components/layout"
import SEO from "../components/seo"
const IndexPage = () => (
<Layout>
<SEO title="Home" />
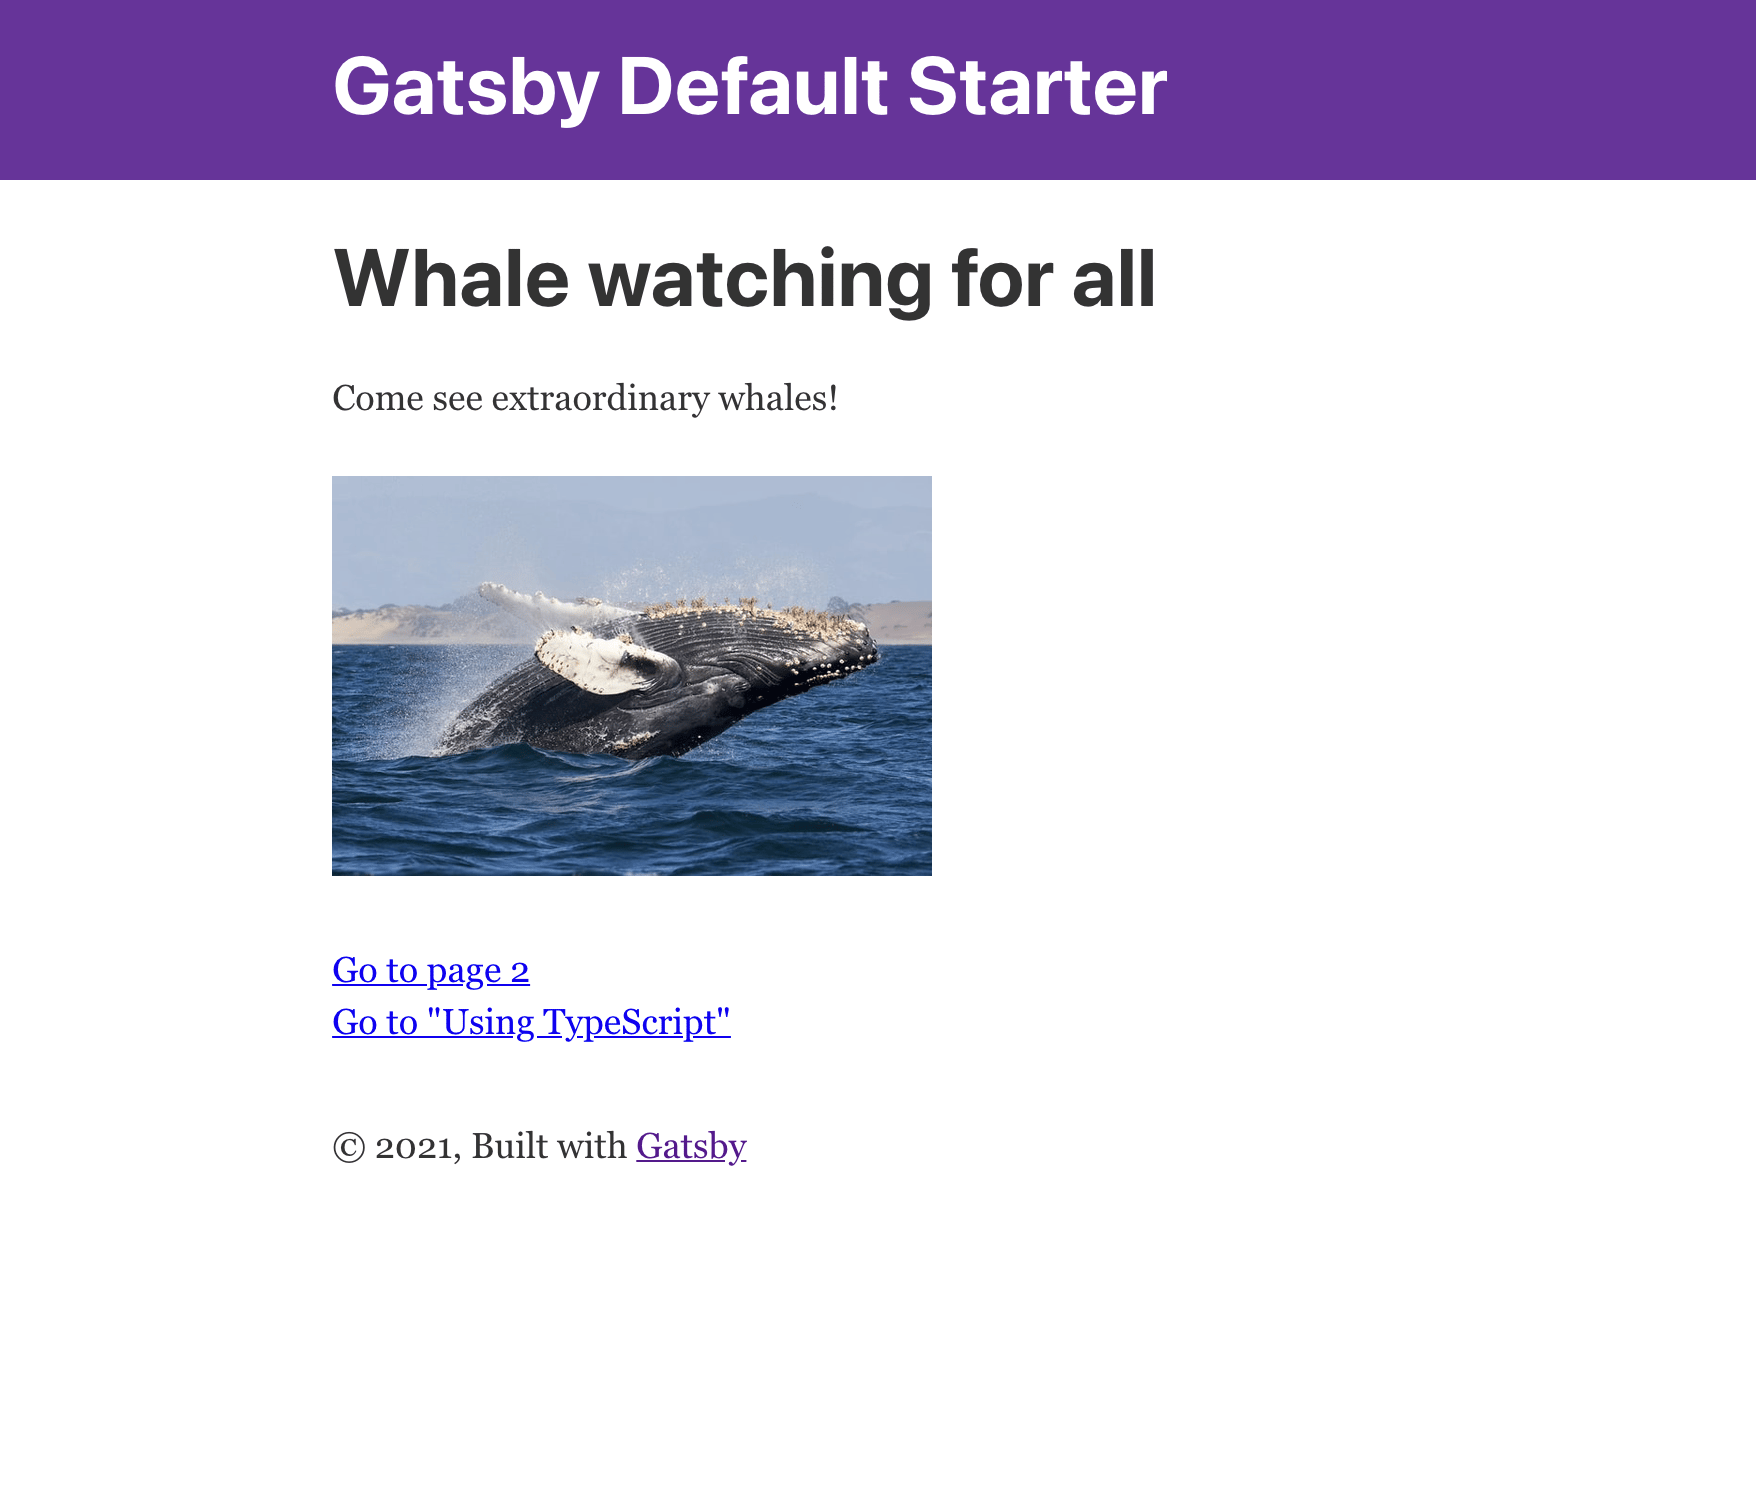
<h1>Whale watching for all</h1>
<p>Come see extraordinary whales!</p>
<StaticImage
src="../images/whale-watching.png"
width={300}
quality={95}
formats={["AUTO", "WEBP", "AVIF"]}
alt="A surfacing whale"
style={{ marginBottom: `1.45rem` }}
/>
<p>
<Link to="/page-2/">Go to page 2</Link> <br />
<Link to="/using-typescript/">Go to "Using TypeScript"</Link>
</p>
</Layout>
)
export default IndexPage
Save the file. To try out the code, start a local development server with the following command:
- gatsby develop
Once the server is running, check localhost:8000 in your browser. You will find your new site rendered in the browser:
You are now finished setting up your project. Next, you will add meta tags to your site header with React Helmet.
Step 2 — Creating an SEO Component with React Helmet
In this section, you are going to learn how to control the technical SEO aspects of your site with the help of Gatsby’s React Helmet plugin and an SEO component. The Helmet plugin provides server side rendering to all of the metadata found in the head of the Gatsby site. This is important because, without server side rendering, there is a chance that server engine bots might not be able to scrape and record metadata before the site is rendered, making it more difficult to index the site for search.
When you use gatsby-starter-default as a base for your website, it already comes with everything you need to start tweaking SEO. To do this, you will be working with the following files:
-
gatsby-config.js: Gatsby config includes metadata values that GraphQL will query and place in the SEO file. -
src/components/seo.js: This file contains the Helmet and the SEO component.
You are first going to open the gatsby-config.js file, which is located at the root of your project:
- nano gatsby-config.js
Before you make any changes to the file, examine the plugins key in the exported object. The Gatsby default starter already has the Helmet plugin installed, as shown in the following highlighted line:
module.exports = {
  siteMetadata: {
    title: `Gatsby Default Starter`,
    description: `Kick off your next, great Gatsby project with this default starter. This barebones starter ships with the main Gatsby configuration files you might need.`,
    author: `@gatsbyjs`,
  },
  plugins: [
    `gatsby-plugin-react-helmet`,
    `gatsby-plugin-image`,
    {
      resolve: `gatsby-source-filesystem`,
      options: {
        name: `images`,
        path: `${__dirname}/src/images`,
      },
    },
    `gatsby-transformer-sharp`,
    `gatsby-plugin-sharp`,
    {
      resolve: `gatsby-plugin-manifest`,
      options: {
        name: `gatsby-starter-default`,
        short_name: `starter`,
        start_url: `/`,
        background_color: `#663399`,
        theme_color: `#663399`,
        display: `minimal-ui`,
        icon: `src/images/gatsby-icon.png`, // This path is relative to the root of the site.
      },
    },
    `gatsby-plugin-gatsby-cloud`,
    // this (optional) plugin enables Progressive Web App + Offline functionality
    // To learn more, visit: https://gatsby.dev/offline
    // `gatsby-plugin-offline`,
  ],
}
Next, direct your attention to the siteMetadata key. This contains an object that holds the metadata for your site. You are going to change the title, the description, and the author. You will also add keywords to help users search for your site:
module.exports = {
  siteMetadata: {
    title: `Wondrous World of Whale Watching`,
    description: `Come and enjoy an experience of a lifetime! Watch whales with us!`,
    author: `@digitalocean`,
    keywords: `whales, marine life, trip, recreation`,
  },
...
The keywords metadata is instrumental in optimizing for search. While the topic of choosing keywords is beyond the scope of this tutorial, you can learn more about the basics of SEO at Google’s search documentation website. Here you have added specific search terms that users might use when searching for a site like the sample whale-watching site.
Save and close this file.
Next, proceed to open the SEO component:
- nano src/components/seo.js
There is a lot going on in the SEO component. Focus your attention on the SEO function. In this function you are using GraphQL to query the siteMetadata object. Remember that you have added keywords to your siteMetadata object, so make the following highlighted change to your query:
...
function SEO({ description, lang, meta, title}) {
  const { site } = useStaticQuery(
    graphql`
      query {
        site {
          siteMetadata {
            title
            description
            author
            keywords
          }
        }
      }
    `
  )
...
Below the SEO function, add a reference to this queried data in a keywords constant to make the data easier to work with:
...
  const keywords = site.siteMetadata.keywords
  const metaDescription = description || site.siteMetadata.description
  const defaultTitle = site.siteMetadata?.title
...
The variable keywords has all of the keywords you created in the gatsby-config.js file. The variable metaDescription is a description that you can pass as a prop on a page or query from the siteMetadata object in gatsby-config.js. Finally, defaultTitle is set to the value of title in the siteMetadata object. The ? in the siteMetadata attribute checks for a null value and returns undefined for a null or nullish value.
Next, inspect what the SEO component is returning, and add an object for keywords:
...
  return (
    <Helmet
      htmlAttributes={{
        lang,
      }}
      title={title}
      titleTemplate={defaultTitle ? `%s | ${defaultTitle}` : null}
      meta={[
        {
          name: `description`,
          content: metaDescription,
        },
        {
          name: `keywords`,
          content: keywords,
        },
        {
          property: `og:title`,
          content: title,
        },
        {
          property: `og:description`,
          content: metaDescription,
        },
        {
          property: `og:type`,
          content: `website`,
        },
        {
          name: `twitter:card`,
          content: `summary`,
        },
        {
          name: `twitter:creator`,
          content: site.siteMetadata?.author || ``,
        },
        {
          name: `twitter:title`,
          content: title,
        },
        {
          name: `twitter:description`,
          content: metaDescription,
        },
      ].concat(meta)}
    />
  )
...
You are returning a Helmet component. Helmet populates the head of an HTML document using server side rendered data, which makes it easier for Google to crawl and record the metadata. htmlAttributes={{lang,}} specifies the language of the element’s content, and title is the title found in the metadata, which comes from siteMetadata. titleTemplate creates the title tag, which is important, since Google penalizes sites that are missing a title tag.
After this section, you’ll find the meta object, which contains the metadata. Most of the values here come from siteMetadata.
Finally, examine the SEO.defaultProps and SEO.propTypes objects:
...
SEO.defaultProps = {
  lang: `en`,
  meta: [],
  description: ``,
}

SEO.propTypes = {
  description: PropTypes.string,
  lang: PropTypes.string,
  meta: PropTypes.arrayOf(PropTypes.object),
  title: PropTypes.string.isRequired,
}
SEO.defaultProps are the default values of the SEO props. SEO.propTypes passes the correct value type and acts as a light typing system.
Save your file with the new keywords entry and start the local server in your terminal:
- gatsby develop
After the server has starter, enter localhost:8000 in the browser. Open up the view of the HTML in your browser; for Chrome, right click the window and open DevTools. Choose Elements and open the <head></head> tag. In this tag, you will find the following line:
...
<meta name="keywords" content="whales, marine life, trip, recreation" data-react-helmet="true">
...
You have now successfully set the header data with React Helmet.
In this section, you created metadata to improve the SEO of your whale-watching site. In the next section, you’ll add an image and make this site easier to share on social media.
Step 3 — Adding Images to Enhance Social Sharing
Social networks play an important role in attracting attention to your content. In this section, you are going to add an image to two features that optimize sharing your site on social: your Twitter card and the Open Graph protocol for Facebook. You will also learn which tools to use to ensure that your metadata is appearing on these two social network platforms.
Open up gatsby-config in a text editor:
- nano gatsby-config.js
You are going to add images/whale-watching.png into the siteMetadata:
module.exports = {
  siteMetadata: {
    title: `Wondrous World of Whale Watching`,
    description: `Come and enjoy an experience of a lifetime! Watch whales with us!`,
    author: `@digitalocean`,
    keywords: `whales, marine life, trip, recreation`,
    image: `src/images/whale-watching.png`
  },
  plugins: [
    `gatsby-plugin-react-helmet`,
    `gatsby-plugin-image`,
    {
      resolve: `gatsby-source-filesystem`,
      options: {
        name: `images`,
        path: `${__dirname}/src/images`,
      },
    },
    `gatsby-transformer-sharp`,
    `gatsby-plugin-sharp`,
    {
      resolve: `gatsby-plugin-manifest`,
      options: {
        name: `gatsby-starter-default`,
        short_name: `starter`,
        start_url: `/`,
        background_color: `#663399`,
        theme_color: `#663399`,
        display: `minimal-ui`,
        icon: `src/images/gatsby-icon.png`, // This path is relative to the root of the site.
      },
    },
    `gatsby-plugin-gatsby-cloud`,
    // this (optional) plugin enables Progressive Web App + Offline functionality
    // To learn more, visit: https://gatsby.dev/offline
    // `gatsby-plugin-offline`,
  ],
}
GraphQL will now be able to query the image. Close and save the file.
Next, open up seo.js in the text editor:
- nano src/components/seo.js
Now that your image is in the site metadata, it’s time to add it to the SEO component. Add the following highlighted lines to seo.js:
...
function SEO({ description, lang, meta, title}) {
  const { site } = useStaticQuery(
    graphql`
      query {
        site {
          siteMetadata {
            title
            description
            author
            keywords
            image
          }
        }
      }
    `
  )
  const image = site.siteMetadata.image
  const keywords = site.siteMetadata.keywords
  const metaDescription = description || site.siteMetadata.description
  const defaultTitle = site.siteMetadata?.title

  return (
    <Helmet
      htmlAttributes={{
        lang,
      }}
      title={title}
      titleTemplate={defaultTitle ? `%s | ${defaultTitle}` : null}
      meta={[
        {
          name: `description`,
          content: metaDescription,
        },
        {
          name: `keywords`,
          content: keywords,
        },
        {
          property: `og:title`,
          content: title,
        },
        {
          property: `og:description`,
          content: metaDescription,
        },
        {
          property: `og:type`,
          content: `website`,
        },
        {
          property: `og:image`,
          content: image,
        },
        {
          name: `twitter:card`,
          content: `summary`,
        },
        {
          name: `twitter:image`,
          content: image,
        },
        {
          name: `twitter:creator`,
          content: site.siteMetadata?.author || ``,
        },
        {
          name: `twitter:title`,
          content: title,
        },
        {
          name: `twitter:description`,
          content: metaDescription,
        },
      ].concat(meta)}
    />
  )
}

SEO.defaultProps = {
  lang: `en`,
  meta: [],
  description: ``,
}

SEO.propTypes = {
  description: PropTypes.string,
  image: PropTypes.string,
  lang: PropTypes.string,
  meta: PropTypes.arrayOf(PropTypes.object),
  title: PropTypes.string.isRequired,
}

export default SEO
In this code, you:
- Added the image to the GraphQL query
- Created an
imagevariable and set the value to the image found insiteMetadata - Added
og:imageto themetaobject - Added
twitter:imageto themetaobject - Added
imagetoSEO.propTypes
Save your changes and close seo.js.
The final step in this process is to test these changes on Twitter and Facebook. This cannot be done from a local development server; in order to test your site, you must first deploy it. There are many ways to do this, including using DigitalOcean’s App Platform, which you can read about in the How To Deploy a Gatsby Application to DigitalOcean App Platform tutorial.
This tutorial will use a Gatsby app hosted on App Platform as an example. You can find this app at https://digital-ocean-gatsby-seo-xkmfq.ondigitalocean.app/, and it includes the SEO changes you made to your site in this tutorial.
If you want to test if social media objects show up on Twitter, head over https://cards-dev.twitter.com/validator. This validator is maintained by Twitter, and requires a Twitter account to use. Put the URL for the sample deployed site into the validator:
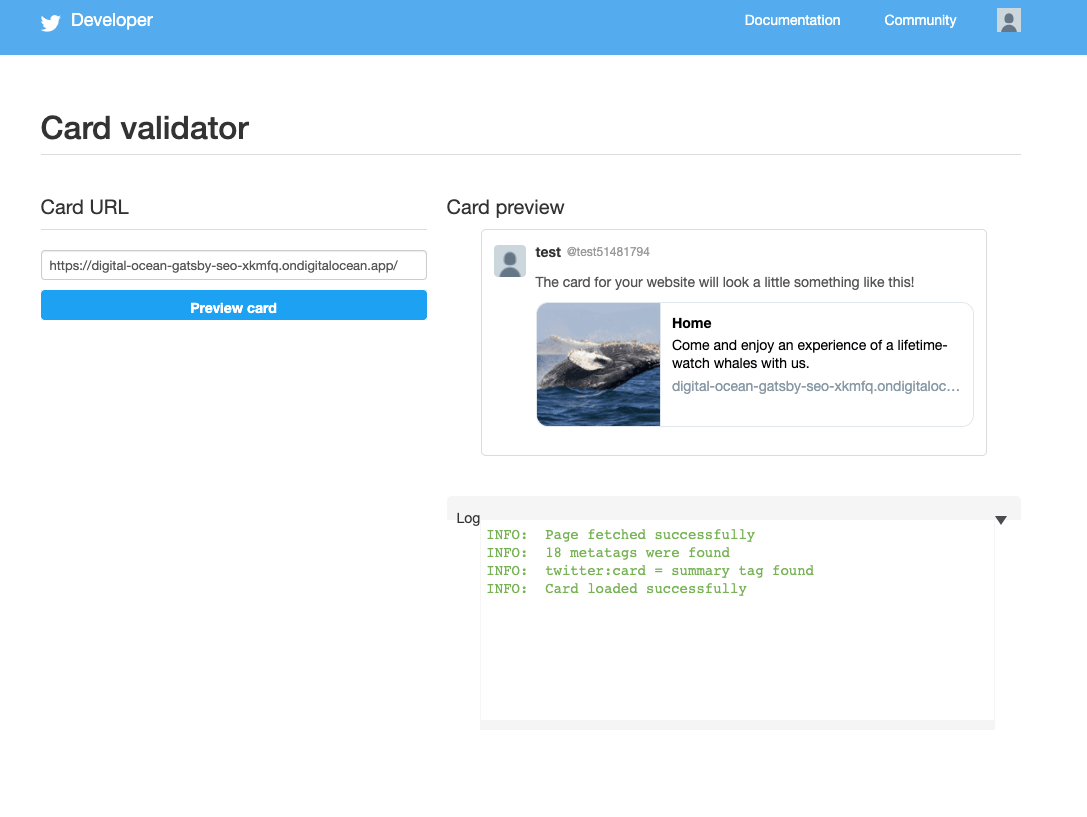
Notice that the custom image will now show when users tweet about your website.
Next, head over to Facebook’s Open Graph validator at https://developers.facebook.com/tools/debug/. This is maintained by Facebook, and requires a Facebook account to use. Add the URL for the sample app into the URL field. The debugger will provide you with more detail about which og objects are present and which ones are missing:
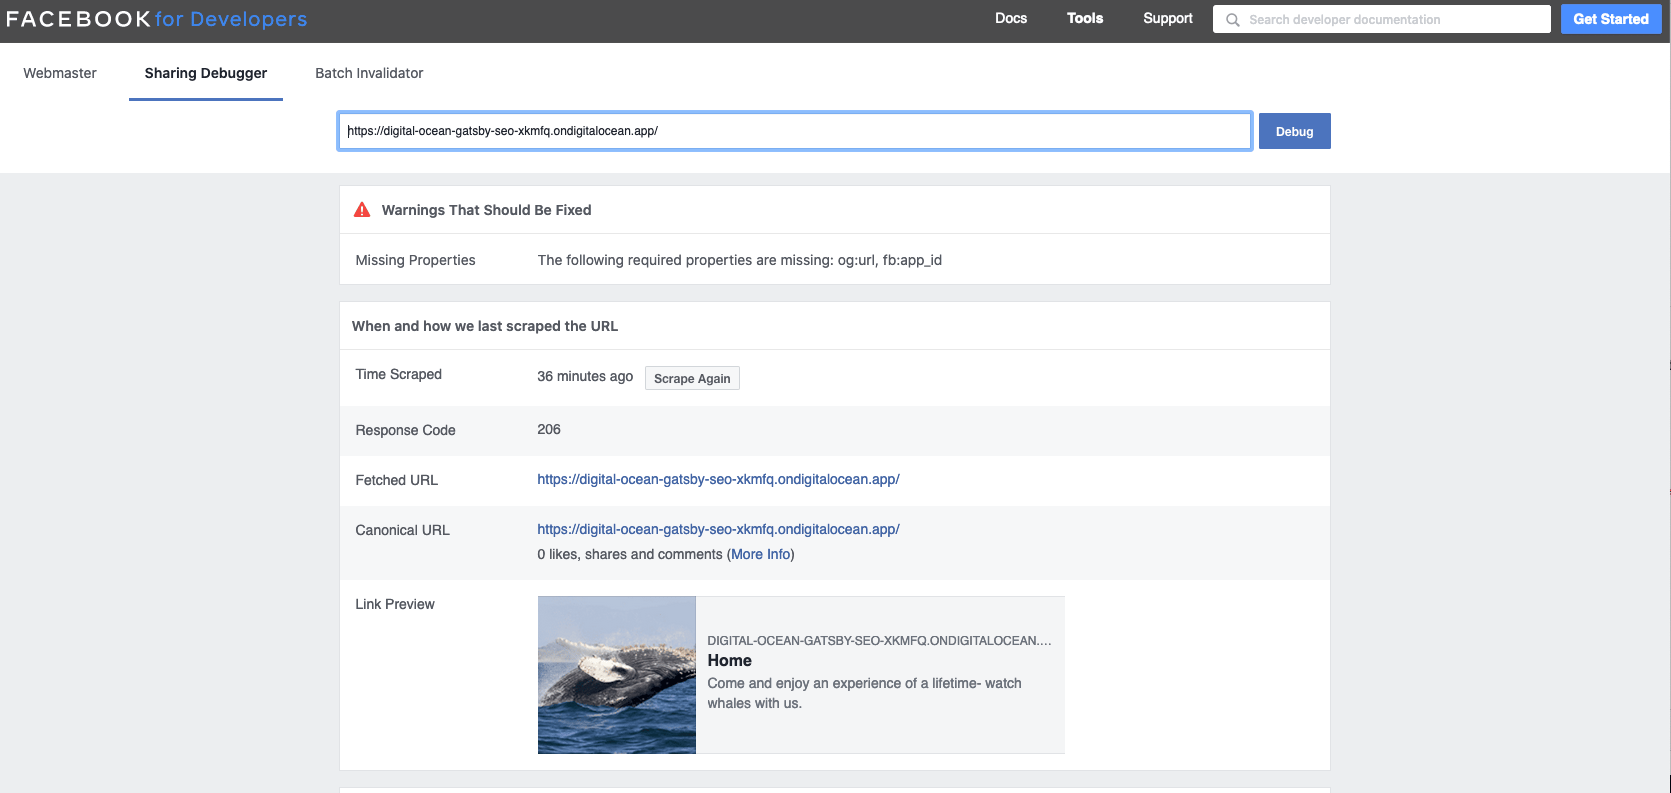
Notice that the image appears with a title and a description in the Link Preview section.
You’ve now added an image to your metadata, a Twitter card, and a Facebook Open Graph.
Conclusion
In this tutorial, you boosted the SEO of your site using Gatsby’s React Helmet and the SEO component. You’ve also learned how to add images to social media cards to make your site more shareable.
With the basics of SEO covered, you can now read more about optimizing search for Gatsby at the official Gatsby documentation.
Thanks for learning with the DigitalOcean Community. Check out our offerings for compute, storage, networking, and managed databases.
Tutorial Series: How To Create Static Web Sites with Gatsby.js
Gatsby is a React framework that allows you to create static and serverless apps. Gatsby websites are different from traditional websites because they are usually deployed on a content delivery network (CDN) and are content agnostic. In this tutorial, you will learn the basics of creating a site with Gatsby, allowing you to create static sites that are optimized for your users.
About the author
I own a technical documentation agency called DocumentWrite. I love writing JavaScript and documentation.
Still looking for an answer?
This textbox defaults to using Markdown to format your answer.
You can type !ref in this text area to quickly search our full set of tutorials, documentation & marketplace offerings and insert the link!
This tutorial gives a practical introduction to SEO in Gatsby because it focuses on implementation instead of only theory. I liked how it uses the SEO component with React Helmet to centralize metadata management rather than repeating tags across pages. Adding titles, descriptions, keywords, and social metadata in one place makes maintenance much easier as a site grows. The section on Open Graph and Twitter metadata is especially useful because SEO today is not only about search rankings but also about how content appears when shared. Social previews can have a real impact on clicks and engagement.
 This work is licensed under a Creative Commons Attribution-NonCommercial- ShareAlike 4.0 International License.
Become a contributor for community
Get paid to write technical tutorials and select a tech-focused charity to receive a matching donation.

DigitalOcean Documentation
Full documentation for every DigitalOcean product.

Resources for startups and AI-native businesses
The Wave has everything you need to know about building a business, from raising funding to marketing your product.
The developer cloud
Scale up as you grow — whether you're running one virtual machine or ten thousand.

Start building today
From GPU-powered inference and Kubernetes to managed databases and storage, get everything you need to build, scale, and deploy intelligent applications.
