By Joe Morgan and Timothy Nolan

Introduction
In this tutorial, you’ll learn how to describe elements with JSX. JSX is an abstraction that allows you to write HTML-like syntax in your JavaScript code and will enable you to build React components that look like standard HTML markup. JSX is the templating language of React elements, and is therefore the foundation for any markup that React will render into your application.
Since JSX enables you to also write JavaScript in your markup, you’ll be able to take advantage of JavaScript functions and methods, including array mapping and short-circuit evaluation for conditionals.
As part of the tutorial, you’ll capture click events on buttons directly in the markup and catch instances when the syntax does not match exactly to standard HTML, such as with CSS classes. At the end of this tutorial, you’ll have a working application that uses a variety of JSX features to display a list of elements that have a built-in click listener. This is a common pattern in React applications that you will use often in the course of learning the framework. You’ll also be able to mix standard HTML elements along with JavaScript to see how React gives you the ability to create small, reusable pieces of code.
Prerequisites
-
You will need a development environment running Node.js; this tutorial was tested on Node.js version 10.19.0 and npm version 6.13.4. To install this on macOS or Ubuntu 18.04, follow the steps in How to Install Node.js and Create a Local Development Environment on macOS or the Installing Using a PPA section of How To Install Node.js on Ubuntu 18.04.
-
You will need to be able to create apps with Create React App. You can find instructions for installing an application with Create React App at How To Set Up a React Project with Create React App.
-
You will also need a basic knowledge of JavaScript, which you can find in How To Code in JavaScript, along with a basic knowledge of HTML and CSS. A good resource for HTML and CSS is the Mozilla Developer Network.
Step 1 — Adding Markup to a React Element
As mentioned earlier, React has a special markup language called JSX. It is a mix of HTML and JavaScript syntax that looks something like this:
<div>
  {inventory.filter(item => item.available).map(item => (
    <Card>
        <div className="title"}>{item.name}</div>
        <div className="price">{item.price}</div>
    </Card>
    ))
  }
</div>
You will recognize some JavaScript functionality such as .filter and .map, as well as some standard HTML like <div>. But there are other parts that look like both HTML and JavaScript, such as <Card> and className.
This is JSX, the special markup language that gives React components the feel of HTML with the power of JavaScript.
In this step, you’ll learn to add basic HTML-like syntax to an existing React element. To start, you’ll add standard HTML elements into a JavaScript function, then see the compiled code in a browser. You’ll also group elements so that React can compile them with minimal markup leaving clean HTML output.
To start, make a new project. On your command line run the following script to install a fresh project using create-react-app:
- npx create-react-app jsx-tutorial
After the project is finished, change into the directory:
- cd jsx-tutorial
In a new terminal tab or window, start the project using the Create React App start script. The browser will autorefresh on changes, so leave this script running the whole time that you work:
- npm start
You will get a running local server. If the project did not open in a browser window, you can find it at http://localhost:3000/. If you are running this from a remote server, the address will be http://your_IP_address:3000.
Your browser will load with a React application included as part of Create React App.
You will be building a completely new set of custom components, so you’ll need to start by clearing out some boilerplate code so that you can have an empty project. To start open App.js in a text editor. This is the root component that is injected into the page. All components will start from here.
In a new terminal, move into the project folder and open src/App.js with the following command:
- nano src/App.js
You will see a file like this:
import React from 'react';
import logo from './logo.svg';
import './App.css';

function App() {
  return (
    <div className="App">
      <header className="App-header">
        <img src={logo} className="App-logo" alt="logo" />
        <p>
          Edit <code>src/App.js</code> and save to reload.
        </p>
        <a
          className="App-link"
          href="https://reactjs.org"
          target="_blank"
          rel="noopener noreferrer"
        >
          Learn React
        </a>
      </header>
    </div>
  );
}

export default App;
Now, delete the line import logo from './logo.svg and everything after the return statement in the function. Change it to return null. The final code will look like this:
import React from 'react';
import './App.css';

function App() {
  return null;
}

export default App;
Save and exit the text editor.
Finally, delete the logo. In the terminal window type the following command:
- rm src/logo.svg
You won’t be using this SVG file in your application, and you should remove unused files as you work. It will better organize your code in the long run.
Now that these parts of your project are removed, you can move on to exploring the facets of JSX. This markup language is compiled by React and eventually becomes the HTML you see on a web page. Without going too deeply into the internals, React takes the JSX and creates a model of what your page will look like, then creates the necessary elements and adds them to the page.
What that means is that you can write what looks like HTML and expect that the rendered HTML will be similar. However, there are a few catches.
First, if you look at the tab or window running your server, you’ll see this:
Output...
./src/App.js
  Line 1:8:  'React' is defined but never used  no-unused-vars
...
That’s the linter telling you that you aren’t using the imported React code. When you add the line import React from 'react' to your code, you are importing JavaScript code that converts the JSX to React code. If there’s no JSX, there’s no need for the import.
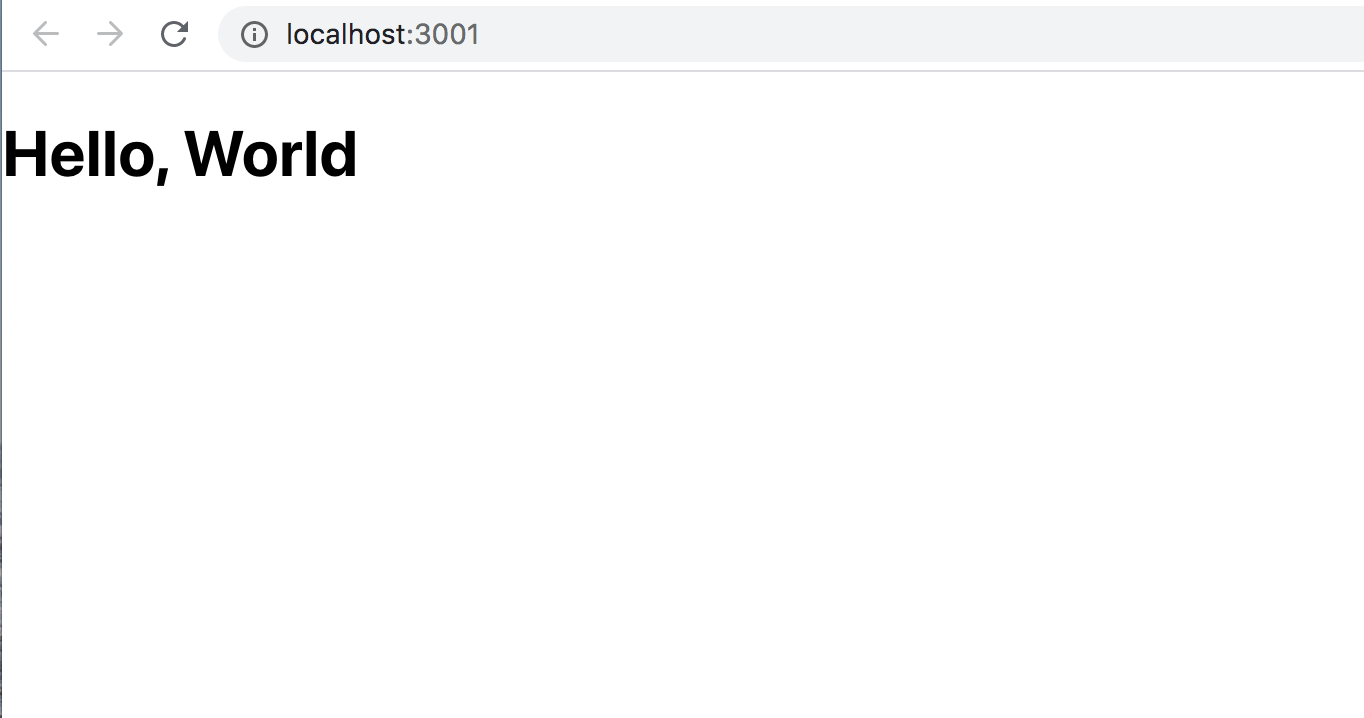
Let’s change that by adding a small amount of JSX. Start by replacing null with a Hello, World example:
import React from 'react';
import './App.css';

function App() {
  return <h1>Hello, World</h1>;
}

export default App;
Save the file. If you look at the terminal with the server running, the warning message will be gone. If you visit your browser, you will see the message as an h1 element.
Next, below the <h1> tag, add a paragraph tag that contains the string I am writing JSX. The code will look like this:
import React from 'react';
import './App.css';

function App() {
  return(
    <h1>Hello, World</h1>
    <p>I am writing JSX</p>
  )
}

export default App;
Since the JSX spans multiple lines, you’ll need to wrap the expression in parentheses.
Save the file. When you do you’ll see an error in the terminal running your server:
Output./src/App.js
  Line 7:5:  Parsing error: Adjacent JSX elements must be wrapped in an enclosing tag. Did you want a JSX fragment <>...</>?

   5 |   return(
   6 |     <h1>Hello, World</h1>
>  7 |     <p>I am writing JSX</p>
     |     ^
   8 |   )
   9 | }
  10 |
When you return JSX from a function or statement, you must return a single element. That element may have nested children, but there must be a single top-level element. In this case, you are returning two elements.
The fix is a small code change. Surround the code with an empty tag. An empty tag is an HTML element without any words. It looks like this: <></>.
Go back to ./src/App.js in your editor and add the empty tag:
import React from 'react';
import './App.css';

function App() {
  return(
    <>
      <h1>Hello, World</h1>
      <p>I am writing JSX</p>
    </>
  )
}

export default App;
The empty tag creates a single element, but when the code is compiled, it is not added to the final markup. This will keep your code clean while still giving React a single element.
Note: You could have also wrapped the code with a div instead of empty tags, as long as the code returns one element. In this example, an empty tag has the advantage of not adding extra markup to the parsed output.
Save the code and exit the file. Your browser will refresh and show the updated page with the paragraph element. In addition, when the code is converted the empty tags are stripped out:
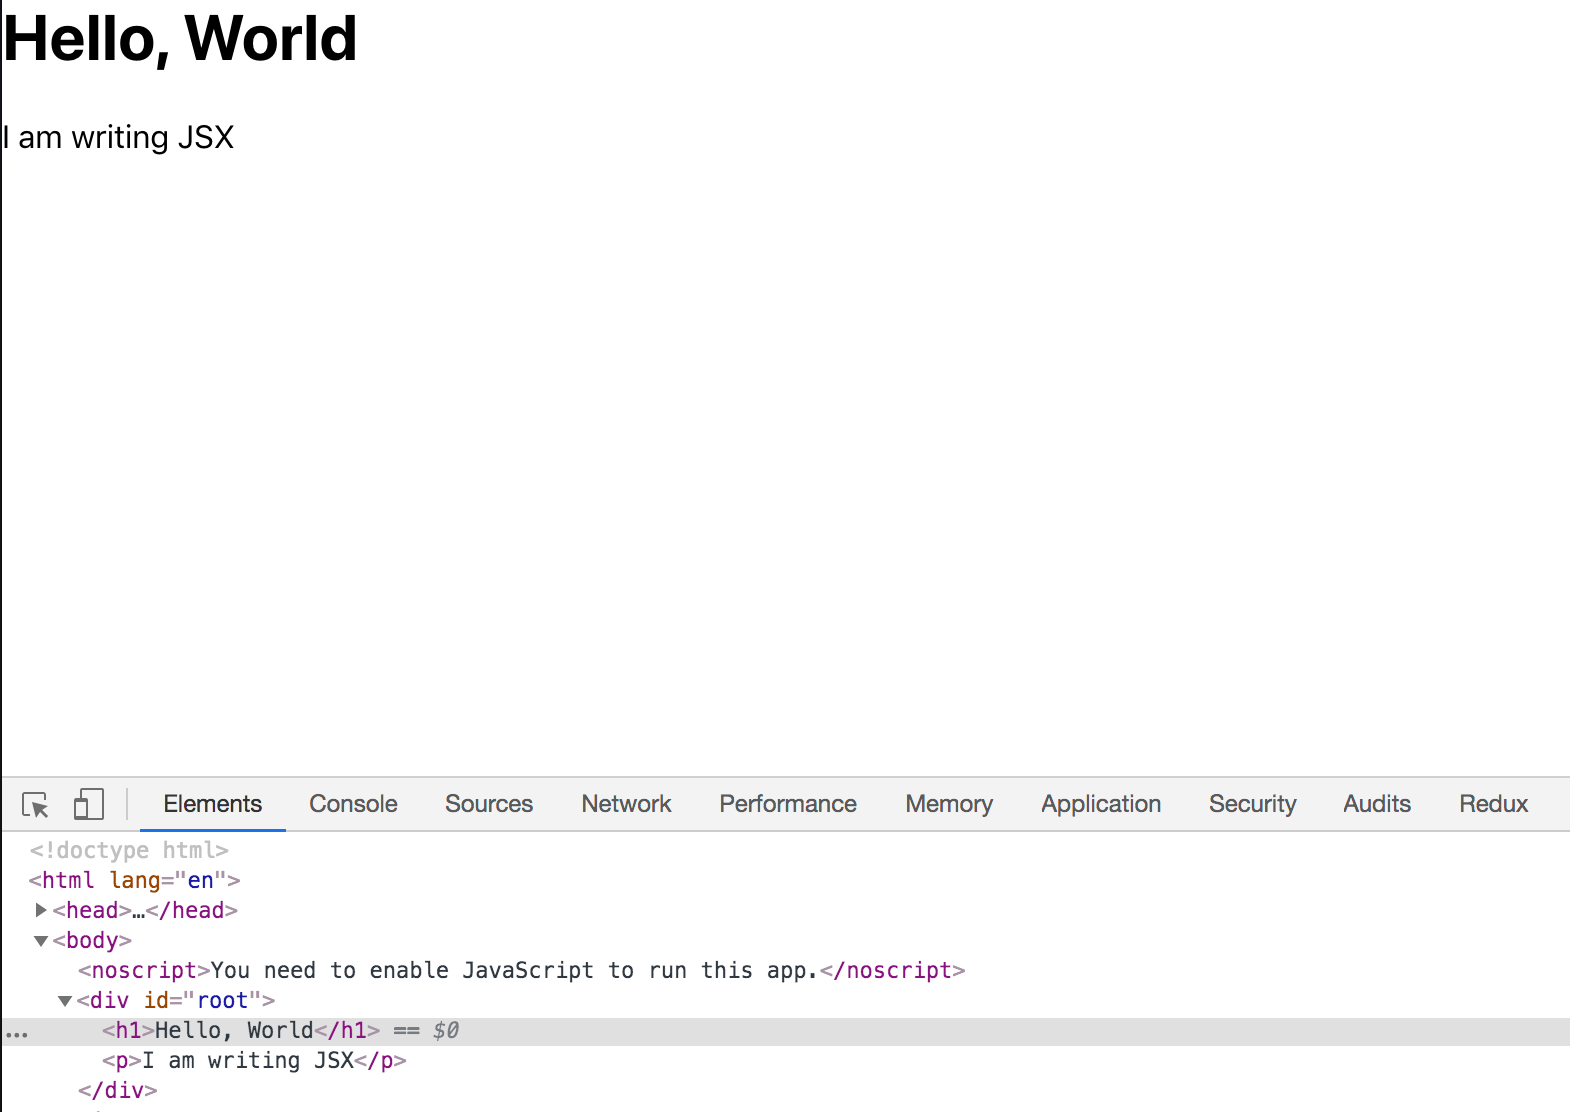
You’ve now added some basic JSX to your component and learned how all JSX needs to be nested in a single component. In the next step, you’ll add some styling to your component.
Step 2 — Adding Styling to an Element with Attributes
In this step, you’ll style the elements in your component to learn how HTML attributes work with JSX. There are many styling options in React. Some of them involve writing CSS in Javascript, others use preprocessors. In this tutorial you’ll work with imported CSS and CSS classes.
Now that you have your code, it’s time to add some styling. Open App.css in your text editor:
- nano src/App.css
Since you are starting with new JSX, the current CSS refers to elements that no longer exist. Since you don’t need the CSS, you can delete it.
After deleting the code, you’ll have an empty file.
Next, you will add in some styling to center the text. In src/App.css, add the following code:
.container {
    display: flex;
    flex-direction: column;
    align-items: center;
}
In this code block, you created a CSS class selector called .container and used that to center the content using display: flex.
Save the file and exit. The browser will update, but nothing will change. Before you can see the change, you need to add the CSS class to your React component. Open the component JavaScript code:
- nano src/App.js
The CSS code is already imported with the line import './App.css'. That means that webpack will pull in the code to make a final style sheet, but to apply the CSS to your elements, you need to add the classes.
First, in your text editor, change the empty tags, <>, to <div>.
import React from 'react';
import './App.css';

function App() {
  return(
    <div>
      <h1>Hello, World</h1>
      <p>I am writing JSX</p>
    </div>
  )
}

export default App;
In this code, you replaced the empty tags—<>—with div tags. Empty tags are useful for grouping your code without adding any extra tags, but here you need to use a div because empty tags do not accept any HTML attributes.
Next, you need to add the class name. This is where JSX will start to diverge from HTML. If you wanted to add a class to a usual HTML element you would do it like this:
<div class="container">
But since JSX is JavaScript, it has a few limitations. One of the limitations is that JavaScript has reserved keywords. That means you can’t use certain words in any JavaScript code. For example, you can’t make a variable called null because that word is already reserved.
One of the reserved words is class. React gets around this reserved word by changing it slightly. Instead of adding the attribute class, you will add the attribute className. As a rule, if an attribute is not working as expected, try adding the camel case version. Another attribute that is slightly different is the for attribute that you’d use for labels. There are a few other cases, but fortunately the list is fairly short.
Note: In React, attributes are often called props. Props are pieces of data that you can pass to other custom components. They look the same as attributes except that they do not match any HTML specs. In this tutorial, we’ll call them attributes since they are mainly used like standard HTML attributes. This will distinguish them from props that do not behave like HTML attributes, which will be covered later in this series.
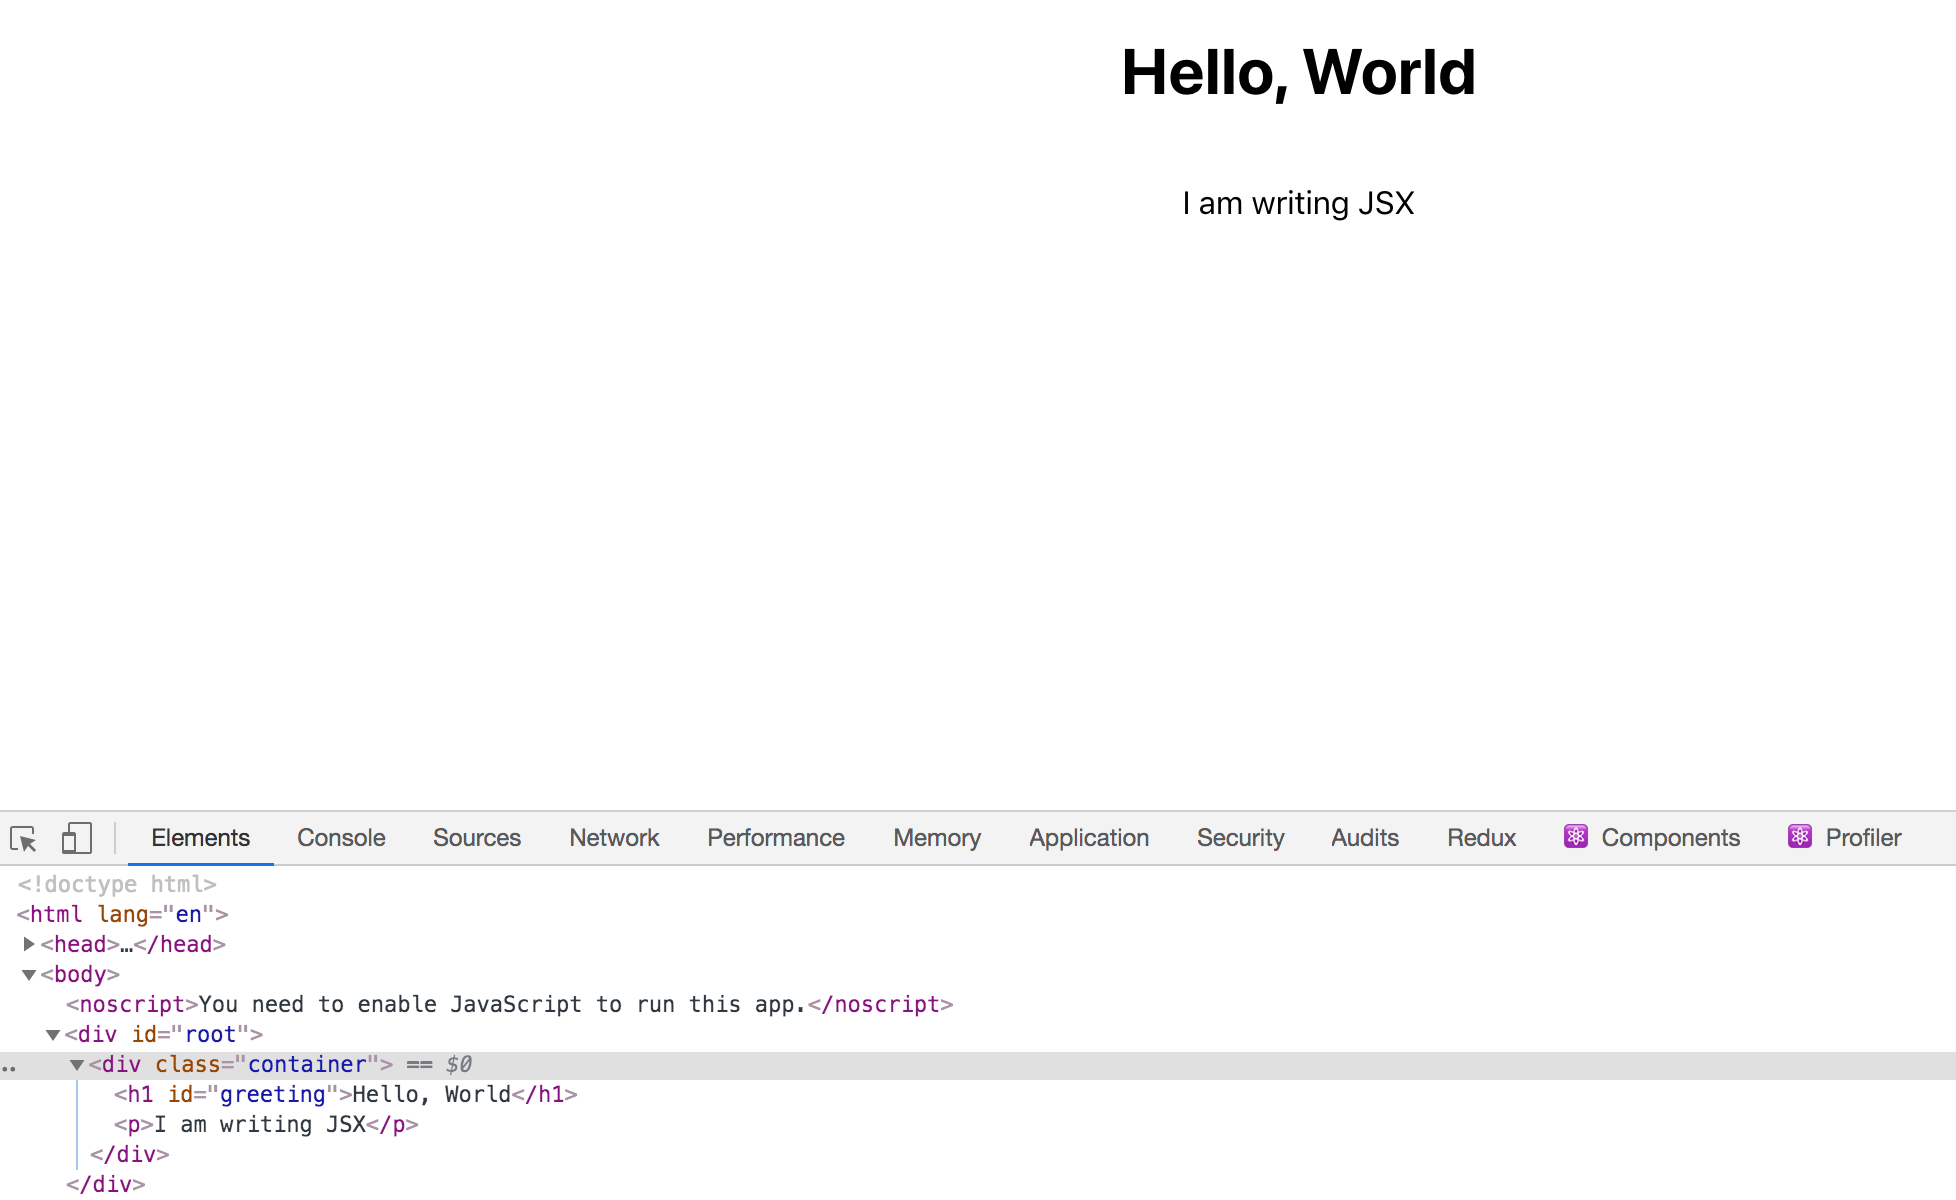
Now that you know how the class attribute is used in React, you can update your code to include the styles. In your text editor, add className="container" to your opening div tag:
import React from 'react';
import './App.css';

function App() {
  return(
    <div className="container">
      <h1>Hello, World</h1>
      <p>I am writing JSX</p>
    </div>
  )
}

export default App;
Save the file. When you do, the page will reload and the content will be centered.
 .
.
The className attribute is unique in React. You can add most HTML attributes to JSX without any change. As an example, go back to your text editor and add an id of greeting to your <h1> element. It will look like standard HTML:
import React from 'react';
import './App.css';

function App() {
  return(
    <div className="container">
      <h1 id="greeting">Hello, World</h1>
      <p>I am writing JSX</p>
    </div>
  )
}

export default App;
Save the page and reload the browser. It will be the same.
So far, JSX looks like standard markup, but the advantage of JSX is that even though it looks like HTML, it has the power of JavaScript. That means you can assign variables and reference them in your attributes. To reference an attribute, wrap it with curly braces—{}—instead of quotes.
In your text editor, add the following highlighted lines to reference an attribute:
import React from 'react';
import './App.css';

function App() {
  const greeting = "greeting";
  return(
    <div className="container">
     <h1 id={greeting}>Hello, World</h1>
      <p>I am writing JSX</p>
    </div>
  )
}

export default App;
In this code, you created a variable above the return statement called greeting with the value of "greeting", then referenced the variable in the id attribute of your <h1> tag.
Save and exit the file. The page will be the same, but with an id tag.
So far you’ve worked with a few elements on their own, but you can also use JSX to add many HTML elements and nest them to create complex pages.
To demonstrate this, you’ll make a page with a list of emoji. These emoji will be wrapped with a <button> element. When you click on the emoji, you’ll get their CLDR Short Name.
To start, you’ll need to add a few more elements to the page. Open src/App.js in your text editor. Keep it open during this step.
- nano src/App.js
First, add a list of emojis by adding the following highlighted lines:
import React from 'react';
import './App.css';

function App() {
  const greeting = "greeting";
  return(
    <div className="container">
      <h1 id={greeting}>Hello, World</h1>
      <p>I am writing JSX</p>
      <ul>
        <li>
            <button>
              <span role="img" aria-label="grinning face" id="grinning face">😀</span>
            </button>
        </li>
        <li>
          <button>
              <span role="img" aria-label="party popper" id="party popper">🎉</span>
          </button>
        </li>
        <li>
          <button>
              <span role="img" aria-label="woman dancing" id="woman dancing">💃</span>
          </button>
        </li>
      </ul>
    </div>
  )
}

export default App;
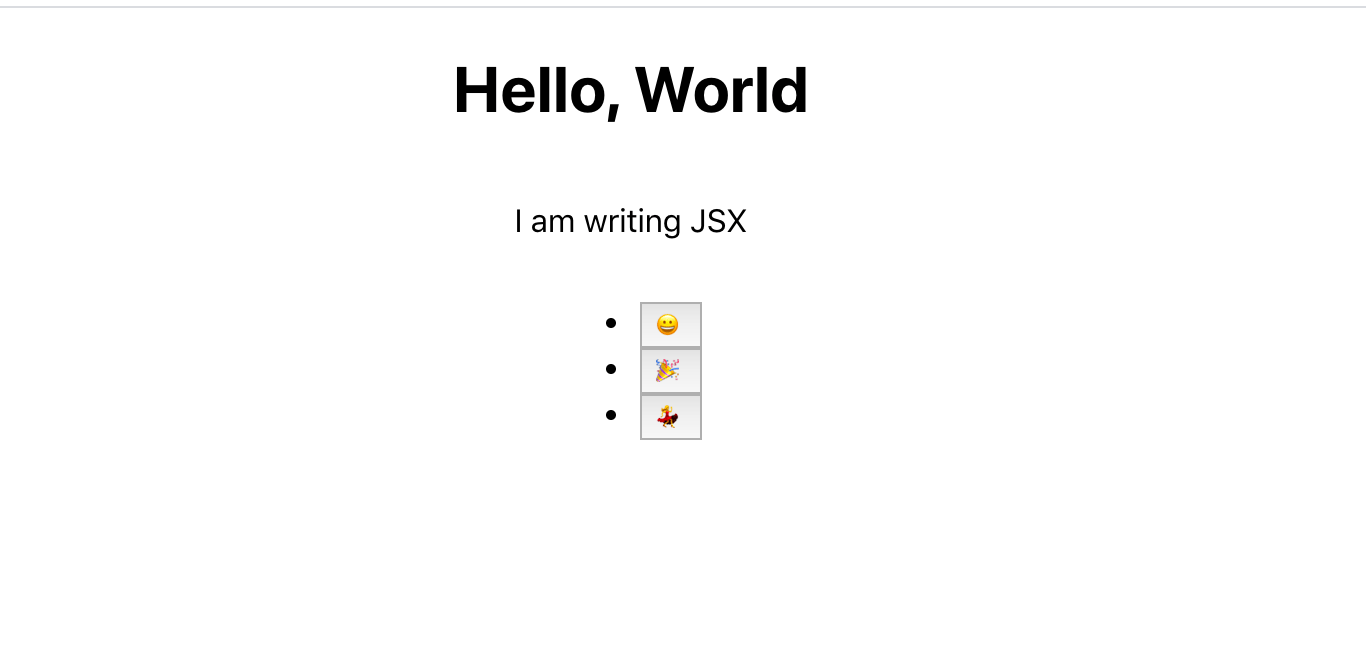
Here you created a <ul> tag to hold a list of emojis. Each emoji is in a separate <li> element and is surrounded with a <button> element. In the next step you’ll add an event to this button.
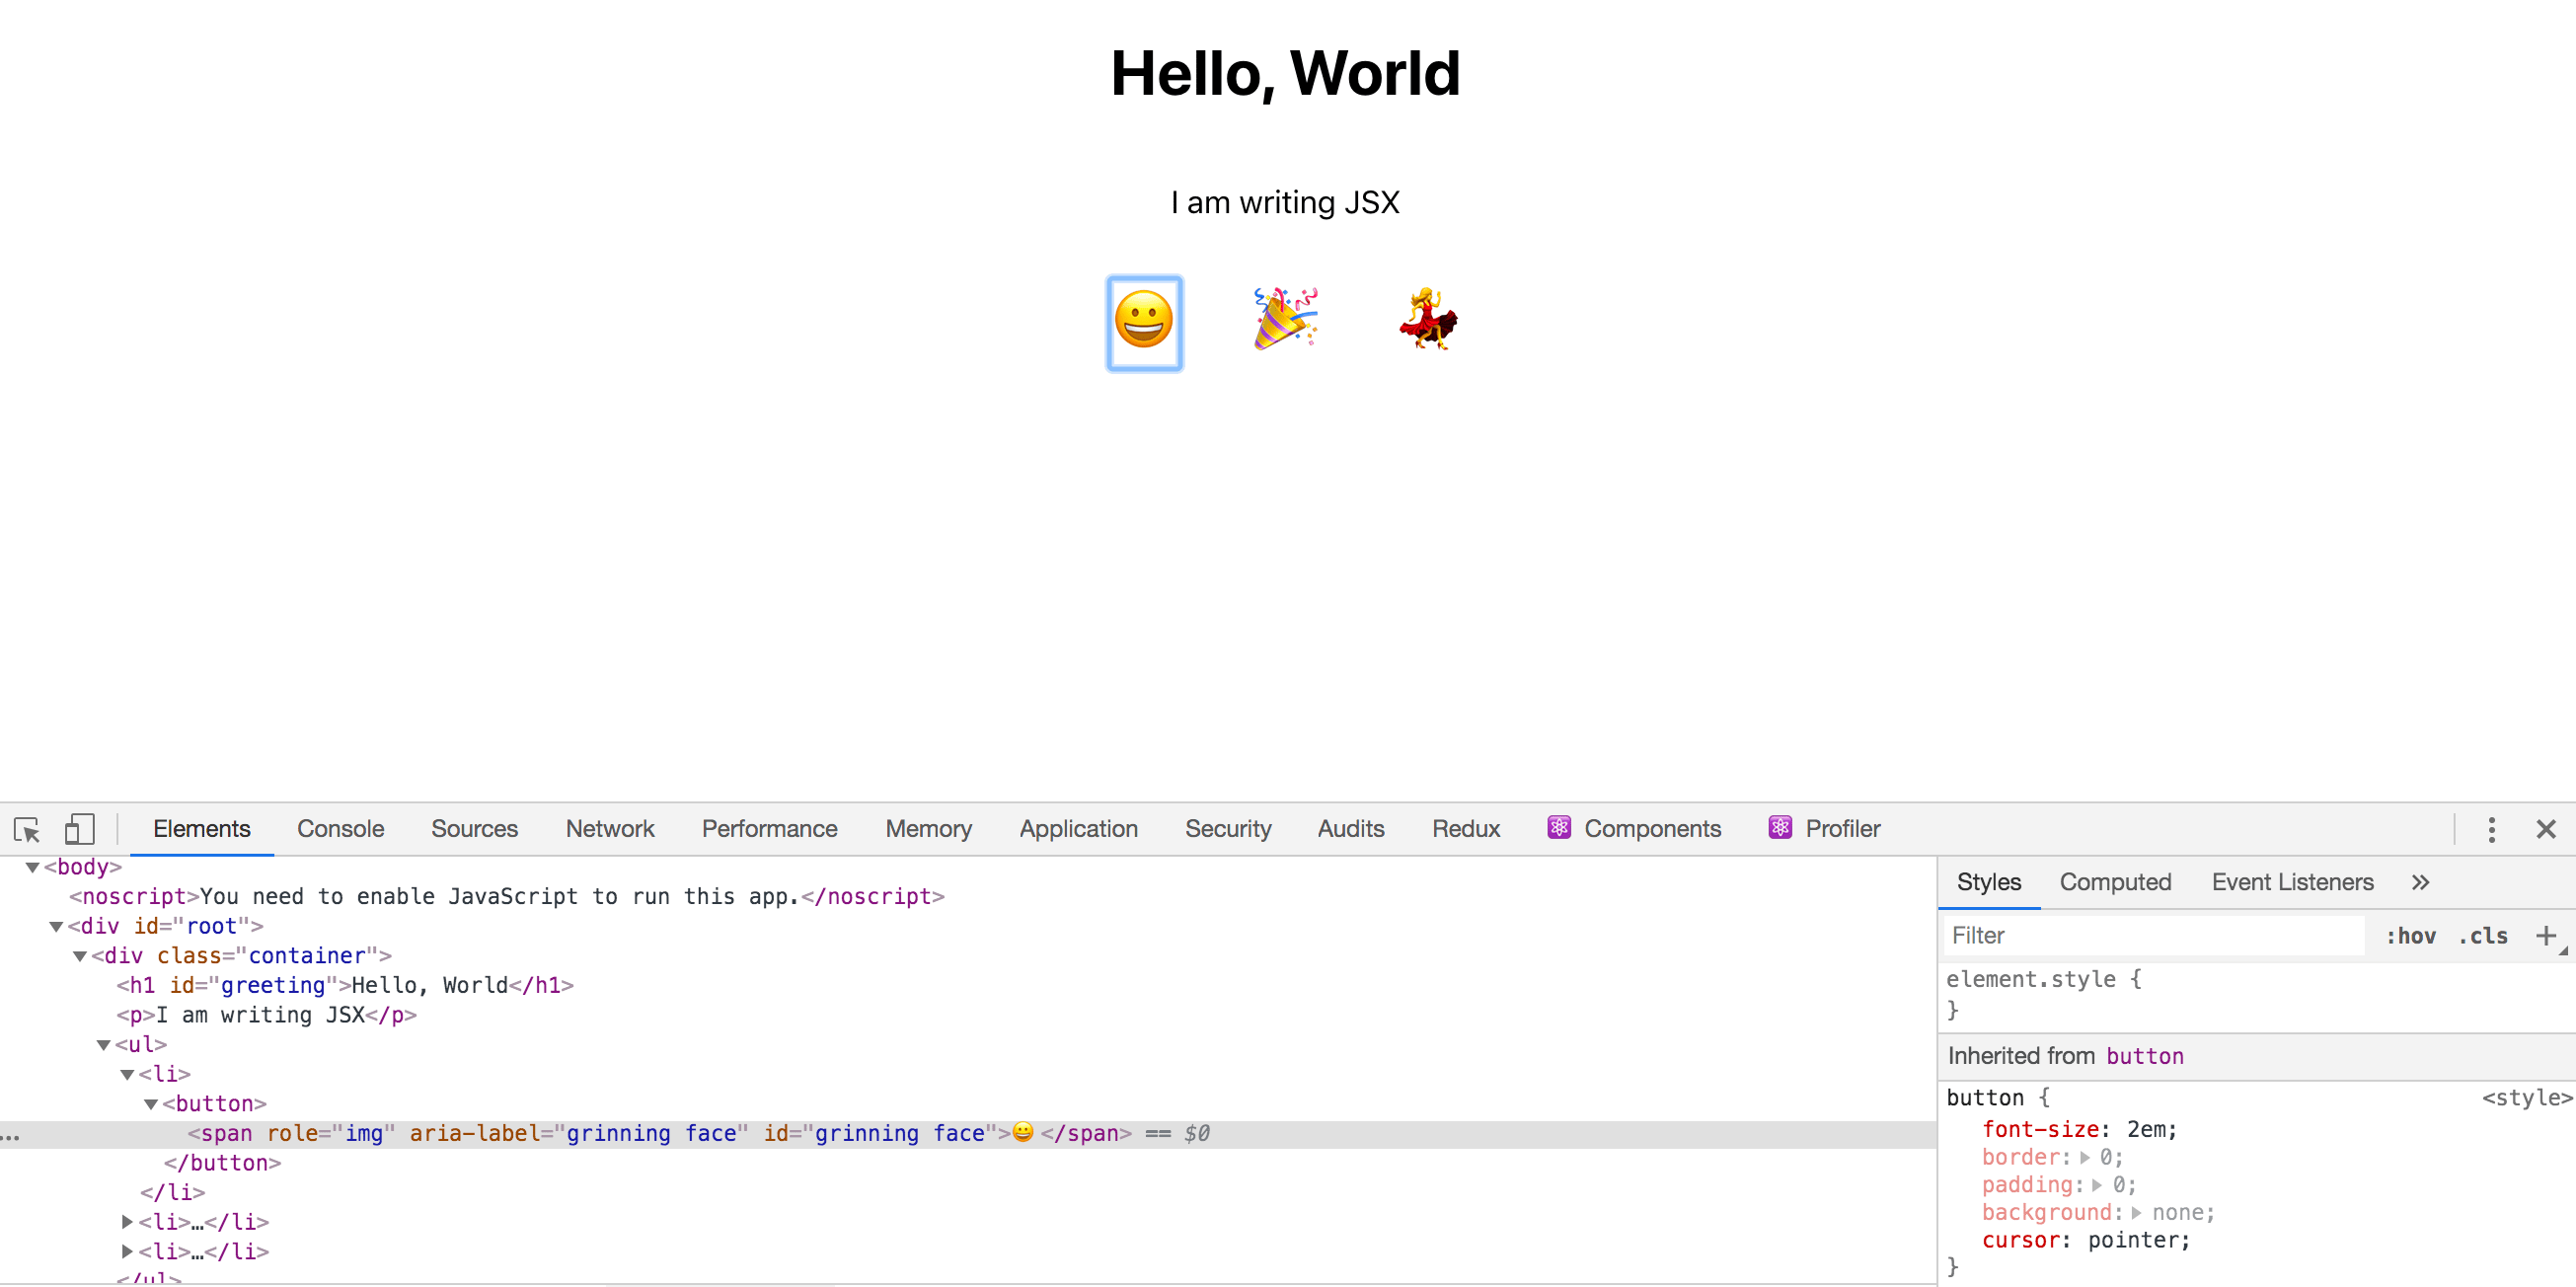
You also surrounded the emoji with a <span> tag that has a few more attributes. Each span has the role attribute set to the img role. This will signal to accessibility software that the element is acting like an image. In addition, each <span> also has an aria-label and an id attribute with the name of the emoji. The aria-label will tell visitors with screen readers what is displayed. You will use the id when writing events in the next step.
When you write code this way, you are using semantic elements, which will help keep the page accessible and easy to parse for screen readers.
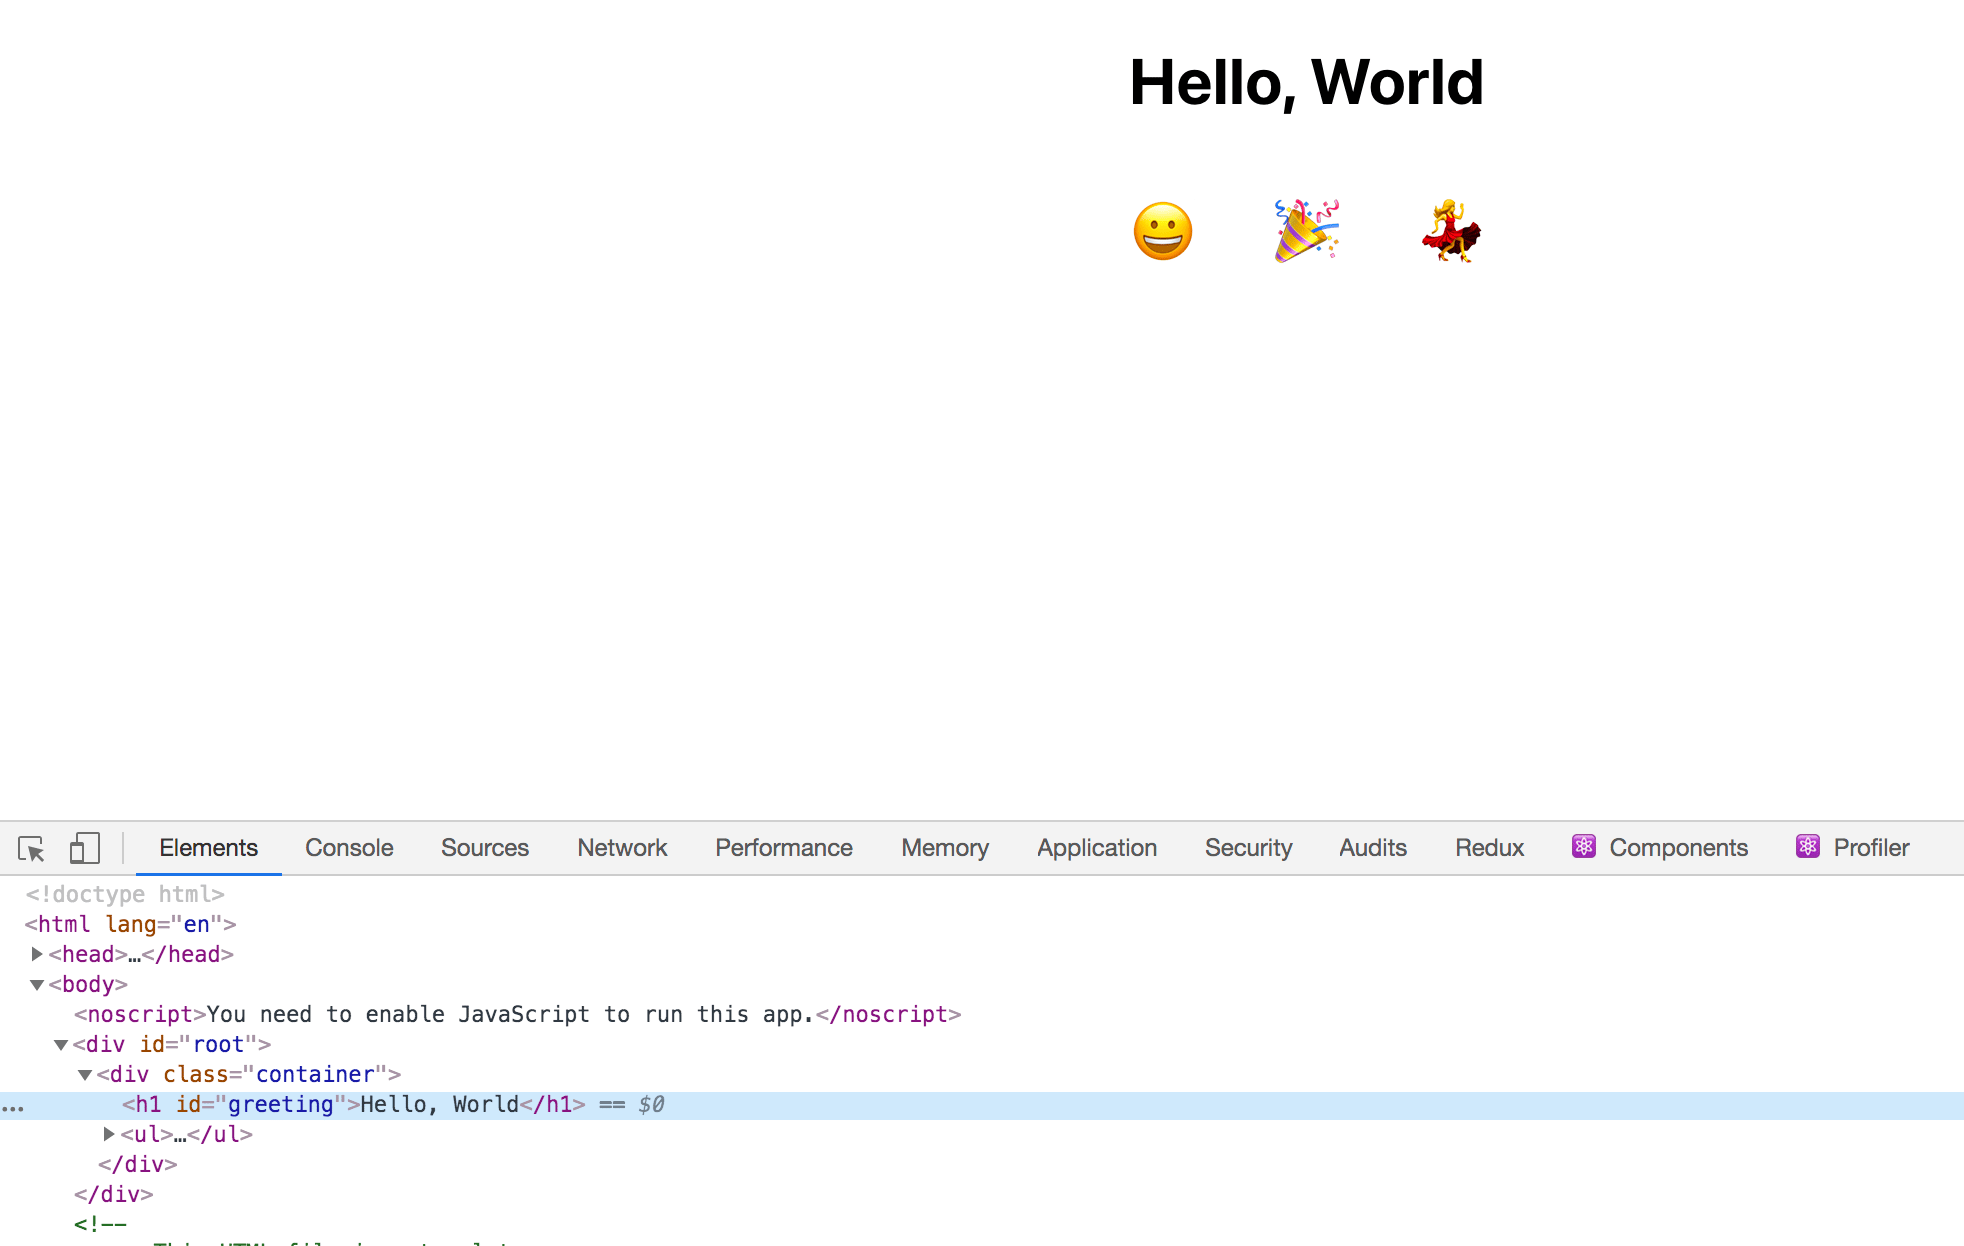
Save and exit the file. Your browser will refresh and you will see this:
Now add a little styling. Open the CSS code in your text editor:
- nano src/App.css
Add the following highlighted code to remove the default background and border for the buttons while increasing the font size:
.container {
    display: flex;
    flex-direction: column;
    align-items: center;
}

button {
    font-size: 2em;
    border: 0;
    padding: 0;
    background: none;
    cursor: pointer;
}

ul {
    display: flex;
    padding: 0;
}

li {
    margin: 0 20px;
    list-style: none;
    padding: 0;
}
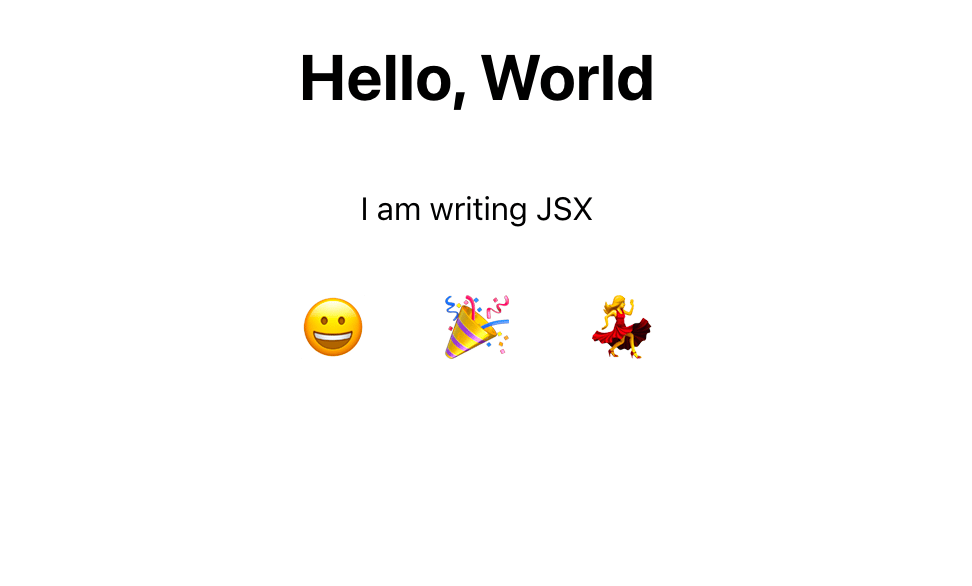
In this code, you used font-size, border, and other parameters to adjust the look of your buttons and change the font. You also removed the list styles and added display: flex to the <ul> element to make it horizontal.
Save and close the CSS file. Your browser will refresh and you will see this:
You’ve now worked with several JSX elements that look like regular HTML. You’ve added classes, ids, and aria tags, and have worked with data as strings and variables. But React also uses attributes to define how your elements should respond to user events. In the next step, you’ll start to make the page interactive by adding events to the button.
Step 3 — Adding Events to Elements
In this step, you’ll add events to elements using special attributes and capture a click event on a button element. You’ll learn how to capture information from the event to dispatch another action or use other information in the scope of the file.
Now that you have a basic page with information, it’s time to add a few events to it. There are many event handlers that you can add to HTML elements. React gives you access to all of these. Since your JavaScript code is coupled with your markup, you can quickly add the events while keeping your code well-organized.
To start, add the onclick event handler. This lets you add some JavaScript code directly to your element rather than attaching an event listener:
import React from 'react';
import './App.css';

function App() {
  const greeting = "greeting";
  return(
    <div className="container">
      <h1 id={greeting}>Hello, World</h1>
      <p>I am writing JSX</p>
      <ul>
        <li>
          <button
            onClick={event => alert(event.target.id)}
          >
            <span role="img" aria-label="grinning face" id="grinning face">😀</span>
          </button>
        </li>
        <li>
          <button
            onClick={event => alert(event.target.id)}
          >
              <span role="img" aria-label="party popper" id="party popper">🎉</span>
          </button>
        </li>
        <li>
            <button
              onClick={event => alert(event.target.id)}
            >
              <span role="img" aria-label="woman dancing" id="woman dancing">💃</span>
          </button>
        </li>
      </ul>
    </div>
  )
}

export default App;
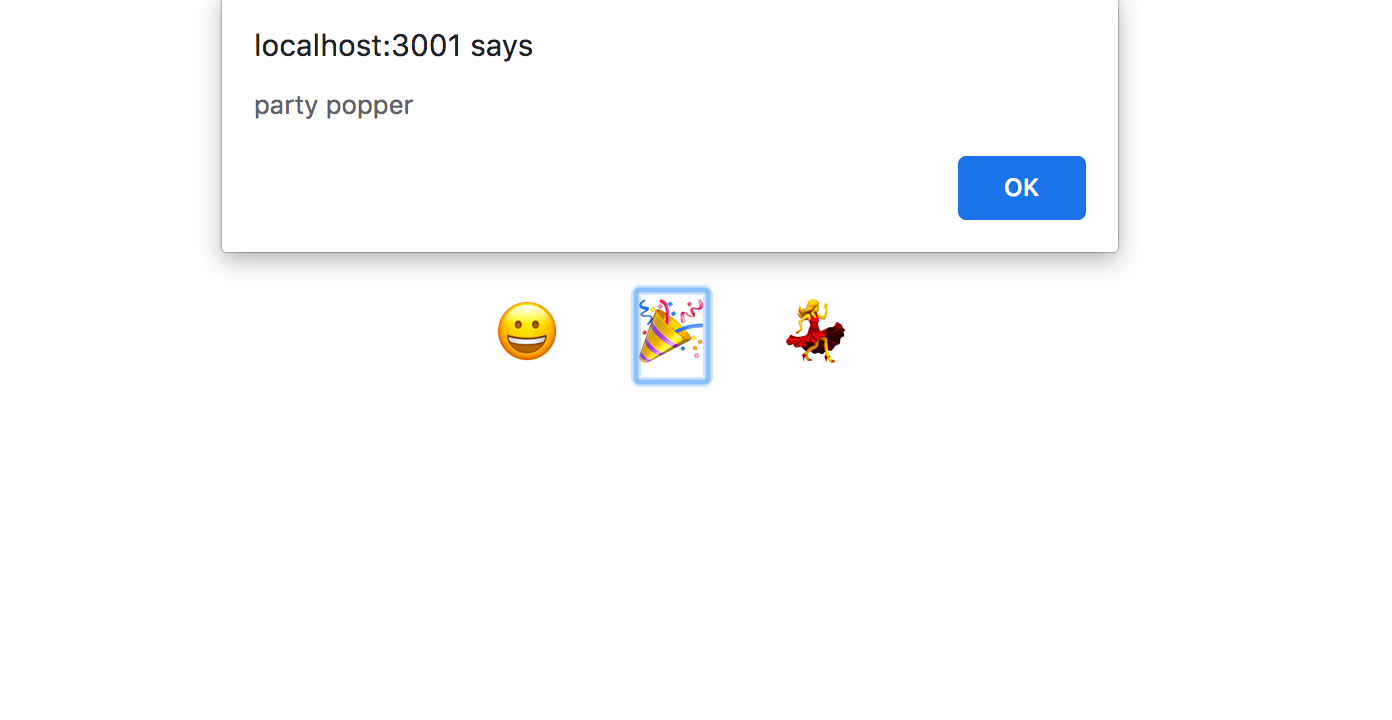
Since this is JSX, you camelCased onclick, which means you added it as onClick. This onClick attribute uses an anonymous function to retrieve information about the item that was clicked.
You added an anonymous arrow function that will get the event from the clicked button, and the event will have a target that is the <span> element. The information you need is in the id attribute, which you can access with event.target.id. You can trigger the alert with the alert() function.
Save the file. In your browser, click on one of the emoji and you will get an alert with the name.
You can reduce a duplication by declaring the function once and passing it to each onClick action. Since the function does not rely on anything other than inputs and outputs, you can declare it outside the main component function. In other words, the function does not need to access the scope of the component. The advantage to keeping them separate is that your component function is slightly shorter and you could move the function out to a separate file later if you wanted to.
In your text editor, create a function called displayEmojiName that takes the event and calls the alert() function with an id. Then pass the function to each onClick attribute:
import React from 'react';
import './App.css';

const displayEmojiName = event => alert(event.target.id);

function App() {
  const greeting = "greeting";
  return(
    <div className="container">
      <h1 id={greeting}>Hello, World</h1>
      <p>I am writing JSX</p>
      <ul>
        <li>
          <button
            onClick={displayEmojiName}
          >
            <span role="img" aria-label="grinning face" id="grinning face">😀</span>
          </button>
        </li>
        <li>
          <button
            onClick={displayEmojiName}
          >
              <span role="img" aria-label="party popper" id="party popper">🎉</span>
          </button>
        </li>
        <li>
            <button
              onClick={displayEmojiName}
            >
              <span role="img" aria-label="woman dancing" id="woman dancing">💃</span>
          </button>
        </li>
      </ul>
    </div>
  )
}

export default App;
Save the file. In your browser, click on an emoji and you will see the same alert.
In this step, you added events to each element. You also saw how JSX uses slightly different names for element events, and you started writing reusable code by taking the function and reusing it on several elements. In the next step, you will write a reusable function that returns JSX elements rather than writing each element by hand. This will further reduce duplication.
Step 4 — Mapping Over Data to Create Elements
In this step, you’ll move beyond using JSX as simple markup. You’ll learn to combine it with JavaScript to create dynamic markup that reduces code and improves readability. You’ll refactor your code into an array that you will loop over to create HTML elements.
JSX doesn’t limit you to an HTML-like syntax. It also gives you the ability to use JavaScript directly in your markup. You tried this a little already by passing functions to attributes. You also used variables to reuse data. Now it’s time to create JSX directly from data using standard JavaScript code.
In your text editor, you will need to create an array of the emoji data in the src/App.js file. Reopen the file if you have closed it:
- nano src/App.js
Add an array that will contain objects that have the emoji and the emoji name. Note that emojis need to be surrounded by quote marks. Create this array above the App function:
import React from 'react';
import './App.css';

const displayEmojiName = event => alert(event.target.id);
const emojis = [
  {
    emoji: "😀",
    name: "grinning face"
  },
  {
    emoji: "🎉",
    name: "party popper"
  },
  {
    emoji: "💃",
    name: "woman dancing"
  }
];

function App() {
...
}

export default App;
Now that you have the data you can loop over it. To use JavaScript inside of JSX, you need to surround it with curly braces: {}. This is the same as when you added functions to attributes.
To create React components, you’ll need to convert the data to JSX elements. To do this, you’ll map over the data and return a JSX element. There are a few things you’ll need to keep in mind as you write the code.
First, a group of items needs to be surrounded by a container <div>. Second, every item needs a special property called key. The key needs to be a unique piece of data that React can use to keep track of the elements so it can know when to update the component. The key will be stripped out of the compiled HTML, since it is for internal purposes only. Whenever you are working with loops you will need to add a simple string as a key.
Here’s a simplified example that maps a list of names into a containing <div>:
...
const names = [
    "Atul Gawande",
    "Stan Sakai",
    "Barry Lopez"
];

return(
    <div>
        {names.map(name => <div key={name}>{name}</div>)}
    </div>
)
...
The resulting HTML would look like this:
...
<div>
    <div>Atul Gawande</div>
    <div>Stan Sakai</div>
    <div>Barry Lopez</div>
</div>
...
Converting the emoji list will be similar. The <ul> will be the container. You’ll map over data and return a <li> with a key of the emoji short name. You will replace the hard-coded data in the <button> and <span> tags with information from the loop.
In your text editor, add the following:
import React from 'react';
import './App.css';

const displayEmojiName = event => alert(event.target.id);
const emojis = [
  {
    emoji: '😀',
    name: "test grinning face"
  },
  {
    emoji: '🎉',
    name: "party popper"
  },
  {
    emoji: '💃',
    name: "woman dancing"
  }
];

function App() {
  const greeting = "greeting";
  return(
    <div className="container">
      <h1 id={greeting}>Hello, World</h1>
      <p>I am writing JSX</p>
      <ul>
        {
          emojis.map(emoji => (
            <li key={emoji.name}>
              <button
                onClick={displayEmojiName}
              >
                <span role="img" aria-label={emoji.name} id={emoji.name}>{emoji.emoji}</span>
              </button>
            </li>
          ))
        }
      </ul>
    </div>
  )
}

export default App;
In the code, you mapped over the emojis array in the <ul> tag and returned a <li>. In each <li> you used the emoji name as the key prop. The button will have the same function as normal. In the <span> element, replace the aria-label and id with the name. The content of the <span> tag should be the emoji.
Save the file. Your window will refresh and you’ll see the data. Notice that the key is not present in the generated HTML.
Combining JSX with standard JavaScript gives you a lot of tools to create content dynamically, and you can use any standard JavaScript you want. In this step, you replaced hard-coded JSX with an array and a loop to create HTML dynamically. In the next step, you’ll conditionally show information using short circuiting.
Step 5 — Conditionally Showing Elements with Short Circuiting
In this step, you’ll use short circuiting to conditionally show certain HTML elements. This will let you create components that can hide or show HTML based on additional information giving your components flexibility to handle multiple situations.
There are times when you will need a component to show information in some cases and not others. For example, you may only want to show an alert message for the user if certain cases are true, or you may want to display some account information for an admin that you wouldn’t want a normal user to see.
To do this you will use short circuting. This means that you will use a conditional, and if the first part is truthy, it will return the information in the second part.
Here’s an example. If you wanted to show a button only if the user was logged in, you would surround the element with curly braces and add the condition before.
{isLoggedIn && <button>Log Out</button>}
In this example, you are using the && operator, which returns the last value if everything is truthy. Otherwise, it returns false, which will tell React to return no additional markup. If isLoggedIn is truthy, React will display the button. If isLoggedIn is falsy, it will not show the button.
To try this out, add the following highlighted lines:
import React from 'react';
import './App.css';

...

function App() {
  const greeting = "greeting";
  const displayAction = false;
  return(
    <div className="container">
      <h1 id={greeting}>Hello, World</h1>
      {displayAction && <p>I am writing JSX</p>}
      <ul>
...
      </ul>
    </div>
  )
}

export default App;
In your text editor, you created a variable called displayAction with a value of false. You then surrounded the <p> tag with curly braces. At the start of the curly braces, you added displayAction && to create the conditional.
Save the file and you will see the element disappear in your browser. Crucially, it will also not appear in the generated HTML. This is not the same as hiding an element with CSS. It won’t exist at all in the final markup.
Right now the value of displayAction is hard-coded, but you can also store that value as a state or pass it as a prop from a parent component.
In this step, you learned how to conditionally show elements. This gives you the ability to create components that are customizable based on other information.
Conclusion
At this point, you’ve created a custom application with JSX. You’ve learned how to add HTML-like elements to your component, add styling to those elements, pass attributes to create semantic and accessible markup, and add events to the components. You then mixed JavaScript into your JSX to reduce duplicate code and to conditionally show and hide elements.
This is the basis you need to make future components. Using a combination of JavaScript and HTML, you can build dynamic components that are flexible and allow your application to grow and change.
If you’d like to learn more about React, check out our React topic page.
The author selected Creative Commons to receive a donation as part of the Write for DOnations program.
Thanks for learning with the DigitalOcean Community. Check out our offerings for compute, storage, networking, and managed databases.
Tutorial Series: How To Code in React.js
React is a popular JavaScript framework for creating front-end applications, such as user interfaces that allow users to interact with programs. Originally created by Facebook, it has gained popularity by allowing developers to create fast applications using an intuitive programming paradigm that ties JavaScript with an HTML-like syntax known as JSX.
In this series, you will build out examples of React projects to gain an understanding of this framework, giving you the knowledge you need to pursue front-end web development or start out on your way to full stack development.
Browse Series: 21 tutorials
About the author(s)
Author of Simplifying JavaScript. Writing featured in Slate, FreeCodeCamp, and here! I like to break things and put them back together. 🛠
Former Senior Technical Editor at DigitalOcean, fiction writer and podcaster elsewhere, always searching for the next good nautical pun! Areas of expertise include Node.js, PostgreSQL, CSS, JavaScript.
Still looking for an answer?
This textbox defaults to using Markdown to format your answer.
You can type !ref in this text area to quickly search our full set of tutorials, documentation & marketplace offerings and insert the link!
Good tutorial. I would update the following paragraph, as the verb tenses are all mixed:
In the code, you mapped over the emojis array in the <ul> tag and returned a <li>. In each <li> you used the emoji name as the key prop. The button will have the same function as normal. In the <span> element, replace the aria-label and id with the name. The content of the <span> tag should be the emoji.
It’s a good tutorial about “how to create react elements with JSX”, Me and my friend Emmanuel Katto want to learn Node.js… Where I read this at DigitalOcean.
 This work is licensed under a Creative Commons Attribution-NonCommercial- ShareAlike 4.0 International License.
Become a contributor for community
Get paid to write technical tutorials and select a tech-focused charity to receive a matching donation.

DigitalOcean Documentation
Full documentation for every DigitalOcean product.

Resources for startups and AI-native businesses
The Wave has everything you need to know about building a business, from raising funding to marketing your product.
The developer cloud
Scale up as you grow — whether you're running one virtual machine or ten thousand.

Start building today
From GPU-powered inference and Kubernetes to managed databases and storage, get everything you need to build, scale, and deploy intelligent applications.
