Developer

The author selected the Diversity in Tech Fund to receive a donation as part of the Write for DOnations program.
Introduction
Writing CSS selectors most often involves setting a condition and locating the element in the HTML that fulfills that condition as true. You can do this broadly with an element selector to select high-level tags, but to gain more control over the selected elements, you can create specific identifiers in the HTML and apply them in the CSS.
In this tutorial, you will use the id, class, and attribute selectors to scope styles to intentionally written HTML. You will begin by creating an HTML and a CSS file that you will edit throughout the tutorial. You will then add id attributes and use those id values to target styles. You will also add class attributes to elements and use those class values independently and together to create more specific and reusable styles. Lastly, you will use the attribute selector to create styles that match much more specific scenarios than an id or class selector alone can accomplish.
Prerequisites
- An understanding of CSS’s cascade and specificity features, which you can get by reading How To Apply CSS Styles to HTML with Cascade and Specificity.
- Knowledge of type selectors, combinator selectors, and selector groups, which you can find in How To Select HTML Elements to Style with CSS.
- An empty HTML file saved on your local machine as
index.htmlthat you can access from your text editor and web browser of choice. To get started, check out our How To Set Up Your HTML Project tutorial, and follow How To Use and Understand HTML Elements for instructions on how to view your HTML in your browser. If you’re new to HTML, try out the whole How To Build a Website in HTML series.
Setting Up the Base HTML and CSS
To start working with id, class, and attribute selectors, you will first set up the HTML and CSS code that you will work on through the rest of the tutorial. In this section, you will write out all the necessary HTML and some initial CSS styles that will handle layout and start the visual aesthetic.
To begin, open index.html in your text editor. Then, add the following HTML to the file:
<!doctype html>
<html>
  <head>
  </head>
  <body>
  </body>
</html>
Next, go to the <head> tag and add a <meta> tag to define the character set for the HTML file. Then add a <meta> tag defining how mobile devices should render the page, set the title of the page, and finally load the CSS file that you will make later with a <link> tag.
These additions are highlighted in the following code block. You will encounter this highlighting method throughout the tutorial as code is added and changed:
<!doctype html>
<html>
  <head>
    <meta charset="utf-8">
    <meta name="viewport" content="width=device-width, initial-scale=1">
    <title>About CSS Selectors</title>
    <link rel="stylesheet" href="styles.css">
  </head>
  <body>
  </body>
</html>
After adding the <head> content, move to the <body> element where you will add content for a page talking about CSS selectors. Add the highlighted section from this code block to your index.html file in your text editor:
<!doctype html>
<html>
<head>
<meta charset="utf-8">
<meta name="viewport" content="width=device-width, initial-scale=1">
<title>Link and Buttons with State</title>
<link rel="stylesheet" href="styles.css">
</head>
<body>
<header>
<h1>Using CSS Selectors</h1>
</header>
<main>
<section>
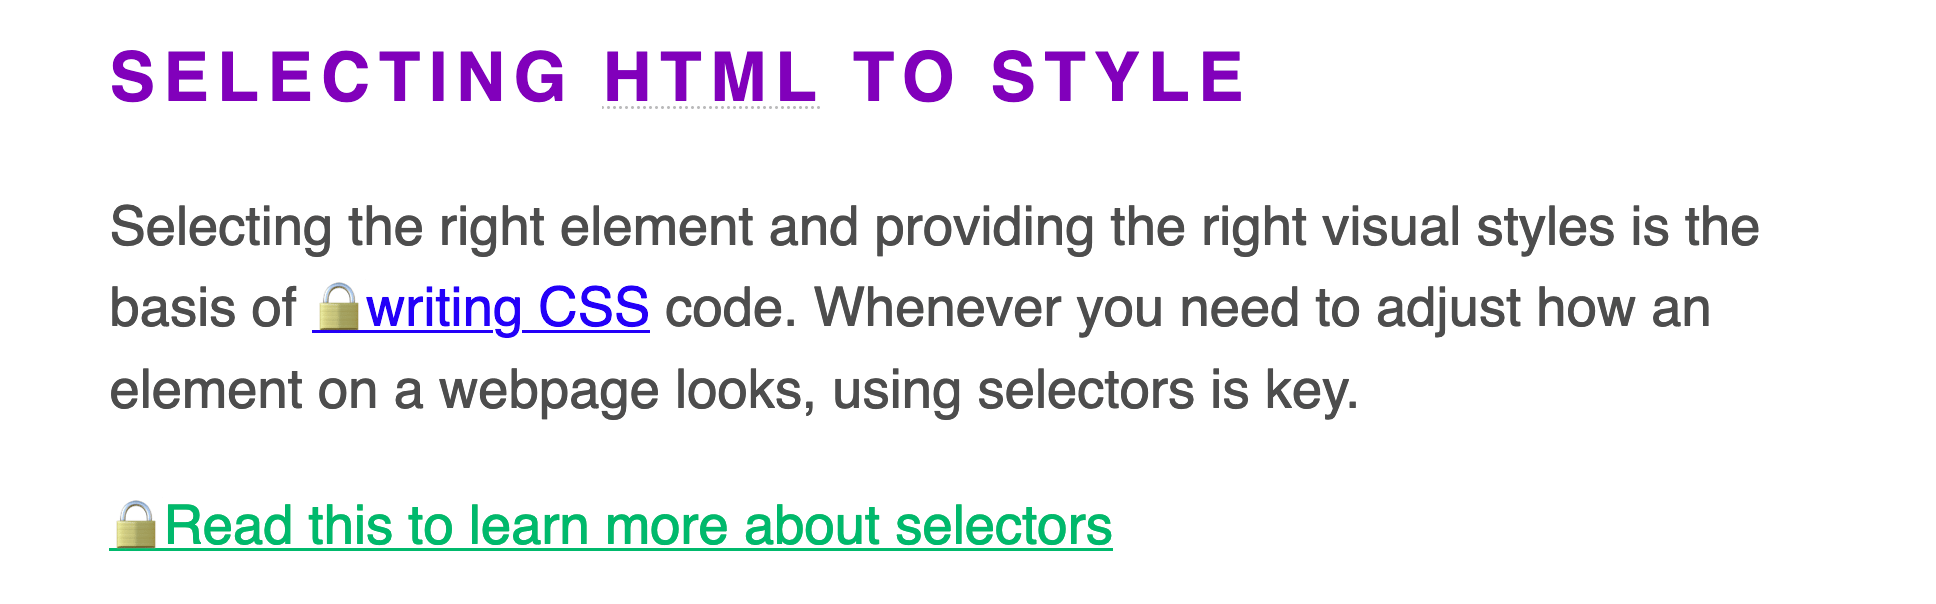
<h2>Selecting HTML To Style</h2>
<p>Selecting the right element and providing the right visual styles is the basis of <a href="https://do.co/community">writing CSS</a> code. Whenever you need to adjust how an element on a webpage looks, using selectors is key.</p>
<p><a href="https://example.com">Read this to learn more about selectors</a></p>
</section>
<section>
<h2>The Type Selector</h2>
<p>The type selector finds elements on the page by tag name. This is a common way to style elements on the page. Type selectors are often referred to as element selectors.</p>
</section>
<section>
<h2>Combining Selectors</h2>
<p>A combinator selector is defined by a space character between selectors, with the HTML ancestry reading left to right. The right-most selector is the intended target. This can be as complex or as simple as necessary to <em>scope</em>, or provide sufficient specificity, to the intended element.</p>
</section>
</main>
</body>
</html>
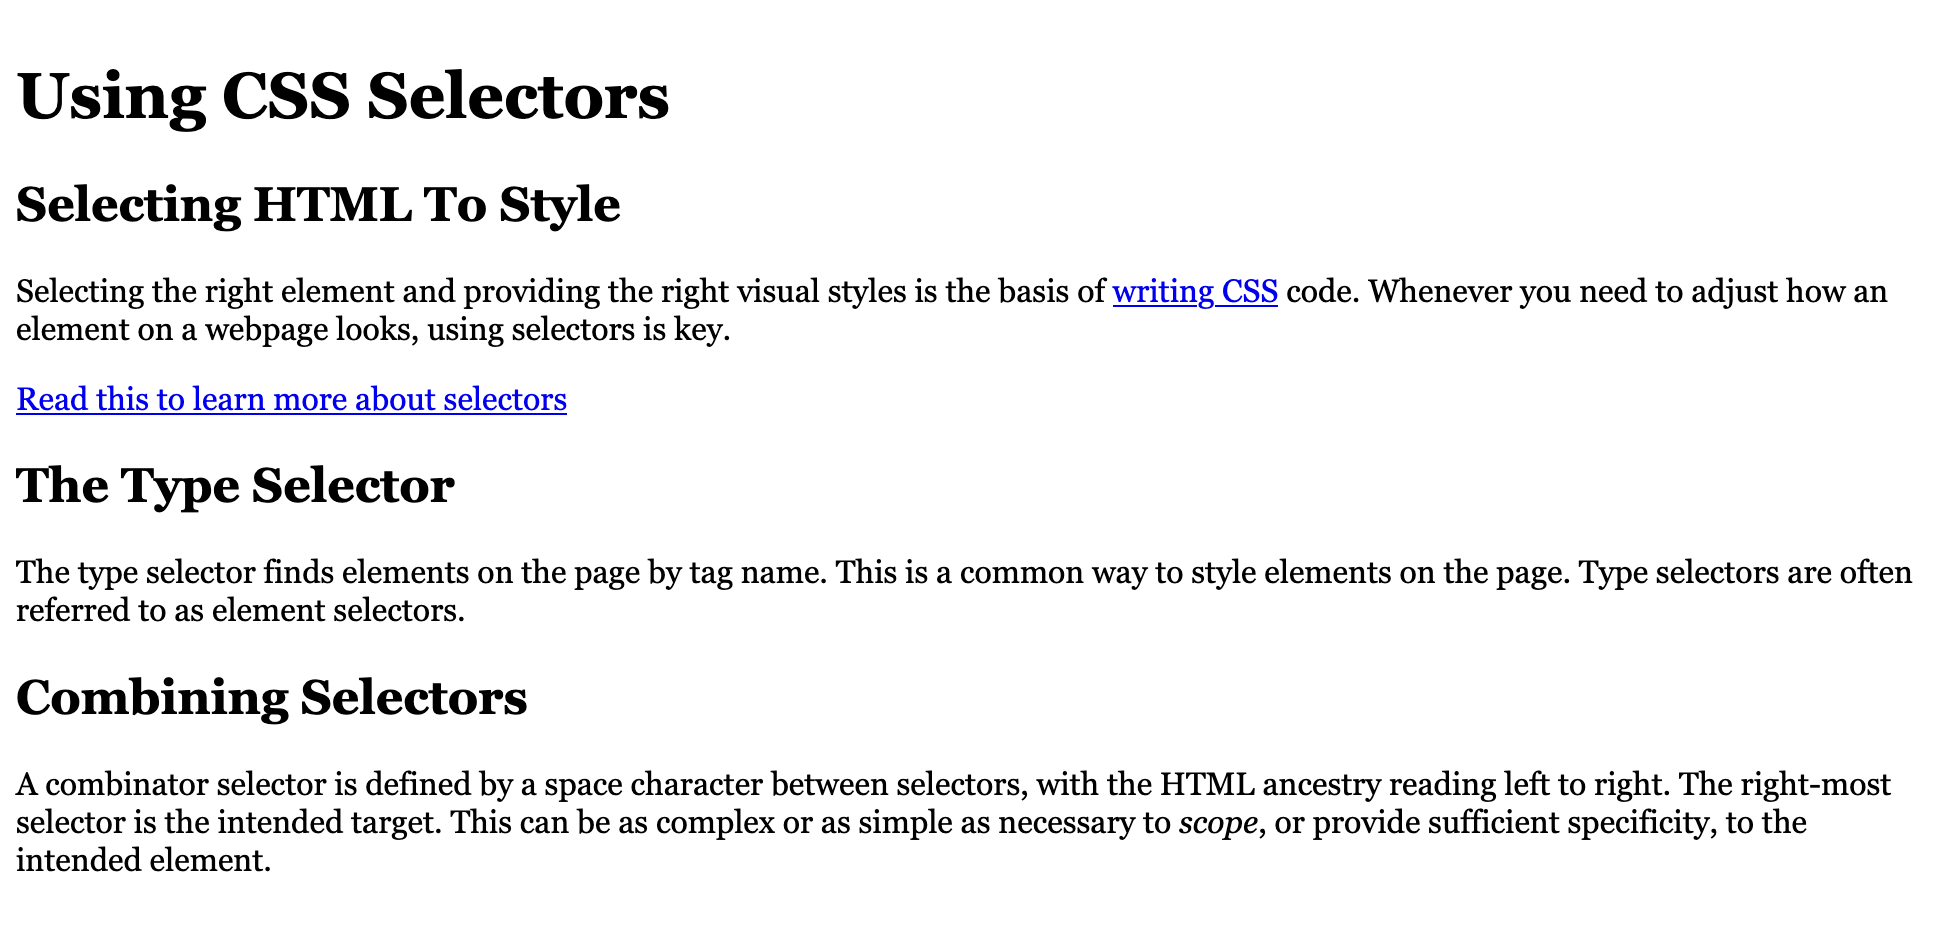
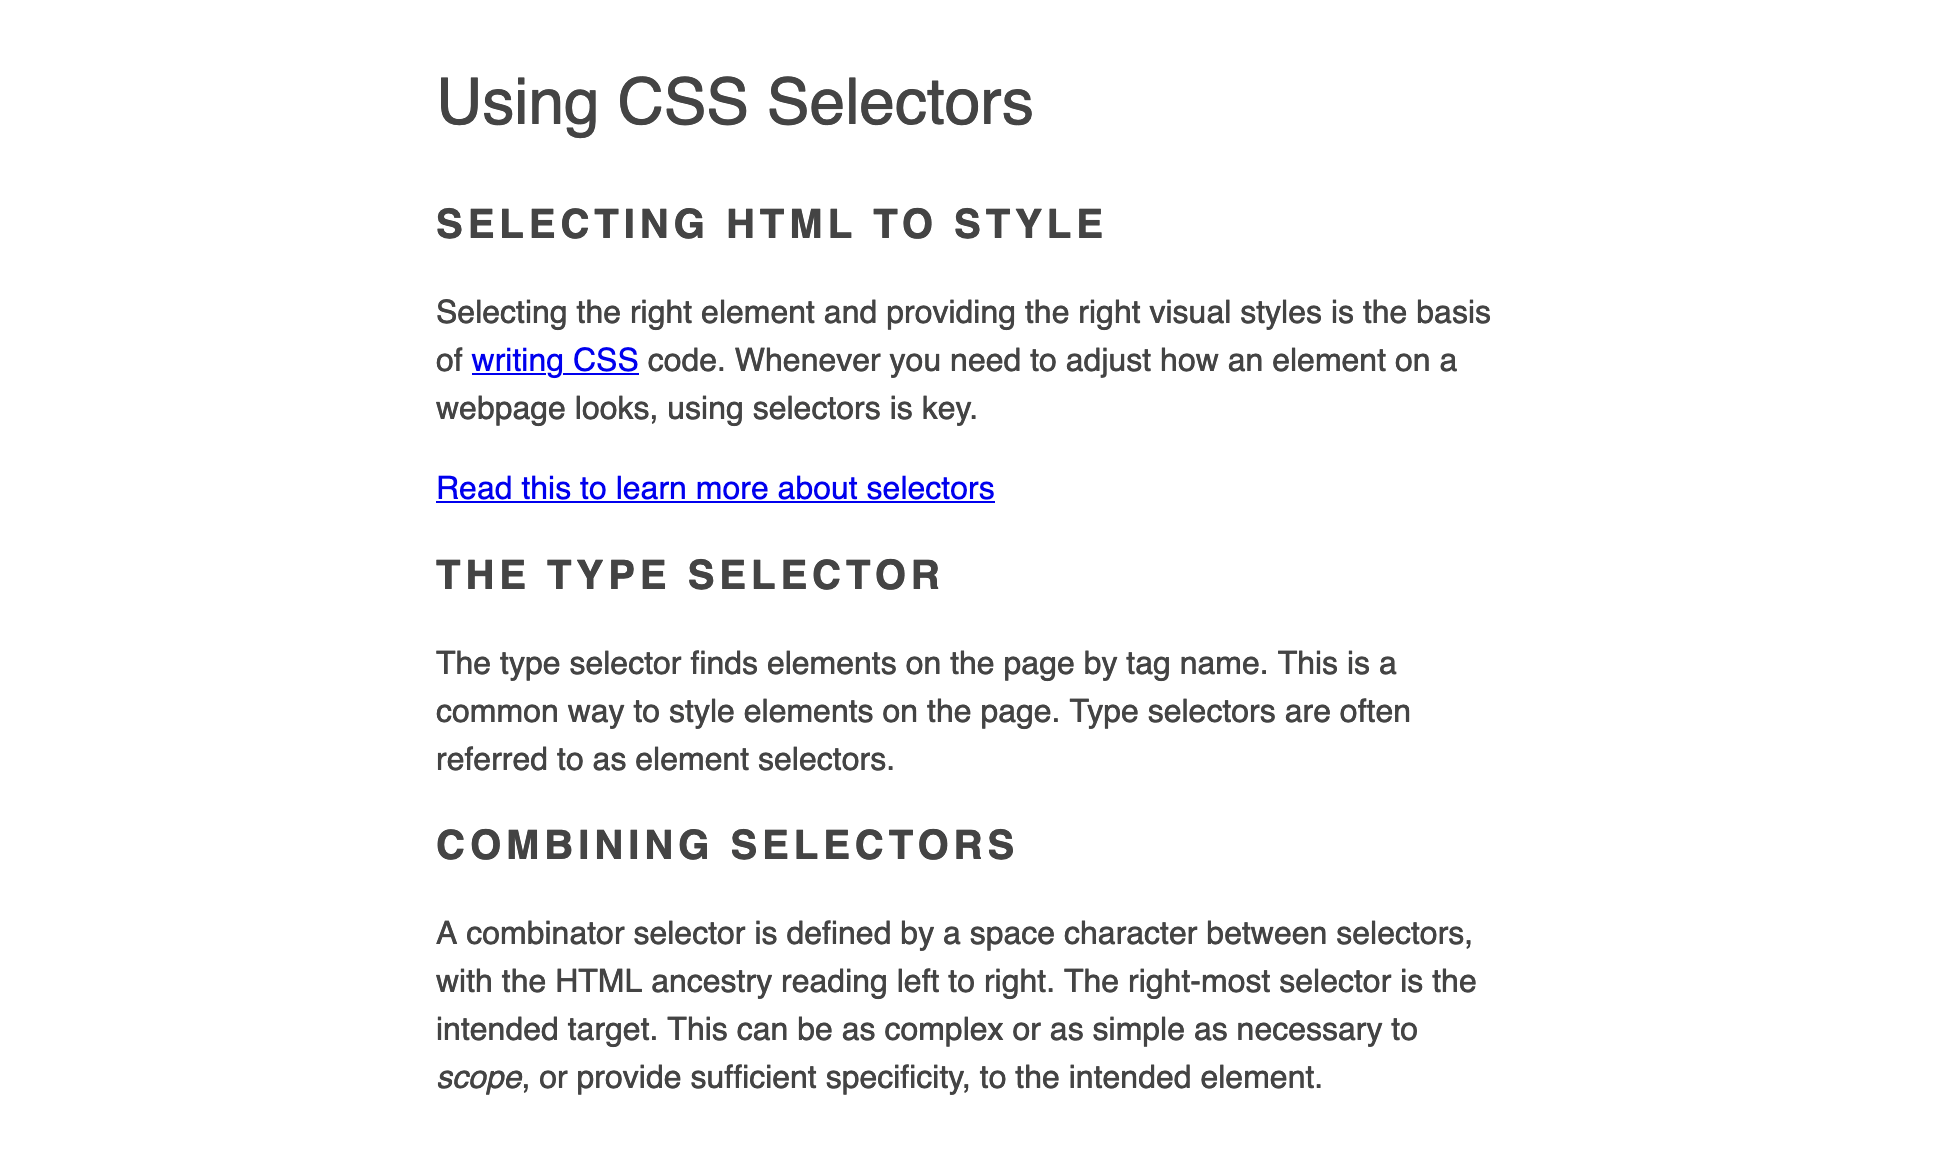
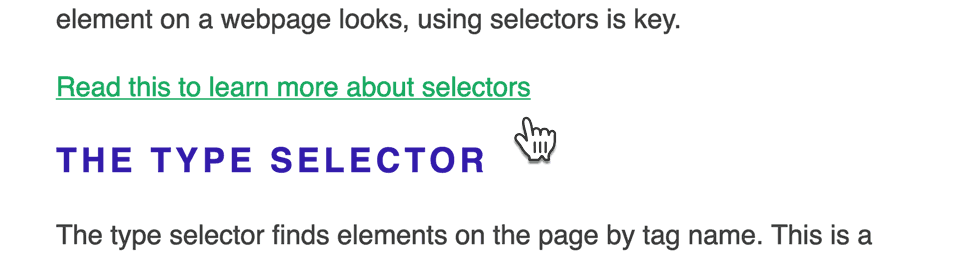
Save your changes to index.html and leave it open in your text editor. Open up your browser and load index.html to render the content of the page with the browser default styles. The following image shows these default styles with black serif text on a white background:
Next, return to your text editor and create a file called styles.css. This is the file that you referenced in the <head> element in your index.html. In the styles.css file, add the following code:
body {
  font-family: sans-serif;
  line-height: 1.5;
  color: #444;
}
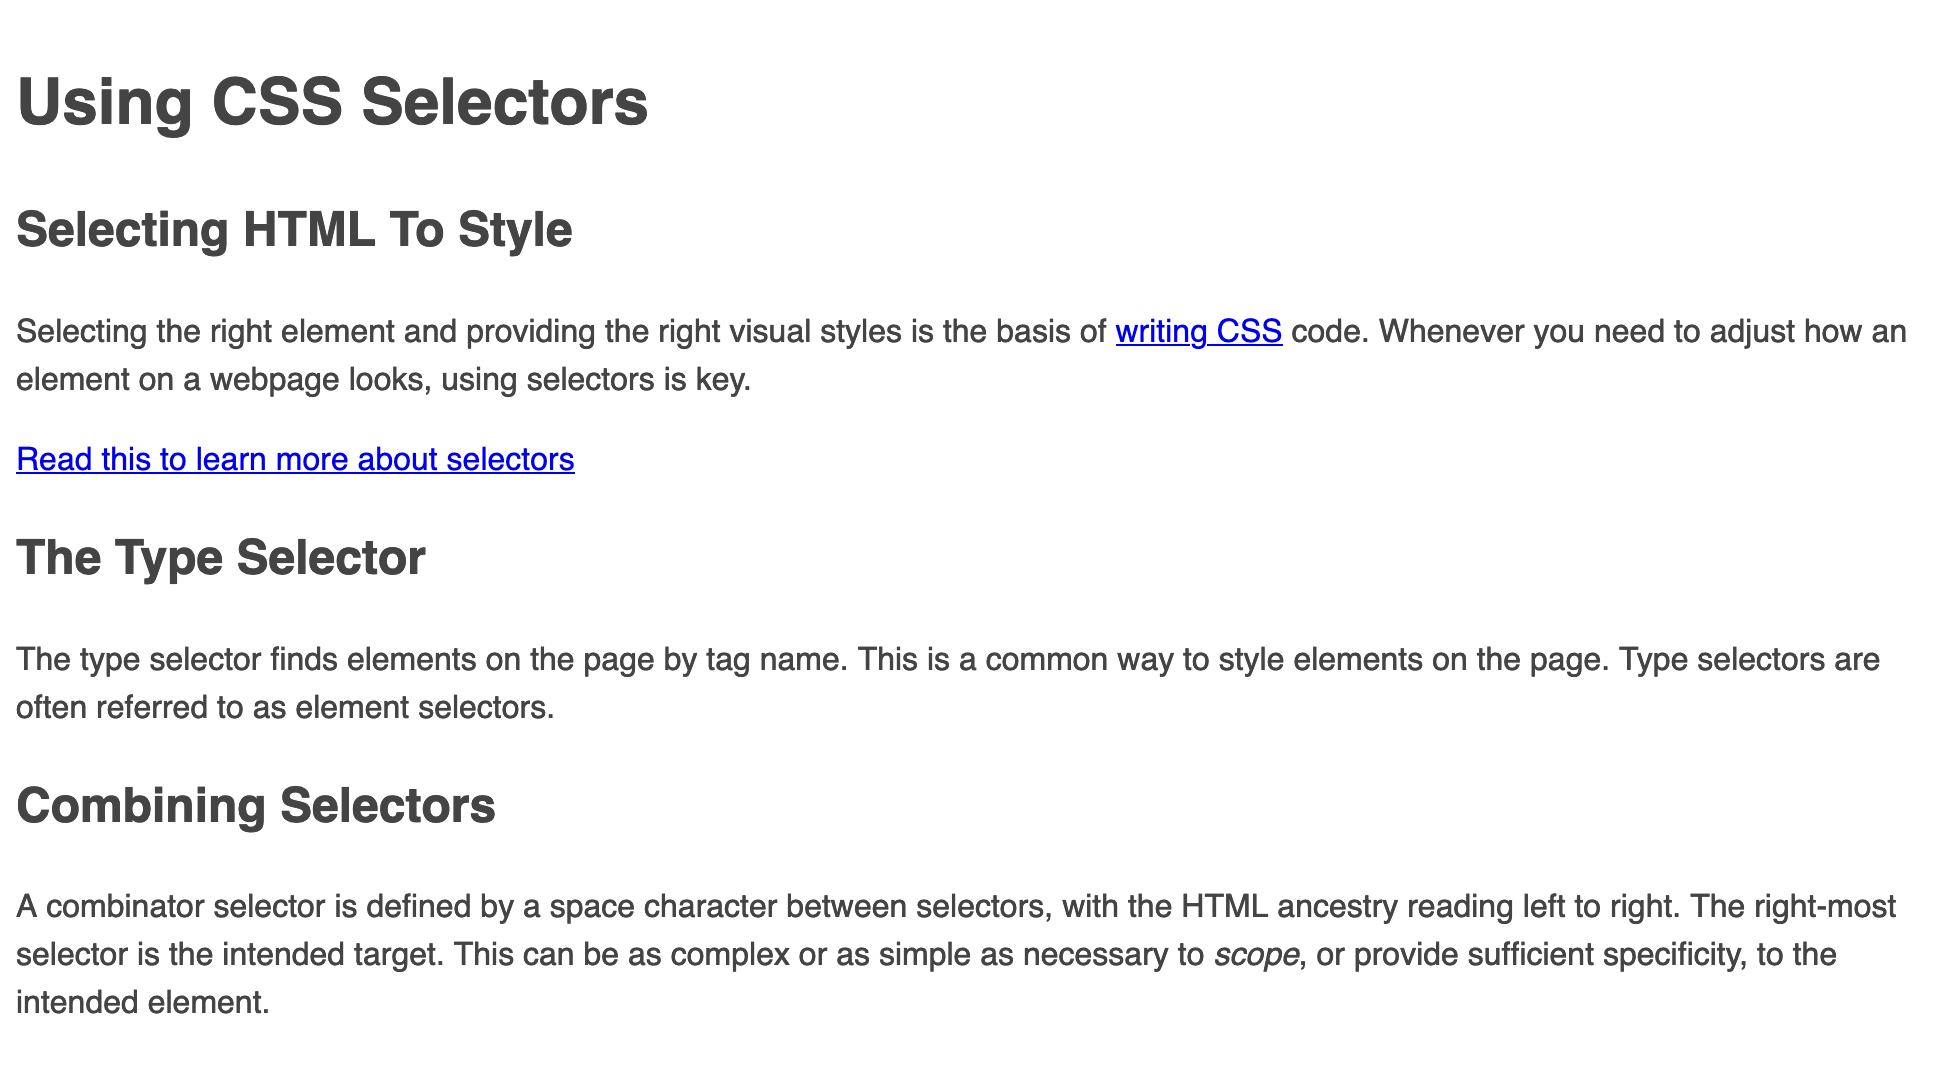
This CSS uses a body type selector to set the default font-family for the page to the browser’s sans-serif font. Then it changes the spacing between lines of text to 1.5 times the font-size. Lastly, the color value changes the text to a dark grey, instead of the default black.
Save these changes to styles.css and return to the browser to see how these changes will appear, as shown in the following image:
You have now set up the starting points for your index.html and your styles.css. In the next section, you will add an id attribute to elements in the HTML and create id selectors in the CSS to apply styles to those elements.
Using the ID Selector
In this section, you will learn about the id attribute and its purpose, then add several id attributes to your HTML. Finally, you will use some of these id selectors to apply layout styles.
The id attribute is a unique identifier that links together content on the page. For example, say there is an element midway down the content of a web page with an id attribute of my-id. By appending that id value with a pound or hash symbol (#) to the URL, such as http://example.com/index.html#my-id, the browser will scroll to that section of the page. Since this can be used as part of the URL and for other scripting purposes, each id value on a page must be unique.
To begin working with the id attribute, open index.html in your text editor. First, locate the <header> element and give it an id attribute with the value of header. Next, move to the <main> element and give it an id attribute with a value of content. These id attributes provide a unique identifier for the two primary sections of the content. The highlighted additions in the following code block show the changes you will make to your index.html file:
...
<header id="header">
  ...
</header>
<main id="content">
  ...
</main>
...
Note that well-written HTML will only have one <header> element and one <main> element, so it may seem redundant to assign a unique ID to elements that are already unique. However, applying specific IDs like this can separate your styling from your HTML structure, allowing you to retain consistent styling attached to the IDs even if the underlying HTML changes.
Be sure to save your changes to index.html before continuing.
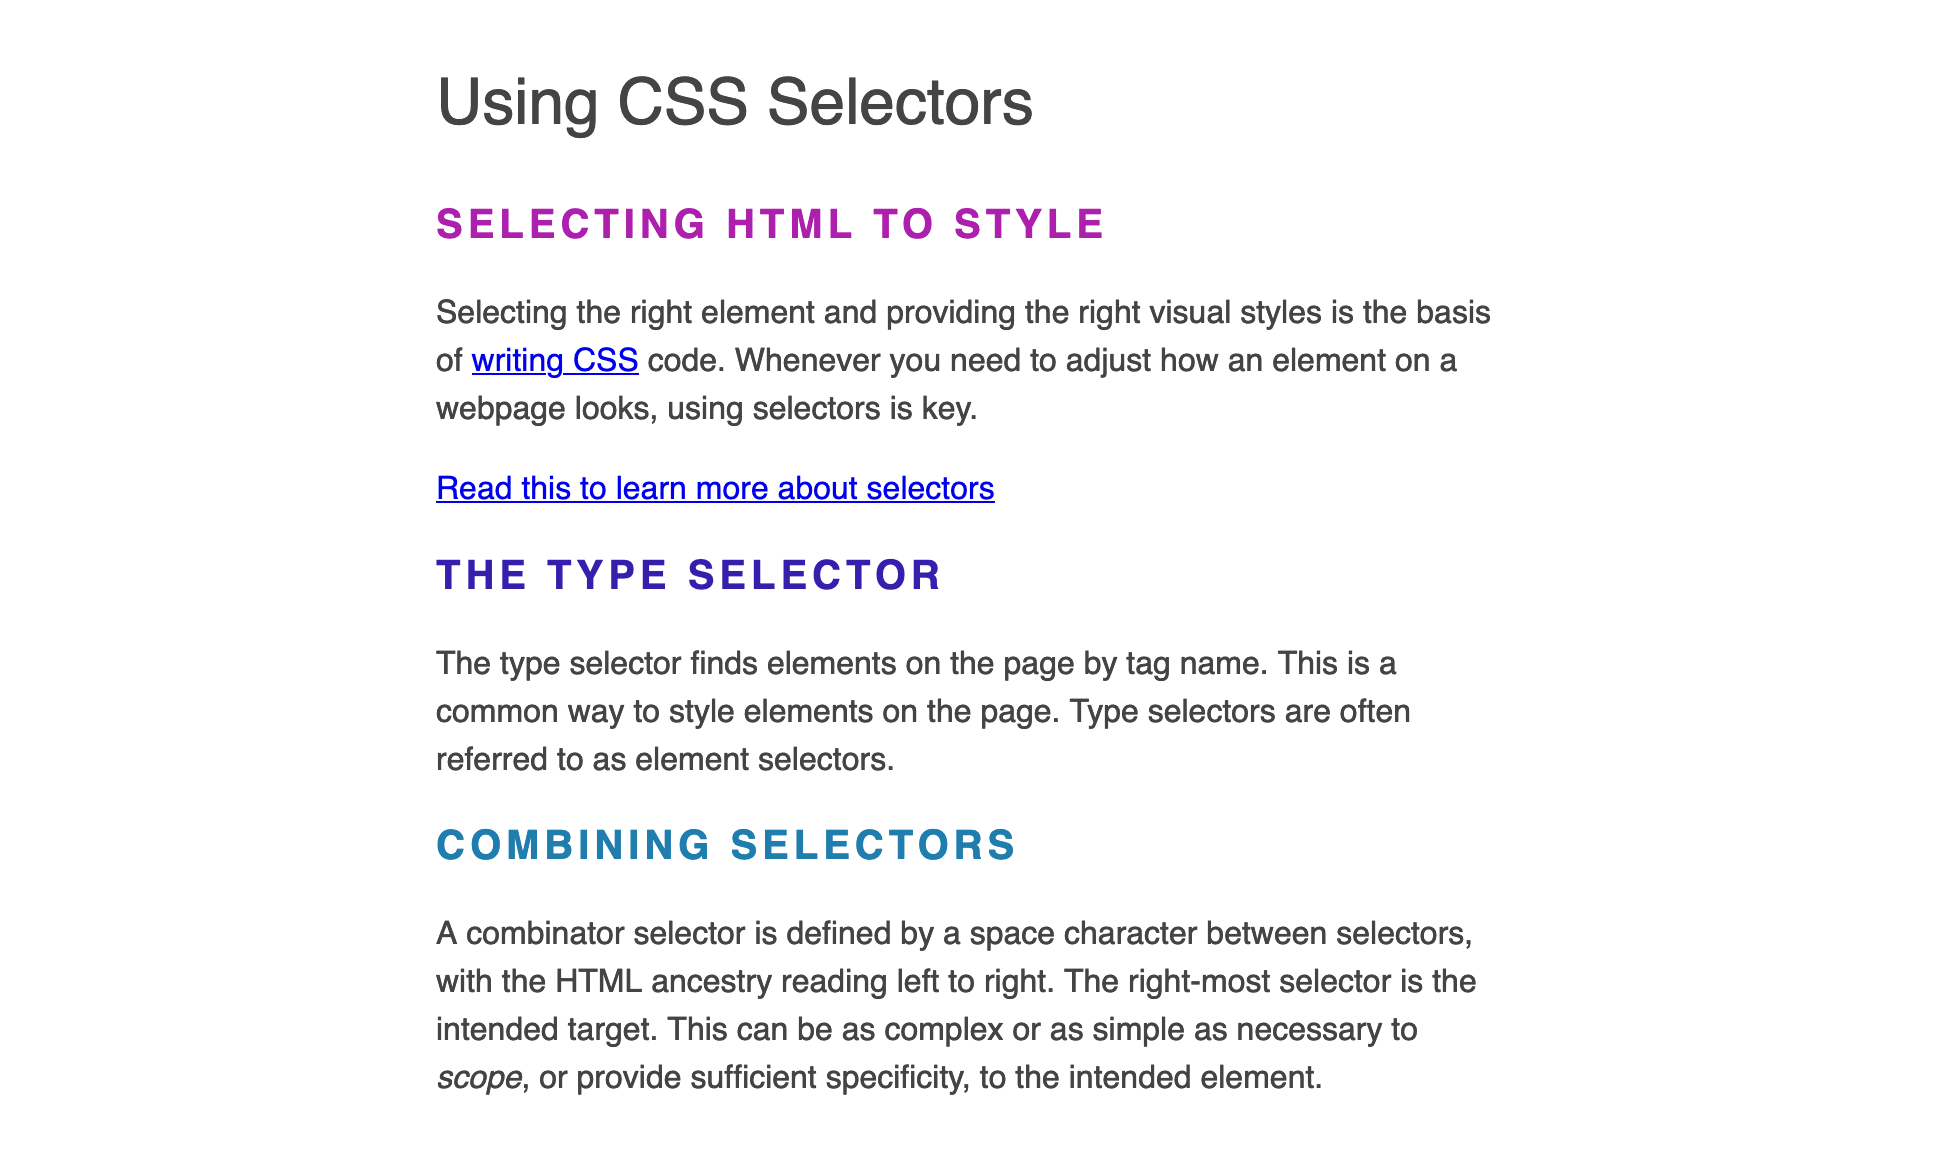
The id selector in CSS uses the same format as when referenced in a URL: a pound sign followed by the name of the id, such as #my-id. To begin using the id selector, open styles.css in your text editor. Then, add the two id attribute values from your index.html as the group combinator #header, #content. You will use this selector to set the content of the <header> and the <main> element uniformly in the middle of the page. The following code block has the selector block and the code necessary for this layout:
body {
  font-family: sans-serif;
  line-height: 1.5;
  color: #444;
}

#header,
#content {
  margin: 1em auto;
  width: 90%;
  max-width: 60ch;
}
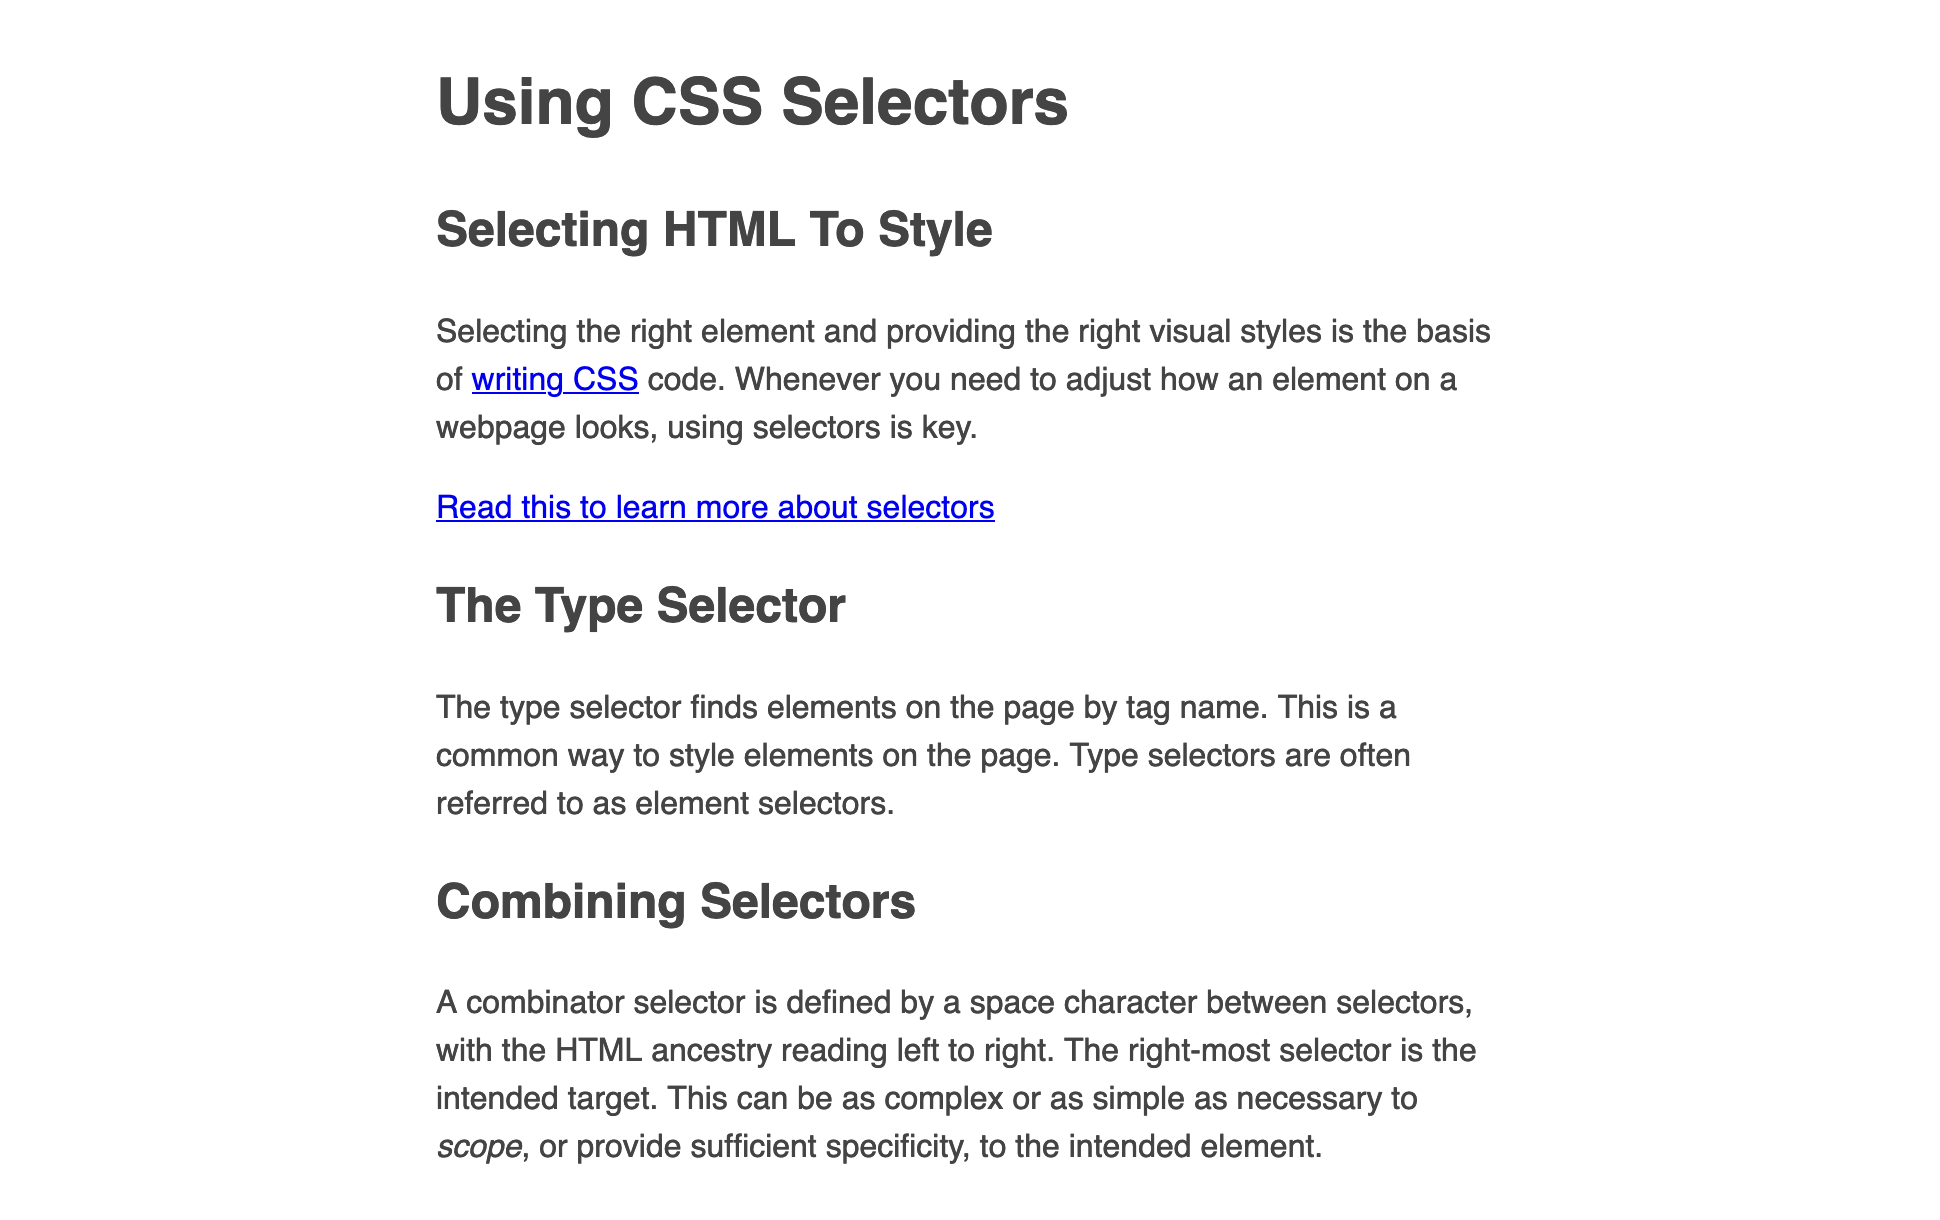
The id selectors will apply a margin of 1em to the top and bottom of both the <header> and the <main> element. The auto value on the margin property keeps the content centered to the page when paired with the width property of 90%. Lastly, the max-width property stops both containers from growing any wider once they reach a size of 60ch, which is equivalent to 60 0 characters in width.
Save your changes to styles.css then open index.html in your browser. The contents of the page are now centered to the page instead of stretching across the length of the window. The following image illustrates how this appears in the browser:
In this section, you learned about the id attribute and used this attribute to apply styles to elements. You also learned that the id attribute is required to have a unique value because of how it can be used by the browser in URLs and in scripting. Next, you will use the class attribute to refactor the code from this section to apply colors to the content with new classes.
Using the Class Selector
In this section, you will use the class selector to find specific element on a page using values found in the class HTML attribute. You will refactor the id selectors to use a reusable class instead. The class attribute is meant to create a specific targetable value that styles can be applied to. Unlike the id, the values of class attributes can be reused, which is its advantage over the id selector.
To begin styling elements with class, start by opening the index.html file in your text editor. On both the <header> and <main> elements, add a class attribute with a value of content-width. The highlighted section of the following code block indicates how to add the class attribute:
...
<header id="header" class="content-width">
  ...
</header>
<main id="content" class="content-width">
  ...
</main>
...
Save the changes to index.html, then open styles.css in your text editor to create the class selector for this class value.
The class selector is similar to id in that it has a special character in CSS, which is indicated by the period symbol (.). In the styles.css file, locate the selector with the IDs #header, #content and replace both selectors with the .content-width class selector. The following highlighted code indicates the change you will make in your code:
body {
  font-family: sans-serif;
  line-height: 1.5;
  color: #444;
}

.content-width {
  margin: 1em auto;
  width: 90%;
  max-width: 60ch;
}
Save these change to your styles.css and return to your browser. Refresh index.html and the styles will remain unchanged. The refactor to the code didn’t change the styles, but did change how the elements are selected. The versatility of a class is that the styles can be used more than once and on different element types.
Next, return to index.html in your text editor and add a class attribute to the <h1> element with a value of style-1. This defines a class name that will be used in your CSS. The following code block indicates this change in the highlighted section:
...
<header id="header" class="content-width">
  <h1 class="style-1">Using CSS Selectors</h1>
</header>
...
Next, on each of the <h2> elements within the <main> element, add a class attribute. Give all three of these class attributes the value of style-2. Use the highlighted sections of the following code block for reference:
...
<main id="content" class="content-width">
  <section>
    <h2 class="style-2">Selecting HTML To Style</h2>
    ...
  </section>

  <section>
    <h2 class="style-2">The Type Selector</h2>
    ...
  </section>

  <section>
    <h2 class="style-2">Combining Selectors</h2>
    ...
  </section>
</main>
...
After adding the class attributes to the elements in the index.html file, be sure to save the changes. Then, open styles.css in your text editor and create a class selector for the style-1 class.
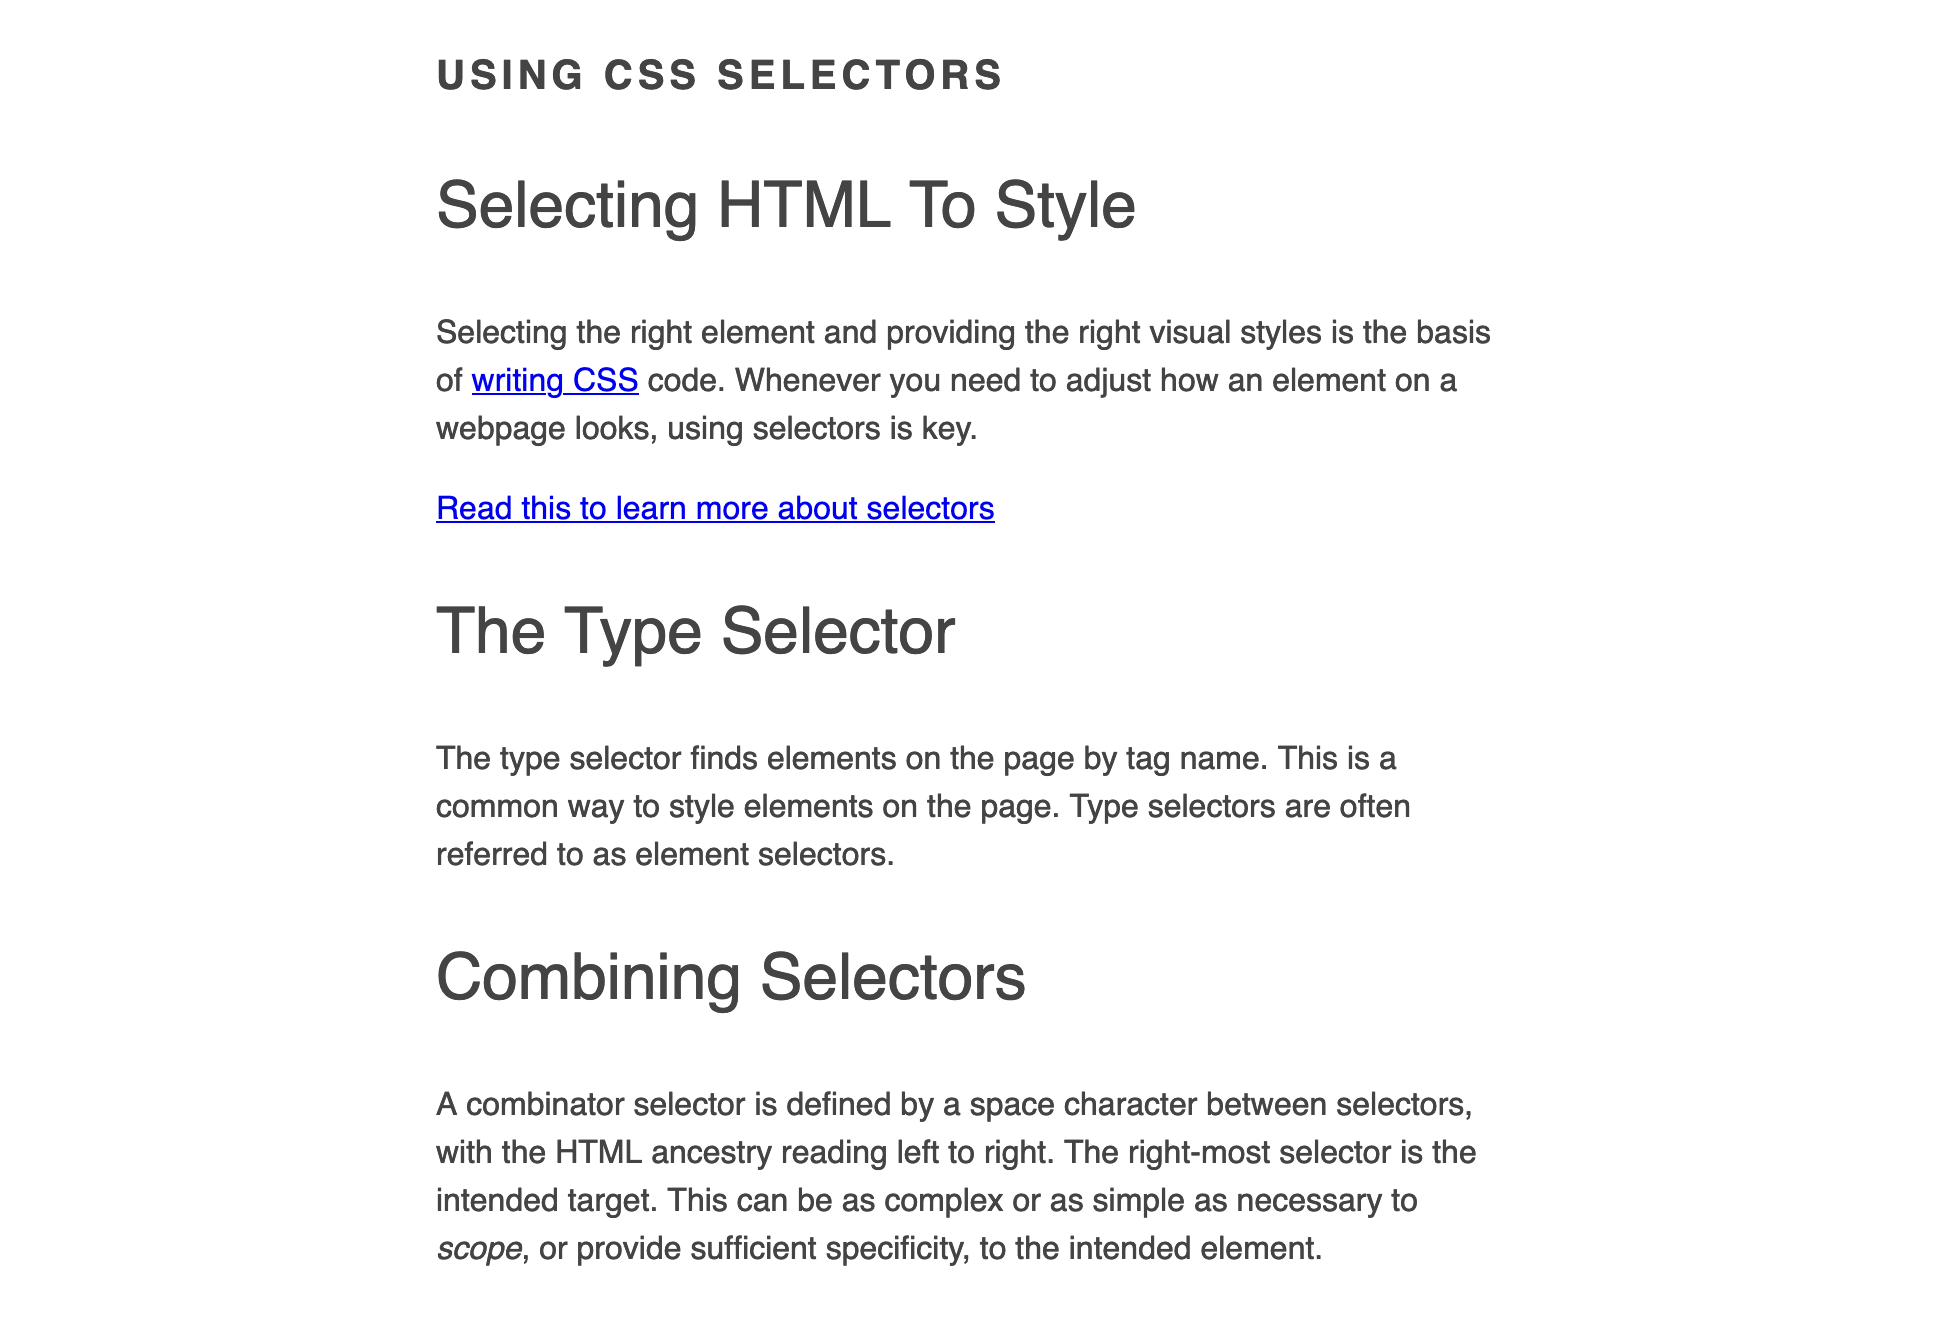
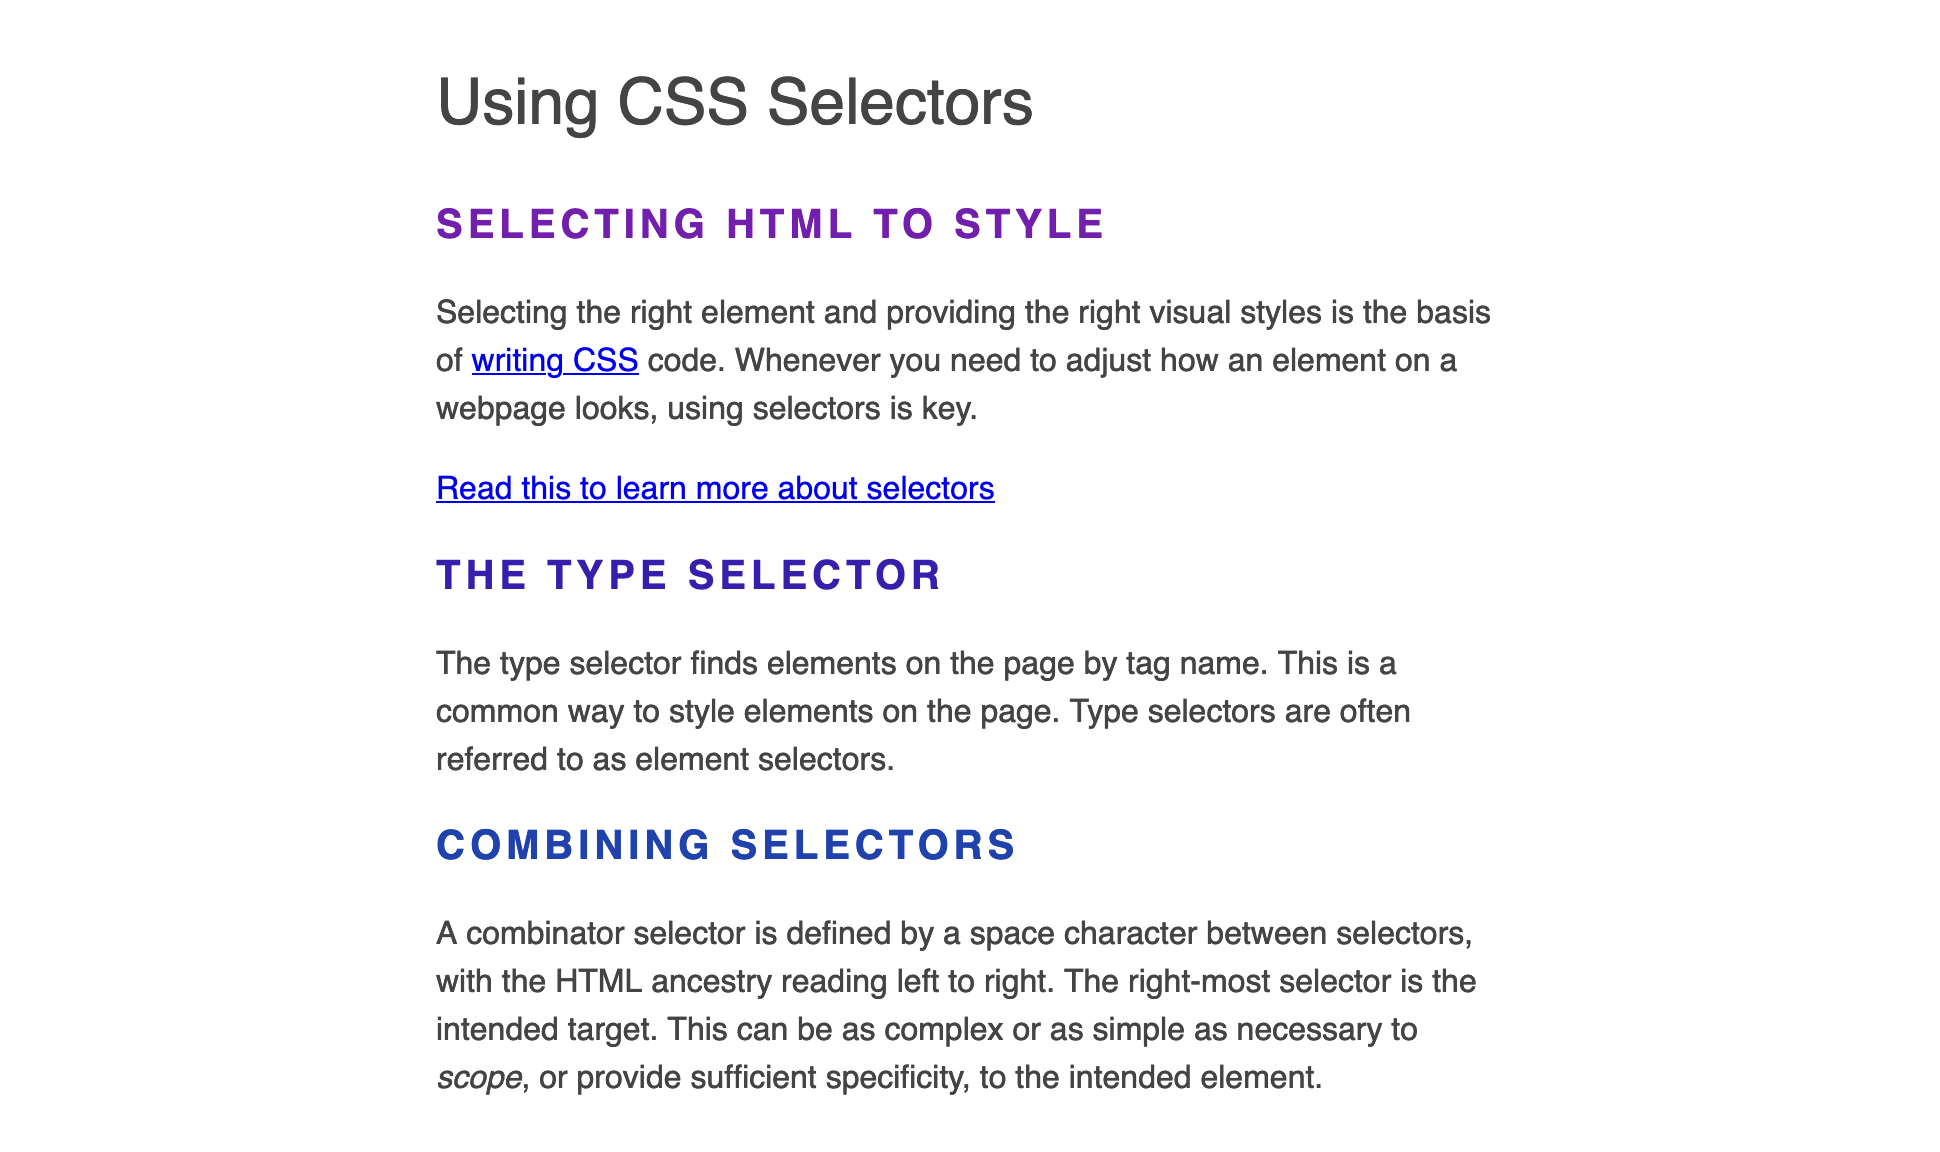
Add to the end of the styles.css a selector called .style-1. The period tells the browser to look for a class attribute on the page with the name of style-1. Then create a selector block and add a font-size property with a value of 1.25rem, a text-transform property set to uppercase, and a letter-spacing property to put 0.125em space between the characters. The following code block indicates these additions in the highlighted sections:
...
.content-width {
  margin: 1em auto;
  width: 90%;
  max-width: 60ch;
}
.style-1 {
  font-size: 1.25rem;
  text-transform: uppercase;
  letter-spacing: 0.125em;
}
Next, create another class selector, this time for the style-2 class. Be sure to add the period before the name of the class value. Then add to that selector a font-size property with a 2rem value and a font-weight property set to normal. Reference the highlighted code in the following code block:
...
.style-1 {
  font-size: 1.25rem;
  text-transform: uppercase;
  letter-spacing: 0.125em;
}

.style-2 {
  font-size: 2rem;
  font-weight: normal;
}
Save your changes to styles.css and refresh the index.html file in your browser. The <h1> content will now be smaller and uppercased while the <h2> content will be a bit larger and no longer bold. The following screenshot showcases how these changes will appear in the browser:
Classes are a powerful selector, as they can be reused and applied to any element on the page. This means you can swap where and how the style-1 and style-2 classes are used, and no changes need to be made to the CSS.
To make this change, open index.html and change the class attribute value style-1 on the <h1> element to style-2. Afterward, change the style-2 values on the <h2> elements’ class attribute to style-1. Reference the highlighted sections of the following code block for these changes:
...
<header id="header" class="content-width">
  <h1 class="style-2">Using CSS Selectors</h1>
</header>

<main id="content" class="content-width">
  <section>
    <h2 class="style-1">Selecting HTML To Style</h2>
    ...
  </section>

  <section>
    <h2 class="style-1">The Type Selector</h2>
    ...
  </section>

  <section>
    <h2 class="style-1">Combining Selectors</h2>
    ...
  </section>
</main>
...
Save these changes to styles.css, return to your browser, and reload index.html. The large, normal font weight of style-2 is now applied to the content in the <h1> element, and the shorter, uppercase styles of style-1 now apply to the section <h2> elements. The following image shows how this will appear in the browser:
In this section you used class selectors to refactor the id selectors from the previous section. You also created two new class selectors to apply font styles to the <h1> and <h2> heading elements and you swapped those class attribute values to change which elements received what styles. In the next, section you will continue working with class selectors by applying more than one class to an HTML element.
Combining Class Selectors
In this section, you will apply multiple class values to the same HTML element to combine the styles from more than one CSS class selector. The advantage of class over id is its reusability, as shown in the previous section. class selectors can also be combined to target more specific elements. The class selector is the most common and preferred CSS selector for this versatility and specificity in finding an element and applying styles.
To begin, open your styles.css file in your text editor. Then add three new class selectors: .color-1, .color-2, and .color-3. Each of these three selectors will have a color property with similar HSL values that differ by increments of 50 on the hue spectrum. This will provide a color palette that you can apply to elements in the HTML. See the highlighted portions of the following code block for what to add to your CSS file:
...
.style-2 {
  font-size: 2rem;
  font-weight: normal;
}

.color-1 {
  color: hsl(300, 70%, 40%);
}

.color-2 {
  color: hsl(250, 70%, 40%);
}

.color-3 {
  color: hsl(200, 70%, 40%);
}
Save your changes to styles.css, then open index.html in your text editor. You will now add a color to each of the three <h2> elements in the <main> block. For the first <h2>, add a space after style-1 and then add color-1. The space between each value in the class attribute indicates an additional class name that can be referenced from the CSS. Do the same for the other <h2> elements, except use the color-2 value for the second <h2> and color-3 for the third <h2>.
The highlighted portions of the following code block show how to format the additional class values:
...
<main id="content" class="content-width">
  <section>
    <h2 class="style-1 color-1">Selecting HTML To Style</h2>
    ...
  </section>

  <section>
    <h2 class="style-1 color-2">The Type Selector</h2>
    ...
  </section>

  <section>
    <h2 class="style-1 color-3">Combining Selectors</h2>
    ...
  </section>
</main>
...
Save your changes to index.html, return to your browser, and refresh the page. The three <h2> section headings retain the same font styles, but now each have a different color. The following image shows how this will appear in your browser:
Just as class values can be used together in HTML, the class names can also be combined to create more specific situations that may be present in the HTML. By chaining together class names in the CSS, you can select elements that have both classes at the same time.
For example, the CSS selector .color-1.color-2 would only select elements that have an HTML class value that contains both color-1 and color-2.
To try using multiple class names in a selector, open styles.css in your text editor. Create a new selector that combines the color-1 class and the color-2 class. The intent with this combination is to apply a color that is halfway between the defined color value of each of these classes.
Add the following highlighted sections to your CSS file:
...
.color-3 {
  color: hsl(200, 70%, 40%);
}

.color-1.color-2 {
  color: hsl(275, 70%, 40%);
}

.color-2.color-3 {
  color: hsl(225, 70%, 40%);
}
In this code block, you set the color property of the combined class selector .color1.color-2 to hsl(275, 70%, 40%), since that is halfway between the 300 value of .color-1 and the 250 value of .color-2. Then you did the same to combine .color-2 and .color-3.
Be sure to save your changes to styles.css, then move over to index.html in your text editor and make the highlighted changes in the following code block:
...
<main id="content" class="content-width">
  <section>
    <h2 class="style-1 color-1 color-2">Selecting HTML To Style</h2>
    ...
  </section>
  ...
  <section>
    <h2 class="style-1 color-3 color-2">Combining Selectors</h2>
    ...
  </section>
</main>
...
Note that the new styling you declared for the combined class selectors will take precedence over the style set for each of the individual classes. This is because the combined class selector is selecting a more specific element than the individual class selectors. For example, the rule you wrote for .color-1 is looking for an HTML element that has color-1 as one of its classes. The .color-1.color-2 rule is looking for an HTML element that has both color-1 and color-2 in the list of its classes. Since the second rule is a subset of the first, it can be said to be more specific, and thus overrides the first.
With the two combined class CSS rules you have written, there are situations in which both rules could apply. For example, an HTML element with a class value of color-1 color-2 color-3 would satisfy both the .color-1.color-2 and .color-2.color-3 rules. In this case, since they both have the same amount of specificity, the cascade would come into effect, and the last rule declared would override the styling. In this case, .color-2.color-3 would apply its styling, since it is the final rule declared.
Save the changes to index.html and then refresh the page in your browser. The colors of all three <h2> elements will still be distinct, but will now be visually closer together in hue.
The following screenshot shows how this will appear in the browser:
This section presented you with a way to string class values together to create more specific scenarios in which to apply styles. In the next section, you will learn how to find an element on the page based on any attribute type.
Using the Attribute Selector
In this section, you will use the attribute selector to find and select an element. In the previous sections, you have learned that the id and class selectors have a symbol indicating the kind of attribute to target followed by a value to select. The attribute selector’s format consists of the name of the attribute wrapped in a pair of square brackets, like so: [attr]. The attribute selector can be used with any attribute, including id and class.
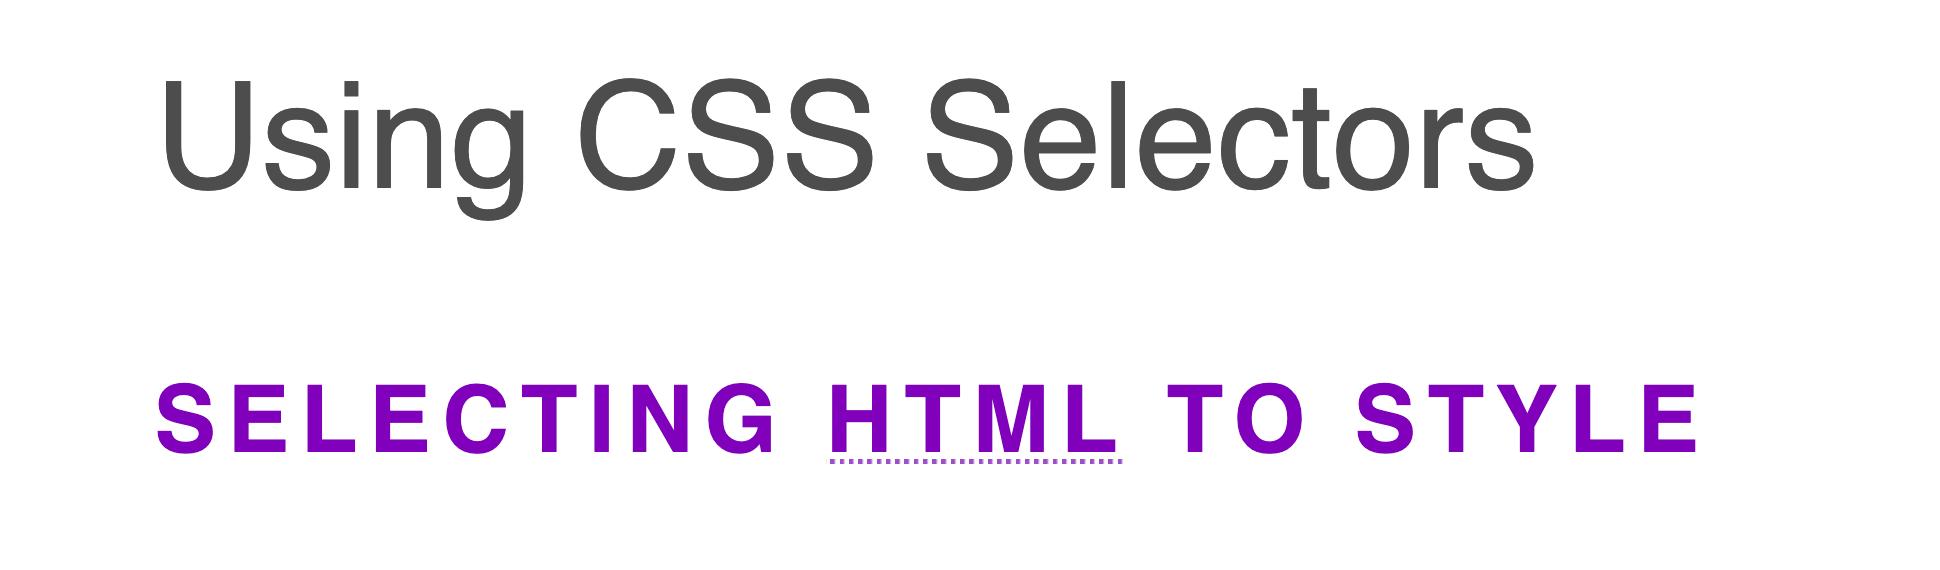
To begin using an attribute selector, open the index.html file in your text editor. You will add the HTML element for abbreviations, <abbr>, as a situation where attribute selectors would be beneficial. Place the <abbr> around the first instance of CSS in the <h1> element. Then, place another <abbr> around the first instance of HTML in the first <h2> element. With the HTML <abbr>, add a title attribute with a value of Hypertext Markup Language. Reference the following code block for how this will be formatted:
...
<h1 class="style-2">Using <abbr>CSS</abbr> Selectors</h1>
...
<h2 class="style-1 color-1 color-2">Selecting <abbr title="Hypertext Markup Language">HTML</abbr> To Style</h2>
...
Save your changes to index.html, then return to your browser to load the file. If you are using Chrome or Firefox, the browser default for <abbr> elements with a title attribute is to add a dotted underline. The purpose of the visual indicator is to have a user hover over the text, at which point the meaning of the abbreviation, the title attribute’s value, will appear. The following image demonstrates the default <abbr> styling in Firefox:
Unlike Chrome and Firefox, some browsers, like Safari and other older browsers, do not have an indicator of when an <abbr> element has a title. This same styling can be brought to these other browsers, along with some customizations with the attribute selector.
To begin styling with an attribute selector, open the styles.css file in your text editor. Add an attribute selector for [title] and then curly brackets for the selector block. In the selector block, add the text-decoration property set to underline. Then add the text-decoration-style property with a value of dotted. These two properties will equalize the styling across browsers. Lastly, to add a custom look for the underline, add the property text-decoration-color and set it to a light gray with the value hsl(0, 0%, 70%) .
Reference the following code block for how this will be formatted in your code:
...
.color-2.color-3 {
  color: hsl(225, 70%, 40%);
}

[title] {
  text-decoration: underline;
  text-decoration-style: dotted;
  text-decoration-color: hsl(0, 0%, 70%);
}
Save your changes to styles.css, then return to your browser and refresh index.html. The styling for the HTML text will now have a light gray dotted underline. The following image demonstrates how this will appear in the browser:

The one issue with using the [title] attribute as a selector is that it can be used on almost any element on the page. This means, with the current selector in place, <img> or <a> elements with the title attribute would also receive these styles. In this case, the selector needs to be scoped to work only with the <abbr> element.
To make this adjustment to the selector, return to styles.css in your text editor. To the left of the [title] attribute selector, add the abbr element selector. Be sure there is no space between these selectors as this tells the browser to specifically look for an <abbr> element with a title attribute. The following code block demonstrates how this will look, with the added element selector highlighted:
...
abbr[title] {
  text-decoration: underline;
  text-decoration-style: dotted;
  text-decoration-color: hsl(0, 0%, 70%);
}
Save your changes to styles.css. The styles are now scoped to only work with <abbr> elements with a title attribute. The CSS <abbr> in the <h1> element will not receive these styles either. Though it does match the abbr selector, it does not have a title attribute and so does not match.
In this section, you used the attribute selector to scope styles to an <abbr> element to apply styles when a title attribute is present. In the next section, you will use more advanced capabilities of the attribute selector by matching the value of a given attribute.
Creating Advanced Attribute Selectors
The attribute selector is useful for finding particular attributes in the HTML and applying styles to them. However, the attribute selector also has several ways to look for the value of an attribute. In this final section, you will use the attribute selector to look for matching value strings and apply styles that meet these specific conditions.
To begin, open your styles.css file in the text editor. In the HTML there is a link that goes to the website https://example.com; to target that specific URL link, create an attribute selector for an href attribute. Then, within the brackets following the attribute name, add an equal sign followed by string quotes. Within those quotes, add https://example.com. This selector will target a link that goes to the specified URL. Add a color property with a green color using hsl(150, 70%, 40%).
The highlighted code in the following code block shows how this is formatted in your styles.css file:
...
abbr[title] {
  text-decoration: underline;
  text-decoration-style: dotted;
  text-decoration-color: hsl(0, 0%, 70%);
}

[href="https://example.com"] {
  color: hsl(150, 70%, 40%);
}
Save these changes to styles.css and return to your browser to refresh index.html. Only the link that goes to https://example.com has changed to the color green, while the other link on the page remains the default blue. The following image demonstrates how this will appear in the browser:

Next, return to styles.css in your text editor and add a custom hover state by using the :hover pseudo selector. The selector is set up the same as the previous selector, and immediately follows after the closing square bracket with :hover. Then within the selector add a color property with a darkened version of the previous green by changing the lightness value of the HSL from 40% to 20%.
Reference the highlighted code in the following code block for how to format this in your code:
...
[href="https://example.com"] {
  color: hsl(150, 70%, 40%);
}

[href="https://example.com"]:hover {
  color: hsl(150, 70%, 20%);
}
Save your changes to styles.css and then reload index.html in your browser. The link that goes to https://example.com now has a hover state that switches to a darker green, as demonstrated in the following animation:
The attribute selector has additional condition modifiers to look for particular scenarios within a value string. One of these conditions that an attribute can look for is if a value starts with a given string. This is represented with the ^ symbol between the attribute name and the equal sign. This approach can be used to highlight links that are secure, meaning they go to a URL that begins with https:// instead of http://.
Return to styles.css in your text editor and add an attribute selector that looks for a value that begins with a secure URL by using [href^="https://"]. This selector will only match elements that have an href element that begins with https://. Then, to add a visual indicator that the link is secure, use a pseudo element selector by adding ::before immediately following the closing bracket. Lastly, the ::before pseudo element selector requires a content property to be used, which will add a string before the content of the HTML element. For the value of this content property, use the unicode identifier for the lock emoji, \1F512.
The highlighted section of the following code block demonstrates this syntax:
...

[href^="https://"]::before {
  content: '\1F512';
}
Save your changes to styles.css and return to your web browser to reload index.html. The two links in the content both have secure links and are now indicated as such with the lock emoji, as demonstrated in the following image:
In this section you used the advanced features of the attribute selector to look for specific strings in the HTML attribute’s value. There are more options available for attribute value scenarios than were covered here. If you want to learn more about the different attribute selector options, read The Skinny on CSS Attribute Selectors by Chris Coyier.
Conclusion
Writing styles that are specific and reusable is a cornerstone to effective CSS architecture. In this tutorial, you learned how and when to use the id selector, how you can use and reuse the class selector in multiple combinations, and how to use the attribute selector and some of its features to create very specific scenarios in which to add styling. These selectors are a powerful asset to create styles that bring life and functionality to a website.
If you would like to read more CSS tutorials, try out the other tutorials in the How To Style HTML with CSS series.
Thanks for learning with the DigitalOcean Community. Check out our offerings for compute, storage, networking, and managed databases.
Tutorial Series: How To Style HTML with CSS
Cascading Style Sheets (CSS) is the styling language of the web, and is used to design and control the visual representation of Hypertext Markup Language (HTML) on a web page. With CSS, you can manage everything from font to layout to animations on your web page. This series will lead the reader through CSS exercises that demonstrate the building blocks of the language and the fundamental design principles needed to make a user-friendly web site.
Browse Series: 20 tutorials
About the author
I code, design, write, and teach and I’m an IAAP Certified Web Accessibility Specialist.
Still looking for an answer?
This textbox defaults to using Markdown to format your answer.
You can type !ref in this text area to quickly search our full set of tutorials, documentation & marketplace offerings and insert the link!
 This work is licensed under a Creative Commons Attribution-NonCommercial- ShareAlike 4.0 International License.
Become a contributor for community
Get paid to write technical tutorials and select a tech-focused charity to receive a matching donation.

DigitalOcean Documentation
Full documentation for every DigitalOcean product.

Resources for startups and AI-native businesses
The Wave has everything you need to know about building a business, from raising funding to marketing your product.
The developer cloud
Scale up as you grow — whether you're running one virtual machine or ten thousand.

Start building today
From GPU-powered inference and Kubernetes to managed databases and storage, get everything you need to build, scale, and deploy intelligent applications.
